Atomic Heart: Testing Ground 9 [Location & Upgrades]
Just because Atomic Heart is testing you doesn't mean you can give up on the Testing Ground 9 and the horrors it awaits you!

The atomic heart has one of the most intricate collections of testing grounds that serve and offer up to players a puzzling area that they need to solve, alongside also having tons of enemies that are littered in the grounds which players need to fight, after which they can access precious loot. Players might need assistance with figuring out how they can access the Testing Ground 9, while also getting their hands on the upgrades that are hidden!
- Testing Ground Nine holds four upgrades: KS-23 Collimator, Kalash Polarizer, Pashtet Handle, and Dominator Impulse Divider.
- KS-23 Collimator is found in a red chest.
- Electromagnetic Polarizer is inside a yellow chest.
- Dominator Impulse Divider is safeguarded by a complex silver chest.
- Pashtet Handle shares a chest with the Electromagnetic Polarizer.
- Unlock the KS-23 Collimator area using a glowing orb.
- Solve a teal/red puzzle to access the Dominator Impulse Divider.
- Reach Testing Ground Nine via a sewer walkway.
- Face and defeat the Plyusch boss via melee or ranged attacks.
KS-23 Collimator
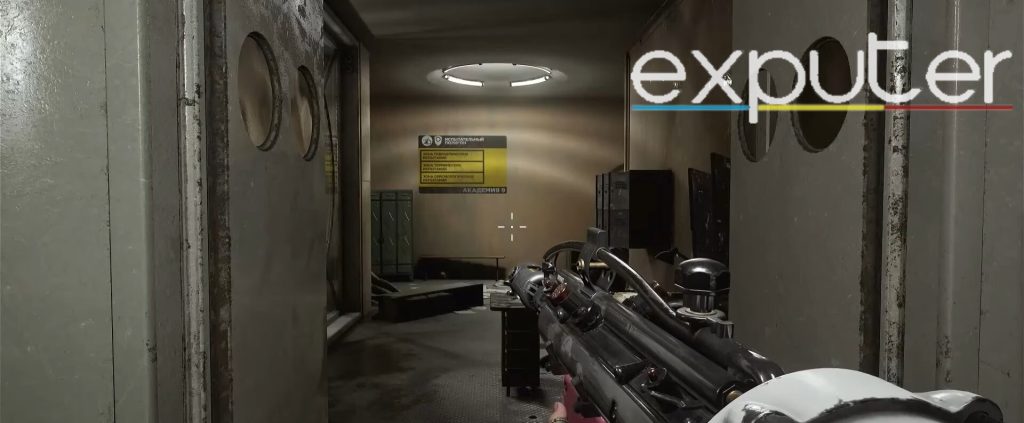
- To find the KS-23 Collimator in Testing Ground 9, head left from the room with lockers.
- Pass through a metal gate with open doors.
- Enter the room with orange separators, activate a mechanism using your glove to open the door past metal bars.
- Upon entering the next room, carefully fall to the ground to avoid excessive fall damage.
- In front of you, find a mechanism holding a golden glowing orb on a circular base with a tube.
- Levitate the orb with your glove’s abilities and carry it to a red mechanism at the far end of the room.
- Interact with the red mechanism to connect the orb, which activates a grate-like door to the left.
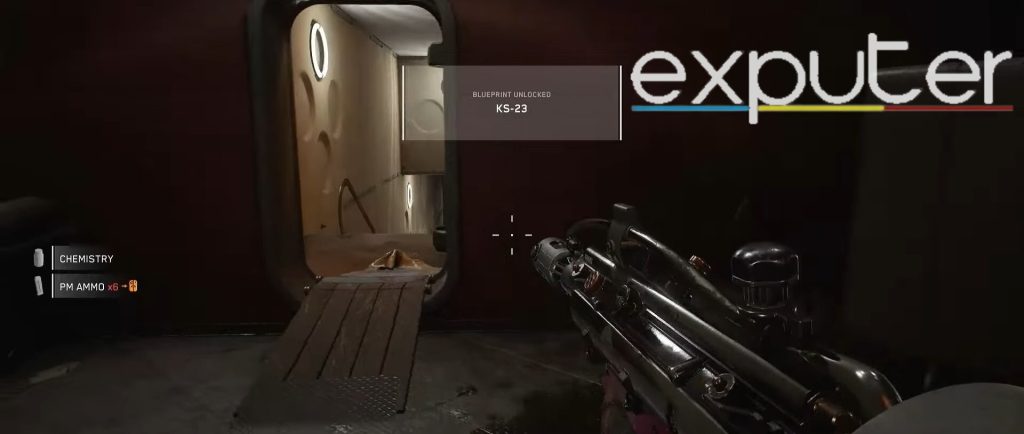
- Crawl underneath to enter the room.
- Inside, find a red/bronze chest resembling a robot.
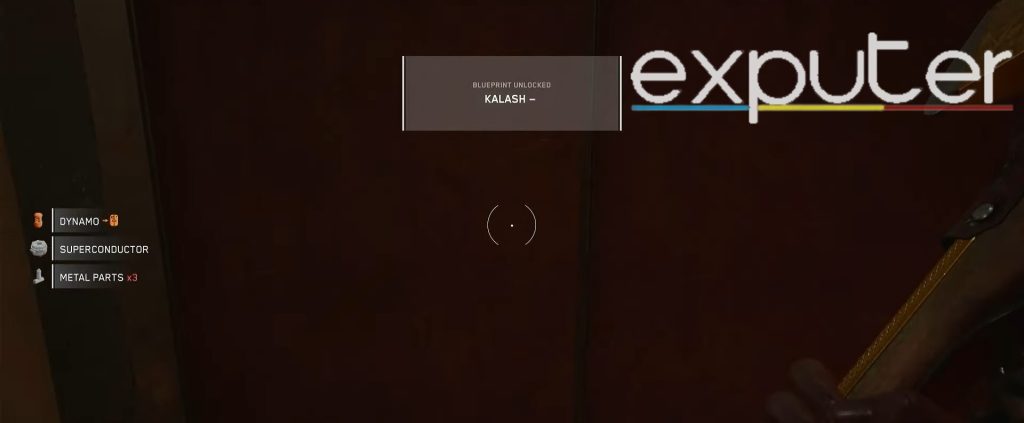
- Open the chest to obtain the KS-23 Collimator blueprint, chemistry items, and PM ammo.

KS-23 (Image Credits Exputer)
Dominator Impulse Divider
To get the Dominator Impulse Divider after the KS-23, follow these steps:
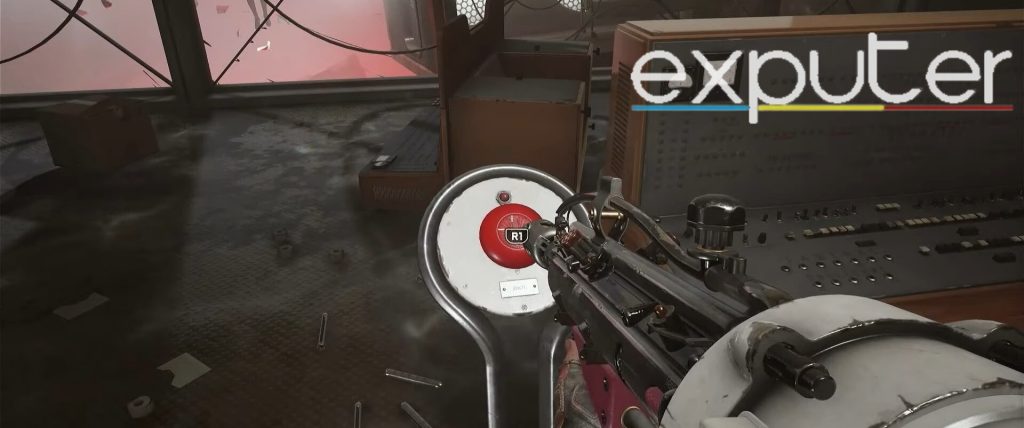
- Press the red button in the room, solve a task, and open the next door.
- In the next room, interact with the teal blue and red mechanism.
- To solve the puzzle, retract five cells in this order: bottom, left (9 o’clock), right (3 o’clock), top left, and top right.
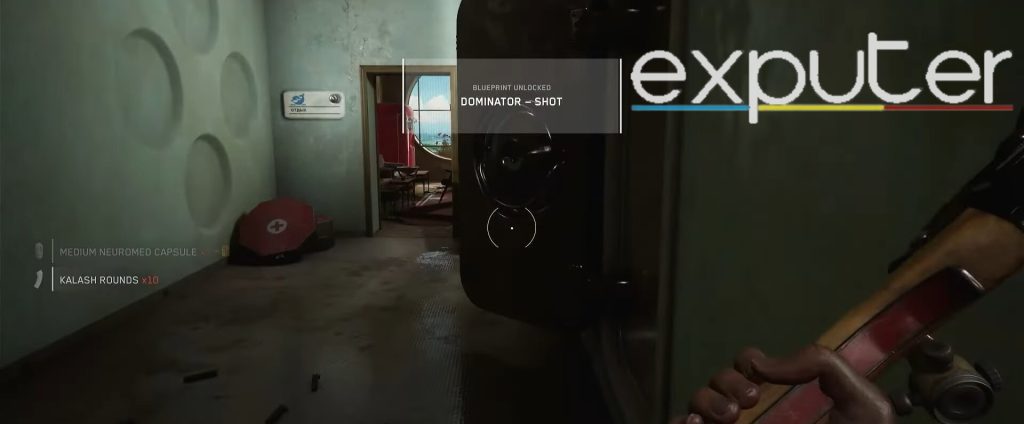
- The door opens to reveal a room with a silver chest, containing the Dominator Impulse Divider blueprint.
Kalash Polarizer/Pashtet Handle
To obtain the other two upgrades, follow these steps:
- Head back to the room with red lights.
- Enter the room with the glowing orb on the high wall.
- Change the battery terminals on the roof with your SHOK charge to bring down a container. Climb on top of it.
- Use the SHOK charge to turn the terminals red to reach a platform with a glowing orb.
- Grab the orb and place it in the wall’s placeholder beside a tube.
- Grab the orb again and place it on another faraway container.
- Place it on the one behind you.
- Take the orb and put it beside the door to open it.
- Proceed to the room at the end, containing the golden chest with both blueprints.
How To Enter Testing Ground 9
To access Testing Ground 9:
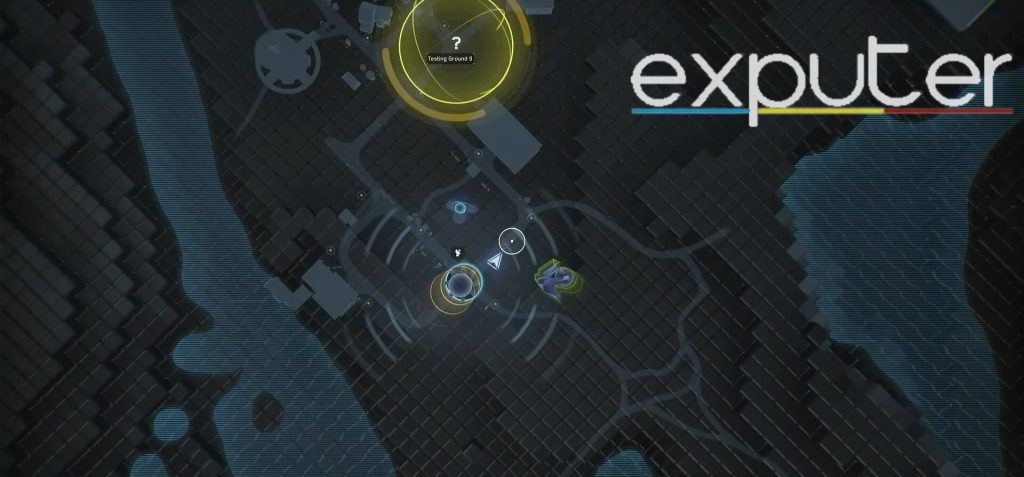
- Open your map, locate the Testing Ground 9 at the center, marked with a yellow circle.
- Set it as your target location.
Testing Ground 9 contains four valuable upgrades:
- KS 23 Collimator: Found in a red chest.
- Dominator Impulse Divider: Hidden in a silver chest, protected by puzzle-solving.
- Electromagnetic Polariser: Safely tucked inside a yellow chest.
- Pashtet Handle: Conveniently located in the same area as the Electromagnetic Polariser.
Starting Out
To begin, locate the Testing Ground 9:
- Stand near the southern end of the Testing Ground 9 area, visible on your map.
- Look for a distinctive mushroom-shaped red building and a windmill behind a set of stairs.
- Find an accessible sewer entrance off the beaten path and enter it to proceed.
Inside The Sewer
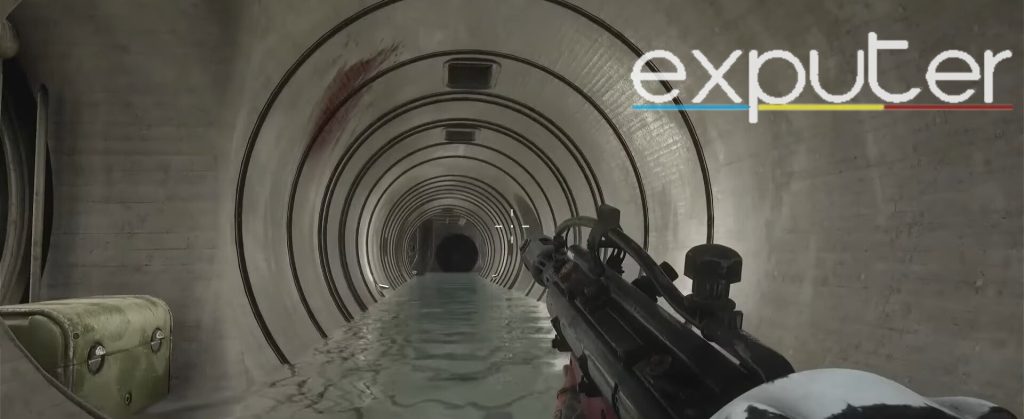
After entering the sewer:
- Proceed straight, passing the first left turn.
- Continue navigating through the waters and make a left turn at the third left you encounter.
- Watch out for an enemy on the wall; eliminate it or bypass it.
- Double back, jump past a corpse, and beware of another mutant on the right.
- Exercise caution in this darker area of the sewer.
- Run past or eliminate the creature and avoid another mutant on the left.
- As you reach the end of the sewer, you’ll find yourself inside.
How To Explore Ground 9
Inside the maze:
- Be prepared to encounter an enemy as soon as you enter; take it down with a well-aimed headshot.
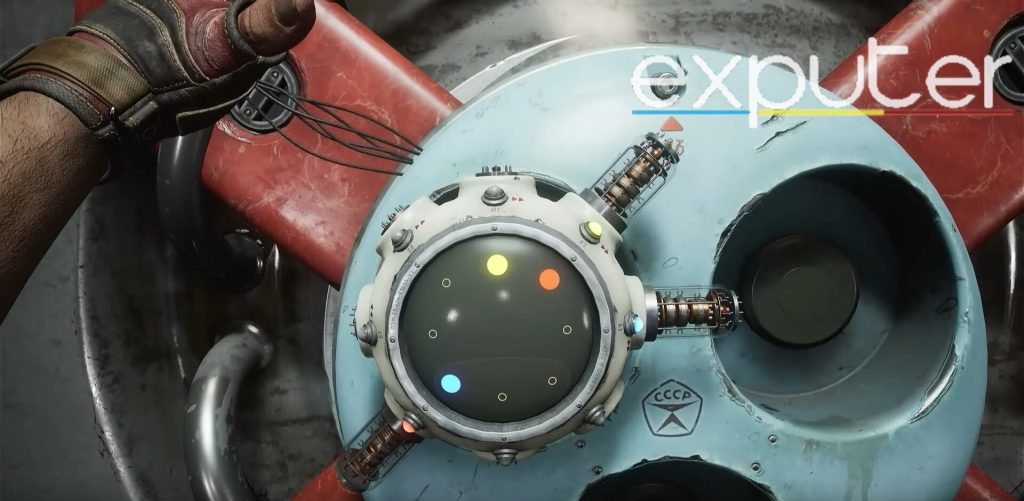
- Head for the door on the far right, where you’ll find a teal blue and red mechanism. If you’re on PS, press R1 to interact with it.
- Solve the three cells connected to the mechanism. Look for the orange marker below the top right cell, a blue marking below the bottom left cell, and a blue light but no marking on the far right cell.
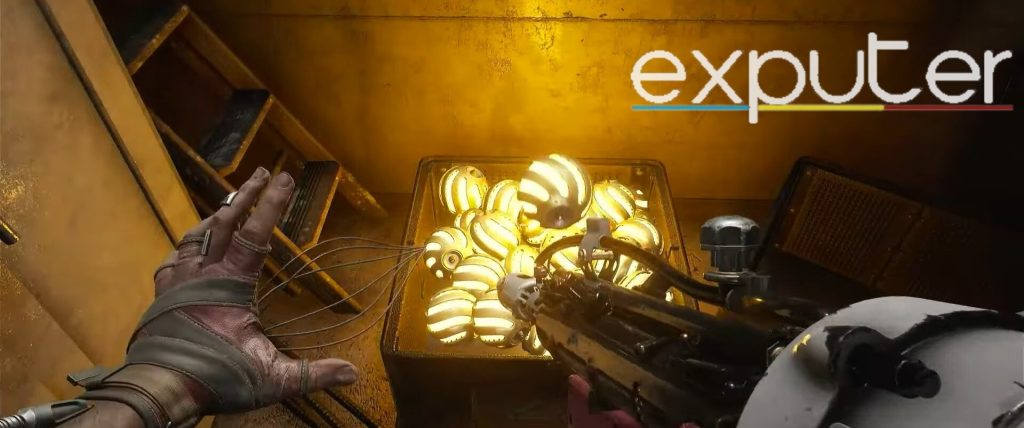
- Proceed to the back of the room, where a box of golden glowing orbs is located.
- Pick up one of the orbs, using your glove to make it hover and stay within reach.
- Move the orb toward one of the tubes protruding below the blue light; it will be automatically drawn into the tube and transported to another location.
Maneuvering The Orbs
Navigating the tubes:
- Exit the room filled with tubes needed for orb navigation.
- Use your glove’s abilities to pull the orb back so that it travels across the tubes. Move it to the right, following the curves of the tube.
- The orb will stop at an intersection. Interact with the tubes to pull the orb down into one of the circular mechanisms, activating it.
- Return to the room to obtain another orb. Navigate it through the tubes again, ensuring it reaches the second circular mechanism to activate it.
- Retrieve another orb, and this time, place it into the first circular mechanism you encounter as you exit the room.
- Pick up yet another orb and guide it to the left side of the tube, making it enter the fourth mechanism.
- This action will trigger an explosion, setting everything on fire. Be cautious and maintain a safe distance to avoid taking serious damage.
Heading Out
Once you do set everything on fire, start heading past the teal blue and red mechanism, and take a left from there. And you want to head into a room where there are tons of plants, then start making your way on top of the ladders, and run through the room on the back of the sewerage system, into the room with the 48 labels on the wall.
- Head inside what seems like a bubble of water, and when you do so, swim your way through safely, and you find yourself on the surface of a lake with a structure in the front.
- Swim to shore, and head up the ramps.
How To Defeat Plyusch
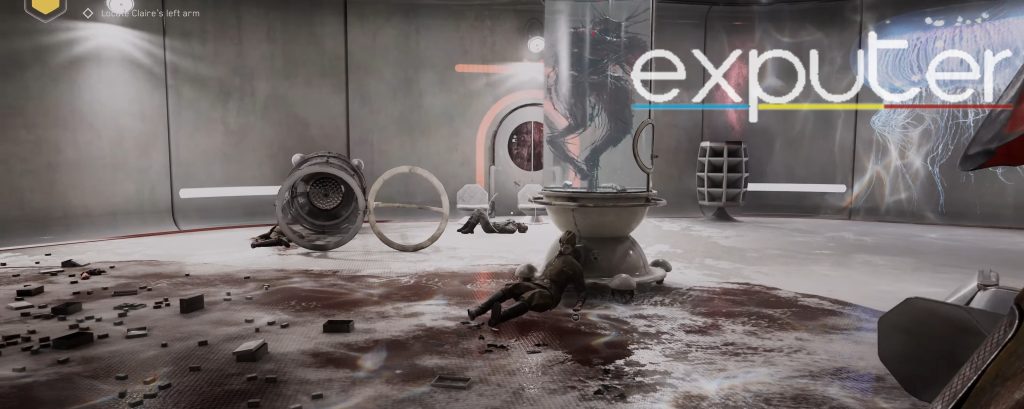
Plyusch in Testing Ground 9:
- Plyusch is initially contained inside a capsule and referred to as “Ivy.”
- It is a dangerous specimen, with numerous black wired arms.
- If it escapes, it becomes a chaotic, black silhouette.
- Plyusch’s attack patterns include flinging its arms back and forth toward you, jumping into the air to strike, and launching melee attacks.
- While Plyusch is fast, it doesn’t constantly attack, allowing you to strike back with melee and ranged attacks.
- Be cautious, as its attacks can stagger and throw you back.
- The boss is not overly difficult to defeat.
Summary
And that’s all we have! All that players need to know about the upgrades and the bosses in Atomic Heart Testing Ground 9, and with that, we will wrap up our guide! While you’re at it, why not read up on our Atomic Heart How To Defeat Hog 7 Hedgie guide, which goes into detail about it’s attack patterns, as well as discusses the tips and tricks that players should follow! While you’re at it, why not check out our Atomic Heart Mirror Mechanism Puzzle guide, which has a total of 4 parts to it as well as puzzles that players need to solve!
If you want to know what the best skills are, then you can read up on our Atomic Heart Best Skills Upgrade guide! Choosing from the 7 skill trees can become difficult with Shok, Character, Frostbite, Mass Telekinesis, Polymeric Jet, Polymeric Shield, and Energy Managemen. Therefore, our Atomic Heart Skill Trees guide can help you out!
Up Next:
- Atomic Heart Dominator Blueprint
- Atomic Heart Best Weapons
- Atomic Heart Trophies
- Atomic Heart Game Length
Thanks! Do share your feedback with us. ⚡
How can we make this post better? Your help would be appreciated. ✍