Callisto Protocol: How To Get Skunk Gun Schematics
Learn how you can get your hands on an overpowered weapon that is optional and is missable!

Callisto Protocol, with its range of limited weapons, has one or two weapons that players might end up missing if they are not careful while exploring through story stages. The same can be said for the Skunk Gun, and our Skunk Gun Schematics guide will showcase how you will be able to get your hands on it!
Key Highlights:
- The Skunk Gun Schematics is an optional weapon that players will not be able to find through the main storyline but rather in a secret room.
- The main benefit of having the Skunk Gun is that players get a broken weapon that can assist them in combat!
- The best way to get your hands on the weapon will be by getting the gate fuse and going through the vent into the workshop!
- While you do not have to get the Skunk Gun to progress through the main storyline, it is always better to have more weapon options!
Note: Spoilers from Chapter 3: Aftermath will be relayed in great detail. Proceed at your own risk.
Look For An Elevator Quest
In chapter 3 of the game, Aftermath, you can find the Skunk Gun Schematics and complete the quest “Look for an Elevator.”
Here’s how to do it:
- Progress through the main storyline until you are about 2/3 of the way through chapter 3, Aftermath.
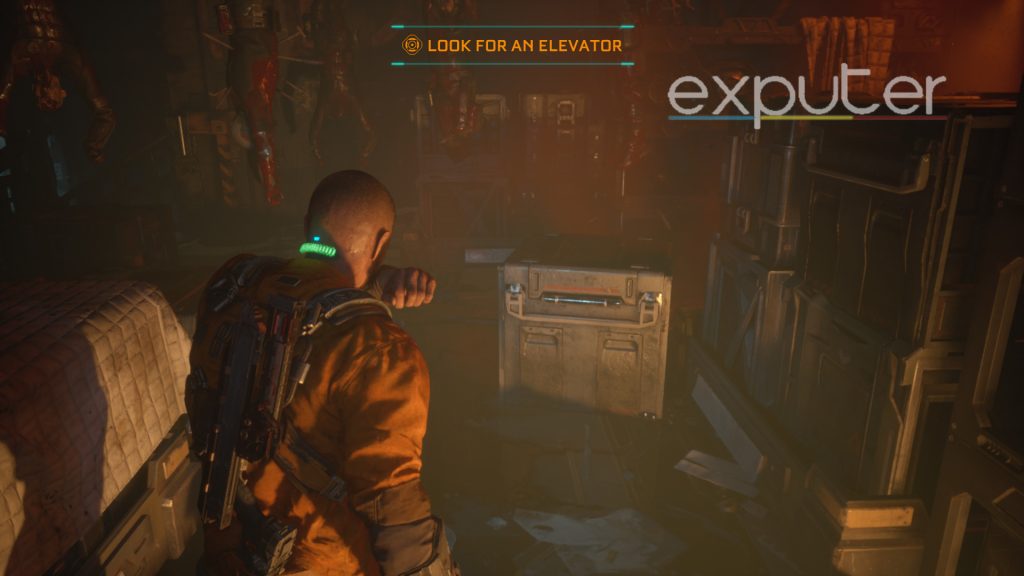
- As you explore, you will come across a room filled with bodies hanging from the ceiling. Elias will inform you about opening the maintenance elevator, and a questline called “Look for an elevator” will start.

Look For An Elevator (Image Credits Exputer) - In this room, investigate a dead body beneath you by holding down the E key. This will reveal Officer Dachs Symmons’ audio log.
- Proceed forward, navigating through the bodies and descending the stairs. The game will autosave your progress.
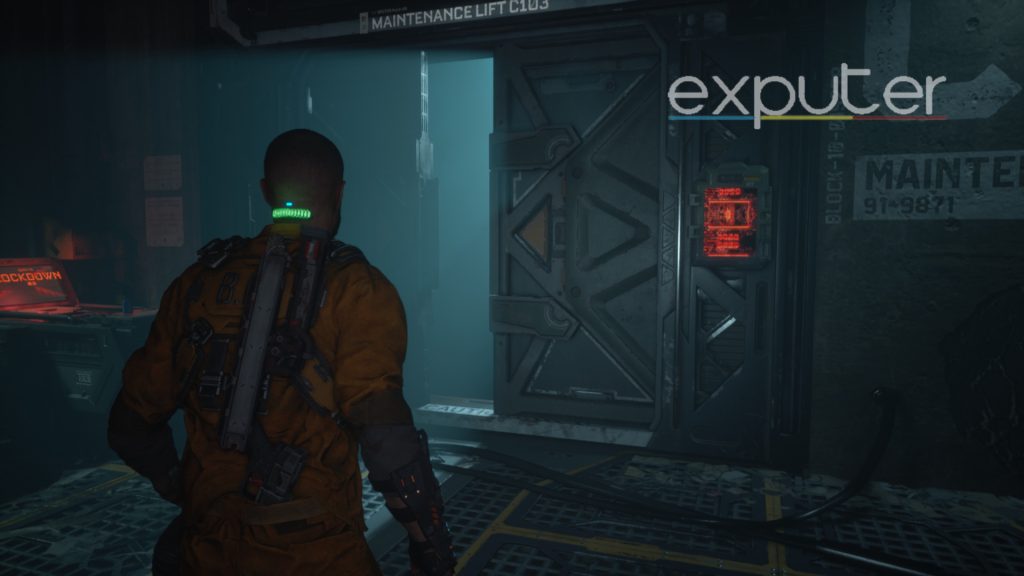
- In the area with systems on lockdown, look to the right for a door with two yellow triangles facing each other. The door will be slightly ajar, indicating that you can interact with it.
- Approach the door and interact with it to shimmy through the narrow gap, revealing the entrance to the elevator.
Way To The Elevator (Image Credits Exputer) - Jacob will comment that the elevator is busted, and Elias will offer to operate it remotely.
Elevator Malfunction
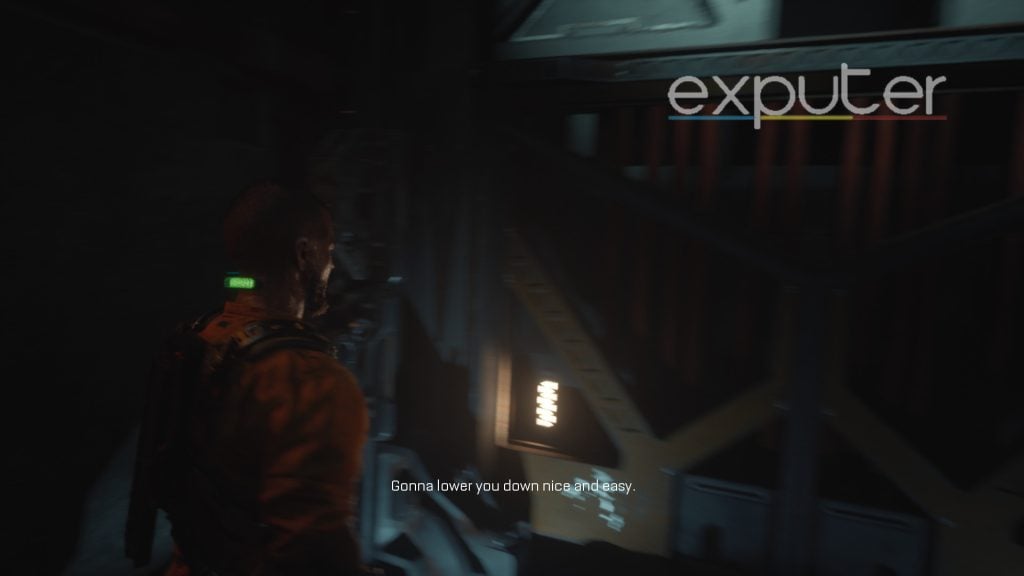
After Jacob shimmying through the narrow gap to get to the elevator platform, an unexpected malfunction occurs. Here’s what happens next:
- Elias assures that lowering down will be easy, but soon the elevator malfunctions, and the lights go out.
- Jacob realizes the brakes are failing, desperately asks Elias to stop the cab, but the systems are unresponsive.
- Jacob uses a steel pipe to jam the brakes in a last-ditch effort.
- The elevator crashes down, and Jacob falls on his back but survives.
- Elias checks on Jacob’s status.
- Elias asks Jacob to reset the power to figure out the system’s issues and instructs him to head to the other elevator, which is nearby.
Resetting The Power
Once Jacob turns around the face of the other end of the elevator, which leads further into the basement, there will be blood covering every corner of the floor, and the ground will be laid with yellow paint.
- Move forward and interact (W and E) to get onto a higher platform.
- A mutant with a long neck suddenly attacks Jacob’s neck.
- Players must rapidly mash the E key to make Jacob stab the mutant, stopping the attack and killing the mutant.
- The mutant initially drags Jacob, so players must act quickly to prevent Jacob’s death.
- Examine the source of the mutant a few feet ahead.
- Stomp on the sacks to prevent more mutants from emerging; three others are in the area.
- Continue forward, where a wall with “D3 Basement” painted on it indicates the right direction.
Find A Way Out Of The Basement
As you progress through the basement area in your quest to find a way out, here’s what you’ll encounter:
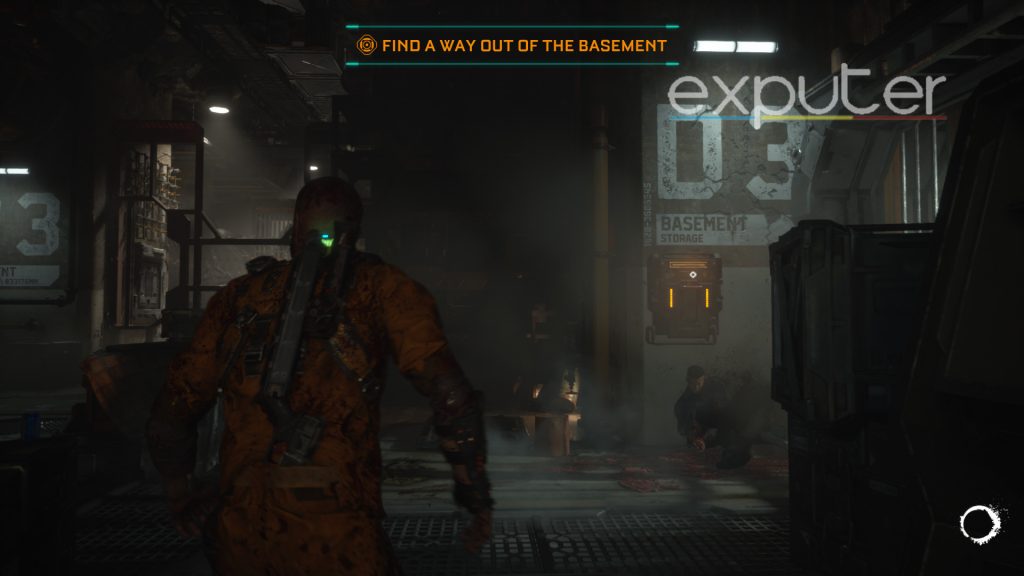
- An autosave occurs, and you should move toward the wall with “D3” written on it.
- You’ll find a fuse on the wall labeled “blocked” and hear creatures groaning in the background.
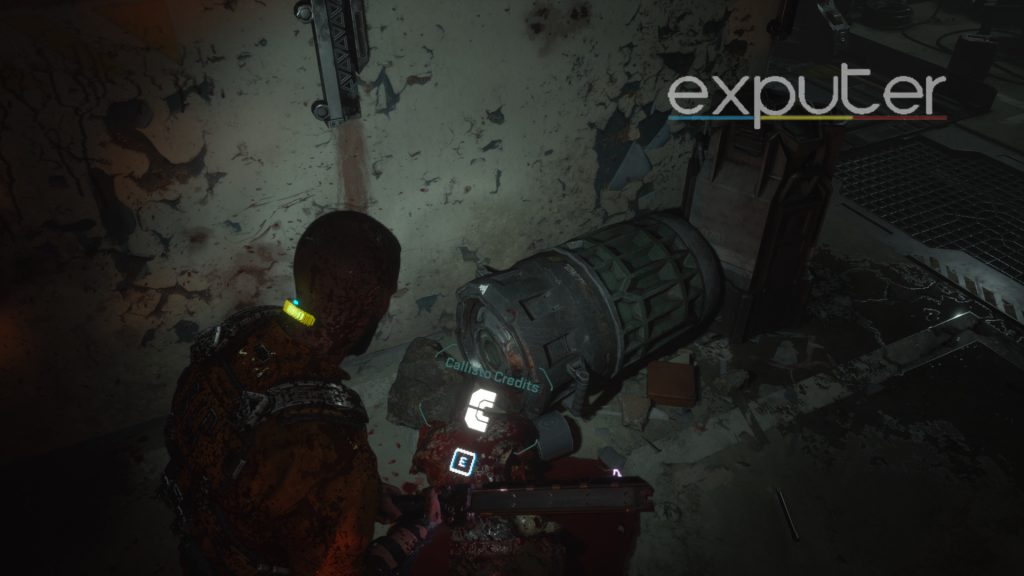
- Turning left from the main entrance, an enemy pops out of a vent, which you can easily defeat for loot.
Credits Loot (Image Credits Exputer) - Returning to the locked room, you’ll find a dead body near the door with a fusebox on the wall labeled “fuse required.”
- Locate a small area with a platform you can jump on, marked by blood splatter and yellow paint.
- Interact with the platform to get on top.
- On the platform, surrounded by stacked crates, a mutant will attack you from a sack in the middle, so defeat it quickly.
- Look for a grey canister near the sack, indicating the path deeper into the basement.
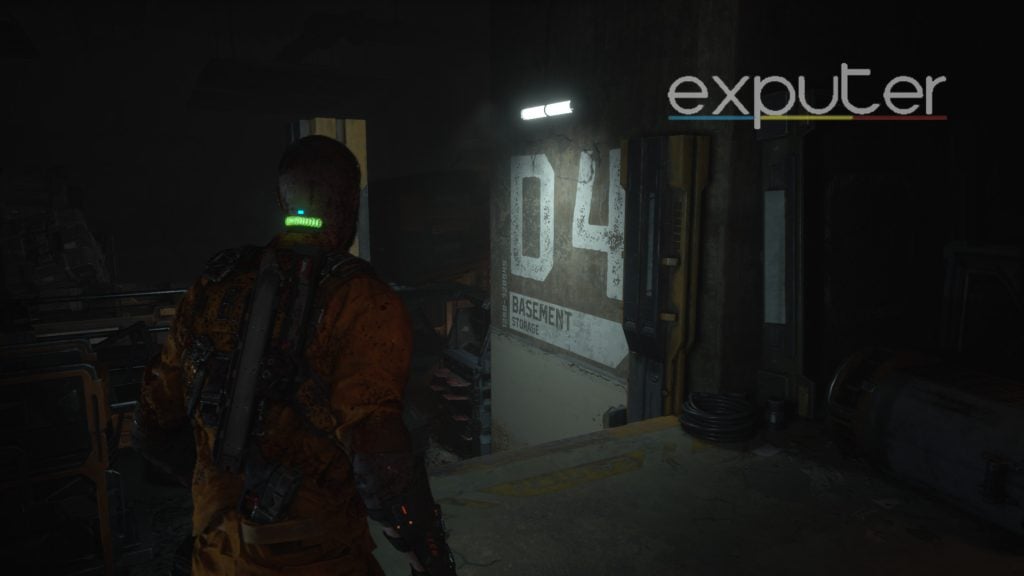
- There’s a flickering white torch and “D4 Basement” paint on the wall.
- Hop down from the platform to proceed into D4.
Heading Into D4
Once you do so, there will be a small pathway that will lead to your left, and the D4 will be marked once again on a wall.
- Turn right, and another enemy emerges from a vent; eliminate it.
- Consider using a health injector if your health is low.
- Continue forward in the dark area with metal shelves and storage boxes.
- Be cautious as you proceed.
- After turning right again, you’ll encounter a giant fan with orange light behind it, indicating a potential jumpscare.
- Shoot the enemy’s sack before it launches itself to avoid taking damage.
- Jump across a few grates to advance further into the basement; the game autosaves.
- Proceed slightly to the right, passing a storage box.
- Reach the area with “D4 Basement” on the wall and boxes on fire.
- Go left from the burning boxes, and another enemy emerges from a vent.
- Use the GRP to launch the enemy into the fans and retrieve an audio log and a chest in front of the fan.
- Turn back, head slightly to the right, then forward, and turn right again.
- Approach a platform labeled “caution” and jump onto it.
- On the platform, go left, and find a fuse box on the wall for an extra health injector.
- Continue ahead to an area with enemies on a lower platform.
- Observe their movements while crouched to plan your attack strategy.
- Descend to the lower platform, eliminate the enemies, and stomp on them for loo
Getting The Gate Fuse

Once you’ve managed to murder them, turn around, and head towards the door which says “locked” there will be a headless guard on the ground, and there will be an item which you will be able to interact with. The item will be a gate fuse which will be required to get into a secret room.
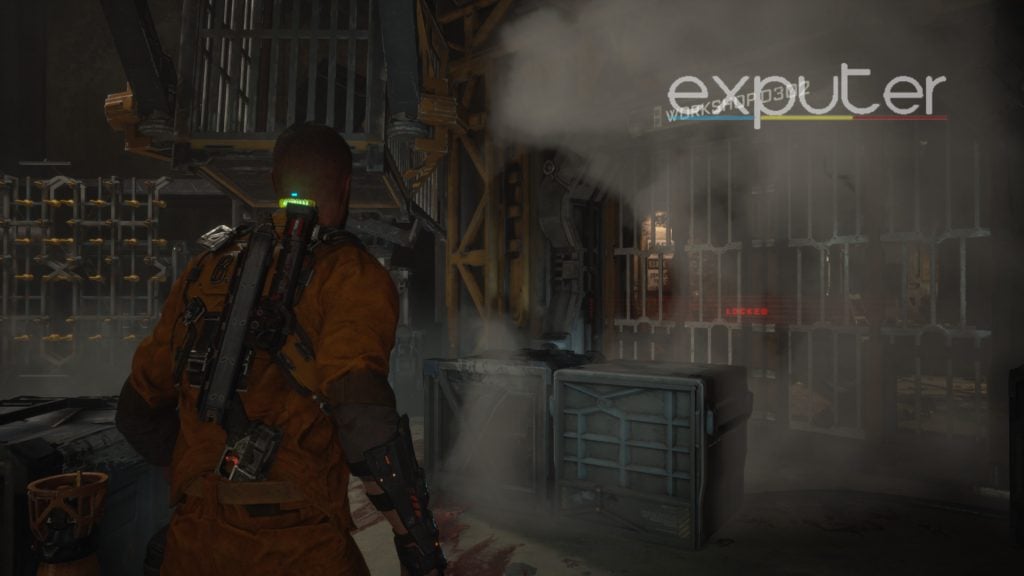
The room that was locked will say “Workshop D302,” and it will be the one that has the Skunk Gun Schematics. You will need to make your way back to the room, which had been locked with the fuse box on the wall, which required the gate fuse. Insert the gate fuse into the fuse box to get into the room.
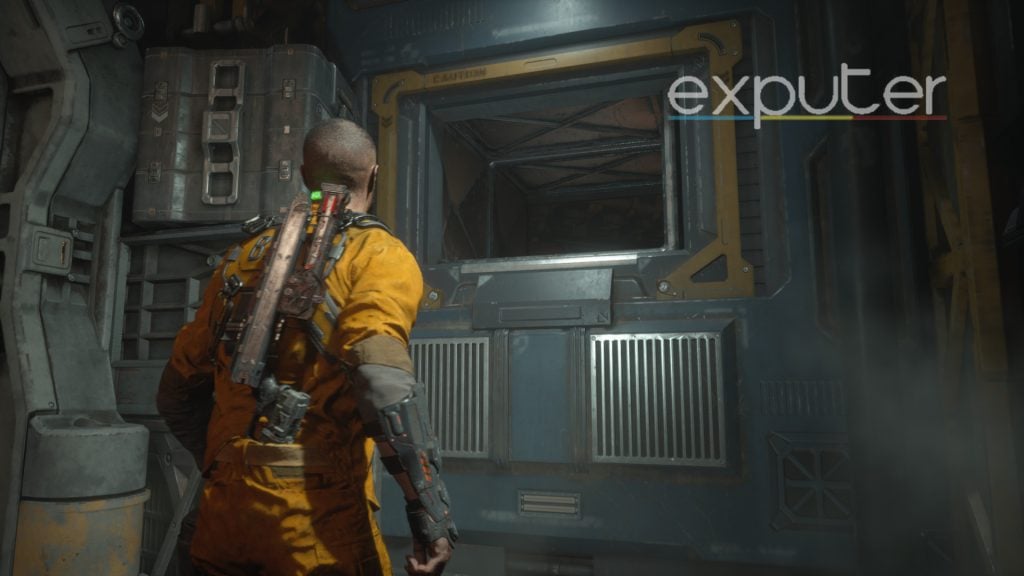
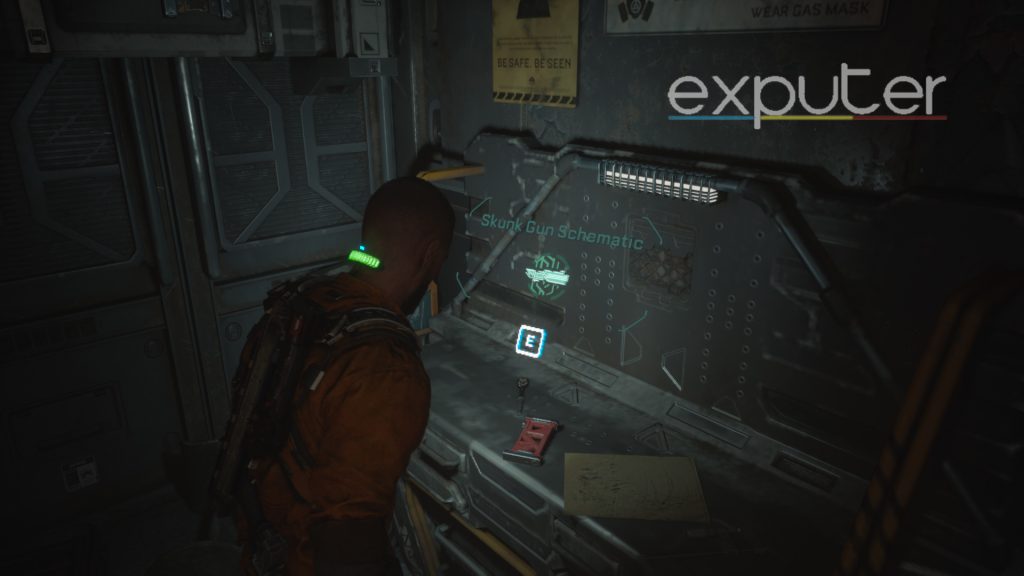
Once you do, there will be a vent that will lead to the workshop room, and you will be able to pick up the skunk gun schematics that will be placed on a table.
And there we have it! We have officially covered a detailed walkthrough of how to get to the skunk gun, and with that, we will wrap up our Callisto Protocol Skunk Gun Schematics guide!
Up Next:
Thanks! Do share your feedback with us. ⚡
How can we make this post better? Your help would be appreciated. ✍