Crisis Core Reunion: Genji Armor Set [All Pieces]
Learn how to get all four pieces of the Genji Armor Set In Crisis Core Reunion to become near invincible!
The Genji Armor Set in Crisis Core Reunion is perhaps one of the most powerful sets in the game due to the number of buffs that it provides. In fact, many consider it to be the most effective set of equipment for tackling high-level missions and optional bosses.
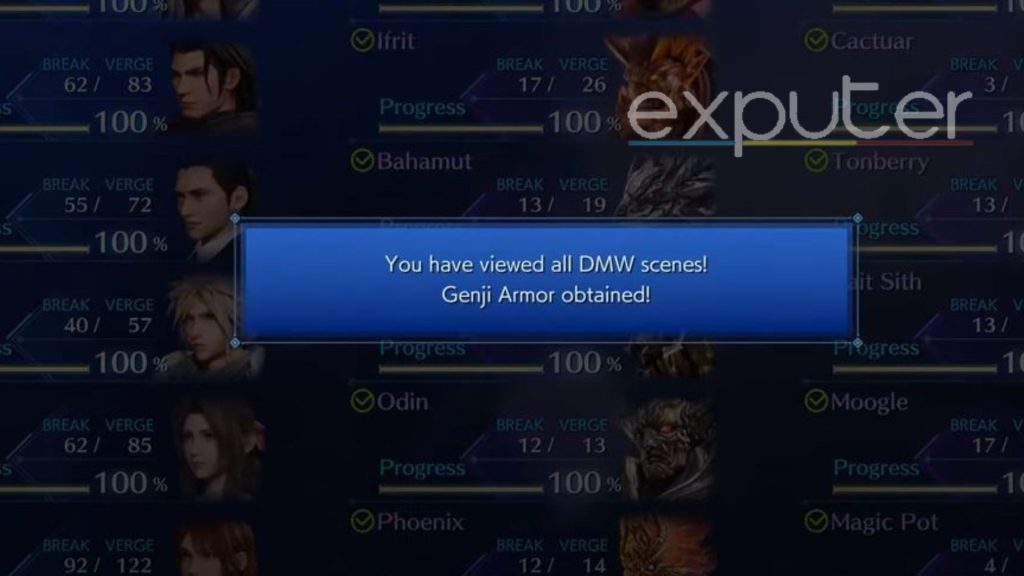
- Genji Armor can be unlocked by getting 100% on all DMW images.
- Genji Shield can be obtained by performing four different actions for Magic Pot.
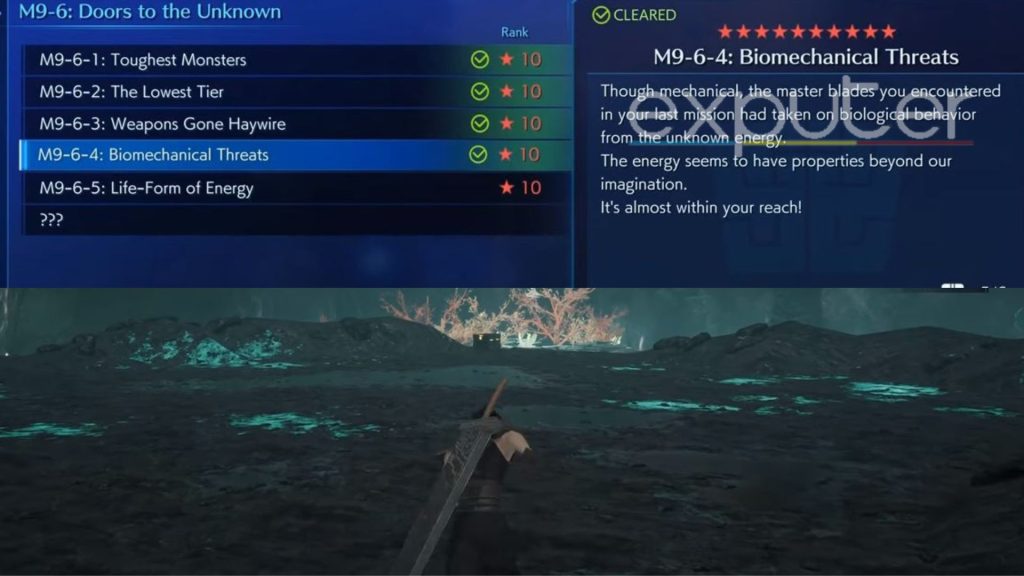
- Genji Glove is found in a chest during M9-6-3: Biomechanical Threats.
- Genji Helm can be bought from the Online Shade Store.
Here’s a brief look at what the Genji Armor Set has to offer in Crisis Core Reunion:
| Genji Armor Set [All Pieces] | Obtained | Abilities | Value |
|---|---|---|---|
| Genji Armor | Complete All Digital Mind Waves to 100% | Sets HP limit to 99,999. Keeps Endure and Regen effects active | - |
| Genji Sheild | Magic Pot ("M7-6-6: The Determined Recruiter) | Keep Barrier and MBarrier effects Active, Absorbs all Elemental Attacks. Prevents all Status Effects | - |
| Genji Glove | Treasure Chest in "M9-6-4: Biomechanical Threats" | Damage limit becomes 99999, Keeps Critical Status Active | - |
| Genji Helm | Net Shop Shade | Zero MP and AP costs, adds Libra Effect | 1,000,000 Gil |
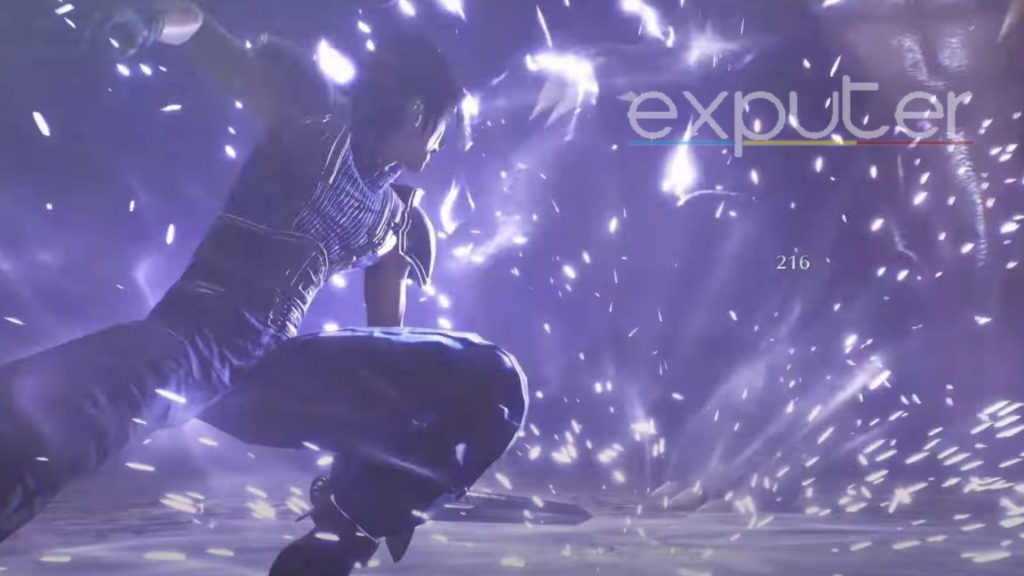
Genji Armor
- Increased HP: It breaks the HP limit, allowing up to 99,999 total HP.
- Endure Status: Your attacks won’t be interrupted, and you won’t be knocked back when hit.
- Regen Status: Health regenerates over time if not at full.
Unlocking it isn’t easy. To unlock the Genji Armor, achieve 100% progress on all Limit Breaks and Summons, which are affected by usage. Here’s how:
- Unlock all DMW images.
- Each Limit Break and Summon has its method for reaching 100% progress.
DMW Limit Breaks
- Limit Breaks are unique special moves tied to specific characters in the game.
- You unlock new Limit Breaks when you meet new characters.
- There are seven Limit Breaks (excluding Zack’s) unlocked in Chapter 6.
- To complete 100% for each Limit Break, activate it during combat with all three images matching one character.
- Memories linked to characters are essential; they trigger with a blue pulse on the screen.
- Most characters have six memories, except Genesis, who has two. You need to be in Genesis Mode to access his memories.
- Memories are tied to the main story, becoming available in Chapter 10.
Increasing Specific Limit Break Chances
- Equip character-specific Materia to boost their Limit Break odds.
- Purchase Materia at Research Dep. QMC+ Store, found in Gonga (Chapter 9).
- Equip four Materia for the Limit Break character and two Lucky Stars Materia.
- Level up Materia to increase chances further.
- More equipped Materia improves your odds of rolling Limit Breaks and seeing memories.
AFK Methods
- Complete battles to register unlocked memories; you can’t abandon or die in battle.
- Choose low-level missions for memory farming.
- Equip the Fraerie Ring for auto-heal (reward from Mission 2-5-5 and 7-6-2).
- Load Mission 1-1-1 or Mission 1-1-3, leave one enemy alive, and let DMW images roll.
- You can leave the game overnight to unlock all memories for a character.
DMW Summons

- Ifrit: Fight in Wutai, then complete Mission 8-1-1: Rematch with Ifrit.
- Bahamut: Defeat Bahamut, then finish Mission 8-1-4: Rematch with Bahamut.
- Bahamut Fury: Complete Yuffie’s missions, ending with Mission 8-1-6: Treasure Info 6.
- Odin: Complete Mission 8-1-6: Mystery Materia and follow M8-1 series.
- Phoenix: Initiate Seven Wonders missions in Nibelheim.
- Chocobo: Finish Mission 8-4-1: Suspicious Mail 1 in Chapter 4.
- Cactuar: Complete Mission 10-1-3: Cactuar Found after M10-1 series.
- Tonberry: Finish Mission 10-2-3: Master Tonberry in M10-2.
- Cait Sith: Complete Mission 8-4-3: Suspicious Mail 3.
- Moogle: Complete Mission 8-4-4: Suspicious Mail 4.
- Magic Pot: Encounter Magic Pot in Mission 10-2-3: Master Tonberry and perform specific actions.
Once you’ve got all the summons, you need to use them in battle. Just like with Limit Breaks, you can increase the chance of rolling a specific Summon by equipping their Materia. You can get them from the Bone Village Commerce store (found in a chest in M7-5-3) and Junon Souvenirs Store (found in a chest in M2-4-1).
Genji Shield
- The Genji Shield offers significant defensive benefits, including constant Barrier and MBarrier, ailment immunity, and elemental damage absorption.
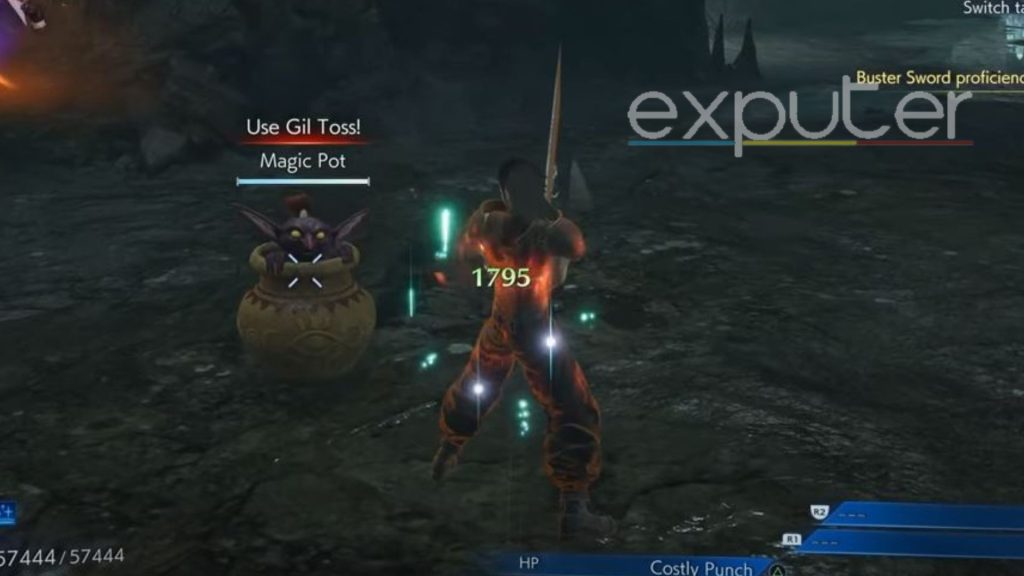
- To unlock the Genji Shield, you must encounter a Magic Pot enemy, which randomly appears during battles.
- You need to perform specific actions during the Magic Pot encounter to obtain the shield.
- You must face the Magic Pot twice, with the first encounter granting access to the Magic Pot DMW.
- Encounter the Magic Pot in Mission 7-6-6: The Determined Recruiter during Chapter 5.
Once you’re facing the Magic Pot, you’ll need to do the following actions (or use the following abilities) to acquire the Genji Shield:
- Gil Toss: You can get this through Mission 4-4-4: Wutai in the Slums.
- Costly Punch: You can usually get a Costly Punch as a reward through missions. However, you can craft Costly Punch yourself as well.
- Deal 99,999 Damage: Your damage output is locked at 9,999 unless you use the Genji Glove. Alternatively, you can just use the Costly Punch again by combining it with the Battle Stance.
- Octaslash: Octaslash is Sephiroth’s Limit Break. You can either increase the likelihood of the Limit Break by equipping its Octaslash Materia. Alternatively, you can try to get the Genji Shield early on, where you might not have that many DMWs, so you’ll be more likely to roll Sephiroth’s Limit Break.
Genji Glove
- Increase the damage limit from 9,999 to 99,999.
- Turns all of your attacks into Critical Hits.
To get the Genji Glove, you need to head over to Mission 9-6-3 Biomechanical Threats. Considering that it is one of the last few missions of the game, you won’t be able to get the Genji Glove early on in the game.
Once you’re on the mission, keep going forward, and you’ll encounter some enemies. Fight them or exit combat mode. But as soon as you get out of the encounter, turn left and keep heading upwards. Once you’re at the top, you should be able to spot the chest at the other end. The chest will contain the Genji Glove.
Genji Helm
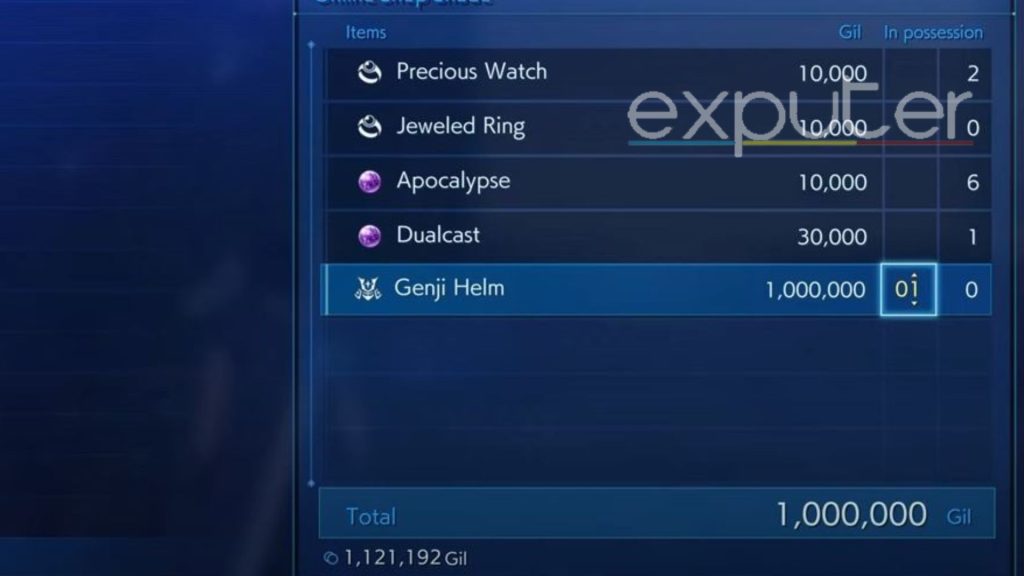
The store is granted to you as a reward for completing Mission 9-5-4: Abnormal Power. The Genji Helm offers the following:
- MP and AP moves can be used without any limitations
- You can see the full stats of all your enemies due to the always-active Libra.
With that, you know how to acquire the full Genji Armor Set in Crisis Core Reunion, which includes amazing items such as the Genji Glove, Shield, Helm, and Genji Armor. Of course, some items are better than others, and in the end, you might mix and match certain equipment to come up with a strong character build.
Up Next:
- Crisis Core Reunion: Trophy List
- Crisis Core FFVII Reunion Max Level
- Crisis Core Reunion: Number Guessing Game
Thanks! Do share your feedback with us. ⚡
How can we make this post better? Your help would be appreciated. ✍