Diablo Immortal: All 8 Dungeons [Definitive Guide]
One of the best source of exp in Diablo Immortal is raiding Dungeons. In this guide, I'll tell you how you can clear them easily.

Dungeons in Diablo Immortal play a vital role in developing the story. They are story-based instances that are placed at specific locations in the different zones of Diablo Immortal. These dungeons have a static layout that features pre-determined monster compositions. These dungeons also have fixed bosses; more on that later.
I’ve jotted down the name of eight dungeons in Diablo Immortal:
- Mag King’s Breach Dungeon.
- Forgotten Tower Dungeon.
- Tomb Of Fahir Dungeon.
- Destruction’s End Dungeon.
- Kikuras Rapids Dungeon.
- Temple Of Namari Dungeon.
- Carven Of Echoes Dungeon.
- Pit Of Anguish Dungeon.
Here’s my summarized list of all the dungeons in Diablo Immortal:
| Dungeons | Statistics | Bosses | Set items |
|---|---|---|---|
| Mag King’s Breach Dungeon | Required Entry Level: 10 Battle Points Reward: 15 Good for: Good experience Farming | Sir Gorash Manoruk The Skeleton King | Hell I+: Torn Sole and Mountebank’s Bravado Hell II+: Issatar at Rest and Dozen Strikes of Shal’baas Hell IV+: Fairfleet and Shepherd and Mother |
| Forgotten Tower Dungeon | Required Entry Level: 20 Battle Points Reward: 15 Good for: High experience in Farming. | The Blood Priestess Innaloth The Countess | Hell I+: Mountebank’s Slyness and Storm-Tack of Shal’baas Hell II+: Wisdom’s Edge and Issatar’s Open Hand Hell IV+: Shepherd and Father and The Prisoner |
| Tomb Of Fahir Dungeon | Required Entry Level: 28 Battle Points Reward: 20 Good for: Loot potential with an average experience Farming | Icon of Rebirth Icon of Souls King Fahir Segithis | Hell I+: Wind-Trods of Shal’baas and Issatar Contained Hell II+: Shepherd and Architect and Hurtling Steel Hell IV+: Shameless Urge and The Turnkey |
| Destruction’s End Dungeon | Required Entry Level: 35 Battle Points Reward: 15 Good For: Sentimental Value, Loot Potential | The Lord of Destruction, Baal | Hell I+: Issatar the Brute and Whipcrack Hell II+: The Subjugator and Shepherd and Beastmaster Hell IV+: Modest Urge |
| Kikuras Rapids Dungeon | Required Entry Level: 40 Battle Points Reward: 15 Good For: Unique dungeon experience, farming, and good loot potential. | Chieftain Ongori | Hell I+: Stump-Stir and Shepherd and Begetter Hell II+: Awakener’s Urge and The Mailed Fist Hell IV+: Broken Palm and Mountebank’s Marvel |
| Temple Of Namari Dungeon | Required Entry Level: 40 Battle Points Reward: 15 Good For: Fast completion and good loot potential | Sargoth | Hell I+: Shepherd and Leaders and The Gaoler Hell II+: Urge (Hands of Vithu’s Urges Set) Hell IV+: Mountebank’s Misdirection and Resting Fangs of Shal’baas |
| Carven Of Echoes Dungeon | Required Entry Level: 50 Battle Points Reward: 15 Good for:High risk-to-reward ratio. | Bloodrime The Glacial Colossus | Hell I+: The Tyrant and Exemplar’s Urge Hell II+: Mountebank’s Flourish and Bloody Hand Hell IV+: Braided Serpent of Shal’baas and Issatar Undone |
| Pit Of Anguish Dungeon | Required Entry Level: 56 Battle Points Reward: 20 Good For: Okayish experience farming and loot potential. | Abyssal Tiller Zolthrax Zaka | Hell I+: Beacon’s Urge and Open Gut Hell II+: Burning Heart of Shal’baas and Mountebank’s Shirking Hell IV+: Foul Fleet and Issatar Enraged |
Now, let me get to the real talk about what dungeons are available in Diablo Immortal and how you can clear them.
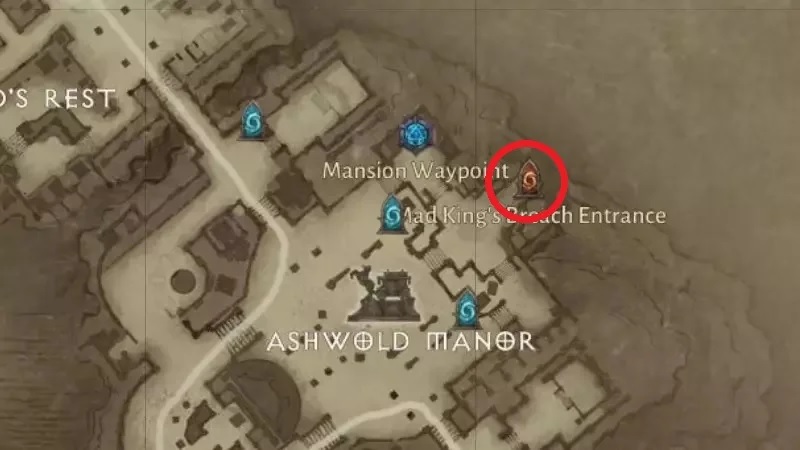
Mag King’s Breach Dungeon
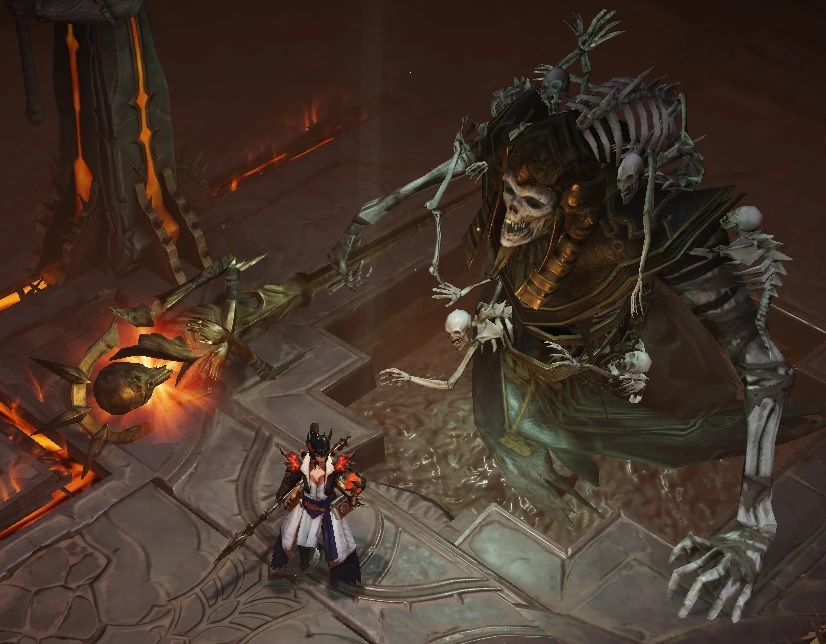
Mad King’s Breach is the first Dungeon you’ll encounter in Diablo Immortal. You’ll find the dungeon at the end of the Ashwold Cemetery world. The Dungeon is a three-floor dungeon that makes you face 3 bosses separately. They are Sir Gorash, Manoruk, and the Skeleton King. In my opinion, it is an excellent source of item farming and experience early on.
Statistics of the Mad King’s Breach Dungeon
- Required Entry Level: 10
- Battle Points Reward: 15
- Good for: Good experience Farming
The Strategy of Mag King’s Breach Dungeon
To efficiently clear Mad King’s Breach in Diablo Immortal for Experience Farming in Dungeons, I suggest following this strategy:
- Prioritize fast and coordinated movement.
- Focus on maintaining the Massacre bonus.
- Although this dungeon is relatively small, each floor is populated with monsters.
For maintaining your Massacre bonus streak, I recommend the following approach, especially in a group:
- Have one party member start from the entrance to the floor and proceed straight ahead.
- Other party members should move into the corners of each floor.
- Attempt to chain one fight into another while preserving the Massacre bonus streak.
This strategy will help you maximize your efficiency while farming experience in Mad King’s Breach.
The Skeleton King
When you get to the final boss, the Skeleton King, have your team pop out their ultimates and long cooldown skills as soon as the fight begins. That way, they will recharge when he gets to phase 2. You can save these skills to ensure they don’t get wasted during his immunity transition.
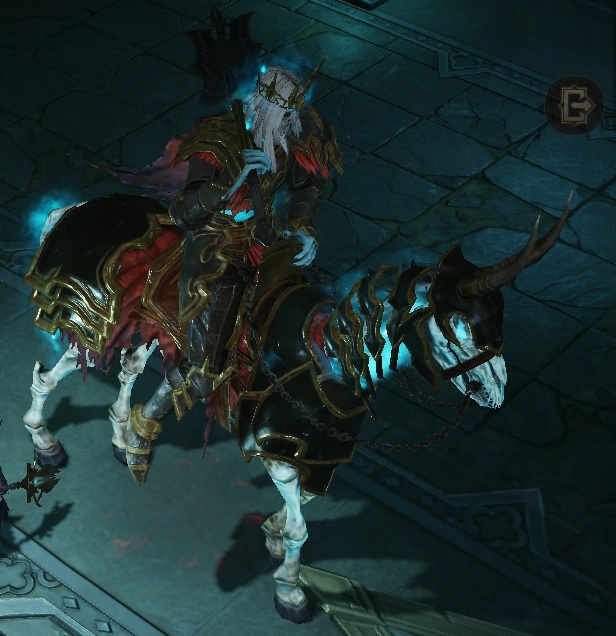
By the end, he will hop onto a skeletal steed and raise ghostly walls that start closing in. As per my experience, you need to defeat the Skeleton King before the walls close in towards you. Because if you get out of the walls, you’ll get high Damage over Time, and it will kill you.
Mad King’s Breach Dungeon’s Set items
You’ll get the following rewards at different Hell Levels.
Hell I+
- Torn Sole (Boots of Grace of the Flagellant Set)
- Mountebank’s Bravado (Belt of Untouchable Mountebank Set)
Hell II+:
- Issatar at Rest (Neck of Issatar Imbued Set)
- Dozen Strikes of Shal’baas (Hands of War Rags of Shal’baas Set)
Hell IV+:
- Fairfleet (Ring of Windloft Perfection Set)
- Shepherd and Mother (Ring of Shepherd’s Call of Wolves Set)
Forgotten Tower Dungeon
The Forgotten Tower Dungeon is located in the Dark Wood region of Diablo Immortal. Unlike the first one, it is a single-floor dungeon in which you fight against two bosses, the Blood Priestess Innaloth and The Countess. I found this tower to be good for players who know how to maintain long Massacre Bonus streaks.

Statistics
- Required Entry Level: 20
- Battle Points Reward: 15
- Good for: High experience in Farming.
Strategy
To efficiently clear this dungeon in Diablo Immortal, I suggest following these key strategies:
- Prioritize speed and coordinated movement to complete the dungeon quickly.
- Pay close attention to maintaining the Massacre bonus streak, as it plays a crucial role in earning a substantial amount of experience points (Exp).
- The dungeon offers the potential for up to 5 bonus Treasure Chests after each run, depending on your performance within the dungeon’s built-in timer.
- Divide the dungeon into three main parts: The Entrance, Side Rooms, and The Countess.
By implementing these strategies effectively, you can maximize your rewards and progress efficiently through the dungeon in Diablo Immortal.
The Countess
The Countess fights in melee, and she has strong attacks that inflict heavy damage if you can’t dodge them. I recommend that you start with your Ultimates and long cooldown skills. They will come readily when the Countess gets into her 2nd phase.
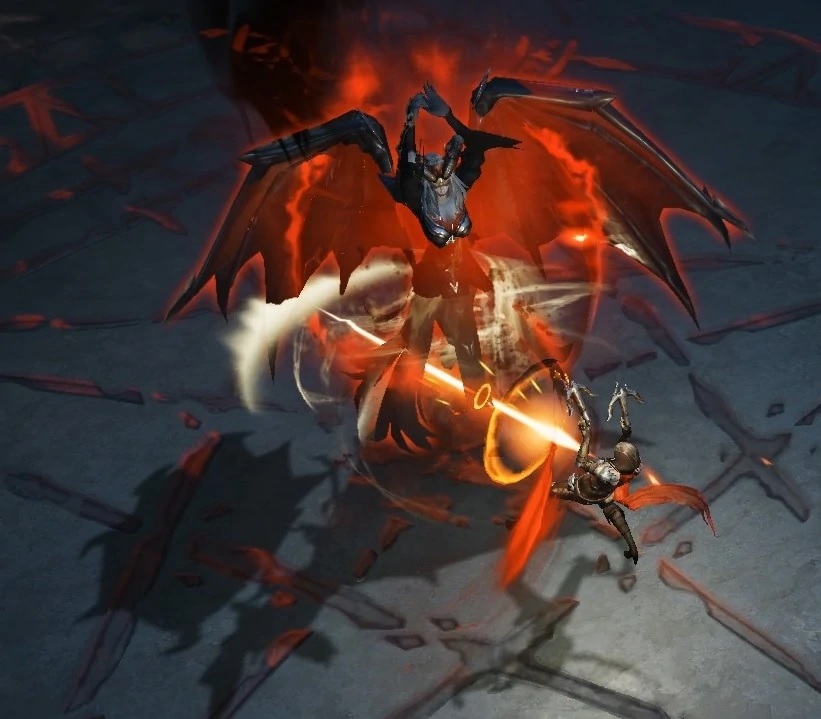
After you take a bit of her health, she will disappear and summon Bloodsworn adds. Kill them quickly and keep an eye on the ground for a red circular telegraph. That is where Countess will reappear and deal damage to those caught in it.
After that, what you need to do is stay away from any markings on the ground, they will hurt you. Try to dodge her bat swarm as much as possible, as they will deal massive damage if you get hit.
Set items
I have written all the Set items that you can get as loot.
Hell I+
- Mountebank’s Slyness (Boots of Untouchable Mountebank Set)
- Storm-Tack of Shal’baas (Belt of War Rags of Shal’baas Set)
Hell II+
- Wisdom’s Edge (Neck of Windloft Perfection Set)
- Issatar’s Open Hand (Hands of Issatar Imbued Set)
Hell IV+
- Shepherd and Father (Ring of Shepherd’s Call of Wolves)
- The Prisoner (Ring of Feasting Baron’s Pack Set)
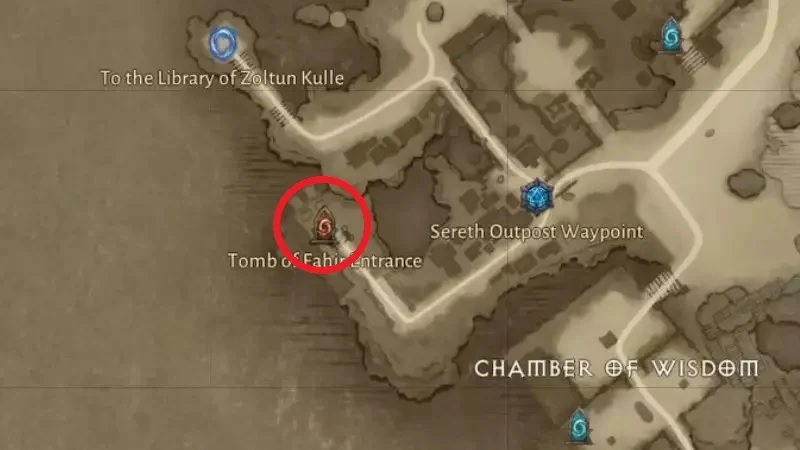
Tomb Of Fahir Dungeon
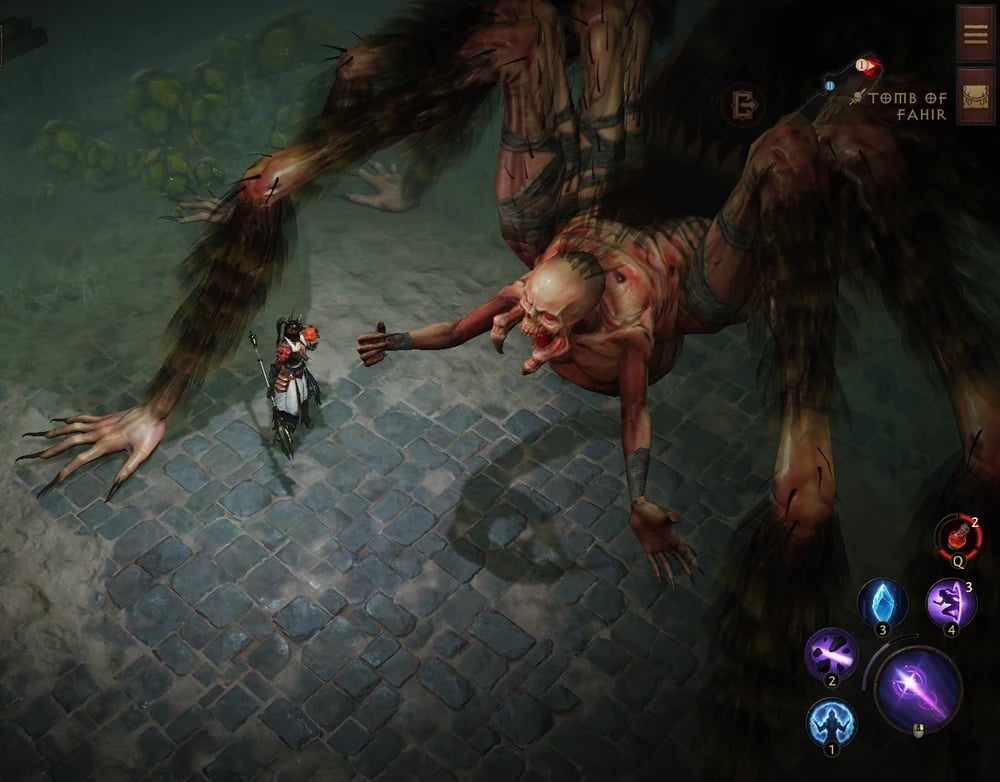
The Tomb of Fahir in Diablo Immortal, located in the Shassar Sea region, is a two-floor dungeon known for its unique features:
- The dungeon includes transitional phases where you’ll encounter a total of 4 bosses: Icon of Rebirth, Icon of Souls, King Fahir, and Segithis.
- The Tomb of Fahir is renowned for its inventive boss fights and the structure of these encounters.
- As you progress through the dungeon, you’ll have the opportunity to open numerous Treasure Chests.
- To succeed in this dungeon, your team must have good mobility, as it will prove advantageous during your journey.
Statistics
- Required Entry Level: 28
- Battle Points Reward: 20
- Good for: Loot potential with an average experience in Farming
Strategy
In my opinion, you’ll require high mobility to clear the sprawling Tomb of Fahir Dungeon effectively in Diablo Immortal. This is because you must reach opposite sides of the Dungeon to defeat the ‘Icon’ mini-bosses for the story to progress.
If playing solo, defeat these mini-bosses one by one. In a group, send your strongest members to handle the Icons while two other members prepare to face King Fahir upon his arrival.
Alternatively, you can defeat each Icon with two members and then regroup in the middle to confront Fahir together. The choice of strategy is yours to make.
King Fahir
King Fahir doesn’t move from his position at the center, but don’t let it fool you; he has numerous far-reaching attacks that can catch you off guard. If he starts channeling, then you should run away or use mobility skills to get out. Anyways, King Fahir isn’t the main boss. The main boss is Segithis.
Segithis
Tear down Segithis’ legs, first front legs, then back ones, and then attack her center body. You’ll have to repeat this process again and again. In the second phase, she will start webbing careless players. You’ll have to be on the move to save yourself from her attacks.
Set items
From what I gathered, these are the following set of items that you can get from the Tomb of Fahir.
Hell I+
- Wind-Trods of Shal’baas (Boots of War Rags of Shal’baas Set)
- Issatar Contained (Belt of Issatar Imbued Set)
Hell II+
- Shepherd and Architect (Neck of Shepherd’s Call to Wolves Set)
- Hurtling Steel (Hands of Windloft Perfection Set)
Hell IV+
- Shameless Urge (Ring of Vithu’s Urges Set)
- The Turnkey (Ring of Feasting Baron’s Pack Set)
Destruction’s End Dungeon
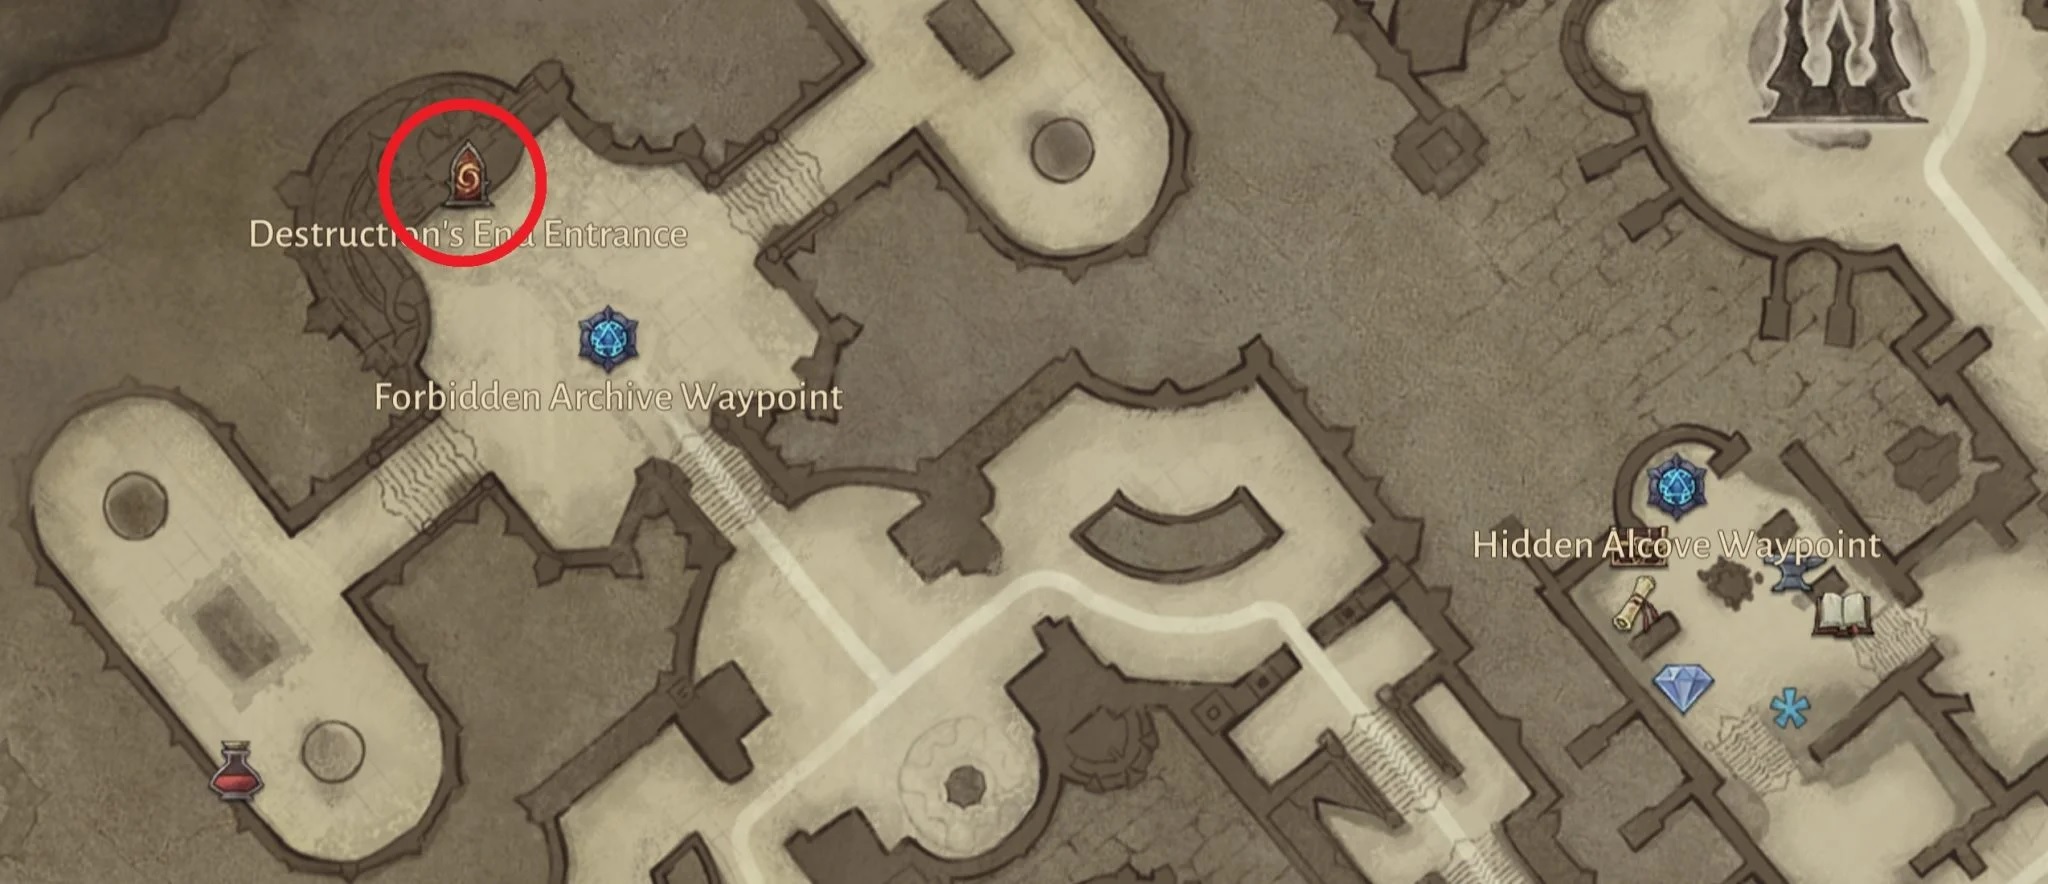
In Zoltun Kulle’s Library in Diablo Immortal, you’ll come across the Destruction’s End Dungeon. This is a two-phase dungeon where you have to face off against a single boss, Baal. Baal splits the fight into two phases. Destruction’s End dungeon is famous because it lets you encounter one of the signature Prime Evils, The Lord of Destruction, Baal.
Here, you get to ally with some iconic Diablo characters like Tal Rasha, and the library’s namesake Zoltun Kulle. But I found that cleaning the dungeon isn’t worth it at all unless you’re farming a specific set piece. That is because Destruction’s End Dungeon doesn’t provide any notable experience. And other rewards aren’t noteworthy at all.
Statistics
- Required Entry Level: 35
- Battle Points Reward: 15
- Good For: Sentimental Value, Loot Potential
Strategy
Destruction’s End Dungeon is not suitable for optimizing loot or farming. It’s more of a nostalgic experience for fans of older Diablo games. You’ll join Zoltun Kulle and Tal Rasha to fight waves of enemies. However, the dungeon has only one boss fight with enforced pit stops, making it impossible to maintain Massacre bonuses or split farm. Completing it in a specific time grants one extra Treasure Chest, but overall, it’s best for those seeking specific set items.
Baal – The Lord of Destruction
I discovered that dealing with Baal is relatively easy in the first encounter. All you have to do is take out two of his health bars. Even then, you shouldn’t underestimate the Lord of Destruction. He will send out different ice-related attacks that can take out tons of health from your character. You should avoid getting hit. Once his health drops, he will teleport away.
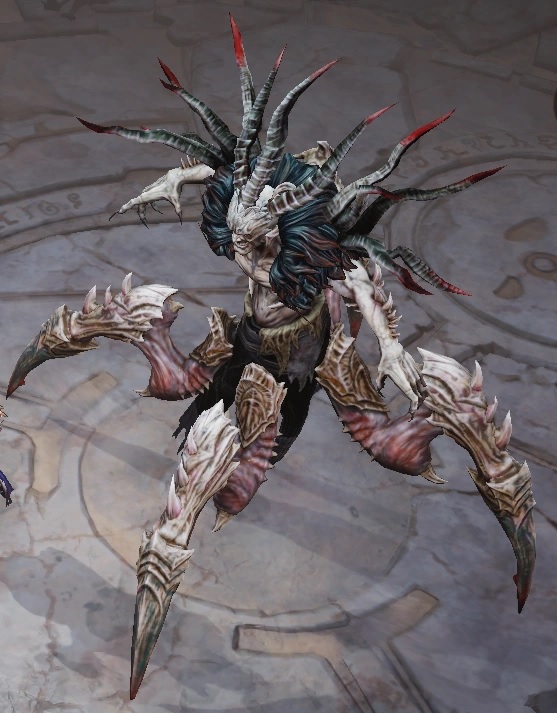
In the second phase, you’ll finally get to defeat Baal. you’ll have to destroy the Festerings Appendages to target him at all. Baal will stun you and then the fight starts. He will take some of his attacks from the first phase. But now, he’ll include some fire-related attacks too. It’s better to bring a few healers with you to this fight.
Set items
Following are the Set items you can get for clearing the Destruction’s End Dungeon in Diablo Immortal.
Hell I+
- Issatar the Brute (Boots of Issatar Imbued Set)
- Whipcrack (Belt of Windloft Perfection Set)
Hell II+
- The Subjugator (Neck of Feasting Baron’s Pack Set)
- Shepherd and Beastmaster (Hands of Shepherd’s Call to Wolves)
Hell IV+
- Modest Urge (Ring of Vithu’s Urges Set)
Kikuras Rapids Dungeon
You’ll find Kikuras Rapids Dungeon in the Bilefen region of Diablo Immortal. This dungeon is a single-floor dungeon that is divided into three phases. As for the boss, it too has only one boss, known as Chieftain Ongori.
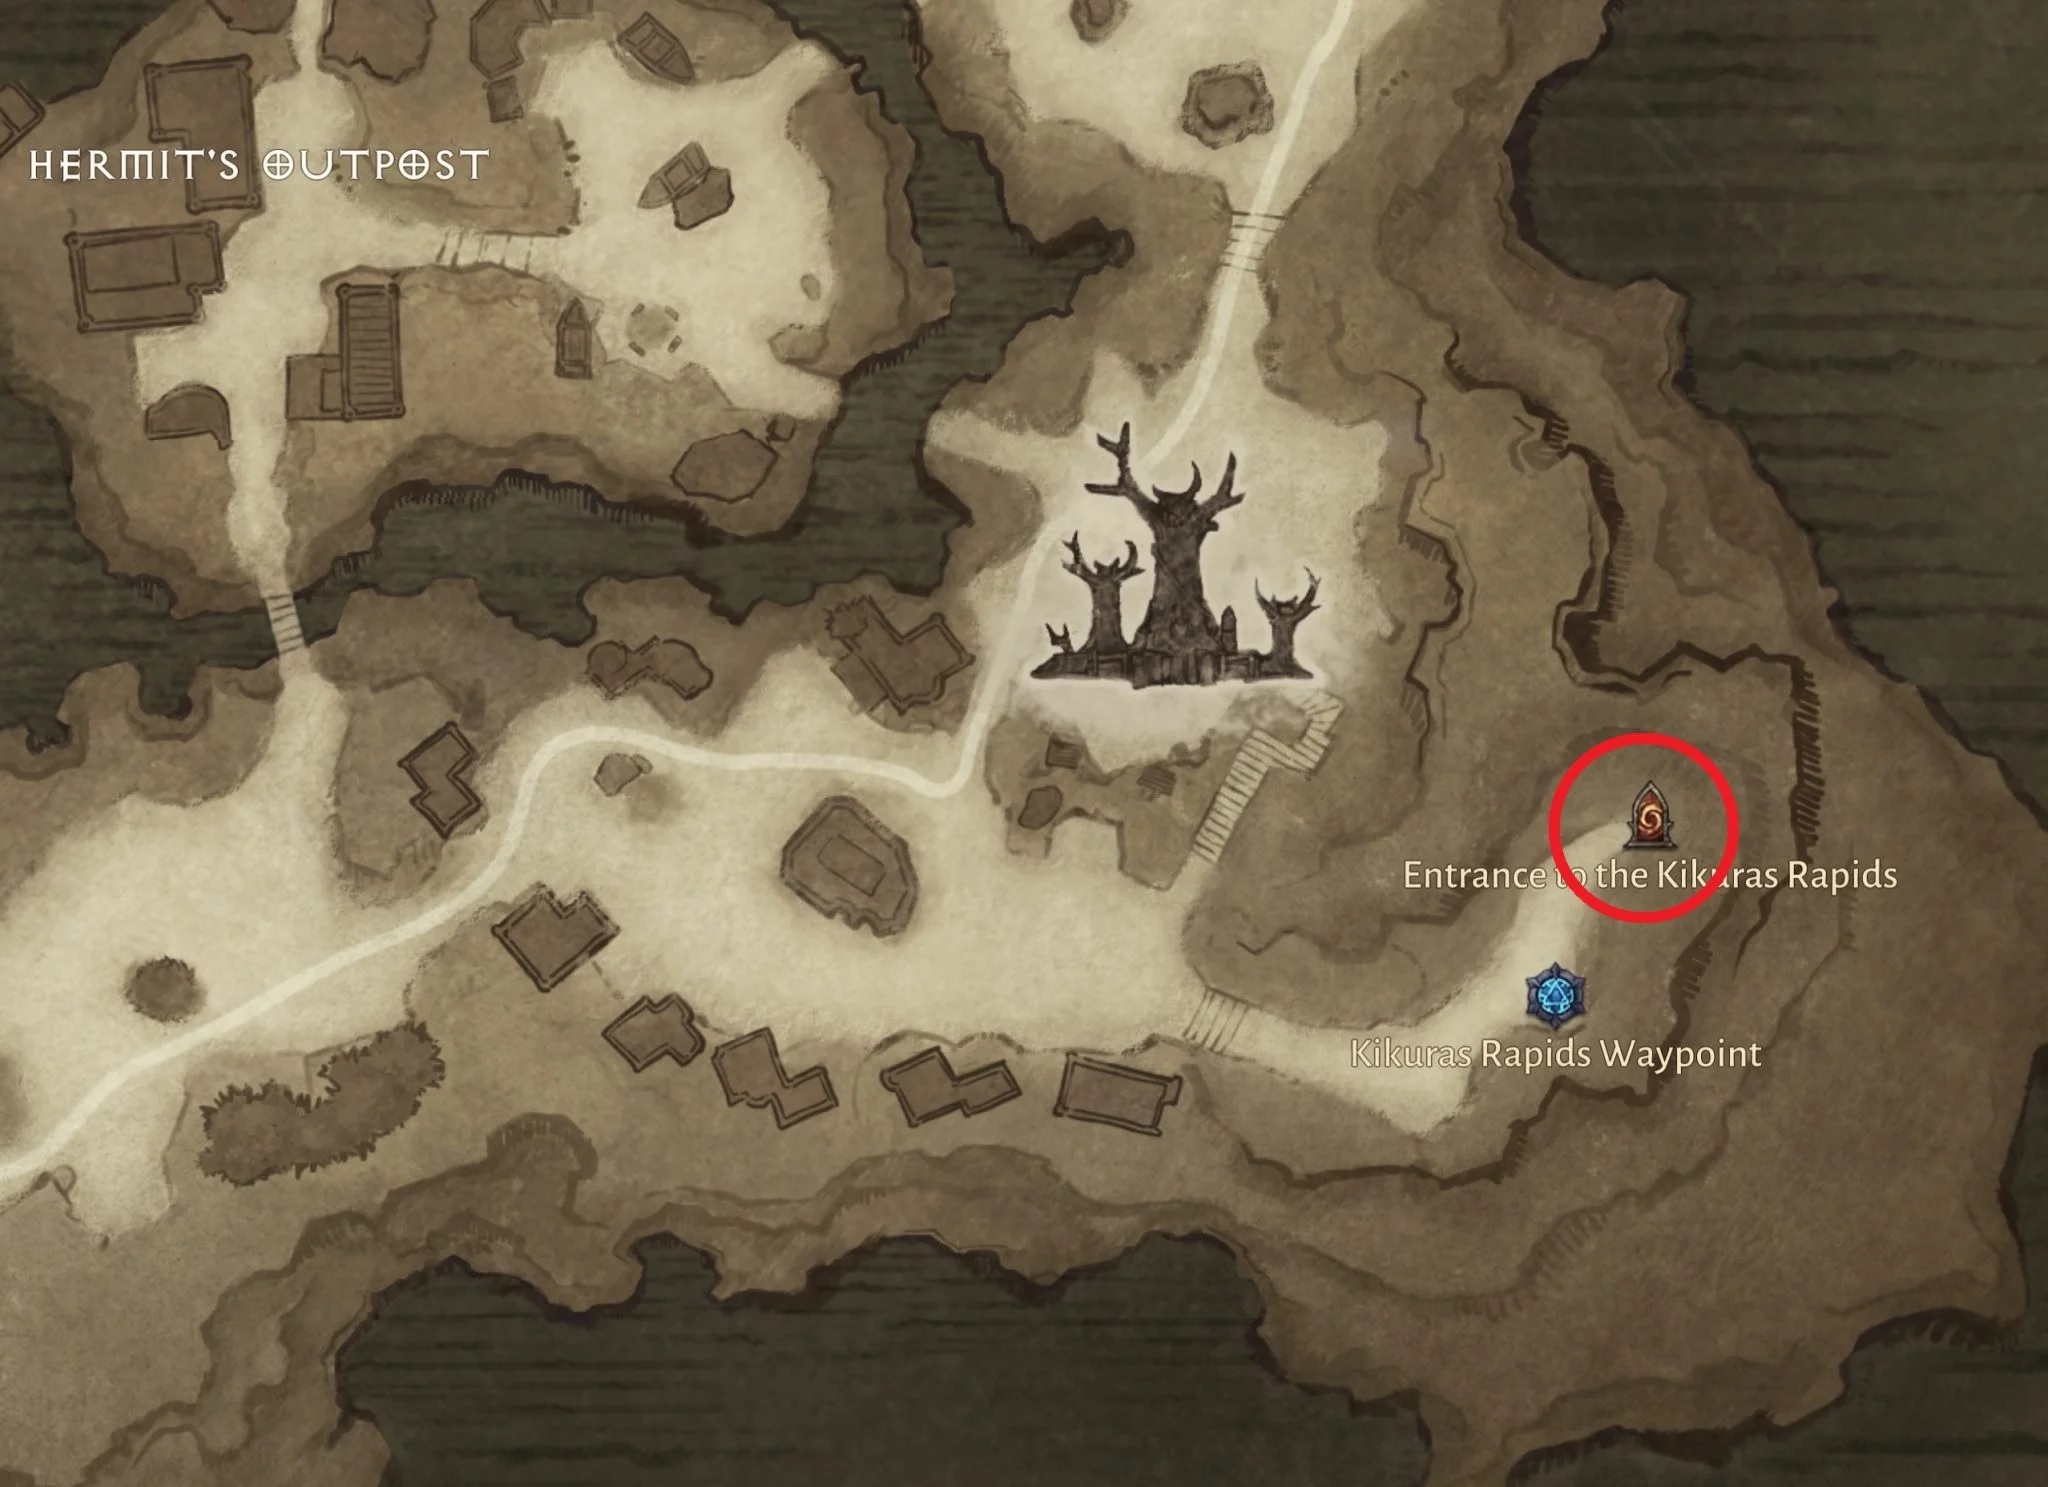
The Dungeon is known for its visual variety. Most players like it as it does something unique, you get to ride a raft for half of the time. I suggest grinding here for a while because it has some decent loot for you to gather.
Statistics of the Kikuras Rapids Dungeon
- Required Entry Level: 40
- Battle Points Reward: 15
- Good For: Unique dungeon experience, Average experience farming, and good loot potential.
Strategy
The Kikuras Rapids dungeon is straightforward. Follow the path, maintain the Massacre Bonuses streak, and quickly board the raft. In a group, ensure everyone boards the raft for it to sail. If your group is strong, one member can handle the monsters while others take a break during this segment.
Chieftain Ongori
After the Raft segment, you’ll walk before reaching the boss, Chieftain Ongori of the Fetish Village. He has various abilities, so be cautious. He summons Fetish Flayers and Runic Totems, which you should destroy. Dodge the purple missiles as they deal high damage.
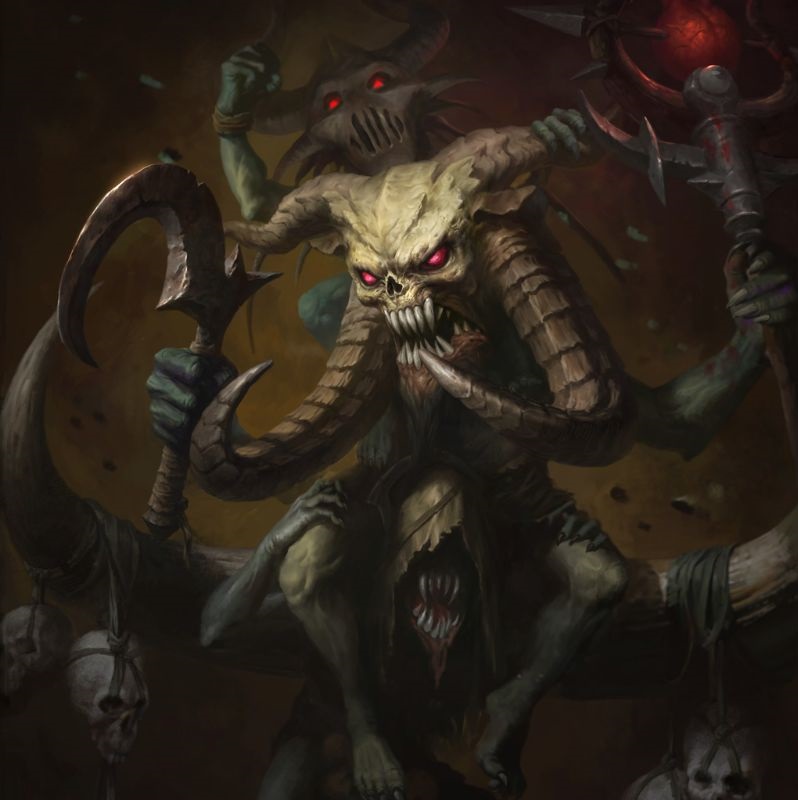
But that’s not all, he will often Leap out of sight and land on one of the party members randomly. Other members should step away as soon as possible as this skill hits hard. As for the finishing touch, he lights up 4 rotating torches across the battlefield. They will make a fiery death for players once they’re all lit up. In my opinion, you should do your best to avoid them as they hit hard.
Set items
Hell I+
- Stump-Stir (Boots of Windloft Perfection Set)
- Shepherd and Begetter (Belt of Shepherd’s Call to Wolves Set)
Hell II+
- Awakener’s Urge (Neck of Vithu’s Urges Set)
- The Mailed Fist (Hands of Feasting Baron’s Pack Set)
Hell IV+
- Broken Palm (Ring of Grace of the Flagellant Set)
- Mountebank’s Marvel (Ring of Untouchable Mountebank Set)
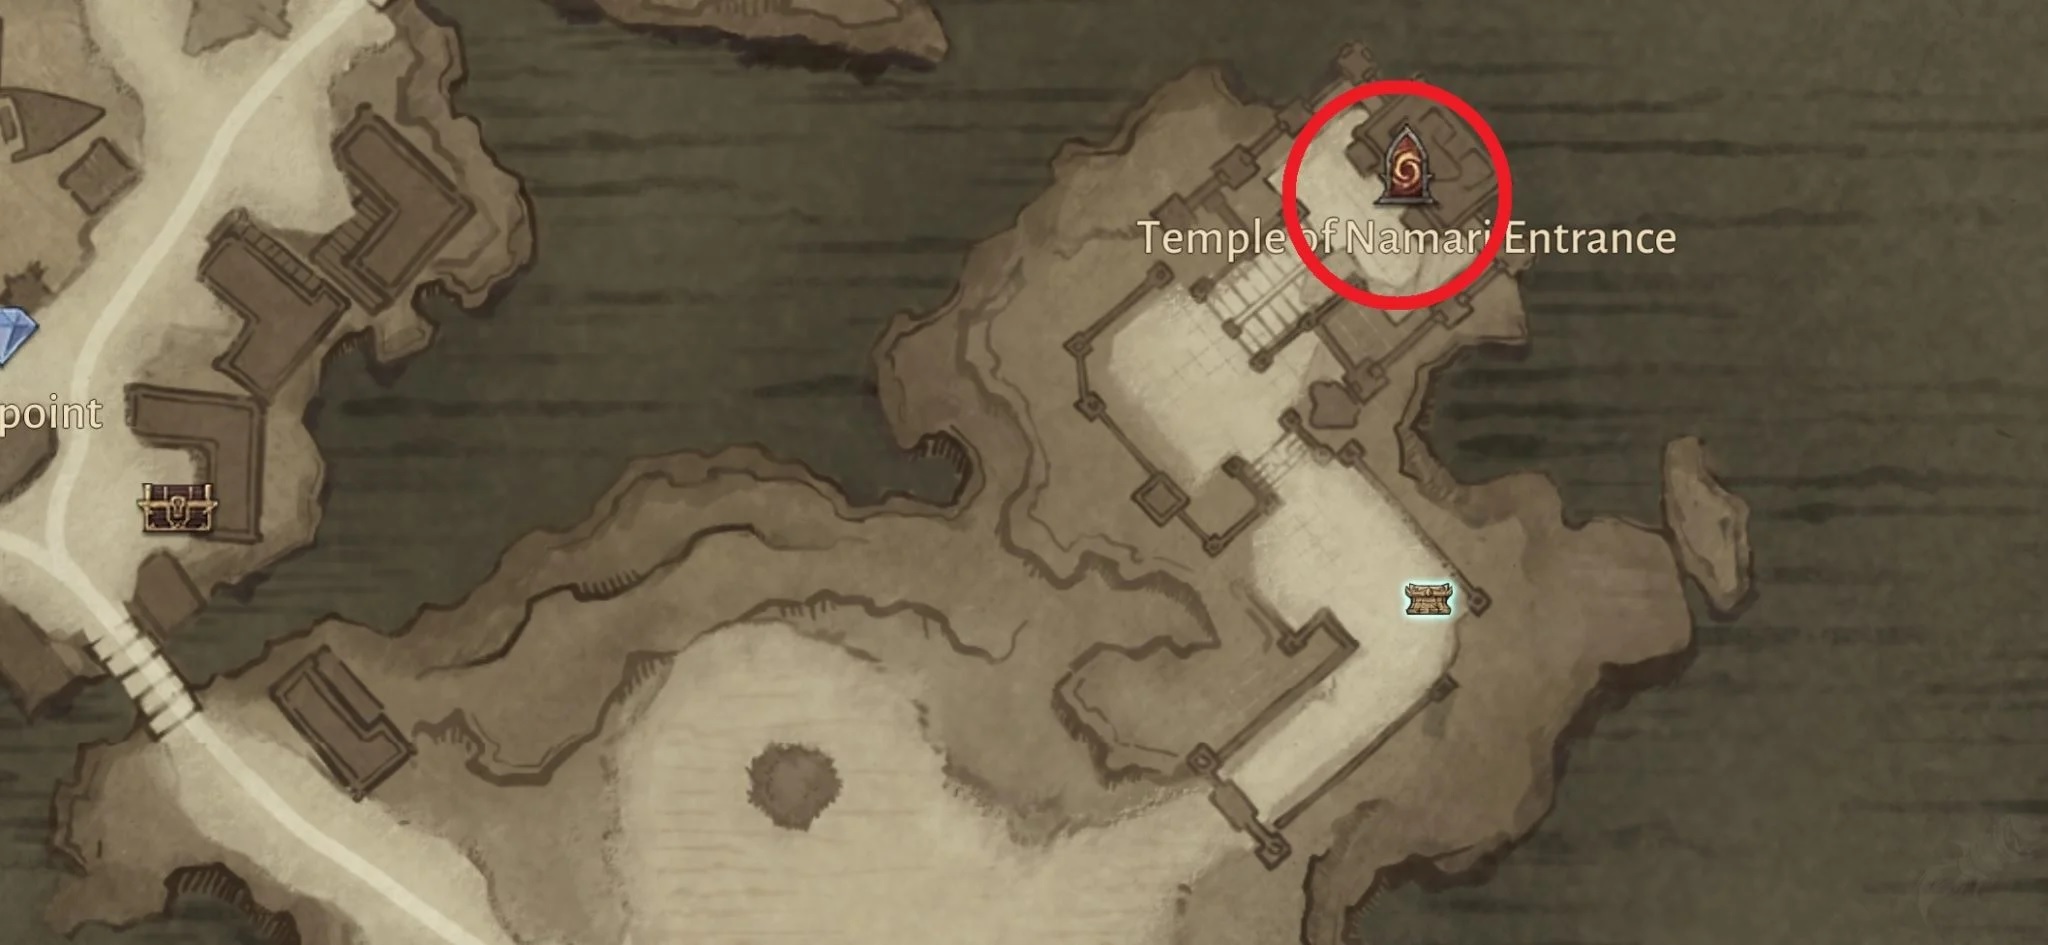
Temple Of Namari Dungeon
Up next, we have the Dungeon ‘Temple of Namari’. You’ll find this dungeon in the Bilefen region of Diablo Immortal, like the Kikuras Rapids Dungeon. The Dungeon is a single-floor dungeon that is the shortest out of all dungeons found in the game. The dungeon has three rooms and a single boss with the name ‘Sargoth’.
The Temple of Namari offers a unique challenge with its randomized final boss encounter. You face random mini-bosses chosen from various options and Sargoth, the final boss, acquires random abilities from a pool of choices. This randomness keeps the dungeon interesting and requires you to adapt your tactics to overcome Sargoth.
Statistics
- Required Entry Level: 40
- Battle Points Reward: 15
- Good For: Fast completion (helpful for players looking to speed up Battle Pass progress). He has good experience farming and good loot potential.
Strategy
The Temple of Namari is a quick and straightforward dungeon, with slow animations being the primary challenge. The main boss, Sargoth, is engaging in fighting due to his varied skills. Additionally, Sargoth summons a combination of three mini-bosses, including Cold Snap, Fallen War Matron, Perdition, Siegebreaker, Torrid One, The Ashen Marauders, and Voracity, before you can face him.
Mini-Bosses of Temple of Namari
You can fight three of the following mini-bosses, each with distinct abilities:
- Cold Snap: This massive demon unleashes life-threatening attacks, including far-reaching basic attacks and explosive icy orbs that can overlap for increased damage.
- Fallen War Matron: She summons minions using portals and creates large orbs with arcane energy on the outer rim. These orbs move towards her and should be dodged, while she also performs a ground slam attack that can be predicted and avoided.
- Perdition: This war-oriented demon performs heavy charging attacks that cleave enemies. Stay away from his path, dodge his telegraphed attacks, and avoid his twin blades’ reach.
- Siegebreaker: A brute demon known for charged attacks. Avoid standing in front of him when he charges and performs backstabs since his front is shielded.
- Torrid One: The flaming demon with fire-related attacks, including fire-breathing and fireball attacks. Dodge these attacks and watch out for his exploding minions.
- The Ashen Marauders: A trio of Marauder Demons wielding different weapons. Prioritize taking out the sword and shield-wielding Marauder, then the two-handed ax Marauder, and finally, the dual ax-wielding Marauder.
- Voracity: This demon spits poison volleys that cause Damage over Time. Ranged members should be cautious, and melee members should watch for vomiting attacks. Beware of the poisonous AoE zones that can cover the chamber if Voracity isn’t dealt with quickly.
After defeating these mini-bosses, you’ll face Sargoth, the main boss of the Temple of Naamari Dungeon in Diablo Immortal. Sargoth possesses various abilities, including crushing hands and homing missiles, which create a challenging and dynamic battle.
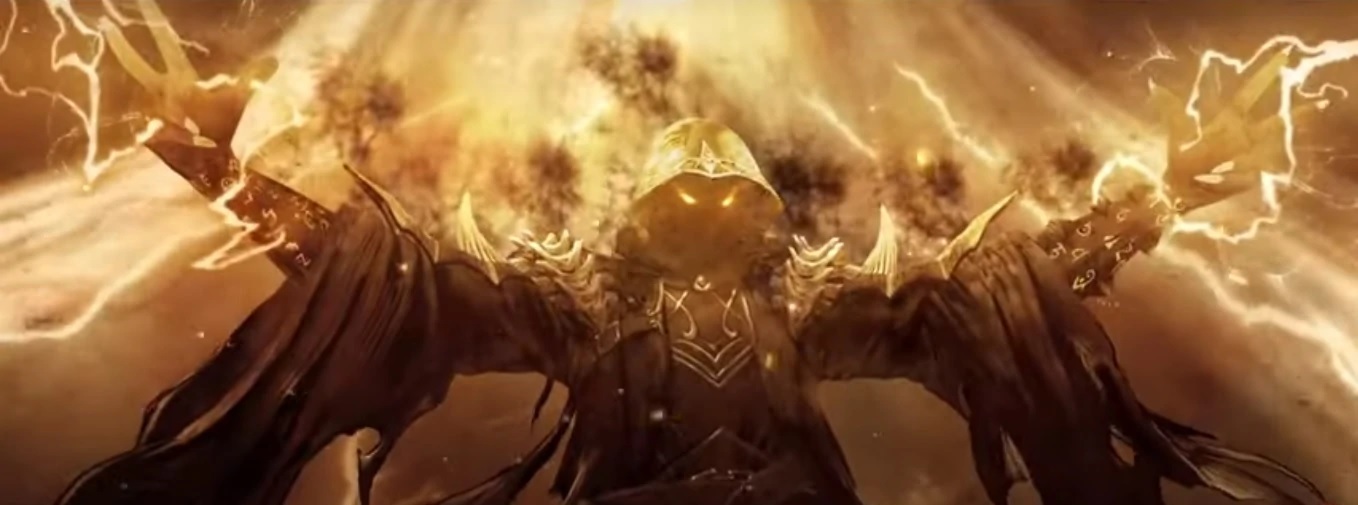
I found that the Charging Attack is the same as the mini-bosses. In that attack, he charges forward and knocks back anyone coming his way. He also summons the Nephalem Warriors to help him defeat you.
Frozen Orbs is the worst attack that Sargoth uses against you. He will summon numerous frozen orbs on the ground. These orbs will explode after a brief period. They stick onto any members near them. And if two or more get stuck, it means certain death. You have to save yourself from this ability.
Set items
Following are the items you will get as loot for completing the Temple of Namari Dungeon.
Hell I+
- Shepherd and Leaders (Boots of Shepherd’s Call to Wolves)
- The Gaoler (Belt of Feasting Baron’s Pack Set)
Hell II+
* Urge (Hands of Vithu’s Urges Set)
Hell IV+
- Mountebank’s Misdirection (Ring of Untouchable Mountebank)
- Resting Fangs of Shal’baas (Ring of War Rags of Shal’baas Set)
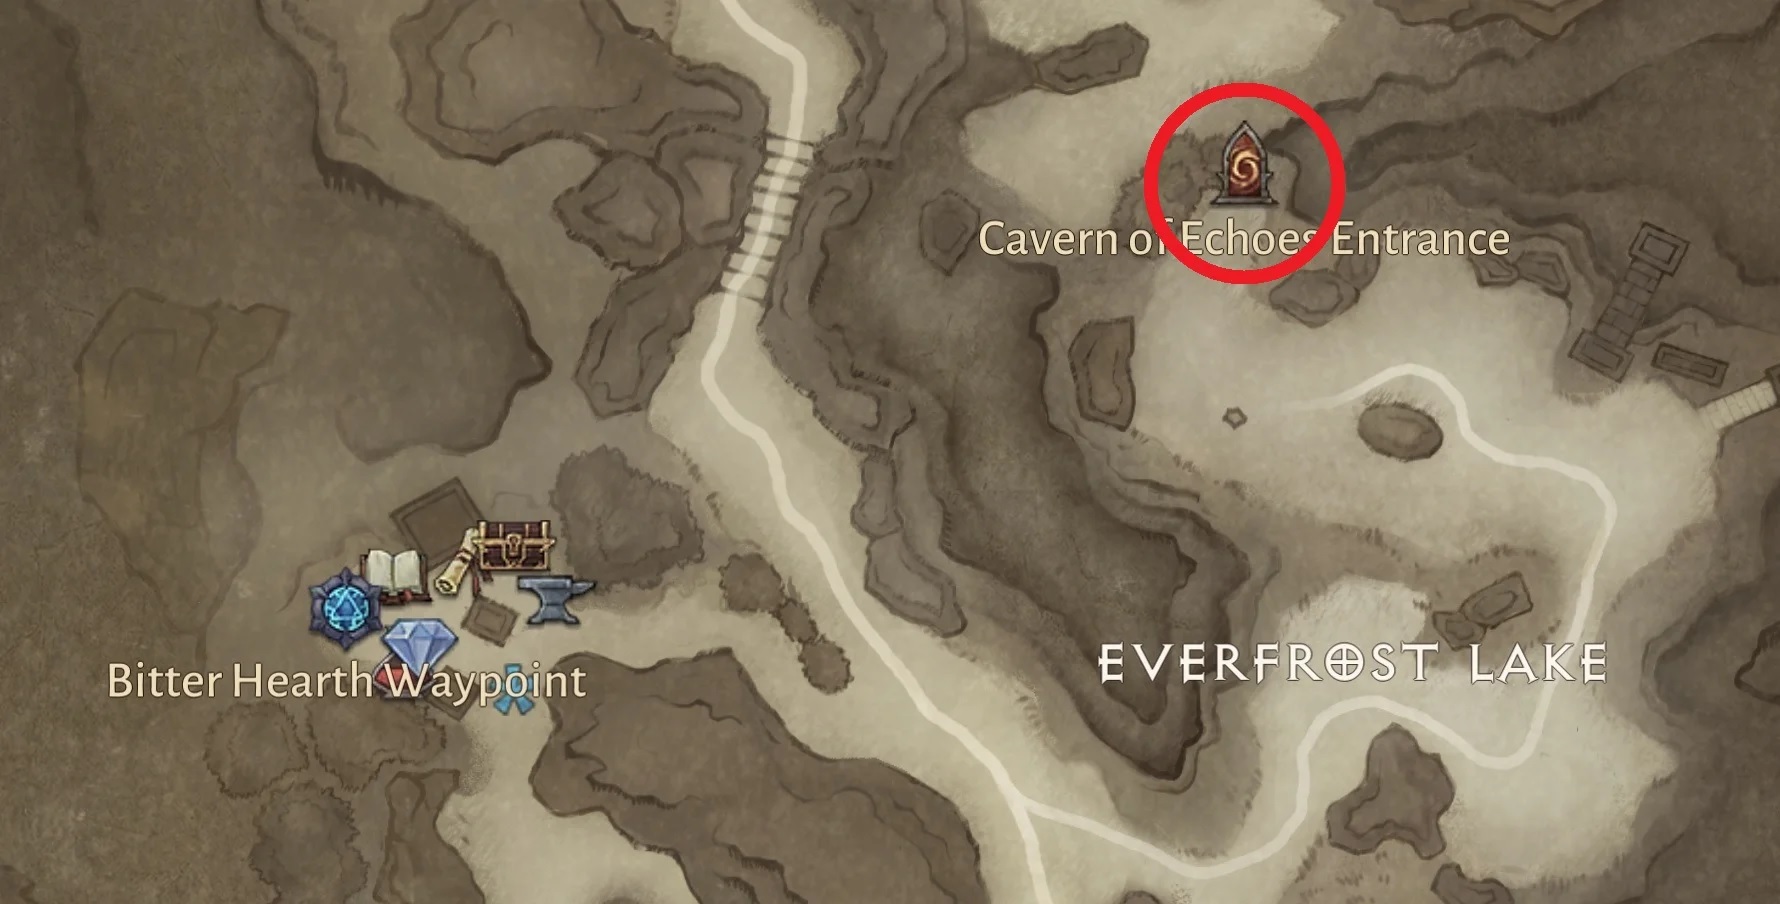
Cavern Of Echoes Dungeon
In the Frozen Tundra, you’ll find the Cavern of Echoes. This Dungeon is a single-floor dungeon with two bosses of Diablo Immortal. The bosses are Bloodrime and the Glacial Colossus. It is broken into three sections.
According to my experience, the dungeon has some deadly environmental threats with some more demanding boss mechanics. You’ll have to focus on the whole terrain to clear the dungeon. Even though it is a hard dungeon, you’ll get an excellent experience reward.
Statistics
- Required Entry Level: 50
- Battle Points Reward: 15
- Good for: Excellent experience farming and a high risk-to-reward ratio.
Strategy
The Cavern of Eches offers higher monster difficulty but rewards well-coordinated groups, especially in challenging Diablo Immortal settings. The dungeon has a straightforward layout, making it easy to navigate and memorize monster pack locations for maximizing the Massacre Bonus streak.
In group formation, use the 3:1 setup. One slow yet hard-hitting member stays in the rear to eliminate stragglers while the other three push forward aggressively to maintain the massacre streak. Their goal is swift boss encounters, aiming for the highest massacre streak, interrupted between map sections.
Bloodrime
Bloodrime, resembling a yeti, uses various melee attacks, throws boulders, rolls toward players, drops icicles, and summons Feral Yetis and Wendigos.
After defeating Bloodrime, face a few monster packs on challenging terrain before encountering the Glacial Colossus.
Glacial Colossus
In the Glacial Colossus arena, quickly deal with three monster packs to stay focused on the boss. His battle unfolds in three phases, each featuring four distinct abilities for attacking.
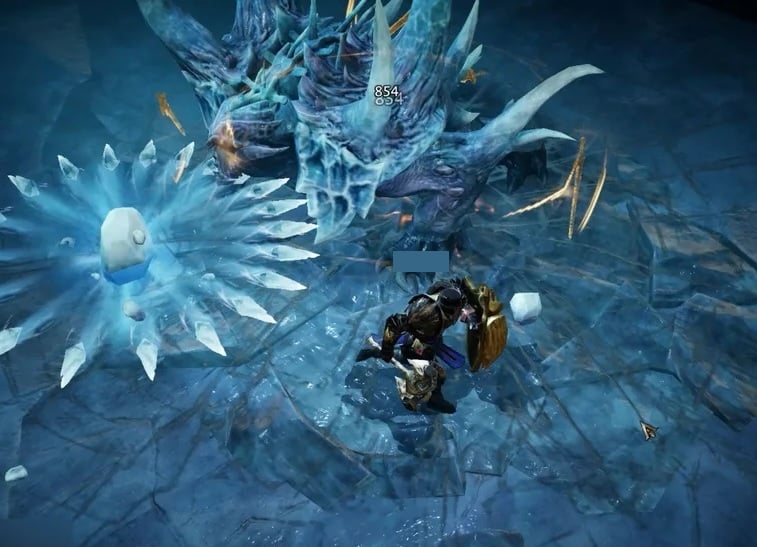
He throws Frozen Shards, Summons Constructs, uses Ice Shockwave, and makes ice rings that you should dodge ASAP. Once he gets to 50% health, he hides beneath the ground and throws ice shards onto the party members. I Suggest to exercise caution; he also makes ice chunks drop from the ceiling. Then Phase 3 starts, which is similar to Phase 1.
Set items
Hell I+
- The Tyrant (Boots of Feasting Baron’s Pack Set)
- Exemplar’s Urge (Belt of Vithu’s Urges Set)
Hell II+
- Mountebank’s Flourish (Neck of Untouchable Mountebank Set)
- Bloody Hand (Hands of Grace of the Flagellant Set)
Hell IV+
- Braided Serpent of Shal’baas (Ring of War Rags of Shal’baas Set)
- Issatar Undone (Ring of Issatar Imbued Set)
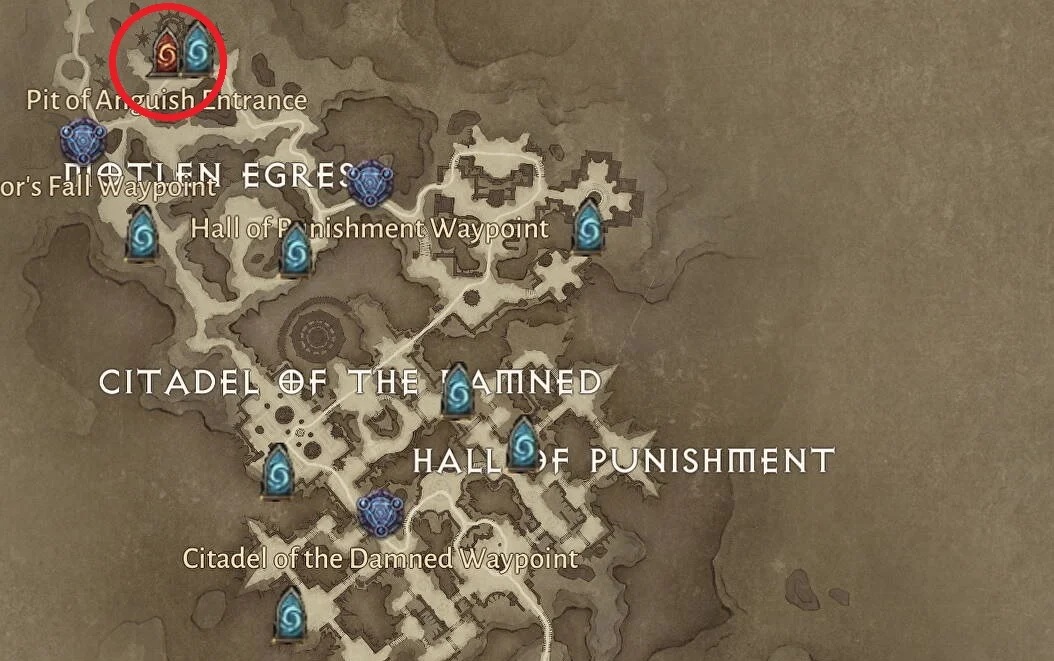
Pit Of Anguish Dungeon
The Pit of Anguish is located in the region ‘Realm of Damnation’. This dungeon is a single-floor dungeon that is broken into three sections. You’ll have to face a total of three bosses in the dungeon. They are the Abyssal Tiller, Zolthrax, and Zaka.
The Pit of Anguish dungeon is known for the boss rush strategy. Because the arenas of boss fights aren’t limited by preceding trash pack monsters. You get easy access to the bosses so you can quickly get done with all three bosses.
If the boss fights seem hard, you might want to learn How to change the Difficulty in Diablo Immortal. Reduce it so that you have an easy time in the Pit of Anguish Dungeon found in Diablo Immortal.
Statistics
- Required Entry Level: 56
- Battle Points Reward: 20
- Good For: Okayish experience farming and loot potential.
Strategy
The Pit of Anguish dungeon, while appearing lengthy, is straightforward. You can traverse the arena end to end, bypassing monsters that don’t affect the boss encounter. The dungeon features fire and lava-based ground effects to avoid.
You can evade monsters and the harsh environment with a well-coordinated group, potentially completing the dungeon in under 5 minutes. Maintaining the Massacre bonus is impossible due to the dungeon’s three distinct sections, so don’t focus on it.
The strategy for facing the three Pit of Anguish bosses is as follows.
Abyssal Tiller
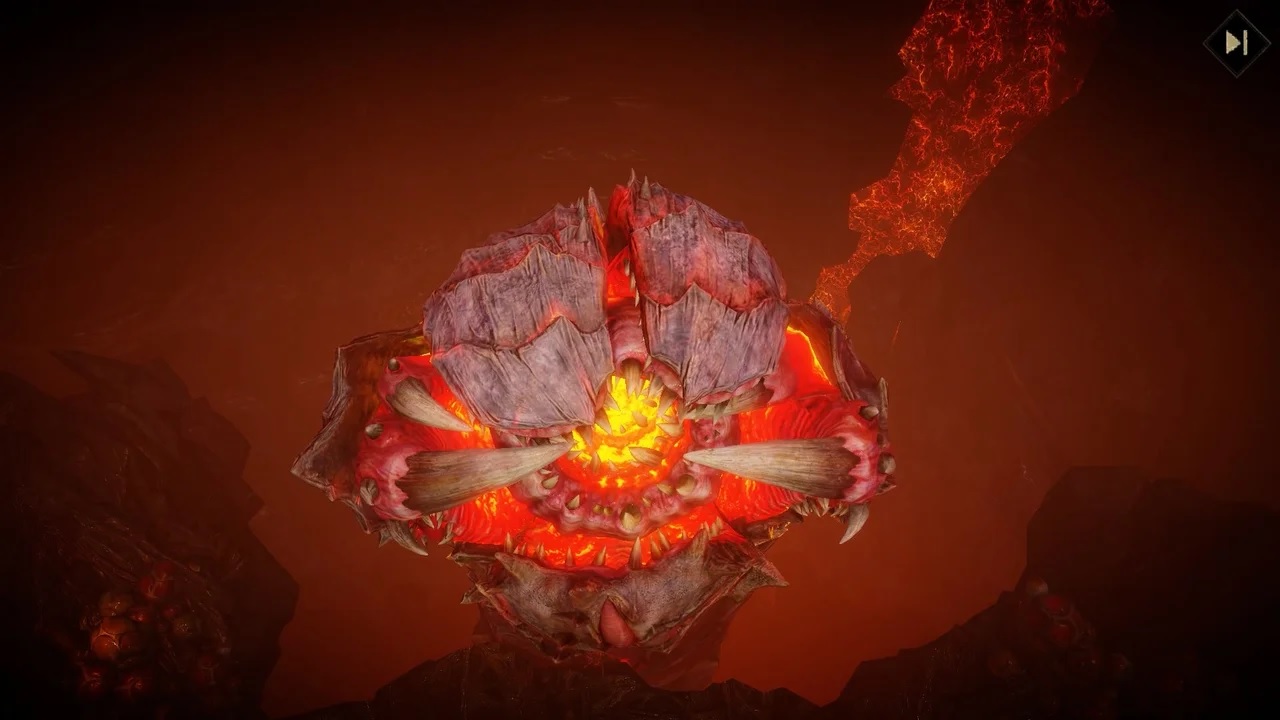
The Abyssal Tiller, a worm-like creature, has intriguing abilities. It uses Burrow to disappear and reappear elsewhere, then launches Molten Barrage with damaging lava circles. It shoots a zig-zag molten fire beam, creating ground effects, which intensify when its health drops below 50%. Additionally, it summons Vicious Drubs to distract party members. I suggest swiftly defeating the boss due to his increasing danger over time.
Zolthrax
I recommend being careful as Zolthrax descends from the ceiling to the middle of the room. In his first phase, he has three attacks. The first one is Triple Slashes. In this attack, he makes frontal slashes with his sword that sweep in a nearly 180-degree arc. Then, he connects a front-facing chop with his left hand and crosses and sweeps with both swords.
Zoltrax’s second attack is a Charge, knocking back anyone in its path. The third attack charges its swords with fire, releasing 7 firefly shockwave projectiles, a telegraphed move that’s easier to dodge.
When Zoltrax’s health falls below 50%, he moves to the arena’s center and plants his third sword in the ground, periodically emitting fire beams. He also summons 6 Flesh Fiends to disrupt party members and performs a ground slam, causing substantial damage to those hit.
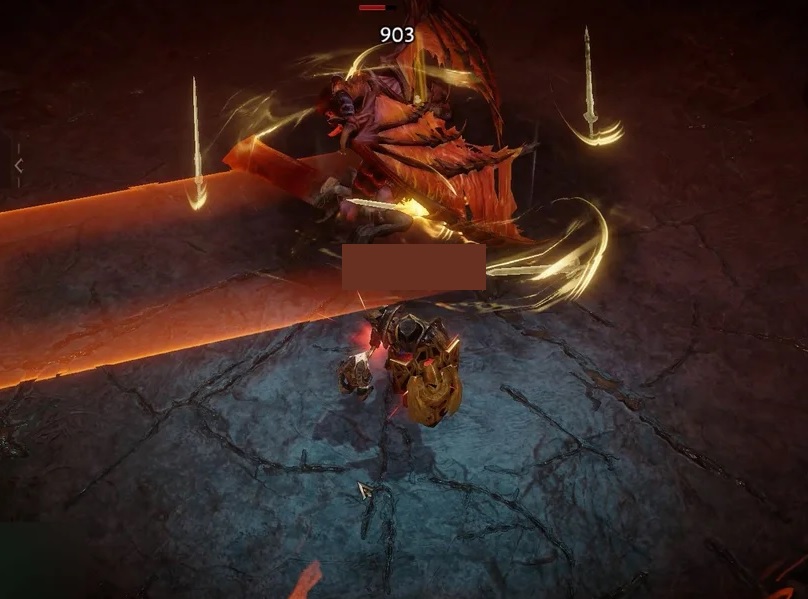
Zaka
Zaka is the final boss of Pit of Anguish. He will raise firewalls, and you’ll have to fight Zaka in a confined arena space. Zaka has a total of 4 attacks in the first phase. The first one is the Fireball. It is the molten lava balls that he spits out. They are of two sizes, large and small. The large one leaves a DoT effect on the ground.
In his first phase, Zaka uses the Gobble attack to lunge forward and eat anyone in front, a fast and unpredictable move. He also summons Damned Infesters. Another attack involves channeling and charging towards a marked area; avoid it.
At ⅔ health, Zaka adds more attacks: Molten Bombs detonate, potentially overlapping and causing damage over time. He also uses Suction, draining air from the arena and Vomit Lava, covering half the battlefield with damaging lava.
At ⅓ health, Zaka transports you to a different arena where you attack the Heart of Zaka, defended by the Parasitic Maw. This Maw has several attacks: spitting radiating blood spears, vomiting damaging substances, dropping balls of clotted blood, and summoning spawns of Anguish that fire projectiles.
Set items
Hell I+
- Beacon’s Urge (Boots of Vithu’s Urges Set)
- Open Gut (Belt of Grace of the Flagellant Set)
Hell II+
- Burning Heart of Shal’baas (Neck of War Rags of Shal’baas Set)
- Mountebank’s Shirking (Hands of Untouchable Mountebank)
Hell IV+
- Foul Fleet (Ring of Windloft Perfection Set)
- Issatar Enraged (Ring of Issatar Imbued)
These are the eight Dungeons found in Diablo Immortal. You have to complete each of these dungeons if you want to progress the Diablo Immortal Storyline. If you are successful in clearing these dungeons, there is a chance that you’ll get one of the Set Items as a reward. I find the feature handy as players can re-run the dungeons once they’ve cleared them for the story.
Thanks! Do share your feedback with us. ⚡
How can we make this post better? Your help would be appreciated. ✍
Well researched and so helpful