Diablo Immortal Raids: Dungeons, Rifts & Kion’s Ordeal
Raids in Diablo Immortal are one of the best methods to get tons of Loot & XP in a short time. So here are all the raids you should do.
With the release of Diablo Immortal, the Diablo series has held onto its roots and bought a lot of new content for the players. The game has six different classes that you get to level up. To level them up, you need to take part in raids in Diablo Immortal. They’re one of the best sources of exp and loot. Here we have a complete guide on Raids in Diablo Immortal. Let’s get started.
Diablo Immortal features five raid types: Challenge Rifts, Dungeons, Elder Rifts, Helliquary Bosses, and Kion’s Ordeal.
- Challenge Rifts: Unlocks in Westmarch, solo or 4-player, rewards Crafting Materials, Runes, and more.
- Dungeon Raids: Repeatable in world zones, 7 unique Dungeons with Set Item rewards.
- Elder Rifts: Randomized Dungeon raids near Westmarch, offer Legendary Gems, EXP, and more.
- Helliquary Raids: Unlocked after story completion, featuring three bosses.
- Kion’s Ordeal: Exclusive for Lieutenants/Elites, accommodates up to 48 players, loot based on positioning.
Raids in Diablo Immortal
Diablo Immortal has different types of Raids. You need to clear the area and kill their respective bosses in these raids. Once the area is cleared, you’ll be rewarded with loot; usually, in these raids, the players team-up. The team can be anywhere from 2 player raids to up to 48-player raids. Yes, you read that right. We’ll get on the raid with 48 players in a while.
In Diablo Immortal, there are five different types of Raid that players can take part in. They are Challenge Rifts, Dungeons, Elder Rifts, Helliquary Bosses, and Kion’s Ordeal.
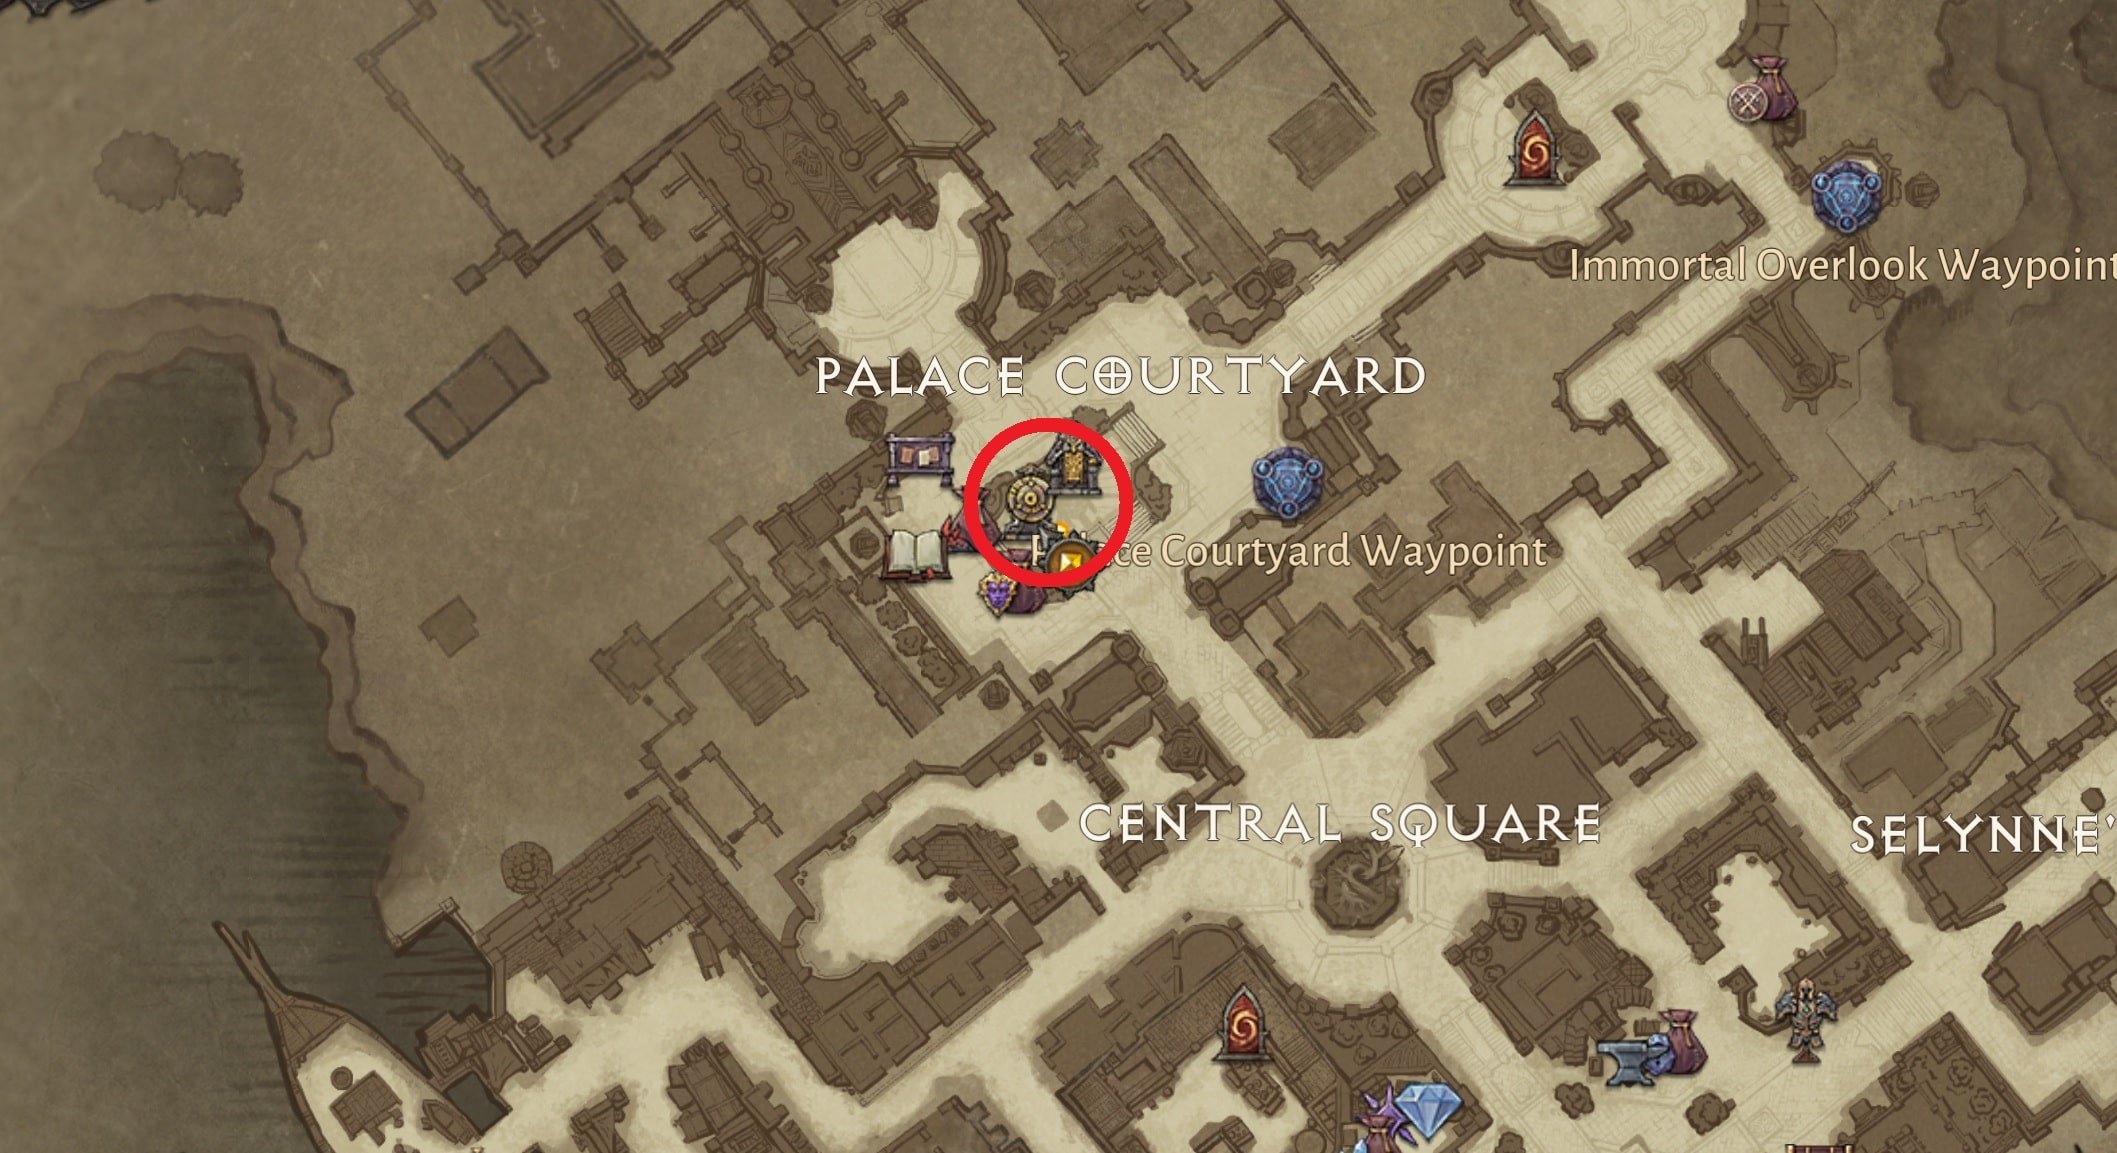
Challenge Rifts Raids
First up, we have the Challenge Rifts.
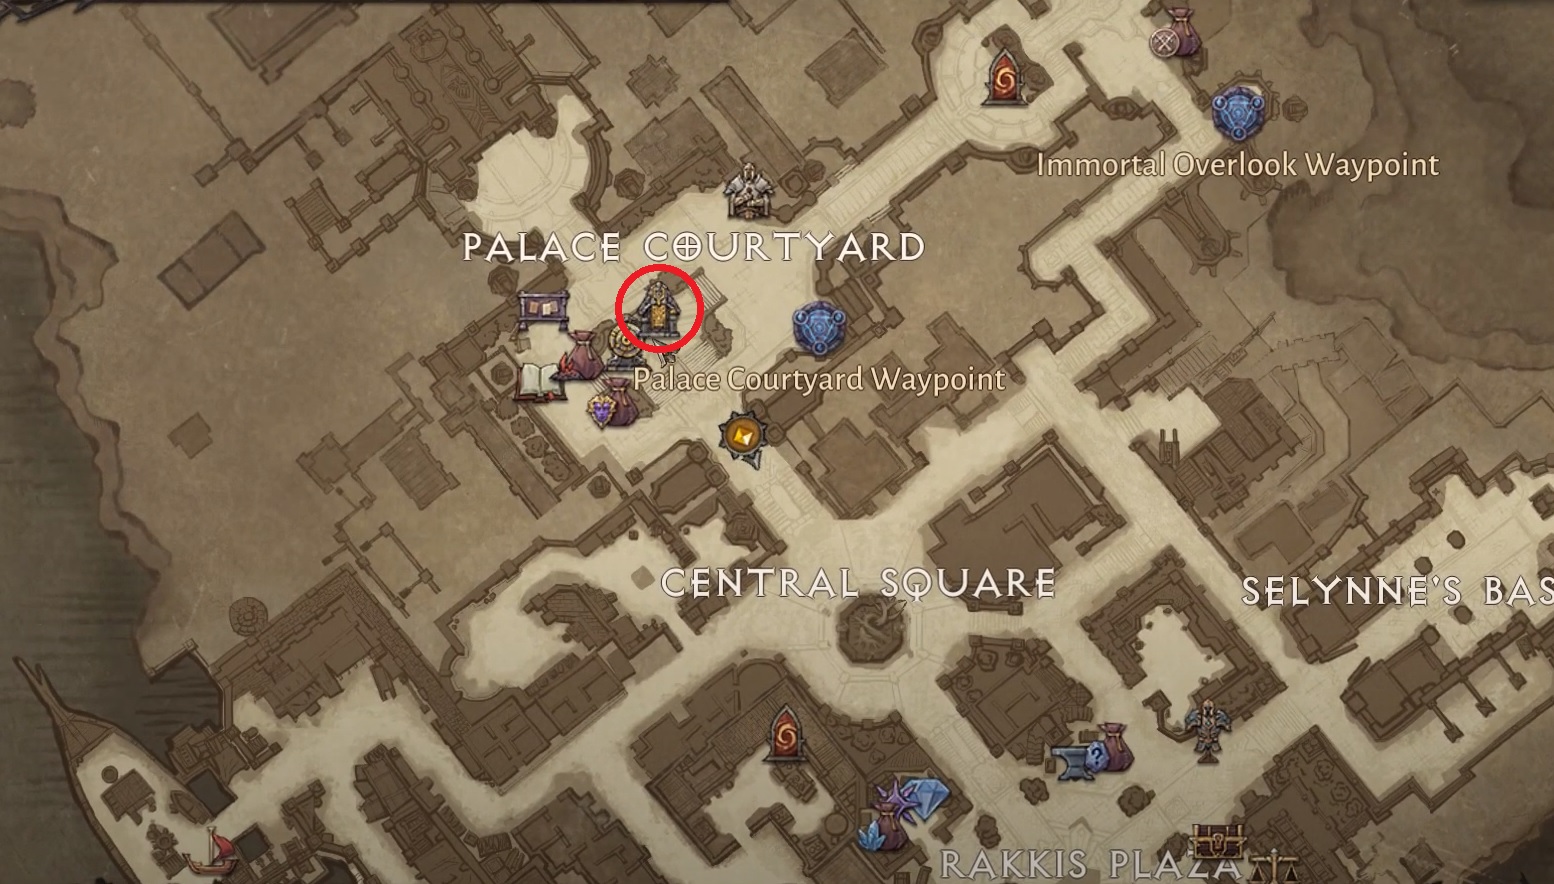
- Unlocked in Westmarch’s Palace Courtyard.
- Tutorial available early in the game to familiarize players with the Raid system.
- Unlike Diablo 3, in Diablo Immortal, Challenge Rifts require players to clear levels with increasing difficulty.
- Rewards increase as you progress and rise on the leaderboards.
- Multiplayer leaderboards offer even more rewards, encouraging players to team up with friends or clan members for greater loot.
Challenge Rifts in Diablo Immortal offer a dynamic and rewarding gameplay experience compared to their Diablo 3 counterparts.
Mechanics of Challenge Rift Riads
- Challenge Rift Raids can be done solo or with a group of up to 4 players.
- Each raid run is randomized, featuring a random zone, layout, and enemy types.
- Players must clear 100 levels, with increasing Monster Combat Ratings per level.
- Progress is determined by comparing your rating to the monsters’ fixed ratings.
- Fill the progress bar by defeating monsters or picking up progress globes from Elite Monsters.
- When the bar is full, a random Rift Guardian appears for a final fight.
- The entire run must be completed in 10 minutes for a successful clear.
- First players to complete level increments of 10, 20, or 30 receive recognition and additional honor.
- Leaderboards display top solo and multiplayer clearers, allowing you to inspect their builds and strategies.
Leaderboards
In Challenge Rifts in Diablo Immortal, there are two main leaderboards: the Solo Leaderboard and the Multiplayer Leaderboard. Here’s a breakdown of each:
Solo Leaderboard:
- The Solo Leaderboard features slots for 1000 individual players.
- Players are ranked on this leaderboard based on their highest clearing level in Challenge Rifts.
- The Solo Leaderboard has six brackets with different rewards.
- It resets every Monday at 3 AM Server time.
- Rewards for the top 1000 players are sent via in-game mail.
Read Our Best Solo Classes for this:
| Players Rank | Gold Reward | Hilts Reward |
|---|---|---|
| 1-10 | 100,000 Gold | 500 Hilts |
| 11-100 | 90,000 Gold | 400 Hilts |
| 101-300 | 80,000 Gold | 350 Hilts |
| 301-500 | 70,000 Gold | 300 Hilts |
| 501-700 | 60,000 Gold | 250 Hilts |
| 701-1000 | 50,000 Gold | 200 Hilts |
Multiplayer Leaderboard:
- The Multiplayer Leaderboard has slots for the top 10 teams.
- Teams can consist of 2-player, 3-player, or 4-player teams.
- A player can appear in different spots on the leaderboard as part of various teams, but they’ll receive rewards based on their highest clearing.
- The Multiplayer Leaderboard resets on the first day of every month at 3 AM Server time.
- The top 10 team members receive rewards via in-game mail.
| Multiplayer Rank | Hilts Reward | Enigmatic Crystal Reward |
|---|---|---|
| 1 | 1000 Hilts | 200 Enigamtic Crystals |
| 2 | 900 Hilts | 180 Enigamtic Crystals |
| 3 | 850 Hilts | 170 Enigamtic Crystals |
| 4 | 800 Hilts | 160 Enigamtic Crystals |
| 5 | 750 Hilts | 150 Enigmatic Crystals |
| 6 | 700 Hilts | 140 Enigamtic Crystals |
| 7 | 650 Hilts | 130 Enigamtic Crystals |
| 8 | 600 Hilts | 120 Enigamtic Crystals |
| 9 | 550 Hilts | 110 Enigamtic Crystals |
| 10 | 500 Hilts | 100 Enigamtic Crystals |
Rewards:
- Completing a level for the first time rewards players with Crafting Materials, Runes, and Hilts.
- Challenge Rifts also offer Gold, Hilts, and Enigmatic Crystals as rewards for leaderboard placement.
- Enigmatic Crystals are especially valuable, and the Multiplayer Leaderboard offers competitive rewards in this regard.
Dungeon Raids
Dungeons play a significant role in your character’s progression and gear acquisition. Here are some key points about dungeons in the game:
Dungeon Locations:
- Dungeons are available in various World Zones that you’ll encounter during the game’s campaign.
- Once you complete a dungeon, you can revisit and replay it as much as you want.
- Dungeons are incorporated into different objectives and quests, including Immortal Daily Quests, Bounty Board tasks, and Shadow Contracts.
Types of Dungeons:
- Diablo Immortal features seven dungeons, each with its unique design, monsters, and challenges.
- Some pay tribute to past Diablo games, while others introduce new environments and foes.
- Designed to match your character’s power level, gear upgrades from the Jeweler or Blacksmith help prepare for them.
Difficulty Levels:
- Dungeon difficulty increases with game progression, especially in Hell difficulties.
- Players can adapt their strategy, gear, and abilities for tougher dungeons.
Rewards:
- Set Items, which are equipment pieces for secondary slots like Amulets, Belts, Boots, Gloves, and Rings, can only be obtained as rewards from dungeons.
- To access Set Items, you need to reach the maximum level.
- Set Items are part of the normal loot pool in dungeons, but they are not guaranteed drops. You may need to farm dungeons to complete full sets.
- You can use the Codex to check which dungeon is offering a Double Drop event for Set Items, enhancing your chances of obtaining them.
7 Dungeons in Diablo Immortal
As we’ve mentioned before, there are a total of 7 Dungeons in Diablo Immortal as of writing this guide. Some of these dungeons are a tribute to most blood-ridden battles of former Diablo Games, or they are completely new.
The 7 Dungeons that you can raid in Diablo Immortal are:
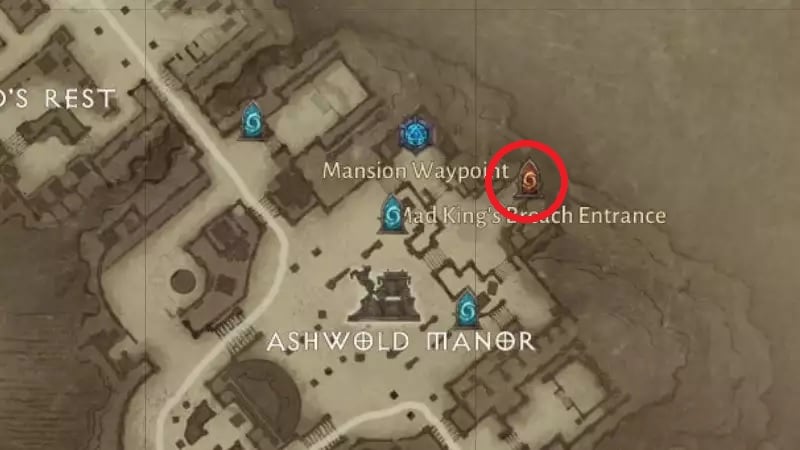
Mad King’s Breach
It is the first Dungeon that players can raid in Diablo Immortal. It is located at the end of the 2nd World Zone, known as Ashwold Cemetery. The Mad King’s Breach Dungeon is considered one of the best places to farm exp and items.
The dungeon consists of two levels, with a boss of their own. You’ll have to defeat them before you can fight The Skeleton King. A great way to get extra experience in this dungeon is by maintaining the Massacre Bonus.
To enter the dungeon, you need to be at least level 10. It has 15 battle points. And the good thing is that in just a 3-5 minutes run, and you’ll get a high exp and lot.
Here, you can get the following Set Items as rewards
Amulet
- Istaar At Rest (Hell II +)
Ring
- Shepherd and Mother (Hell IV +)
- Fairfleet (Hell IV+)
Hands
- Dozen Strikes of Shal’baas (Hell II+)
Belt
- Mountebank’s Bravado (Hell I+)
Boots
- Torn Sole (Hell I+)
Forgotten Tower
Forgotten Tower is the second Dungeon that you get to raid in Diablo Immortal. It is the final area in Dark Wood that you have to clear before you can transition to the Shassar Sea. This is one of the Dungeons that is a rework of old Diablo Games. The Forgotten Tower Dungeon is reworked from Diablo 2, a classic that is not forgotten at all.
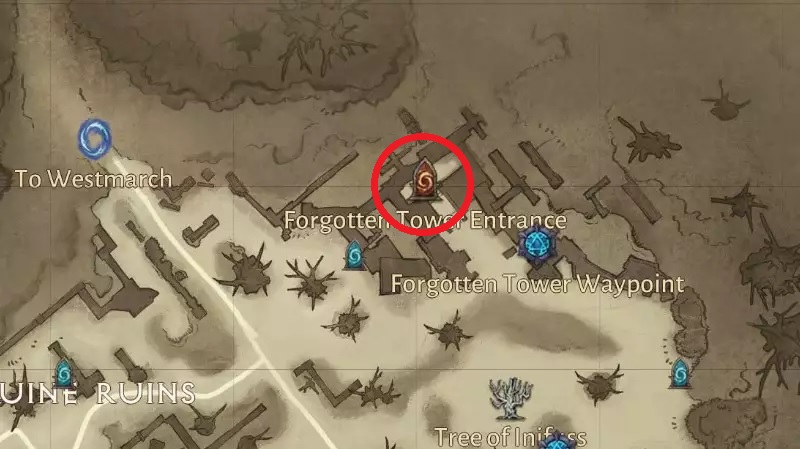
Most players love clearing this dungeon because it has a one-floor layout. The dungeon is filled with monsters, so getting to 100 Massacre Bonus is no big thing in it.
Forgotten Tower Dungeon has a quest of its own. If you’re able to kill a certain amount of enemies before the timer ends, you’ll be rewarded with up to 5 bonus chests. It is all the more reason to join a clan and team up in Diablo Immortal and raid the dungeon.
For the dungeon, level 20 is required. And it usually takes anywhere from 3-5 minutes to clear the Dungeon. The Forgotten Tower has 15 battle points, and it rewards with high exp and loot.
Here, you can get the following Set Items as rewards
Amulet
- Wisdom’s Edge (Hell II +)
Ring
- The Prisoner (Hell IV +)
- Shepherd and Father (Hell IV+)
Hands
- Issatar’s Open Hand (Hell II+)
Belt
- Storm-Tack of Shal’baas (Hell I+)
Boots
- Mountebank’s Slyness (Hell I+)
Tomb of Fahir
The tomb of Fahir is a massive dungeon compared to others. It takes you on an adventure in the Shassar Sea world. If you want to raid it quickly in Diablo immortal, pick up a movement skill. Because to clear the Dungeon, you’ll find yourself running here and there for its objectives. The Treasure Chests in this dungeon are spread all over the dungeon. The Dungeon is filled with unique boss fights and encounters.
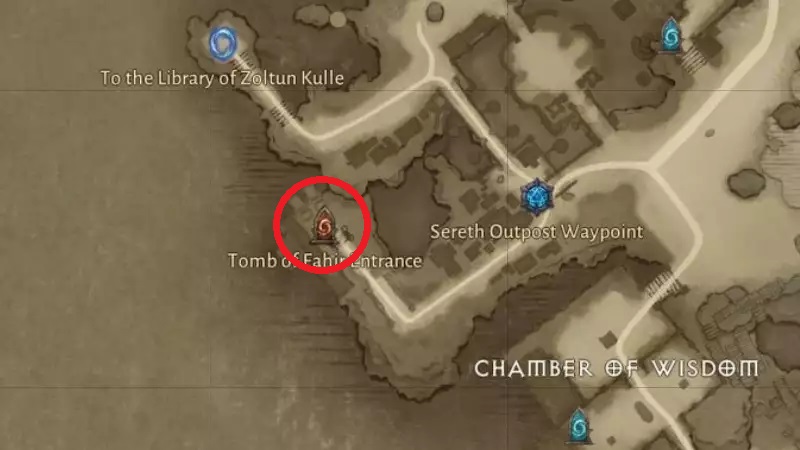
The Dungeon requires level 28 to clear it. Has 20 Battle points. Although it has treasure chests spread around, in terms of loot and exp, it doesn’t have much.
Here, you can get the following Set Items as rewards
Amulet
- Shepherd and Architech (Hell II +)
Ring
- Shameless Urge (Hell IV +)
- The Turnkey (Hell IV+)
Hands
- Hurtling Steel (Hell II+)
Belt
- Issatar Contained (Hell I+)
Boots
- Wind-tords of Shal’baas (Hell I+)
Destruction’s End
At the end of Zoltun Kulle’s Library region is the Dungeon named Destruction’s End. If you’ve played Diablo 2, then we’ve got good news, you get to meet Baal from Diablo 2 here. But you have to trap him in the Soul Shard. The Dungeon has many stops, but you won’t lose the way.
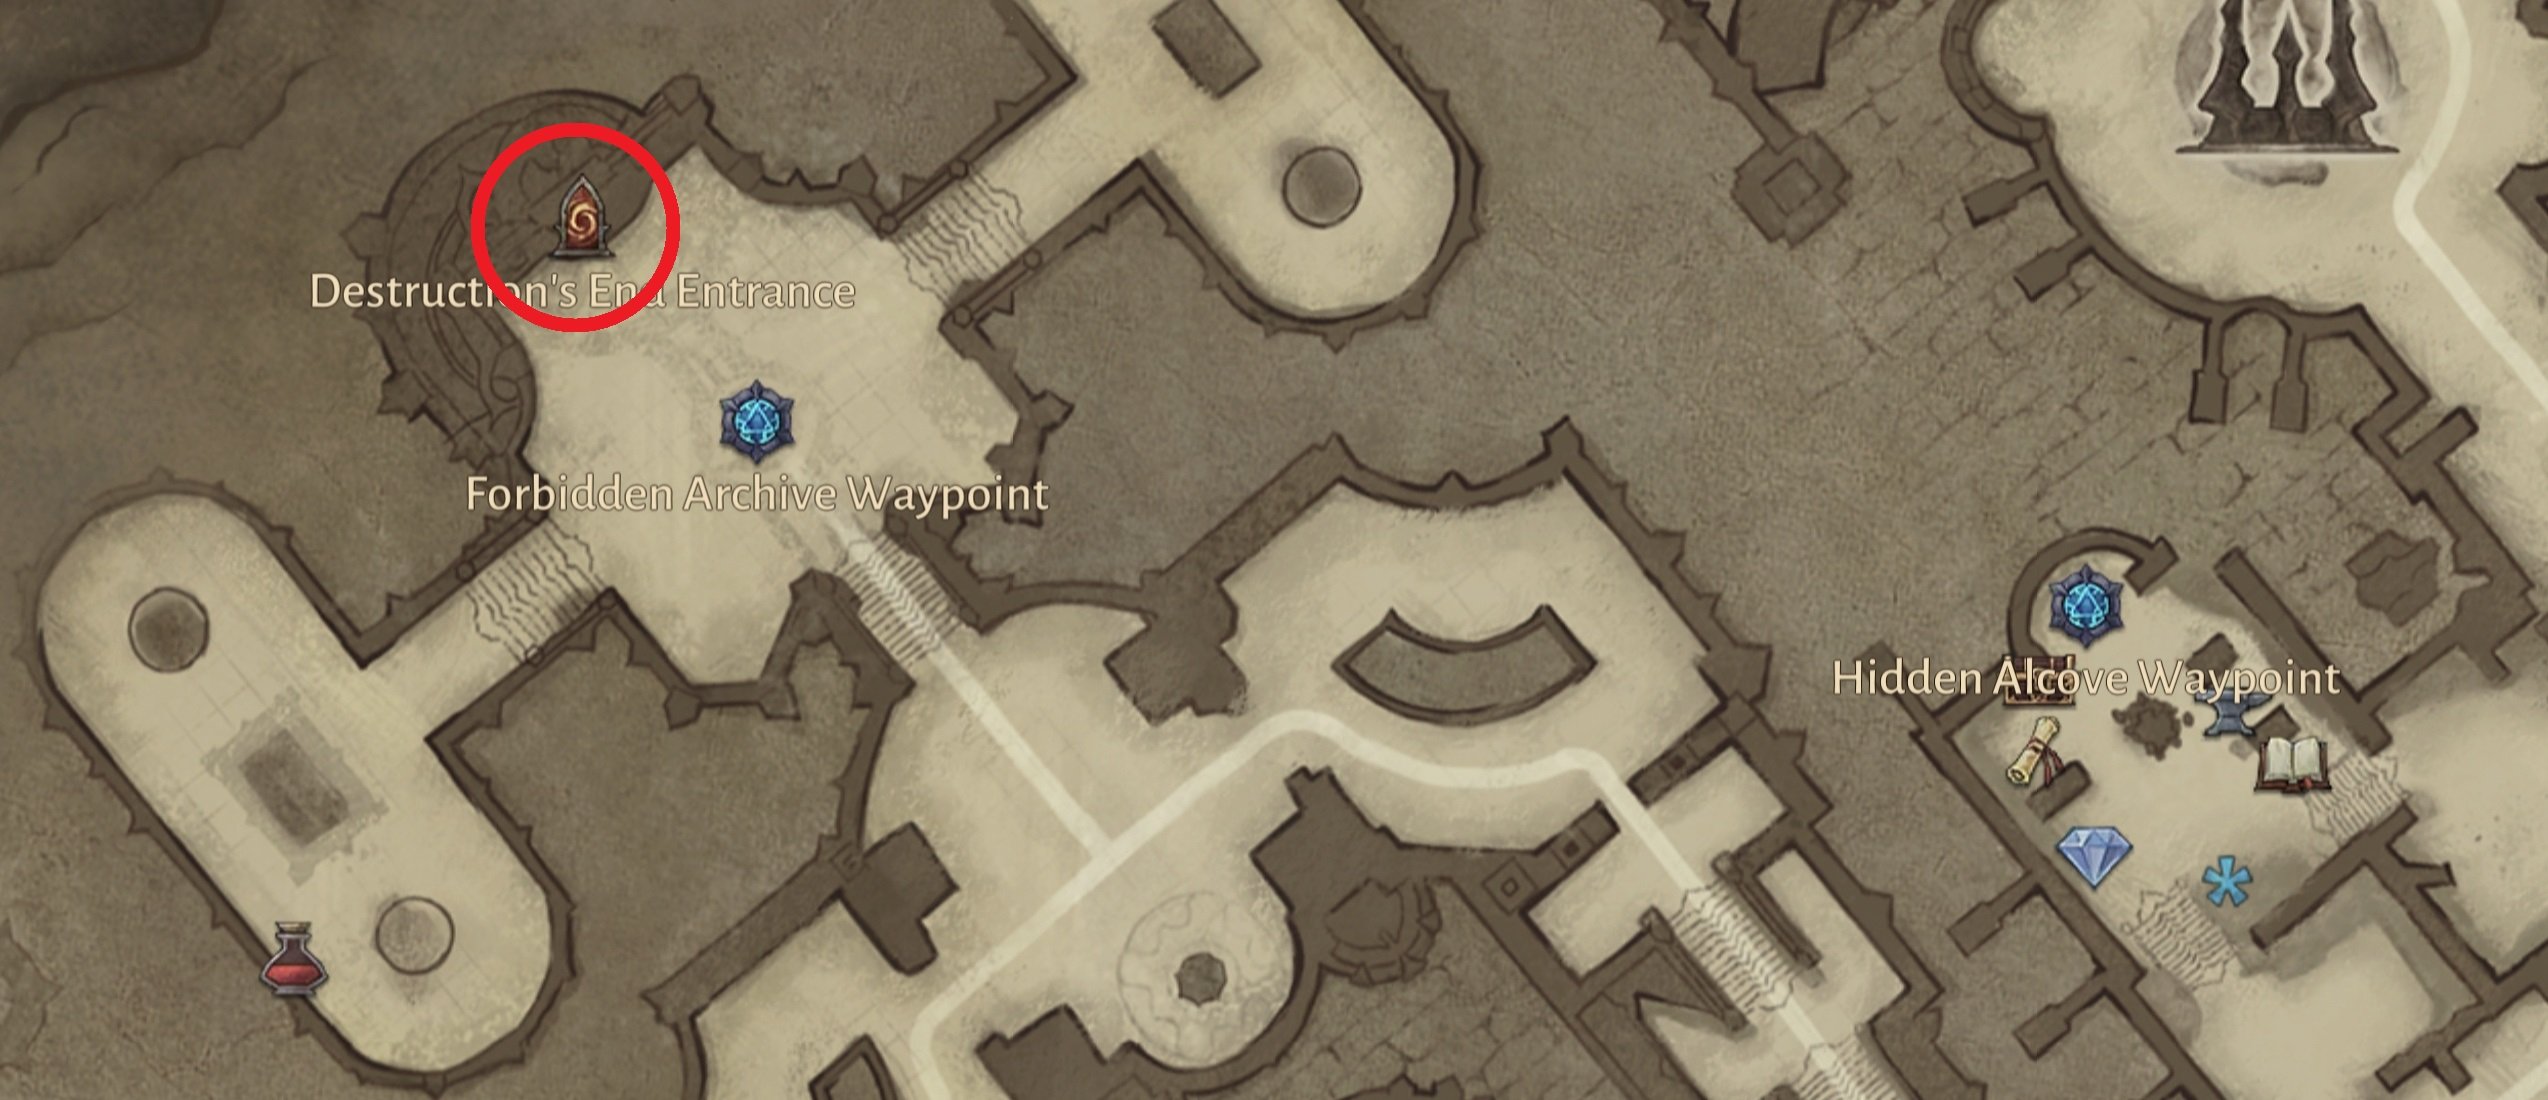
A minimum level of 35 is required to clear the Dungeon. It, too, has 20 Battle Points. One thing disappointing about this dungeon is that it doesn’t reward any high exp or loot.
Here, you can get the following Set Items as rewards
Amulet
- The Subjugator (Hell II +)
Ring
- Modest Urge (Hell IV +)
Hands
- Shepherd and Beastmaster (Hell II+)
Belt
- Whipcrack (Hell I+)
Boots
- Issatar The Brute (Hell I+)
Kikuras Rapid
Kikuras Rapid is a Dungeon that you encounter in Bilefen, and it is a unique Diablo Immortal raiding experience you’ll have. That is because you get to slay demons in this dungeon on a raft. But be careful of the end because, in the end, you’ll have to fight a barrage of fire.
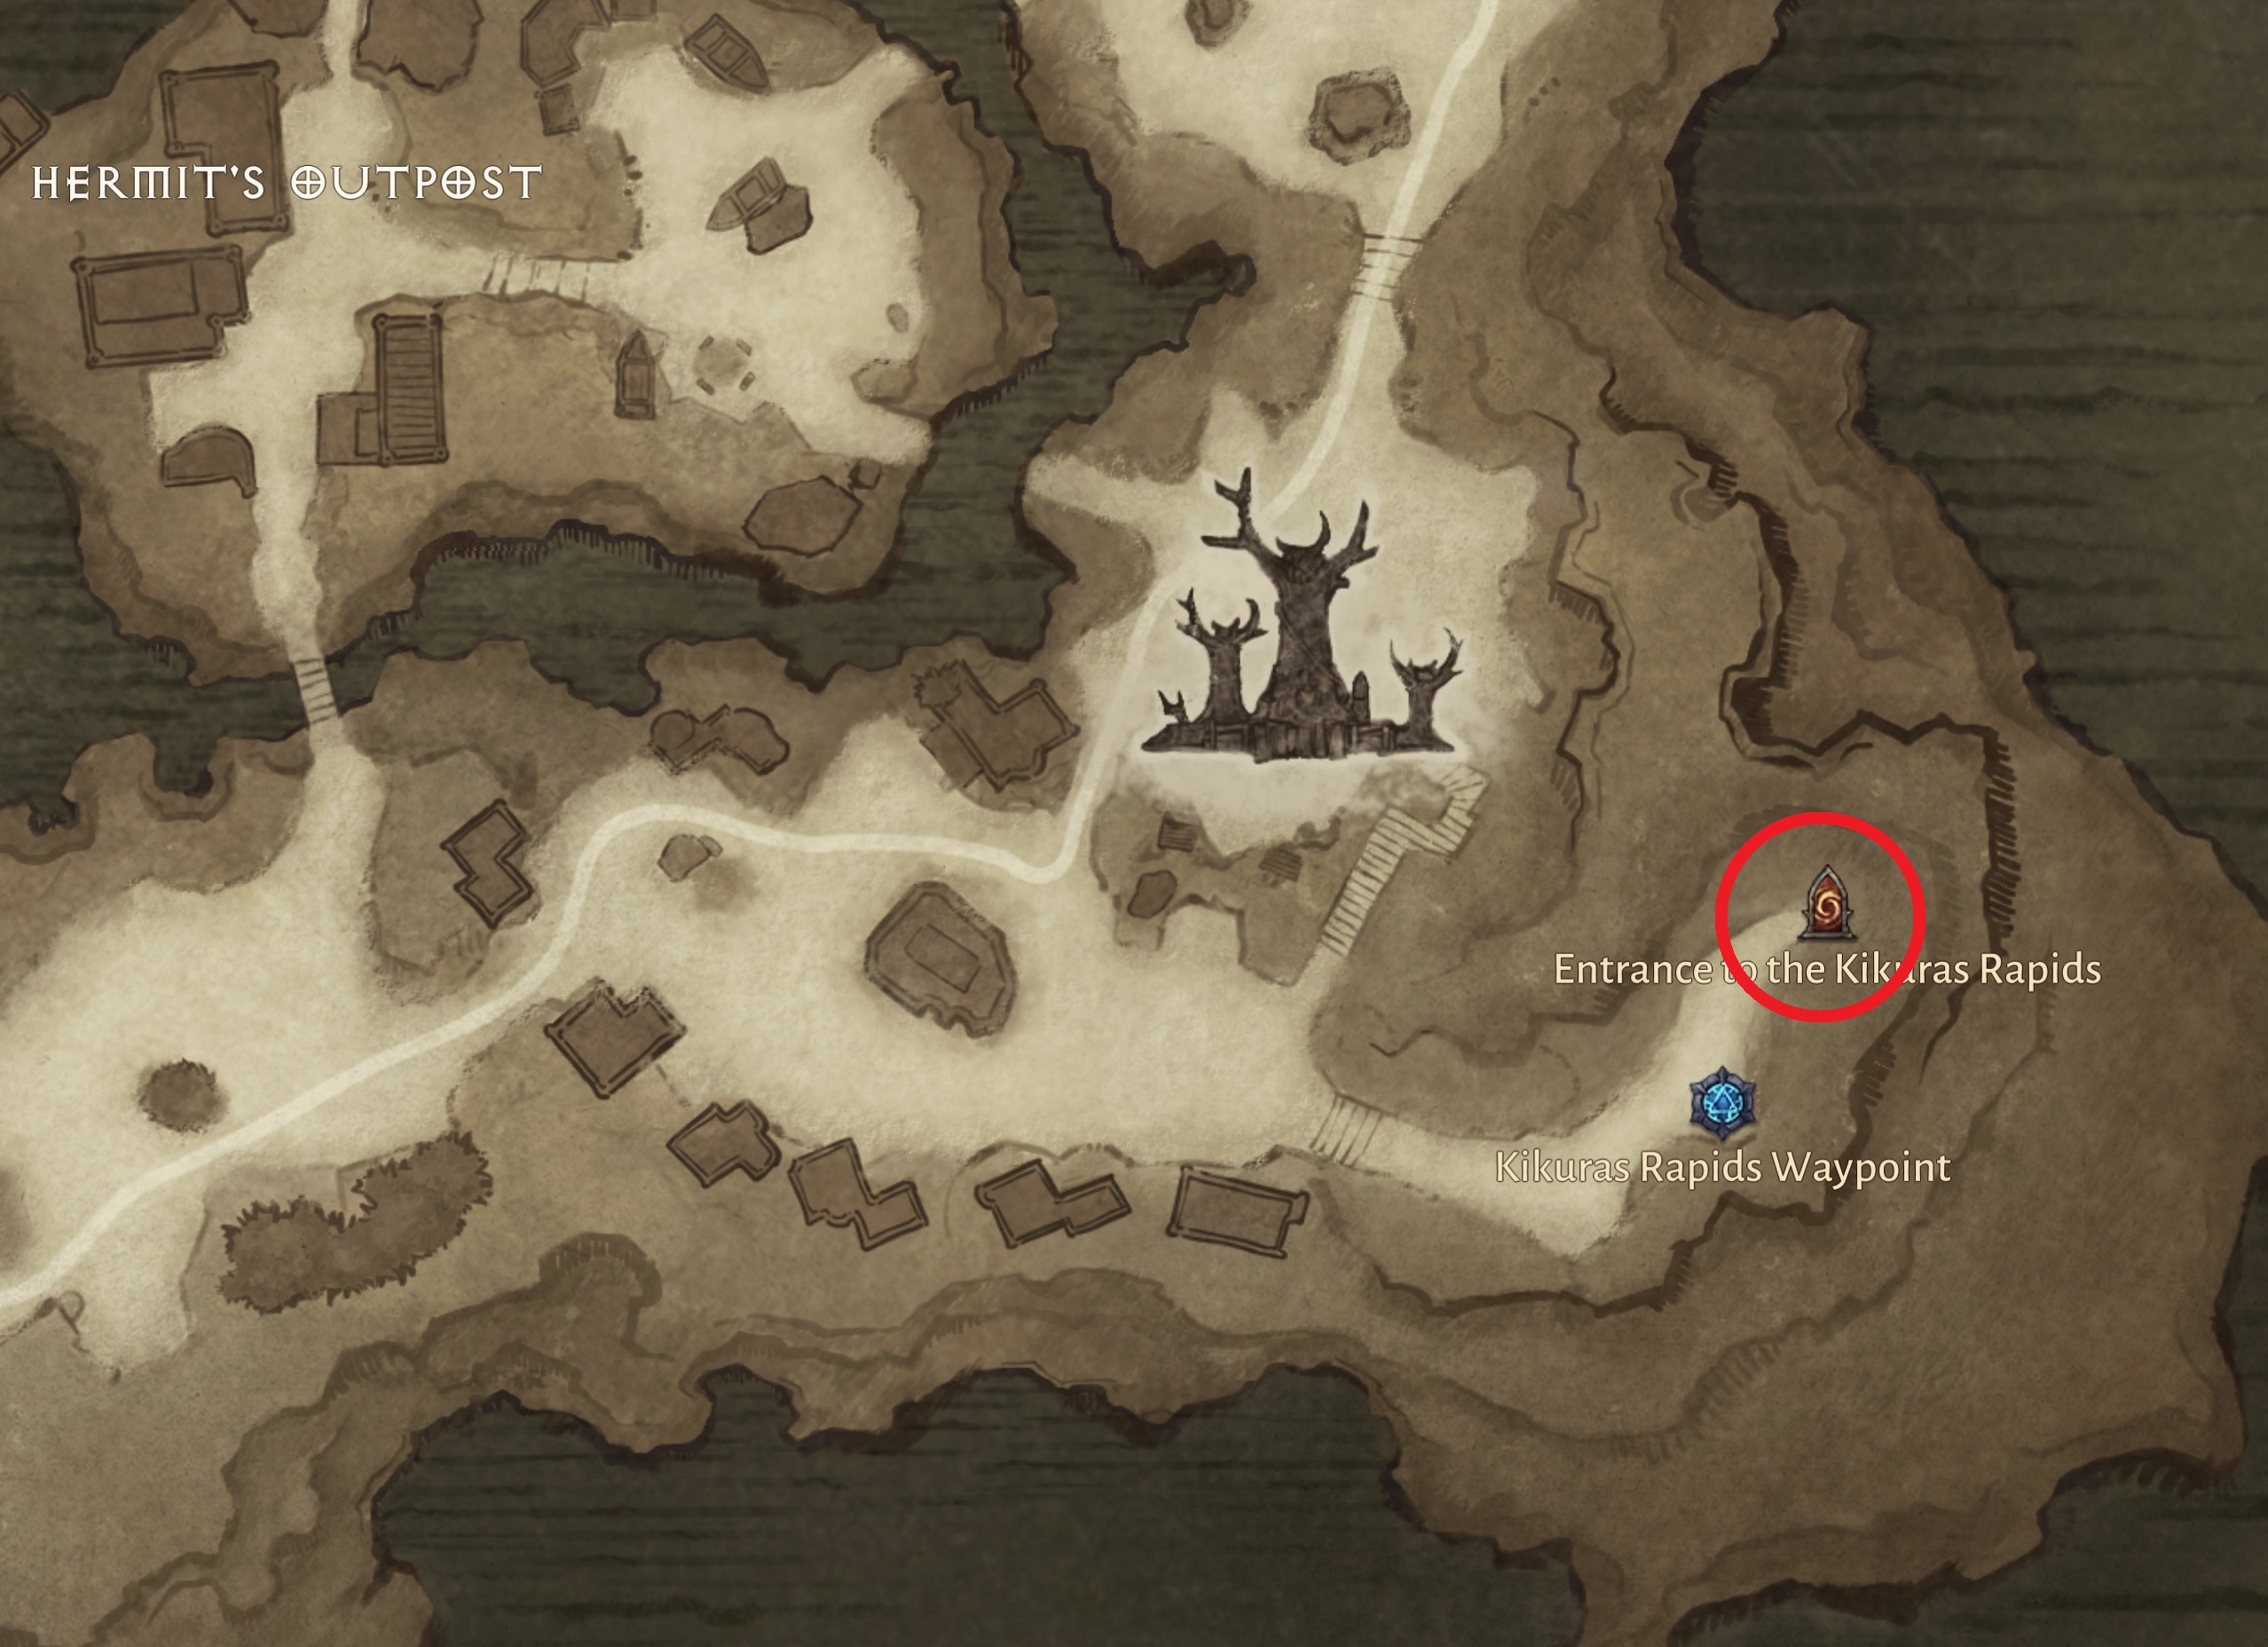
This dungeon is a good experience in Diablo Immortal as it is unique and enjoyable. To Raid Kikuras Rapid in Diablo Immortal, you’ll need to be level 40 at least. It has 20 Battle points. It offers moderate exp and loots even though it takes longer to get through it.
Here, you can get the following Set Items as rewards
Amulet
- Awakener’s Urge (Hell II +)
Ring
- Broken Palm (Hell IV +)
- Mountebank’s Marvel (Hell IV+)
Hands
- The Mailed Fist (Hell II+)
Belt
- Shepherd and Begetter (Hell I+)
Boots
- Stum-Stir (Hell I+)
Temple of Namari
In the Bilefen region of Diablo Immortal, you can raid two Dungeons: Kikuras Rapids and the Temple of Namari. Unlike other dungeons, the Temple of Namari is smaller and challenges you with a sequence of four bosses followed by the final boss, Sargoth.
Fighting four bosses consecutively may sound tough, but Health Globes drop to aid your journey. However, the raid loot in the Temple of Namari isn’t exceptionally rewarding considering the difficulty level. It serves as a great opportunity to test your skills.
Similar to Kikuras Rapids, you need to be at least level 40 to clear the Temple of Namari, and it offers 20 Battle Points.
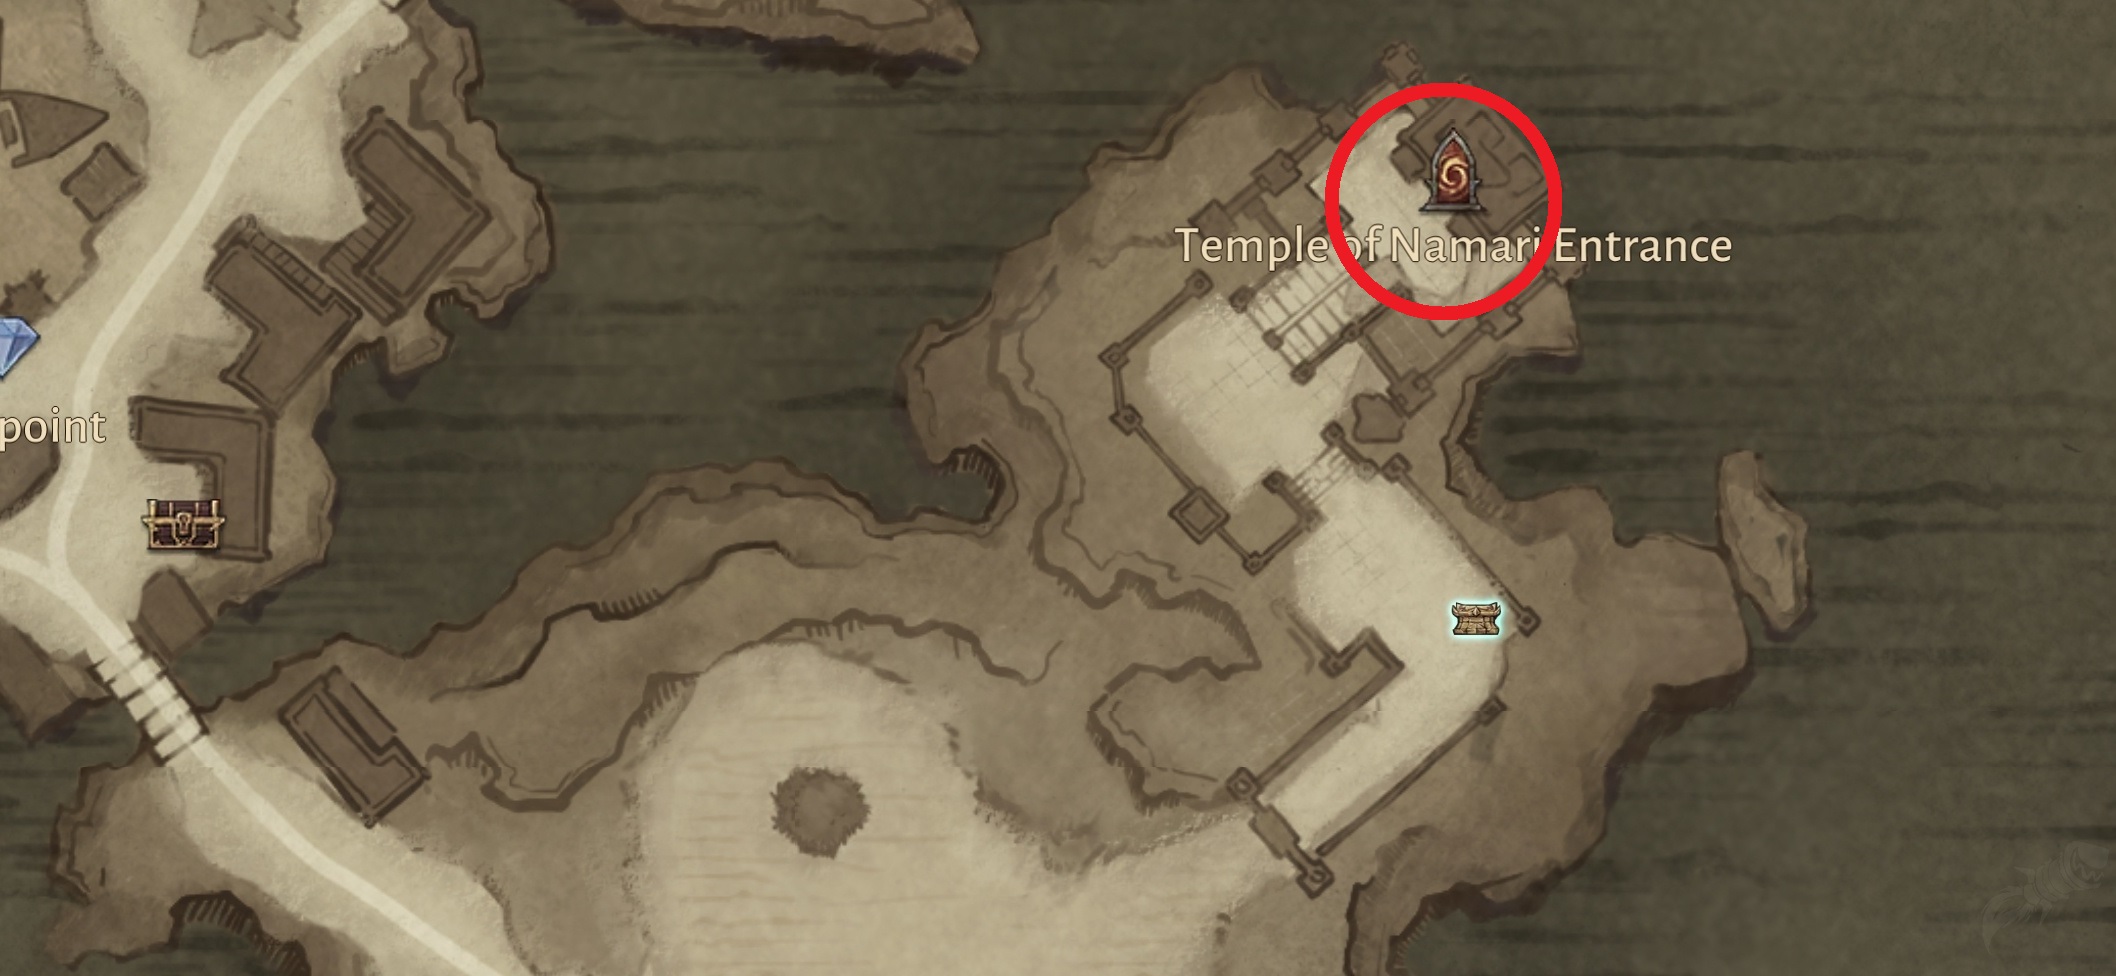 Temple of Namari’s Entrance.
Here, you can get the following Set Items as rewards
Amulet
- Cut Throat (Hell II +)
Ring
- Mountebank’s Misdirection (Hell IV +)
- Resting Fangs of Shal’baas (Hell IV+)
Hands
- Luminary’s Urge (Hell II+)
Belt
- The Gaoler (Hell I+)
Boots
- Shepherd and Leader (Hell I+)
Carven of Echoes
The Carven of Echos is a great dungeon to explore at the end of the Frozen Tundra region. The Dungeon pays tribute to the Diablo 3 as it lets you fight a boss using Blood Maw and Rime mechanics from Diablo 3. From here onwards, you have to fight some monsters to get to the final boss of the Dungeon, Glacial Colossus.
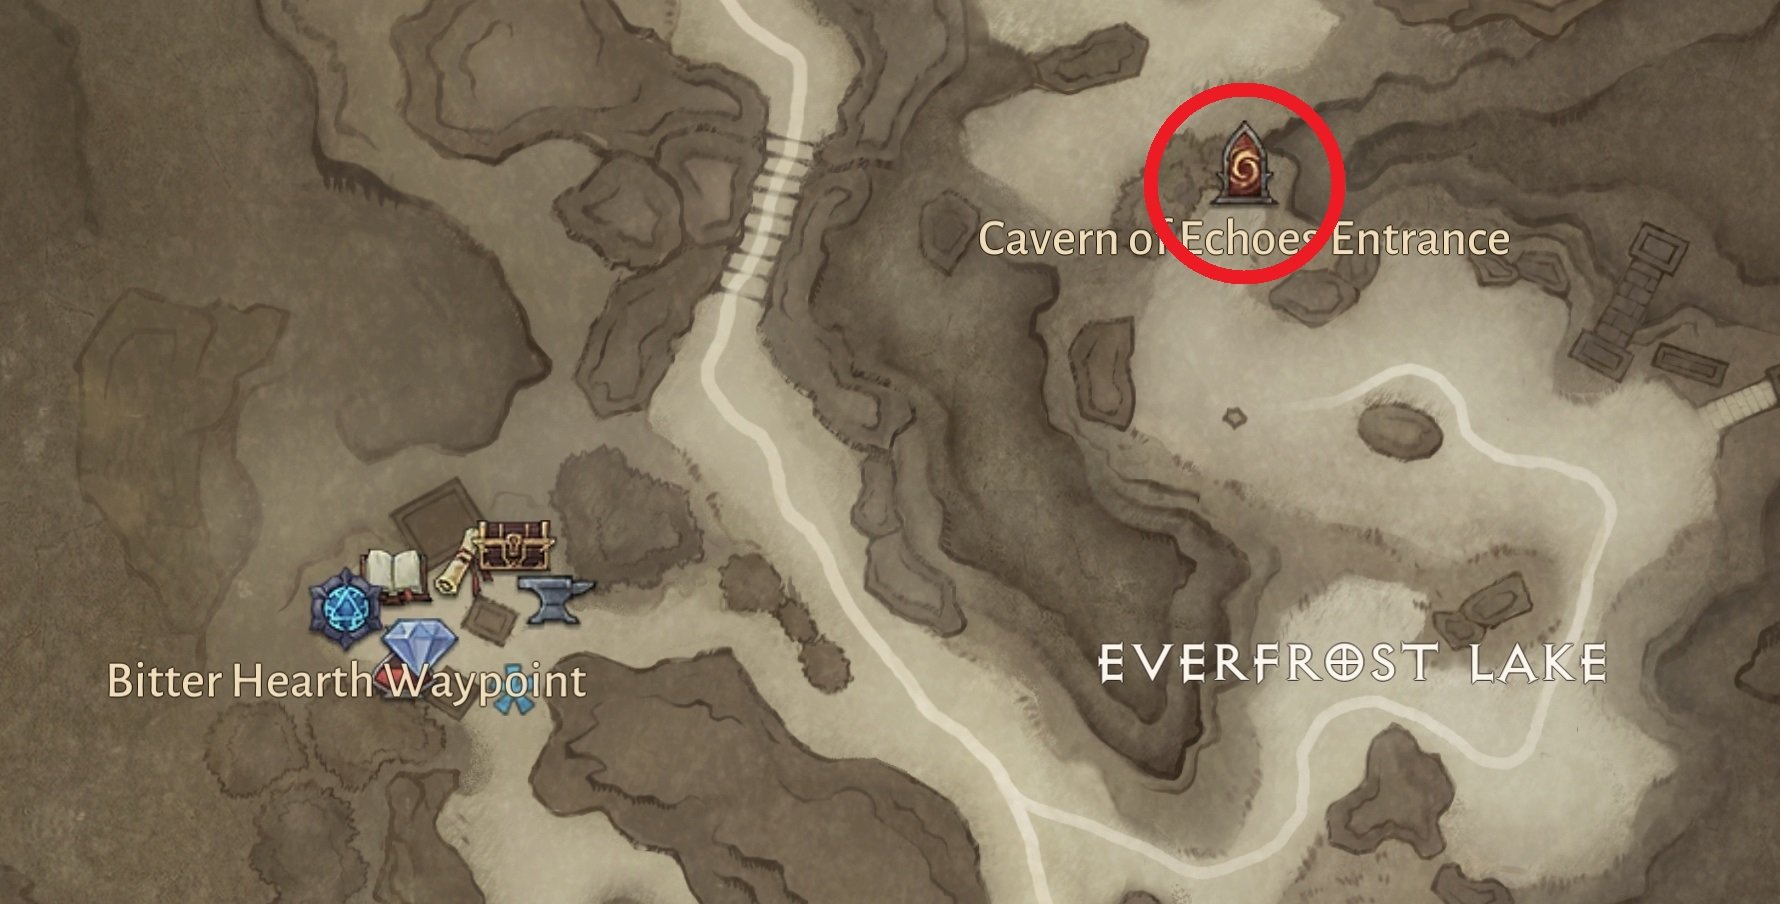
The Dungeon isn’t only great for its looks, and it gives enormous sums of exp and loot too. It requires you to have a level 50 player. And it has only 15 Battle Points.
Here, you can get the following Set Items as rewards
Amulet
- Mountebank’s Flourish (Hell II +)
Ring
- Issatar Undone (Hell IV +)
- Braided Serpent of Shal’baas (Hell IV+)
Hands
- Bloody Hand (Hell II+)
Belt
- Exemplar’s Urge(Hell I+)
Boots
- Wind The Tyrant (Hell I+)
Pit of Anguish
Pit of Anguish is the 7th and final Dungeon that you get to raid in Diablo Immortal at the time of writing. You get to clear this dungeon in the final world zone; that is, Realm of Damnation. The Dungeon is filled with Abussal Gargantuans spawning pools. At one particular pit, you’ll have to battle demonic cultivators. Not only that, you’ll have to fight a boss fight with the most blood in the game, hence the name ‘Pit of Anguish’.
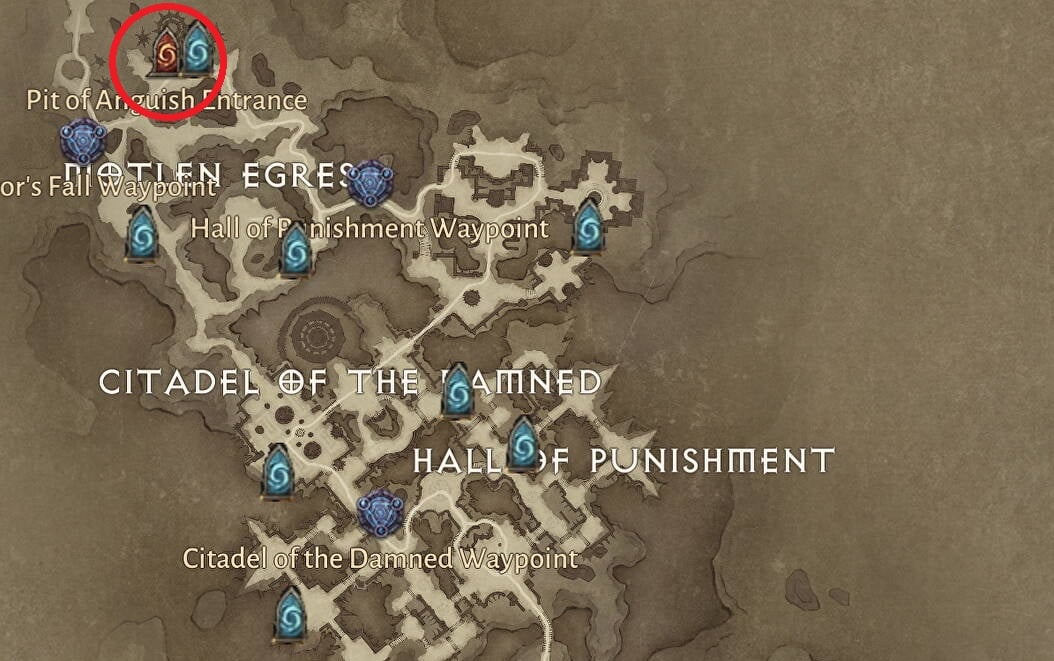
To raid the Dungeon in Diablo Immortal, you need to be at least level 56. It gives Moderate exp and loot, but the fighting experience is worth it. It has 20 battle points.
Here, you can get the following Set Items as rewards
Amulet
- Buring Heart of Shal’baas (Hell II +)
Ring
- Foulfleet (Hell IV +)
- Issatar Enraged (Hell IV+)
Hands
- Mountebank’s Shirking (Hell II+)
Belt
- Open Gut (Hell I+)
Boots
- Beacon’s Urge (Hell I+)
Elder Rifts Raids
Elder Rifts are a type of raid in Diablo Immortal that lets you tear through hordes of monsters. These dungeons are randomized, so there’s a chance of getting big rewards. To enter Elder Rifts, you’ll have to travel to the Northwest corner of Westmartch. There, between the Bounty Board and Challenge Rift obelisk, is the entrance to Elder Rifts.
Elder Rifts are a great source to earn Legendary loot and experience. And you get to enhance them using Rare Crest or Legendary Crest. This way, you’ll earn Runes and Legendary Gems.
Mechanics of Challenge Rift Riads in Diablo Immortal
- Elder Rifts are free to enter and have no entry restrictions.
- There’s no time limit during Elder Rifts; progress fills as you defeat enemies and collect globes from Elites.
- The experience within Elder Rifts is entirely random, including the map, Rift Guardian, mob types, and pylons.
- Monster Combat Ratings scale with your character’s strength, ensuring a consistent challenge.
- To obtain Legendary Gems as drops, equip both Rare Crests and Legendary Crests.
- Each Crest used in Elder Rifts rewards one Fading Ember, and you can get additional Embers if your friends use Crests, up to a maximum of 210 per week.
- Elder Rifts usually take 2 to 5 minutes to complete.
- Daedessa’s Blessing provides three daily chests with Asprint Keys and a chance for a Rare Crest.
- If Immortals fail to clear Kion’s Ordeal within 24 hours, Shadows receive a buff.
Bosses
The Bosses in Elder Rifts raids are similar to those in the Challenge Rift. But compared to those in Elder Rifts, the Challenge Rift bosses are harder to defeat. Defeating a boss drops a chest with Legendary Gems, Fading Ember, Runes, and the loot that you’ve obtained during the Elder Rift raid.
Rewards
Elder Rifts in Diablo Immortal offer various rewards:
- Primary Rewards: Legendary Gems, Fading Ember, and Runes.
- Additional Rewards: Crafting materials, experience, and legendary gear.
- Legendary Gems: Check out “Diablo Immortal Best Legendary Gems” for guidance on which one suits your playstyle.
Two notable Legendary Gems from Elder Rifts:
- The Howler’s Call: Clears enemy hordes in front of you.
- Sleeping Bite: Spreads poison throughout the room to eliminate enemies.
You can use up to 10 Legendary Crests at once for increased loot and extra Fading Ember. With a full party, this results in 40 Fading Ember per run. However, this applies only to Legendary Crests, not Rare Crests. Rare Crests allow 1, 2, or a maximum of 3 for each Elder Rift. To learn more about maximizing Fading Ember, refer to our “How to Find & Use Legendary Crests” guide in Diablo Immortal.
Helliquary Raids
Helliquary Raids provide an opportunity to increase your character’s Combat Rating. These raids start as relatively easy and become more challenging as you progress. Here’s how to unlock Helliquary Raids and some information about the bosses you’ll encounter:
Unlocking Helliquary Raids:
- Complete Bilefen’s main storyline.
- Proceed to Deckard Cain’s Workshop in Westmarch.
- In a secret room, you’ll meet Rayoc, who will introduce you to Chaos Herald Pyl as the first Demonic Target.
- Reach Challenge Rift 6 to face Chaos Herald Pyl.
- Defeat Chaos Herald Pyl, who drops Pyl’s Flowing Chaos (a Legendary item).
- Take Pyl’s Flowing Chaos to Rayoc, who will guide you to seal it into Helliquary.
- Receive your first Scoria from the Bounty Quartermaster.
Leveling Up Helliquary:
- Increasing Helliquary’s level enhances the Combat Rating earned from raids.
- You can refine Scoria to hellfire Scoria for 100 Gold and use it to upgrade Helliquary.
- Scoria is obtained through Daily Battle Pass Quests and Battle Pass Raid Activity.
- As you level up Helliquary, you’ll need more Hellfire Scoria to upgrade it.
Bosses in Helliquary:
- Chaos Herald Pyl: This boss has moderate difficulty. He doesn’t have one-shot mechanics, but his four special attacks can deal substantial damage if not avoided. Defeat his Demon Warrior waves first, dodge his ground attacks, and stay away from fire circles on the ground.
- Lassal, the Flame Spun: Lassal has four phases and is significantly more challenging than Chaos Herald Pyl. It’s recommended to have a raid party and reach the game-recommended Combat Rating before attempting to defeat Lassal.
- Vitaath, The Shivering Death: Vitaath is the final boss in Helliquary Raids. Before fighting her, you’ll need to deal with frozen Ice Clan enemies. After clearing them, the actual battle with Vitaath begins.
Kion’s Ordeal
Kion’s Ordeal is an Immortal Exclusive Riad in Diablo Immortal. In the raid, a total of 48 players join a raid and take on four bosses in one raid.
Entering Kion’s Ordeal Raid:
- Kion’s Ordeal is unlocked by spending Essentia.
- Only specific Immortal ranks (The Immortal, Lieutenants, or Elite) can enter this raid.
- Become an Immortal to participate in these raids.
Raid Organization:
- In Kion’s Ordeal, there are four portals in the main room, each leading to a different Tormentor.
- A 12-player party enters through one portal.
- Organize three parties, with 4 players each, to face each Tormentor.
Difficulty and Rewards:
- Choose the highest difficulty to raid multiple times a day and increase Dominance Rewards.
Loot Distribution:
- After completing the raid, return to the main room to distribute the loot.
- To distribute the loot, interact with the crystal.
- Players must stand in circles to roll for loot.
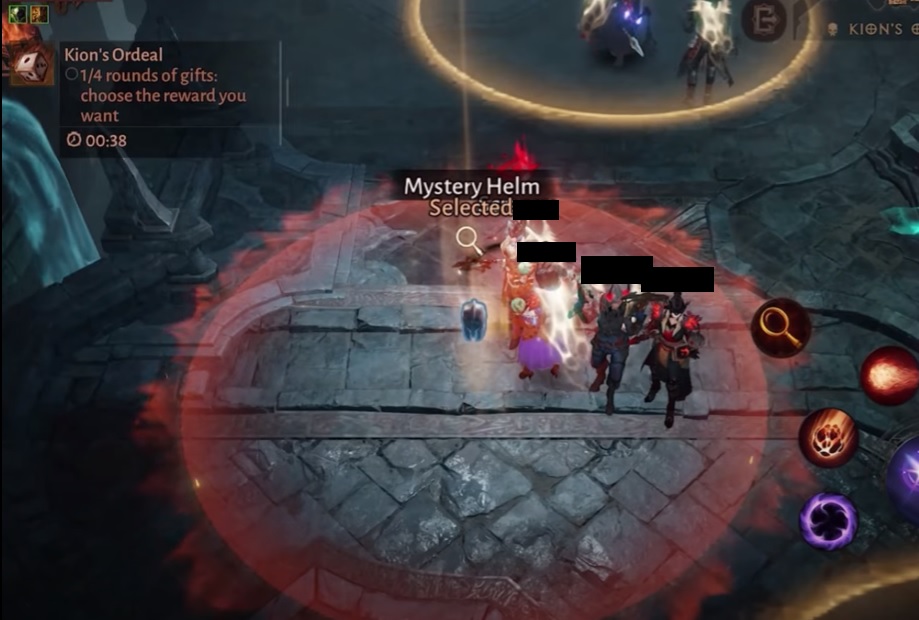
The loot is divided into different circles. If you want to roll on a piece of loot, stand in the circle around it. You can inspect the loot before deciding which one to roll on, tap on the magnifying glass in front of the loot.
If you think you have enough loot and want to help new players, you can decide not to stand in any circle too. Anyways, once the timer ends, the roll happens, and you can check who got the loot. One thing to keep in mind is that Kion’s Ordeal has the best loot in the game. For that, you’ll have to get to Immortal in Diablo Immortal and take part in the raid.
Thanks! Do share your feedback with us. ⚡
How can we make this post better? Your help would be appreciated. ✍