Evil West All Bosses: How To Defeat & Strategies
Learn about all the 4 bosses that are featured in Evil West missions and the best ways to combat them!

Evil West has accumulated four main boss fights sprinkled all across the 16 main missions through which the player has to progress to complete the game. The boss fights can get exceptionally challenging at times. Therefore, my Evil West All Bosses guide will uncover all of them in detail and work out how to defeat them!
Note: based on the chosen difficulty of the player, the boss fights can get more or less challenging.
- Bosses are featured in missions 7, 10, 14, and 16 in Evil West!
- The best way to combat main bosses is by dodging, evading, and studying their attack patterns!
- The main benefit of defeating these bosses is that you will be one step closer to getting to the end of the game!
- While bosses can get insanely annoying, practicing patience and calmness during the fight is crucial to succeeding!
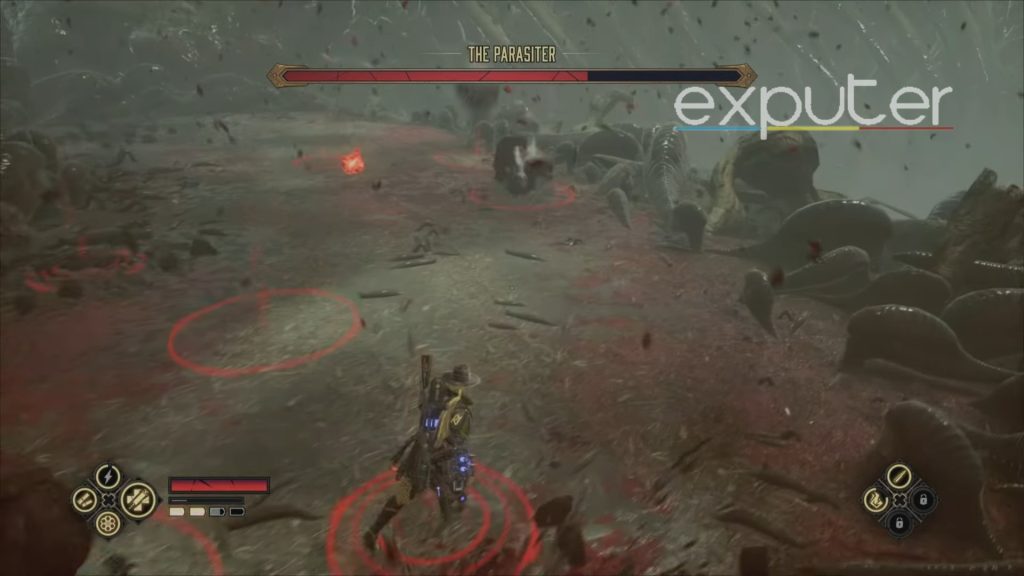
The Parasiter
Kicking things off with the first boss in the game, the Parasiter is introduced in chapter 7, which really spikes up the difficulty level all that much. The parasiter is one of the few challenging bosses that require strategy and stealth from the player’s end.
First Phase

- For the first phase, focus on the left tentacle’s weak point marked by a golden circle.
- Shoot it, roll forward, and initiate 2-3 melee attacks before it rises.
- Repeat the process, evading right tentacle attacks.
- After a stabbing attack, perform more melee hits on the right tentacle, shooting its weak point.
- Run to the other side to avoid poison and execute melee attacks on the right tentacle during its stabbing sequence.
- Once both tentacles are down, shoot the vulnerable points on the leech to proceed.
Second Phase
- In the next phase, red circles appear on the ground, signifying projectile attacks.
- Dodge by running in a left and right pattern.
- Target the weak spots on both tentacles, focusing on the right one first.
- Melee attacks become possible on the right tentacle after shooting its weak point.
- A cocoon forms in the middle—burn or avoid it—and continue shooting the left tentacle’s weak point.
- The Parasiter spawns enemies, which you should ideally avoid attacking and focus on survival.
- The tentacles repeat their stabbing motions, providing opportunities for melee hits.
- Sprint along the left edge to evade poison.
- After the tentacles collapse, shoot the weak points on the leech to conclude the second phase.
Third Phase

- In the third phase, dodge the rocks with red circles and move slowly.
- The parasiter intensifies the challenge by launching poison projectiles and forming cocoons while the tentacles attack.
- Stay calm and prioritize handling one tentacle at a time.
- Deal with enemies, evade poison, and target the vulnerable spots on the tentacles.
- Repeat these steps until the boss fight concludes.
The Bruch

Following through with the next boss, you have The Bruch, which will be introduced to you when you end up reaching chapter 10 of the main questline. As for the overall difficulty, the boresight will be on the easier end compared to the parasiter.
First Phase
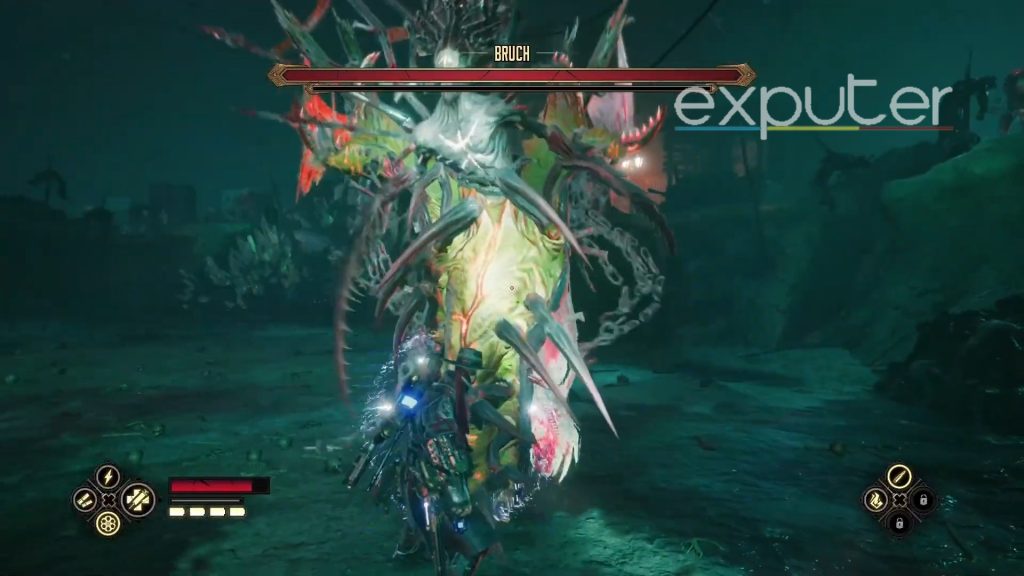
- In the initial phase of the boss fight, Bruch will unleash four unavoidable tail attacks.
- Use the block command (Q or L1) to mitigate the damage.
- Afterward, take advantage of the brief opening to counterattack, using the lightning bolt weapon for increased damage.
- When Bruch spawns minions, swiftly eliminate them to prevent the boss from healing.
- Expect another sequence of seven tail attacks from Bruch, requiring continued blocking.
- Dodge his fireballs during this phase.
- Utilize the flamethrower for efficient minion disposal.
- Stay vigilant and focused throughout these maneuvers.
Second Phase

- In the second phase of the boss fight, Bruch exits the battlefield and summons smaller vampire opponents.
- Prioritize eliminating these foes while adeptly dodging the fireballs hurled by Bruch.
- Look upward to identify his vulnerable points, then use your rifle to target and shoot them.
- Bruch will persist in deploying tail attacks and spawning enemies until approximately one-third of its health remains.
- Remain focused and efficient in dispatching both enemies and exploiting vulnerabilities.
Third Phase
- When the boss has about 1/3rd health remaining, long walls of enemies spawn, rotating in a line.
- A small gap opens for the player to navigate; being attacked heals the boss.
- The wall repeats without rotation, launching toward the player.
- The boss shoots fire projectiles but reveals weak points.
- After hitting the weak points, the boss becomes vulnerable to close combat.
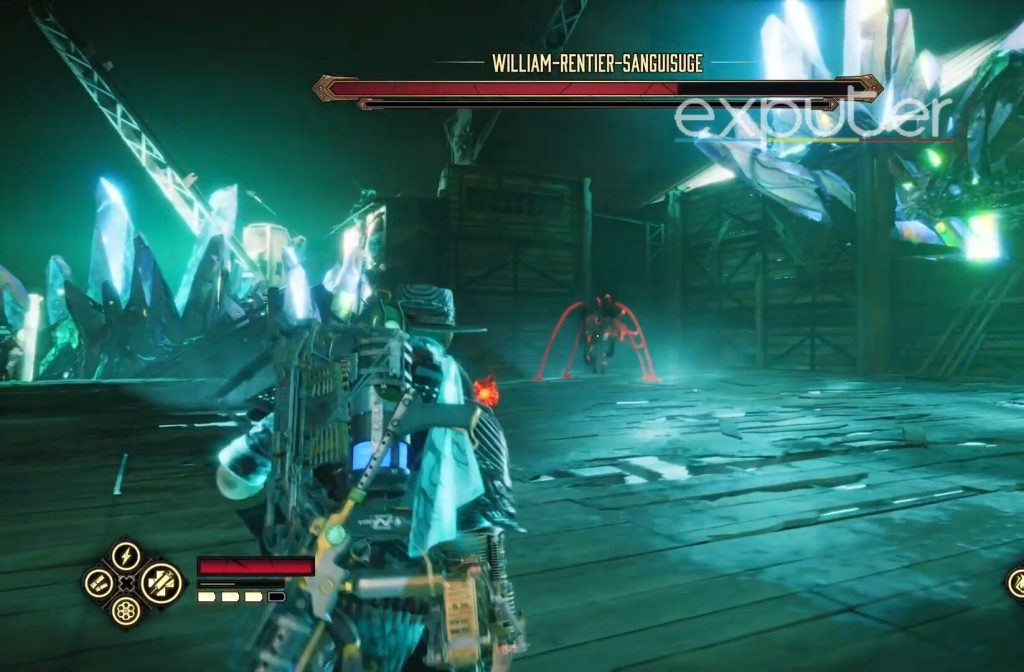
William Rentier
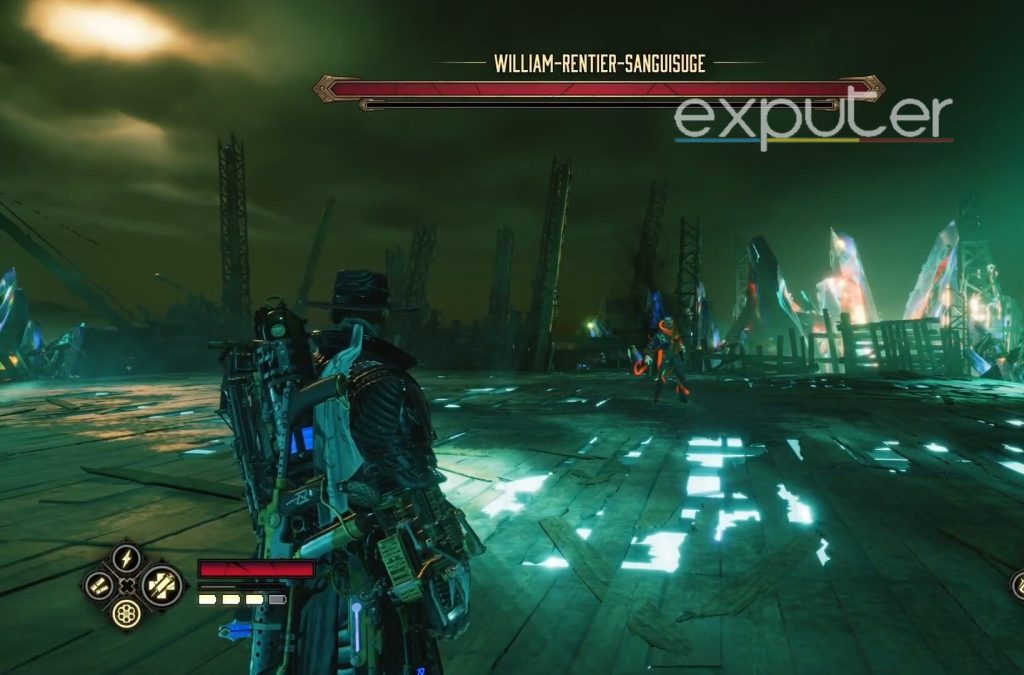
As for the next boss fight, payers will encounter William Rentier when they manage to reach level 14 in the game. When it comes to the overall difficulty, the boss is equally tough, but it’s nothing players can’t defeat with a bit of strategy up their sleeve.
First Phase
- At the start, the boss quickly moves right and shoots two red-lined shots.
- Players can shoot back, but evading left is the best way to avoid damage.
- The boss stands at the arena edge, revealing the first weak point for interruption.
- Launches a bomb with blinding light; dodge William’s rush afterward.
- Close in to deal damage; phase continues until 1/3rd HP is lost.
- Repeat cycle until the phase concludes with a cutscene.
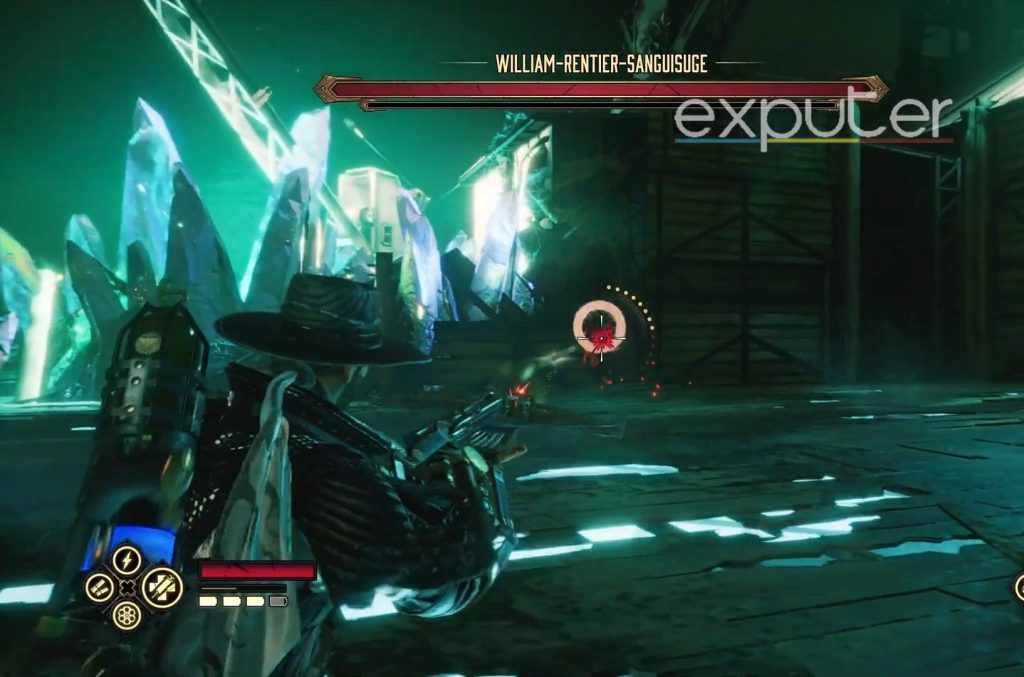
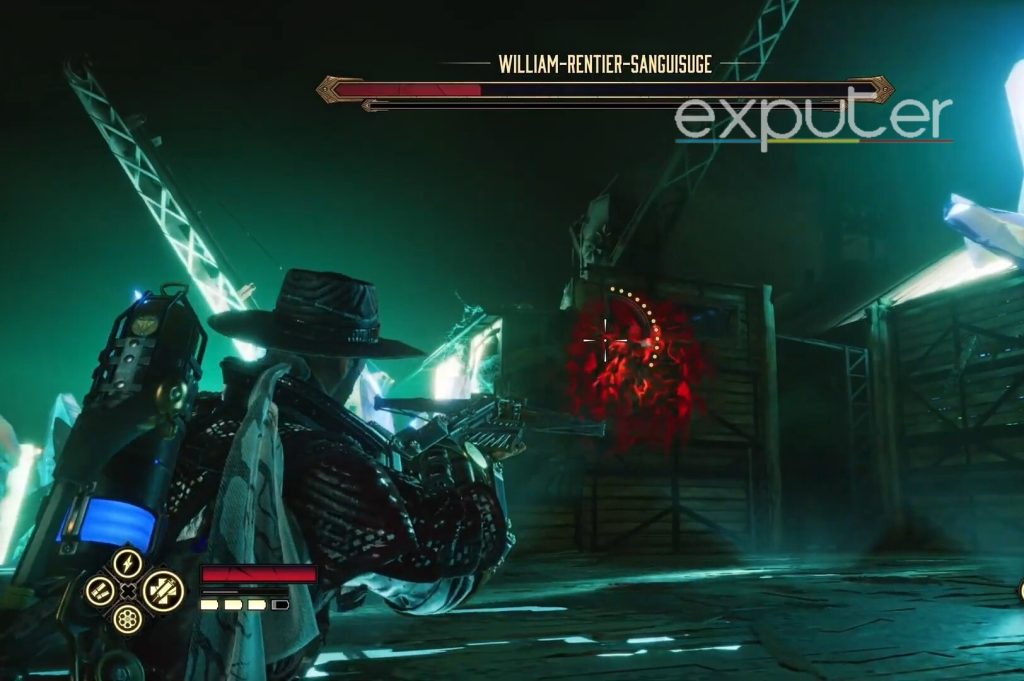
Second Phase
- In the second phase, William shoots projectiles, transitioning to a tentacle form.
- Projectiles come in packs of 2, 3, and 4; evade or sprint away.
- Another weak point is revealed during projectile attacks.
- After shooting the weak point, William charges, allowing for a dodge and melee attack.
- Be cautious of his aerial stomp marked by a red circle; dodge accordingly.
- He repeats the blinding bomb attack, offering a moment for counter-attacks.
- Repeat these actions until another 1/3rd of his HP is depleted.
Third Phase
- In the third phase, William is in the sky with a red shield, launching projectiles until his weak point appears.
- Shooting the weak point interrupts his attacks, making him vulnerable briefly.
- After a blinding bomb, he rushes with a marked red circle path 3-4 times.
- Another blinding bomb reveals clones of William within a ring with yellow barriers.
- Shoot weak points on the clones to render them useless.
- Repeat the process until William becomes vulnerable; failure may lead to a repetition of the phase.
Felicity’s True Form

Last but not least, if you’re reading this, congrats, you’ve probably made it to mission 16, which, if you haven’t, uh. The boss fight will start once Jesse can find Felicity, and Jesse will end up being furious about the fate of his father, and the interaction seems pretty standard with Felicity, but once the fight starts, her true form appears.
First Phase

- The first phase begins with Felicity charging at incredible speed, necessitating dodging.
- She launches and plunges, followed by a ground slam.
- Frequent dodging is essential, as she sends targeted shockwaves in cycles of 2-3.
- A revealed weak point allows for easy shooting.
- Felicity charges, moves left, repeats plunging attack, and sends more shockwaves.
- The phase is characterized by a repetition of slamming, dodging, and shooting.
Second Phase

- The second phase follows a cutscene, with Felicity launching and slamming down.
- She climbs a wall, revealing 3 weak points to shoot at.
- Shooting weak points causes her to leap to the next wall, repeating the process.
- After slamming onto the ground, she performs a rotating slam.
- Felicity charges at you four times; constant dodging and evading are key.
- Afterward, she becomes vulnerable briefly, allowing for melee attacks.
Third Phase

- In the third phase, Felicity launches a shockwave with her right arm, repeats with her left, and then uses both arms to launch one.
- Jumping and slamming behind you, she becomes briefly invulnerable.
- Take advantage of the invulnerable moment to land melee attacks.
- She continues slamming, charging, and starts throwing rubble projectiles.
- Positioning near the rubble can provide protection against her attacks.
- Weak points reappear, allowing you to finish her off with well-timed moves.
Summary
And there you have it! All four boss fights are in the game! And with that, I will wrap up my Evil West All Bosses guide!
Up Next:
- Evil West Best Upgrades
- Evil West How To Reset Perks
- Evil West How Long To Beat
- Evil West All Voice Actors Cast
Thanks! Do share your feedback with us. ⚡
How can we make this post better? Your help would be appreciated. ✍