Minecraft Legends: How To Beat Portal Pile [All Waves]
Our Minecraft Legends Portal Pile guide will showcase an effective way how to work through and survive each wave in the challenge!

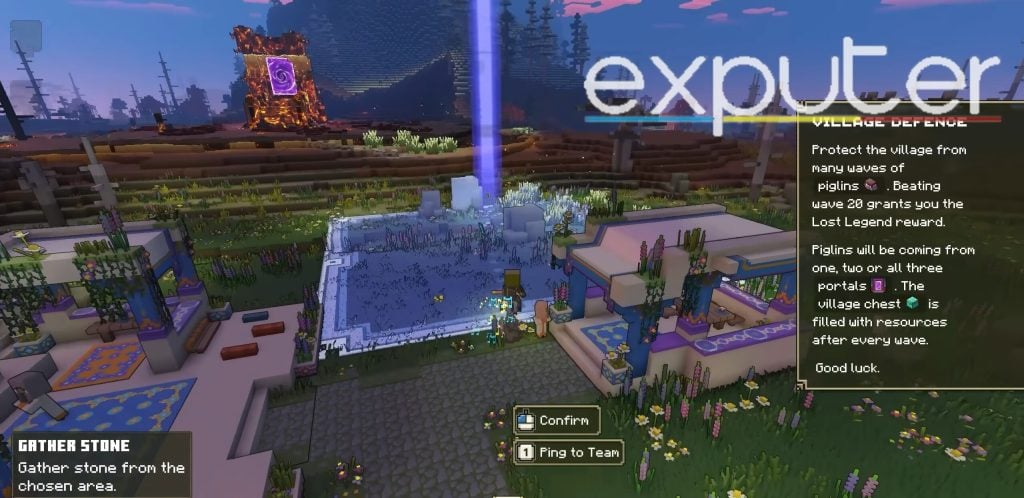
Minecraft Legends is finally out, and it features many challenges awaiting the players, such as the Minecraft Legends Portal Pile, which features a challenge of protecting the village from spawns of piglins until the 20 waves end. Players might want assistance figuring out what strategies they can use and resources to protect their village while playing the game mode!
- In Portal Pile, survive 20 waves to protect the village and earn the Portal Buster Hero skin.
- Wave 1: Gather resources, plant plank golem spawners, and recall them toward piglin locations.
- Wave 2: Piglins spawn from opposite ends; build a carpenter hut.
- Wave 3: Access Scatter Towers, and place them near portal corners.
- Wave 4: Increase scatter towers as spawn limit rises.
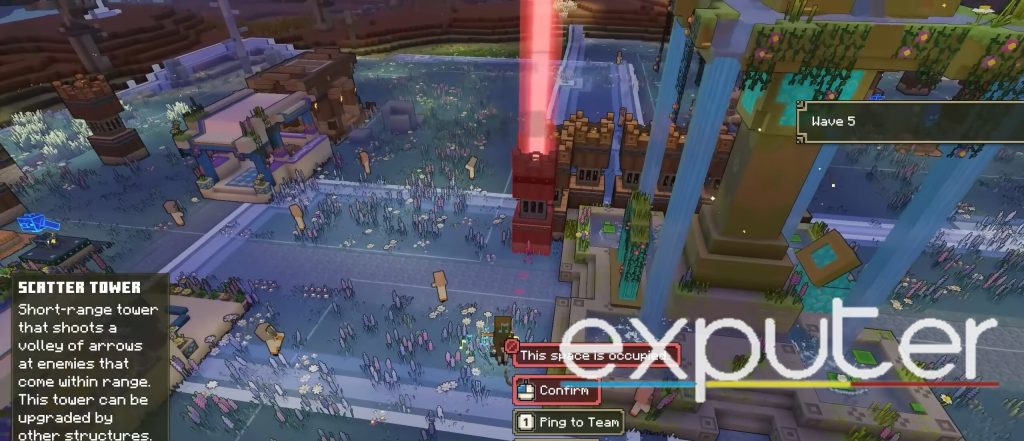
- Wave 5: Focus on internal village protection.
- Wave 6: Build more scatter towers and spawn additional golems.
- Wave 7: Construct masonry and more scatter towers.
- Wave 8: Watch for overall size of spawning piglins.
- Wave 9: Upgrade everything; include Spyglass Overlook, masonry, battle drum, and Kaboomery.
- Wave 10: Spawn more skeletons.
- Wave 11: Build additional scatter towers and spawners.
- Wave 12: Get a blast tower and strategically place it.
- Wave 13: Access stun tower and place it strategically.
- Wave 14: Strengthen the defense line and build more towers.
- Wave 16 onwards: Repeat established steps to maintain defense.
How To Survive The Challenge
First, players should know that the Minecraft Legends Portal Pile challenge will not be easy. Players should expect there to be 20 waves of piglins, and there won’t be a lot of resources at their disposal. Therefore, strategy and patience is the main key here.
Start Of Challenge
Players want to focus on gathering resources whenever they first spawn into the area. You want to take a look at your surroundings and go around gathering important items such as wood as well as stone that might help you later.
- After you’ve gathered a few resources, the next thing players want to do is plant plank golem spawners and place them near the areas from where the piglin portals are located.

- Ensure golems are ready to protect against piglins when they appear from the portal.
- Plant the spawner and spawn as many golems as possible.
- Move to the next two portals where piglins will spawn and repeat the golem spawner placement.

- After building and gathering resources, recall your army to the golem-encircled area for the first wave.
- Leave the golems there to attack piglins and build arrow towers near the portals for your next defense.

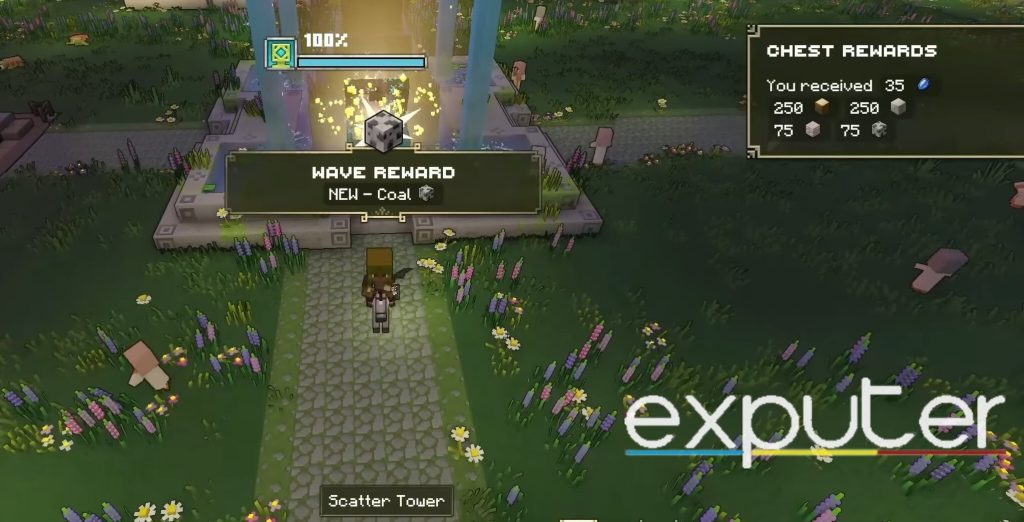
- The first wave ends up completing pretty quickly since it’s just the beginning, and once it does, you get a prompt to go and collect the village chest.

- Other than that, players should also plant down a grindstone golem spawner behind the regular plank golem spawners that they might have since these spawns can handle larger amounts of piglins with ease.
Wave 2
As the first wave dies down and the second one begins, this one will be a bit tougher since the piglins will spawn from two opposite ends of the village.
- Players want to recall their units and send them off to the first spawn of piglins.
- After that, head over to your arrow towers to see whether they need more defense, and if not, then good.

- Eventually, the number of piglins decreases, allowing players to recall their units to the other side of the portal where the second spawn is.
- This way, your army can take out these piglins with ease.

- Players should also aim to build a carpenter hut close by in the middle of their village to have more structures standing.
Wave 3
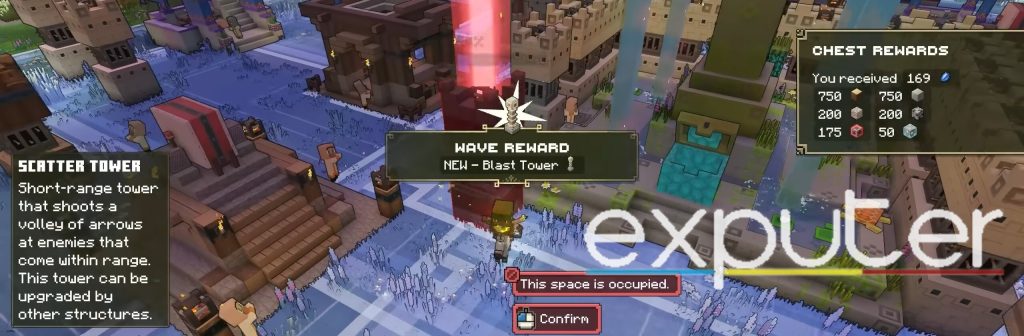
Once wave 2 has ended, you gain access to the Scatter Towers once you’ve raided the village chest.
- Scatter towers are extremely effective, as they are short-range towers that can shoot out a volley of arrows toward the piglins.
- Aim to build a few of these scatter towers near each portal corner from where the piglins spawn.
- If you are out of coal or low on coal in one of the spawn areas, you can recall your army to take care of the piglins for you.

- Another carpenter’s hut can be built towards the scatter towers so that it can be repaired if any damage has been done to the scatter towers.
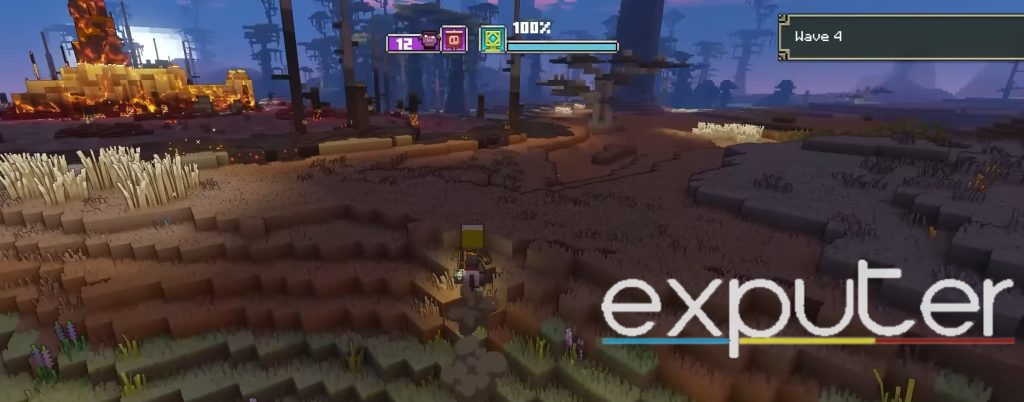
Wave 4
With wave 3 now being over and one with, players can get the village chest once again, and they will now be able to build a lot more scatter towers simply because of the consistent replenishment of coal.
- As each wave proceeds, your span max limit also increases, which allows players to spawn in more golems to help with the Minecraft Legends Portal Pile challenge.

- Place down even more scatter towers towards the piglin spawn locations so that they can assist with taking them down.
- If you feel like a plank golem spawner is in the way and being a hurdle, you can build it towards the back of the scatter towers.
- At this point, while the piglin waves can become scarier, players should be pretty safe with the right strategy and the right amount of golem spawners and scatter towers.
Wave 5
With wave 4 out of the way, players can get the chest again, granting them access to much more coal.
- Wave 5 introduces the start of the real danger.
- This is why players should now start focusing on protecting the internal structures of the village.
- Therefore, players can start by prioritizing building a boundary wall of scatter towers that wraps around the village well.
- While players might not be able to fully build a wall right from the get-go, they can fill in the empty spaces by using simple walls instead.
- This is when the piglins that explode also start to spawn, which naturally means that they will cause resources like one of the carpenter’s huts to break down as well.
- As the number of piglins decreases, players can grab the chest once it’s finished.
Wave 6
As the sixth wave starts to spawn, the challenge becomes all the harder; therefore, players should prioritize protecting the village well even more, therefore going ahead and building more Scatter towers.
- Players might note that the icon of the piglins ends up appearing on your compass above, indicating the general direction from which the piglins might end up spawning.

- Go to your plank golem spawners and spawn in more golems to care for the piglin spawns, especially if they are spawning in from only one end.
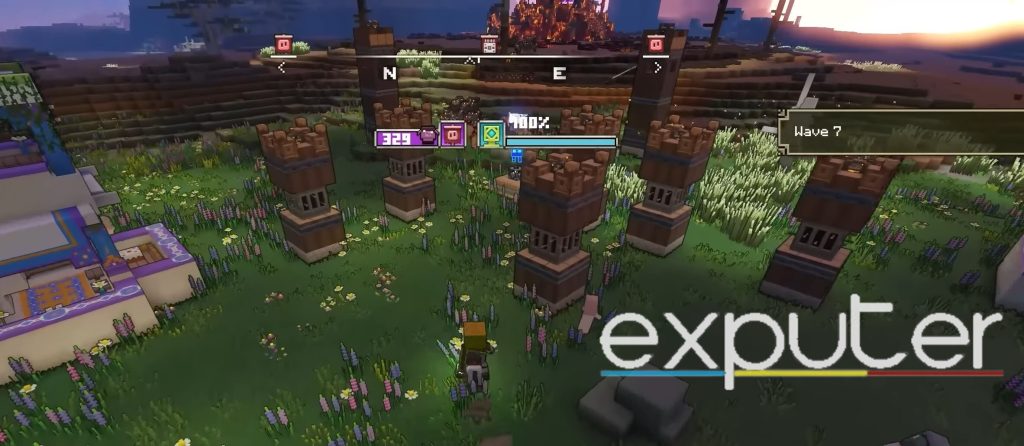
Wave 7
Now that wave 6 has ended, Village Chest can be acquired once more, allowing players to get even more coal and Redstone.
- Now, players can build masonry as well, which can help their towers stay guarded for longer during the battle.

- Build scatter towers wherever you can, as more scatter towers improve defense.
- Once wave 7 begins with about 400 piglins, their numbers rapidly decrease as your golems and scatter towers easily handle them.
Wave 8
Once wave 7 has finished, players want to start focusing on protecting the internal part of their village
- There should be no shortage of scatter towers no matter where you look.
- Start building more scatter towers towards the village area’s outside and inside.

- During wave 8, the main thing that players will need to look out for is the size of the piglins that are being sent in.
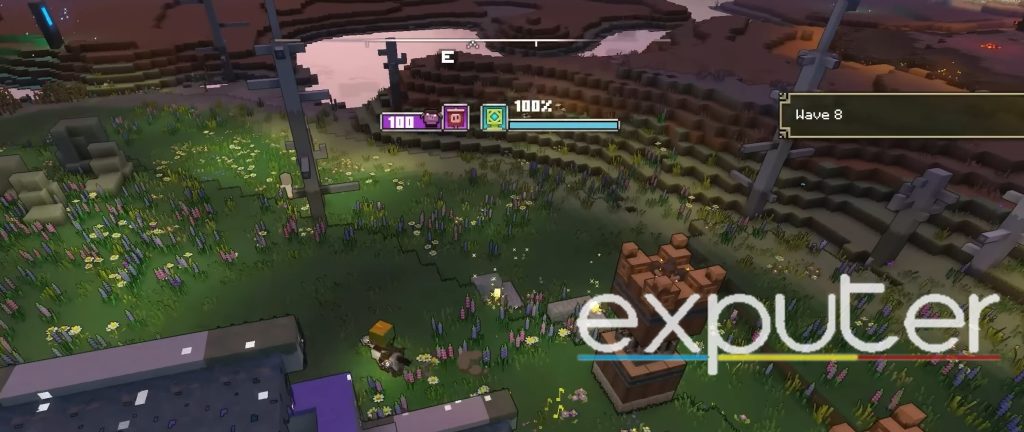
- If the piglins are too much in number to handle, then recall your golems towards you and charge forth.
Wave 9
As wave 9 starts to dawn, players are to do the same things as before, but the main exception here is that this time, players should also start to look for their upgrades as well.
- Go to the upgrade book and search for upgrades that may be available for the scatter towers.
- One of the upgrades that players might want is the Spyglass Overlook, which essentially enhances the overall firing range of nearby arrow towers, scatter towers, and Redstone launchers.
- Bring in masonry as well, since it can permanently turn walls that are close by, as well as towers or gates, into stone, which enhances their overall durability.
- You should also look to get the Kaboomery while you’re at it.
- A battle drum will be quite effective near the place from where the piglins might be spawning.
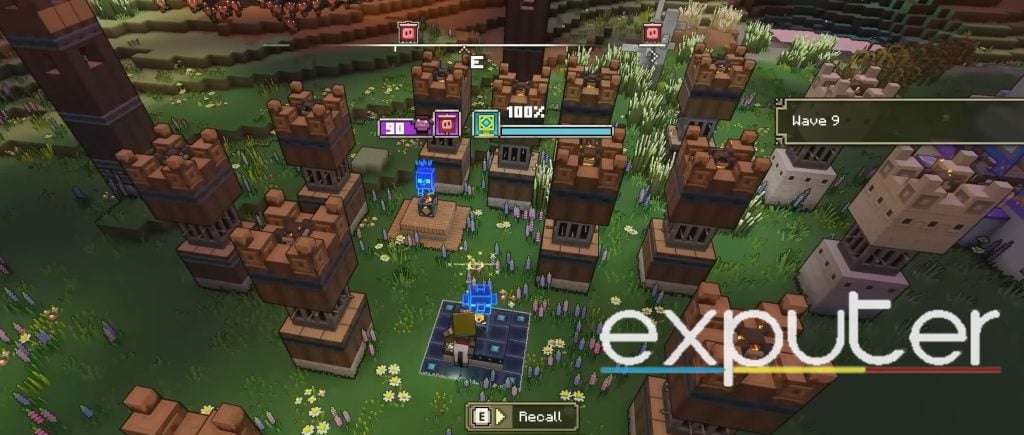
- Players will also need to face off against Lavalaunchers at this point, and the best strategy for that is to go tow yards them and try to stun them so that they don’t end up doing too much damage to your village.
- Players should also look to build a skeleton spawner while at it.
Wave 10
The starting of Wave 10 indicates the midpoint of the Minecraft Legends Portal Pile challenge.

- Spawn in skeletons from your skeleton spawner so they can fend off a few of the piglins.

- Once you’re secure on one end, go towards the opposite end from where more piglins are spawning, and if you see piglins breaking into your village, the scatter towers should be able to take them out easily.
Wave 11
Once the wave is done, collect the resources from the chest and build a kaboomery and a battle drum near the spawn points.

- Reinforce your scatter towers and spawn more golems and skeletons.

Wave 12
One wave 11 is done with. Players want to continue finishing up the scatter towers they are building on the village’s perimeter wall.
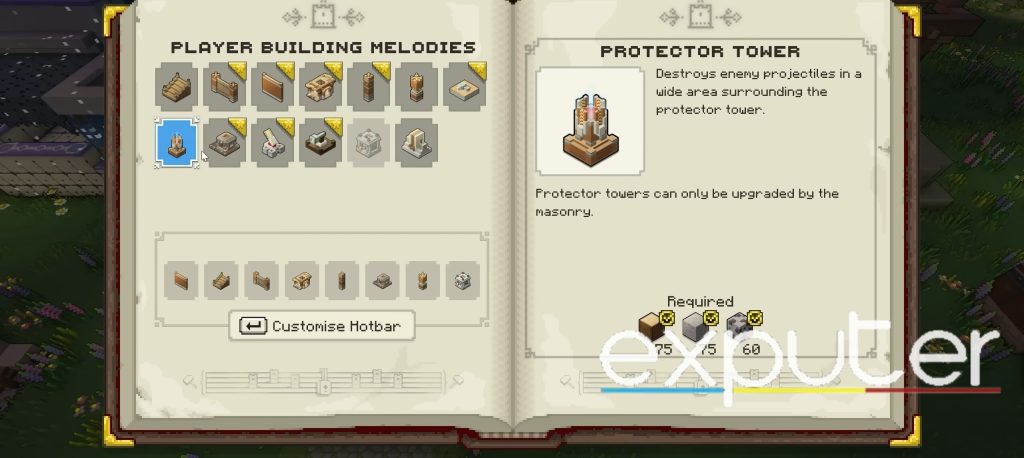
- Alongside that, players also get access to a Blast Tower; however, players might be able to note that they will only get one Blast Tower from the loot.
- Therefore, you gotta be strategic with where you place the Blast Tower, and the best place to place it down might be between a few of the piglin portals.

- If you see that your protective walls are being broken, you can build in more skeleton spawners that allow you to take them out more easily.
Wave 13
Once wave 12 has finished, players can get even more resources from the village chest, and at this point, they can also gain access to the Stun Tower.

- Place down the Stun Tower where a large hoard of piglins might be spawning from, and it will help keep them at bay for a while.

- The stunning tower will also help massively increase the overall security of your village.
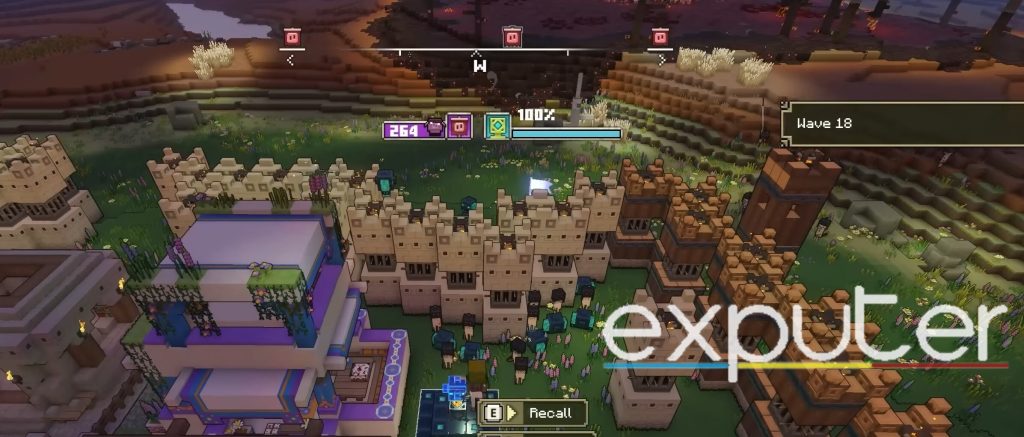
Wave 14
At this point, your line of defense should be pretty secure, but as you loot the village chest and gather more resources, continue building even more scatter towers and strengthening your perimeters.

- Another battle drum behind a few scatter towers might help strengthen the area even more.
Wave 15
Now, wave 15 is where the real danger begins since the piglins become an absolute hell to deal with at this point.
- At this point, players should spawn in more skeletons since your overall force might be lesser now.

- Combine that with the spawning of a bunch of grindstone golems.

- The scatter towers should be able to take out the piglins with little to no difficulties.
Wave 16
As wave 15 approaches, players get access to a First of Diorite Spawner alongside other goodies.
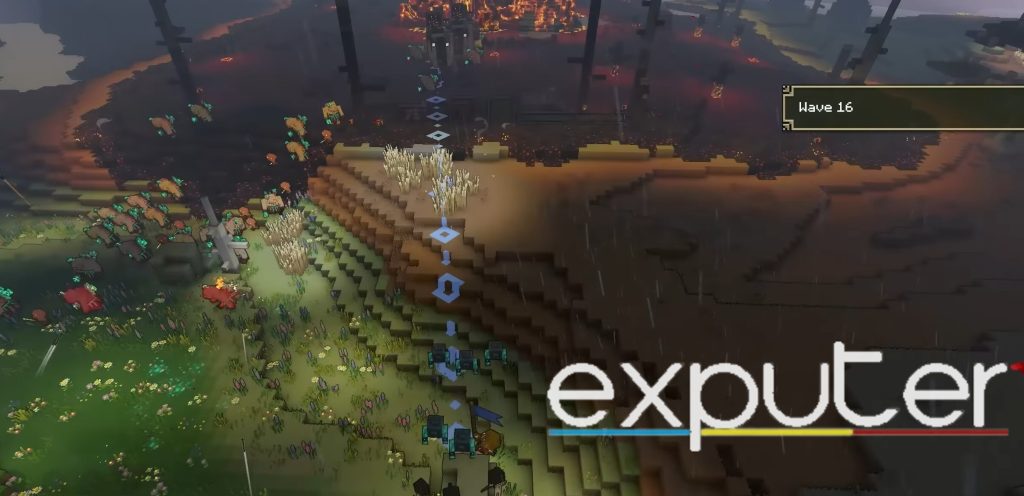
- At wave 16, the lava launchers will start to hoard in. Therefore, players should focus on sending out their grindstone golems toward them.

- The main reason for that is simply because the lava launchers can cause the most destruction.
Wave 17 Onwards
After wave 17 and onwards, players typically want to rinse and repeat the same thing that has been done for the first 17 waves.

- Plant as many scatter towers as possible.
- Focus on your line of defense, and send out grindstone golems to take care of the larger enemy units.
- Spawn more golems to fight and target them at the piglins.
- Bring in even more skeletons and grindstone golems.
Wave 20
The final wave might be the hardest one to deal with, but the main aim of the players should be to 100% just survive the wave and to ensure that all the piglins are done.
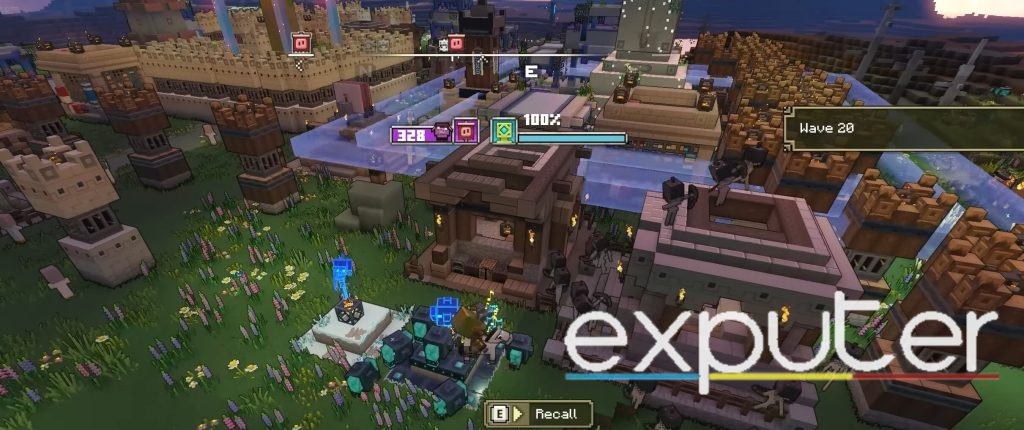
- Spawn more scatter towers, spawn more grindstone golems, build more kaboomery, and just ensure that everything dies.
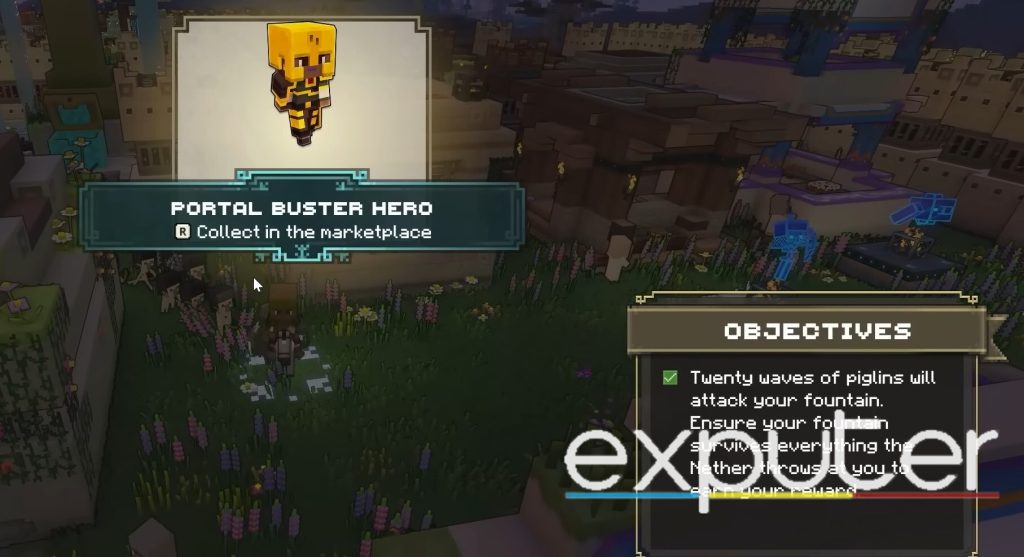
At the end of the wave, if you manage to survive it, you are rewarded with the Portal Buster Hero skin.
Summary
And there you have it! All that players need to know about the Minecraft Legends Portal Pile, and with that, I will wrap up my guide!
Next:
- Minecraft Legends: How To Unlock First Of Stone
- How To Get Gold In Minecraft Legends
- Minecraft Legends Villager Chest
- Minecraft Legends All Mounts
Thanks! Do share your feedback with us. ⚡
How can we make this post better? Your help would be appreciated. ✍