Stray Memory Locations: All 27 B-12 Items
The complete list of all the optional and mandatory memory collectible locations found in Stray.

There are over 27 total memory holograms that you can scan and collect in almost every location of Stray. However, it is worth pointing out that 5 of these memories are Story-based. This means that players can collect them automatically with story progression, so you cannot miss them at all.
Leaving behind only 22 optional memory locations that players will need to visit as well to get the trophy called “I Remember!” in Stray. The game is pretty linear in level design while only offering some minimal verticality and puzzles to solve.
So you should not have too much trouble scouring for these collectibles. The only ones that might give you a headache are the Badge locations in Stray, but luckily we have a guide covered for it too.
All information about the location of memories in Stray:
| Chapter | Memory # | Location |
|---|---|---|
| Chapter #3 | Memory 1 | Stray Flat 1 |
| Chapter #4 | Memory 1 | Robot's corpse on rooftop |
| Chapter #4 | Memory 2 | Companion portrait |
| Chapter #4 | Memory 3 | Inside the bar |
| Chapter #4 | Memory 4 | Momo's apartment |
| Chapter #4 | Memory 5 | Alleyway with graffiti |
| Chapter #4 | Memory 6 | Near Morusqe |
| Chapter #4 | Memory 7 | Elliot Programming apt. |
| Chapter #5 | Memory 1 | Rooftop |
| Chapter #5 | Memory 2 | Neco Corp construction site |
| Chapter #5 | Memory 3 | Automatic story reward |
| Chapter #7 | Memory 1 | Metal shutter |
| Chapter #7 | Memory 2 | Robot corpse |
| Chapter #7 | Memory 3 | Doc's living room |
| Chapter #8 | Memory 1 | Left split corridor |
| Chapter #8 | Memory 2 | Drainage hole |
| Chapter #9 | Memory 1 | Large machine |
| Chapter #9 | Memory 2 | Antvillage |
Chapter #3 The Flat
The flat is the third chapter of the game. It is here where you are first introduced to B-12. The companion of our orange stray cat in the game as well as the memory items that we will be hunting down. Let’s look at the first and only B-12 memory found in the chapter.
Memory #1
| Chapter | Chapter 3 |
| Location | Stray Flat 1 |
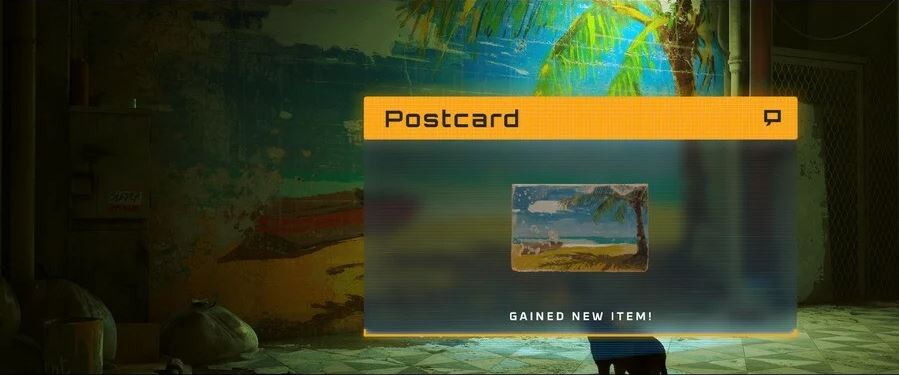
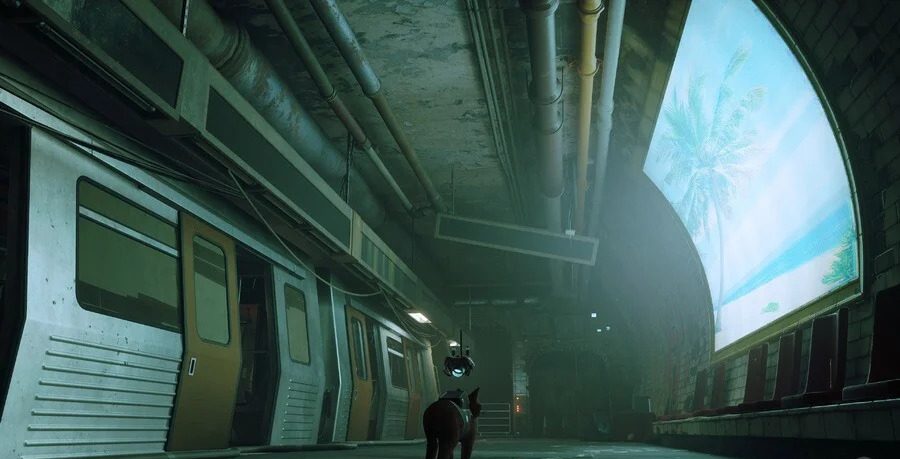
The entire chapter has only one automatic story-related fragment to collect. You will automatically scan it once you retrieve B-12 for the very first time. As you leave the flat via the Bucket elevator, you should eventually come across a Beach Mural along the main path of progression.
Here, the game will introduce you to the memory collectibles for the first time once B-12 is done reminiscing upon scanning it. You will receive a postcard upon successful scan and add it as a part of your first memory item in the log book, along with any future ones that you may find.
Chapter #4 The Slums
It is the fourth chapter in the game and takes place right after The Flat. You can find up to a total of 7 hidden memories, so keep your whiskers and eyes peeled for them as you follow the location guide for each one.
Memory #1
| Chapter | Chapter 4 |
| Location | Robot’s corpse on rooftop |
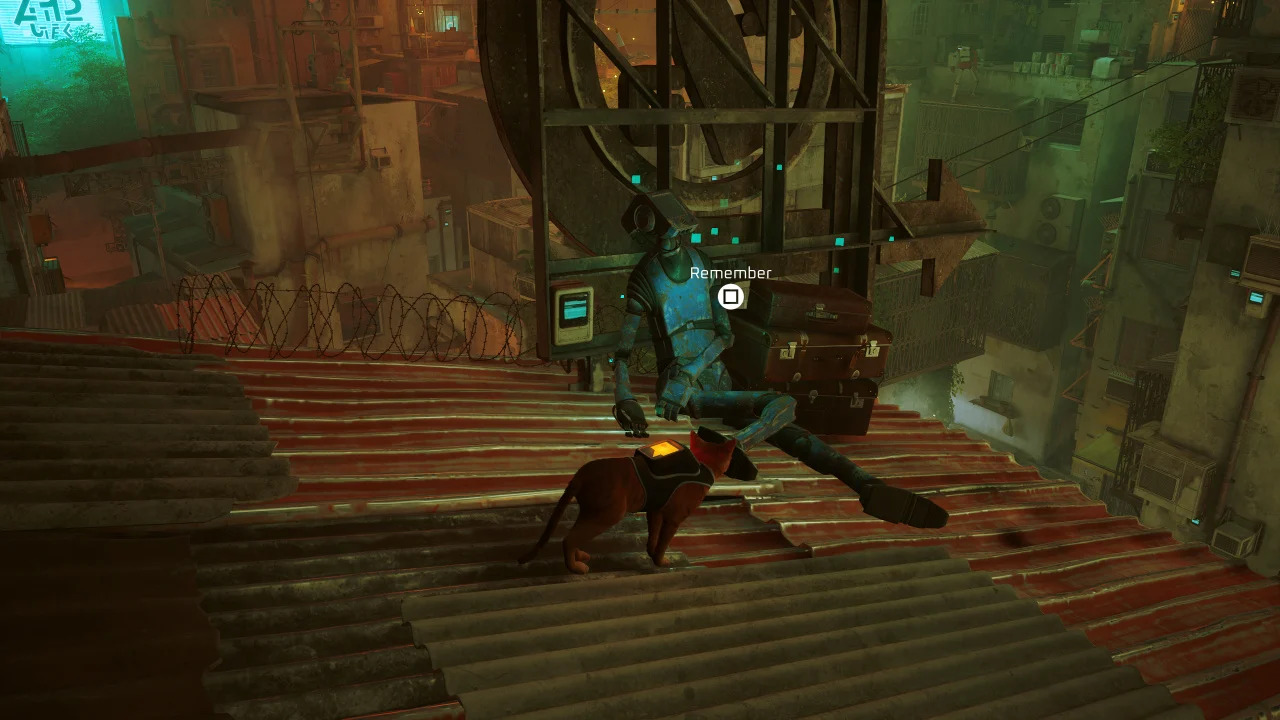
The 1st memory in the slums is found via a Robot’s corpse on a rooftop. You can search to collect it as you exit Clementine‘s Building in the chapter. From the Guardian NPC, turn around and look for a bar. It should have a very familiar Neon sign on top of the door to identify it easily.
Simply climb onto the roof of the building using the vents and the vending machine. You should be able to climb onto another ledge of a building on the left side. The rooftop with the dead robot body should be visible as it will have the Arrow Pointed sign on top of it as shown in the image above. Hop across from each rooftop until you reach the fragment so B-12 can scan it.
Memory #2
| Chapter | Chapter 4 |
| Location | Companion portrait |
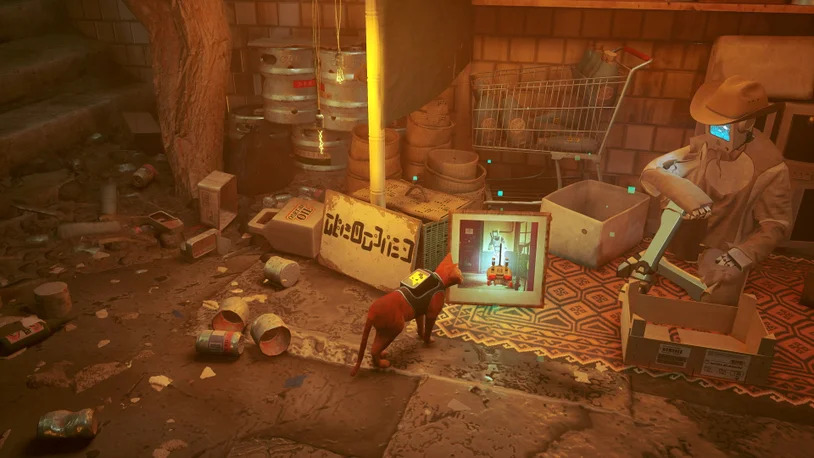
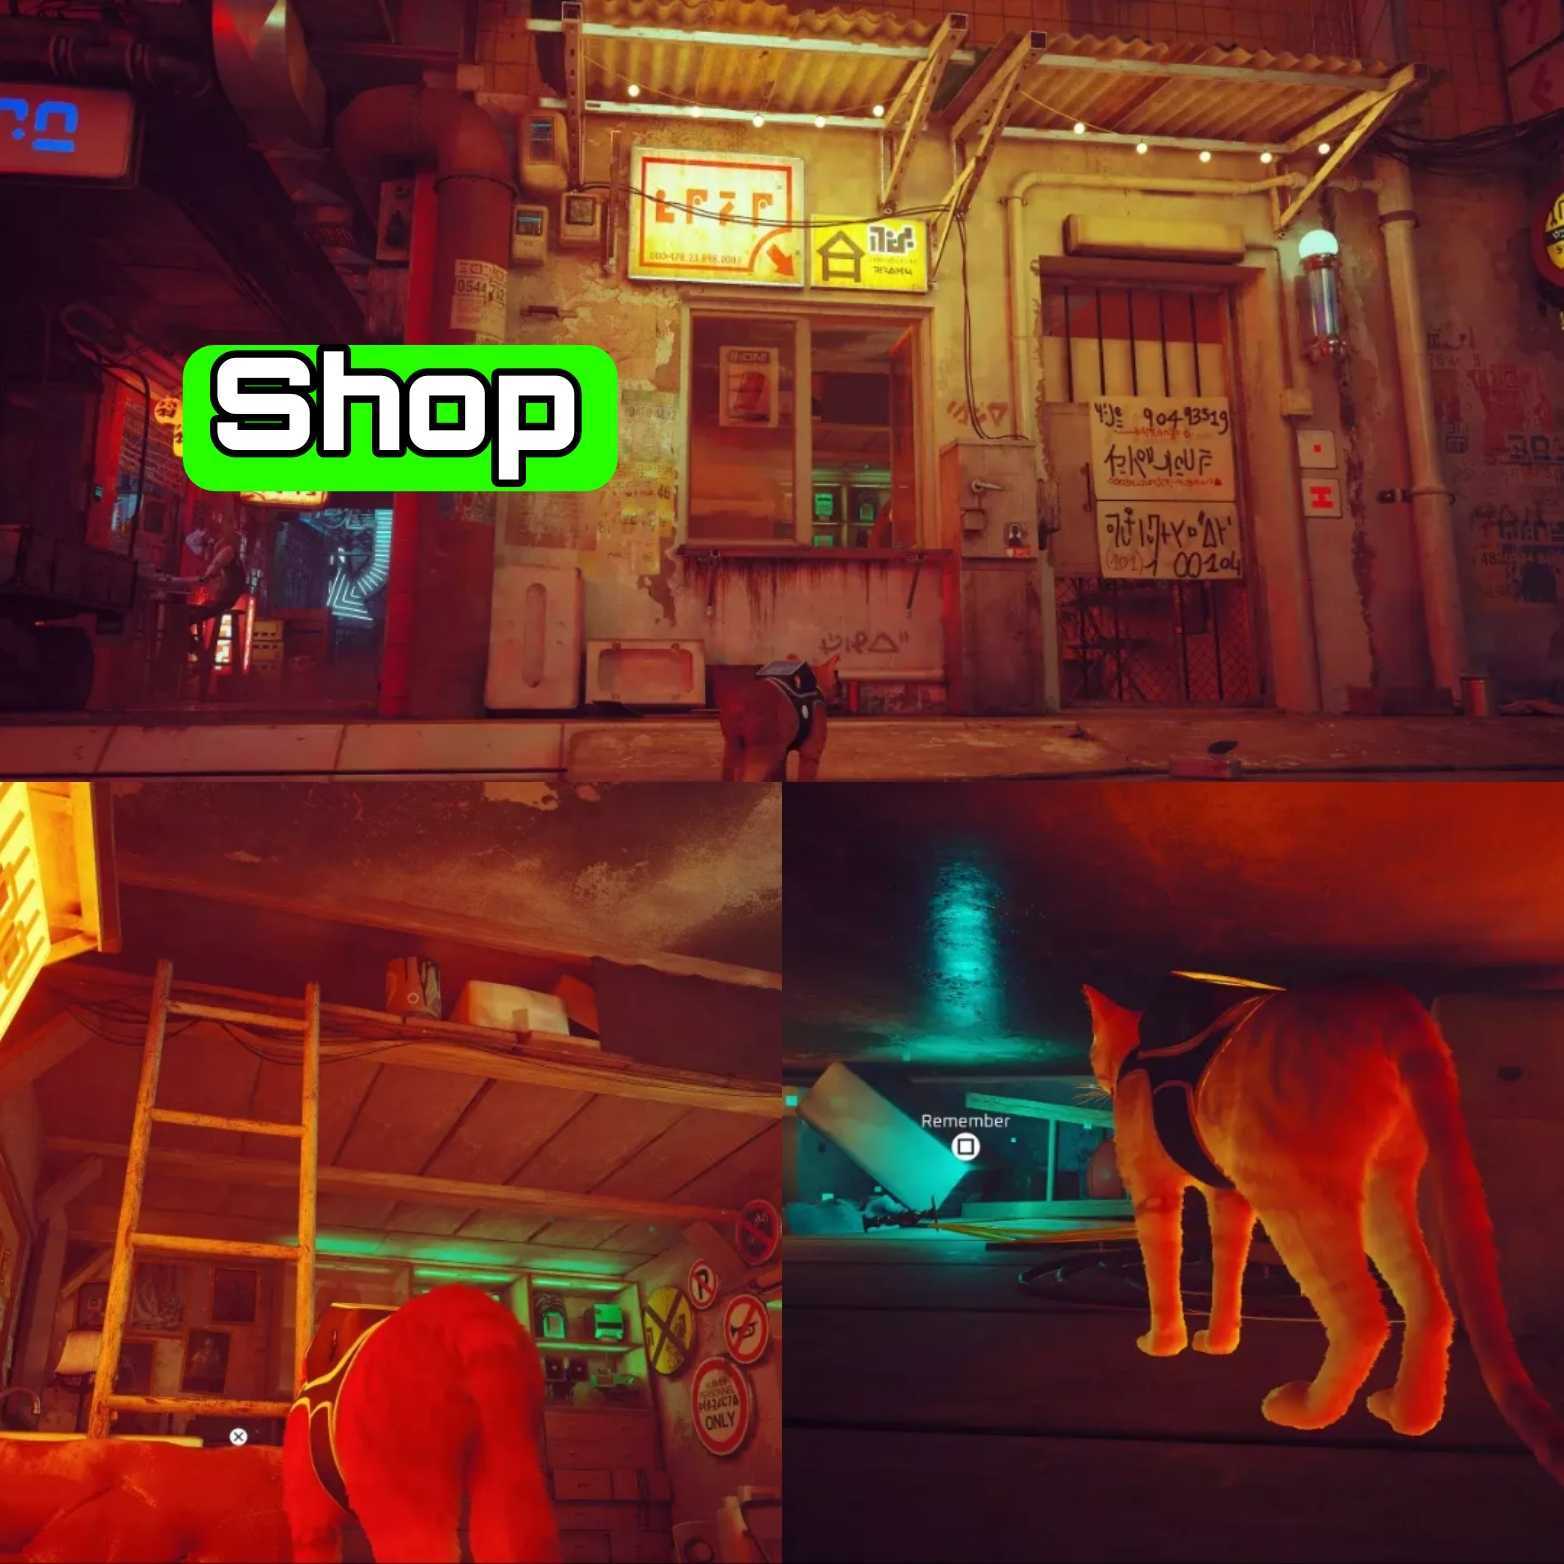
The second memory is a Companion portrait. Right next to the Guardian NPC is a merchant who is selling items for sale as shown in the image above. However, to be able to purchase it, you will need 3 Energy drink cans. It is also worth adding that you can purchase one of the Music Sheets in Stray from him too, which are the other collectibles.
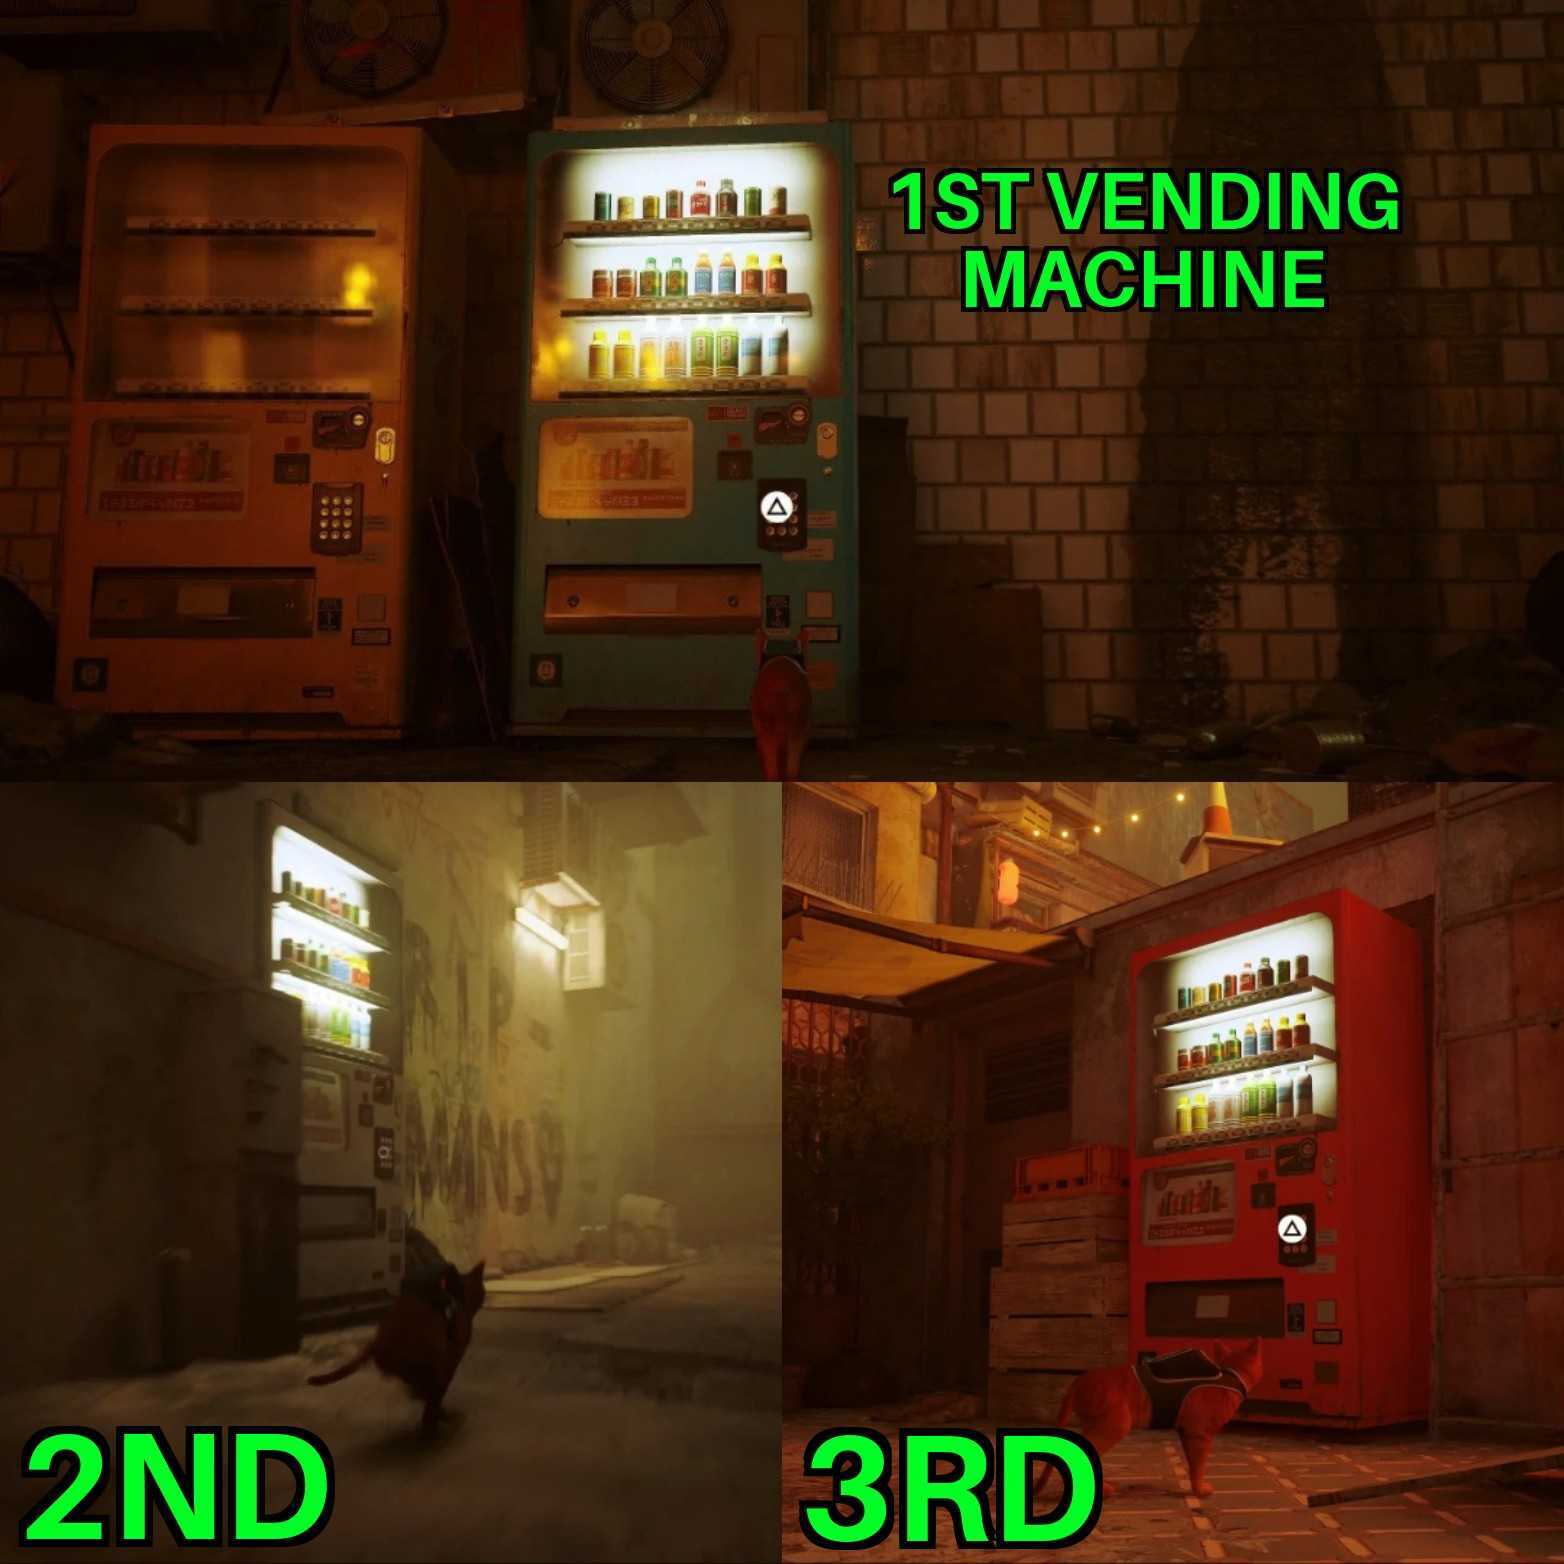
The energy drinks can all be found right here in the slums via the Vending machines. They are not too hard to locate and you will be prompted to receive a can with the button icon once you get close to one of them.
The first vending machine is to the left side of the Guardian, to the opposite side of Morusque. The second one is located up some stairs in a darkly lit alleyway that also has the 5th memory of the area right next to it. which we will mention in a bit.
Lastly, the third and final machine is a red one found on a rooftop veranda next to a sleeping robot. With all three energy drink cans, return to the merchant to reveal the portrait and receive the memory log. Speaking of which, we have a detailed guide on all the Energy Drink Locations in Stray.
Memory #3
| Chapter | Chapter 4 |
| Location | Inside the bar |
The memory is Robot Food. It can be found inside the bar as we previously mentioned with the first memory. The fragment is located on the 2nd floor of the building so you will need to get climb the stairs on the ground floor.
The stairs are just around the left-hand side of the bar interior. The memory will be a bowl with robot parts inside it sitting on a small table. Interact with it to complete the location for the third memory in stray.
Memory #4
| Chapter | Chapter 4 |
| Location | Momo’s apartment |
The fourth memory is pretty straightforward and does not require much searching. The memory is located in Momo’s apartment, which is coincidentally the next area you need to go to progress the story. You can find the apartment yourself, too, but we will describe it just in case you get stuck.
From our staff-wielding friend, the Guardian just turns around and heads down the steps. To the right, there should be a Super Spirit sign with the Dumpster chute to the left of it. Use it to jump across the rooftops and reach the apartment. You will know you are in the right direction if you see two robots throwing paint cans at each other.
The window to enter the apartment will be next to the robot that is on the highest level near a balcony. You will now be in Momo’s apartment and simply head back to one of the rooms and interact with the Video Game poster in the bedroom to receive the fourth memory.
Memory #5
| Chapter | Chapter 4 |
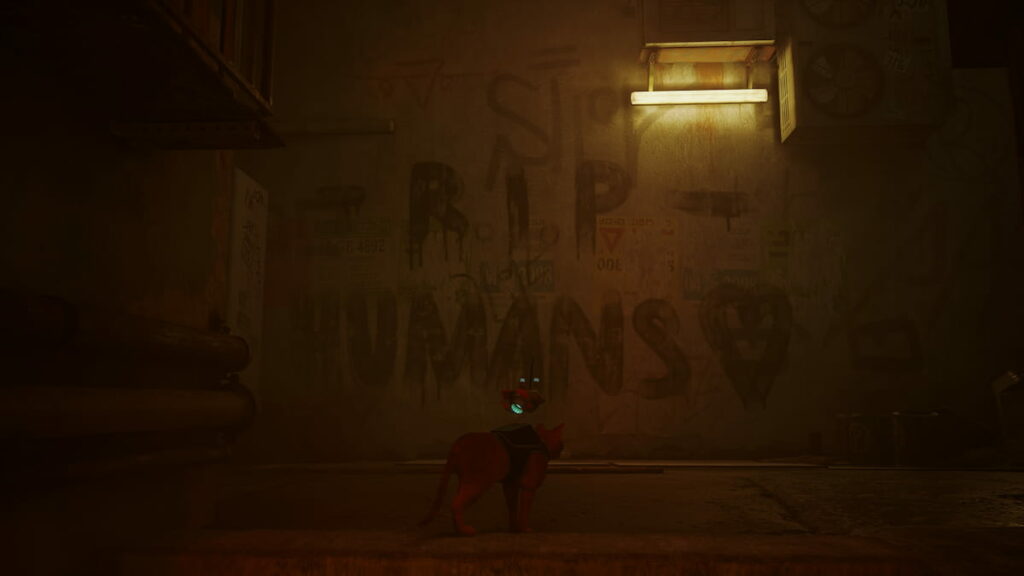
| Location | Alleyway with graffiti |
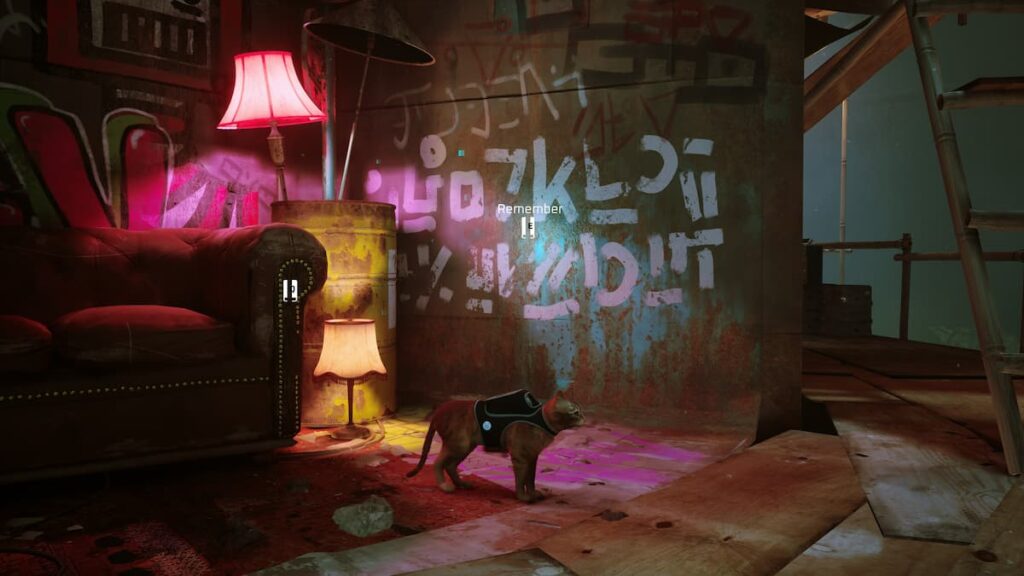
The fifth memory location is pretty simple to find on Stray. Just retrace your steps back to where we found one of the vending machines for the Portrait memory fragment. Specifically, we mean the steps in front of Guardian leading downwards. Head to the right side of the alleyway until you see a bright yellow light.
Between the alley, you will find stairs leading up to the Graffiti tag that you need to scan for the memory log. Approach it and scan it to receive the fifth memory for the slum chapter in the game.
Memory #6
| Chapter | Chapter 4 |
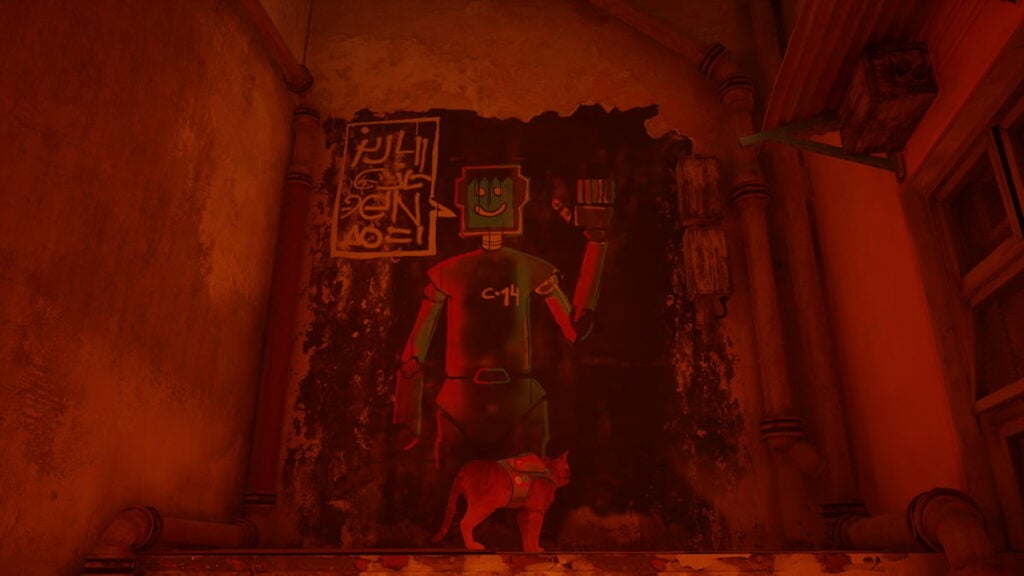
| Location | Near Morusque |
The memory is also in the main areas of the slums. Head to the left side of Guardian to find Morusqe, the music-playing robot. To the left of him, there is a small opening with AC vents under a red dimmed light. Simply climb up on the dumpsters to reach the ledge that has the artwork for the 6th memory log in the area.
Memory #7

| Chapter | Chapter 4 |
| Location | Elliot Programming apt. |
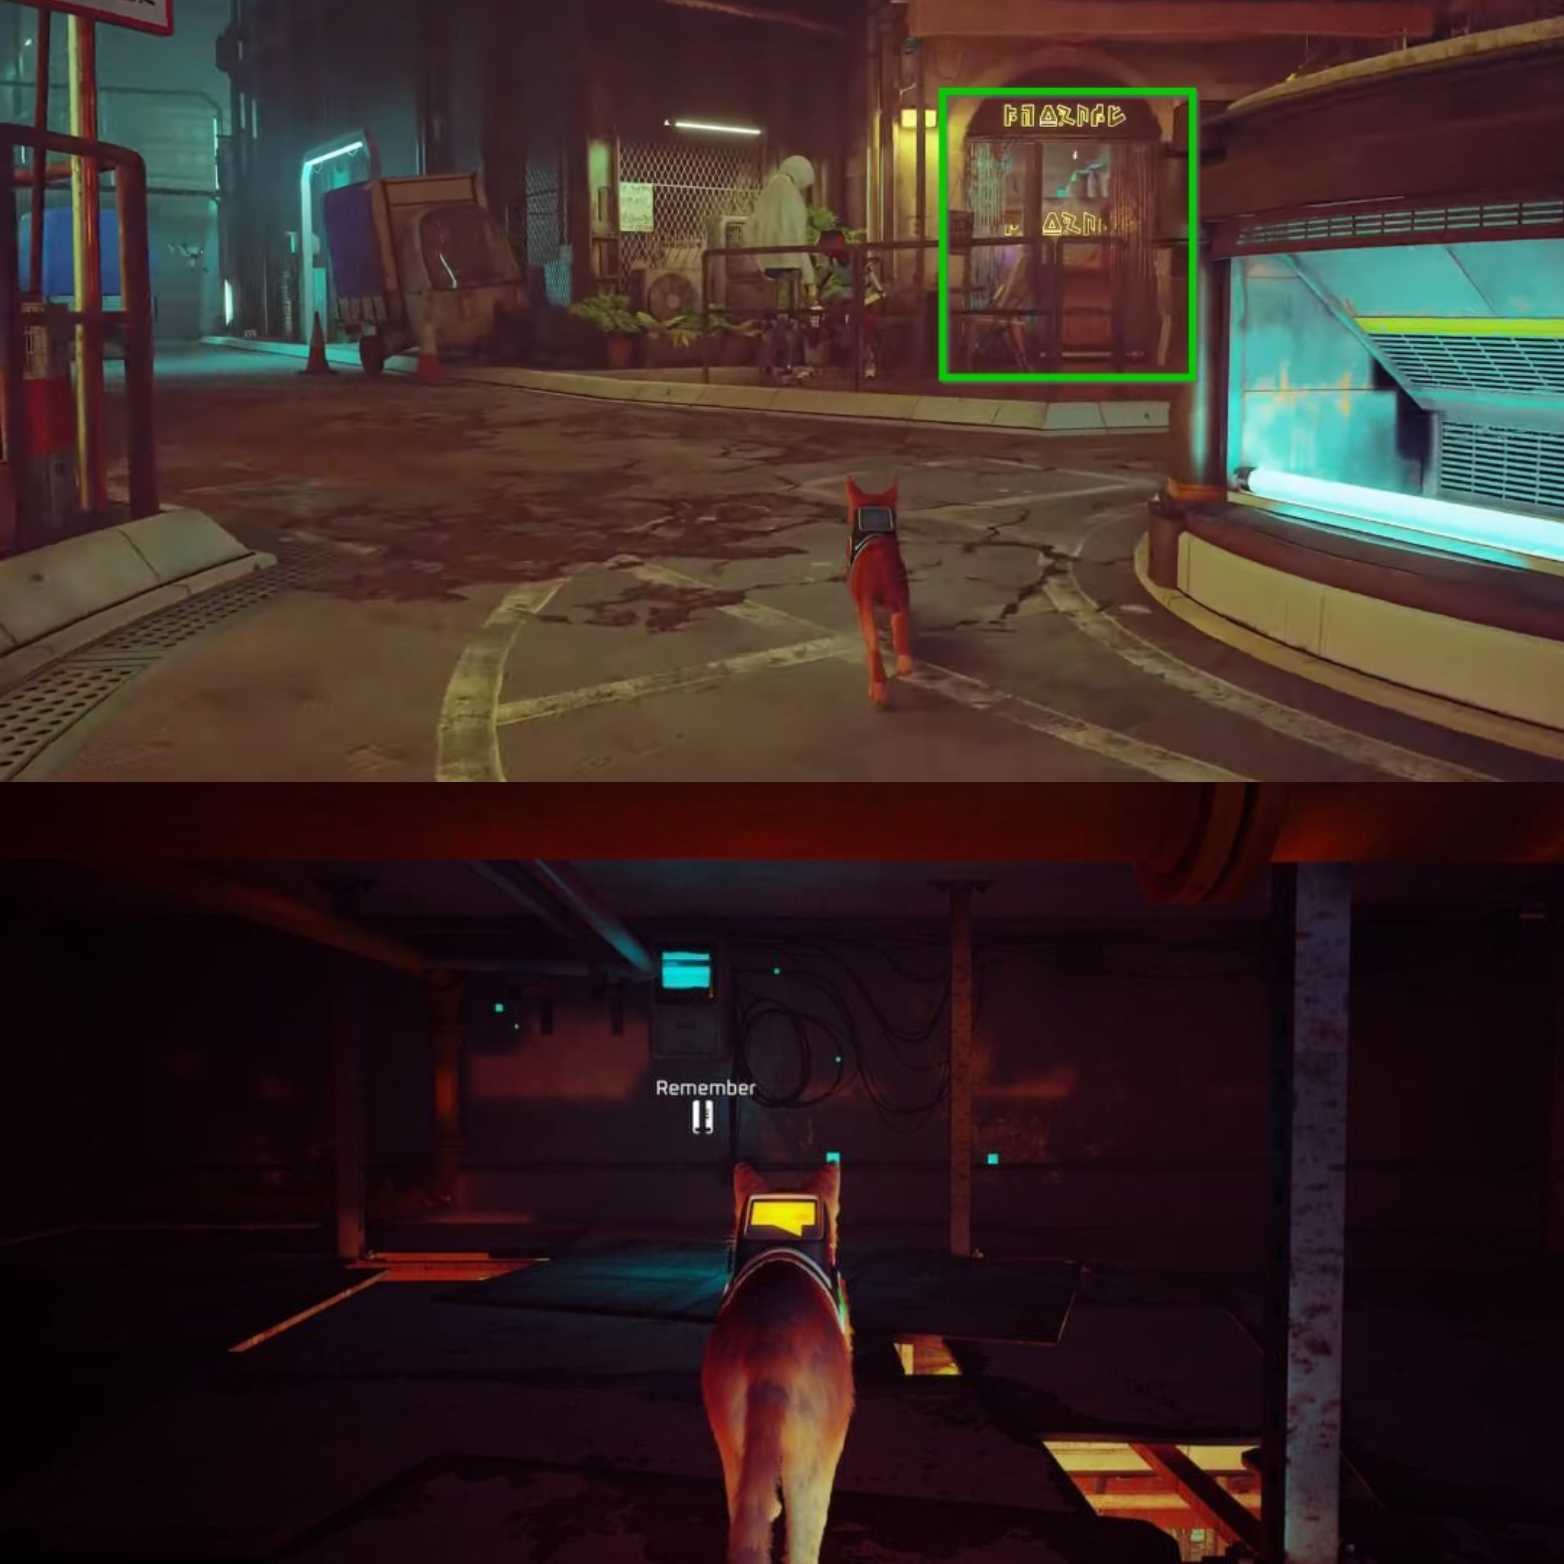
The final memory of the area is located in the “Elliot Programming” apartment. To reach you need to head back to the bar with the lounge we mentioned previously. But this time, go past it towards the left side, and you should spot stairs leading slightly upwards. Just on the right side is a red door with a tube light glowing above it.
Approach it, and you should have the option to translate and scratch the door. The door will then open for you to enter by a robot resident. Here, head upstairs from the first floor to find a potted plant memory. It is one of the seventh and final memory locations to be found in the Slums area in Stray for the PC and PS5.
Chapter #5 Rooftops
As you exit Momo’s apartment, the main objective now will be to head to the large building in the far-off distance with the glowing orange lights. But before you get to it, you will need to stay wary of the Zurk bugs. These are the same bugs that chased you in swarms during the opening chapters of the game.
There are only three memory locations that you need to discover in the Rooftop chapter of Stray. Just be careful that you do not run into any of the bugs while collecting them, as we mentioned.
Memory #1
| Chapter | Chapter 5 |
| Location | Rooftop |
The memory is pretty simple enough as it is hard to miss it when you pass by it. Continue in the game until you have dealt with the 2nd Zurks encounter of the chapter. After you have avoided them, you will now come across a large pipe to cross over. You will have no other choice but to continue to hop onto the Rooftops.
Once you reach a brand new rooftop, the red sign with the memory should be directly in front of you. Scan it to receive the first memory of the Rooftops chapter in the game.
Memory #2
| Chapter | Chapter 5 |
| Location | Neco Corp construction site |
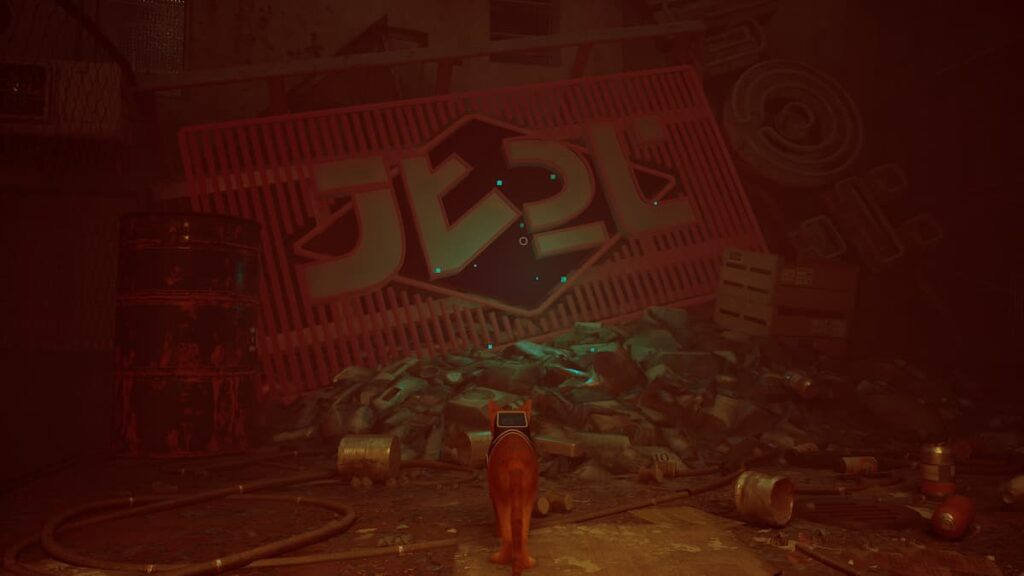
The memory is found a little later in the chapter. You will know you are close to it once you reach where you have to knock over a piece of wooden plank to get into the Neco Corp construction site.
Keep moving forward once you enter the building until you spot some zurks locked in a cage. Head to the right side of the cage with the switch on it. But before you even interact with it, head straight as shown in the image above. Jump up the barrier and you should be able to spot a Neco Corp sign with the 2nd memory to scan it.
Memory #3
| Chapter | Chapter 5 |
| Location | Automatic story reward |
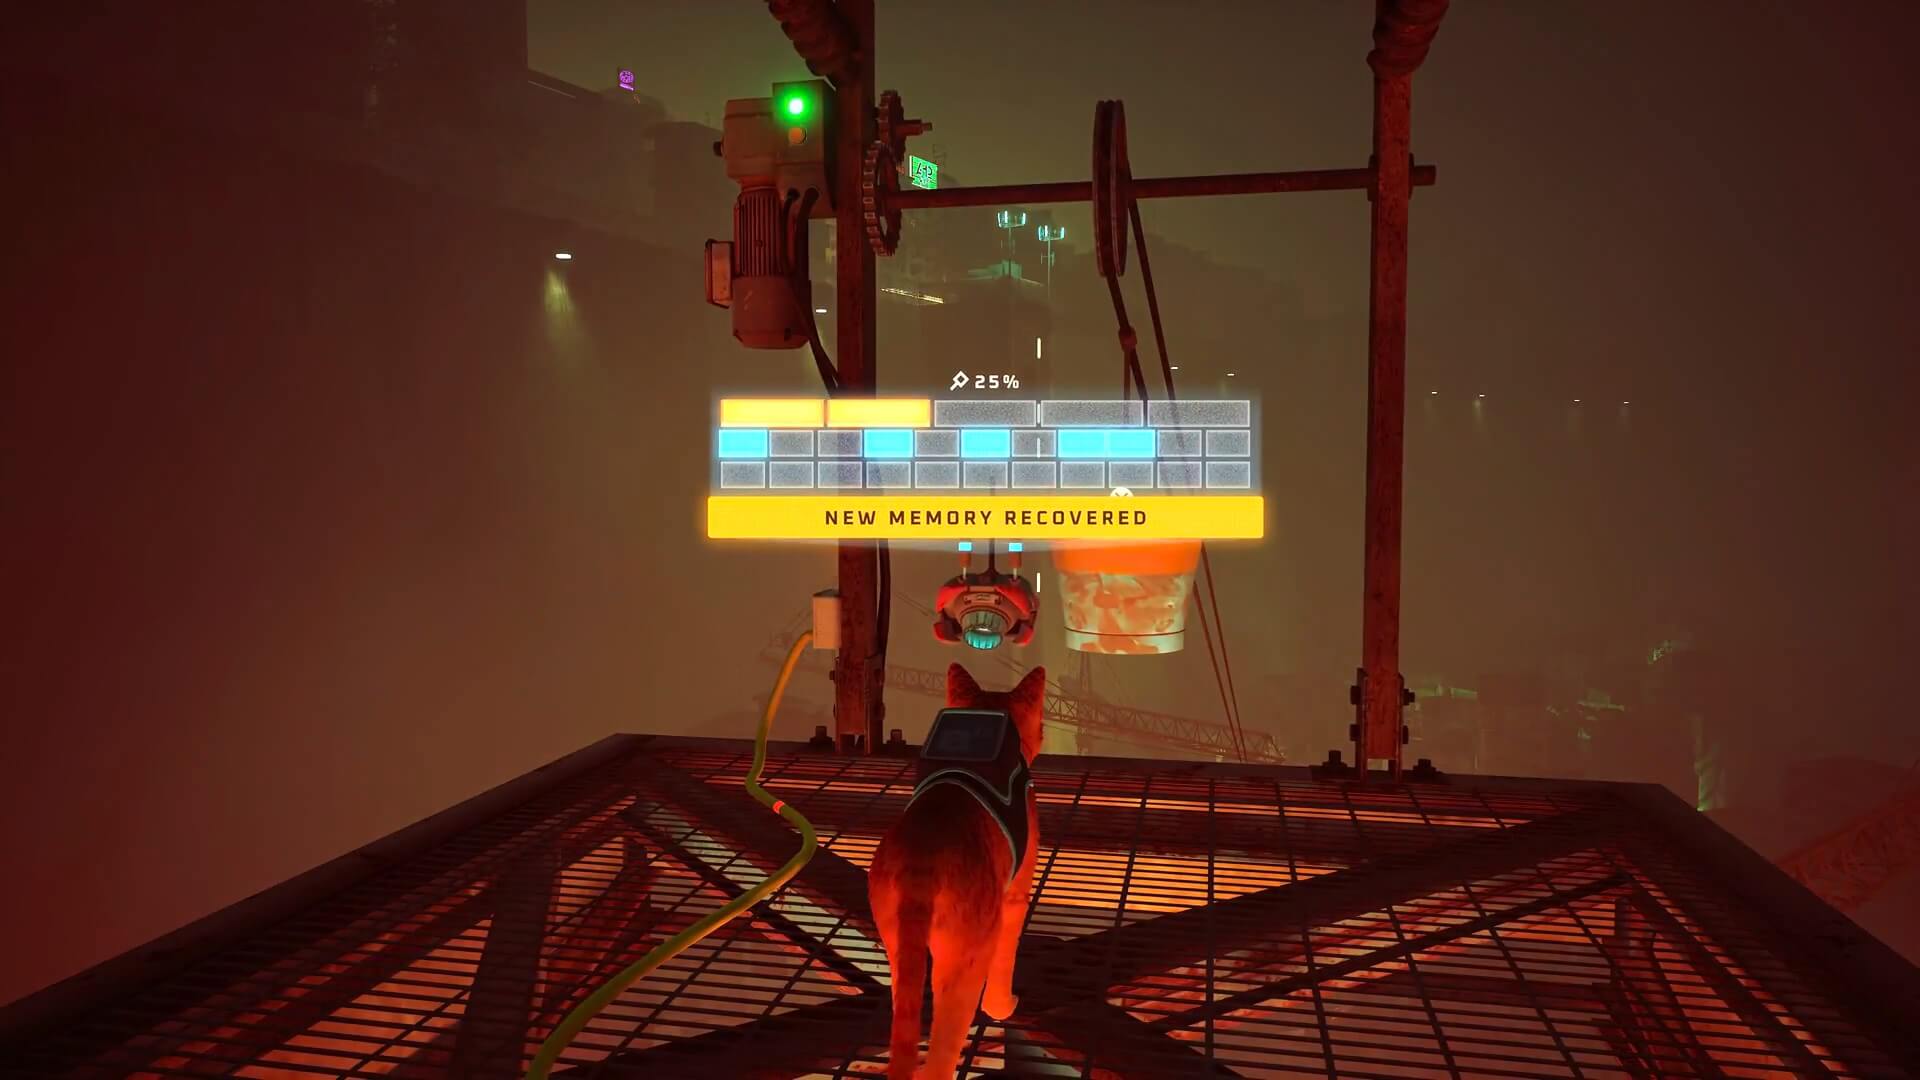
The final and third memory of the rooftops chapter is an automatic story reward. You will receive it upon successfully installing the transceiver with B-12 at the top of the Antenna after a short cutscene from B-12. If by chance it does not count due to some glitch or bug, we recommend resetting the checkpoint.
Chapter #7 Dead End
There are no memory locations to be found in Part 2 of the Slums in Stray. So we are skipping that chapter and moving straight to the seventh chapter, Dead End. It takes place in a foliage-heavy sewer maintenance-type area. As always we highly recommend being wary of the Zurks that will chase you in this chapter. There are only three memory logs to be found in the whole chapter.
Memory #1

| Chapter | Chapter 7 |
| Location | Metal shutter |
The first memory of the chapter can be missable by a few players. Before the chapter begins, Seamus the Robot opens up the doors for you. Keep heading forward until you spot on the left side.
Heading to the right will begin the Dead End chapter officially so do not jump down the slide just yet. Near the Van is a metal shutter with the memory hologram ready to be scanned on it.
Memory #2
| Chapter | Chapter 7 |
| Location | Robot corpse |
The following memory fragment can be found laying on a robot corpse. Progress normally through the chapter until you finish the 1st chase sequence of the Zurk bugs. You will crash and to recover, you must climb onto some pipes to reach proper ground level.
Once you continue from here, you should see the main path leading leftwards with a broken metal fence in front of you on the straight end. Head through the fence instead and if you look to the right side, the robot corpse should be in front of you. Approach and scan it to receive the 2nd memory of the Dead End location in Stray.
Memory #3
| Chapter | Chapter 7 |
| Location | Doc’s living room |
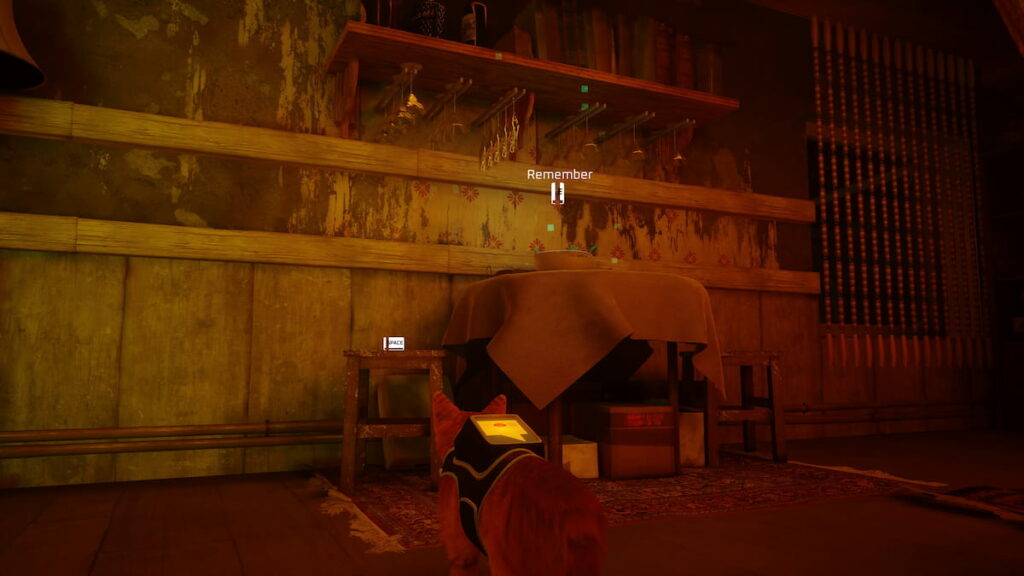
The memory is pretty self-explanatory, as you can see in the image above. You will find yourself in a Doc apartment. The memory is of the mannequin with a bucket on his head in his living room. You will reach the location once you fix a generator, and you will be able to cross a broken metal bridge into the house by following a wire.
Once you enter the residence, head downstairs and meet the Doc for the first time. Behind him, you should be able to spot the Mannequin and scan it for the final memory of the Dead end chapter in the game.
Chapter #8 The Sewers
“The Sewers” is the eighth chapter in the game. It takes place directly after Dead End and involves you heading back to the Slums and navigating with Momo towards the Sewers to find a path through to Ant Village. There are only two memory holograms you need to collect in the sewer of Stray. However, they can be tricky to find.
Memory #1
| Chapter | Chapter 8 |
| Location | Left split corridor |
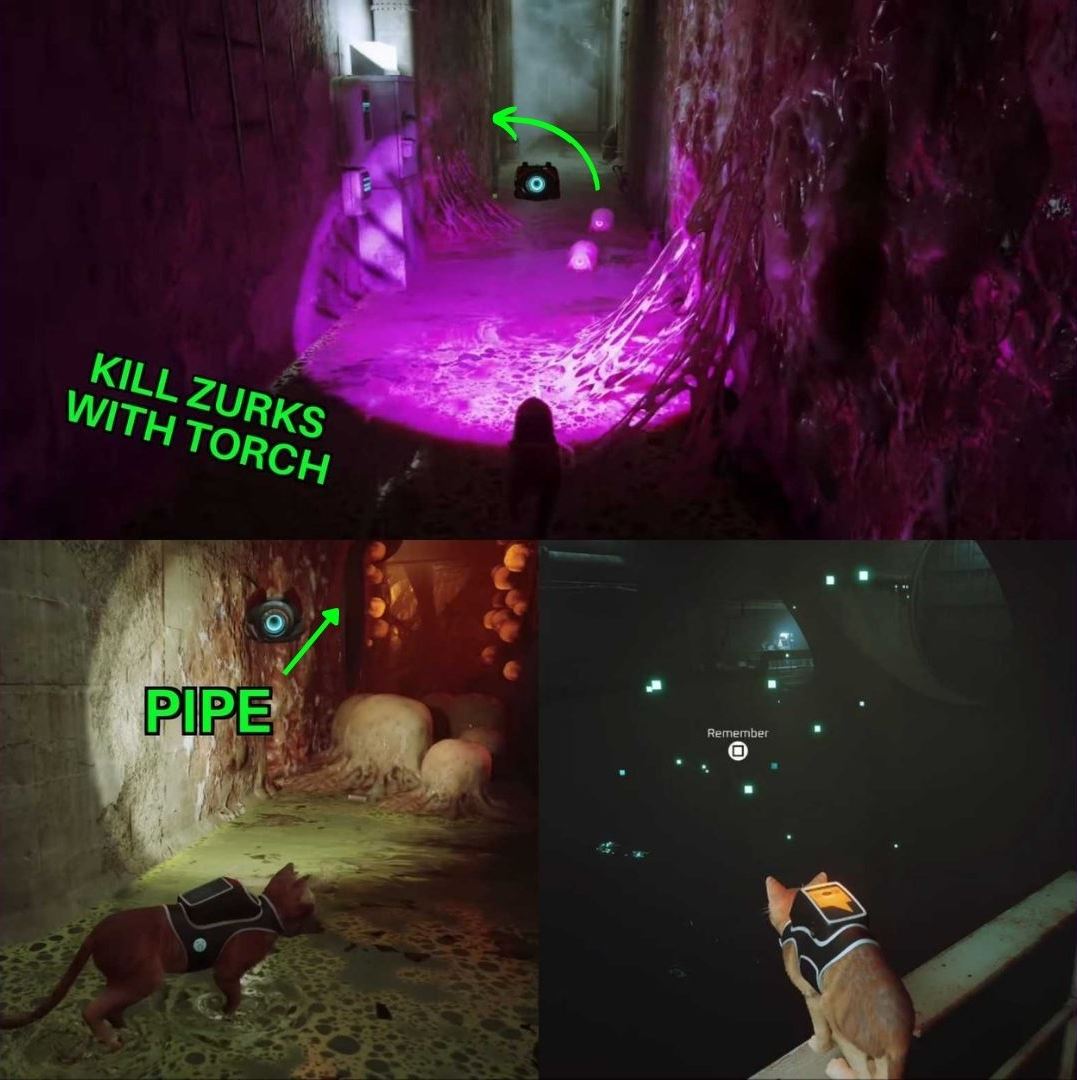
At one point during the chapter, Momo will open up a metal door and leave you alone to deal with the Zurks. These bugs will be inside their nests in a tight corridor. You will first need to flush them out with the UV-like Torch ability of B-12 and exterminate them.
However, As shown in the image above, keep your eye on the left turn of the corridor where there is a split. The memory is missable due to it being hidden in a pipe way on the left side of the pathway. It should be easily noticeable due to the hole on the wall of it on the left split corridor.
Now simply torch all of the Zurk hatchlings on the left side and climb into the pipe as you can see in the image we provided. Follow it along until you emerge to a guardrail. Jump on it and the first sewer memory in Stray should be accessible to scan as soon as you perch on the railing.
Memory #2
| Chapter | Chapter 8 |
| Location | Drainage hole |
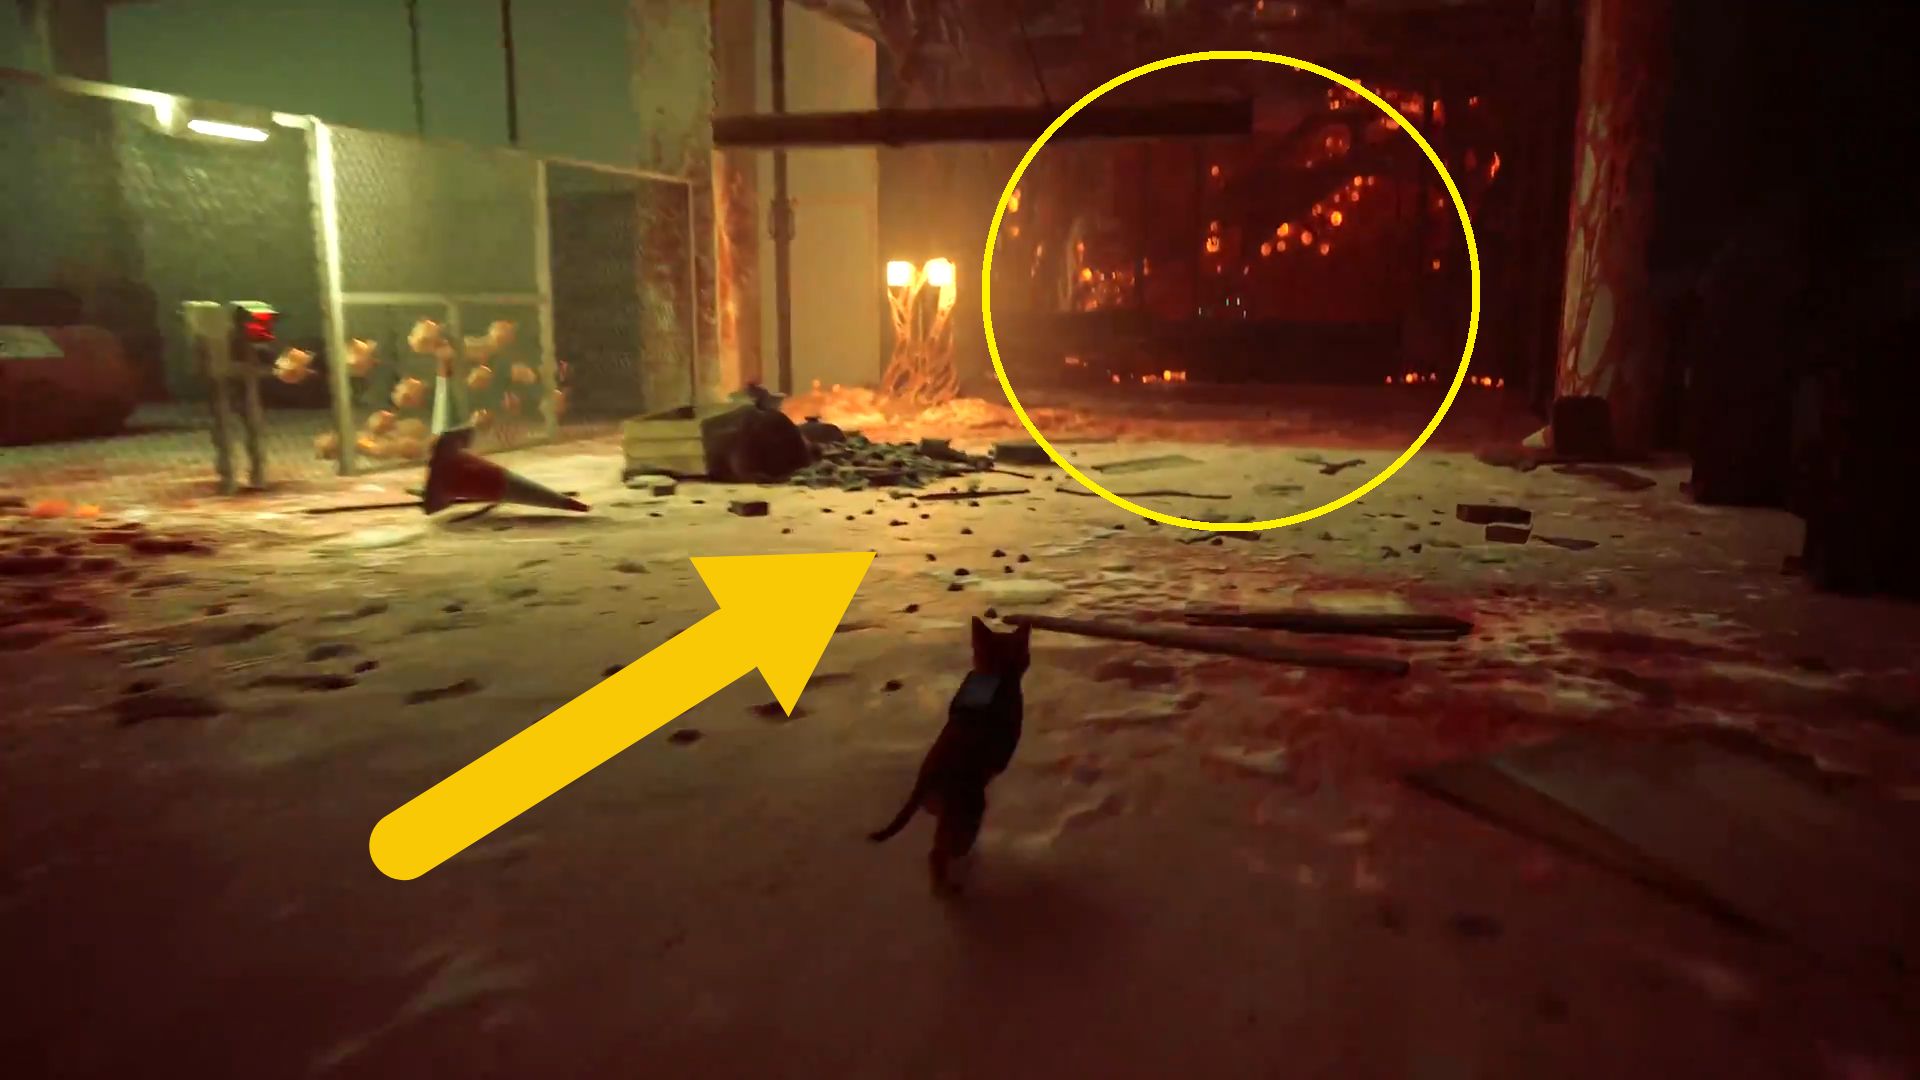
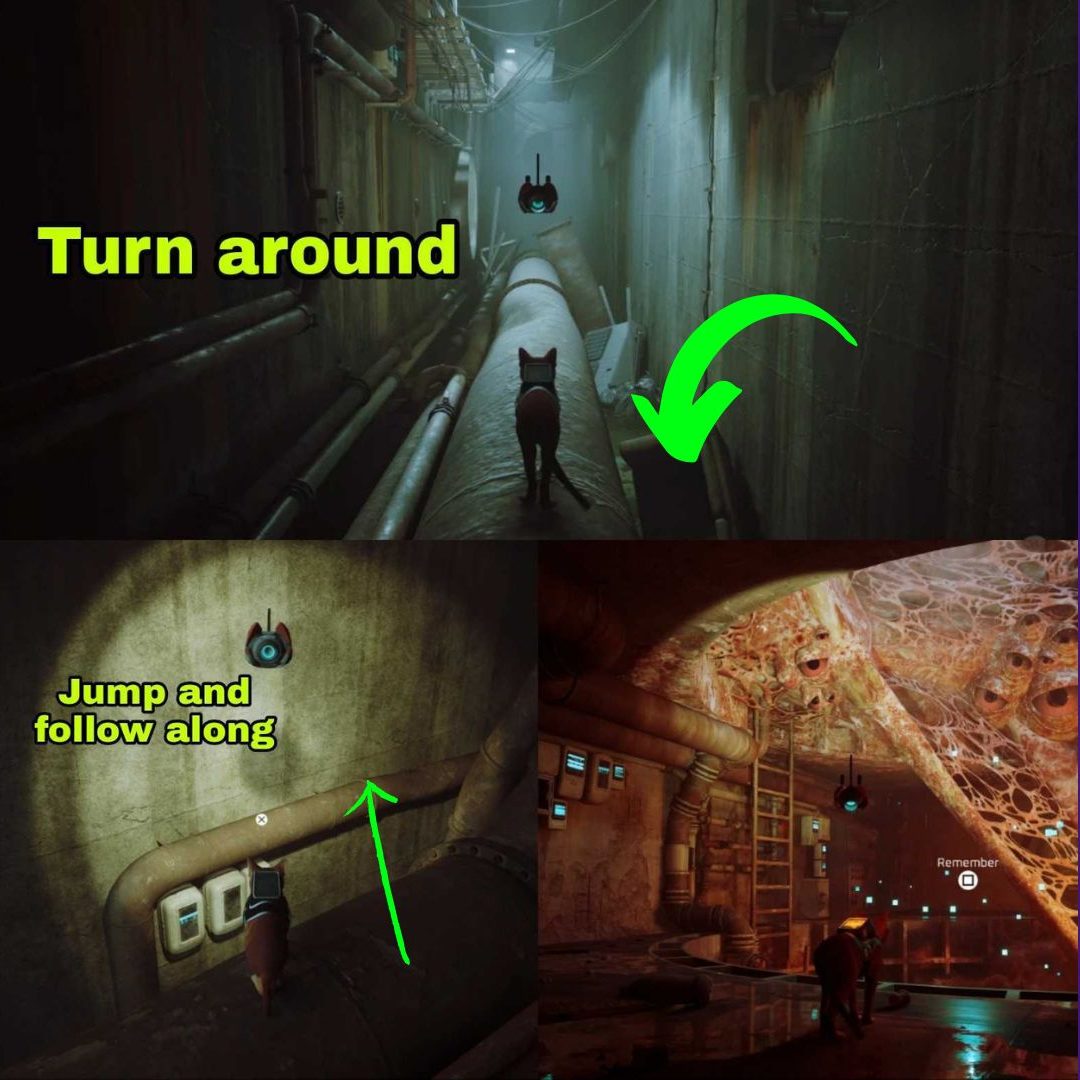
The following memory can also be easily missed if players do not pay attention to their surroundings. Once you complete the sequence of some exploding zurk nests you will find yourself jumping out of a drainage hole onto some pipes to get out of harm’s way.
It is here where you need to look to the left or turn around if you are facing the right side as shown in the image above. Follow along the pipe and you should be able to climb onto another smaller pipe like the one in the image that we provided.
Jump on it and right across another barrel platform and into another drainage hole, you should find yourself at the 2nd and last sewer memory location in Stray which is a bunch of horrendous-looking eyes nests, presumably the cause behind the infestation of Zurks.
Chapter #9 Antvillage
The Antvillage is home to various robots. You will exit here right after the barricaded entrance in the sewers. You will be greeted by another Guardian Robot at the entrance of the area. There are only two memories to be found here and they are relatively simple enough to locate, unlike in the previous chapter.
Memory #1
| Chapter | Chapter 9 |
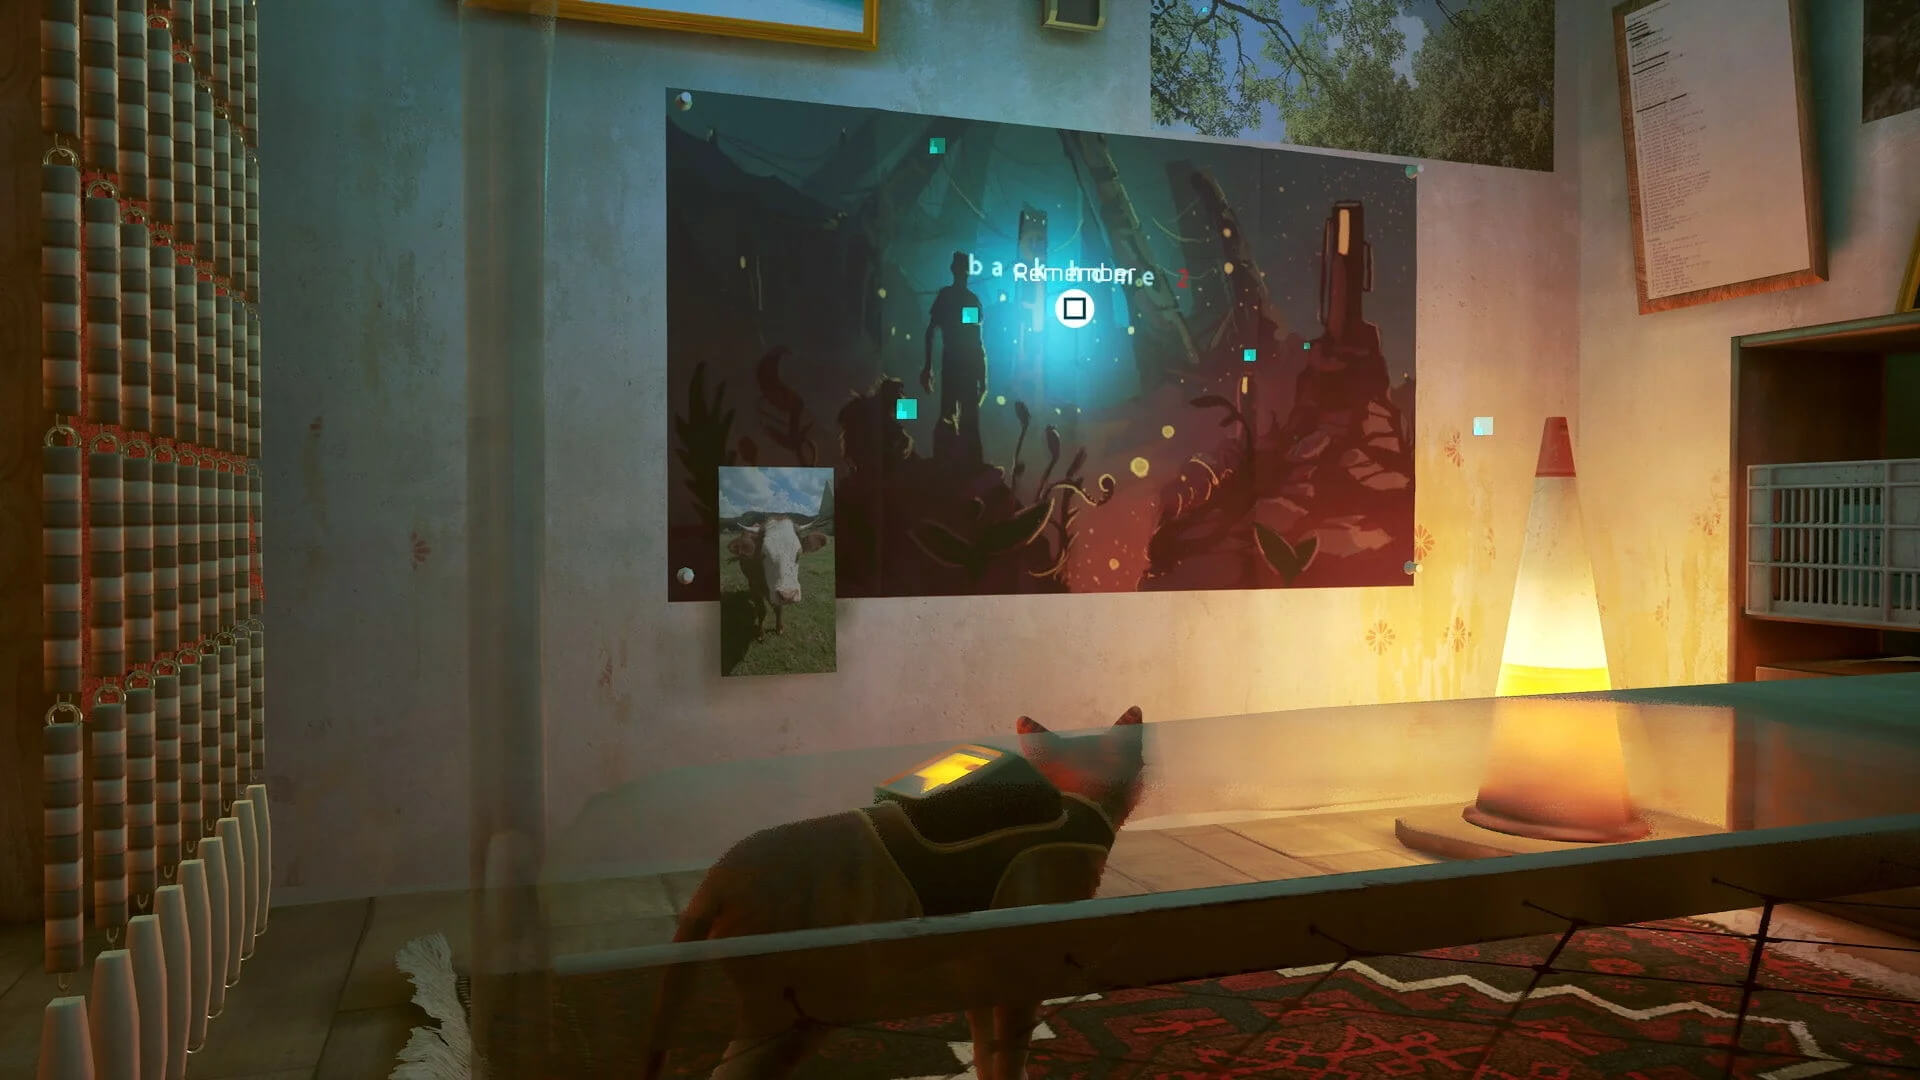
| Location | Large machine |
The first memory is another one that is automatically unlocked by story progression. As you cross the village, you and B-12 will come across another large machine in the image above. It is like the one you saw in The Flat Chapter where the Cat meets it for the first time. Upon scanning it B-12 will unlock a major memory of its past.
Memory #2
| Chapter | Chapter 9 |
| Location | Antvillage |
The 2nd memory is straightforward to locate. It is found pretty much located right after you collect the automatic story one we mentioned previously. Climb onto the ladder and you should reach a walkway with two robots playing a game of Mahjong with each other at a table.
Look for a second ladder leading upwards, you should identify it easily if you see a guardian robot sitting on a couch just nearby it. Just to the right of it is the 2nd memory log which is a graffiti tag. It is the last memory log of the entire chapter so do not worry about trying to find more in the area.
Chapter #10 MidTown
Midtown is one of the major areas of the game alongside The Slums. It is the tenth chapter of the game. You enter it as soon as you exit the Subway station. It is a bit layered to an extent so you will have to keep your cat reflexes sharp to be able to locate the total of 7 memories in the vicinity.
Memory #1
| Chapter | Chapter 10 |
| Location | A big subway station, before Midtown |
Once you have exited the Antvillage, you will enter a big subway station. Before you even enter Midtown, here you will automatically receive the first story memory from B-12. So it is unmissable.
Memory #2
| Chapter | Chapter 10 |
| Location | The bookshelf |
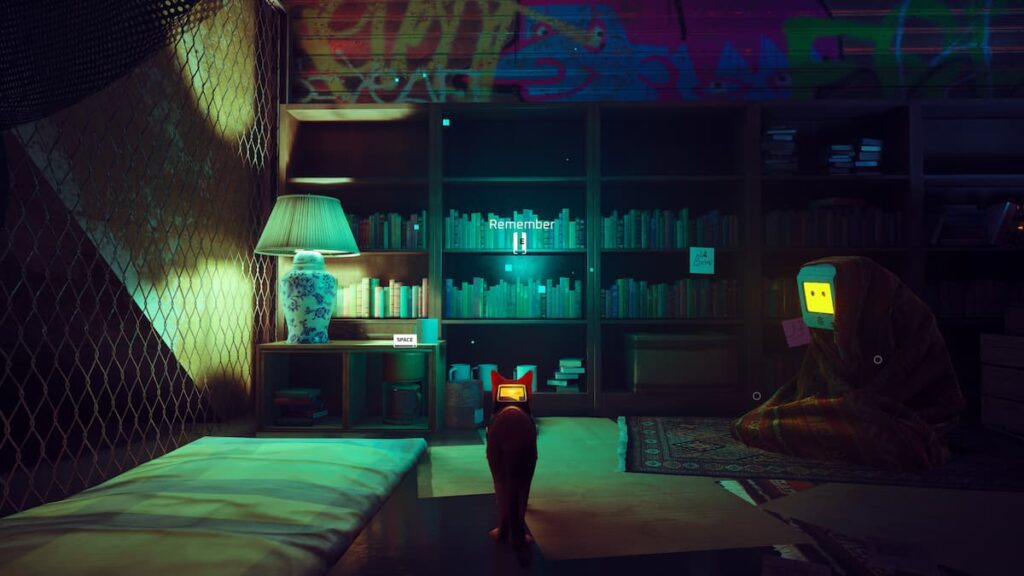
The 2nd memory will be well along your way as you exit the Subway station. At the point where you need to go up an escalator and crawl out of a fence mesh hole, instead of going forward look to the right side after emerging from the wire fence for a mini residence.
Here you will find a friendly Robot cozying up in his blanket as well as the 2nd memory on the bookshelf for you to scan and add to your collection.
Memory #3
| Chapter | Chapter 10 |
| Location | Alleyroof |
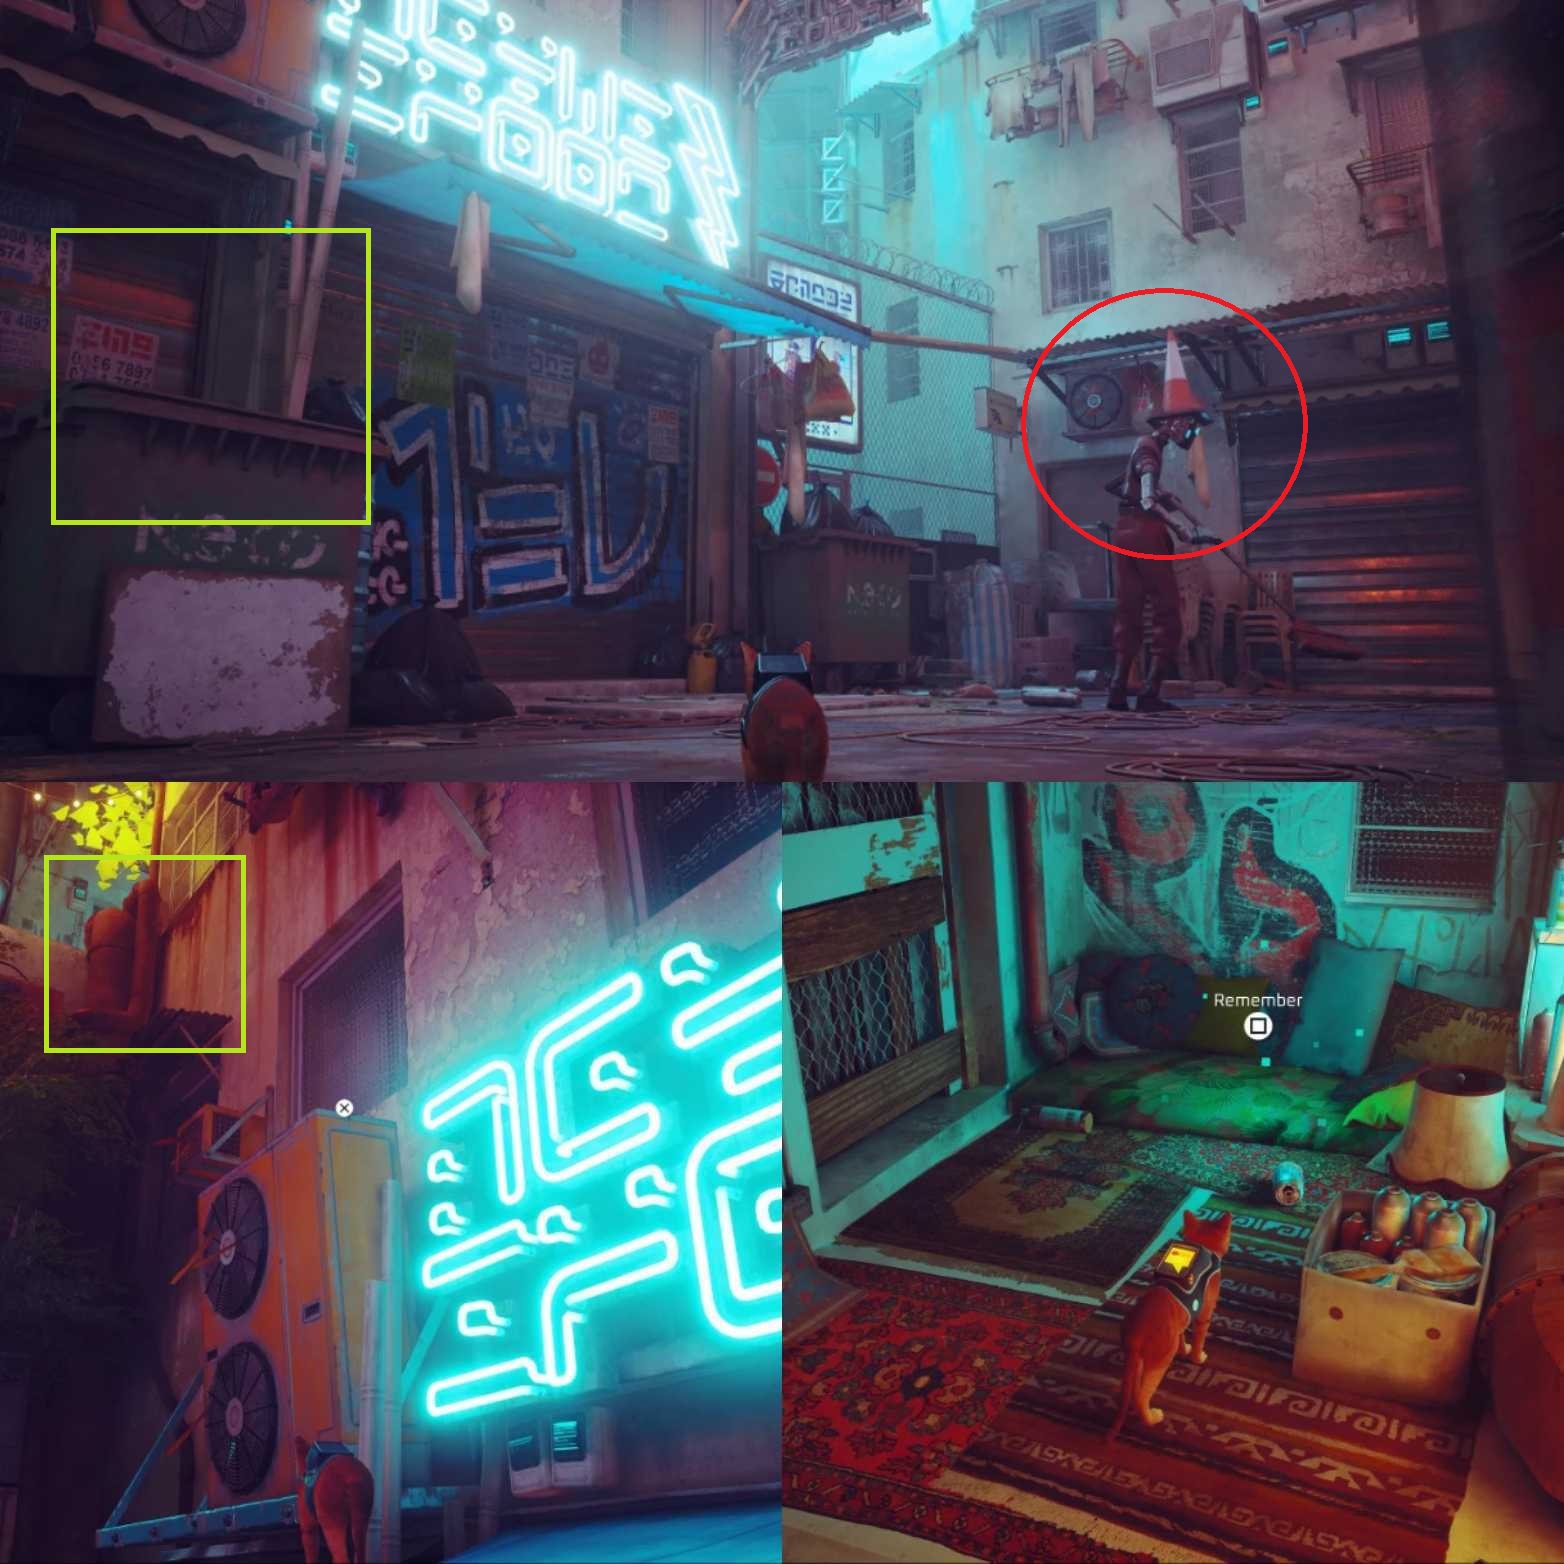
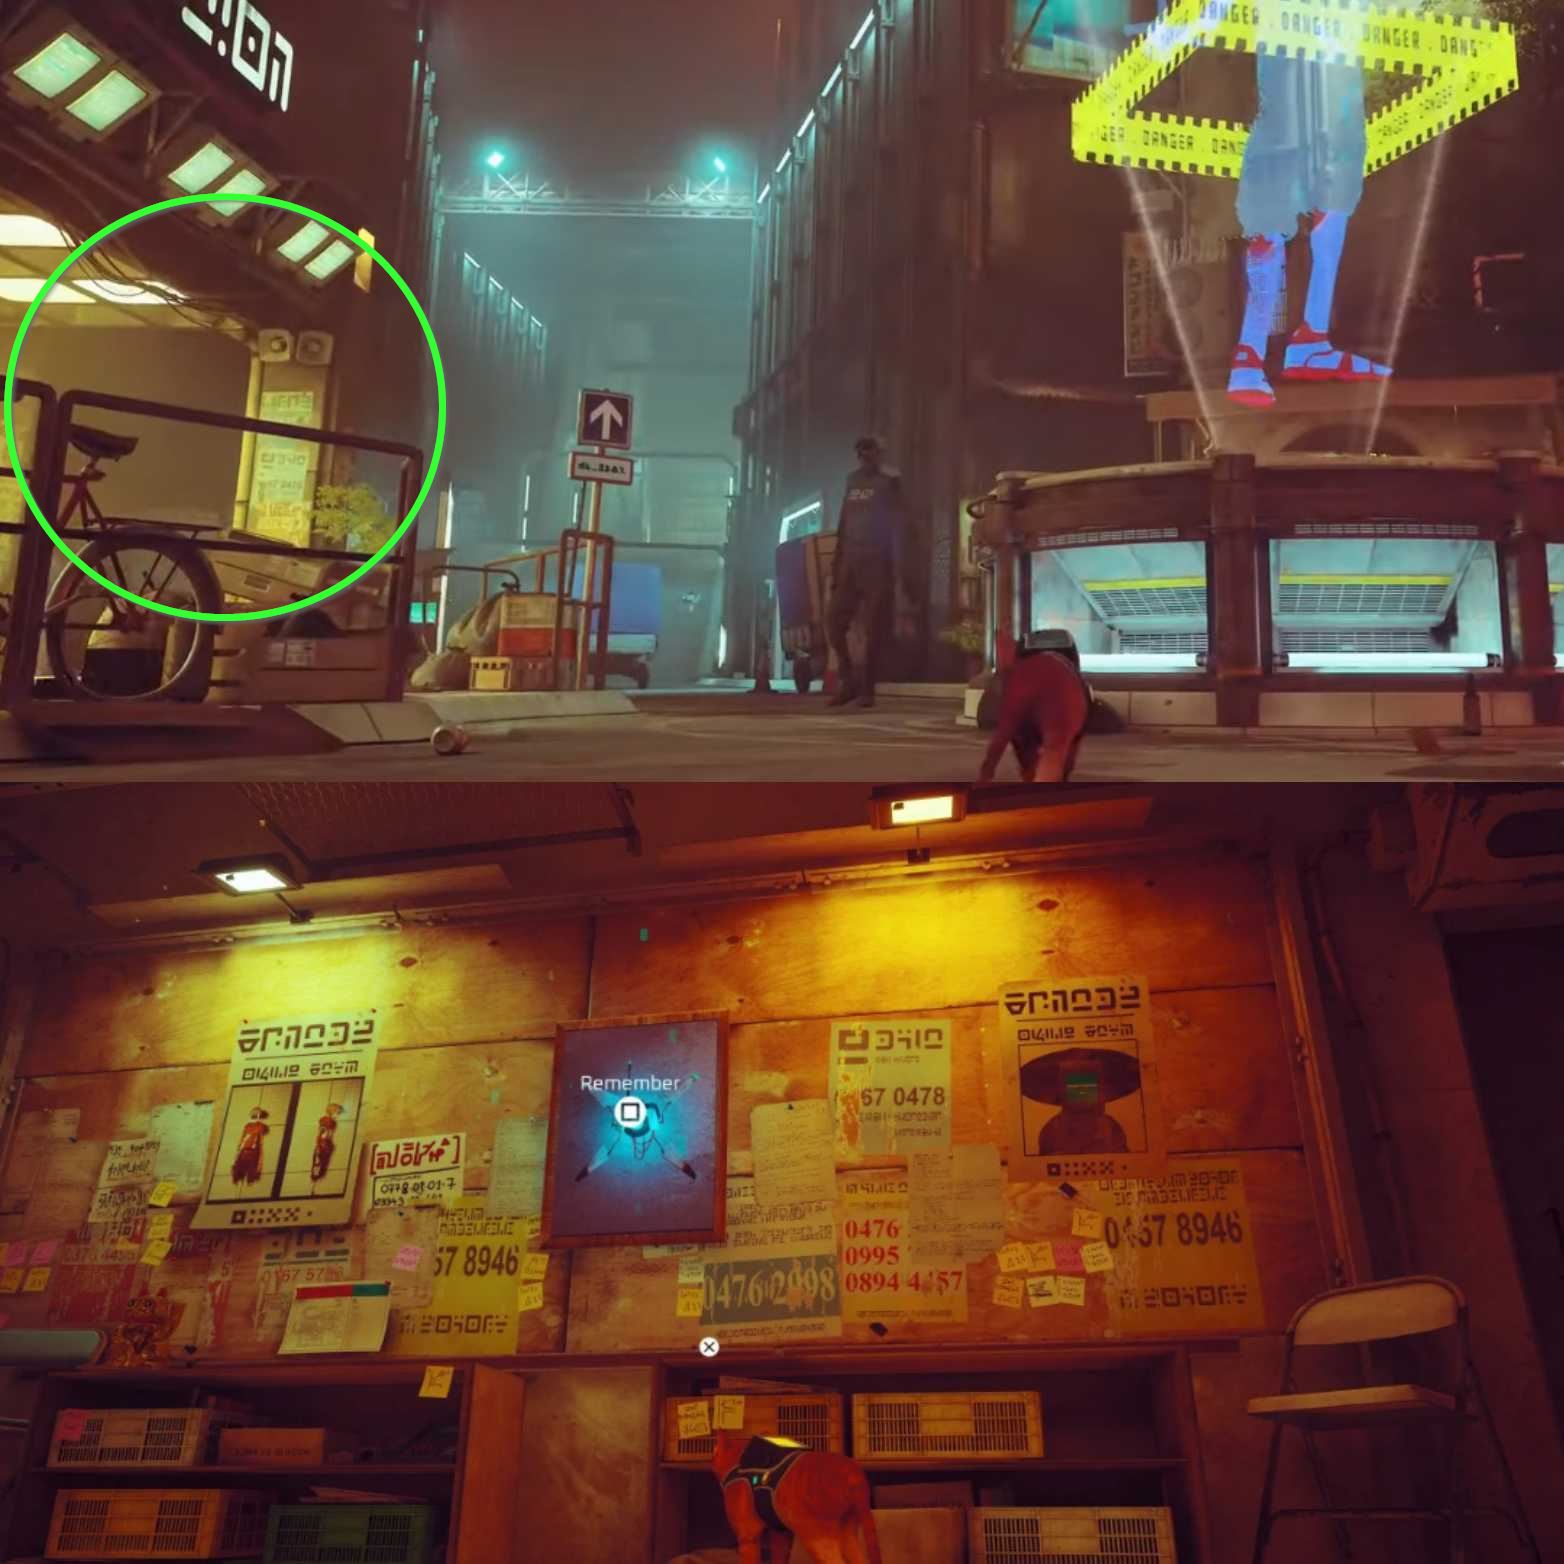
As you make your way out of the Subways, you should now properly be in the Midtown area which is an urban market district type zone. Turn right from the main street and you should spot a Neon red Ramen Bowl sign in an alleyway. As you emerge, look for a broom-sweeping robot here with a traffic cone on its head.
There should be a bright blue Neon sign near him. Climb on the nearby dumpster and onto the sign rooftop as shown in the image above.
Now it’s just a matter of climbing the AC ducts to reach a veranda with a lime-colored plant sticking out of it as you can see in the image. The third memory will be among some pillows for you to scan and collect.
Memory #4
| Chapter | Chapter 10 |
| Location | Salon Roof |
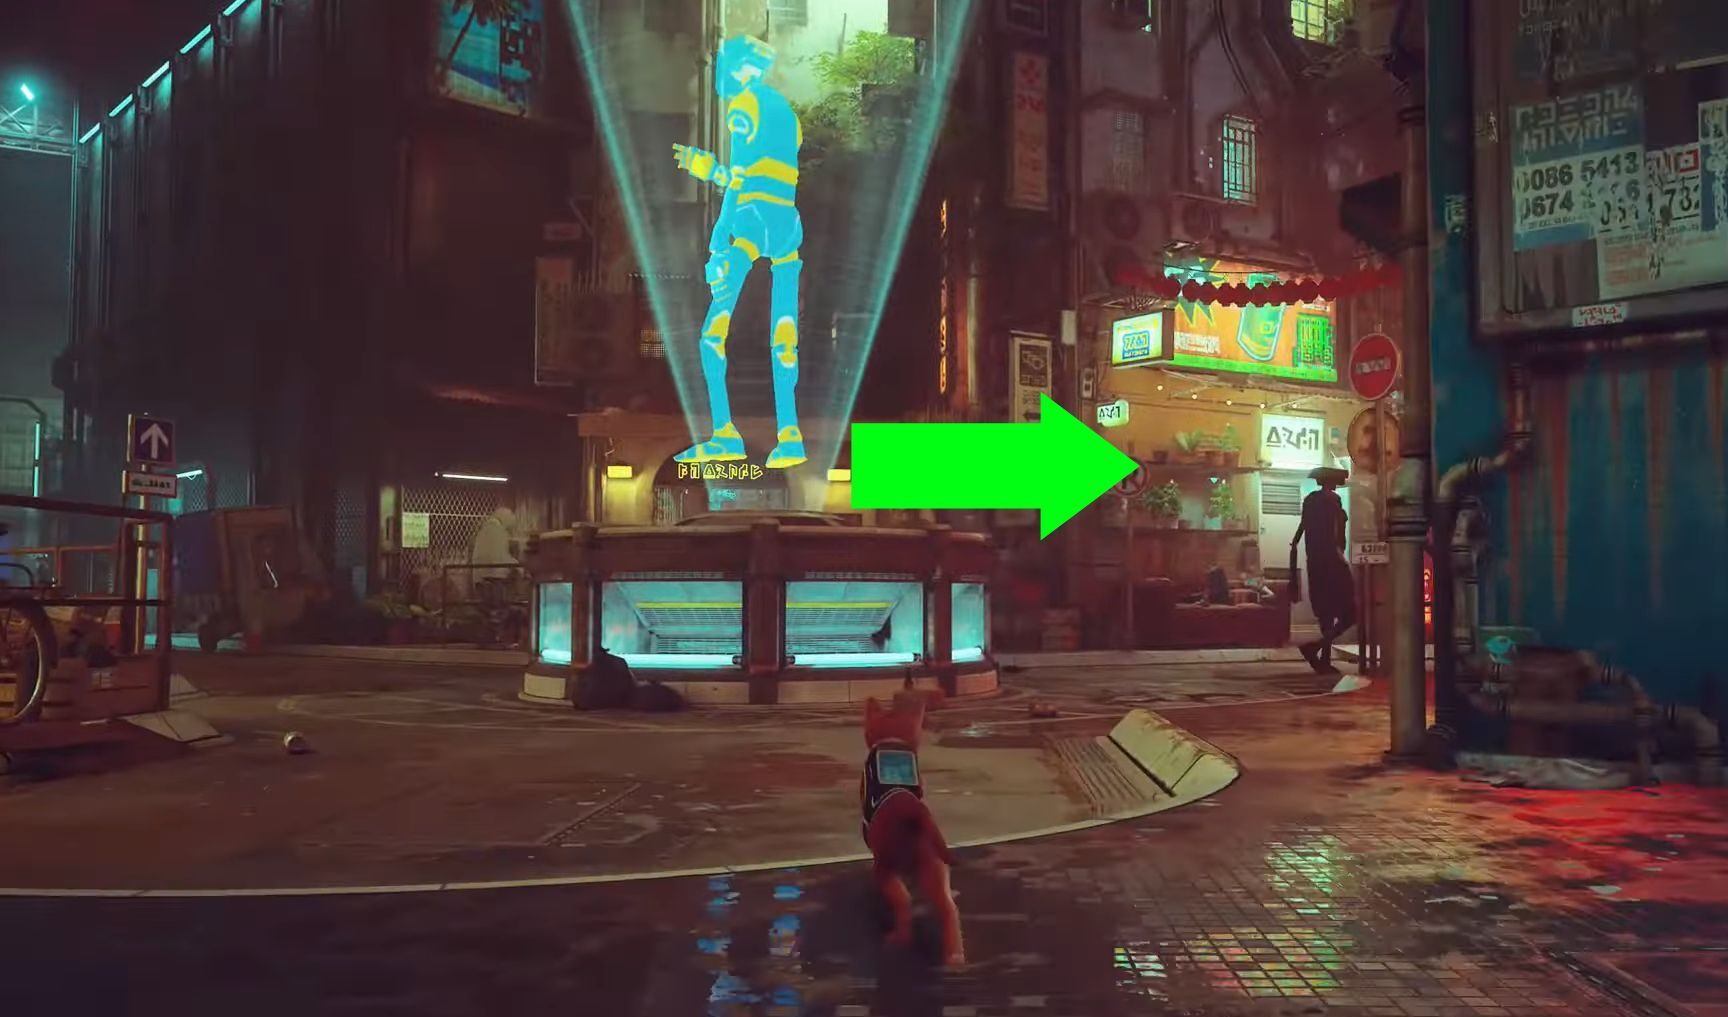
The fourth memory can be found in a shop right at the central turning point of the area. It is the zone where you climb up a few stairs and reach a junction where is a Hologram of a blue Sentinels robot in the direct center.
You will identify the shop as it will have an open window for the cat to jump in with ease. Now just climb onto that upper level as shown in the image up to the attic-like space and narrowly crawl through it to find the fourth memory of Midtown.
Memory #5
| Chapter | Chapter 10 |
| Location | Cafe Roof |
Surprisingly, the fifth memory is pretty close to the one you just collected in the shop. Exit out of it to come back to the main junction once again. The fragment is inside the cafe which is located right behind the Sentinel hologram in the center of the area.
Now climb up to the counter and you should have the option to jump into the cracked ceiling opening. Jump into it and lo and behold, the fifth memory is available here to scan and retrieve.
Memory #6
| Chapter | Chapter 10 |
| Location | Sentinel security station |
The sixth memory can be missable by a few players since it involves a bit of backtracking. The memory is located in the Sentinel security station just to the left of the blue robot hologram area. However, there is only one way inside which is through the door and it will be locked initially.
The only way to gain access and unlock the door is by progressing the story until you have gained an atomic battery from the Neco corp factory. Now simply head back to the area again and the door should now be opened for you. Head inside and the memory should be a picture hanging on the wall.
Memory #7
| Chapter | Chapter 10 |
| Location | Nightclub |
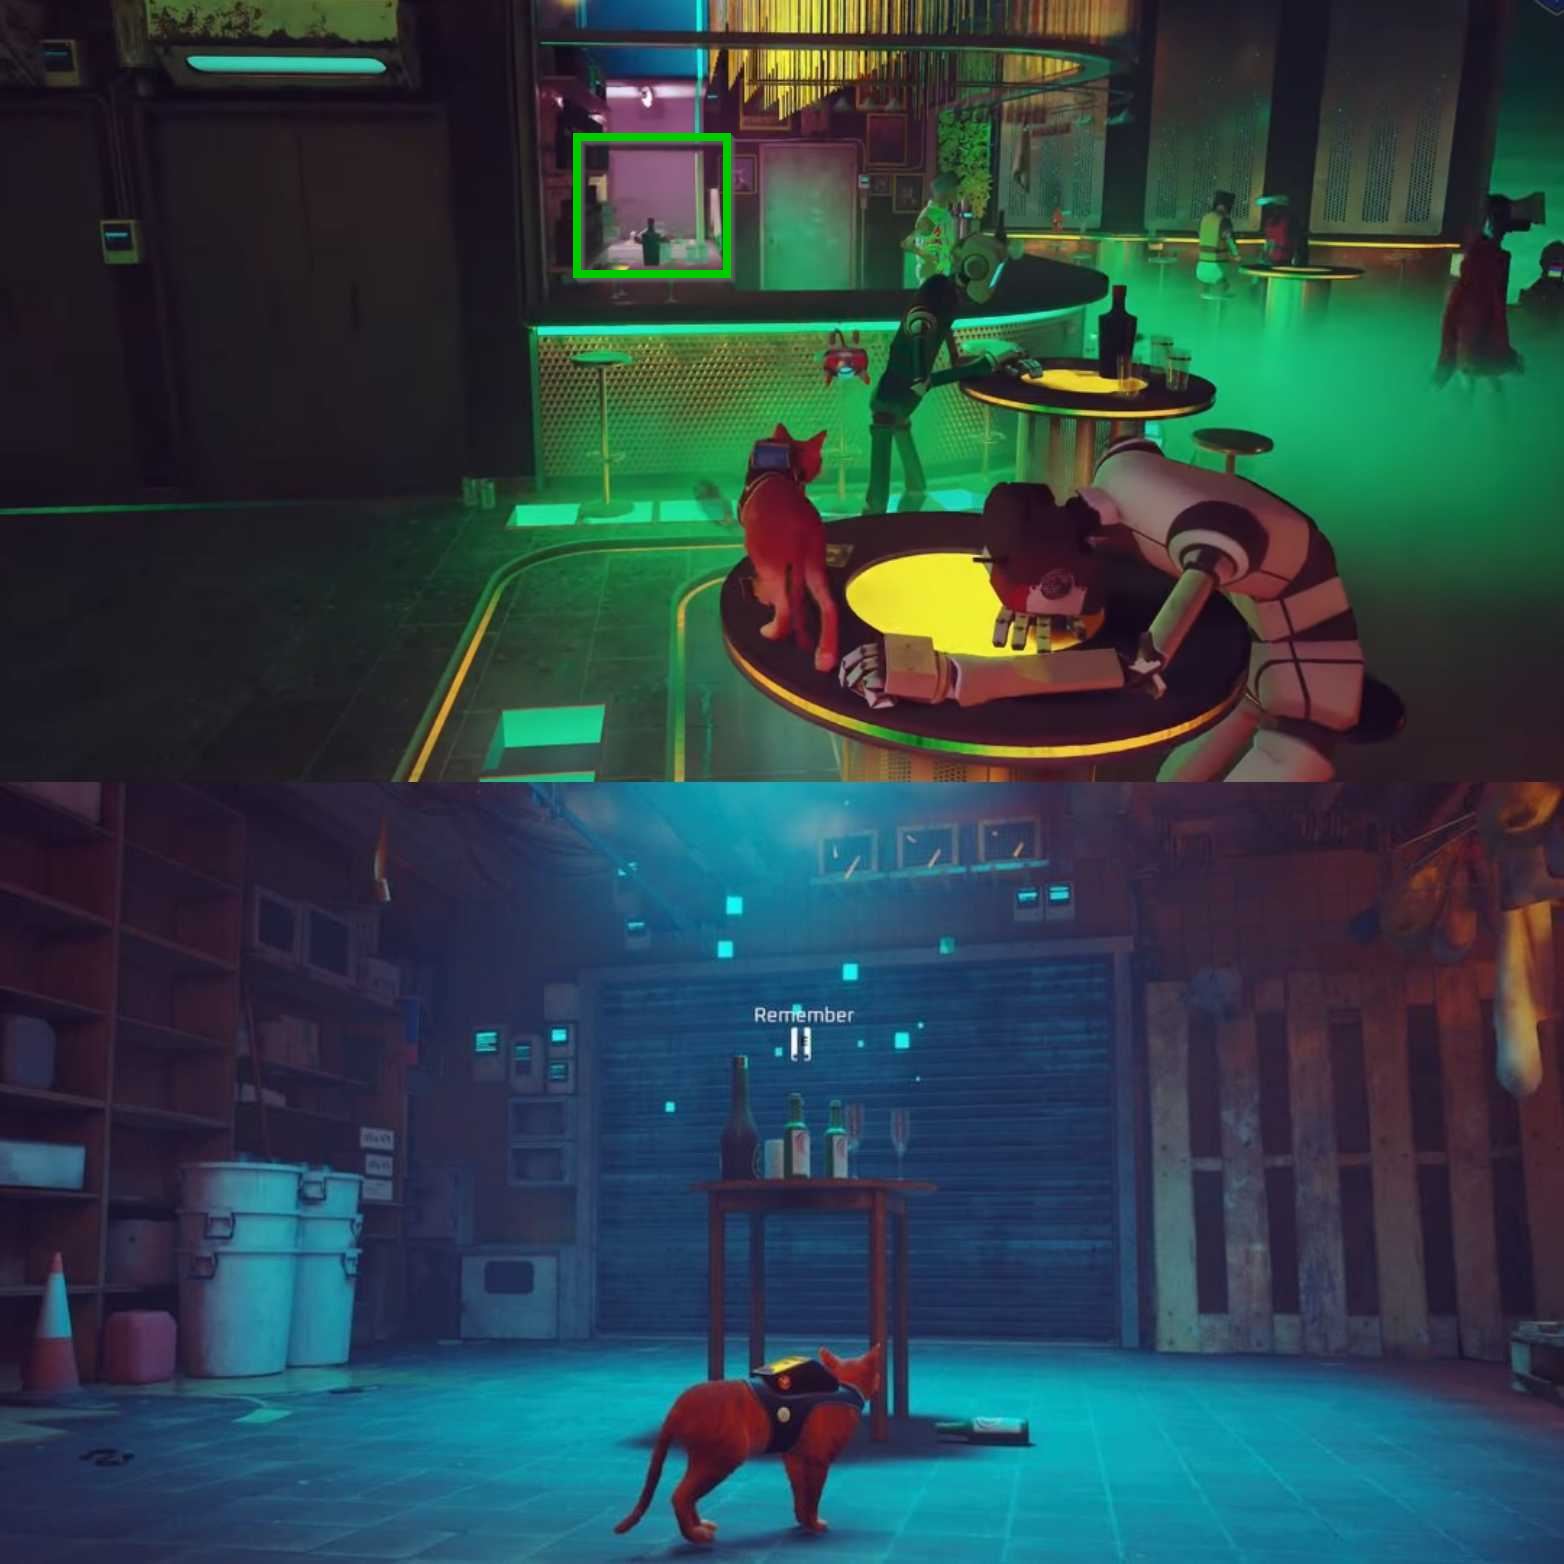
Lastly, the final memory of the area is found within the club that you gain access to through the main progression and a bit of platforming on its outer exterior.
Once you enter the club through the window, you should the main bar counter in front of you. There should a Dumb waiter behind the bar. Step on it and you should be transported down to the lower level of the club. Step out and the seventh memory should be a pair of bottles on a table here.
Chapter #11 Jail Memory
| Chapter | Chapter 11 |
| Location | In the outdoor courtyard after rescuing B-12, near a dead robot |
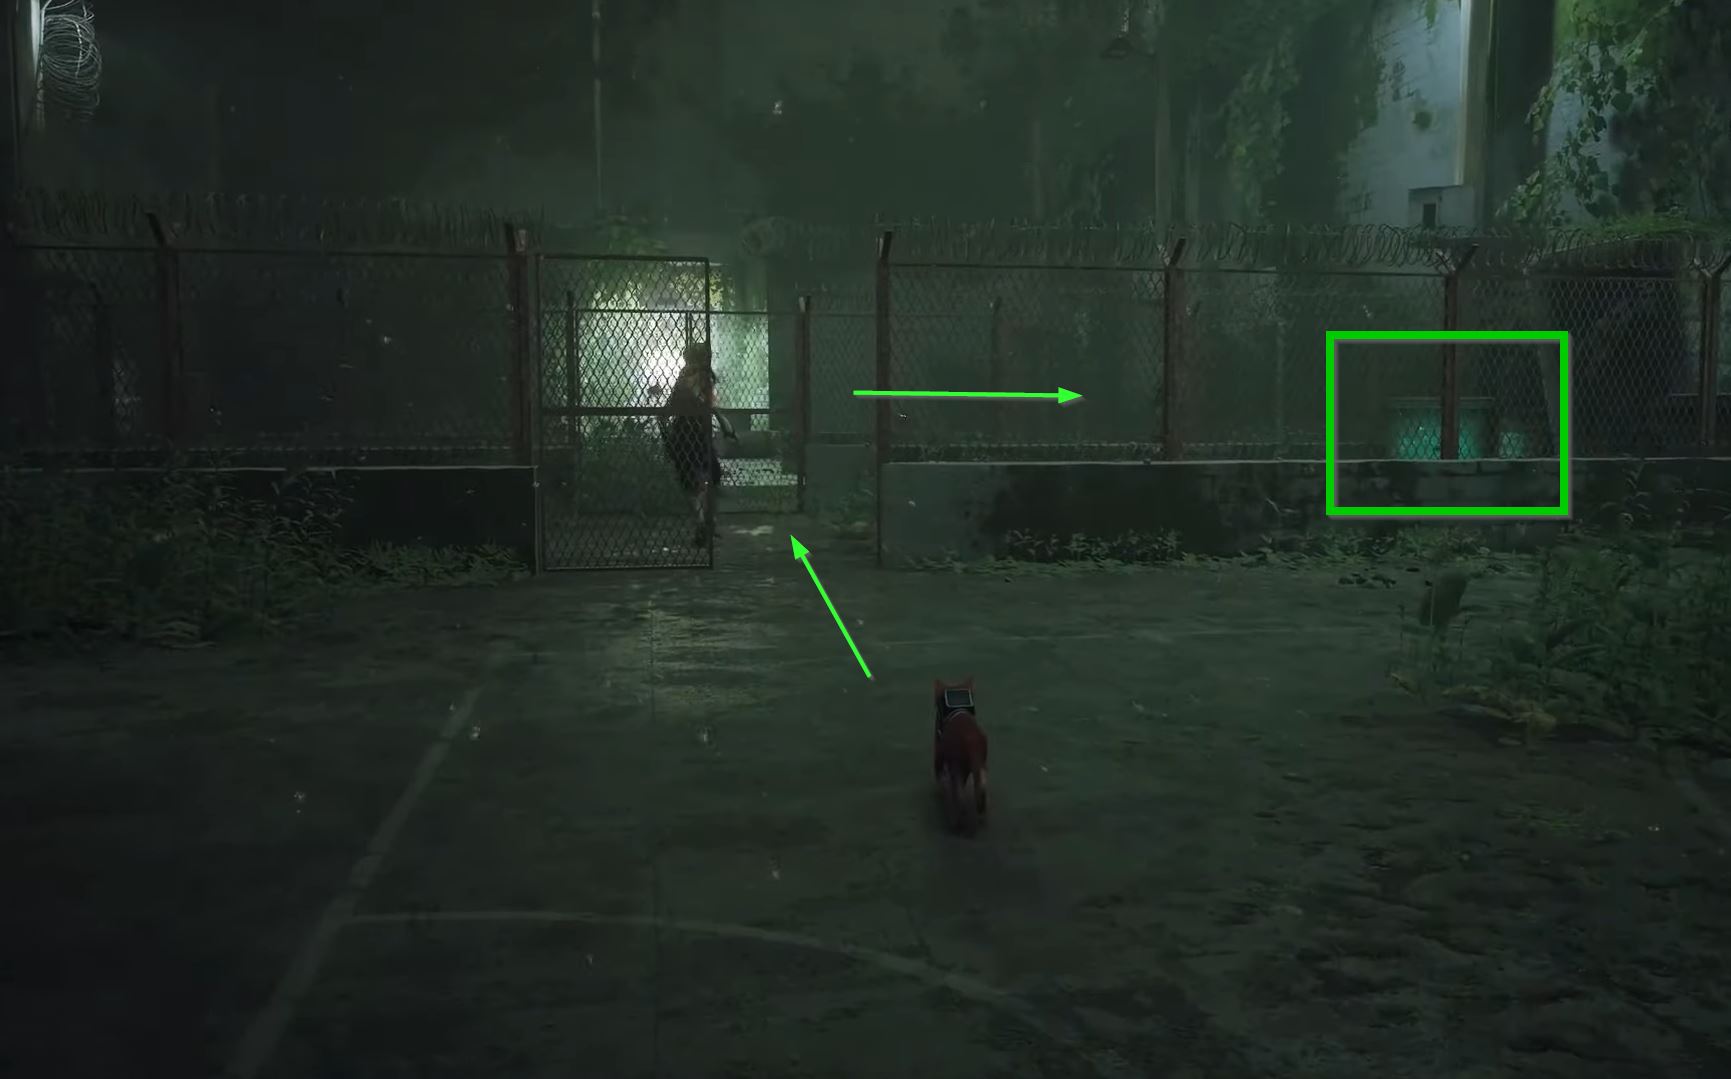
The following are the final optional memories that you need to find on your own in Stray. The Jail has only 1 single memory found in it. You can discover it very easily once you have gotten to the point where you rescue Clementine and B-12 and exit outside to some wire door fences.
Clementine will follow forward opening some doors. Right in the middle after the first door take a right and the memory should be glowing readily right in front of you on a dead robot. It is the last of the optional memory locations found in the world of Stray.
Chapter #12 Control Room
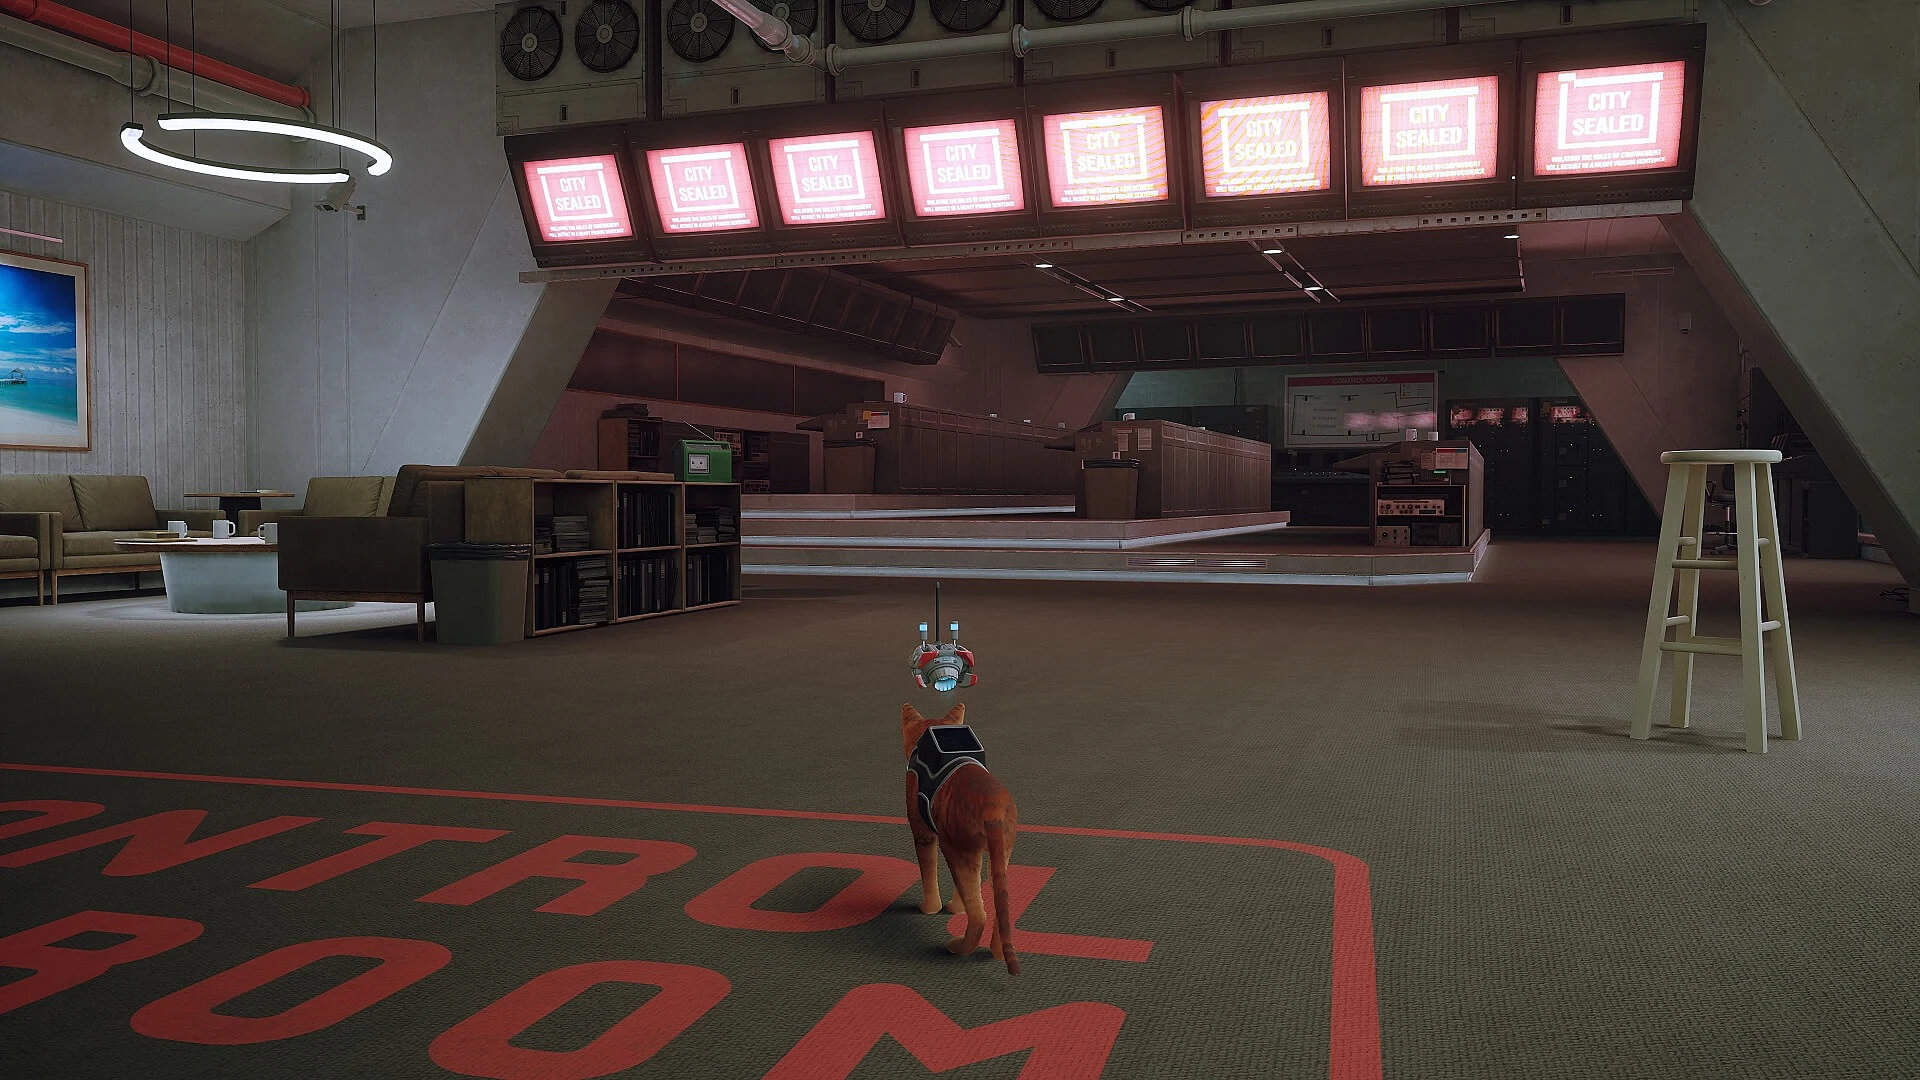
| Chapter | Chapter 12 |
| Location | Collect all the memories to unlock the control room and finish B12’s quest |
Lastly, the final and 27th memory is an automatic story collectible found in the last chapters of the game, Control Room. B-12 will unlock it as soon as you reach the Control room for the first time, so do not worry at all about missing it in any way.
If you have been following along with the guide, that should wrap up just about all of the total 27 memories that are located throughout most of the chapters found in the game. It will also grant you the “I Remember!” A trophy/achievement is needed for 100 percent completion of the game.
We hope this guide helps you in completing your memory collection in Stray. Feel free to let us know if we missed anything or if you need help with some of the locations we mentioned. Stray is out now for Steam and Playstation 4 and 5. We hope you have fun adventuring with the loveable orange feline and B-12!
Next: Stray Safe Mysterious Password
Thanks! Do share your feedback with us. ⚡
How can we make this post better? Your help would be appreciated. ✍