So you have beaten the main campaign in Tiny Tina’s Wonderlands and are now probably wondering what more this masterpiece of a game could have to offer. Well, the answer to that question is Four secret raid bosses! Yes, you heard us right; just when you thought you had defeated every boss in the game, Tina decided to burst your bubble.
- Four Raid bosses need to be unlocked before defeating them.
- To access the rune puzzles, talk to the Dragonlord in the Chaos Chamber and select the “featured run” option.
- Solve each rune puzzle related individually to each boss.
- The yellow rune puzzle unlocks Bunnidhog’s boss. Destroy the yellow beam of light and the sun formed in its place to unlock the boss.
- The green rune puzzle unlocks Barkenstien’s boss. Jump on the mushroom to spawn spores and shoot only the purple-glowing ones.
- The blue rune puzzle is spawned randomly. Stand in the dark circled area under the ice orbs, lead the ice orb to the water sphere, and shoot it to make the water sphere disappear.
- Defeat the Dragonlord himself and the dice formed after him to exit through the red portal and start the boss gauntlet.
Raid Bosses in Tiny Tina’s Wonderland
Each of these bosses is unique in its own way and extremely hard to kill. The fact that they are that difficult may seem off-putting to some, but if you are someone who loves challenges, then our Tiny Tina’s Wonderlands Raid Bosses guide is written just for you. Below are the best strategies to beat all four bosses and solutions to the rune puzzles, solving which are a prerequisite to unlocking the bosses.
Before we continue, one thing worth mentioning is that solving the puzzles will not be much of a problem but defeating the unlocked bosses is what you should be worried about. Although our guide will tell you the best strategy to defeat each of them still, we cannot just magically come over there and hold your hand.
So if you are not skilled enough yet, you might want to practice more before diving deeper into defeating the bosses. And the fact that if you die even once while fighting the bosses or overcoming the waves of the arena, you will be forced to restart the run from the start adds value to the point that you need a good level of skill to overcome the four bosses. That said, let us jump straight into how to unlock and defeat each of them. Before you go any further, bookmark our Tiny Tina’s Wonderlands best builds to read about next!
Unlocking Raid Bosses In Tiny Tina’s Wonderlands
It is painfully obvious that you first need to unlock the four Raid bosses before you can actually start defeating them. “How will I do that?” you ask. Well, keep reading to find out. You need to solve each rune puzzle related individually to each boss. In order to get access to the rune puzzles, you need to talk to the Dragonlord found in the Chaos Chamber and select the “featured run” option before starting. Assuming you’ve done that, let us take a look at how to solve each of the rune puzzles. While you’re at it, consider reading our Tiny Tina’s Wonderland Best Starting Class guide.
Solving Yellow Rune Puzzle

Related: Tiny Tina’s Wonderlands Clawbringer Build
The yellow rune puzzle is the first rune you will encounter after starting the boss gauntlet, and solving this will unlock the Bunnidhog boss. To spawn the yellow rune symbol, you first need to kill all the enemies during the first wave. Once you have killed all the enemies in the first room, head to the platform in the middle of the room where the Dragon lord is standing; while facing him, turn around to find the glowing yellow rune symbol just at the top of the staircase. Interact with the symbol to activate it.

More From eXputer: Tiny Tina’s Wonderlands Brr-zerker Build
Upon activation, a yellow beam of light will eject from it, flying across the arena. Follow the light and destroy the rock. Once you have done that, a glowing Sun thingy will be formed in the place of the rock. Now beware of a light beam it emits as if it hits you; you will fail the yellow rune puzzle and have to start again (you get three tries at this before failing completely).
To avoid the light beam, simply hide behind a structure in the arena, but if you can’t find one, then simply keep running away from it as fast as possible until it disappears. Once the light beam disappears, simply go full-blown Rambo mode on the sun and hail all your guns at it as quickly as possible because there is a short time window before it disappears. If you’ve successfully destroyed the Sun then just unlocked Bunnidhog. Before you move on to solving the next puzzle, consider reading Tiny Tina’s Wonderland Shift Codes Exploit guide.
Solving Green Rune Puzzle

An Interesting Read: Tiny Tina’s Wonderlands Spellshot Build
The second rune that you need to destroy will be a green-colored one. This rune will be spawned during the seventh wave. You know the drill, kill all the enemies, and spot the rune. You can find this rune on a wall to the left of the D20 dice that provides loot upon smashing. Once you interact with the rune, you will see another trail of flashy light fly out from it (this time, the light trail is green). Go along with this trail of light until it lands. Upon landing, it will spawn a big mushroom. To solve this puzzle, you need to jump on the mushroom to make it start spawning spores.

After jumping on the mushroom, jump back to the ground and ready your gun, as this puzzle will test your reaction time along with your aiming ability. The mushroom will throw multiple spores into the air now, DO NOT SHOOT every spore you see as you need to shoot the ones that glow purple, and if you do shoot the former, well, then you fail. Missing a glowing purple mushroom and allowing it to hit the ground is also a sure-fire way to fail the green rune puzzle. Once you’ve successfully shot all the purple glowing spores, the mushroom will launch another set of them into the air (this one contains more spores than the previous set). And then the final set of spores will be launched into the air by the mushroom; shoot this set successfully and you will unlock the Barkenstien protector of the nature boss.
Solving Blue Rune Puzzle

This is the last rune puzzle but finding it can be a bit devious as it has no specific spawn room and is spawned randomly in a normal room. Though do not worry, as the rate at which this rune spawns makes up for its randomness. We are going to continue assuming you have found the Blue Rune symbol. Activating the symbol will eject a similar beam of light, with the difference being that it is blue in color and has two stops before it vanishes.

At its first stop, the beam of light will spawn a dark circled area on the ground along with three glowing ice thingies. At its second stop, a blue water sphere will be spawned. Now what you need to do is to stand in the dark circled area under the ice orbs and wait for a few moments. After waiting here for a while, one of three ice thingies will transform into a proper ice orb and start to follow you. You need to lead this ice orb to the water sphere the light trail spawned. Once it reaches the water sphere, shoot the ice orb, and the water sphere will cease to exist.
Also, To know which class to choose initially, consider reading: Tiny Tina’s Wonderlands Class Tier List.
Your next task is to defeat the Dragonlord himself and defeat the dice formed after him. Now, if you solved the rune puzzles properly, two portals will appear, with one of them being red in color, indicating that you have successfully solved all three of the rune puzzles—exit through the red portal to start the boss gauntlet.
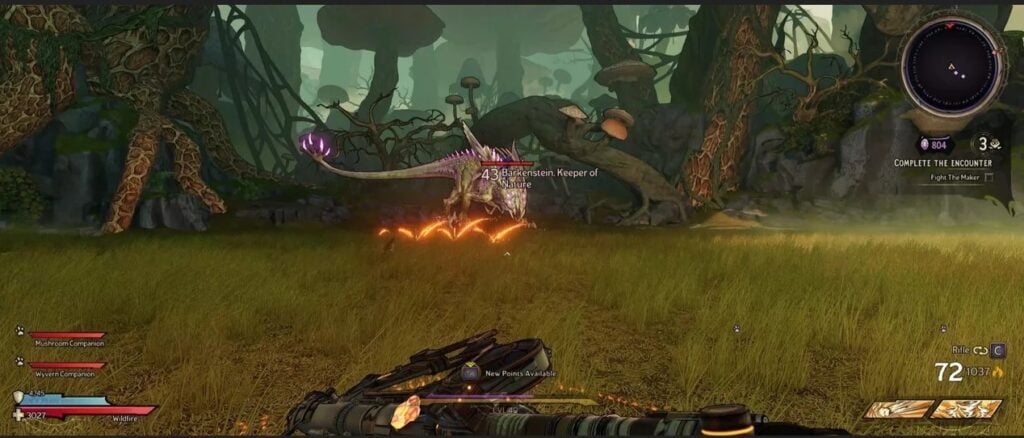
Barkenstein, Keeper Of Nature Raid Boss

- Consider reading our Tiny Tina’s Wonderlands XP Farm guide if you want to unlock skills faster.
Barkenstein will be your first boss in the gauntlet, and we can only say that for being the first boss, this guy is a stinging pain in the butt. He is also level 40, so make sure that you’re at least the same level, if not more, or depleting his already massive health bar will take forever. But if you are reading our Tiny Tina’s wonderland all Raid bosses guide, then you do not need to worry.
Now the moment the battle with Barkenstein starts, he will throw multiple spores in the air similar to the green rune puzzle ones. Upon making contact with the ground, they will form large domes of toxic gas, which coats all over the arena and not only makes it nearly impossible for you to see but also deals corrosive damage.
However, what is often overlooked here is that these spores are a blessing in disguise, as shooting the purple ones will give you ammo and HP drops, and you are going to need a LOT of them. One notable thing here is that during the time Barkenstein is charging up his spores attack, he is totally vulnerable, so you can do some decent health damage to him while he is busy throwing the spores.
Another thing that makes Barkenstein a bit less difficult is that you can hit his limbs which are glowing, to drop small chunks of his health. The glowing also indicates the limb he is about to use to attack you. Now that you know the above-mentioned strategies, you should have a good idea as to what you need to do to kill this nature lover. So load your guns and break all hell loose on Barkenstein.
Bunnidhogg, Keeper Of The Sands Raid Boss

The Bunnidhogg is a pretty cool boss with its immaculate design and fun to exploit mechanics. But what makes this boss not so cool is that it will have you fighting for your life LITERALLY. This boss will also have mechanics from the rune puzzles similar to Berkenstein. You will witness this as the fight with this boss always starts with him launching a light attack resembling the one from the yellow rune puzzle. Again the goal here is to avoid the light by hiding behind the rocks in the arena. Alternatively, you can make a pro gamer move here and simply look away from the light, and it will act as if you are not even standing there.
Another similarity Bunnidhogg shares with Berkenstein is that you can attack him while he is charging the light beam attack to cancel the light beam attack and steal chunks of his HP simultaneously. While you are fighting Bunnidhogg, he will randomly dive under the ground putting you in a false sense of security, but of course, you are better than that and will dodge the sand ripple formed by his dive.
Bunnidhogg is also stationary compared to the Berkenstein, making him somewhat of an easier boss. But he sure as hell makes up for his lack of movement by shooting high-speed lasers at you, so be prepared to dodge them. If you have read all of Bunnidhogg’s related facts and strategies above, then you should have a good idea of what you will be going up against. So, time to obliterate this sandworm and claim your hard-earned loot!
Gloopathoth, Keeper Of The Abyss Raid Boss
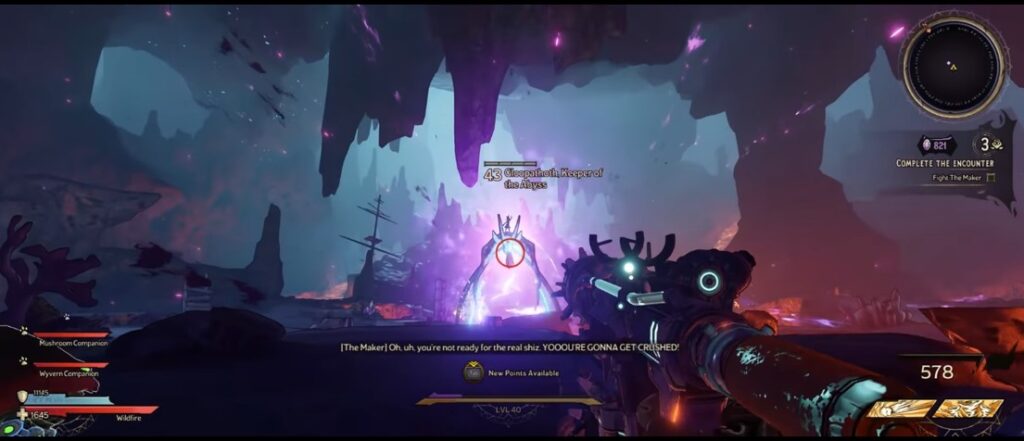
Gloopathoth is the third and the final boss you need to defeat to unlock the actual secret boss in the Chamber of Chaos. The strategy to defeating Gloopathoth is simple yet redundant. Here is what you need to do; first, you want to wait for the boss to spawn the ice and fire orbs; once the orbs are spawned, dash to the water orb while simultaneously dodging the fire orbs.
Now repeat what you did in the blue rune puzzle and wait for one of the ice orbs to come to you. Once the ice orb reaches the water sphere, shoot it to destroy the water sphere while taking huge chunks of the boss’s health bar. All that is left for you to do now is to repeat the above strategy multiple times till this boss falls too.
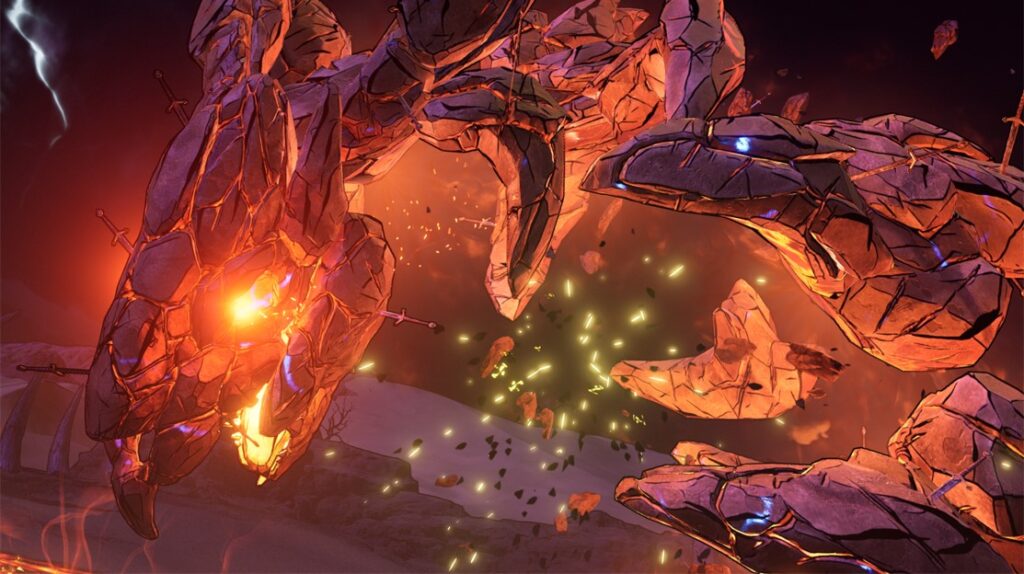
The Maker Secret Raid Boss

Finally, welcome to the segment of Tiny Tina’s Wonderlands Raid Bosses guide, where we’ll talk about the Maker. The Maker, the final and real secret boss in Tiny Tina’s wonderlands, if you can defeat this one, then you give yourself a pat on the back as you will have defeated one of the cruelest bosses in the history of gaming.
It should come as no surprise that the final boss of Chamber of Chaos is non-other than Tiny Tina herself. You know you’ve got yourself a real boss when the boss is named after the game itself. As for defeating this boss, there is no one sure-fire way that will guarantee your victory over this boss; however, keeping the following tips in mind should help you.
The first tip involves her Void Bunnies and her orbs. Just shoot the Bunnies and melee attack the orbs if they get too close. The second tip is that The Maker will spawn laser-shooting statues every time she rolls a dice above her head. You have no other option here but to dodge the laser beams and destroy the statues afterward.
The final tip we can give you is, well, you shoot her, that’s it. Once you have successfully defeated Tina, the game will reward you for your efforts with two Legendary Weapons and two thousand Kwartz Crystals. Pretty slick, right?
The Raid bosses in Tiny Tina’s Wonderlands are no doubt a challenge, but they also give stupendously worthy rewards as well. It is our opinion that, in a beautiful way, this game represents life too; the harder the challenges life throws at you, the better the rewards you get for overcoming them. But let’s not get too philosophical here. If you found our Tiny Tina’s Wonderlands Raid Bosses guide helpful, then you will also be interested in the five Best Tiny Tina’s Wonderlands Mods guide.
Next: Tiny Tina’s Wonderlands Infinite Skeleton Key Glitch
Thanks! Do share your feedback with us. ⚡
How could we improve this post? Please Help us. ✍