Best WWE 2K23 Match Slider Settings
While attempting to cash out matches in WWE 2k23, learn the best slider settings that you can try out for your matches!
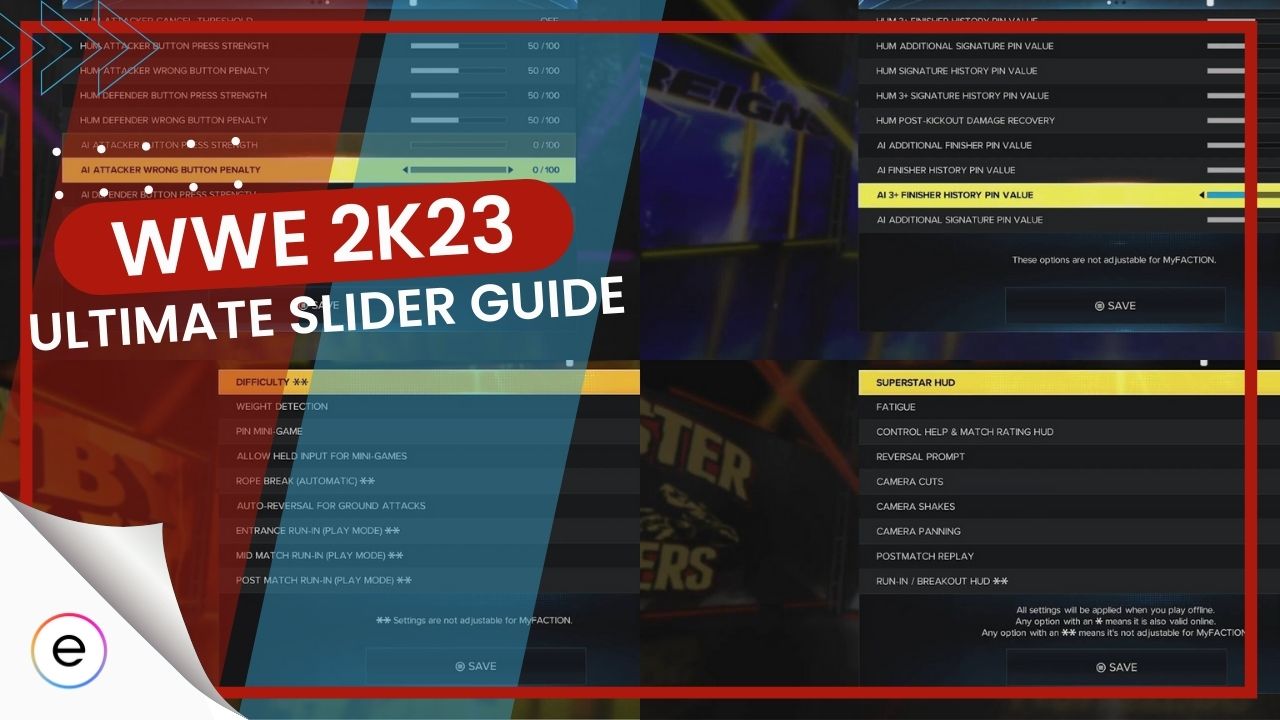
Sliders in WWE 2K23 are settings that players can increase or decrease in order to customise their AI vs AI matches and players can customise AI settings, custom prompts, stamina, etc all of which is kept in five main settings aka presentation, balancing, targeting, gameplay and advanced.
- For Shorter Matches
- Gameplay:
- Held Input For Mini-Games: Off
- Rope Break: On
- Entrance Run-In: Player
- Mid & Post Match Run-In: Off
- Presentation: Turn off various prompts.
- Balancing:
- AI Dive/Springboard Rate: 0/100
- AI Grab/Combo Breaker Rate: 100/100
- Stun Gain: 100/100
- Targeting: Set Target Settings to Semi-Auto.
- Pin Difficulty: First count lock: Off, Others: 50/100
- Timing Pin/Submission Mini-Game: All settings: 50/100 (except AI-related: 0/100)
- Gameplay:
- For Longer Matches
- Gameplay: Turn off Mid & Post Match Run-In, Held Input.
- Presentation: Turn off various prompts and HUD.
- Balancing: Set various rates/durations to 100/100.
- Targeting: Set Target Settings to Semi Auto.
- Pin Difficulty: Most settings: 50/100, AI Post Kickout Recovery: 10/100.
- Timing Pin/Submission Mini-Game: All settings: 50/100 (except AI-related: 0/100).
AI Vs. AI Shorter Match Settings
Kicking things off, the first type of matches that I typically want to focus on are shorter matches that aren’t stretched out for too long. These settings can definitely be tampered with, but these settings below are listed while being catered to AI vs. AI Realistic Matches for shorter matches.
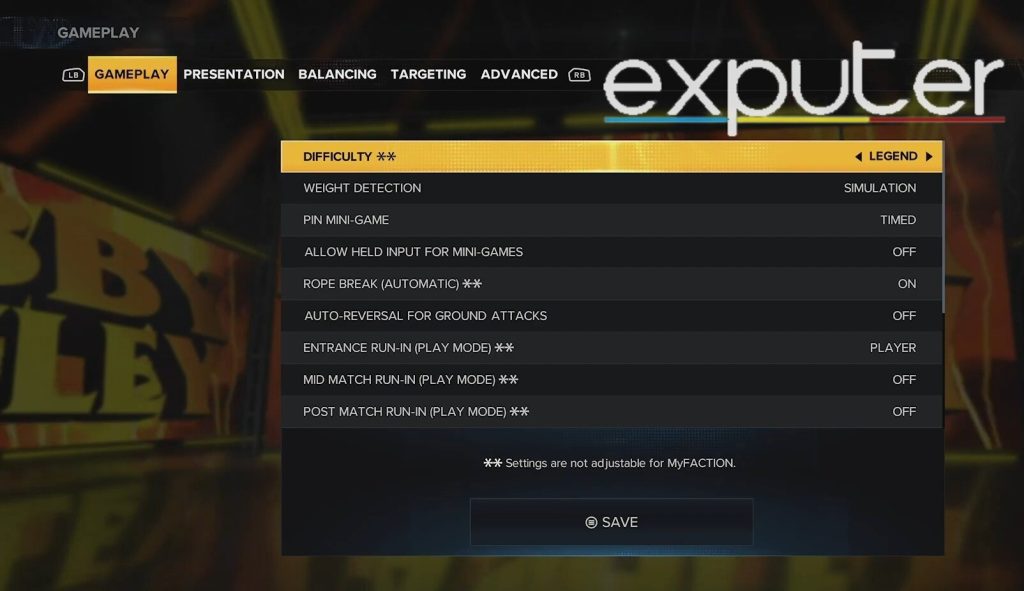
Gameplay
First things first, players want to choose between the different settings that are made available for their overall gameplay, and the best settings to go for are listed as follows:
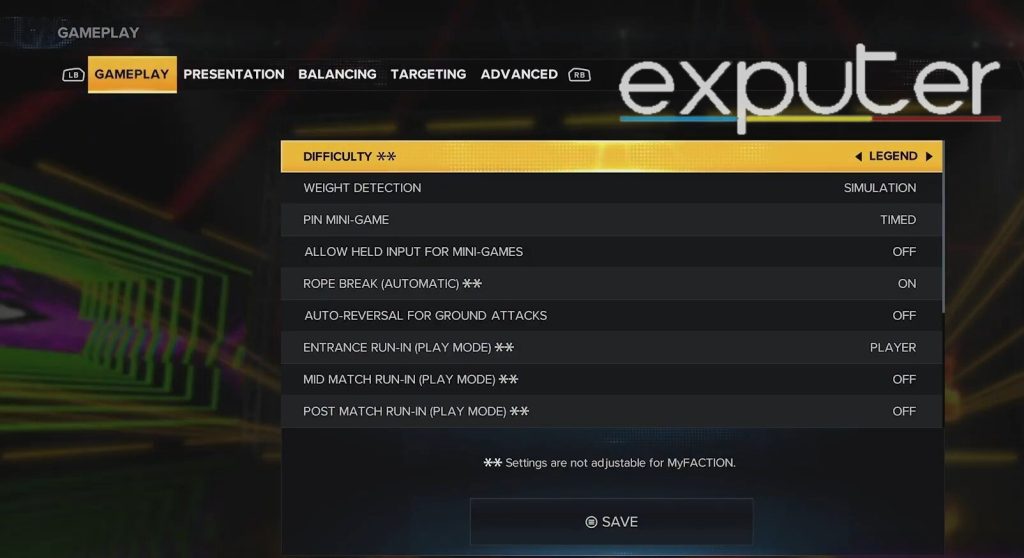
| Gameplay | Settings |
| Difficulty | Legend |
| Weight Detection | Simulation |
| Pin Mini-Game | Timed |
| Allow Held Input For Mini-Games | Off |
| Rope Break (Automatic) | On |
| Auto Reversal For ground Attacks | Off |
| Entrance Run-In (Play Mode) | Player |
| Mid Match Run In (Play Mode) | Off |
| Post Match Run In (Play Mode) | Off |
| Blood | On |
| Subtitles | Off |
| Tutorial Tips | On |
| Edited/Created Superstars | Allowed |
- Now, one of the Main reasons that most of these Slider settings have been kept off, such as the mid-match and post-match run-in, as well as allow held input, is simply so that the length of the matches don’t exceed longer than they need to.
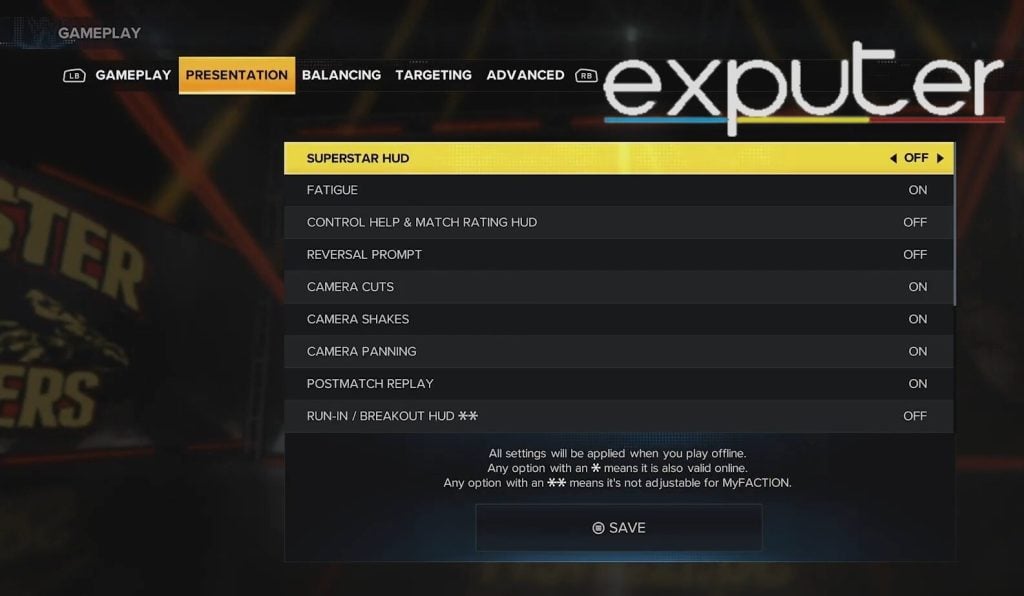
Presentation
Moving on, the next patch of settings that players need to be concerned with is their presentation, and there are quite a few settings to get through here. Therefore, players can choose to stick with these custom ones or make changes as they, please.
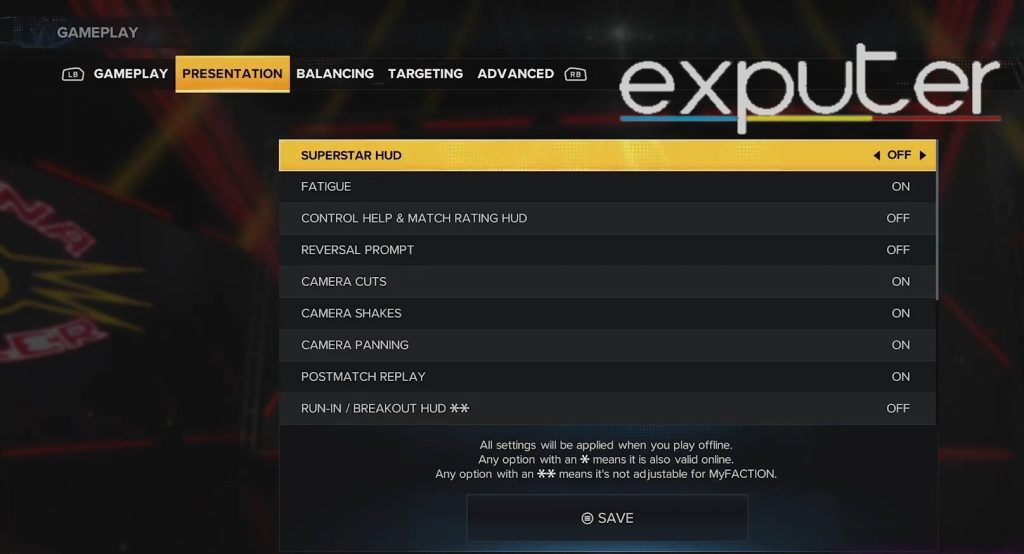
| Presentation | Settings |
| Superstar HUD | Off |
| Fatigue | On |
| Control Help And Match Rating HUD | Off |
| Reversal Prompt | Off |
| Camera Cuts | On |
| Camera Shakes | On |
| Camera Panning | On |
| Postmatch Replay | On |
| Run-In/Breakout HUD ** | Off |
| Display Referee Counts | Off |
| Watermark Image | On |
| Controller Vibration * | On |
| Instant Recovery Prompt | Off |
| Ring Escape Prompt | Off |
| Possum Attack Prompt | Off |
| Possum Pin Prompt | Off |
- Controller vibrations are kept on simply for a more immersive gameplay experience.
- All sorts of prompts, such as instant recovery prompts, ring escape prompts, possum attack prompts, possum pin prompts, well as reversal prompts, are kept off to not have to receive prompts during matches.
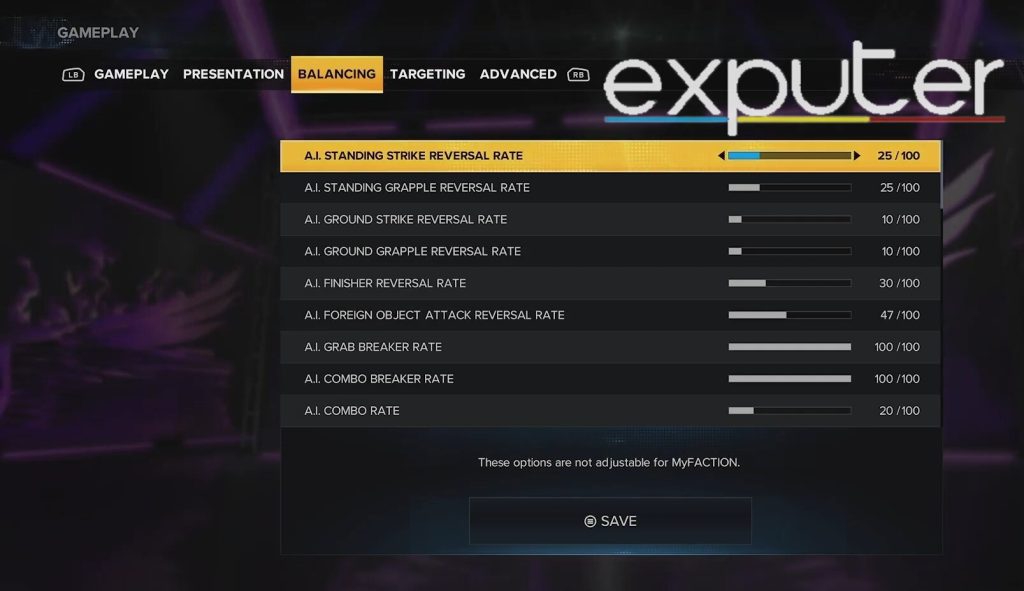
Balancing
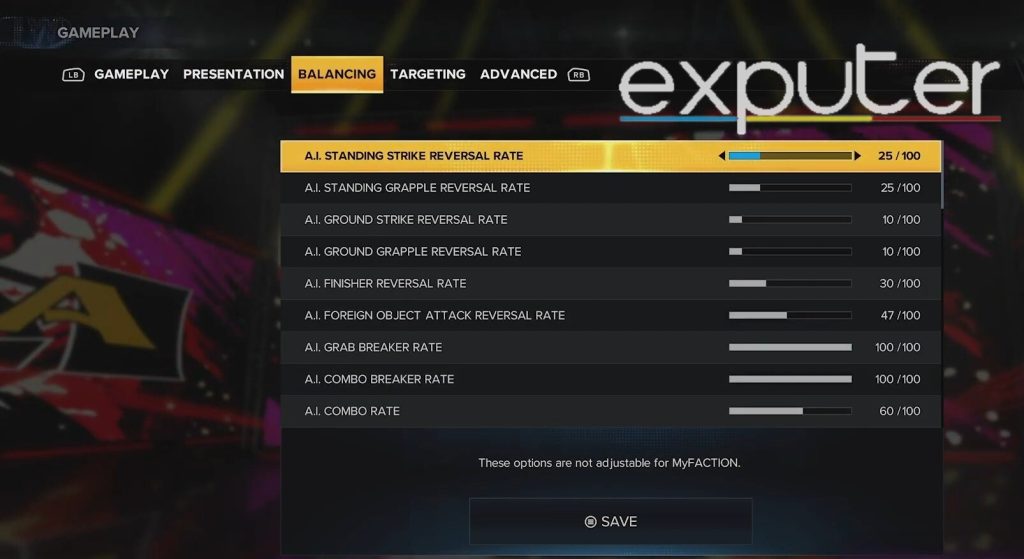
Now, I get to the real deal since the balancing screen is where players will most likely want to customize their settings as much as possible. The balancing screen is mainly concerned with AI-related Slider settings, as can be seen below for a few custom options.
| Balancing | Settings |
| AI Standing Strike Reversal Rate | 25/100 |
| AI Standing Grapple Reversal Rate | 25/100 |
| AI Ground Strike Reversal Rate | 10/100 |
| AI Ground Grapple Reversal Rate | 10/100 |
| AI Finisher Reversal Rate | 30/100 |
| AI Foreign Object Attack Reversal Rate | 47/100 |
| AI Grab Breaker Rate | 100/100 |
| Ai Combo Breaker Rate | 100/100 |
| AI Combo Rate | 60/100 |
| AI Submission Rate | 21/100 |
| AI Dive Rate | 0/100 |
| AI Springboard Rate | 0/100 |
| AI Grapple Rate | 35/100 |
| AI Strike Rate | 19/100 |
| AI Limb Targeting Rate | 20/100 |
| AI Running Attack Rate | 10/100 |
| AI Block Rate | 16/100 |
| AI Dodge Rate | 30/100 |
| Entrance Run-In | 2/10 |
| Mid Match Run-In | 2/10 |
| Post Match Run-In | 2/10 |
| Referee Down Time | 100/100 |
| Basic Reversal Windows | 0/100 |
| Ground Attack Reversal Windows | 0/100 |
| Signature And Finisher Reversal | 60/100 |
| Weapon Reversal | 50/100 |
| Stamina Cost | 100/100 |
| Stamina Recovery Rate | 50/100 |
| Stunned Recovery Rate | 20/100 |
| Rollout Frequency | 0/100 |
| Rollout Duration | 0/100 |
| Stun Gain | 100/100 |
| Stun Duration | 100/100 |
| Vitality Regen Cooldown | 100/100 |
| Vitality Regen Rate | 0/100 |
| AI Difficulty Damage Scaling | 70/100 |
| Drag Escape Difficulty | 50/100 |
| Carry Escape Difficulty | 50/100 |
- If submission rate is kept at 0, then there are practically no submissions taking place in a match, and be it a shorter match, setting it to 21 allows for a few submissions to take place as they are necessary.
- The AI Dive rate is kept at a 0 simply so that there are no dives taking place,
- The springboard rate being kept at 0 means that they will still springboard, but the chances of it happening become extremely rare.
- For all entrance ruins, mid-match run-ins, and post-match run-ins, players are free to keep the settings to whatever they desire.
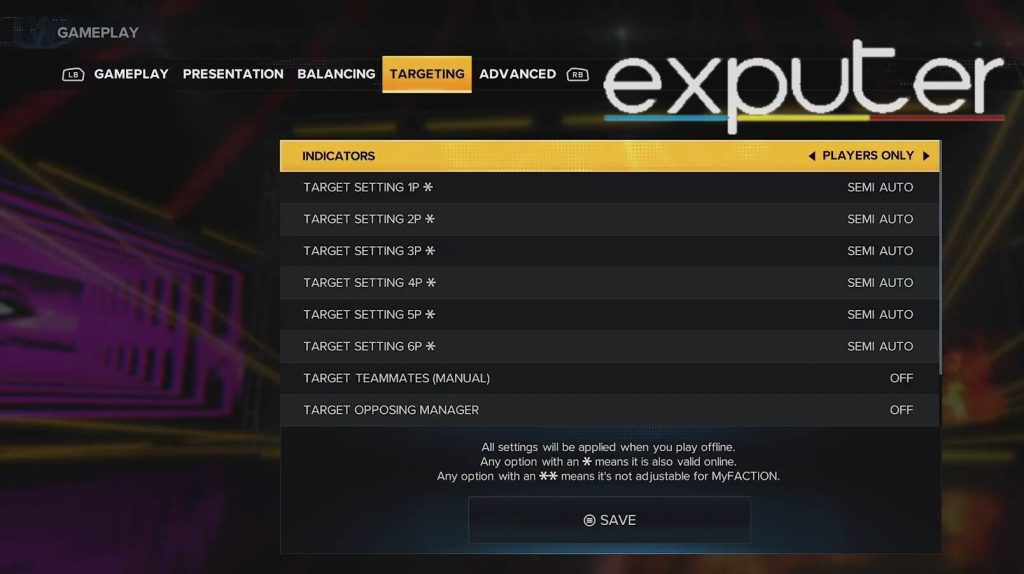
Targeting
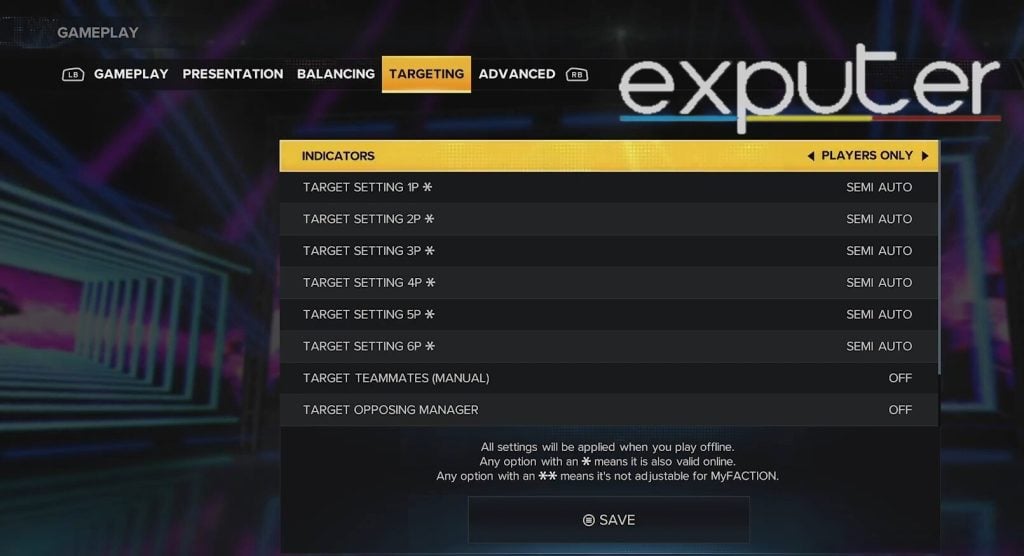
Moving on, let’s take a look at what Slider settings players can try out whenever they’re customizing the targeting.
| Targeting | Settings |
| Indicators | Players Only |
| Target Setting 1P | Semi Auto |
| Target Setting 2P | Semi Auto |
| Target Setting 3P | Semi Auto |
| Target Setting 4P | Semi Auto |
| Target Setting 5P | Semi Auto |
| Target Setting 6P | Semi Auto |
| Target Teammate (Manual) | Off |
| Target Opposing Manager | Off |
Advanced
Moving on, a few advanced Slider settings can be adjusted as well which dives even further deeper into the matches.
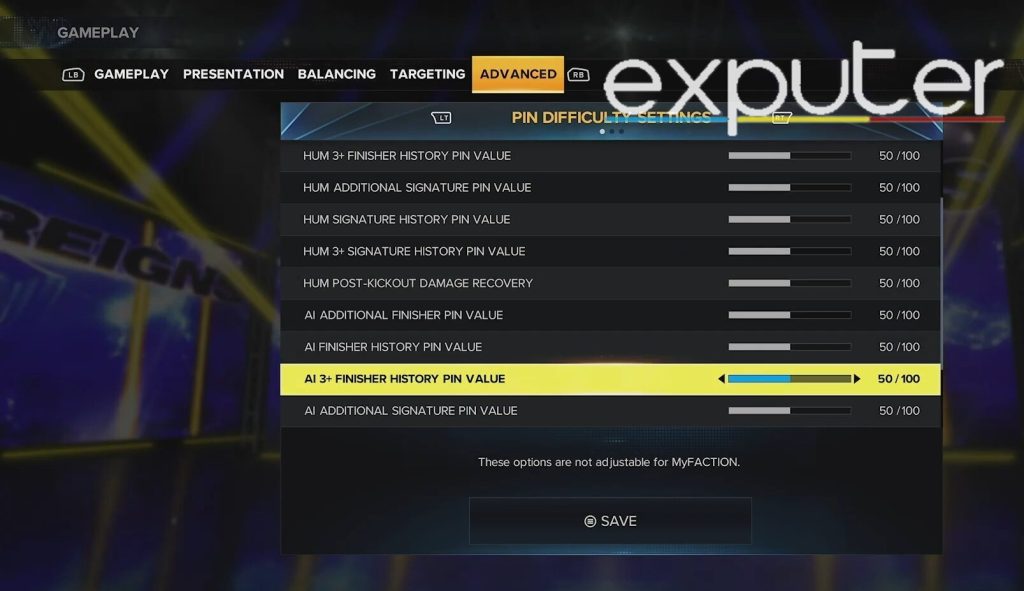
Pin Difficulty Settings
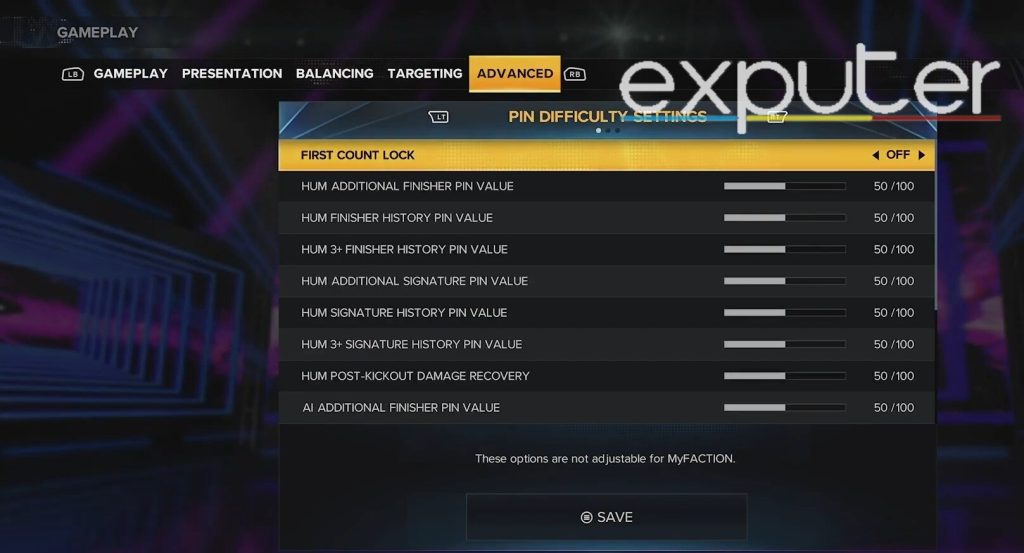
Let’s tackle the pin difficulty settings first, as they are listed below.
| Pin Difficulty Settings | Settings |
| First Count Lock | Off |
| HUM Additional Finisher Pin Value | 50/100 |
| HUM Finisher History Pin Value | 50/100 |
| HUM 3+ Finisher History Pin Value | 50/100 |
| HUM Additional Signature Pin Value | 50/100 |
| GUM Signature History Pin Value | 50/100 |
| HUM 3+ Signature History Pin Value | 50/100 |
| HUM Post-Kickout Damage Recovery | 50/100 |
| AI Additional Finisher Pin Value | 50/100 |
| AI Finisher History Pin Value | 50/100 |
| AI 3+ Finisher History Pin Value | 50/100 |
| AI Additional Signature Pin Value | 50/100 |
| AI Signature History Pin Value | 50/100 |
| AI 3+ Signature History Pin Value | 50/100 |
| AI Post Kickout Damage Recovery | 50/100 |
Timing Pin Mini-Game
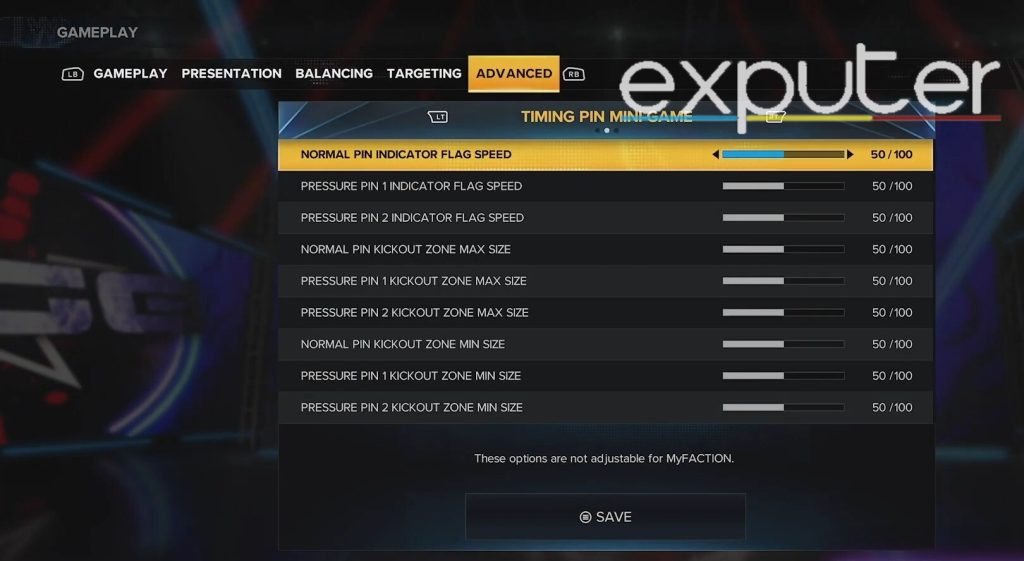
With the Timing Pin Mini-Game, these are the settings that players can go for.
| Timing Pin Mini-Game | Settings |
| Normal Pin Indicator Flag Speed | 50/100 |
| Pressure Pin 1 Indicator Flag Speed | 50/100 |
| Pressure Pin 2 Indicator Flag Speed | 50/100 |
| Normal Pin Kickout Zone Max Size | 50/100 |
| Pressure Pin 1 Kickout Zone Max Size | 50/100 |
| Pressure Pin 2 Kickout Zone Max Size | 50/100 |
| Normal Pin Kickout Zone Min Size | 50/100 |
| Pressure Pin 1 Kickout Zone Min Size | 50/100 |
| Pressure Pin 2 Kickout Zone Min Size | 50/100 |
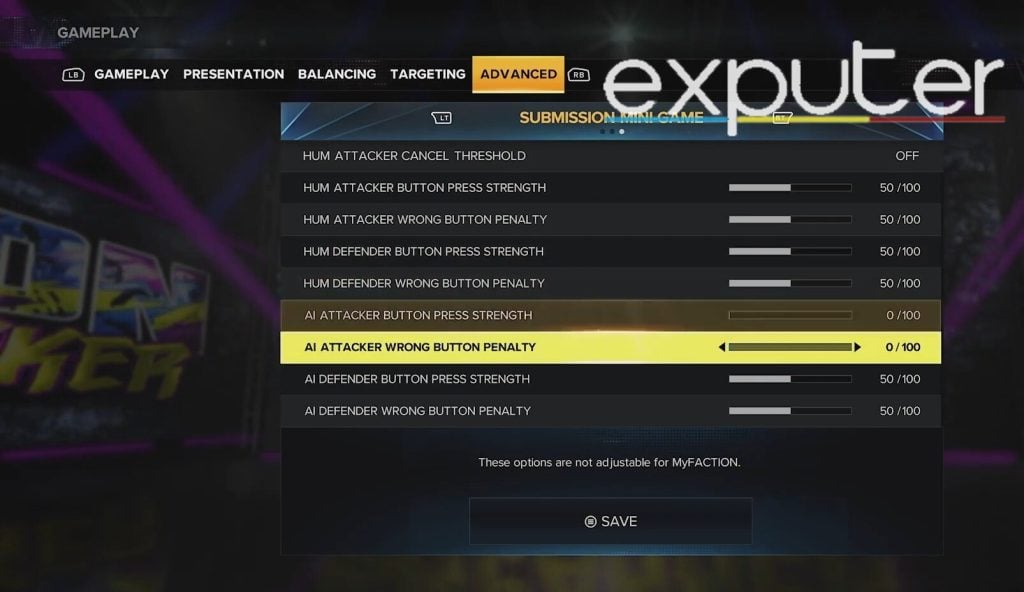
Submission Mini-Game
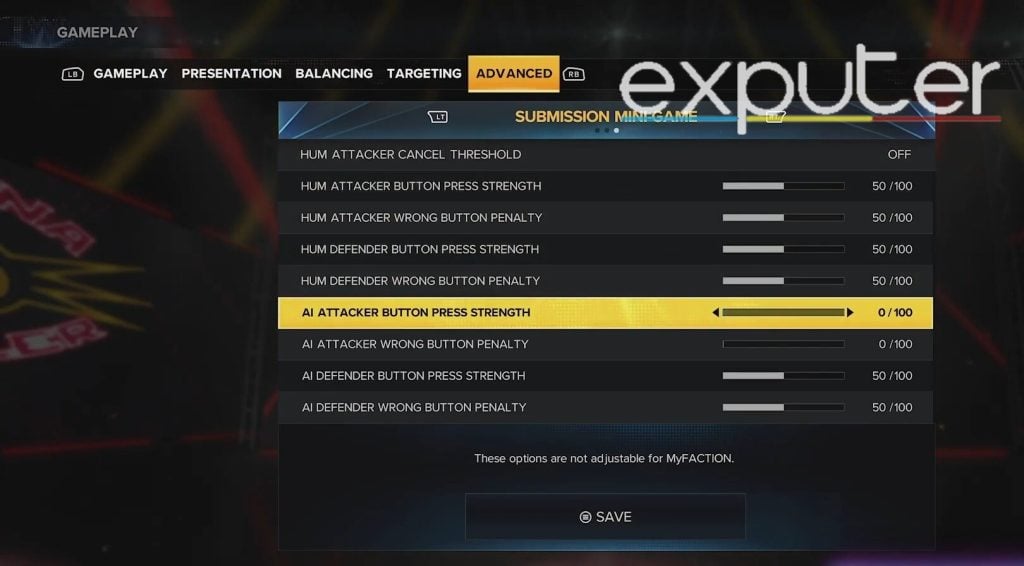
Last but not least, here are the settings that players can try out for the submission Mini-game settings.
| Submission Mini-Game | Settings |
| Hum Attacker Cancel Threshold | Off |
| HUM Attacker Button Press Strength | 50/100 |
| Hum Attacker Wrong Button Penalty | 50/100 |
| Hum Defender Button Press Strength | 50/100 |
| Hum Defender Wrong Button Penalty | 50/100 |
| AI Attacker Button Press Strength | 0/100 |
| AI Attacker Wrong Button Penalty | 0/100 |
| AI Defender Button Press Strength | 50/100 |
| AI Defender Wrong Button Penalty | 50/100 |
Longer Match Settings
Moving on, if there are players who want longer matches, then the settings that are going to be discussed further can assist players with it. The settings are primarily set for universe mode, and AI vs AI matches can go on for longer periods with this.
Gameplay
Starting things out, let’s discuss the Slider settings that players can keep for gameplay. Once again, these can be changed based on the player’s needs.
| Gameplay | Settings |
| Difficulty | Legend |
| Weight Detection | Simulation |
| Pin Mini-Game | Timed |
| Allow Held Input For Mini-Games | Off |
| Rope Break (Automatic) | On |
| Auto Reversal For ground Attacks | On |
| Entrance Run-In (Play Mode) | Player |
| Mid Match Run In (Play Mode) | Off |
| Post Match Run In (Play Mode) | Off |
| Blood | On |
| Subtitles | Off |
| Tutorial Tips | On |
| Edited/Created Superstars | Allowed |
Presentation
For your overall presentation during your matches, players will typically stick to the same settings as before but touch up a few settings.
| Presentation | Settings |
| Superstar HUD | Off |
| Fatigue | On |
| Control Help And Match Rating HUD | Off |
| Reversal Prompt | Off |
| Camera Cuts | On |
| Camera Shakes | On |
| Camera Panning | On |
| Postmatch Replay | On |
| Run-In/Breakout HUD ** | Off |
| Display Referee Counts | Off |
| Watermark Image | On |
| Controller Vibration * | On |
| Instant Recovery Prompt | On |
| Ring Escape Prompt | Off |
| Possum Attack Prompt | Off |
| Possum Pin Prompt | Off |
Balancing
The balancing settings will also typically remain the same. However, players will be able to switch out a few sliders.
| Balancing | Settings |
| AI Standing Strike Reversal Rate | 25/100 |
| AI Standing Grapple Reversal Rate | 25/100 |
| AI Ground Strike Reversal Rate | 10/100 |
| AI Ground Grapple Reversal Rate | 10/100 |
| AI Finisher Reversal Rate | 30/100 |
| AI Foreign Object Attack Reversal Rate | 47/100 |
| AI Grab Breaker Rate | 100/100 |
| Ai Combo Breaker Rate | 100/100 |
| AI Combo Rate | 20/100 |
| AI Submission Rate | 0/100 |
| AI Dive Rate | 0/100 |
| AI Springboard Rate | 0/100 |
| AI Grapple Rate | 35/100 |
| AI Strike Rate | 10/100 |
| AI Limb Targeting Rate | 20/100 |
| AI Running Attack Rate | 10/100 |
| AI Block Rate | 16/100 |
| AI Dodge Rate | 30/100 |
| Entrance Run-In | 2/10 |
| Mid Match Run-In | 2/10 |
| Post Match Run-In | 2/10 |
| Referee Down Time | 100/100 |
| Basic Reversal Windows | 0/100 |
| Ground Attack Reversal Windows | 0/100 |
| Signature And Finisher Reversal | 60/100 |
| Weapon Reversal | 50/100 |
| Stamina Cost | 100/100 |
| Stamina Recovery Rate | 50/100 |
| Stunned Recovery Rate | 20/100 |
| Rollout Frequency | 0/100 |
| Rollout Duration | 0/100 |
| Stun Gain | 100/100 |
| Stun Duration | 100/100 |
| Vitality Regen Cooldown | 50/100 |
| Vitality Regen Rate | 50/100 |
| AI Difficulty Damage Scaling | 50/100 |
| Drag Escape Difficulty | 50/100 |
| Carry Escape Difficulty | 50/100 |
Targeting
As far as targeting in Slider settings is concerned, players won’t really need to edit them a whole lot and will typically stick with default settings such as a few of the settings listed below.
| Targeting | Settings |
| Indicators | Players Only |
| Target Setting 1P | Semi Auto |
| Target Setting 2P | Semi Auto |
| Target Setting 3P | Semi Auto |
| Target Setting 4P | Semi Auto |
| Target Setting 5P | Semi Auto |
| Target Setting 6P | Semi Auto |
| Target Teammate (Manual) | Off |
| Target Opposing Manager | Off |
Advanced
Lastly, I have the advanced settings, of which players can choose three difficulties and use the sliders in WWE 2K23 as per their perusal.
Pin Difficulty Settings
With the pin difficulty settings, players can either stick to default or change them to their preference, but typically for longer matches, these ones can be kept.
| Pin Difficulty Settings | Settings |
| First Count Lock | Off |
| HUM Additional Finisher Pin Value | 50/100 |
| HUM Finisher History Pin Value | 50/100 |
| HUM 3+ Finisher History Pin Value | 50/100 |
| HUM Additional Signature Pin Value | 50/100 |
| GUM Signature History Pin Value | 50/100 |
| HUM 3+ Signature History Pin Value | 50/100 |
| HUM Post-Kickout Damage Recovery | 50/100 |
| AI Additional Finisher Pin Value | 50/100 |
| AI Finisher History Pin Value | 50/100 |
| AI 3+ Finisher History Pin Value | 50/100 |
| AI Additional Signature Pin Value | 50/100 |
| AI Signature History Pin Value | 50/100 |
| AI 3+ Signature History Pin Value | 50/100 |
| AI Post Kickout Damage Recovery | 10/100 |
Timing Pin Mini-Game

As for the timing pin mini-game, the settings that players can choose can be from the follows as listed here.
| Timing Pin Mini-Game | Settings |
| Normal Pin Indicator Flag Speed | 50/100 |
| Pressure Pin 1 Indicator Flag Speed | 50/100 |
| Pressure Pin 2 Indicator Flag Speed | 50/100 |
| Normal Pin Kickout Zone Max Size | 50/100 |
| Pressure Pin 1 Kickout Zone Max Size | 50/100 |
| Pressure Pin 2 Kickout Zone Max Size | 50/100 |
| Normal Pin Kickout Zone Min Size | 50/100 |
| Pressure Pin 1 Kickout Zone Min Size | 50/100 |
| Pressure Pin 2 Kickout Zone Min Size | 50/100 |
Submission Mini-Game
Lastly, for the submission mini-game, settings can be set as seen below.
| Submission Mini-Game | Settings |
| Hum Attacker Cancel Threshold | Off |
| HUM Attacker Button Press Strength | 50/100 |
| Hum Attacker Wrong Button Penalty | 50/100 |
| Hum Defender Button Press Strength | 50/100 |
| Hum Defender Wrong Button Penalty | 50/100 |
| AI Attacker Button Press Strength | 0/100 |
| AI Attacker Wrong Button Penalty | 0/100 |
| AI Defender Button Press Strength | 50/100 |
| AI Defender Wrong Button Penalty | 50/100 |
And there you have it! All that players need to know regarding WWE 2K23’s Slider settings, and with that, I will wrap up my guide!
Thanks! Do share your feedback with us. ⚡
How can we make this post better? Your help would be appreciated. ✍
Thanks alot