Corsair was founded in 1994. The company started as high-performance DRAM manufacturer. Now they are the provider of enthusiast-grade PC components and peripherals. The company launched their Corsair Gaming brand in 2014 and targets the eSports professionals and gamers alike with the products like keyboards, mice, headsets and mouse mats. Corsair is now a leading manufacturer of PC Enthusiast products like Chassis, Power Supply Units, DRAM, Solid State Drives, Cooling solutions for CPU and Graphics Cards, sleeved cables for their PSU units, and various gaming peripherals using cutting edge technology.
We will be taking a look at their popular FPS gaming mouse M65 Pro RGB. This is an enhanced version of the M65 Pro gaming mouse with a better sensor and RGB lighting. The mouse features Omron switches rated for 20 Million clicks. It has PMW3360 with up to 12000 DPI with up to 1000Hz polling rate. This mouse follows the Claw type grip and is suitable for users with larger hands. It has 3 zones for RGB illumination which the user can control with their iCUE software.
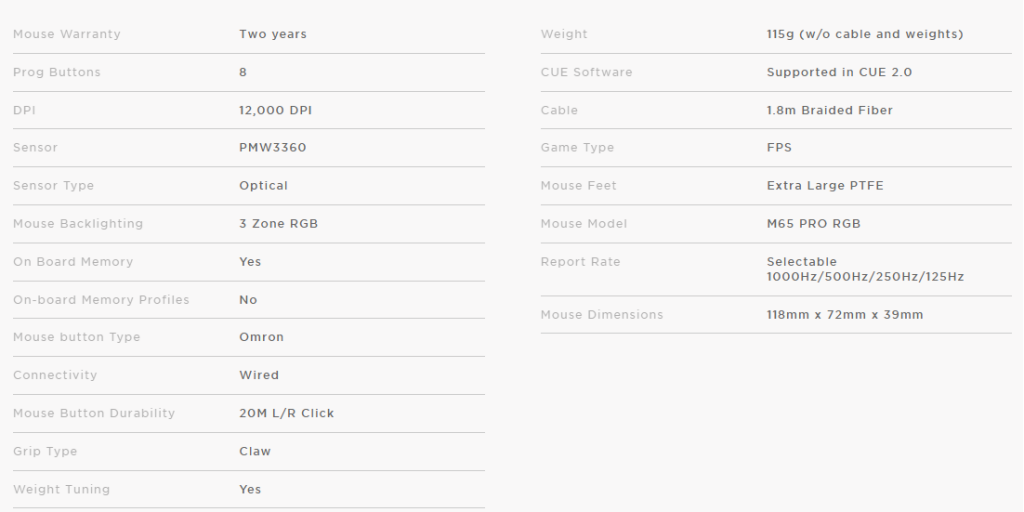
Specifications
Packaging and Unboxing
The mouse comes in the typical black and yellow color cardboard box following the Corsair branding style these days. The front cover of the box has Corsair brand name and logo printed on the top right side. The mouse features 12k DPI, surface calibration, and dynamic multi-color illumination. There is a picture of the mouse on the main section. The mouse features an aircraft grade aluminum frame with weight tuning system and dedicated sniper button. M65 Pro RGB FPS Gaming Mouse is printed at the bottom. The backside of the box has Corsair brand name and logo printed on the top left side. M65 Pro RGB FPS Gaming Mouse is printed on the top side. There is a picture of the mouse on the top side with numbered regions. Each number has the corresponding highlight printed around the mouse picture. Corsairgaming.com is printed at the bottom. The left side of the box has 12000 DPI sensor info printed in 4 languages. Surface calibration utility info is printed in 4 different languages. Corsair Utility Engine (CUE) information is printed in 4 languages. M65 Pro RGB is printed at the bottom. Corsair brand name and logo are printed on the top side. M65 Pro RGB is printed at the bottom. Package contents and System requirements are printed in 4 languages. The top side of the box with opening cover has two seals on it. Corsair brand name and logo are printed on the top left side. M65 Pro RGB and FPS Gaming Mouse are printed next to the Corsair branding. There is an info sticker pasted on the right side. It has serial no barcode, EAN and UPC barcode labels printed on it in addition to the part no. The bottom side of the box has a large opening in the center showcasing the mouse’s backside. The top side has a flapper cover. Open it to see the mouse being showcased inside a transparent container on the right side with the dark yellow background color on the inner packing. The left side of the cover has Corsair brand name and logo printed on the top. The three LED zones have been shown in the pictures for illumination. The info is printed in four languages. The mouse is nicely tucked inside the transparent cover that is sandwiched between the two folded inner packing.

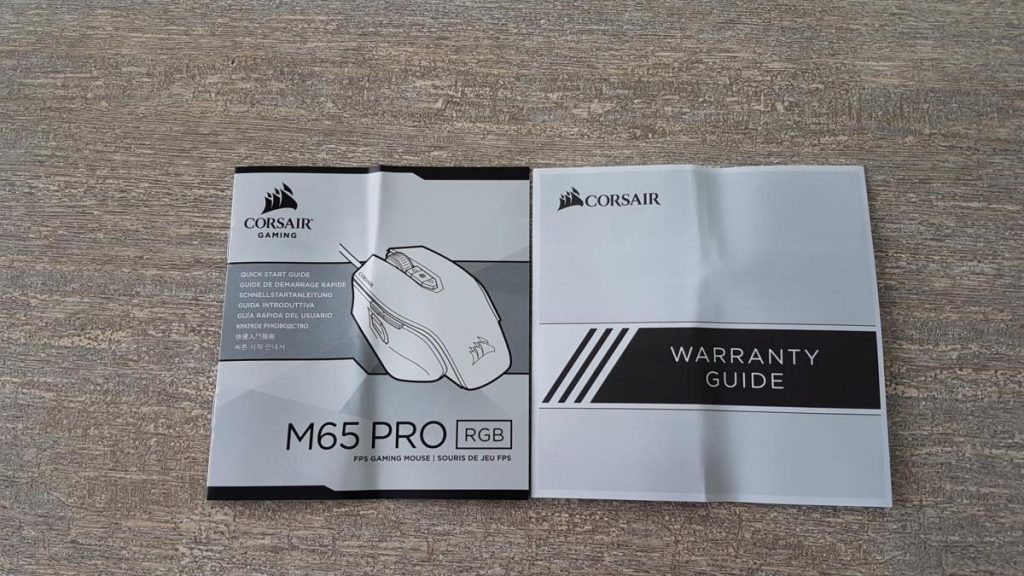
Contents
These include:
- Warranty Guide
- User Guide
- Mouse
Closer Look
For a gaming mouse, there has been a categorization lately subject to the particular gaming style and palm grip. FPS oriented gaming mouse tend to have fewer buttons than the mouse optimized for MMO/RPG etc gaming. Similarly, the ergonomic styling has pretty much to do how the gamer would hold the mouse and corresponding comfort level. The Corsair M65 Pro RGB gaming mouse is optimized for the FPS gaming. Here is what the Corsair is saying about it. “The M65 PRO RGB is a competition-grade FPS gaming mouse with the technology you need to win, the customization to make it your own, and the build quality to last. The M65 PRO RGB features a 12000 DPI optical sensor that provides pixel-precise tracking and advanced surface calibration support. The aircraft-grade aluminum frame gives it low weight, and at the same time, extremely high durability. Use the advanced weight tuning system to set the center of gravity to match your play style, and harness the power of CUE for advanced button configuration, macro programming, and three-zone RGB backlighting customization.”
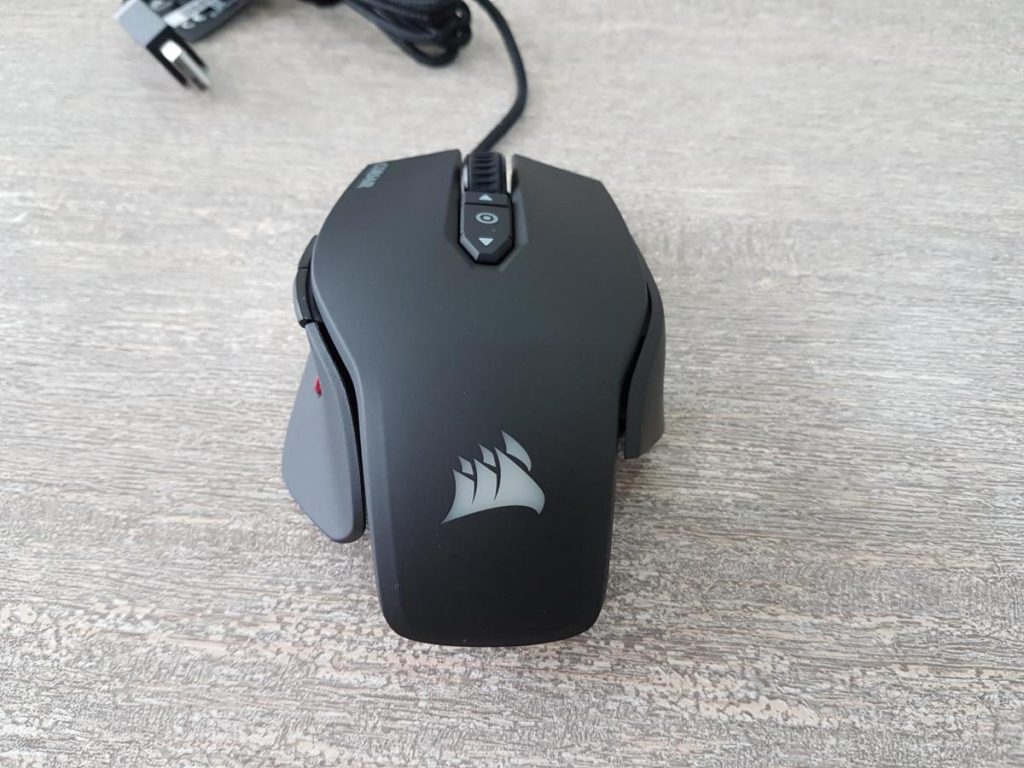
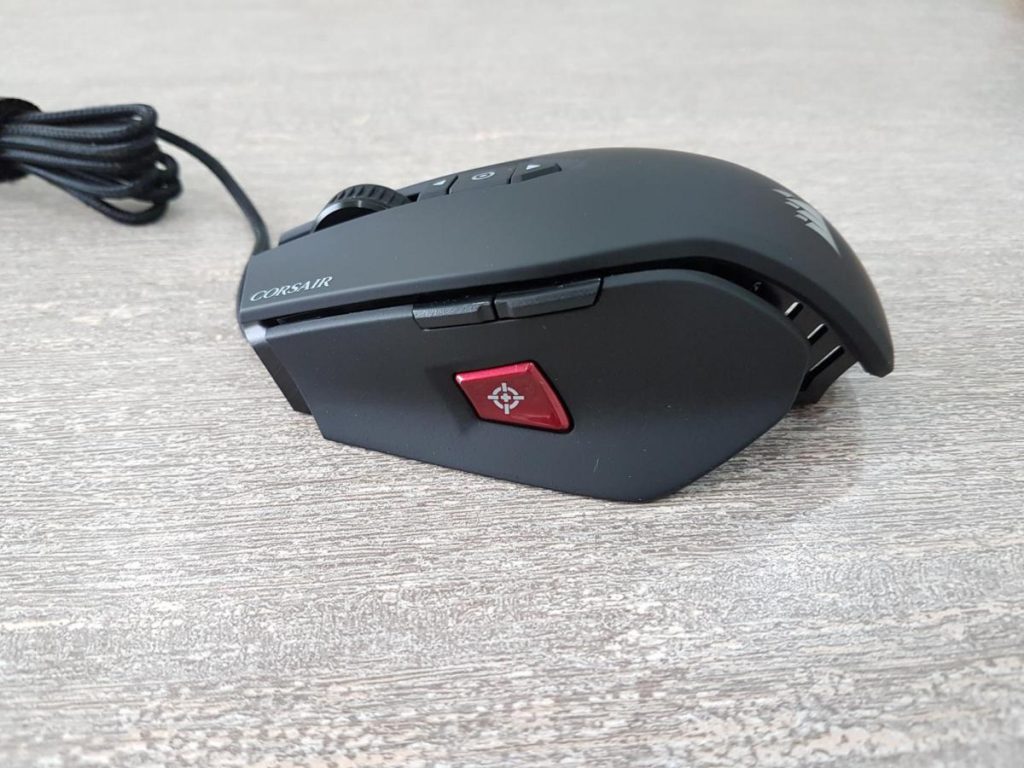
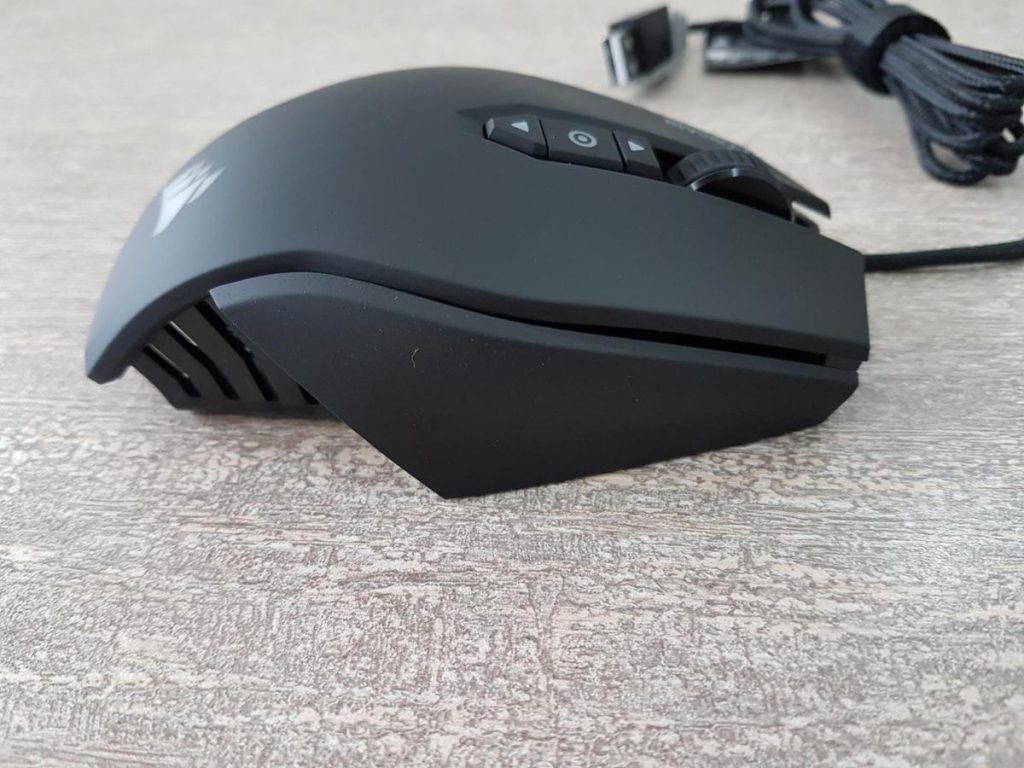
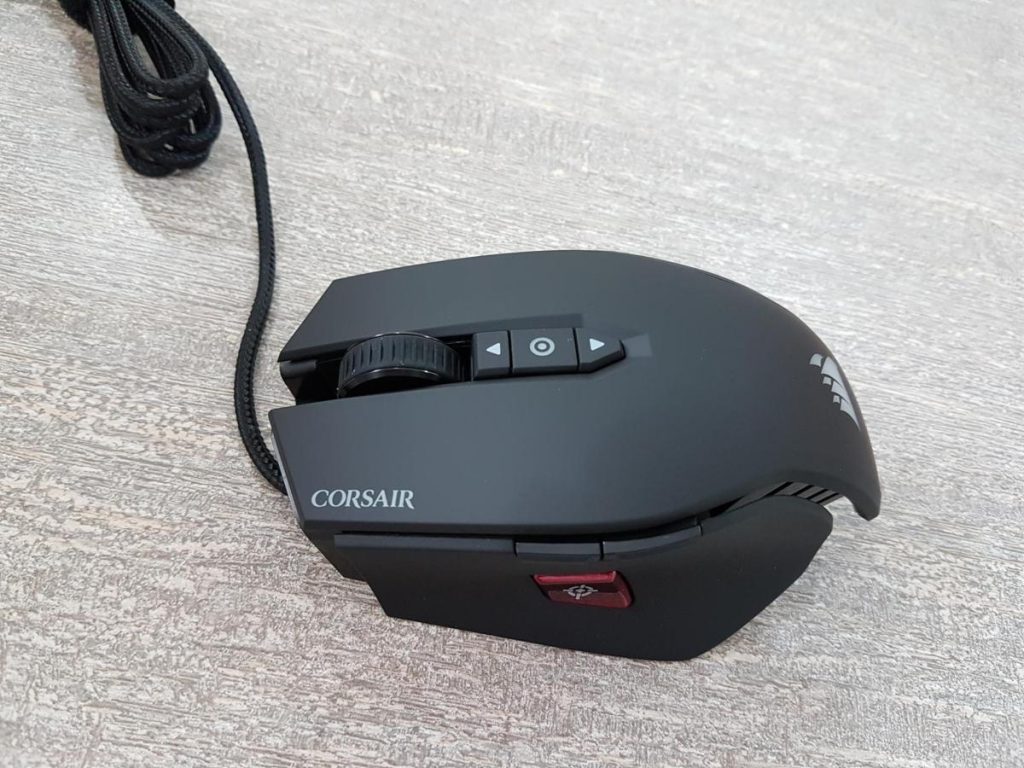
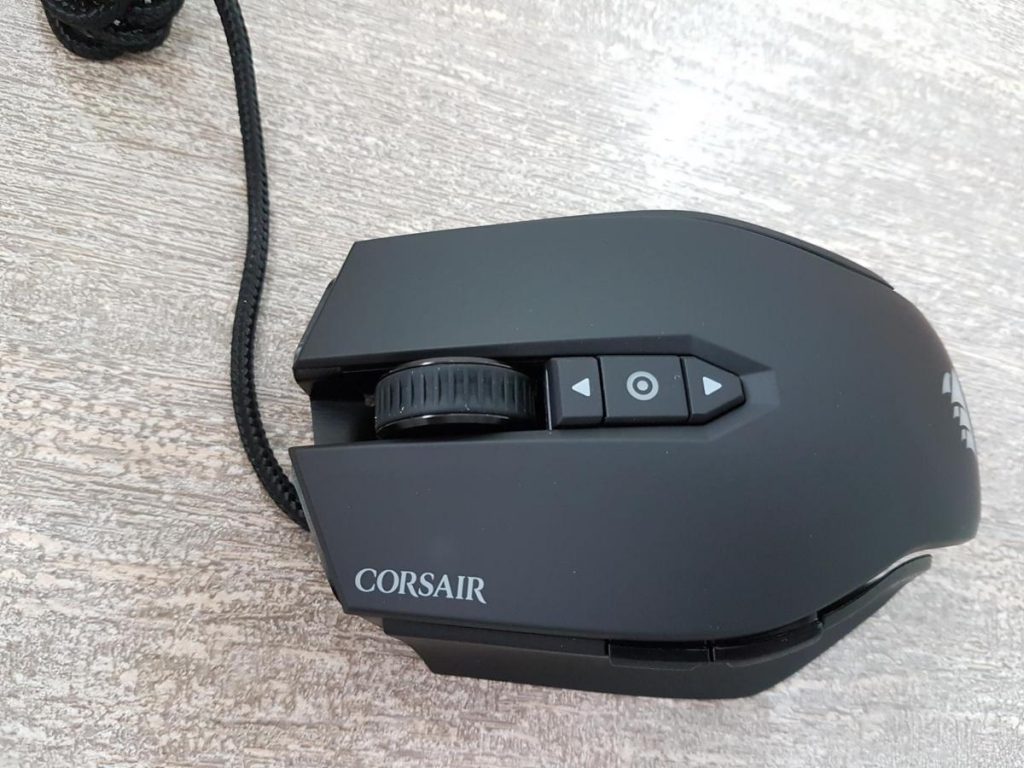

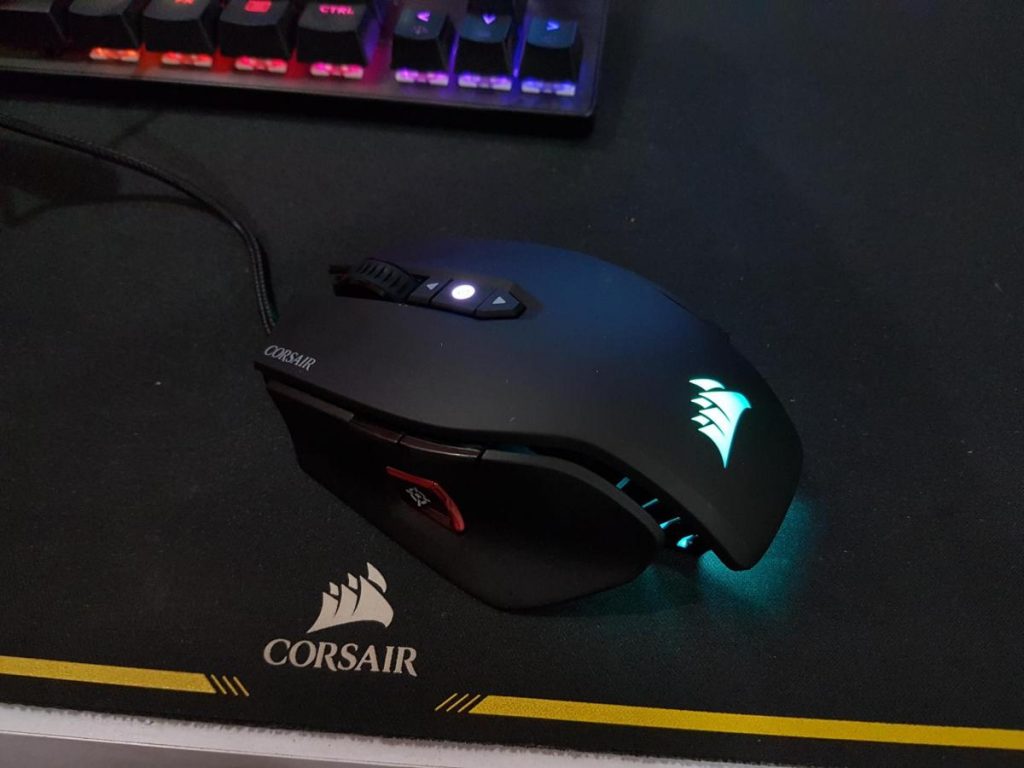
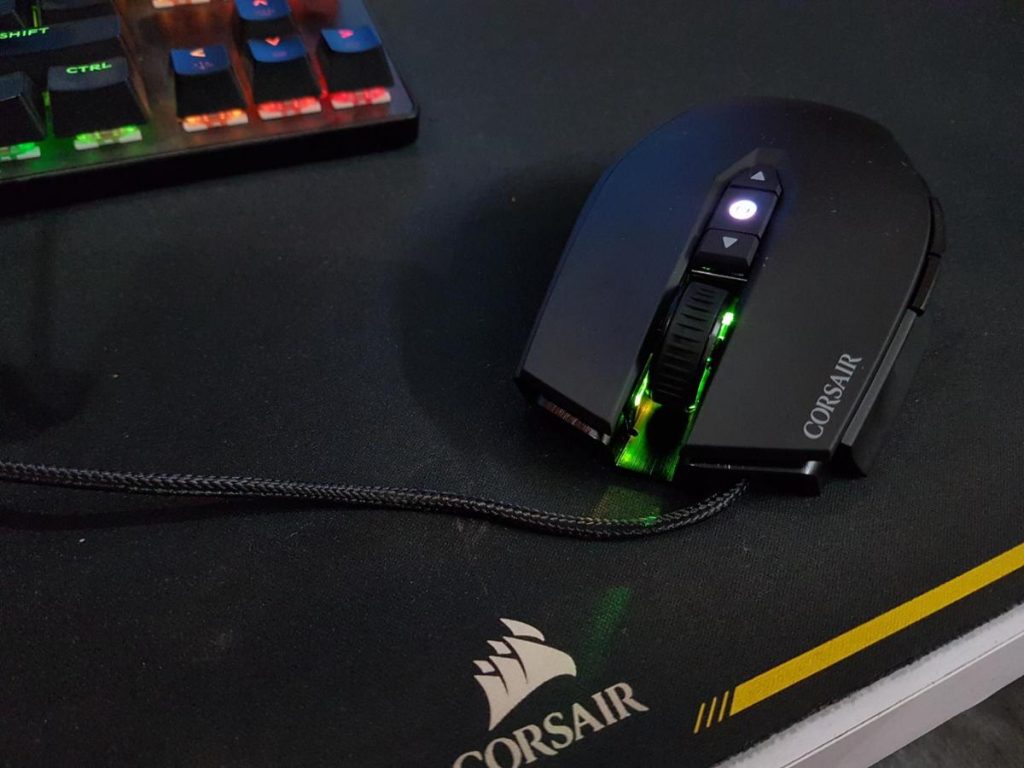
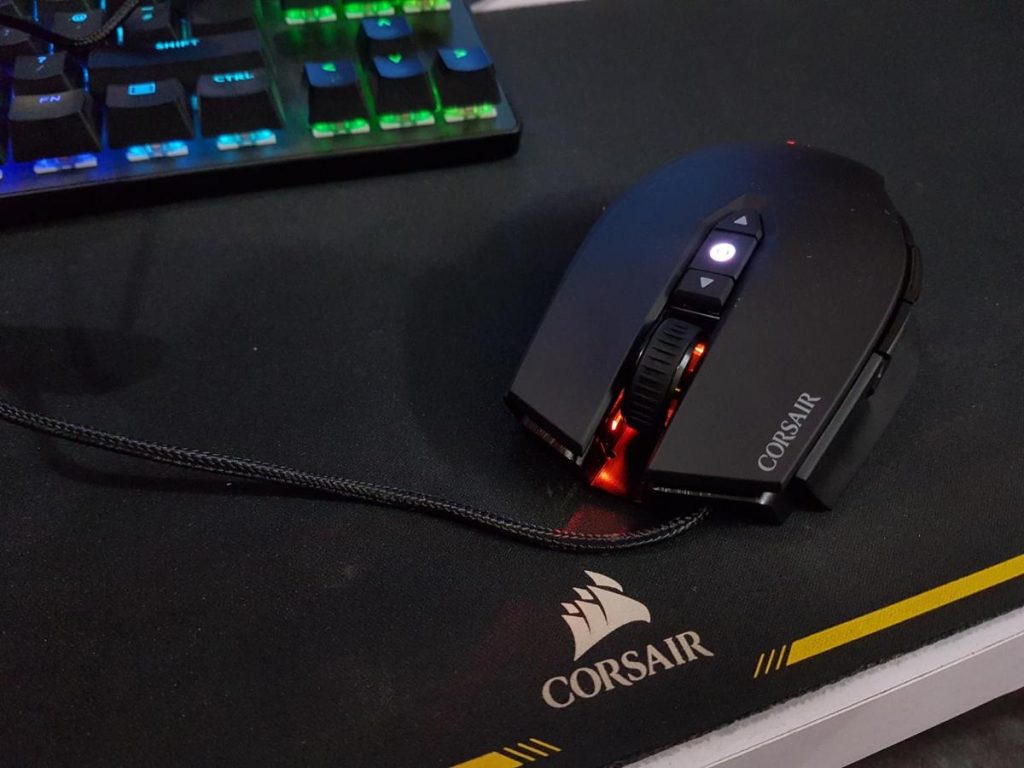
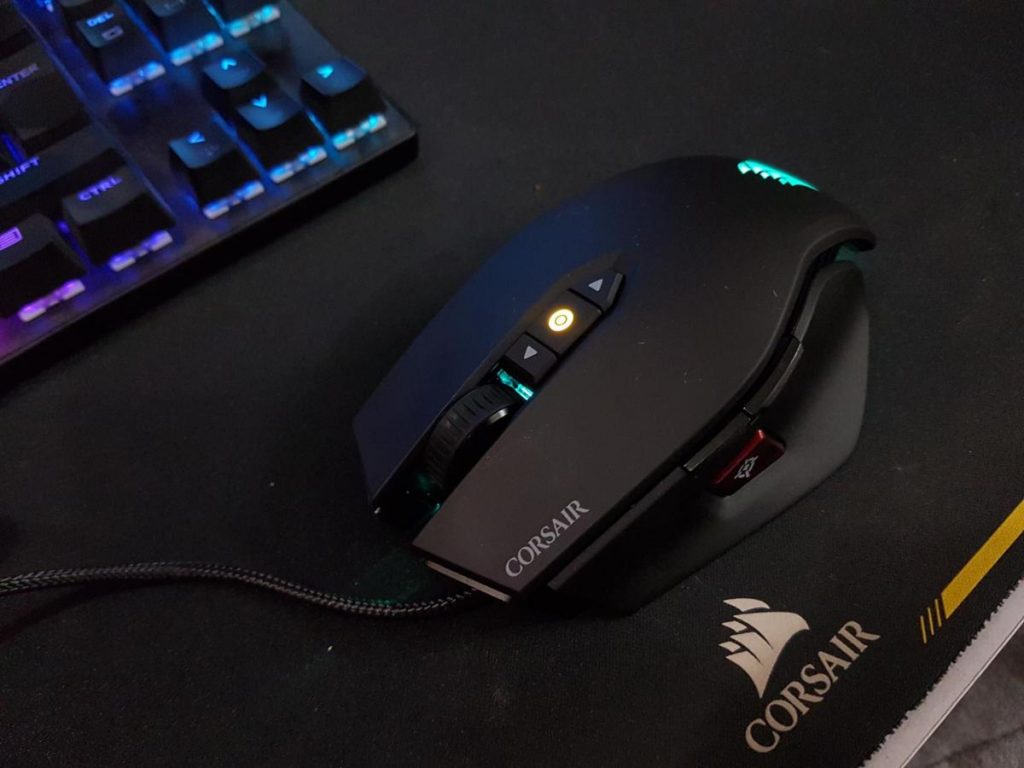
Let’s take a closer look at the mouse. The dimension of the mouse is 118x72x39mm. This is a black color version of the mouse. It is also available in the white color. It has 8 programmable buttons. The frame of the mouse is made of the aircraft grade aluminum which adds much to the rigidity of the gaming mouse. The overall look and feel of the mouse design give a bold styling that speaks for itself yet it is elegant. The unibody aluminum frame provides a lightweight body, excellent durability, and optimal mass distribution. The backside of the mouse has a sliding down design. There is a frosty white color Corsair logo which has RGB LED(s) underneath it. This is Zone 3 of the RGB LED lighting illumination. The finish on the mouse is matte black. The curvatures on the left and right sides of the mouse are designed precisely to go in sync with the bulk of the mouse mass being at the top right before the slope of the recess on the backside. This is ideal for claw grip styling. The aluminum-based inner structure is covered with the plastic frame sides. The left side of the mouse has two buttons right on the border line’s edge. The first button is referred to as Button 6 with the corresponding predefined action of Forward and second button is referred to as Button 7 with the corresponding predefined action of Backward. The user can customize the default actions in the iCUE software. There is a red color button below these buttons. This is the Sniper button which goes hand in hand with the FPS style of gaming. Instead of pressing and holding the shift key to slow the speed and giving the impression of holding the breath during the sniper action, pressing the sniper button will take care of it. This button has a crosshair in the middle with a + sign. This button is referred to as Button 8. The left side cover is designed as such that there is widening gap on the trailing side from the top cover. We can see the aluminum-based inner structure on the front and on the rear. The right side cover has no buttons on it. This is the side responsible to hold your ring and baby fingers and it does the job. It is covering from the front side all the way to the rear by leaving the central aluminum frame exposed as is the case with the left side cover. Let’s take a look at the top of the mouse. A sparing look on the top reveals that there is a gap on the trailing edges of the left and right side covers. This mouse features a high-mass scroll wheel with rubberized exterior wrapped around a metallic core to give a great feel, effortless control, and tactile precision. The area under and around the scroll wheel is the Zone 2 of the RGB lighting illumination. There are three buttons following the scroll wheel. These three buttons are related to DPI settings. The top button is used to increase the DPI value. It is in the rectangular shape and is referred to as button 4. The bottom button is almost in rounded triangular shape and it decreases the DPI value. It is referred to as button 5. The middle button is DPI Indicator. It is not a button as such but design in a manner to give the impression of being a button so that overall aesthetics can be achieved. It simply changes the color of the LED on it to show the corresponding DPI value. In order to better understand the built-in 5 DPI levels, refer to the software section. Each value has color coding. The same color will be illuminated on this button to indicate the corresponding DPI level. This mouse is using the Omron switches which are rated for 20 Million clicks on the left and right buttons. The left click button is referred to as Button 1 and the right click one is referred to as button 2. The front side of the mouse shows the extremely good finishing of the aluminum inner structure. The braided USB cable is coming out from the left side. Notice the gap between the top cover and the aluminum structure.
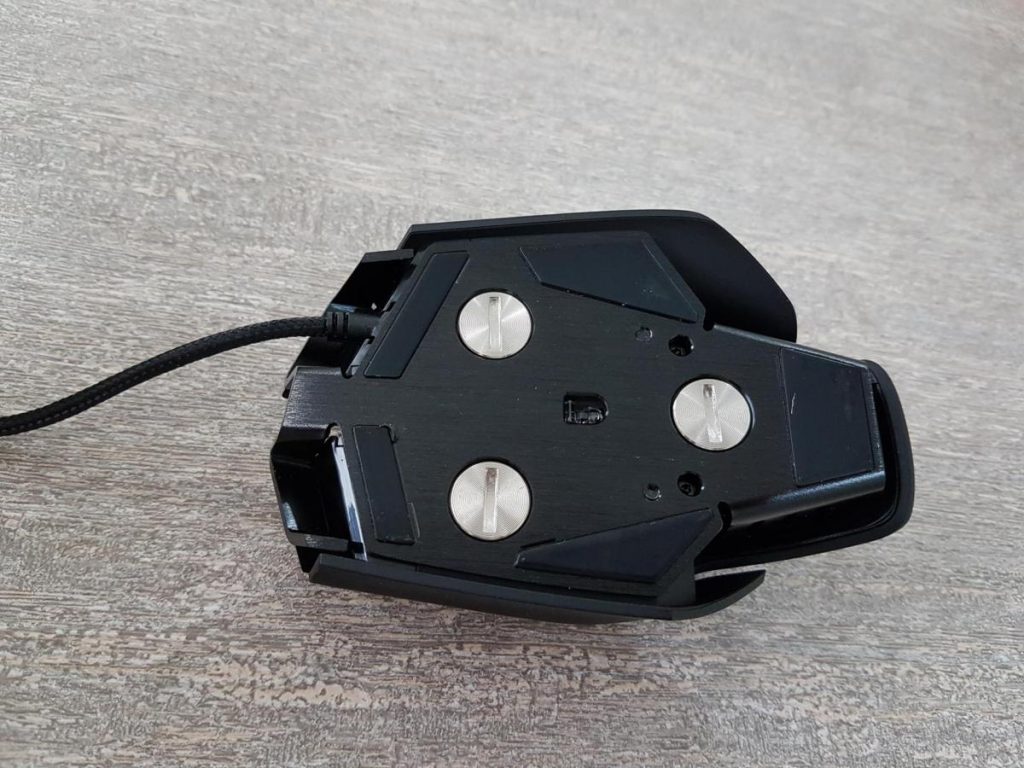
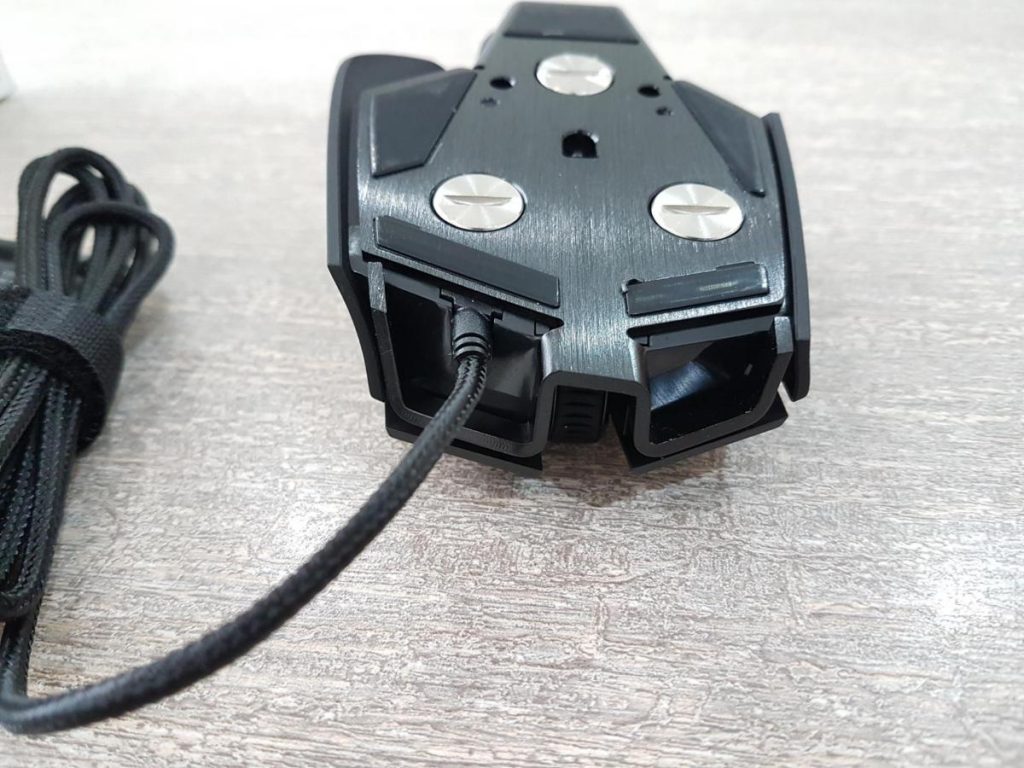

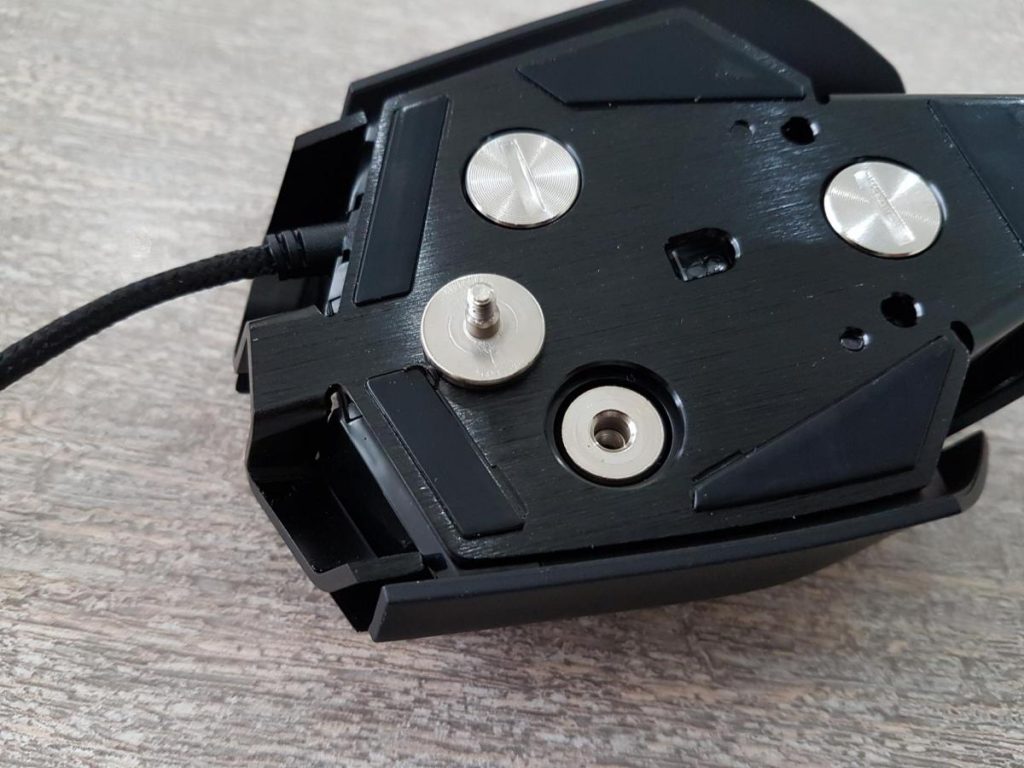
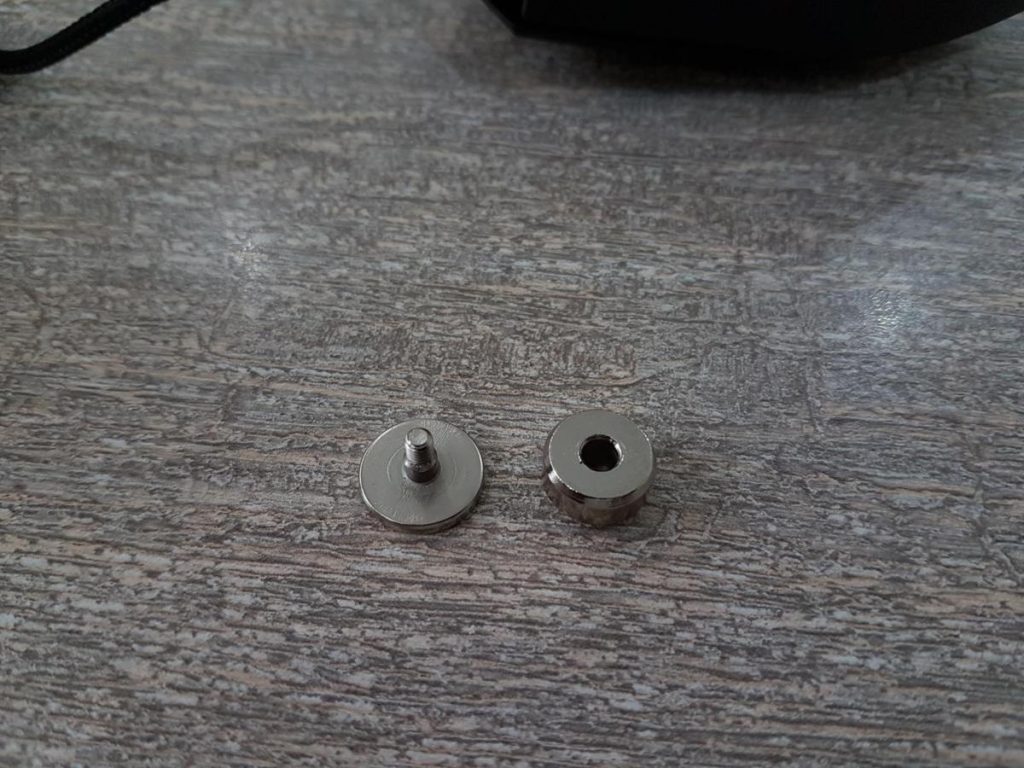
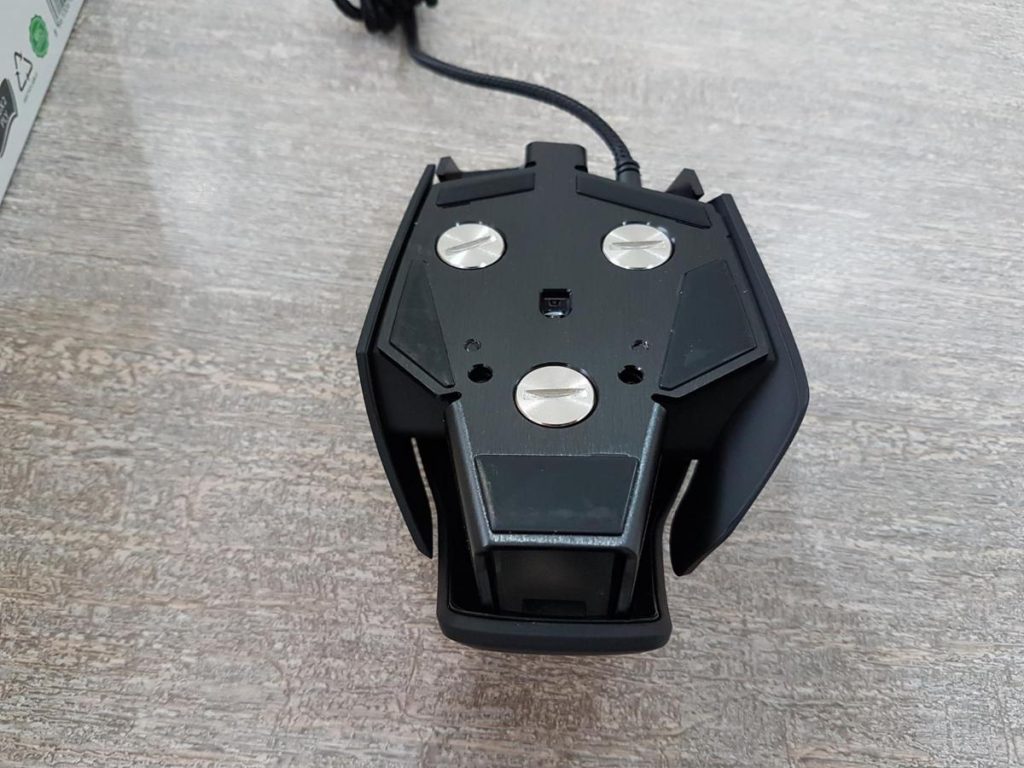
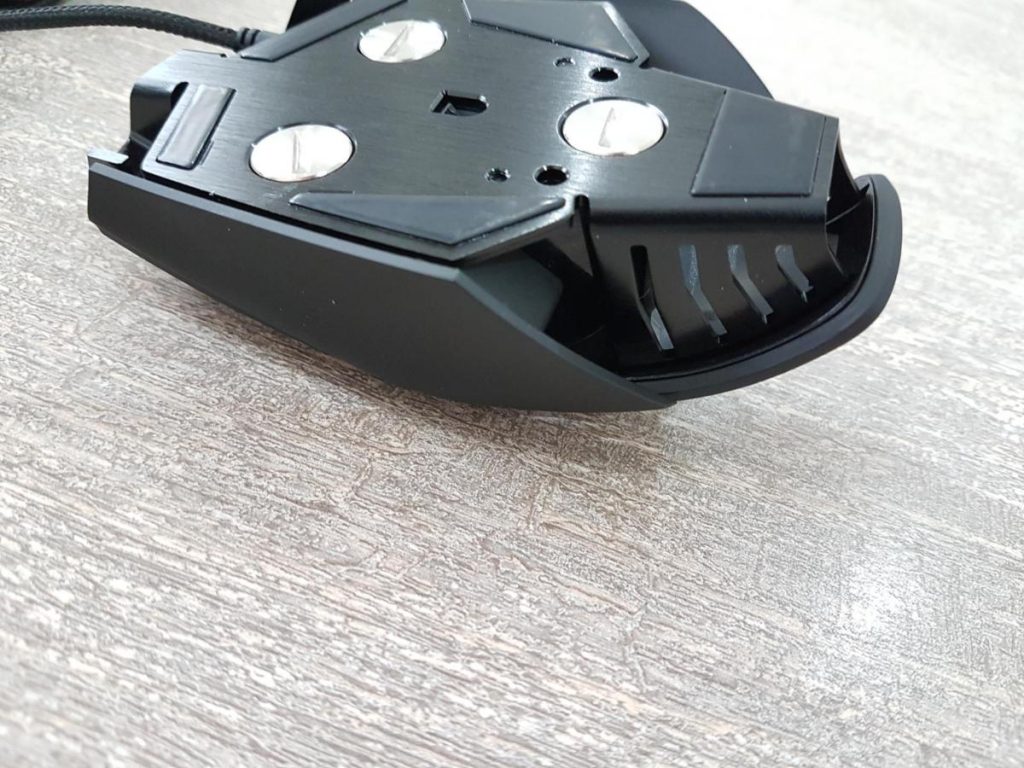
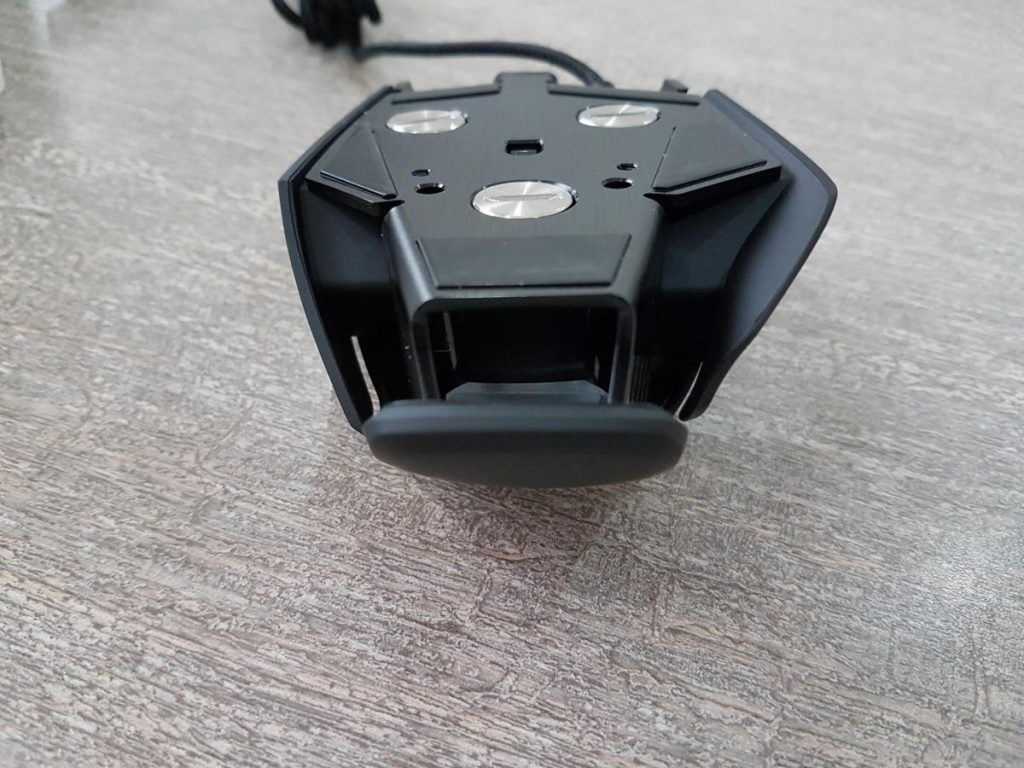
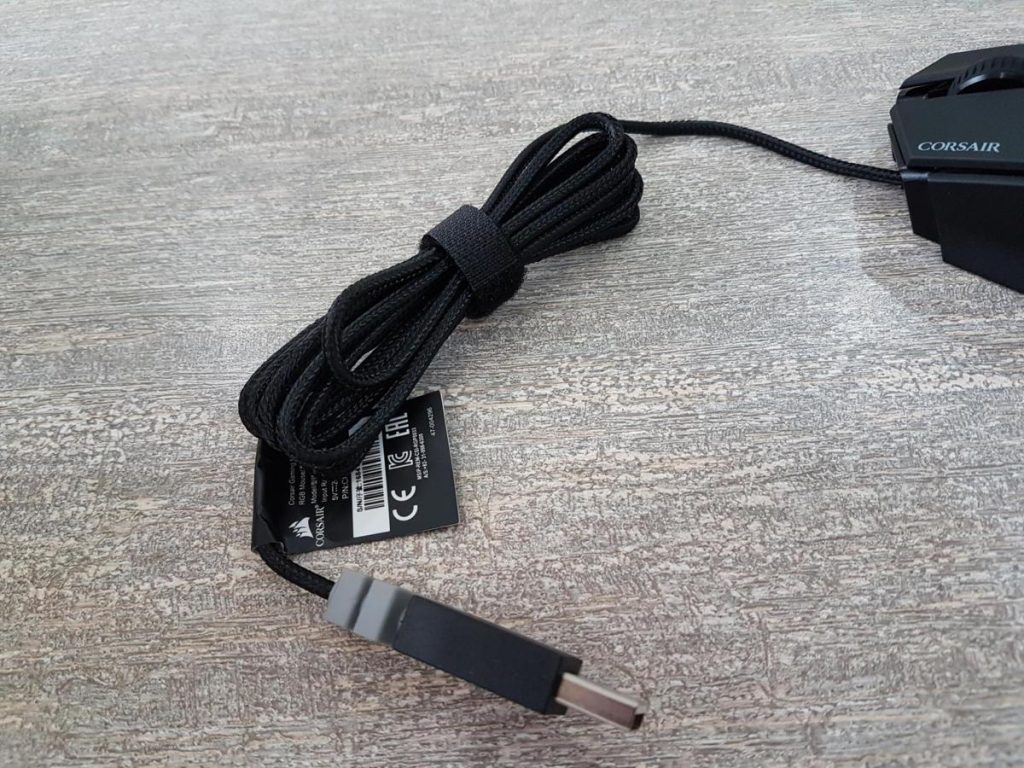
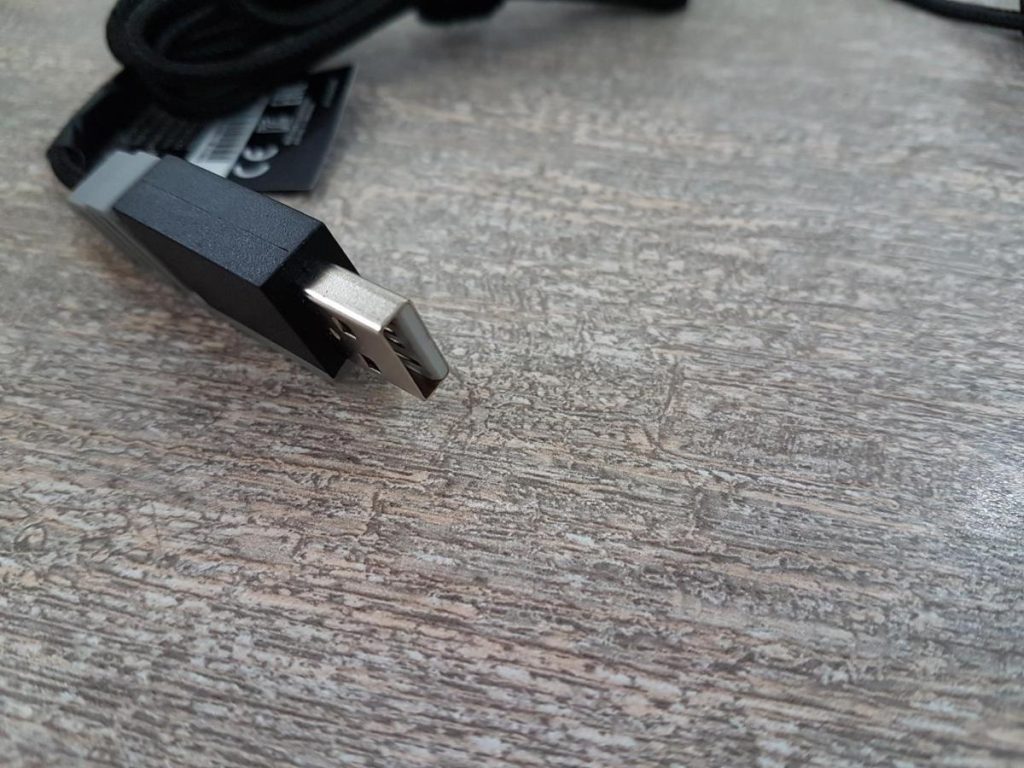
Let’s take a look at the bottom of the mouse. The M65 PRO RGB is designed with low-friction contact points to ensure a great feel and swift, precise movement with minimal effort. This is achieved by using the extra-large PTFE glider pads on the bottom which are 5 in total. One is at the bottom, two are on the front and one each on the left and right sides. This mouse has advanced weight tuning system to set the center of gravity of your M65 PRO RGB to match your play style. There are three weight tuning zones. Each one has a weight block inside covered with a screw. There are possible scenarios for weight adjustment. The user can remove the weight block and keep the screw on remove both the weight block and the screw. This is totally up to the users to configure the weight of the mouse as per their convenience. On a side note, this mouse is relatively heavier than the majority of the mouse that we have used/tested. Last but the most important element from the bottom side of the mouse is the optical sensor. Corsair is using Gaming grade PMW3360 optical sensor for pixel-precise tracking, custom tuned to give you superior performance on virtually any surface. This is one of the main differences between the Corsair M65 Pro and Pro RGB versions. This sensor is rated for 12000 DPI for high accuracy and precise movement. The pool rate of the mouse can be adjusted from 125Hz/250Hz/500Hz/1000Hz. The last element in our closer look section is the rear side of the mouse. The main shaft of the aluminum unibody design is narrowing down the rear side. There are cutouts on the left and the right sides of this part of the aluminum structure. The rear part is not covered and is hollow in design. The USB cable is braided with fiber material and has 1.8m length. Setting up the mouse is easy. Turn on your computer. Connect the mouse to an available USB port. Download the Corsair Gaming Mouse Software from corsair.com/downloads. Run the installer program and follow instructions for installation.
Software and RGB Lighting
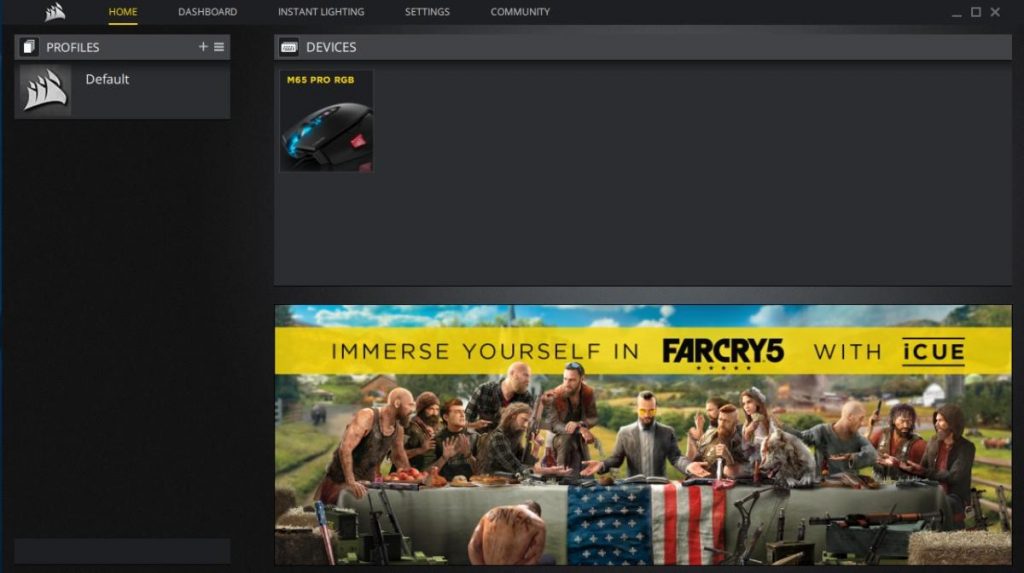
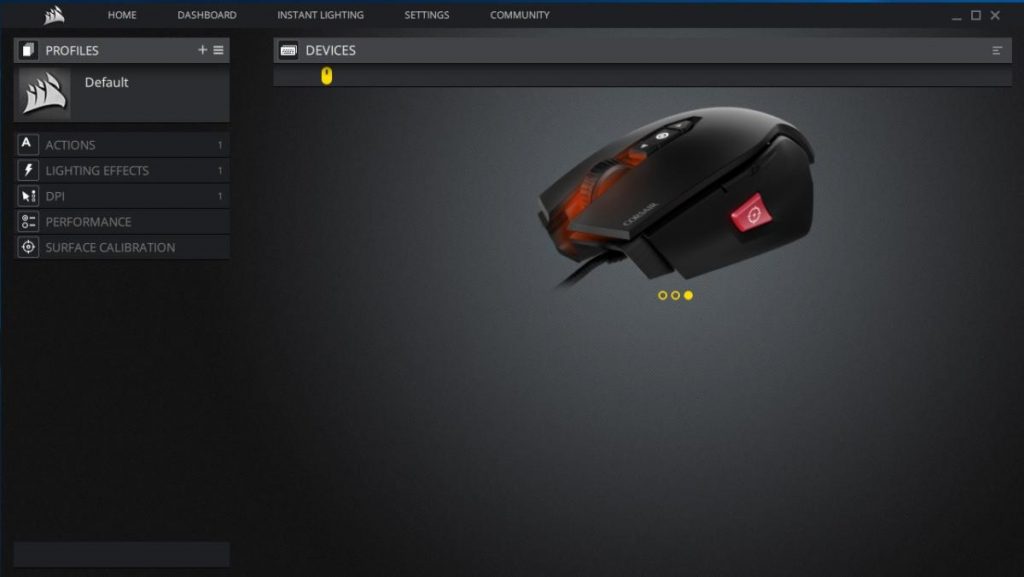
Corsair has recently introduced their new application software to control their devices. This is known as iCUE standing for Intelligent Corsair Utility Engine. CORSAIR iCUE software enables vivid dynamic RGB lighting control, sophisticated macro programming and full-system lighting synchronization across compatible CORSAIR peripherals, coolers, fans and more. This software makes it easy to set up button mapping and other parameters for each of your favorite games. You can save a gaming profile directly to your M65 PRO RGB and take it with you. Don’t just configure your mouse – program it with double macros, custom RGB lighting, and more. Once the software is downloaded and installed. Open it after connecting the mouse to the PC. The main interface will show the connected devices. In our case, it is only the gaming mouse. There are four main menus:
- Home
- Dashboard
- Instant Lighting
- Settings
Home will take you to the home screen of the software. A dashboard will show the selected graphs of the connected devices. The user will have to configure each device to be shown in the Dashboard. Instant lighting will show some basic colors to choose from to be loaded on the RGB LED lighting enabled connected devices. Settings will open new options pertaining to the software itself and the selected device as well.
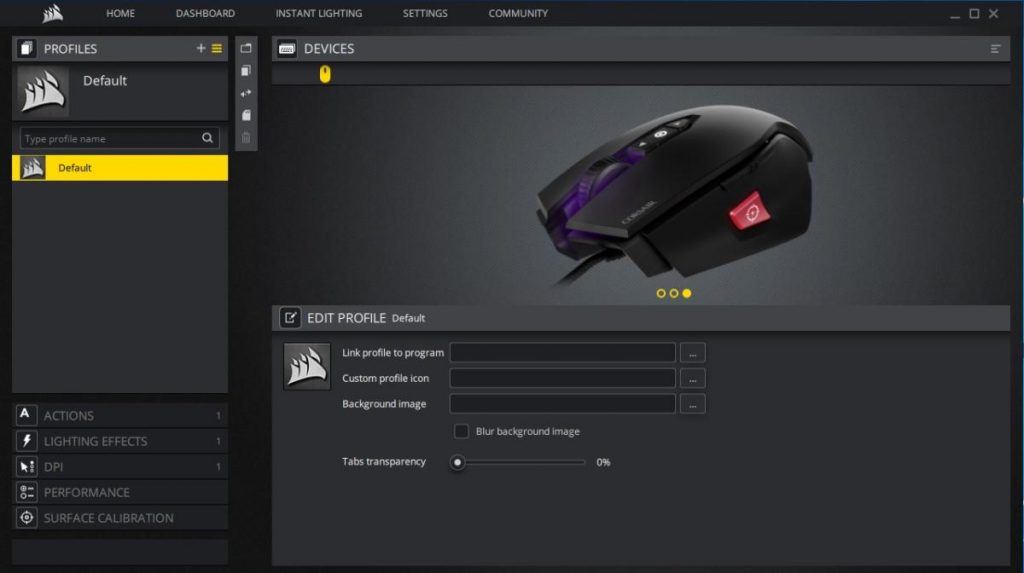
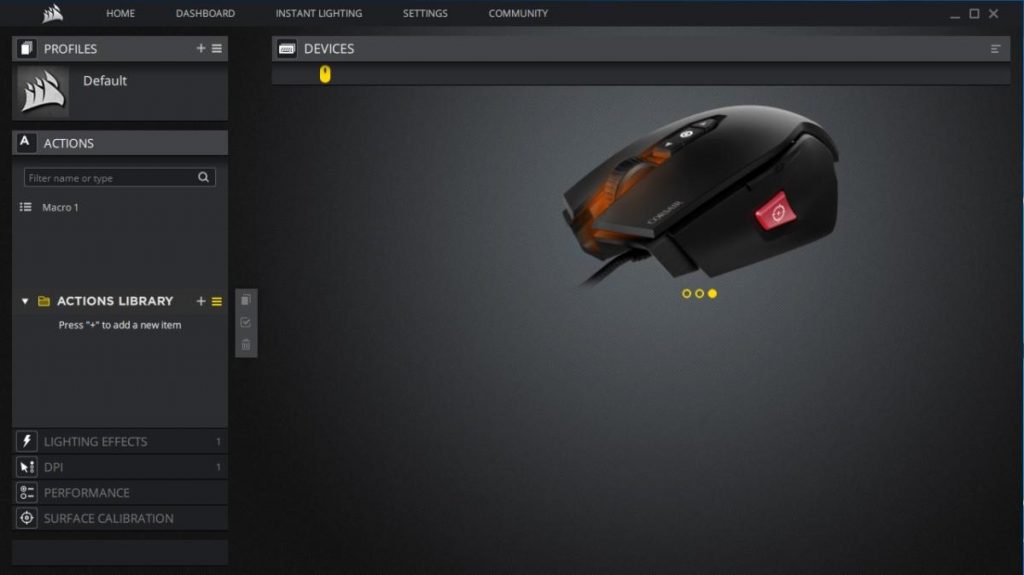


The interface is straightforward and easy to use. Click on the connected device and corresponding menu options will pop up under the Profile section. In our case the options are:
- Action
- Lighting Effects
- DPI
- Performance
- Surface Calibration
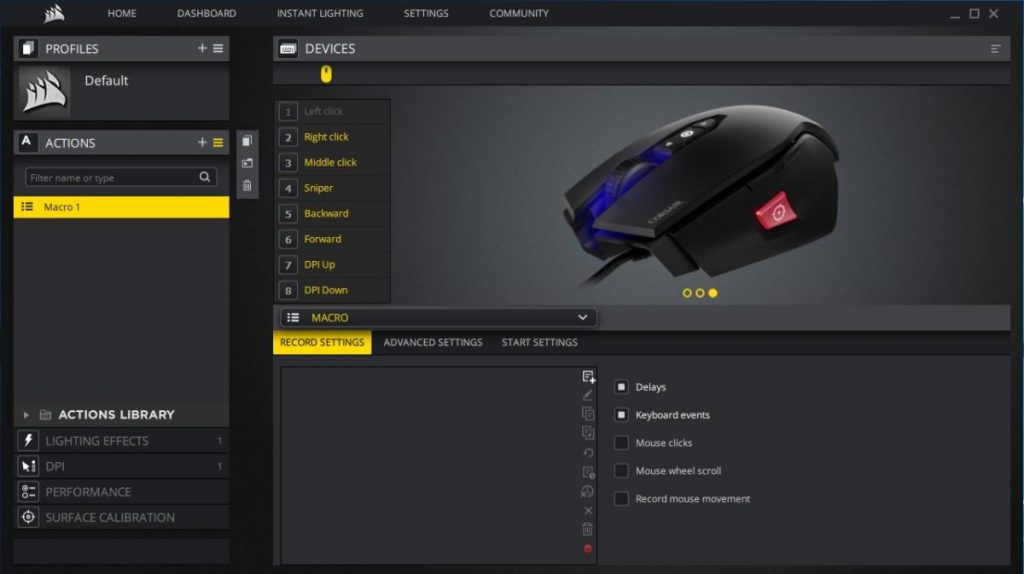
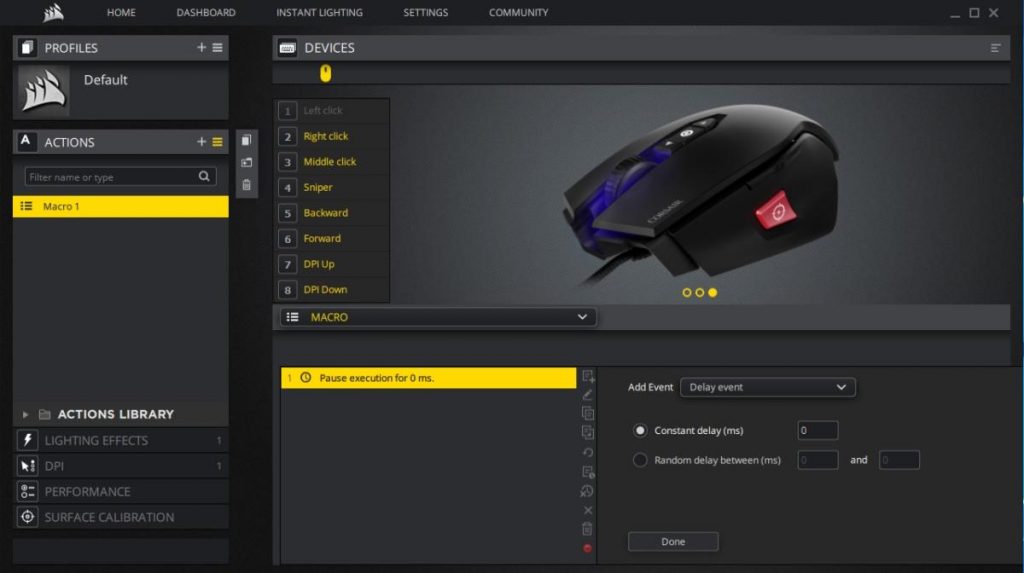
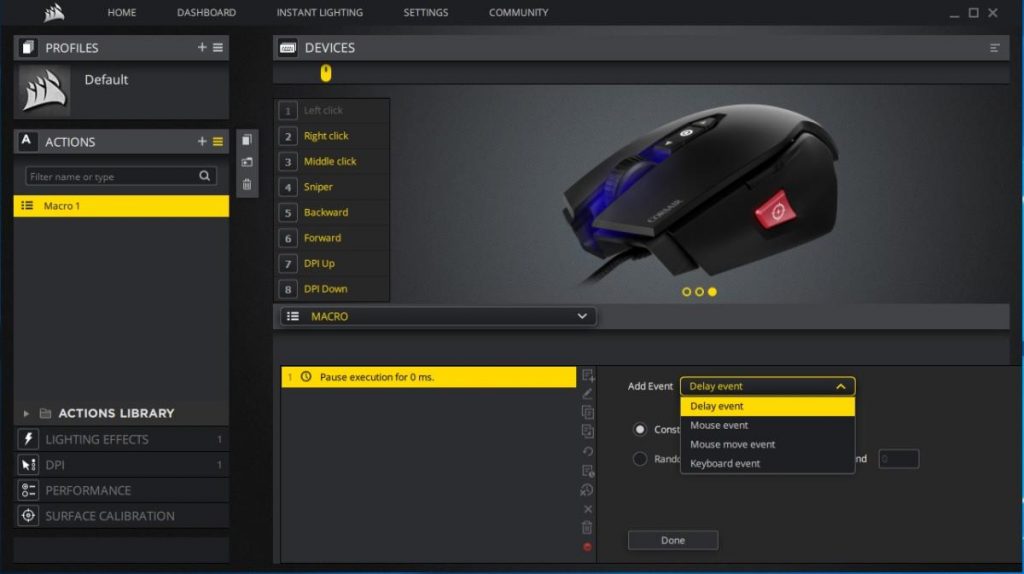
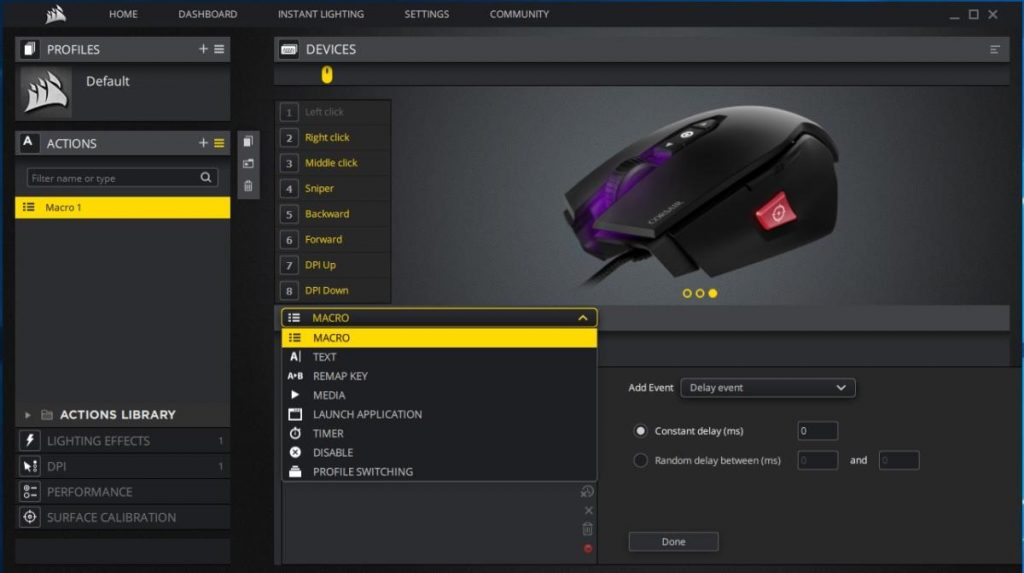
The Action menu is quite elaborative and has the macro defining interfaces. The user can define certain action via a macro and map it to the available 8 buttons. This is why these are termed as programmable buttons. The user can define and edit the macro here.
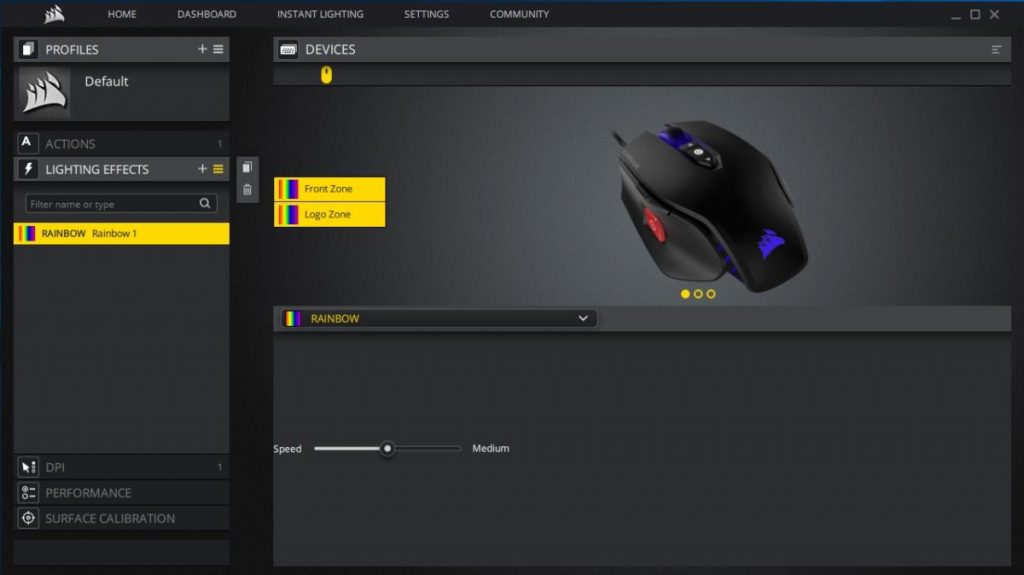
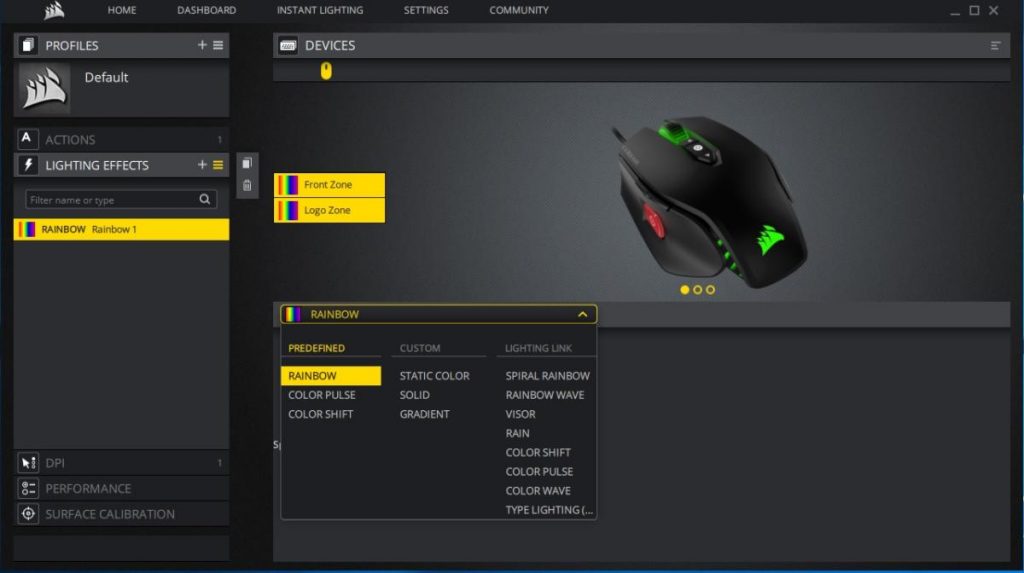
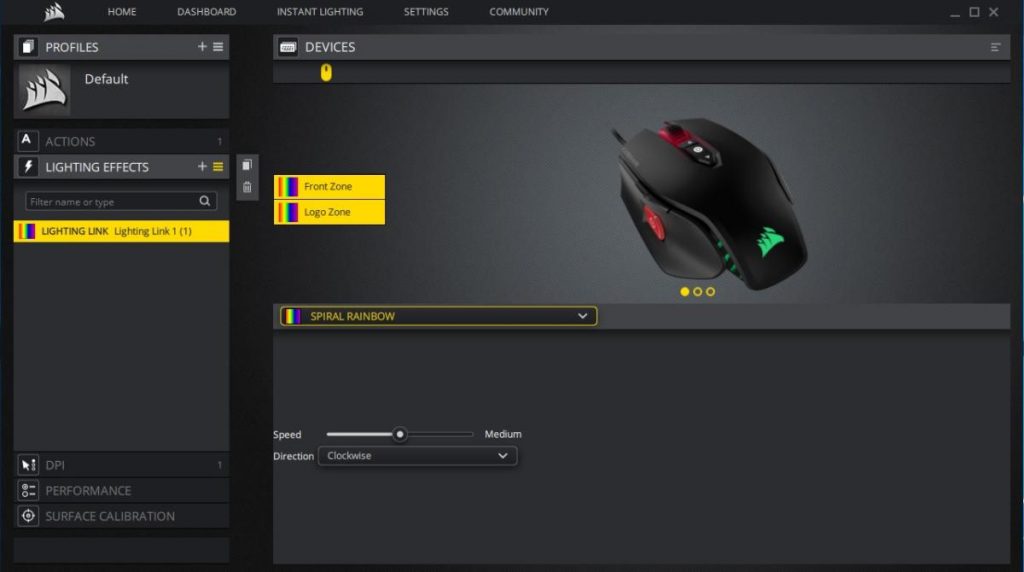
The default lighting mode is the Rainbow mode. There are three lighting zones on this mouse. Zone one is the three DPI buttons on the top, Zone two is the area under and around the scroll wheel and the Zone three is the Corsair brand logo on the rear side of the top cover. In software, the Zone 1 and 2 are combined under the Front Zone and Zone 3 is mentioned as Logo Zone. These two zones can be configured independently. There are 14 lighting effects in 3 broad categories:
- Rainbow
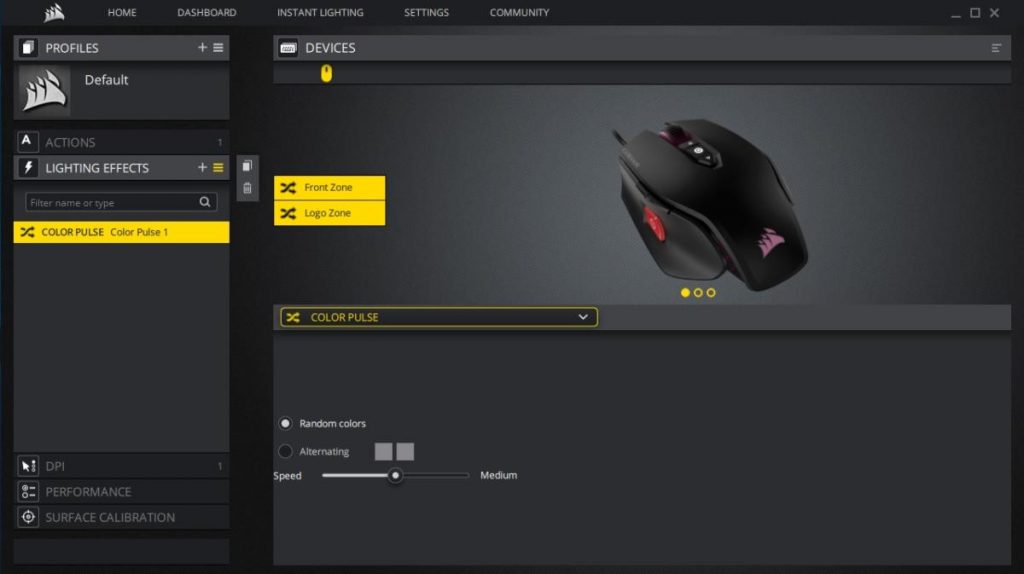
- Color Pulse
- Color Shift
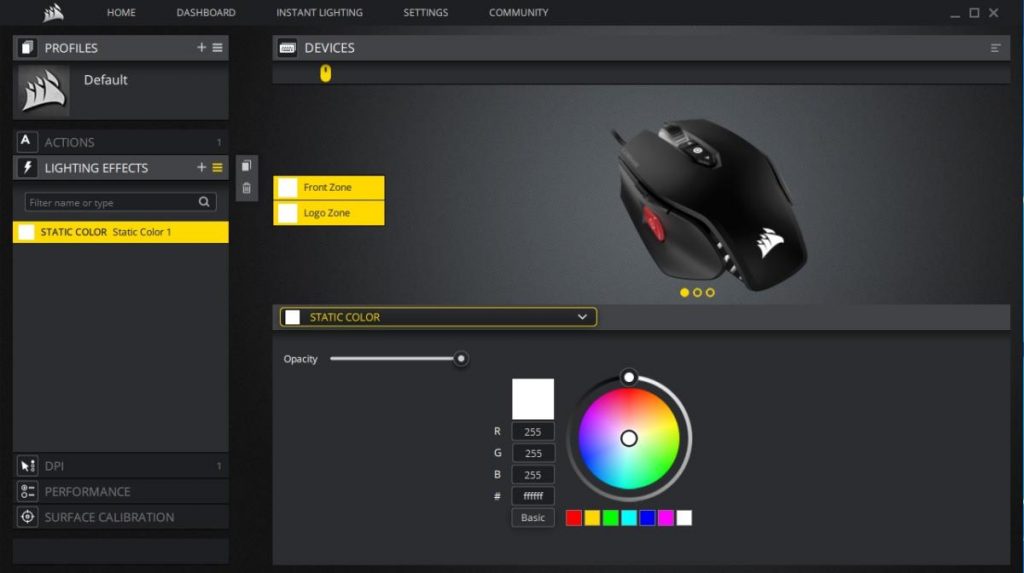
- Static Color
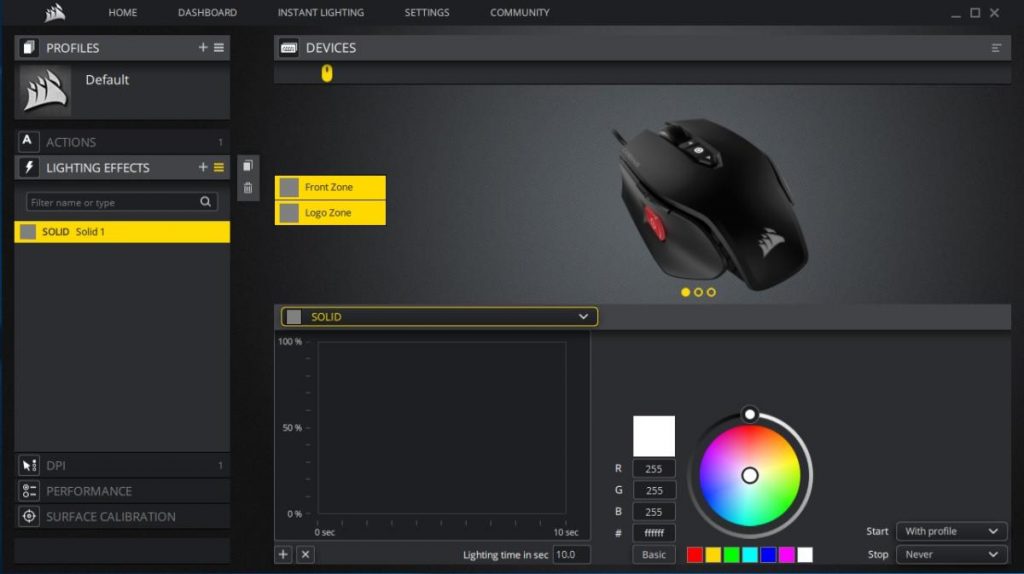
- Solid
- Gradient
- Spiral Rainbow
- Rainbow Wave
- Visor
- Rain
- Color Shift [under Lighting Link]
- Color Pulse [under Lighting Link]
- Color Wave [under Lighting Link]
- Type Lighting
Some settings are common among the lighting effects while some effects have their own custom settings as well. Moe or less each option has Color selection settings from Red, Green, and Blue colors or Color codes using HTML or alternatively the user can select a color from the displayed color palette in the circle. Some lighting effects like Spiral Rainbow has the option to control the speed of the effect from Fat to slow on a slider scale and direction of the lighting flow like forward or backward. Some lighting effects like Visor has the option to randomize the colors by the software or switch to two alternating colors based on user selection.
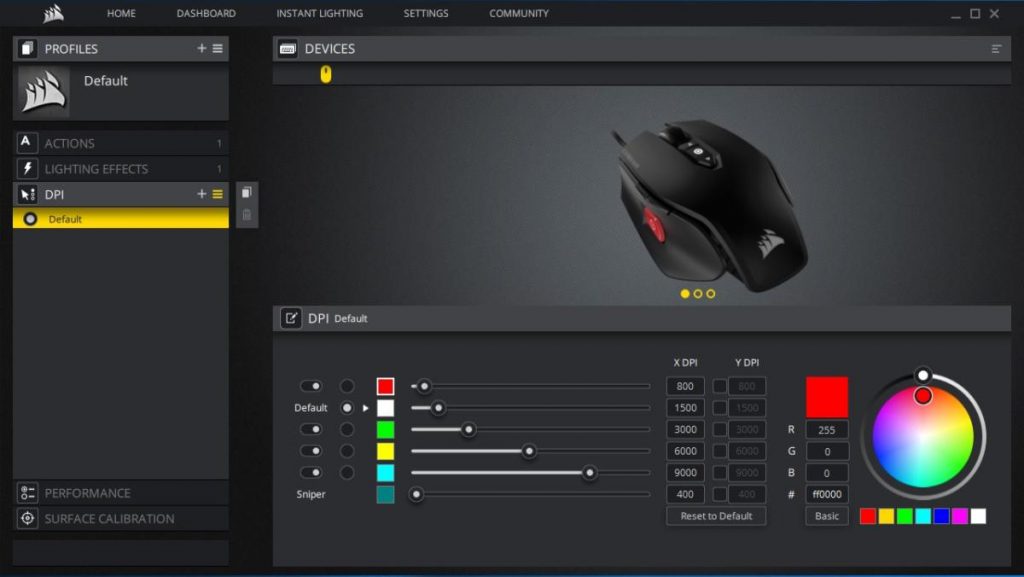
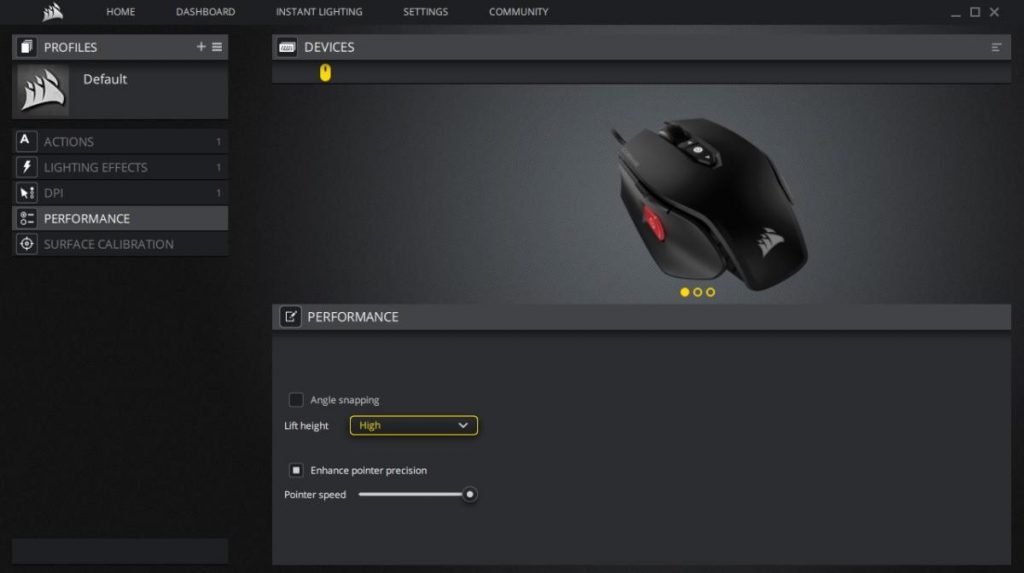
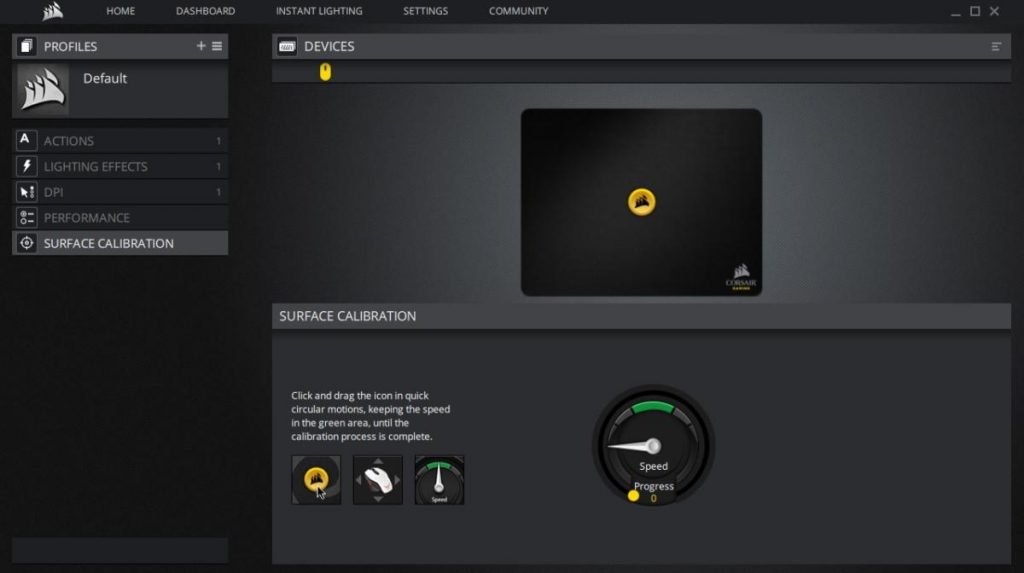
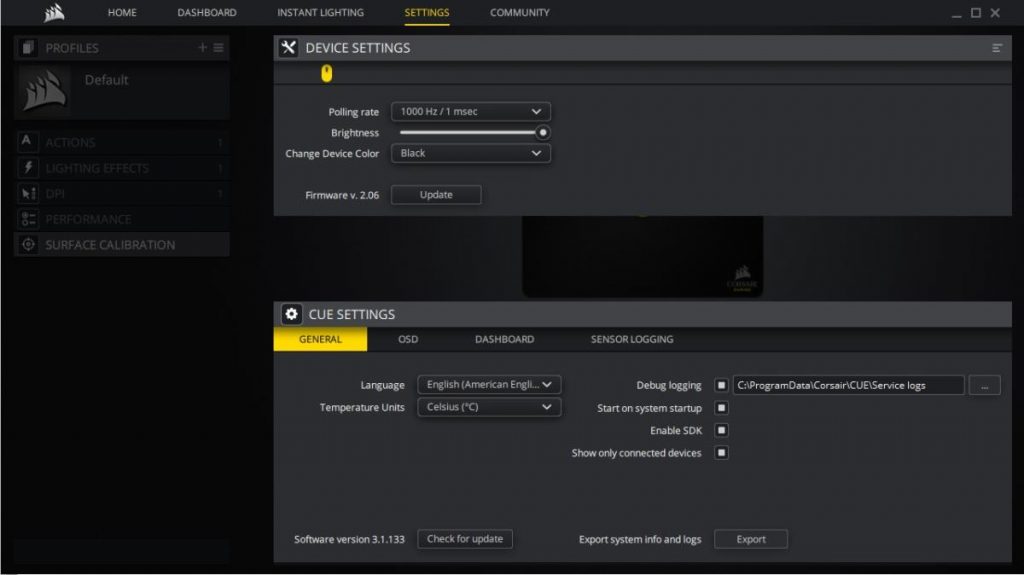
The DPI section allows configuring the pre-defined 5 DPI levels. Each level has a color code assigned to it. This color will appear on the middle DPI button on the top cover. Factory settings have 1500 DPI set on the mouse with the white color. The user can change the colors per level if so required. DPI for the Sniper button is also displayed which can be configured separately. The Performance section allows the user to control the angle snapping and pointer related settings. The Surface Calibration section allows the user to automatically optimize the M65 PRO RGB 12000 DPI sensor precision and responsiveness for playing surface to ensure excellent tracking, no matter the surface or environment. There is a yellow color button with the black color Corsair logo on it. Click on it and start moving a mouse in quick circular motions. The process will tune the mouse to the surface and calibrate it based on the motions. If successful, there will be a notification for it.


Personal Experience
The Corsair M65 Pro RGB is best suited to my grip style. This is the foremost reason why I prefer this mouse over other options in the market. The mouse is quite heavyweight but thanks to the weight tuning system, it can be adjusted as per user’s convenience. Omron switches are highly responsive and gameplay using this mouse is buttery smooth and precise. Thanks to the 12000 DPI sensor, this mouse caters for every type of requirement in terms of precise control and movement. Being an FPS gamer, the sniper button comes handy when sniper action is needed and relaxes the gamer from using more keys on the keyboard. The lighting effect is subtle and not that bright to rather disturbing the visual experience. I have been using the M65 series mouse for over 4 years now.
Conclusion
Corsair M65 Pro RGB is a gaming mouse which is optimized for FPS gameplay. It has a dimension of 118x72x39mm. It is available in two colors; black and white. We have reviewed the black version. It has 8 programmable buttons. The frame of the mouse is made of the aircraft grade aluminum which adds much to the rigidity of the mouse structural integrity. There are three buttons on the top cover of the mouse. These are the DPI buttons. The top button increases the DPI level and the bottom one decrease it. The middle button is actually not a button as it has no controllable action associated with it except as a visual indicator. It displays the color associated with the current DPI level of the mouse. Predefined DPI levels are 800, 1500, 3000, 6000, 9000, and 12000 with respective colors of Red, White, Green, Yellow, and Light Blue. This mouse features a high-mass scroll wheel with rubberized exterior wrapped around a metallic core to give a great feel, effortless control, and tactile precision. This mouse is using the Omron switches which are rated for 20 Million clicks on the left and right buttons. There are two programmable buttons on the left side of the mouse. These have a default action of Forward and Backward. The user can assign different actions using the macros in the iCUE software. There is a dedicated sniper button on the left side which is strategically well placed as your thumb is resting on the left side which can be used to operate this button. Similarly, the thumb can be trained to operate the two buttons above the sniper button.
The M65 PRO RGB is designed with low-friction contact points to ensure a great feel and swift, precise movement with minimal effort. This is achieved by using the extra-large PTFE glider pads on the bottom which are 5 in total. One is at the bottom, two are on the front and one each on the left and right sides. This mouse has advanced weight tuning system to set the center of gravity of M65 PRO RGB to match play style. There are three weight tuning zones. Each one has a weight block inside covered with a screw. There are possible scenarios for weight adjustment. The user can remove the weight block and keep the screw on remove both the weight block and the screw. This is totally up to the users to configure the weight of the mouse as per their convenience. On a side note, this mouse is relatively heavier than the majority of the mouse that we have used/tested. Corsair is using Gaming grade PMW3360 optical sensor for pixel-precise tracking, custom tuned to give you superior performance on virtually any surface. This sensor is rated for 12000 DPI for high accuracy and precise movement. The pool rate of the mouse can be adjusted from 125Hz/250Hz/500Hz/1000Hz. The USB cable is braided with fiber material and has 1.8m length.
There are three lighting zones on this mouse. Zone one is the group of three DPI buttons on the top, Zone two is the area under and around the scroll wheel and the Zone three is the Corsair brand logo on the rear side of the top cover. In software, the Zone 1 and 2 are combined under the Front Zone and Zone 3 is mentioned as Logo Zone. These two zones can be configured independently. There are 14 lighting effects in total for this mouse. iCUE stands for the Intelligent Corsair Utility Engine which can be downloaded from the Corsair website. It offers everything a user may need to configure and control the Corsair connected devices. User can sync the lighting effects on the multiple connected devices as well. Macros can be defined and edited in the Action setting. Surface calibration allows the user to automatically optimize the M65 PRO RGB 12000 DPI sensor precision and responsiveness for playing surface to ensure excellent tracking, no matter the surface or environment. Pooling rate can be accessed in the Settings menu of the software. Firmware of the mouse can be upgraded from the settings menu as well. Brightness of the LEDs can be controlled from the settings menu as well. Corsair is offering 2 years of warranty on this mouse.
The mouse is rated at $59.99 though at the time of the review it is available the on discounted price of $39.99 making it worth the money and creating value for the FPS gamers in particular. My personal experience with this mouse has been phenomenal as it suits my hand grip style the better than the majority of the gaming mouse in the market. Gaming experience has been buttery smooth and flawless. To make things more elaborative, it has RGB lighting solution enabled on it as well. Plus, it is backed by the 2 years of highly effective customer support service by Corsair. I am saying this from my personal experience.
If you are into the market looking for a gaming mouse that can offer a blend of features and performance suitable for the FPS gaming style, yet at a killer price backed by the effective customer support service of the premium brand, then Corsair M65 Pro RGB FPS Gaming Mouse is highly recommended for you.
Overall
Score - 9
9
Thanks! Do share your feedback with us. ⚡
How can we make this post better? Your help would be appreciated. ✍