Hi-Fi Rush is all about remaining on the beat and landing perfect blows to deal as much damage to your enemies as possible. Besides just landing perfectly timed hits, you can actually use combo attacks to deal significantly large amounts of damage. This is why we’ll be discussing the best combo attacks in Hi-Fi Rush that you need to have in your arsenal.
Although you start off with some very basic light and heavy attack combos, many combo attacks can be bought later with the in-game currency; gears. And as you progress further in the story, more combos will be available for purchase.
- Combo attacks can be bought from Peppermint and later on from Macaron using Gears.
- Combo attacks combine light and heavy attacks, and some end with a Beat Hit for extra damage.
- Chai’s Arpeggio Stab and Harmonic Beam are great ground-to-air combos, while Gain Tornado and Directional Parry are great charge-up and Parry attacks.
- Some of Peppermint’s and Macaron’s combo attacks use up Reverb Gauges and increase cooldown time, but Switch Kicker and Double Bass Drop are worth using up a single bar.
- Cannon Spike for Peppermint and Gravity Well for Macaron can be used by holding the Partner Action button and can be used even without Reverb Gauges.
- Author’s Note: After going through Hi-Fi Rush for several weeks on Xbox, I feel confident going into the topic with thorough experience.
Best Combo Attacks For Chai
| Attacks for Chai | Cost | Controller | Keyboard |
|---|---|---|---|
| Tune Up | 6,000 Gears | Press Light Attack+ Light Attack+ Light Attack+ Light Attack+ Light Attack | LMB, LMB, . , LMB, LMB, LMB |
| Stomp Box | 10,000 Gears | Press Heavy Attack + Light Attack + Heavy Attack | RMB, LMB, RMB |
| Arpeggio Stab | 12,000 Gears | Press Light Attack+ Light Attack+ Heavy Attack+ Heavy Attack+ Heavy Attack | LMB, LMB, RMB, RMB, RMB |
| Pickup Crash | 8,000 Gears | Press Heavy Attack+ Heavy Attack +Light Attack+ Light Attack | RMB, RMB, LMB, LMB |
| Harmonic Beam | 10,000 Gears | Press Light Attack+ Heavy Attack+ Heavy Attack+ Heavy Attack | In Air, LMB, RMB, RMB, RMB |
| Shred | 8,000 Gears | Press Light Attack+ Heavy Attack, Button Mash Heavy Attack | LMB, RMB, Mash RMB |
You can purchase combo attacks from either Peppermint (or Macaron if you’ve got him unlocked) back at the hideout, or you can purchase them during the missions at the terminals which Peppermint hacks.
Regardless of where you buy them from, we’ll be discussing combo attacks that are available during mid-game. Of course, more attacks will be unlocked as you progress further in the game. But it’s best to choose and practice certain combo attacks by mid-game so that you can land them more often and take them all the way over till the endgame.
We’ll mostly be referring to the Xbox controls while describing combos. But if you’re on PC, here’s a helpful key table:
| Move | Xbox Controls | PC Controls |
| Light Attack | X | Left Click |
| Heavy Attack | Y | Right Click |
| Dash | RB | Shift |
| Partner Action | RT | Left ALT |
Tune Up
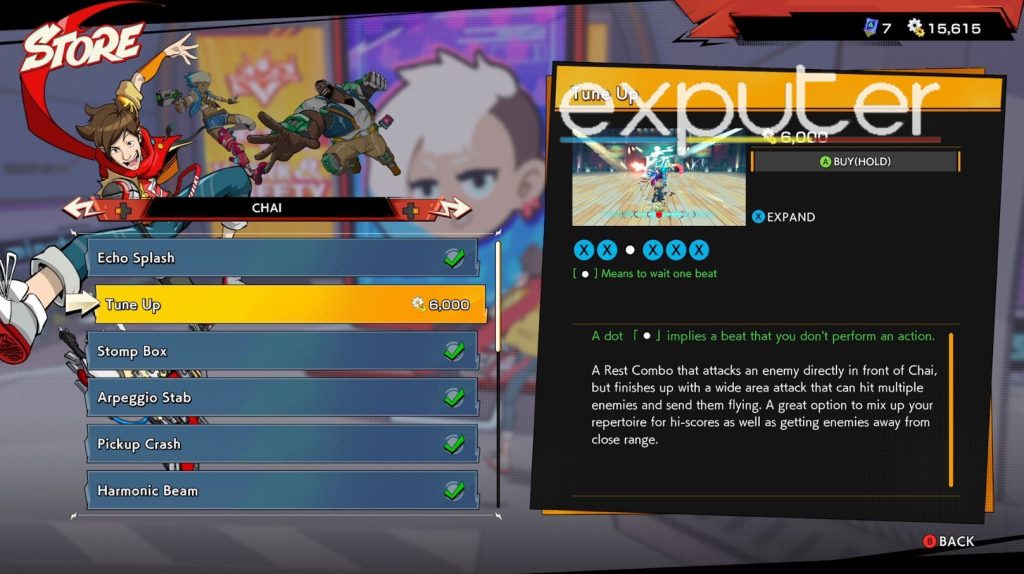
Near the end of the combo, you’ll need to perfect time an attack (press the attack button when the two circles overlap, also known as Beat Hit) to send the enemy flying. It is great for following up with another air combo or simply creating space between you and the enemy. What’s even better is that if you do land the Beat Hit at the end, the attack can spread out and hit multiple enemies, sending them all flying.
Stomp Box
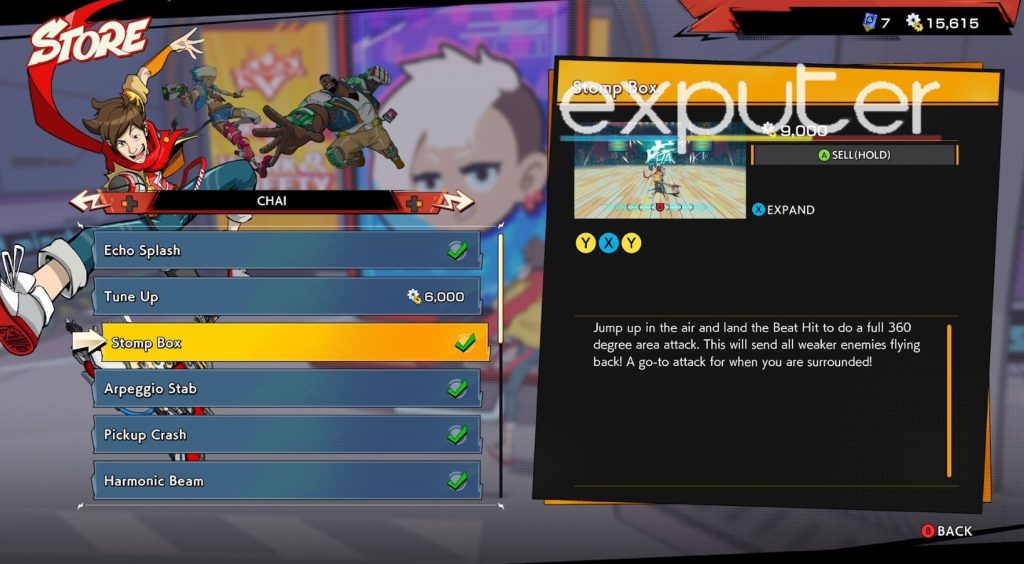
Furthermore, you might come across Golden Vandelay Statues that drop extra gears if you perform successful combos on them. The Stomp Box is one of the best combos to use against the Golden Statue if you want to acquire the most gears from them.
Arpeggio Stab
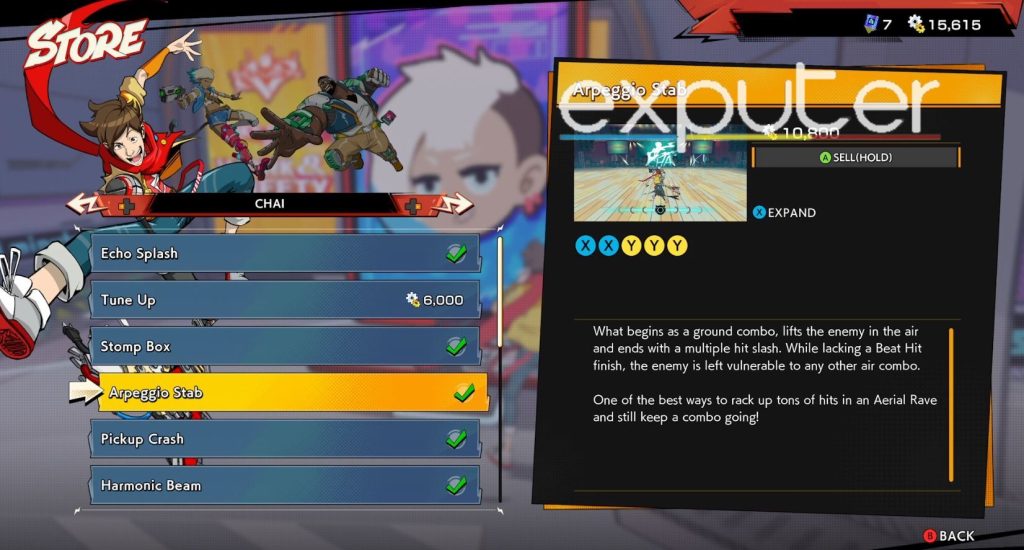
There is no Beat Hit at the end, but you can easily follow up with more attacks on an enemy after the combo. Arpeggio Stab is great for not just regular enemies but even the stronger and bigger enemies, which might have Z-Shielding at the start. To make the combo even more effective, you can call on Peppermint while attacking in the air to deal extra damage.
Pickup Crash
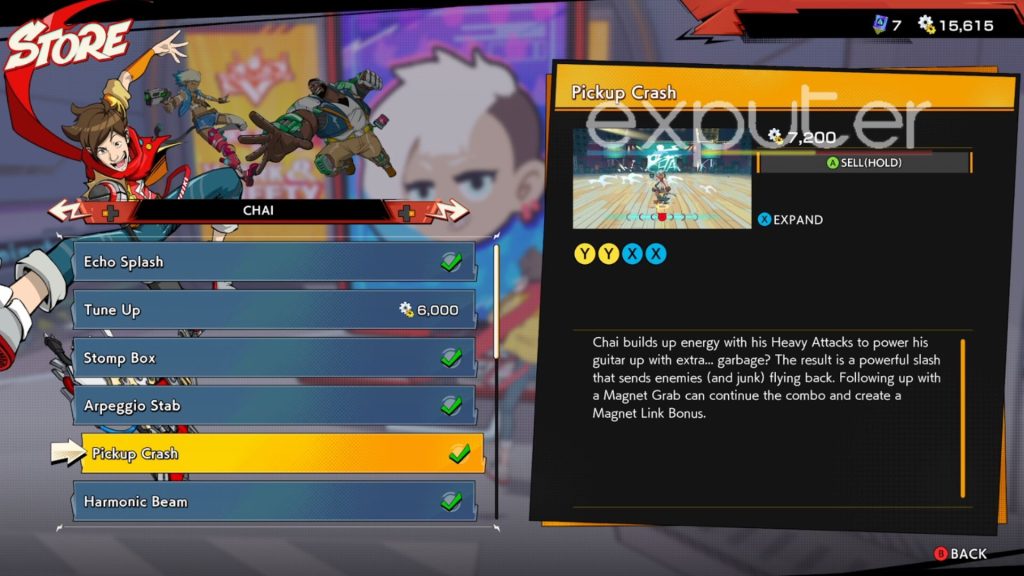
At the end of the combo, there will be a beat hit that will launch the enemy far into the air. You can continue the combo by using your Magnet Grab to close the distance. Once in the air, you can deploy any other follow-up combos, such as the Harmonic Beam.
Harmonic Beam
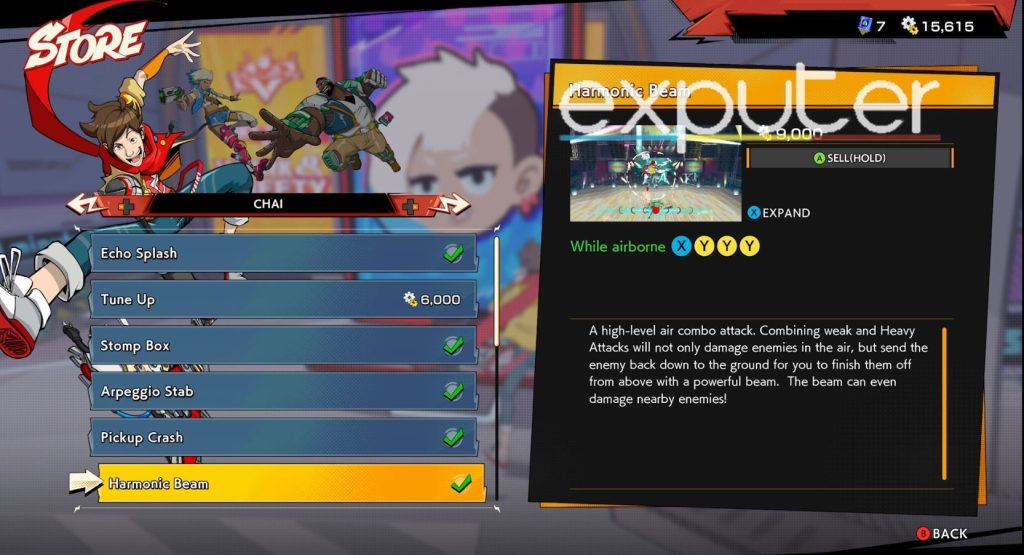
Harmonic Beam isn’t cheap, as it costs 10,000 Gears. But it is quite similar to Arpeggio Stab, so if you can master one of the combos, you can easily use the other one as well. The combo is: (X, Y, Y, Y). If you can successfully pull off an Arpeggio Stab and then follow it up with Harmonic Beam, almost every low-leveled robot will get destroyed.
Shred
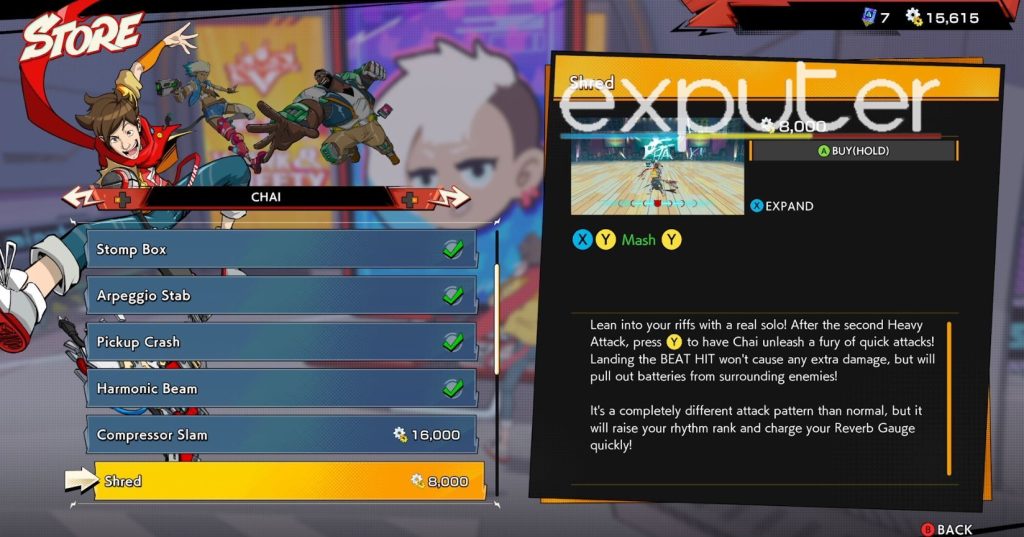
You need to spam Y after the second Heavy Attack lands. That will cause Chai to unleash a fury of quick attacks. There will be a Beat Hit at the end, but it won’t cause any extra damage. Instead, it’ll gain you Batteries from surrounding enemies, allowing you to fill up your Reverb Gauge much quicker so that you can use your Special Attacks.
Best Combo Attacks For Peppermint
| Attacks for Peppermint | Cost | Keyboard | Controller |
|---|---|---|---|
| Switch Kicker | 10,000 Gears | After landing a beat hit combo in the ground press ALT | After landing a beat hit combo in the ground press RT |
| Cannon Spike | - | Hold ALT, release to activate | After successful parry wait for a beat and press RT |
You can also purchase different attacks for your support partners in Hi-Fi Rush. There are multiple support characters in the game, such as Peppermint and Macaron. You’ll unlock a few more, but they’re tied to the story and come later on.
Each support character has a section in the purchasable attacks section where you can buy more useful moves for them. Some of these moves require Reverb Gauges, while others can be used anytime during the battle.
Switch Kicker
In the mid-game, two Peppermint attacks use Reverb Gauges: Switch Kicker and Master Blaster, costing 10,000 Gears. Opt for Switch Kicker; it’s easier.
Master Blaster needs an airborne target, making it harder to set up. Switch Kicker requires a ground combo, pressing the Partner Action button (RT or Left ALT on Xbox) during Beat Hit, unleashing Peppermint’s blasters for a Jam Combo.
Cannon Spike
Cannon Spike is a must-have for Peppermint as it lets you perform a charged attack with her blasters. You can charge up by holding down the Partner Action Button, RT, and letting it go when you’ve charged up enough. If you charge up for four beats, you’ll be able to land a more powerful attack, which can even destroy stronger barriers that would’ve usually required three different hits to break.
Best Combo Attacks For Macaron
| Attacks For Macaron | Cost | Controller | Keyboard |
|---|---|---|---|
| Double Bass Drop | 10,000 Gears | After landing a beat hit combo in the ground press RT | After landing a beat hit combo in the ground press ALT |
| Gravity Well | - | Hold RT, release to activate | Hold ALT, release to activate |
Macaron is essentially your heavy-hitter of the group. He has powerful attacks that are essential for breaking through Z-Shielding, which many of the stronger enemies tend to carry with them. However, some of these enemies require you to land at least two hits with Macaron before you can break their shielding. If you use one of his purchased attacks, you’ll break through with a single attack! That said, here are the best combo attacks for Macaron in Hi-Fi Rush.
Double Bass Drop
Double Bass Drop shines as the top choice. Be mindful that it consumes the Reverb Gauge and lengthens the partner cooldown. Considering Macaron’s lengthier cooldown and multiple Z-shielded foes, sparing cooldown for shield removal can be strategic.
Gravity Well
Holding the Partner Action Button triggers Macaron’s Gravity Well. It prioritizes defense and opportunity creation over pure offense. Macaron encircles an enemy, briefly immobilizing them for your follow-up attack. It’s particularly useful for handling weaker foes while tackling larger ones to bolster your health.
Now, you’re acquainted with some of Hi-Fi Rush’s finest purchasable combo attacks! While it’s possible to progress without combos, using them is essential to hasten battles, lower mortality rates, and secure S ranks in choruses.
Up Next:
Thanks! Do share your feedback with us. ⚡
How can we make this post better? Your help would be appreciated. ✍