Like many others, are you also experiencing terrible visuals and low FPS in Call of Duty Black Ops Cold War? Well, we have been there but don’t worry because, In this guide, we are going to highlight the best Call of Duty Black Ops Cold War Settings PC Settings For High FPS.
In our review, we rated Graphics and Optimization a decent number. However, we did mention that multiplayer visuals were awful; enemies were hard to spot, fps were inconsistent, and in short, nothing add it up.
Our guide is partitioned into three segments. The first one will be all about In-Game Settings, while the second will emphasize Nvidia Settings, and the thirds all about necessary Windows Optimizations.
- First, optimize in-game graphic settings; these include putting Texture Quality to medium, Object View Distance to low, and Shadow Quality to high.
- Additionally, make Anti-Aliasing Quality high, use the default Aspect Ratio, set the Field of View to 103, and disable the rest.
- For Nvidia settings, turn off Image Sharpening, put Antialiasing Mode to override any application setting, and set Low Latency Mode to Ultra.
- Furthermore, put Power Management Mode to maximum performance, get rid of triple buffering, disable V-Sync, and follow the rest of the settings in the guide.
- Windows 10 settings cover using Ultimate Performance Mode, disabling unnecessary animations and eliminating Hardware Acceleration from any applications using it.
- Ultimately, you can make Call of Duty Black Ops a high performance game from Windows graphic settings.
Best Call of Duty Black Ops Cold War Settings
Take a quick gander a look at the best settings:
| Setting Name | What to set it to |
|---|---|
| Texture Quality | Medium |
| Model Quality | Medium |
| Special Effects Quality | Medium |
| Screen Space Reflection (SSR) | Low |
| Object View Distance | Low |
| Volumetric Lighting | Low |
| Shadow Quality | High |
| Dynamic Shadows | Disabled |
| Special Effect Shadows | Disabled |
| Weapon Shadows | Disabled |
| Ray Tracing | Disabled |
| Anti-Aliasing Quality | High |
| Ambient Occlusion Quality | Disabled |
| Motion Blur | Disabled |
| Subsurface Scattering | Disabled |
| Gameplay V-Sync | Disabled |
| Menu V-Sync | Disabled |
| Render Resolution | 100% (Native resolution) |
| Aspect Ratio | Default (Native aspect ratio) |
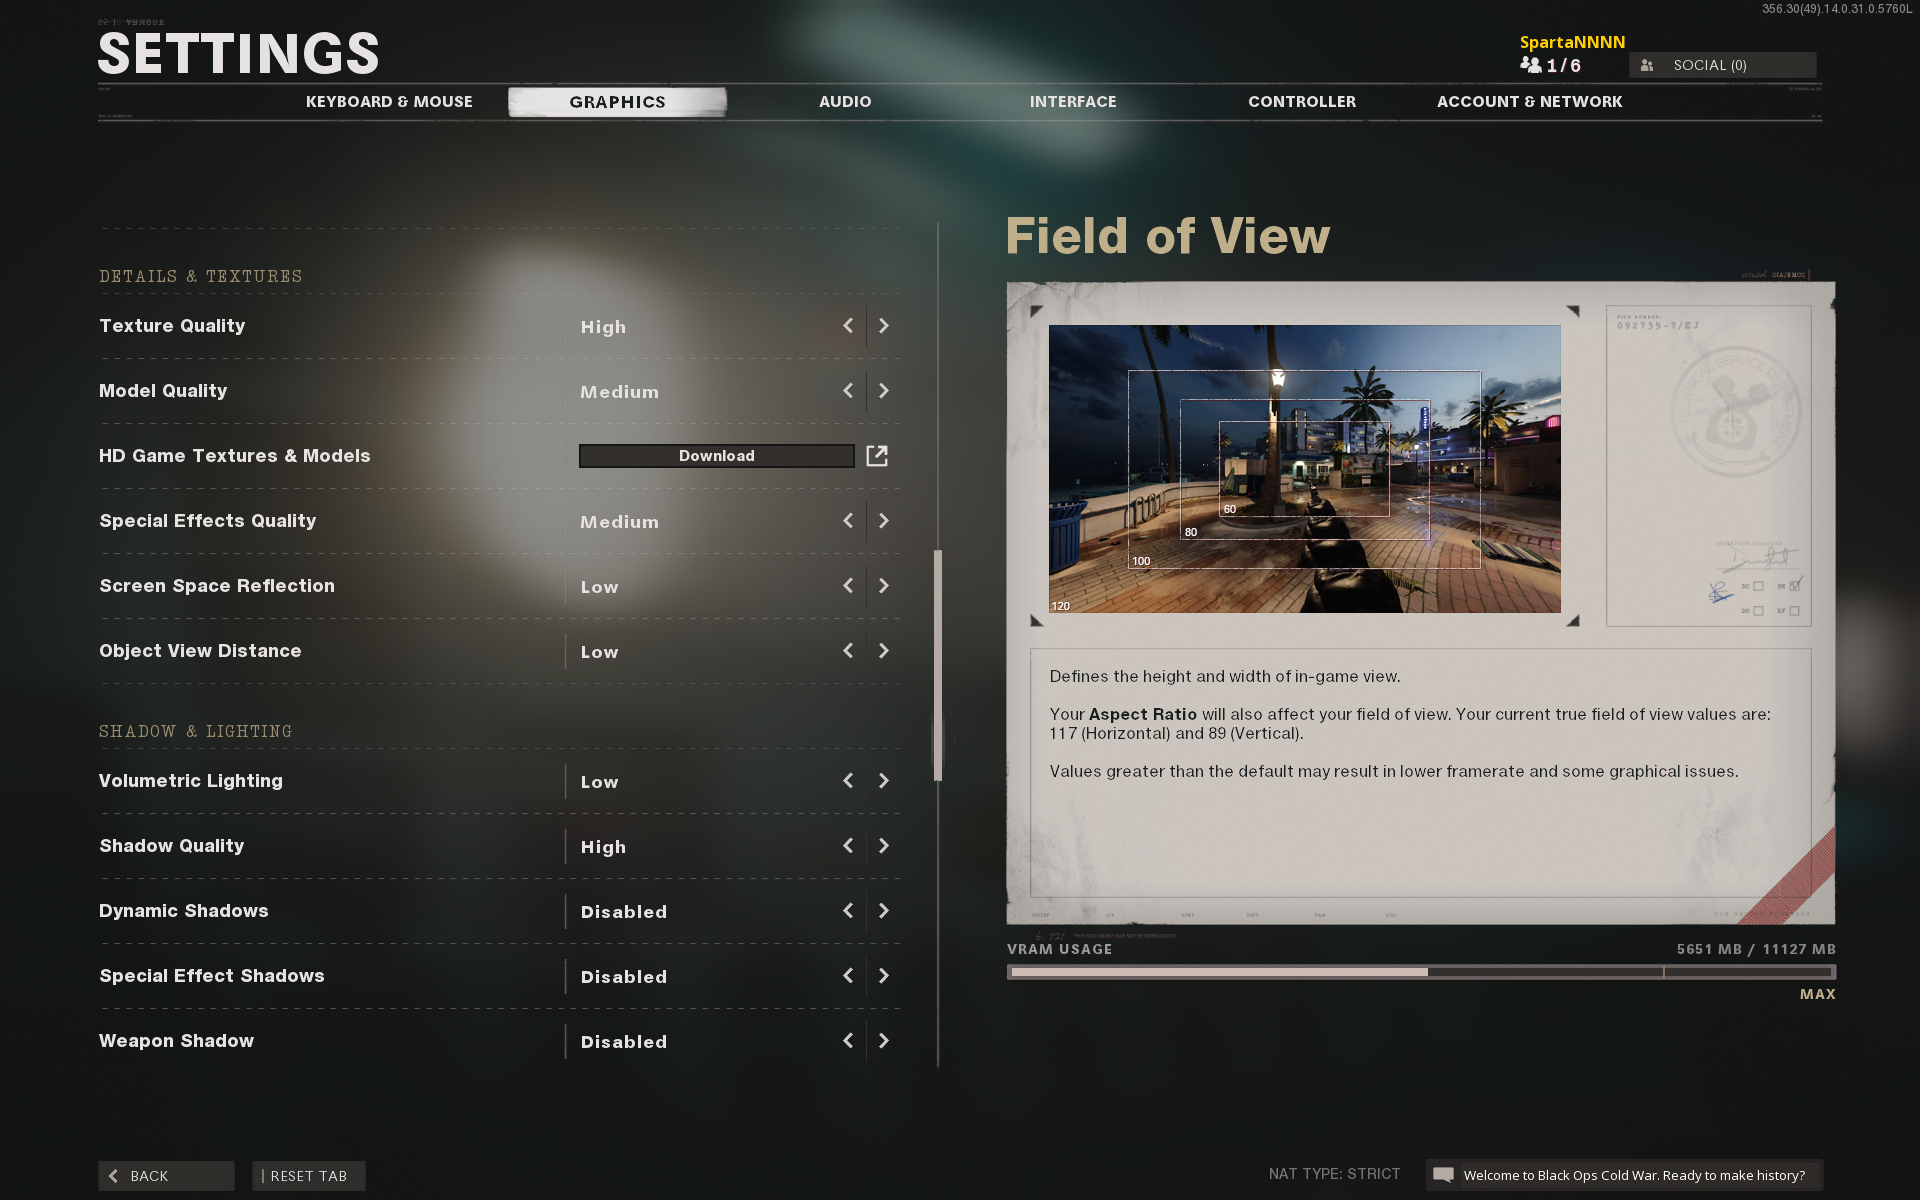
| Field of View | 103 |
| Order Independent Transparency | Disabled |
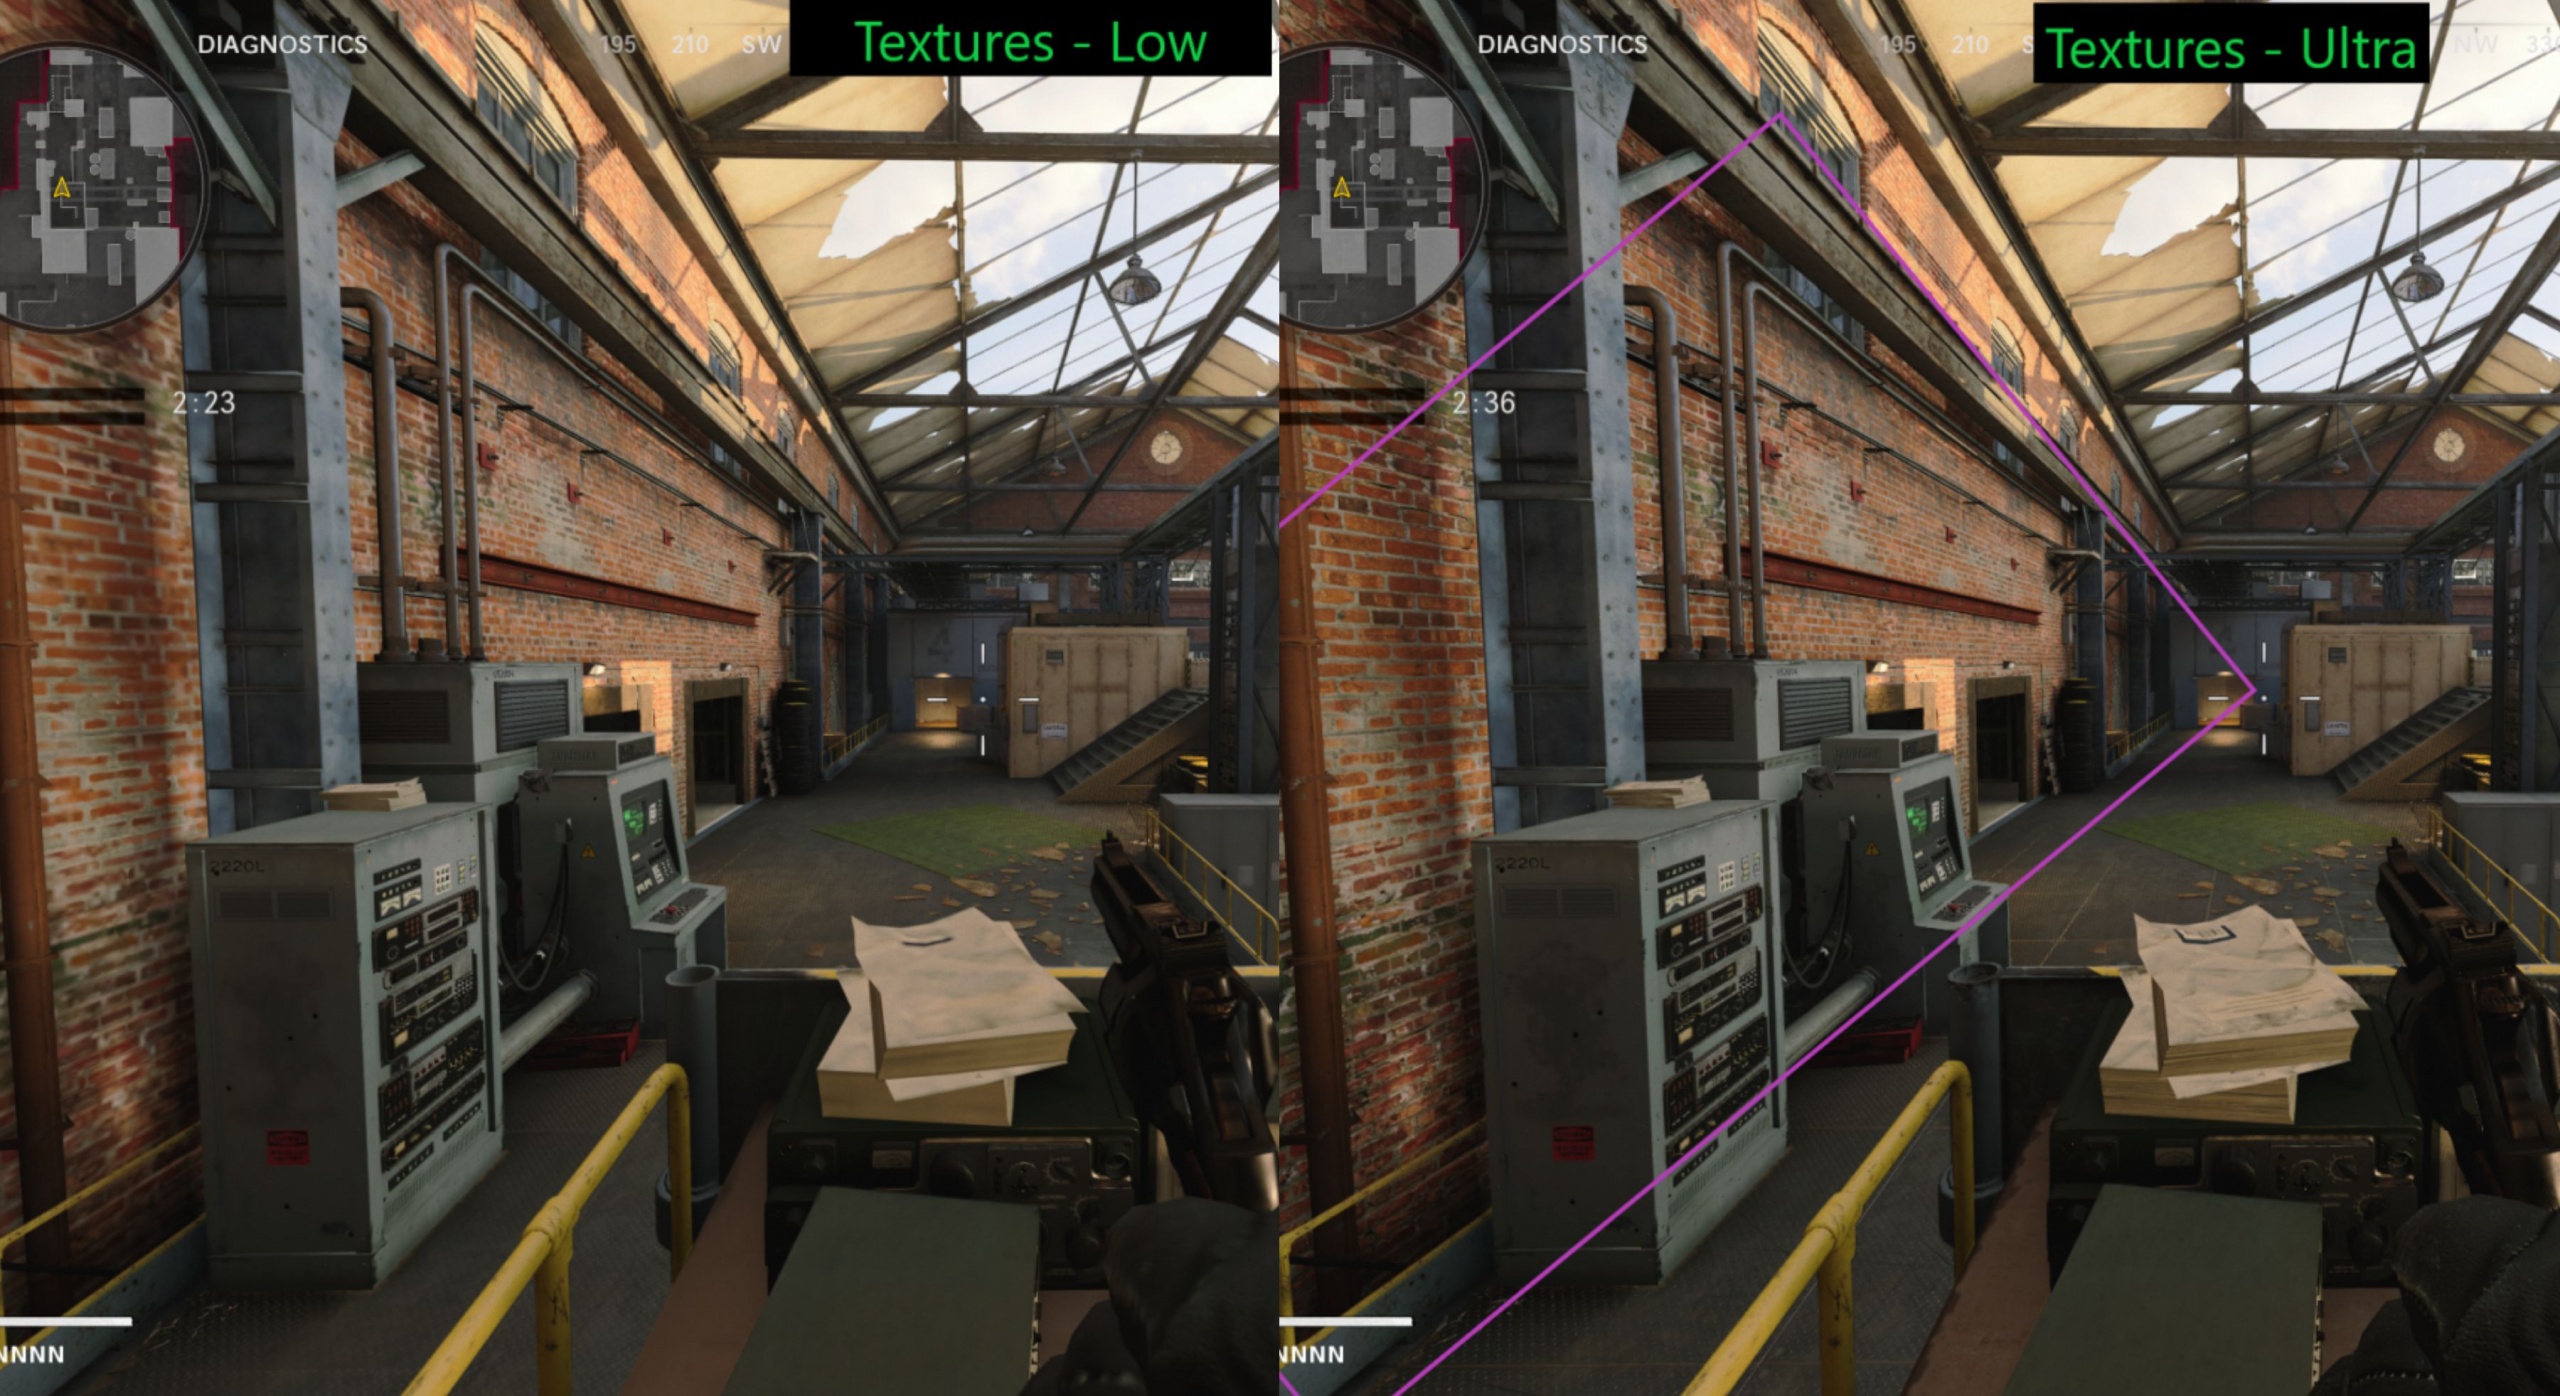
Texture Quality: Medium
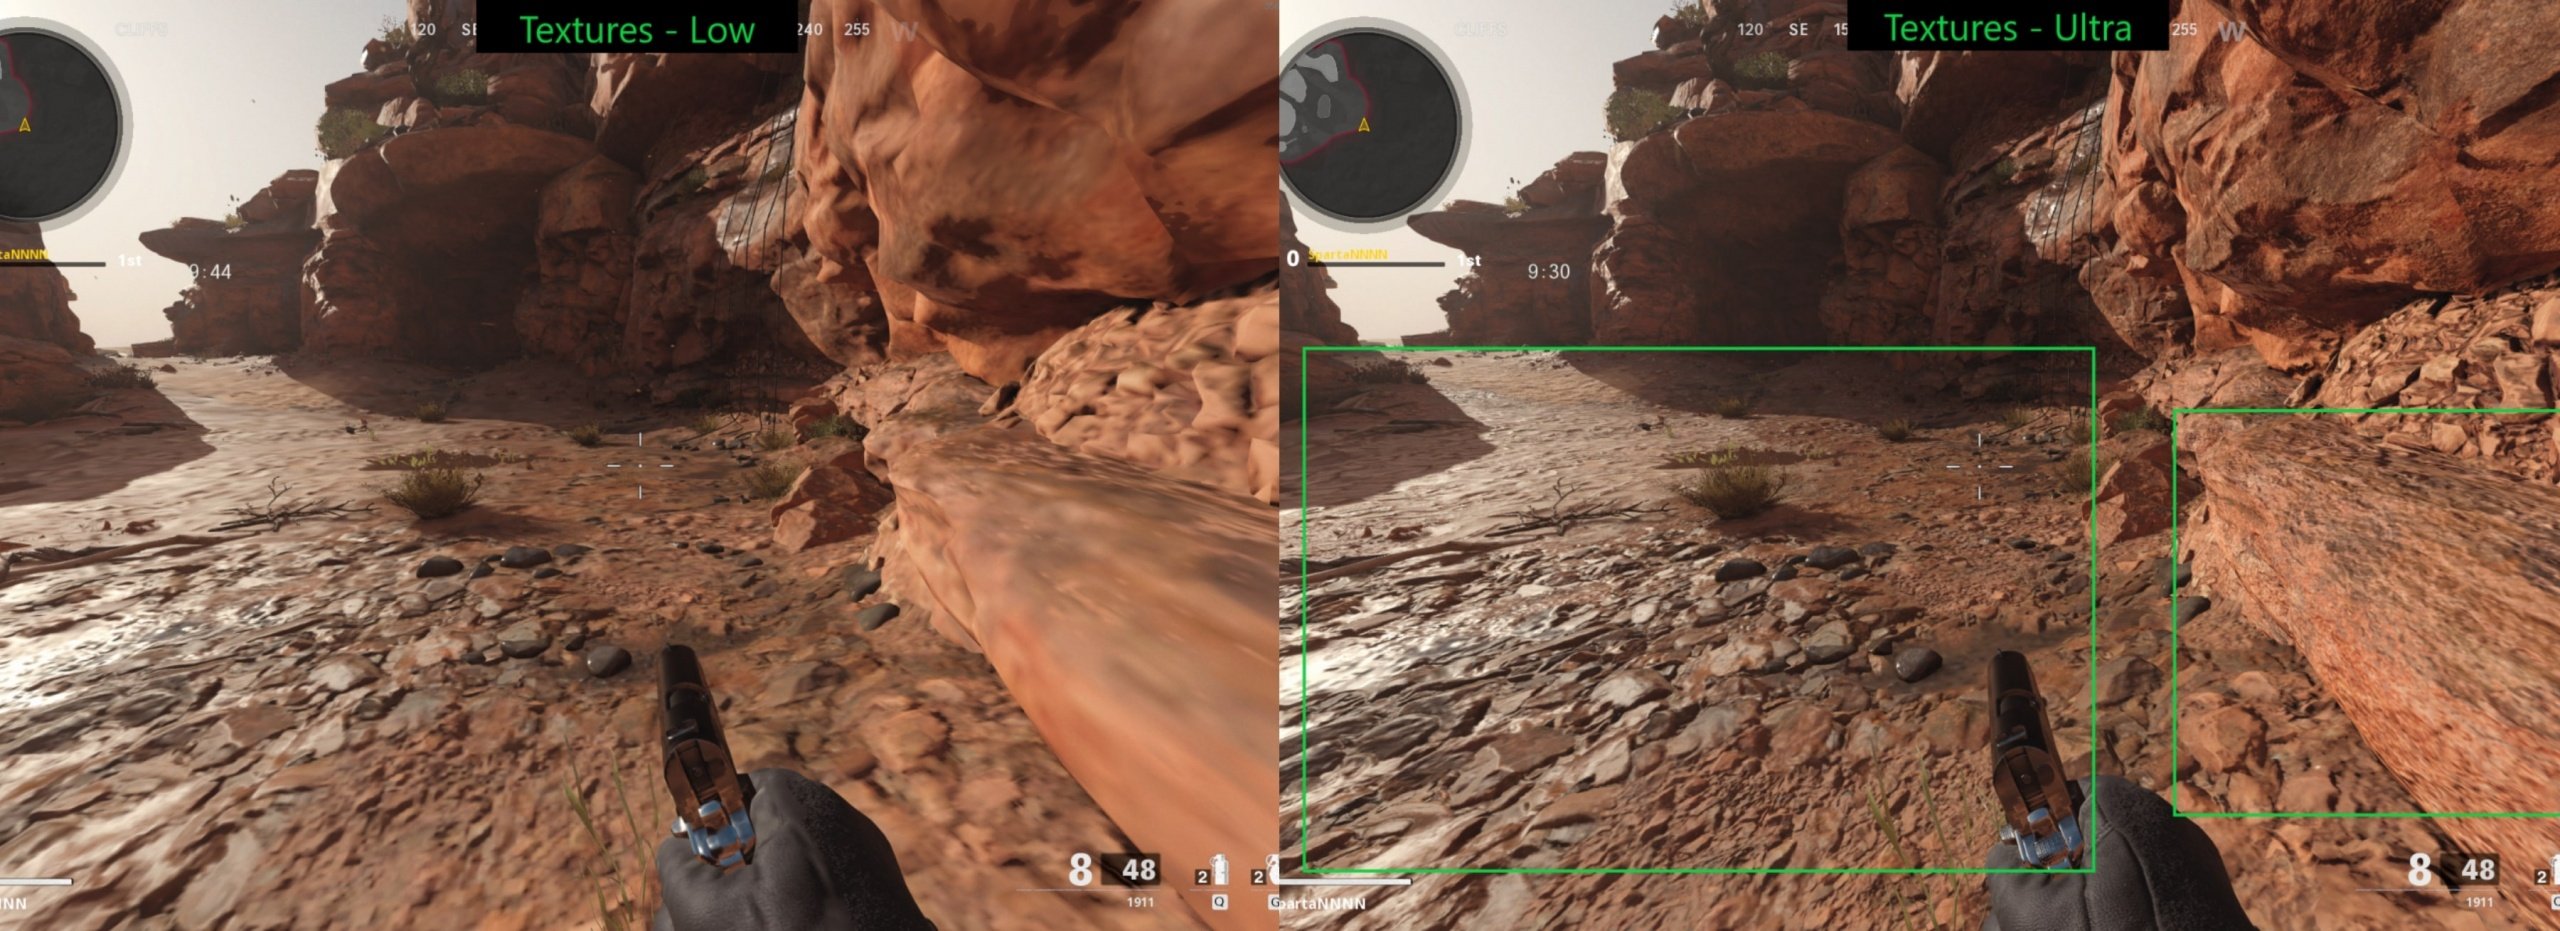
It is best to keep the texture on medium to decrease the VRAM usage of GPUs.
Model Quality: Medium
This feature is kind of useless for If you are keen on playing multiplayer. The essential explanation is that Model Quality adds additional number of shapes that are completely futile. These additional shapes only create conflict in visuals and further impact performance.
Special Effects Quality: Medium
Special Effects Quality is another detailing and texture option that provides a further enhancement to the gameplay. All it does is that it adds special effects to grenades, fires, vehicles, and more. The feature can be helpful if you are using mediocre headphones and can’t locate the enemy fire. We suggest keeping it at medium since it’ll assist with spotting adversaries through gun flash. I use high-end headphones, so this isn’t for me.
Screen Space Reflection (SSR): Low
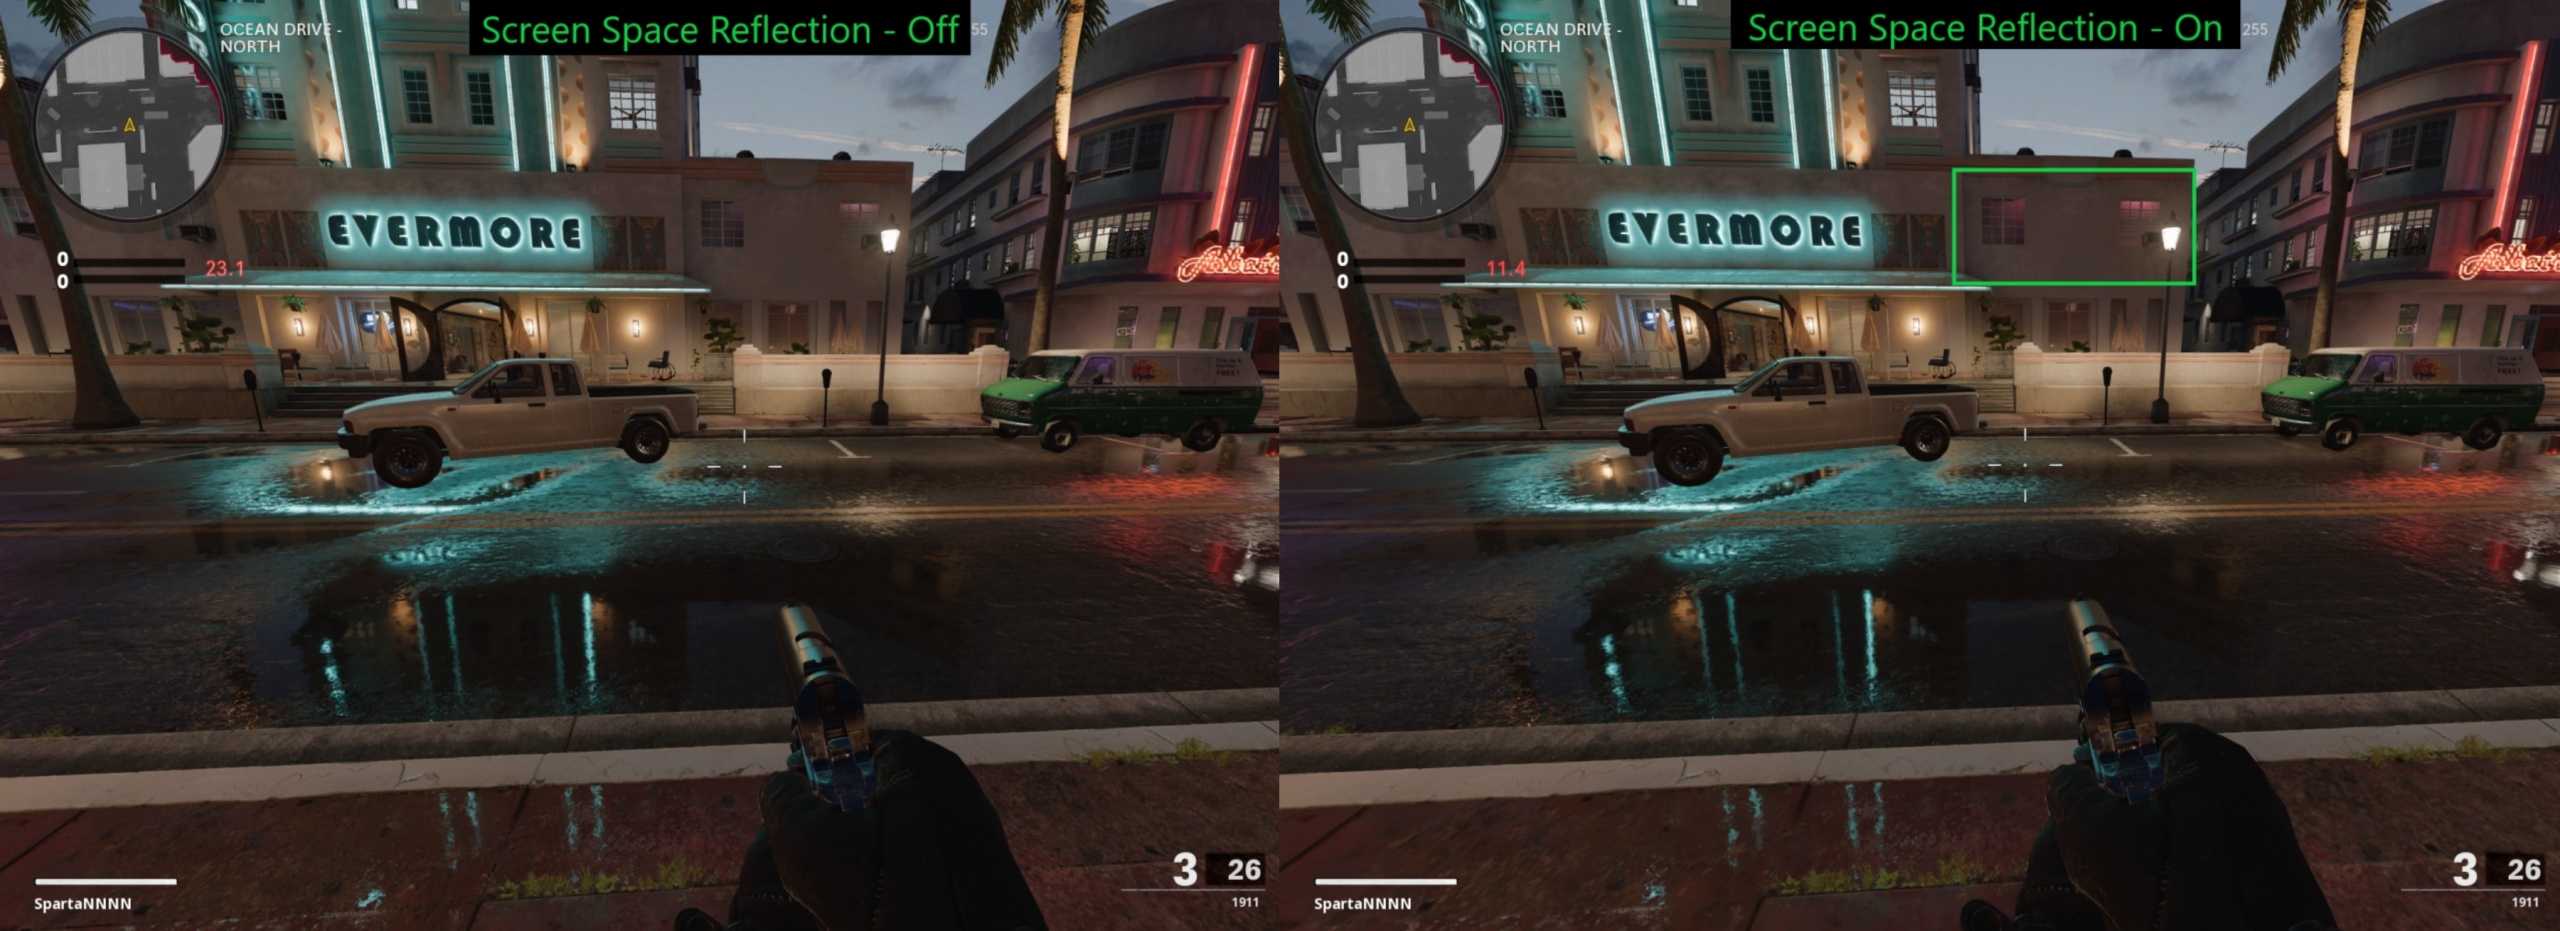
In some maps like Miami, screen space reflection makes an enormous difference, but the feature does not correctly blend in other maps. We benchmarked the graphics with all three options, Disable, Low, and High. All we noticed was that it became difficult to spot enemies in high because the reflection from surfaces was all over the place. Besides, there were also new lighting that didn’t make any sense. The impact on performance was zero to none.
Object View Distance: Low
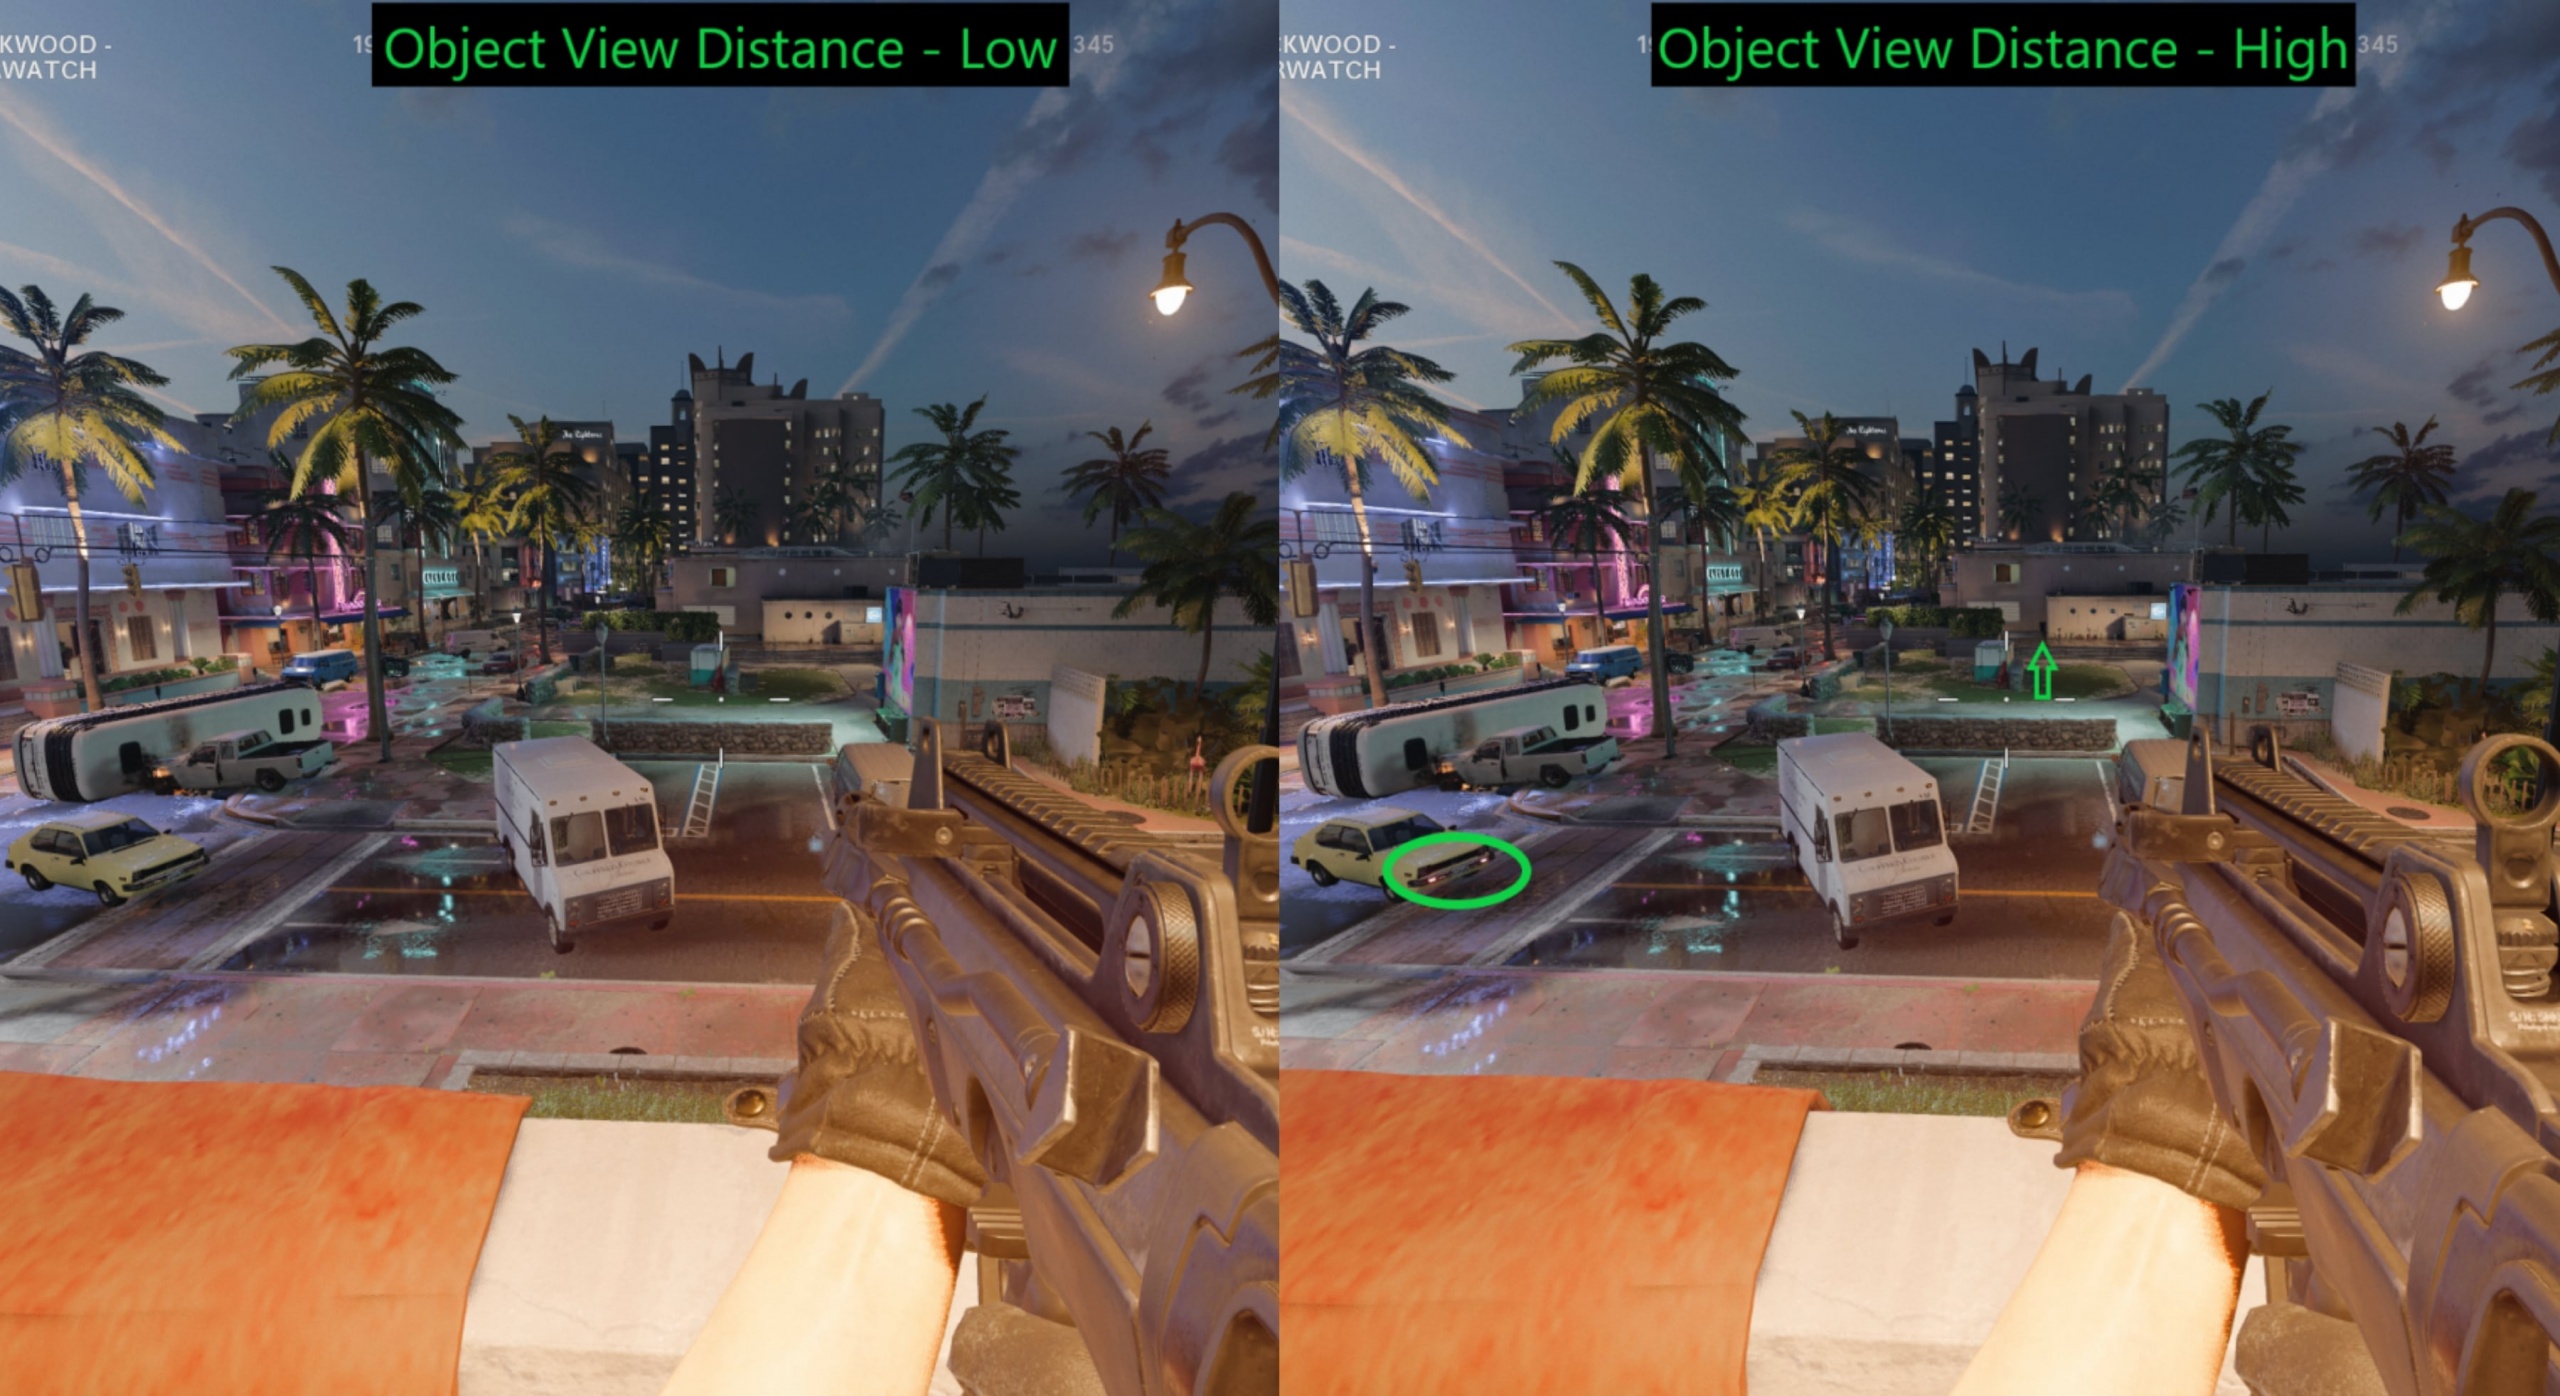
Changing Object View Distance will only add and render additional elements to make the map look fancy. This certainly has a decent impact on performance and provides no value in multiplayer. Also, there’s a lot of confusion about whether Object View Distance has anything to do with rendering enemy players in the distance.
That is a misconception because no matter what settings you use, players and bots will always render.
Volumetric Lighting: Low
I really want to disable this option because during our initial benchmarks, as a player, it felt frustrating. The problem with Volumetric Lighting is that sometimes you will aim at the enemy, but you won’t see him properly because sun rays are all over the place. It’s tough to describe, but keeping it low is the most suitable choice for sharp visuals.
Shadow Quality: High
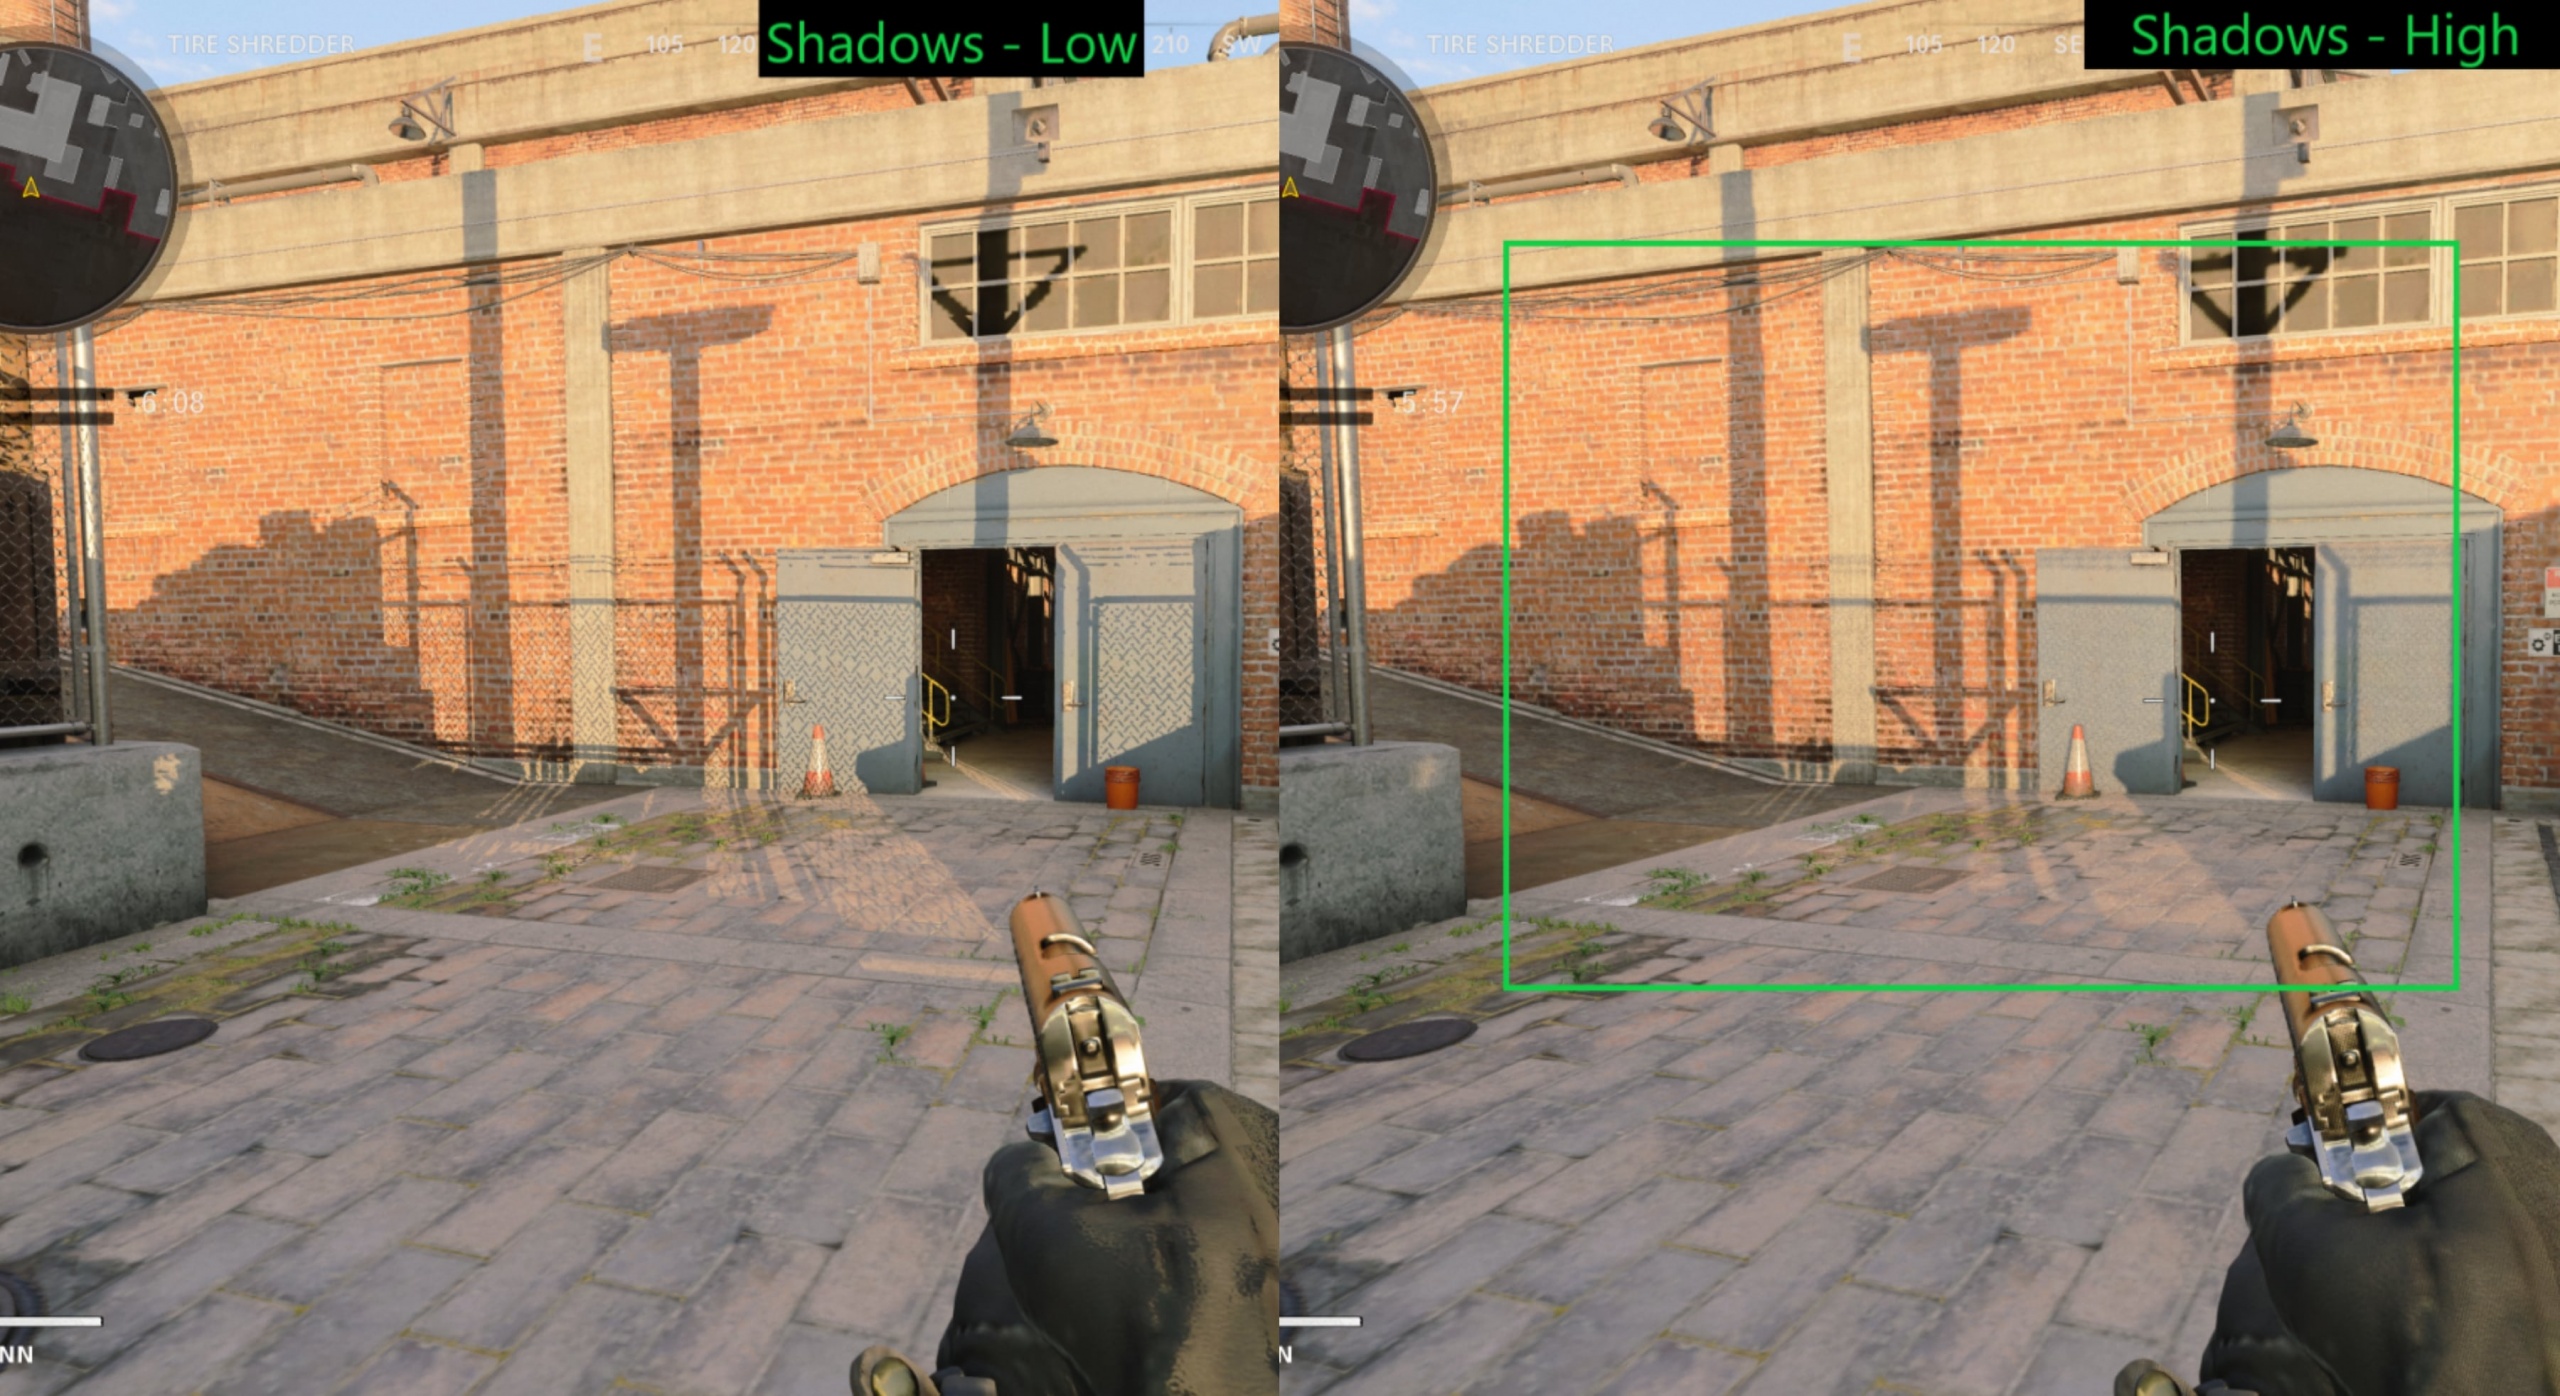
There are two reasons why you should keep Shadow Quality High. The first is that shadows will help you spot enemies in interiors. And the second is that graphics look too washed out without this. You can certainly try it low, but then you will miss the benefit of seeing the enemy player’s shadow and ambient visuals.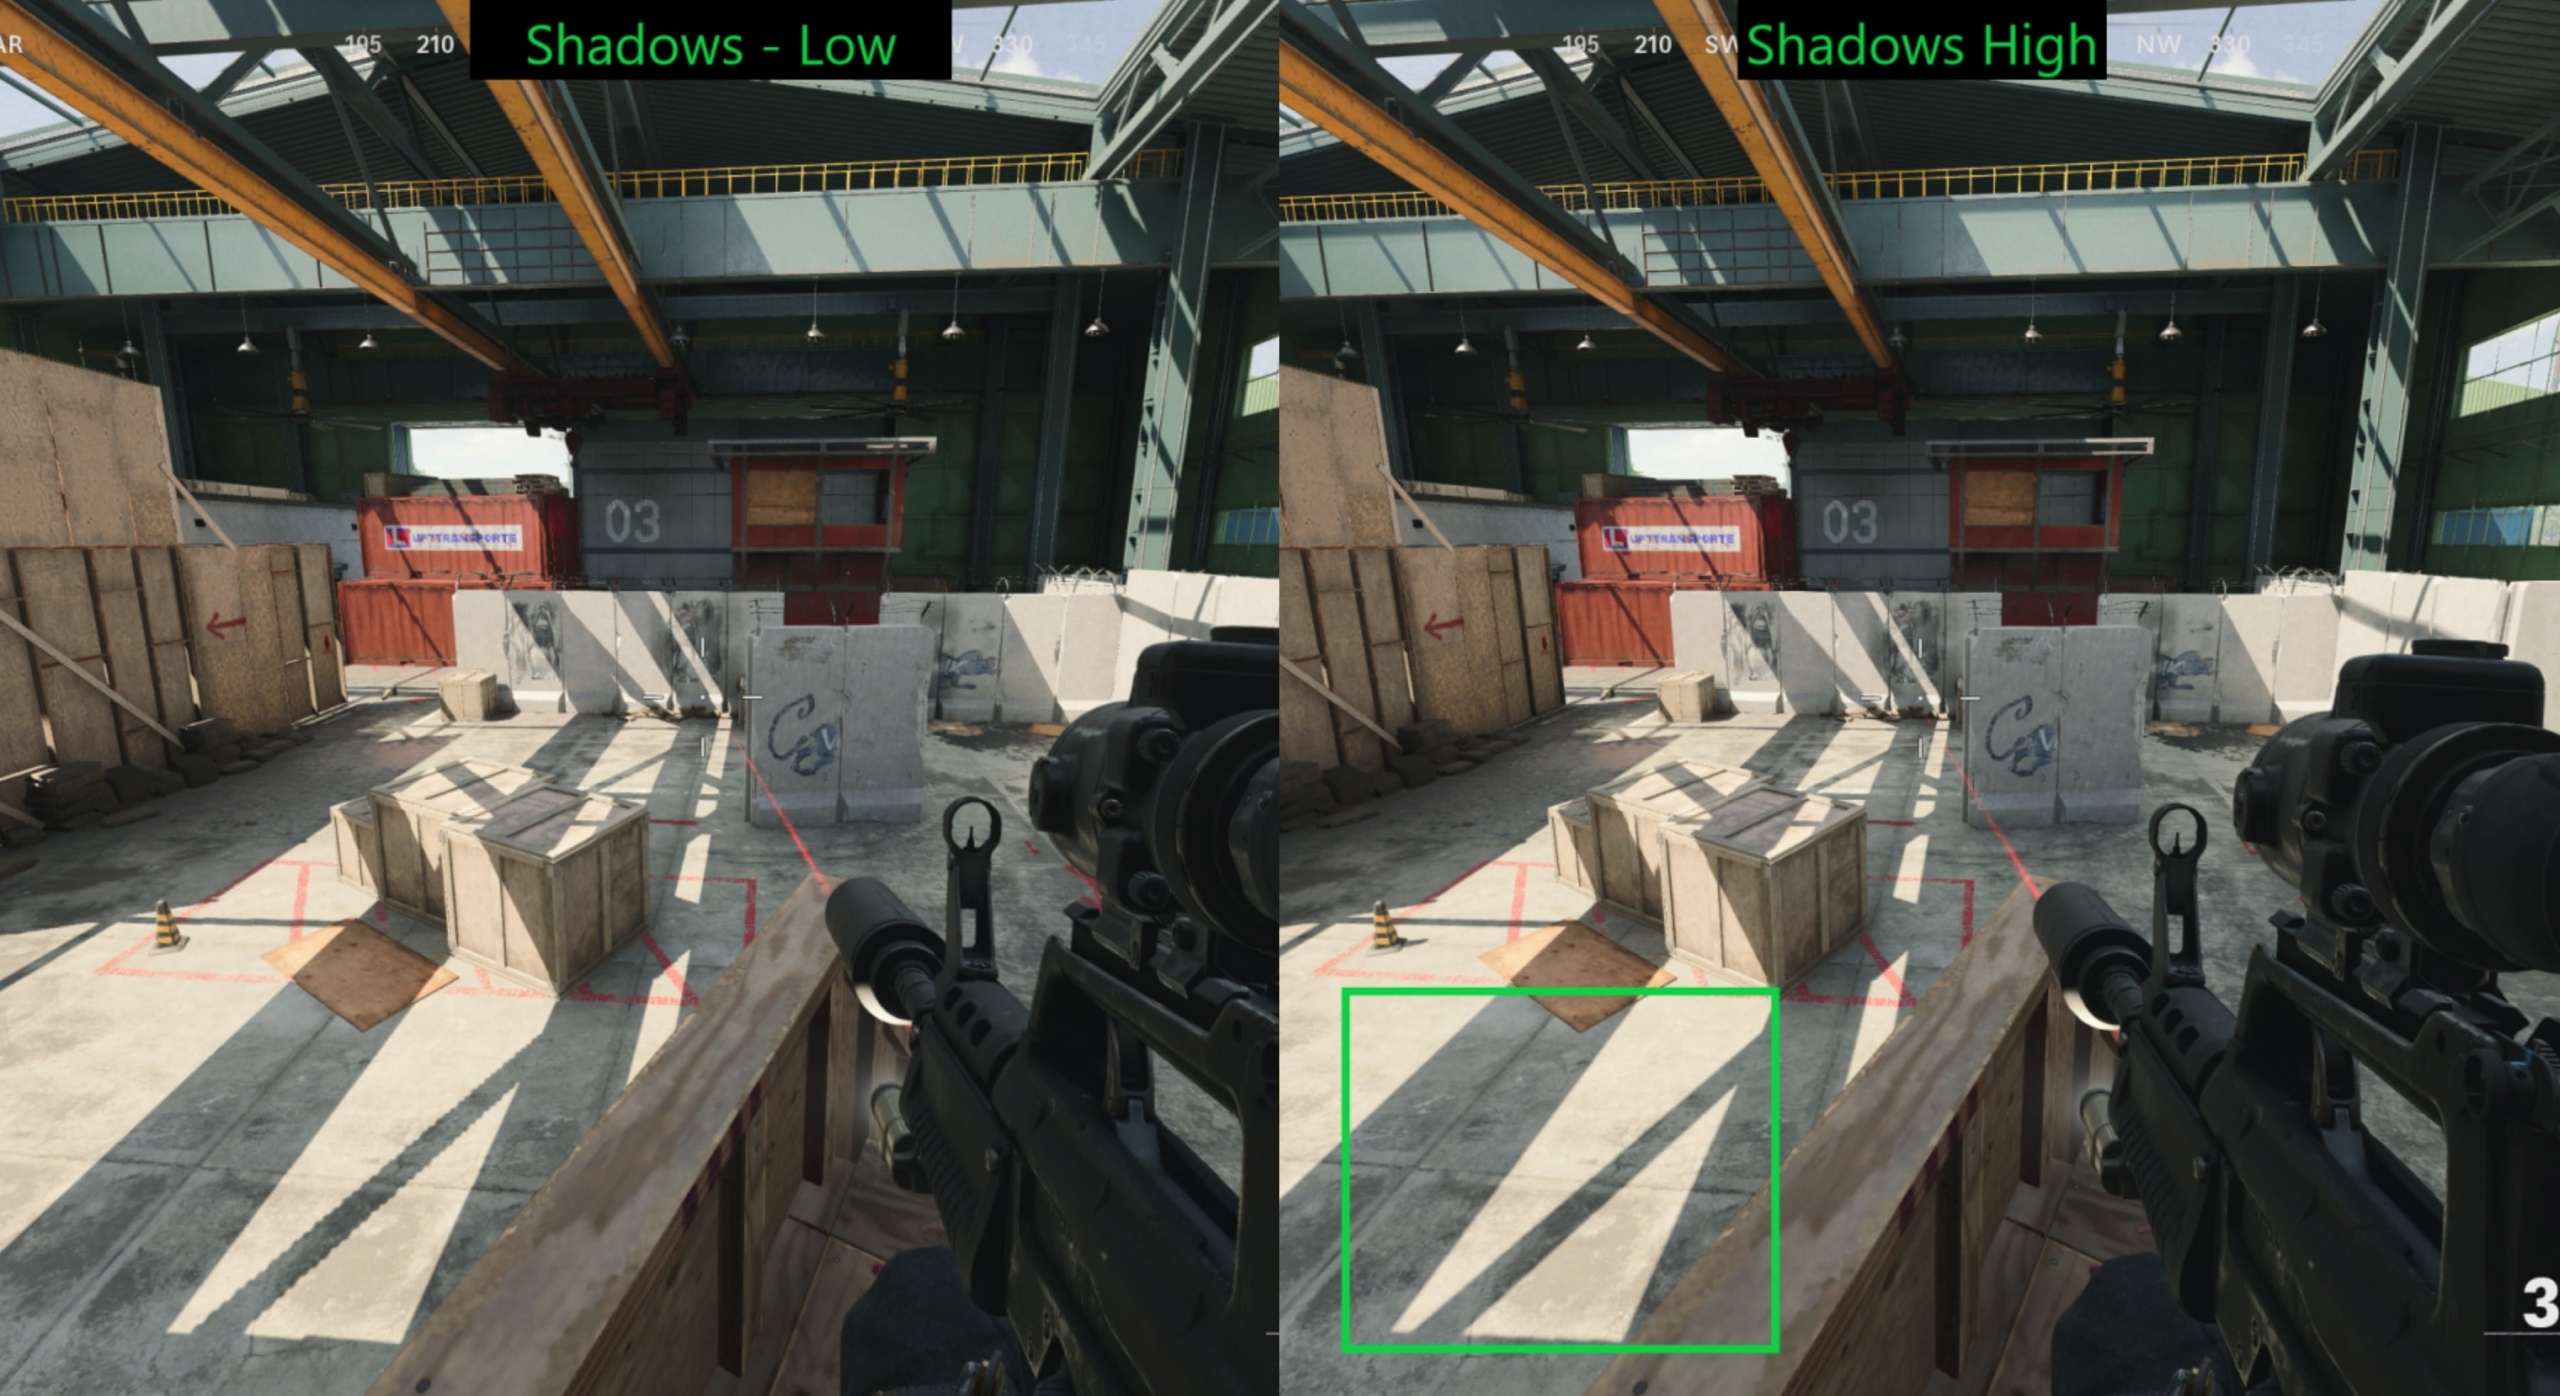
Another thing worth noting from the picture above is that when shadows are on low, they are blurry and scattered very randomly.
Dynamic Shadows: Disabled
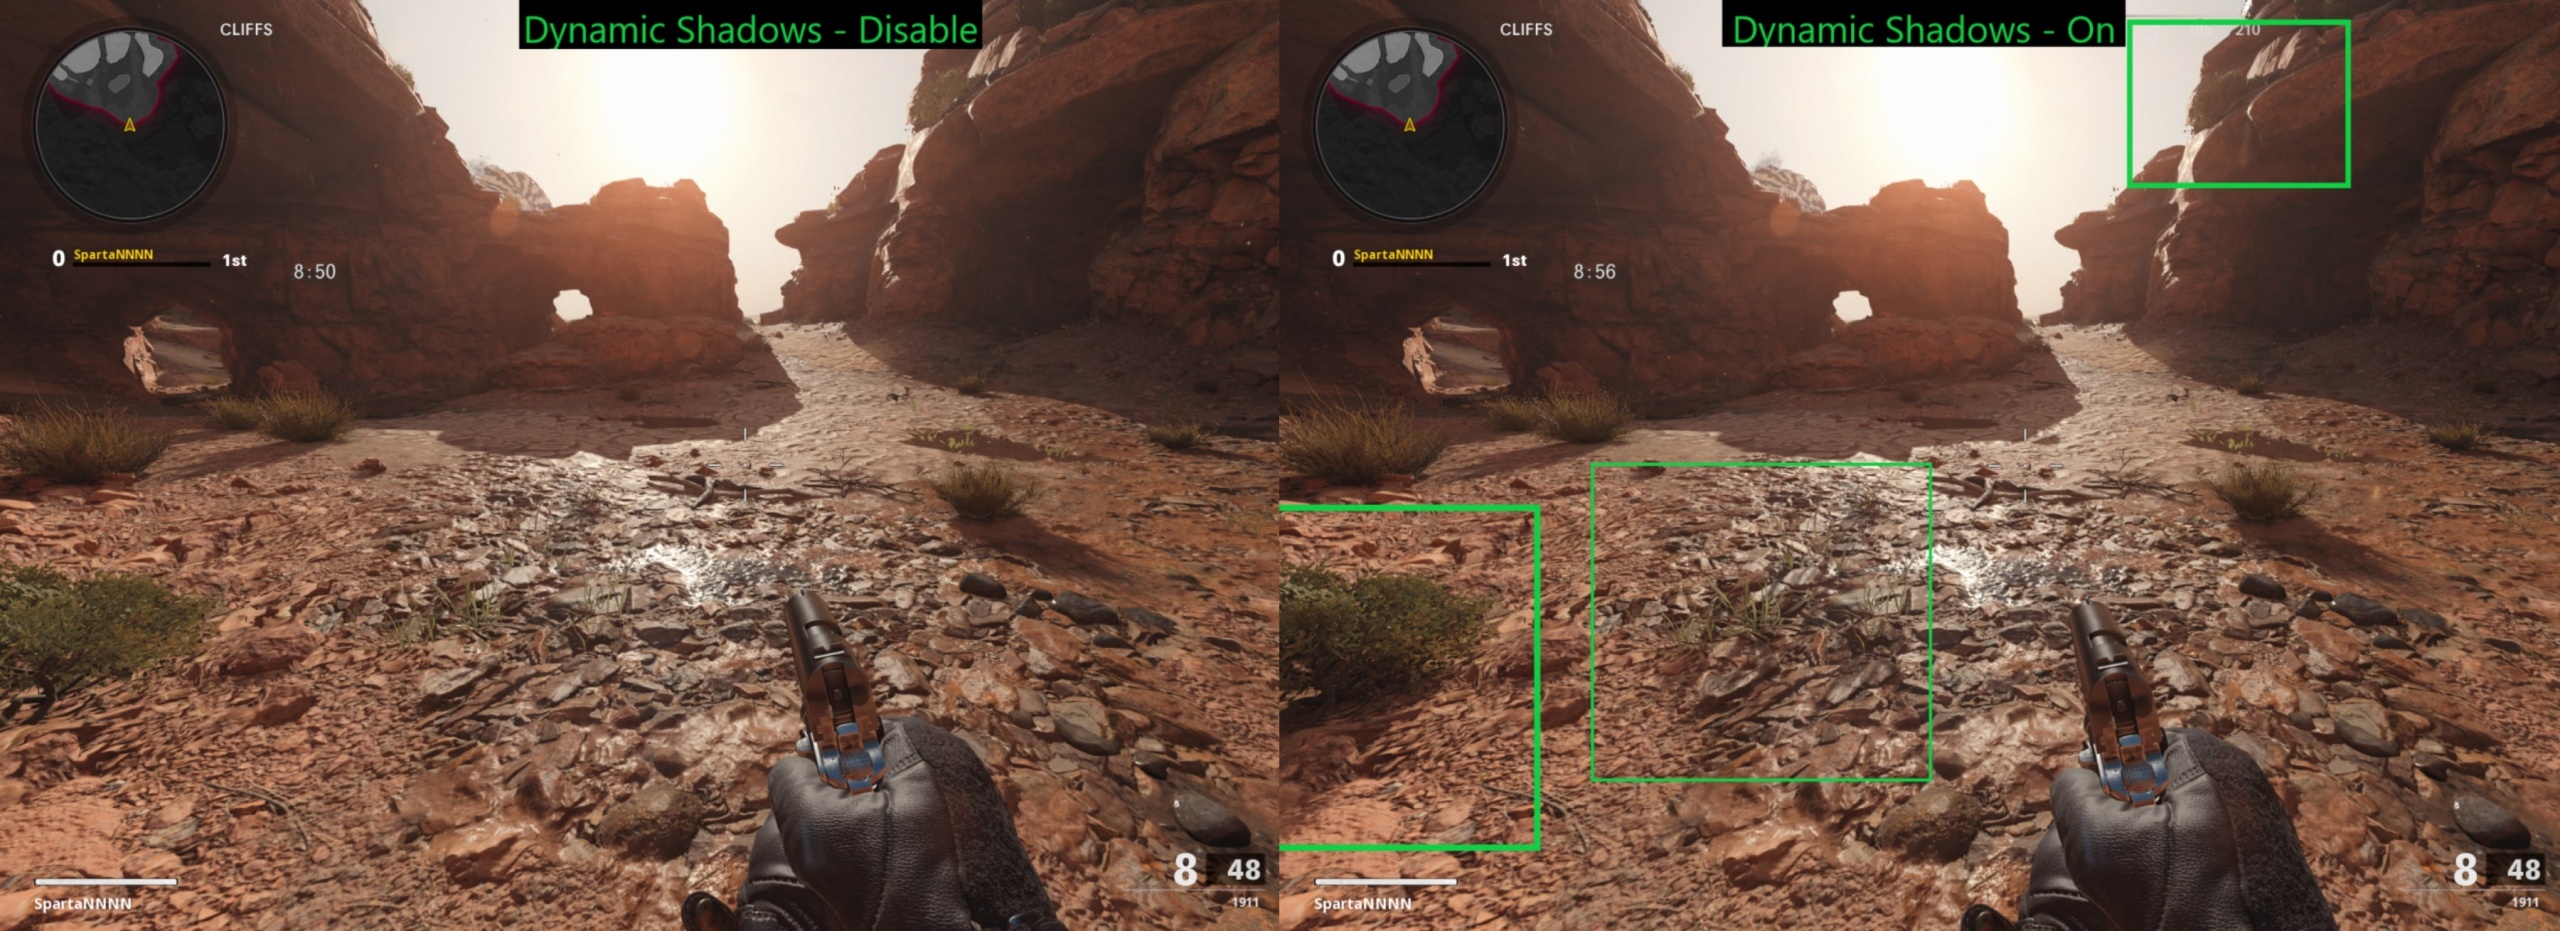
Dynamic Shadows is another feature that contradicted with our motto, “Sharp visuals.”When enabled, we saw unnecessary shadows and a slight impact on performance. Most Importantly, it became challenging to spot enemies. For those who are interested in the campaign, make sure you have it enabled for better graphics.
Special Effect Shadows: Disabled
Again, this adds unnecessary graphical components and further impact performance. Keep it disabled.
Weapon Shadows: Disabled
We did benchmark the graphics with both enabled and disabled. The performance difference wasn’t noticeable; however, at the same time, the feature felt unnecessary. If you want to get high fps and stay top of your competitive circle, the Weapon Shadow feature isn’t for you.
Ray Tracing: Disabled
This part is a bit complex, mainly because not everybody has RTX Graphics Cards. On top of that, there’s also this question, whether Ray Tracing is worth it in FPS Games. From my personnel experience and benchmarks, we did here at exputer. The difference was noticeable, and the visuals felt sharp. However, it did not fit our criteria of High FPS and stable performance. I think Ray Tracing has a long way to go in terms of optimization before being used in competitive FPS games like Call of Duty, CSGO, and Rainbow Six Siege.
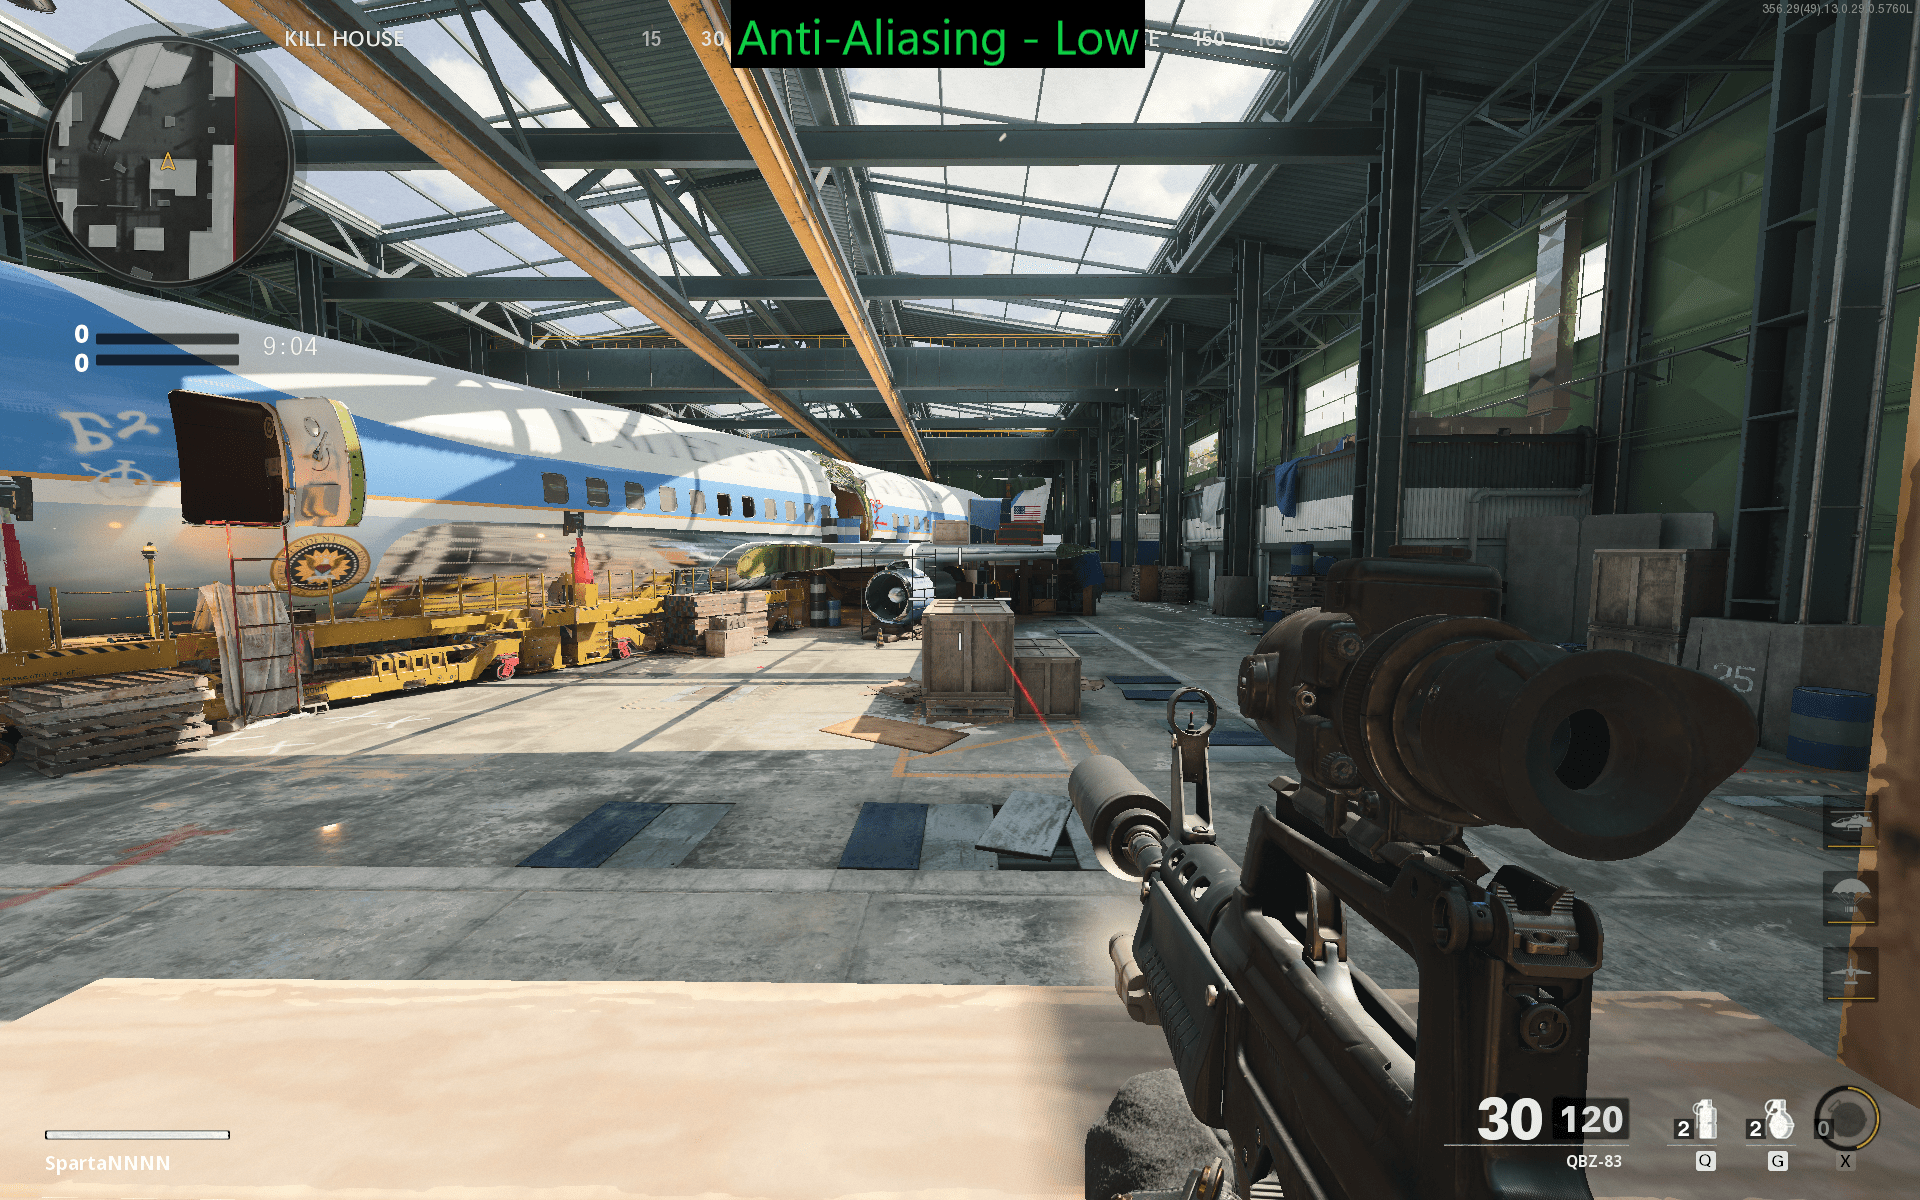
Anti-Aliasing Quality: High

Anti-Aliasing was one of the most prominent graphical features in our benchmark. The setting made a huge difference in terms of visuality. Further, keeping it at high made graphics smooth and ensured that elements appropriately blended in the environment.
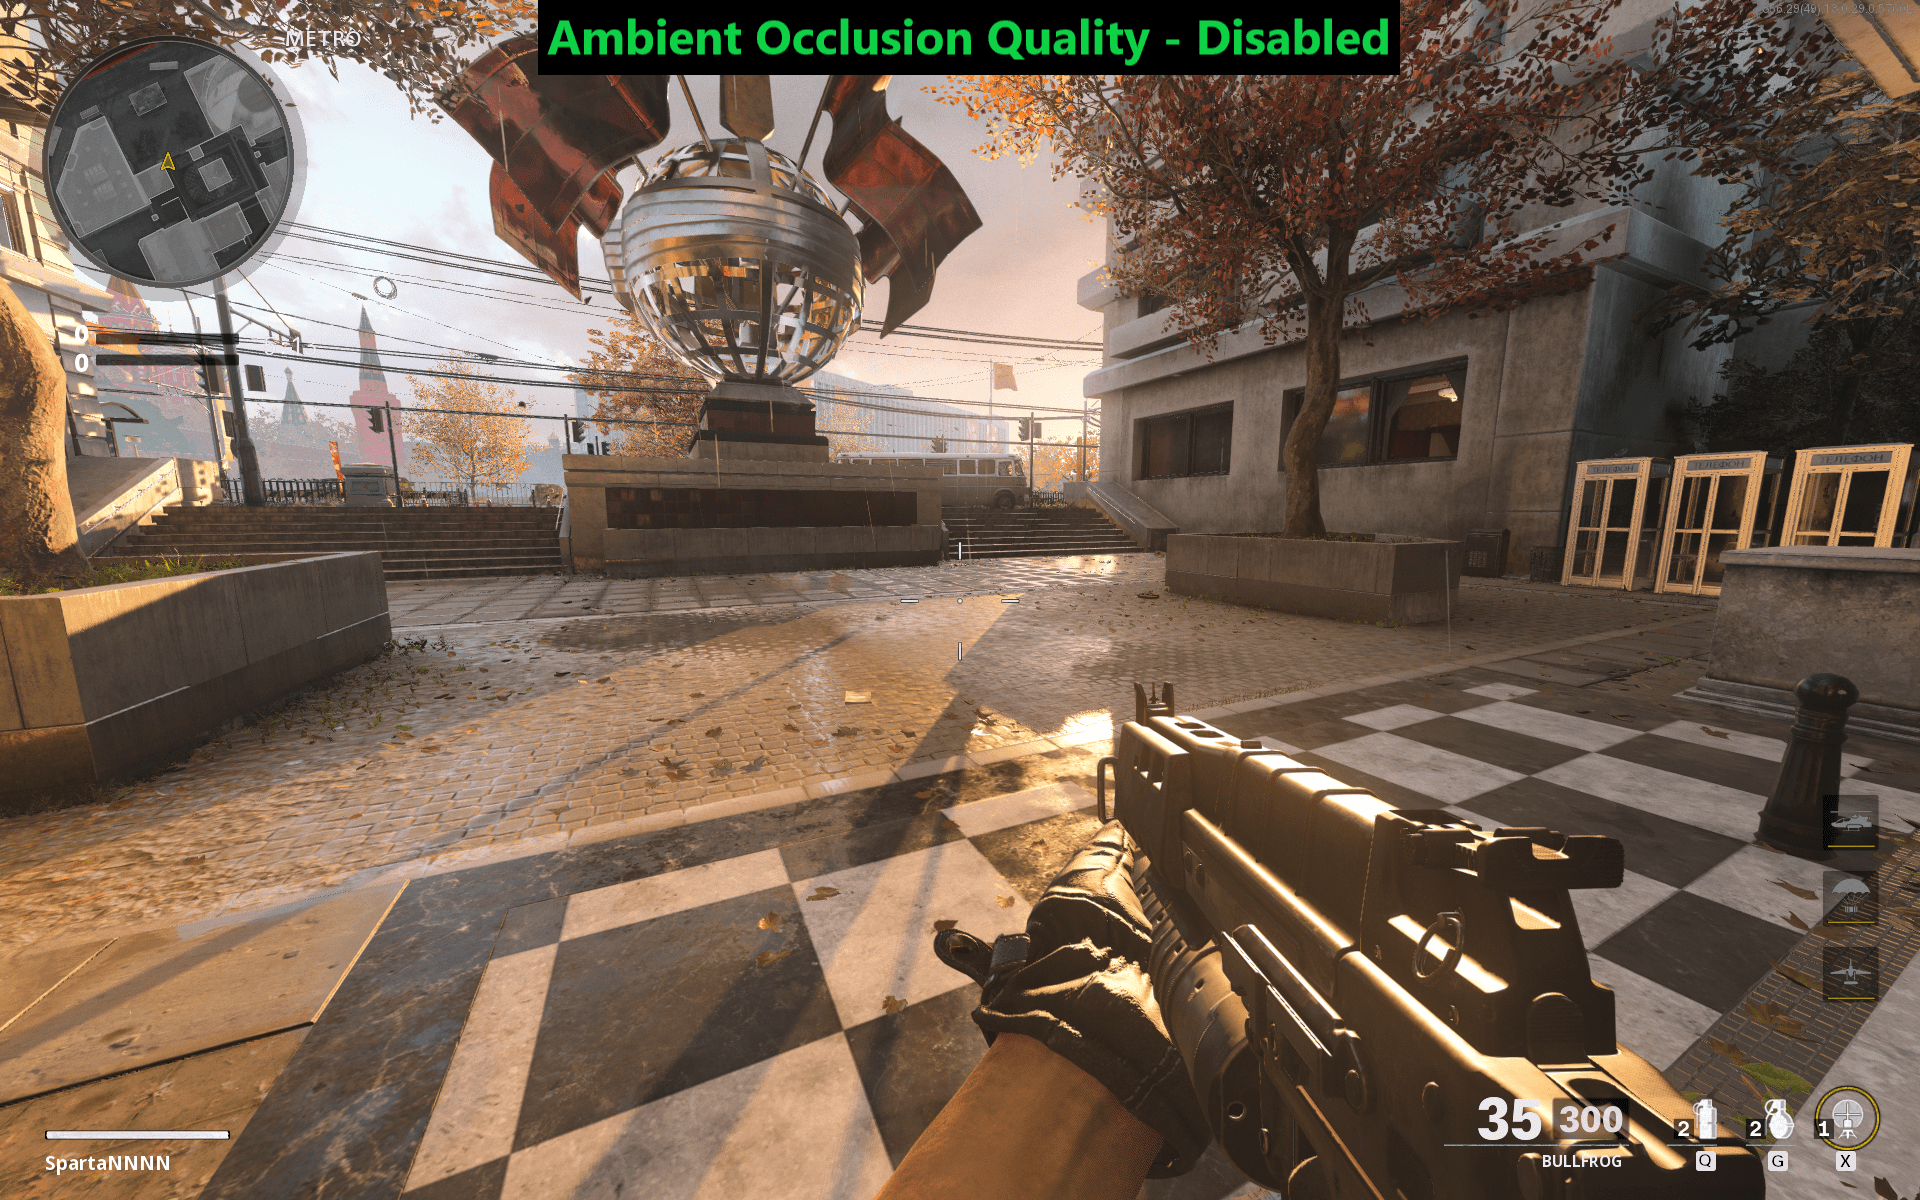
Ambient Occlusion Quality: Disabled
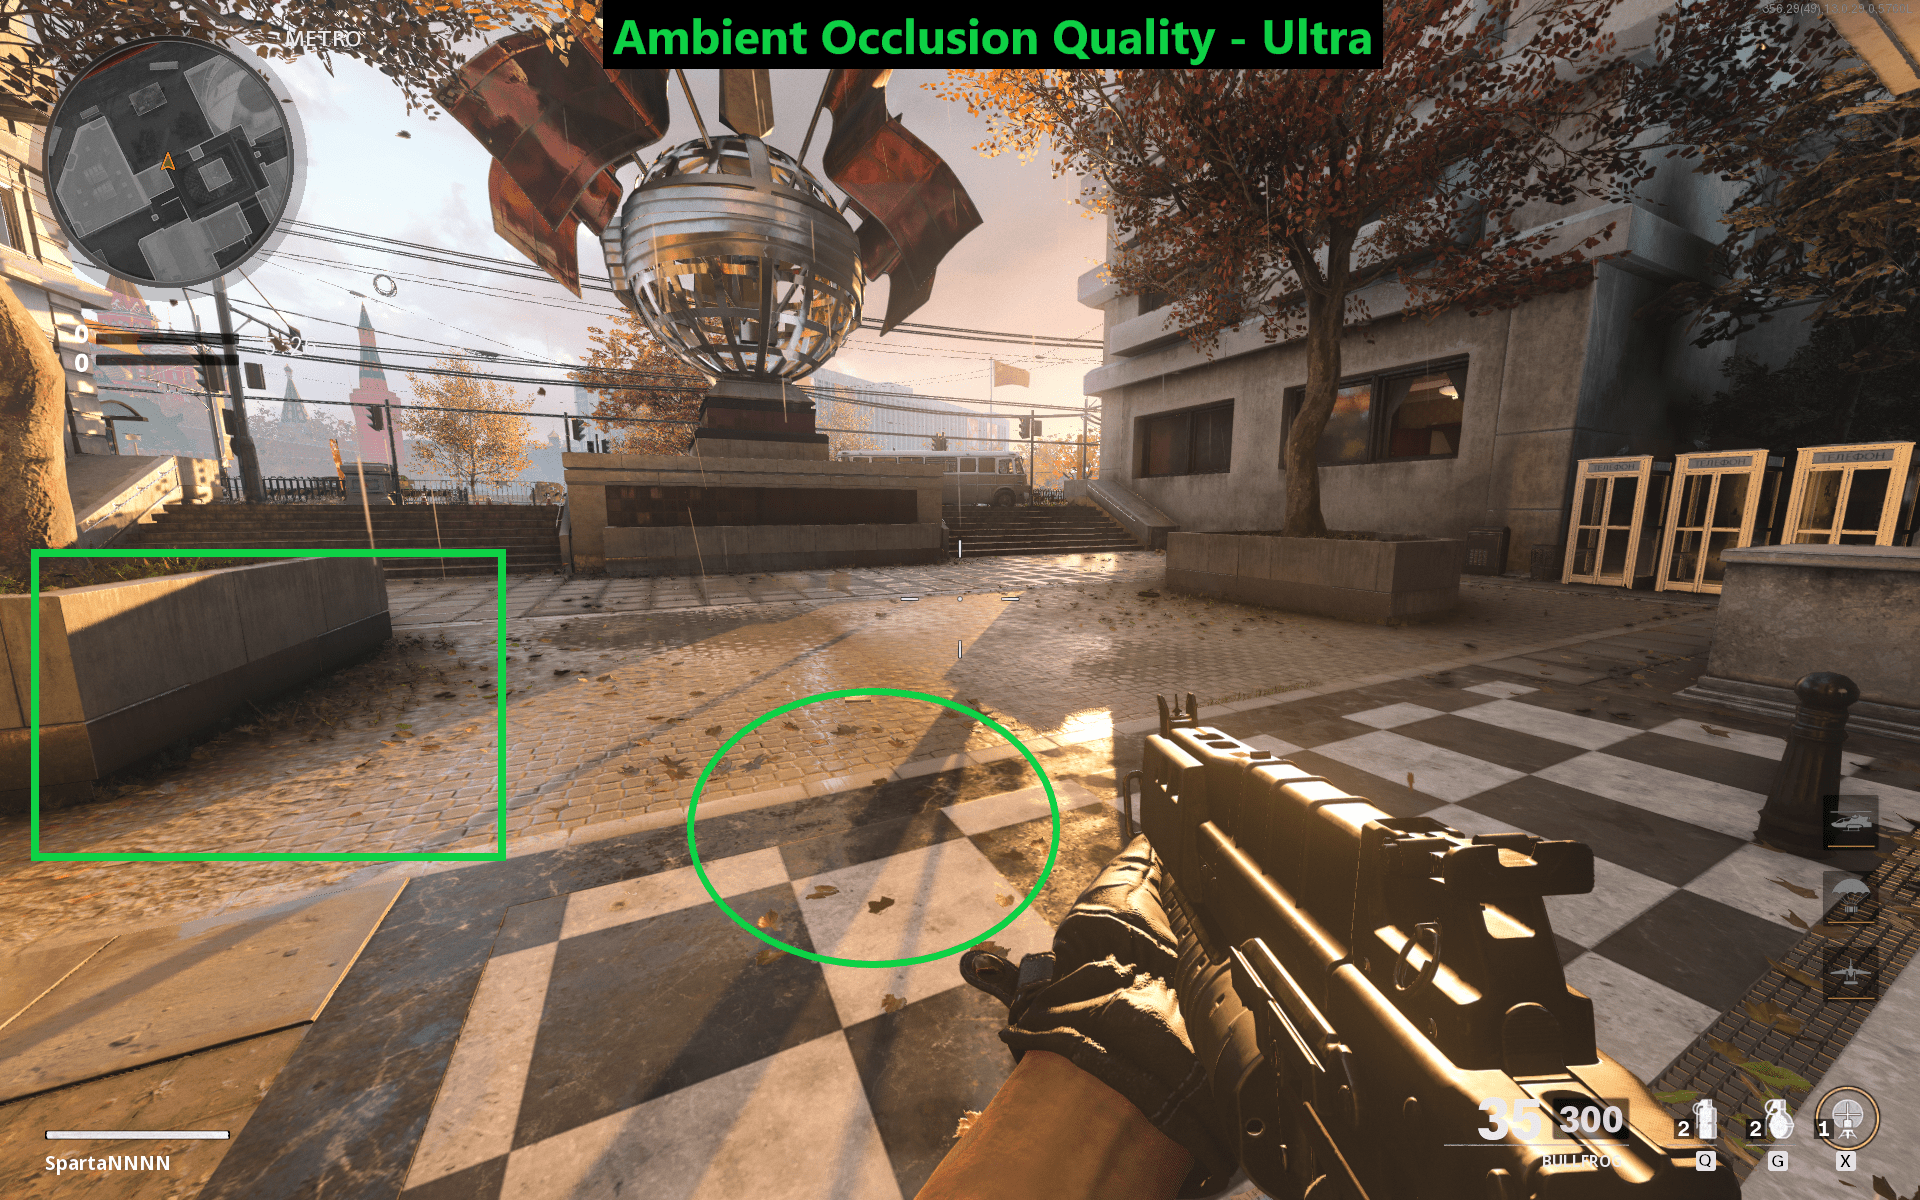
Benchmarking it across all options available and comparing everything. We noticed that difference in visuality and graphics wasn’t good at ultra. Although the game says it has a low effect on VRAM, we saw a roughly 10-15 FPS difference in both Ultra and Low. I think the primary reason why there was no difference in graphics was that we configured it through Nvidia Control Panel.
Motion Blur: Disabled
Motion Blur is entirely useless across all FPS games.
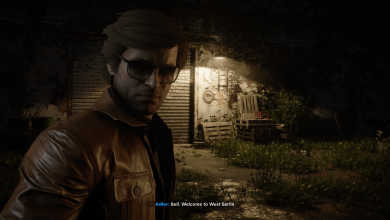
Subsurface Scattering: Disabled
This feature is strictly related to the rendering of human faces; therefore, it’s no purpose in multiplayer. Suppose you want to see Adler’s face full high definition in Campaign. Make sure it’s enabled.
Gameplay V-Sync: Disabled
Disable Gameplay V-Sync, or else your frames will be locked on 60, and you will experience terrible input lag.
Menu V-Sync: Disabled
Menu V-Sync is a personnel preference and has no impact on gameplay performance whatsoever.
Render Resolution: 100%
Select your native resolution, and make sure the rendering percentage is at 100%.
Aspect Ratio: Default
Check whatever’s your native aspect ratio through the Nvidia control panel, or test it yourself, keeping in mind that the native aspect ratio won’t have black bars.
Field of View: 103
Field of View is personnel preference, but try to keep it below 105, because above that, you will get very low FPS. This is principally on the grounds that with more Field of View; you are seeing more pixels all at once.
Order Independent Transparency: Disabled
Order Independent Transparency is one of those features that entirely set the performance and graphics meta apart. Thankfully, this feature does not have a lot to do in multiplayer because most of its extra detailing is strictly related to the campaign. We did notice, like the setting’s description writes, “increase the amount of transparency effects and objects that are sorted when looking through them.” The entire Order Independent Transparency thing isn’t helpful when boiling visuals and performance. Keep it disabled.
Nvidia Settings

Once you have updated the drivers do the following
- Open Nvidia Control Panel and under Adjust image settings with preview click on Use the advanced 3D image settings.

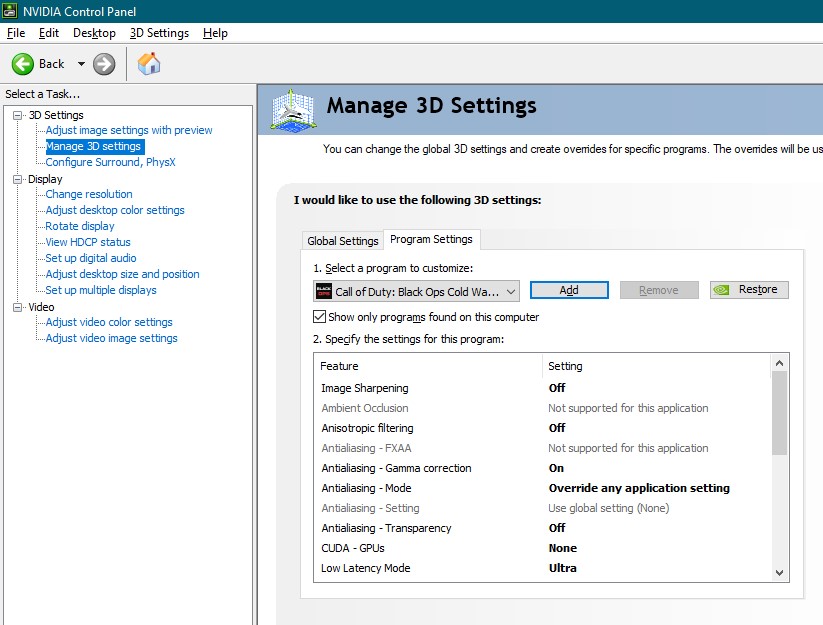
Best Nvidia Graphics Settings For Call of Duty Black Ops Cold War. - Afterward, go to Manage 3D Settings > Add Call of Duty Black Ops Cold War > and make the following changes.
- Turn off Image Sharpening.
- Disable Anisotropic Filtering.
- Enable Antialiasing – Gamma Correction.
- Override any application setting under Antialiasing – Mode.
- Antialiasing – Transparency – Off.
- CUDA – GPUs – Select Your Primary Graphics Card.
- Select Ultra under Low Latency Mode.
- Use Global Settings under Max Frame Rate and Multi-Frame Sampled AA (MFAA).
- Select Your Primary Graphics Card Under OpenGL Rendering GPU.
- Choose “Prefer Maximum Performance” under Power Management mode.
- Enable Shader Cache.
- Enable Texture Filtering – Anisotropic sample optimization.
- Allow Texture Filtering – Negative LOD bias.
- Select High performance under Texture Filtering – Quality.
- Enable Texture Filtering – Trilinear Optimization.
- Turn on Threaded Optimization.
- Turn off Triple Buffering.
- Disable V-Sync.
- Use Global Settings for Virtual Reality pre-rendered frames.
You can now expect terrific visuals along with high fps. These Nvidia settings are the most balanced and optimized ones for Call of Duty Black Ops Cold War.
Windows 10 Optimizations For Black Ops Cold War
If you have a low to mid-range PC, make sure you are following this section. By default, Windows 10 has many settings that compromise on performance for unnecessary and fancy animations. To get the best possible FPS in Black Ops Cold War and stay at the top of your competitive circle. You will have to configure these few sets of settings.
Get Ultimate Performance
Here are the steps to enable the Ultimate Performance Plan.
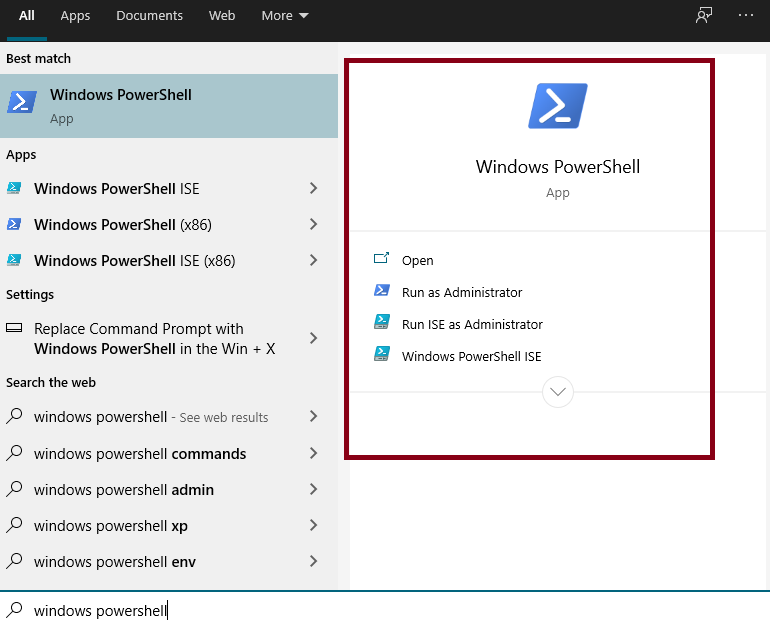
- Under Start > Search and Open Windows PowerShell.

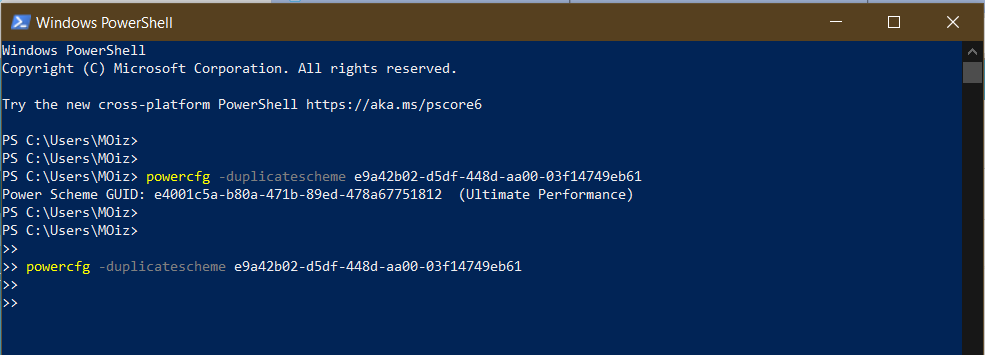
Windows PowerShell. - Now Copy and Paste this set of code and enter.

Ultimate Performance Plan Code – Check spaces properly. -
powercfg -duplicatescheme e9a42b02 -d5df -448d -aa00 -03f14749eb61
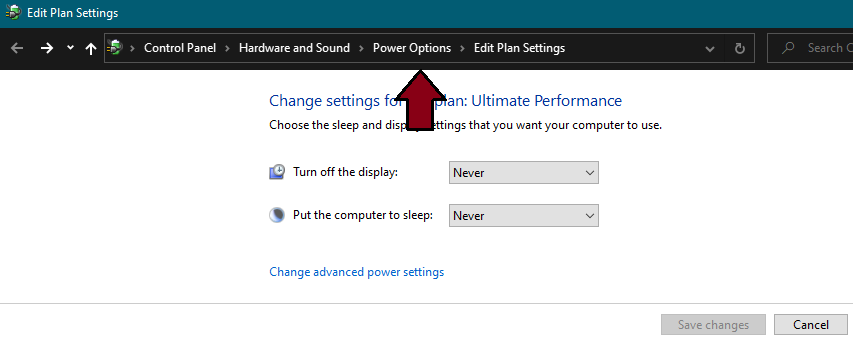
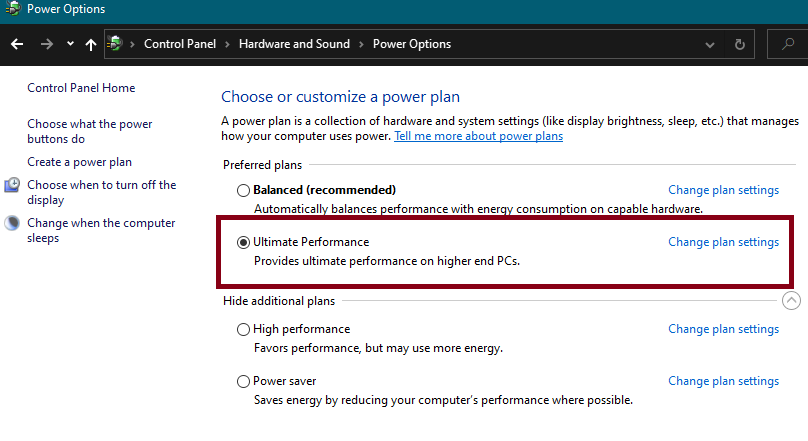
- Once done, go to start again > Edit Power Plan > Power Options.

Power Options. - Checkmark Ultimate Performance Plan.

Checkmark and you are done!
Disable Unnecessary Animations
The majority of these animations are for better visuals, which are relatively unnecessary in gaming. To disable them:
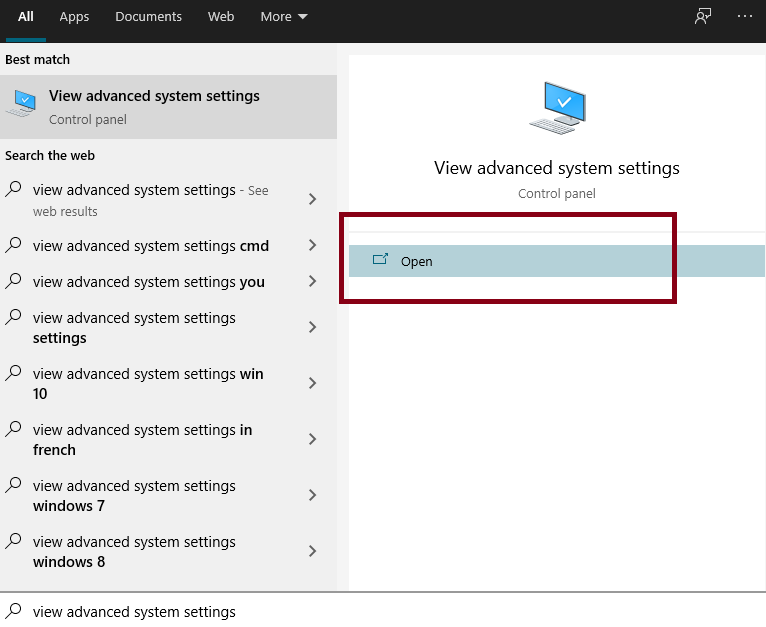
- Open Start > Search View Advanced System Settings > Open It.

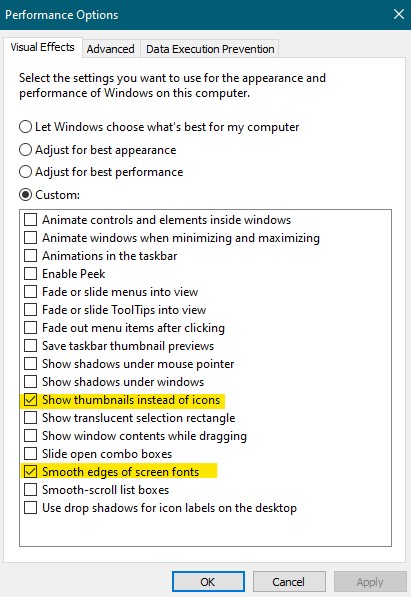
view advanced system settings. - Proceed to the Advanced Tab and Click on Settings > Checkmark the following and click on apply.
- “Show thumbnails instead of icons.”
- “Smooth edges of screen fonts.”

make sure to click on apply and ok.
From now on, not only will you experience speed and rapid response. But, you will also see a slight increase and consistency in your frames.
Get Rid Of Hardware Acceleration
Here is how you can disable it across the common gaming applications.
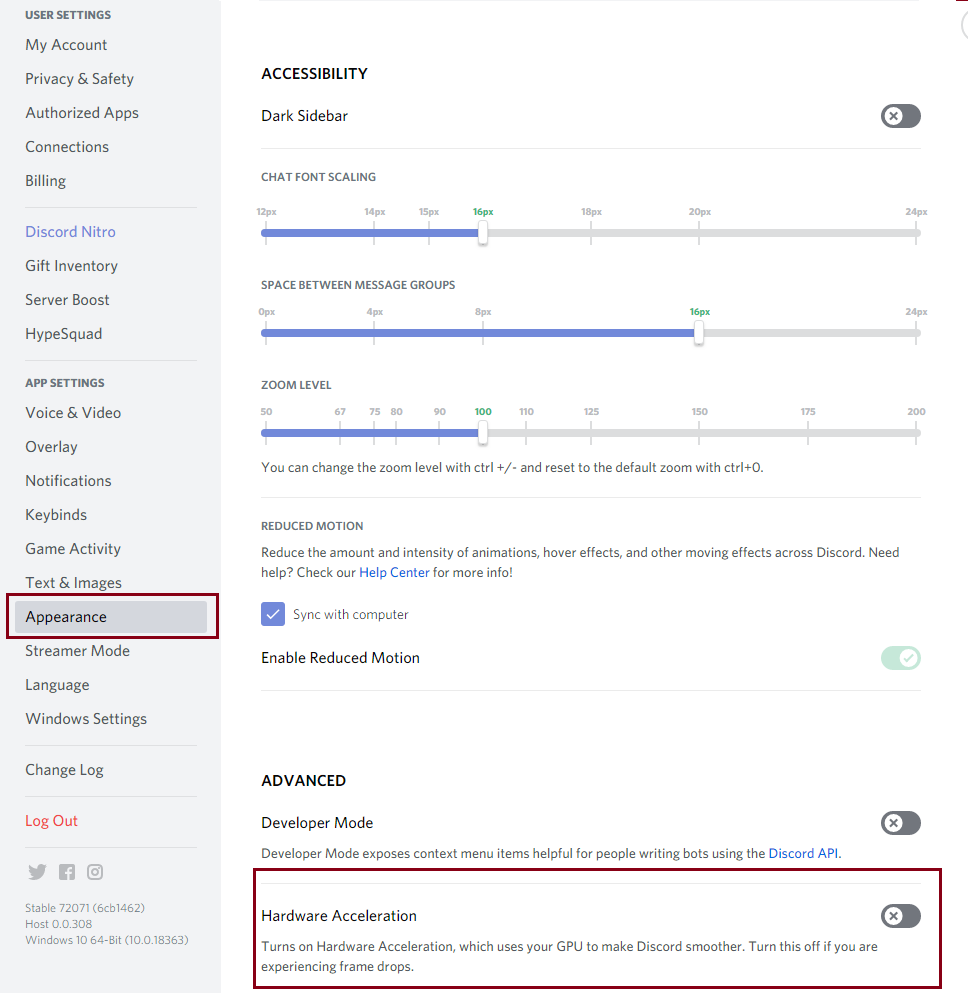
- Open Discord > Settings.

discord settings. - Under Appearance, scroll down and disable Hardware Acceleration.

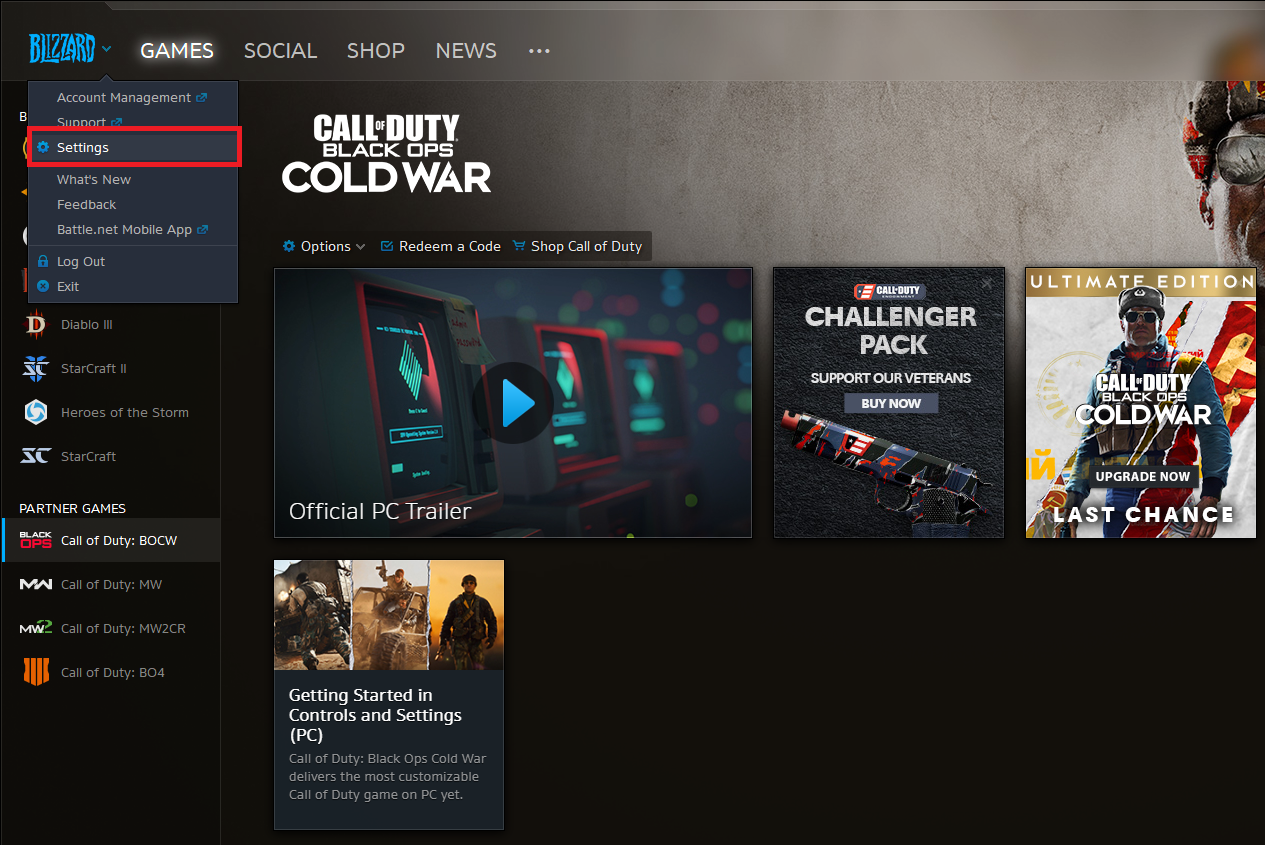
Disable Hardware Acceleration. - Now Open Battle.net > Settings.

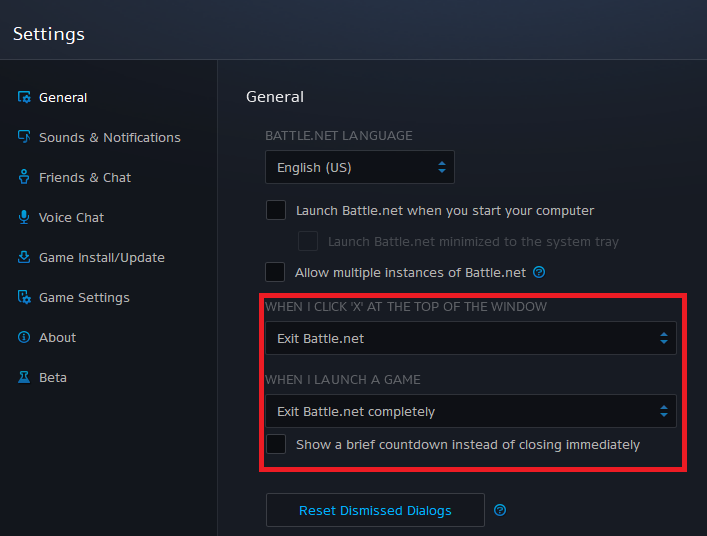
Battle.net settings. - Under General Select Exit Battle.net and Exit Battle.net completely in Window Section.

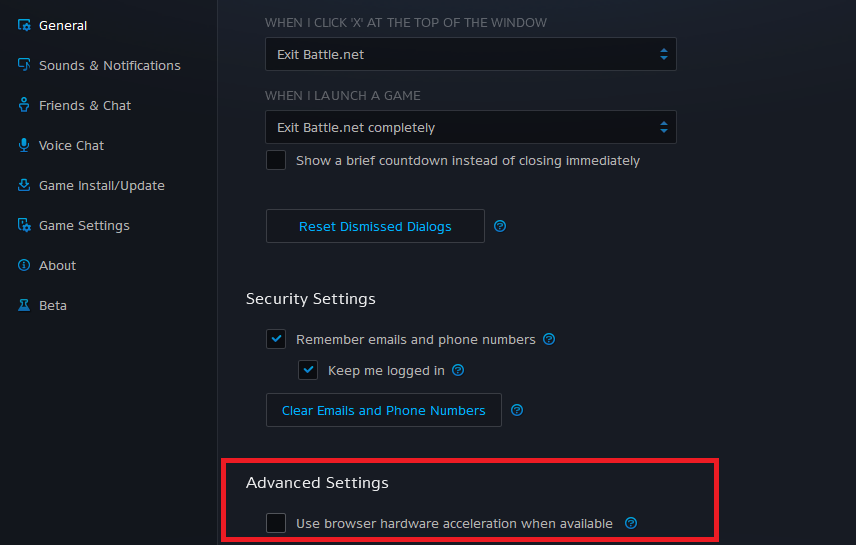
select these two options. - Scroll down and now uncheck “Use browser hardware acceleration when available.”

uncheck this option. - Make sure to click on done, once you make the changes.

Set Graphics Card Priority To High For Call of Duty Black Ops Cold War
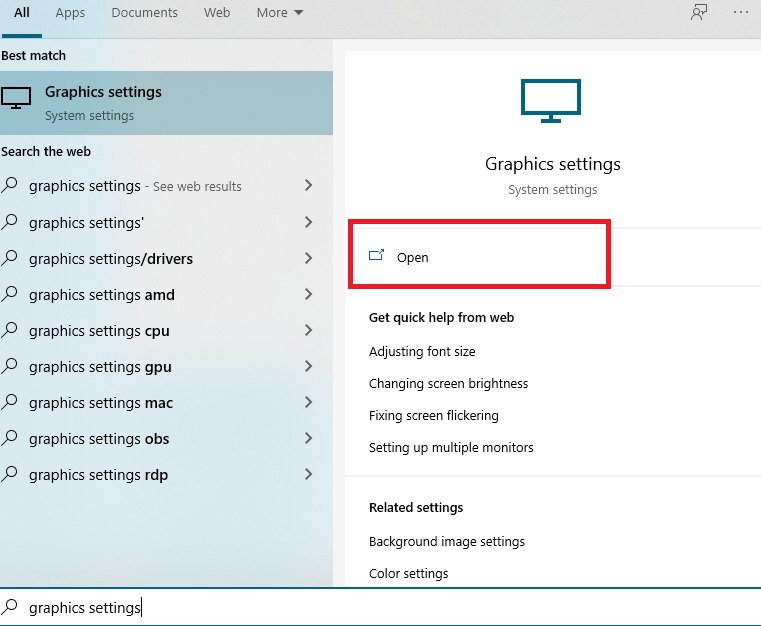
- Under Start > Search And Open Graphics settings.

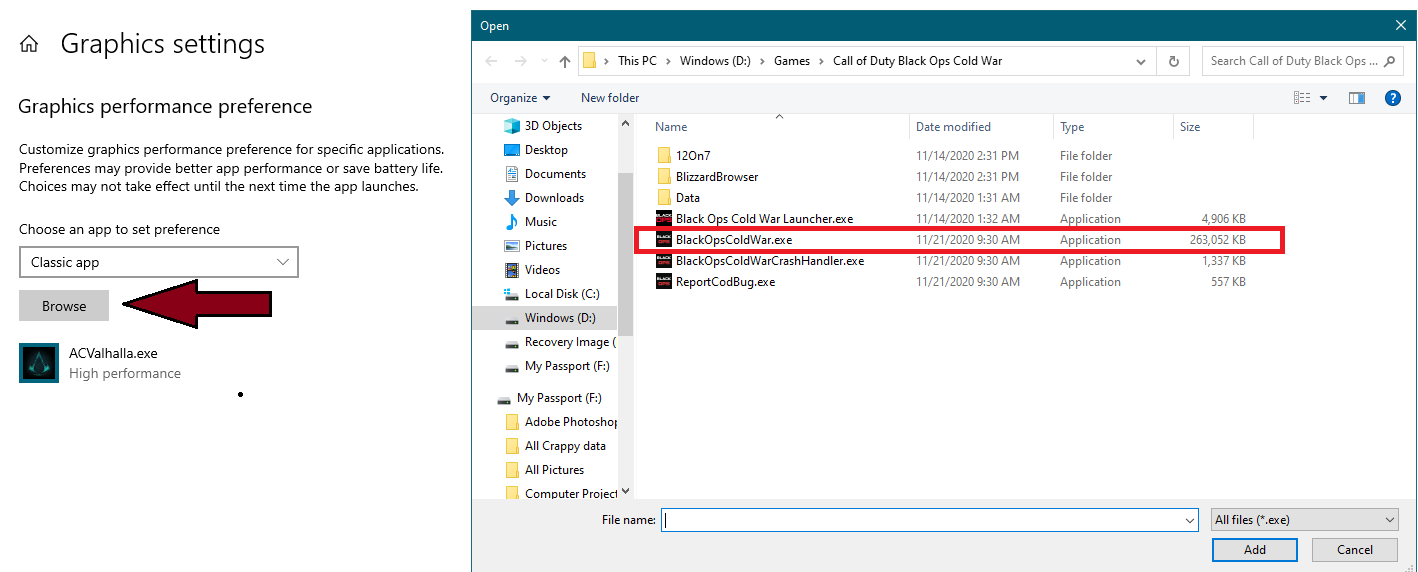
Graphics Settings. - Click on Browse and Add BlackOpsColdWar.exe

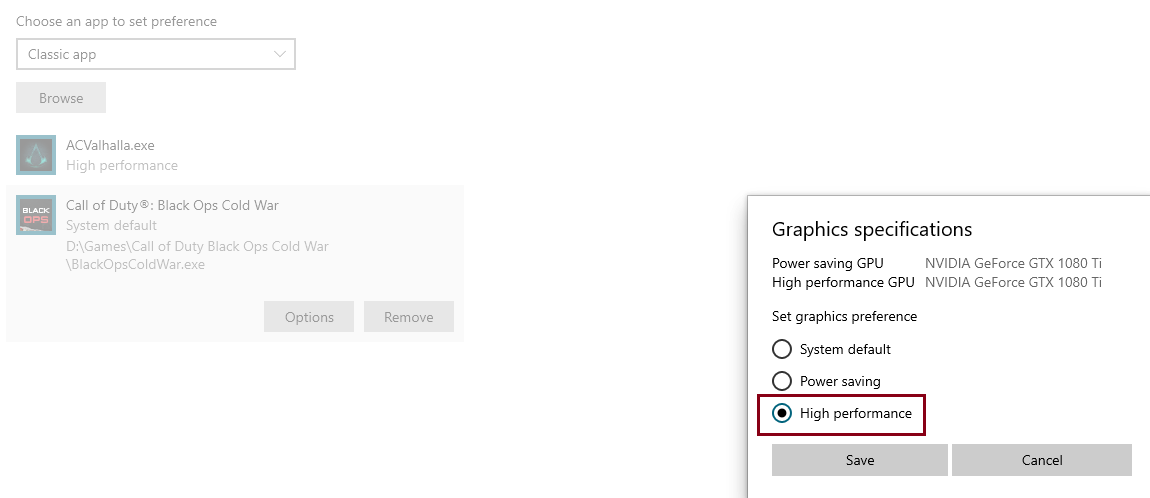
Adding Call of Duty Black Ops Cold War exe. - Now click on options, and under Graphics Preference, Select High Performance.

checkmark High performance. - You will now see dramatic FPS boost and eye-catching smooth gameplay in Call of Duty Black Ops Cold War.
Black Ops Cold War Optimization Thoughts
Overall, I’d say Call of Duty Black Ops Cold War is pretty well optimized. However, the settings are way too many, and for those who plan on getting decent frames at high refresh rate monitors. There’s a lot to configure. On the bright side, if you plan on playing the campaign mode only.
Just go with all high or ultra, because with majority hardware, it’s very likable the game will run at 60 FPS. Last but not least, this Call of Duty Black Ops Cold War PC Setting guide was made in the same month as the game release, so there’s hope that more optimization might be on its way.
Update: The Guide has now been updated with additional methods, while others are changed recognizing the updates.
Thanks! Do share your feedback with us. ⚡
How can we make this post better? Your help would be appreciated. ✍
Great!