The Boom Mic is among the numerous gadgets in Content Warning that can help you get more views on SpookTube and help you earn more money.
- The Boom Mic can be purchased for $100 through a terminal at your base, enhancing audio quality for SpookTube content in Content Warning.
- Use the Boom Mic to amplify nearby audio for better recording quality, potentially increasing views on SpookTube.
- Employ it as a lure to attract monsters to a designated location, helping in the creation of thrilling footage for your content.
How To Get Boom Mic In Content Warning
The Boom Mic is available for purchase for $100 through a terminal at your base.
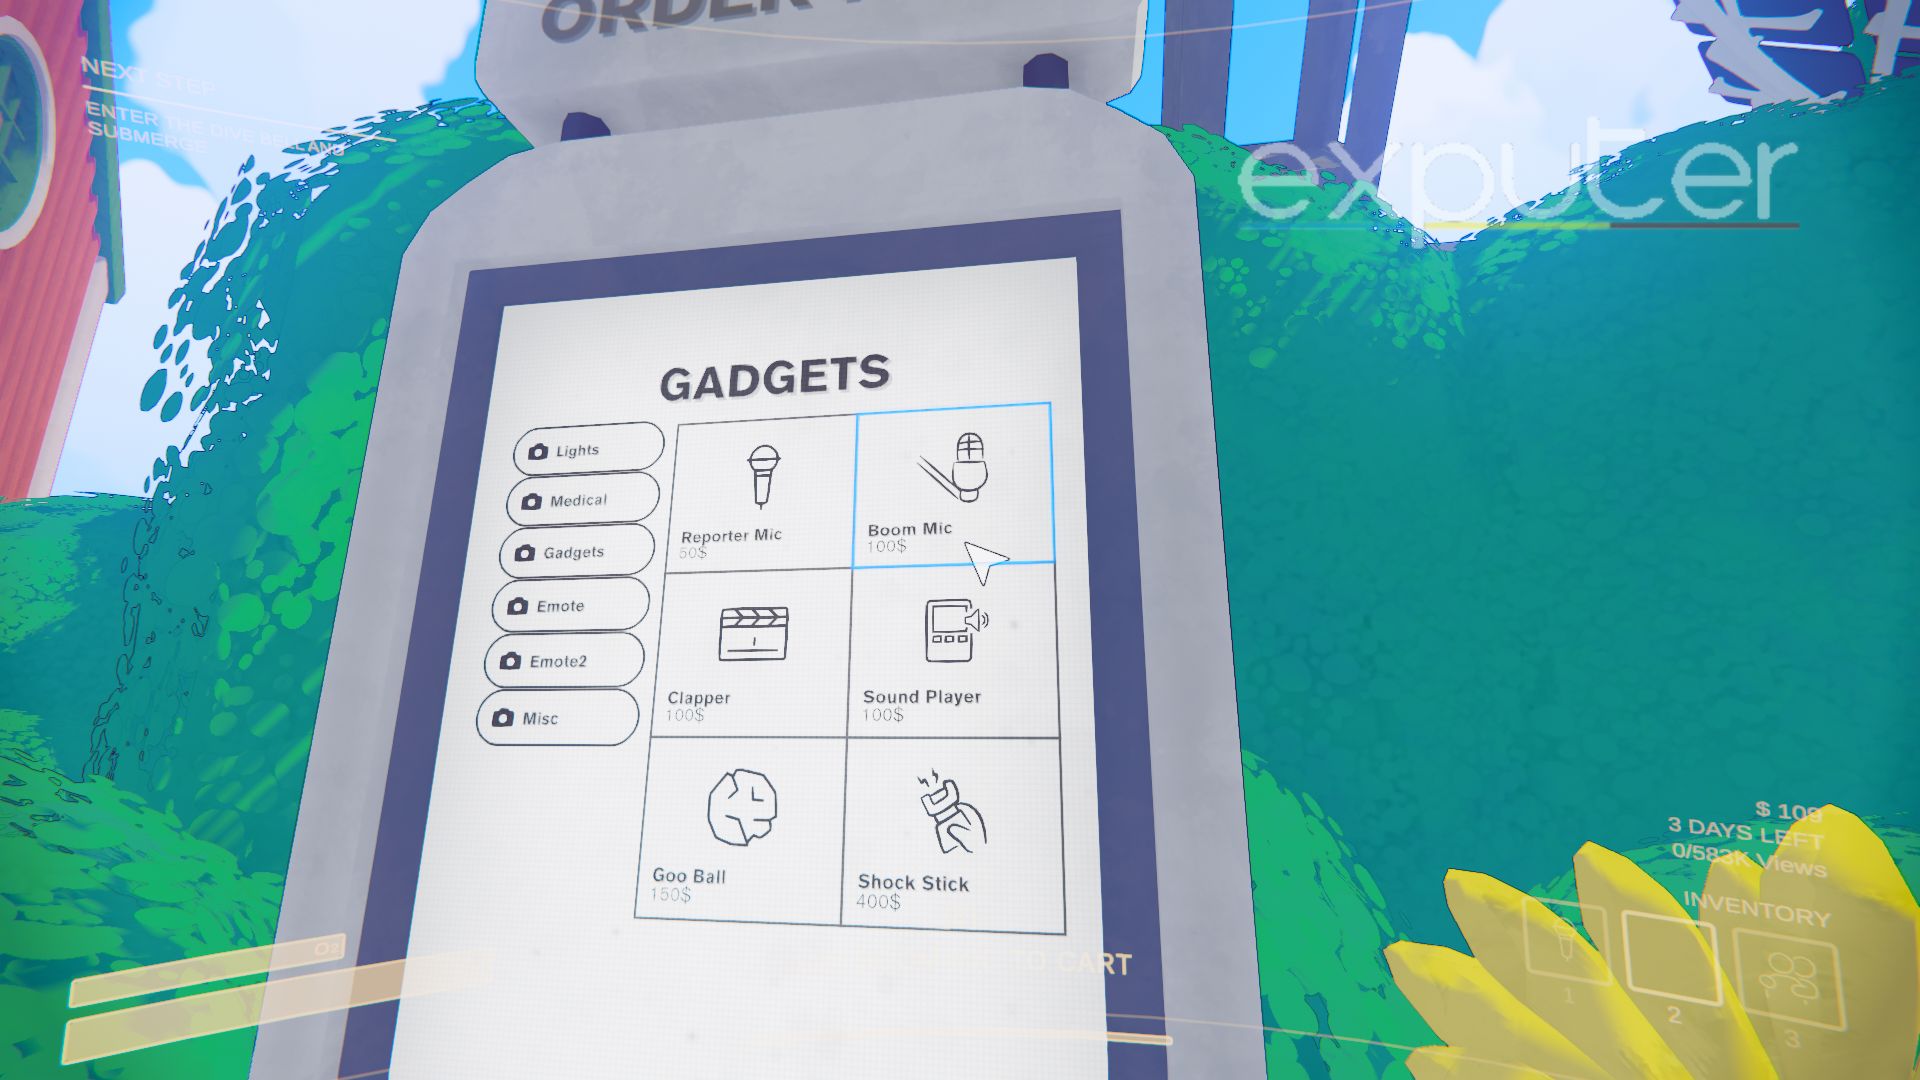
- Visit the Terminal: To obtain the Boom Mic, visit the terminal located to the left of the building exit on your way to the shuttle.
- Interact with the terminal: Navigate to the Gadgets tab.
- Buy the Boom Mic: Select the Boom Mic and add it to your cart, then place your order by clicking the Order button at the bottom of the terminal.
- Wait for Delivery: Retrieve your package from the pickup area to acquire your Mic.
After acquiring the Boom Mic, either you or someone in your team must physically collect the item and transport it to the Dive Bell.
Using The Boom Mic For Better Audio

A noise from across the room won’t be amplified, but one from nearby will be significantly boosted. This feature allows for better audio quality when using the Boom Mic for recording intros and outros, potentially increasing views in-game.
Luring Monsters Using Boom Mic
My preferred method for using the Boom Mic is as a lure to attract monsters to a designated location. Since it looks like a stick, it allows for taunting monsters and guiding them towards you.
To throw the Boom Mic, simply hold down the Q key and then release it. Upon landing, the Mic emits a loud noise, attracting monsters to its location. Even when stationary on the ground, the Boom Mic continues to amplify nearby audio.
Utilize this strategy by combining a dropped Boom Mic with lights and flares to set up a shot. Generating noise near the Boom Mic guarantees ample monster attention, enabling you to capture thrilling footage. As long as your camera operator maintains a safe distance to film the chaos, you can create captivating movie scenes.
That’s everything you need to know about the Boom Mic. Make sure to use the Clapper with it, as the Clapper can help you get more views. Furthermore, learn how to escape the ceiling monster so you don’t die every time you get trapped with it. Also, make the Best Faces in the Content Warning and record some fun videos.
Thanks! Do share your feedback with us. ⚡
How can we make this post better? Your help would be appreciated. ✍