Considering the state of games these past few years, I believe Payday 3 is an exception, running decently on even older hardware. But, even with that said, I have experienced some pretty bad frame drops and micro-stuttering in the game. Something that took hours for me to get rid of. So, if you have been looking for the Best Payday 3 Settings, you won’t have to look any further. Why? Because I am going to spill all my grown beans in this guide.
Here are my Best Payday 3 Settings:
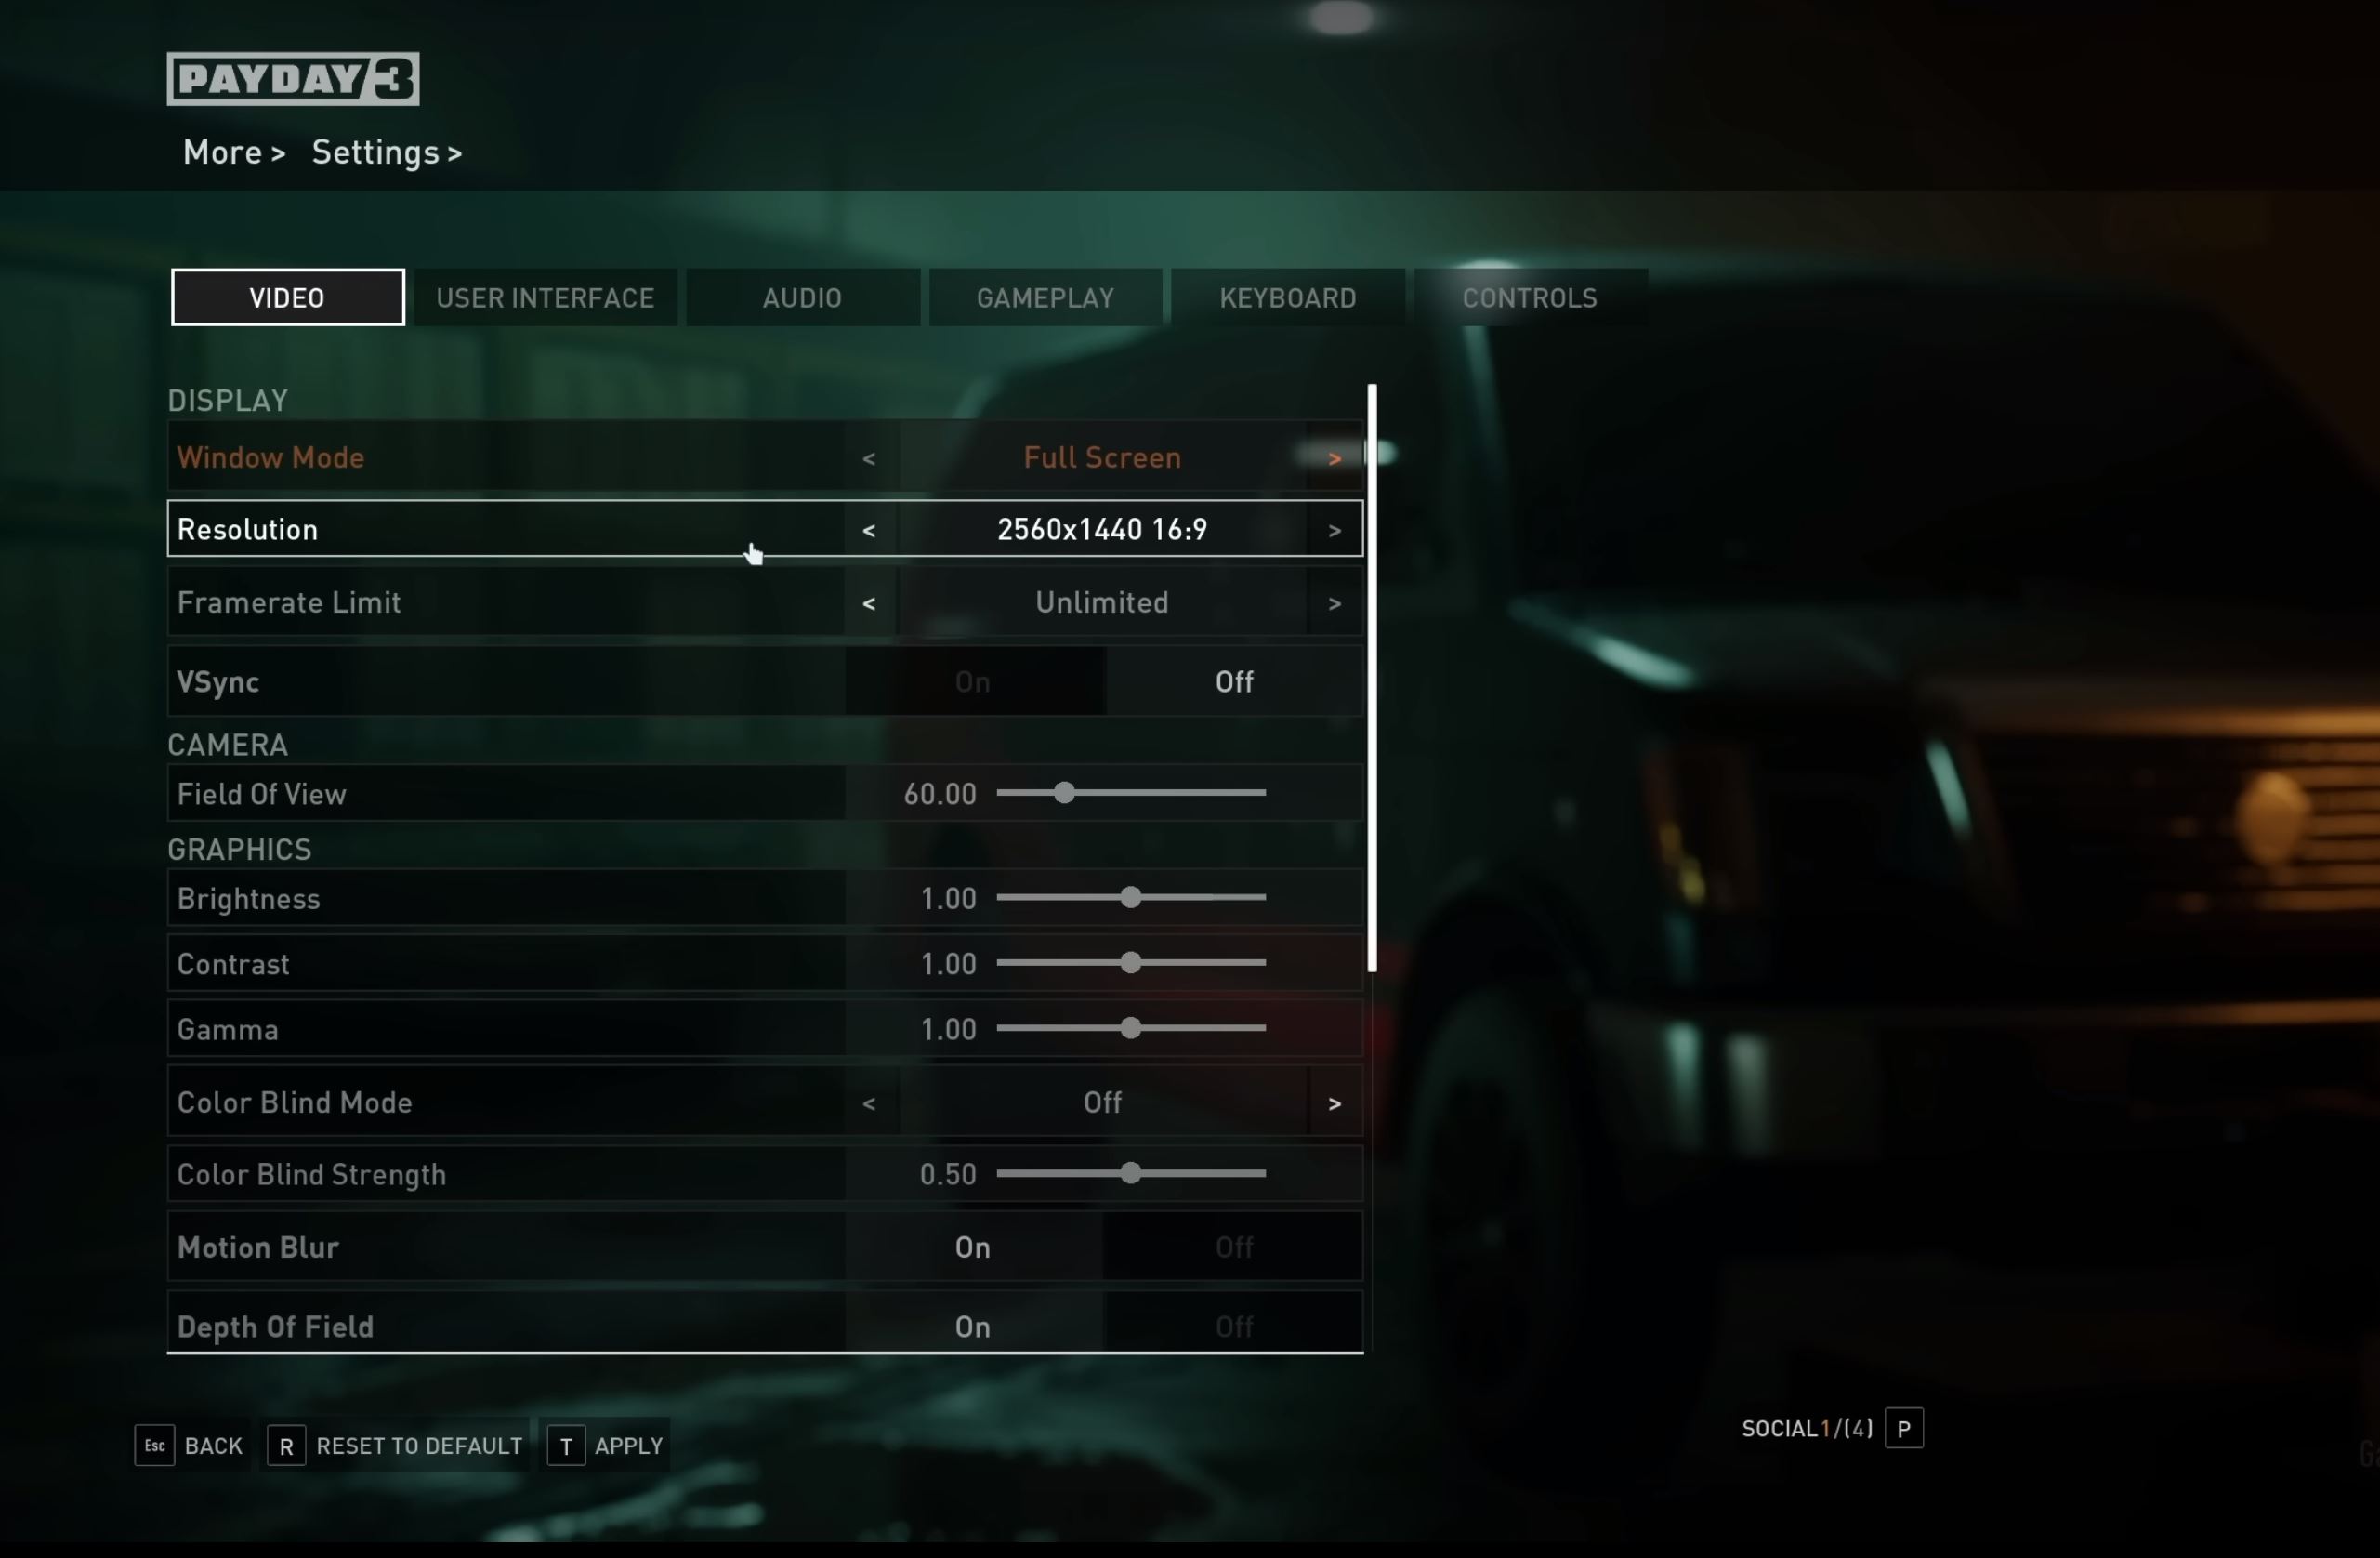
Display Settings:
- Window Mode: Full Screen
- Resolution: Native or 1080p
- Framerate Limit: Native
- Vsync: Off
- Field Of View: 60
Visual Settings:
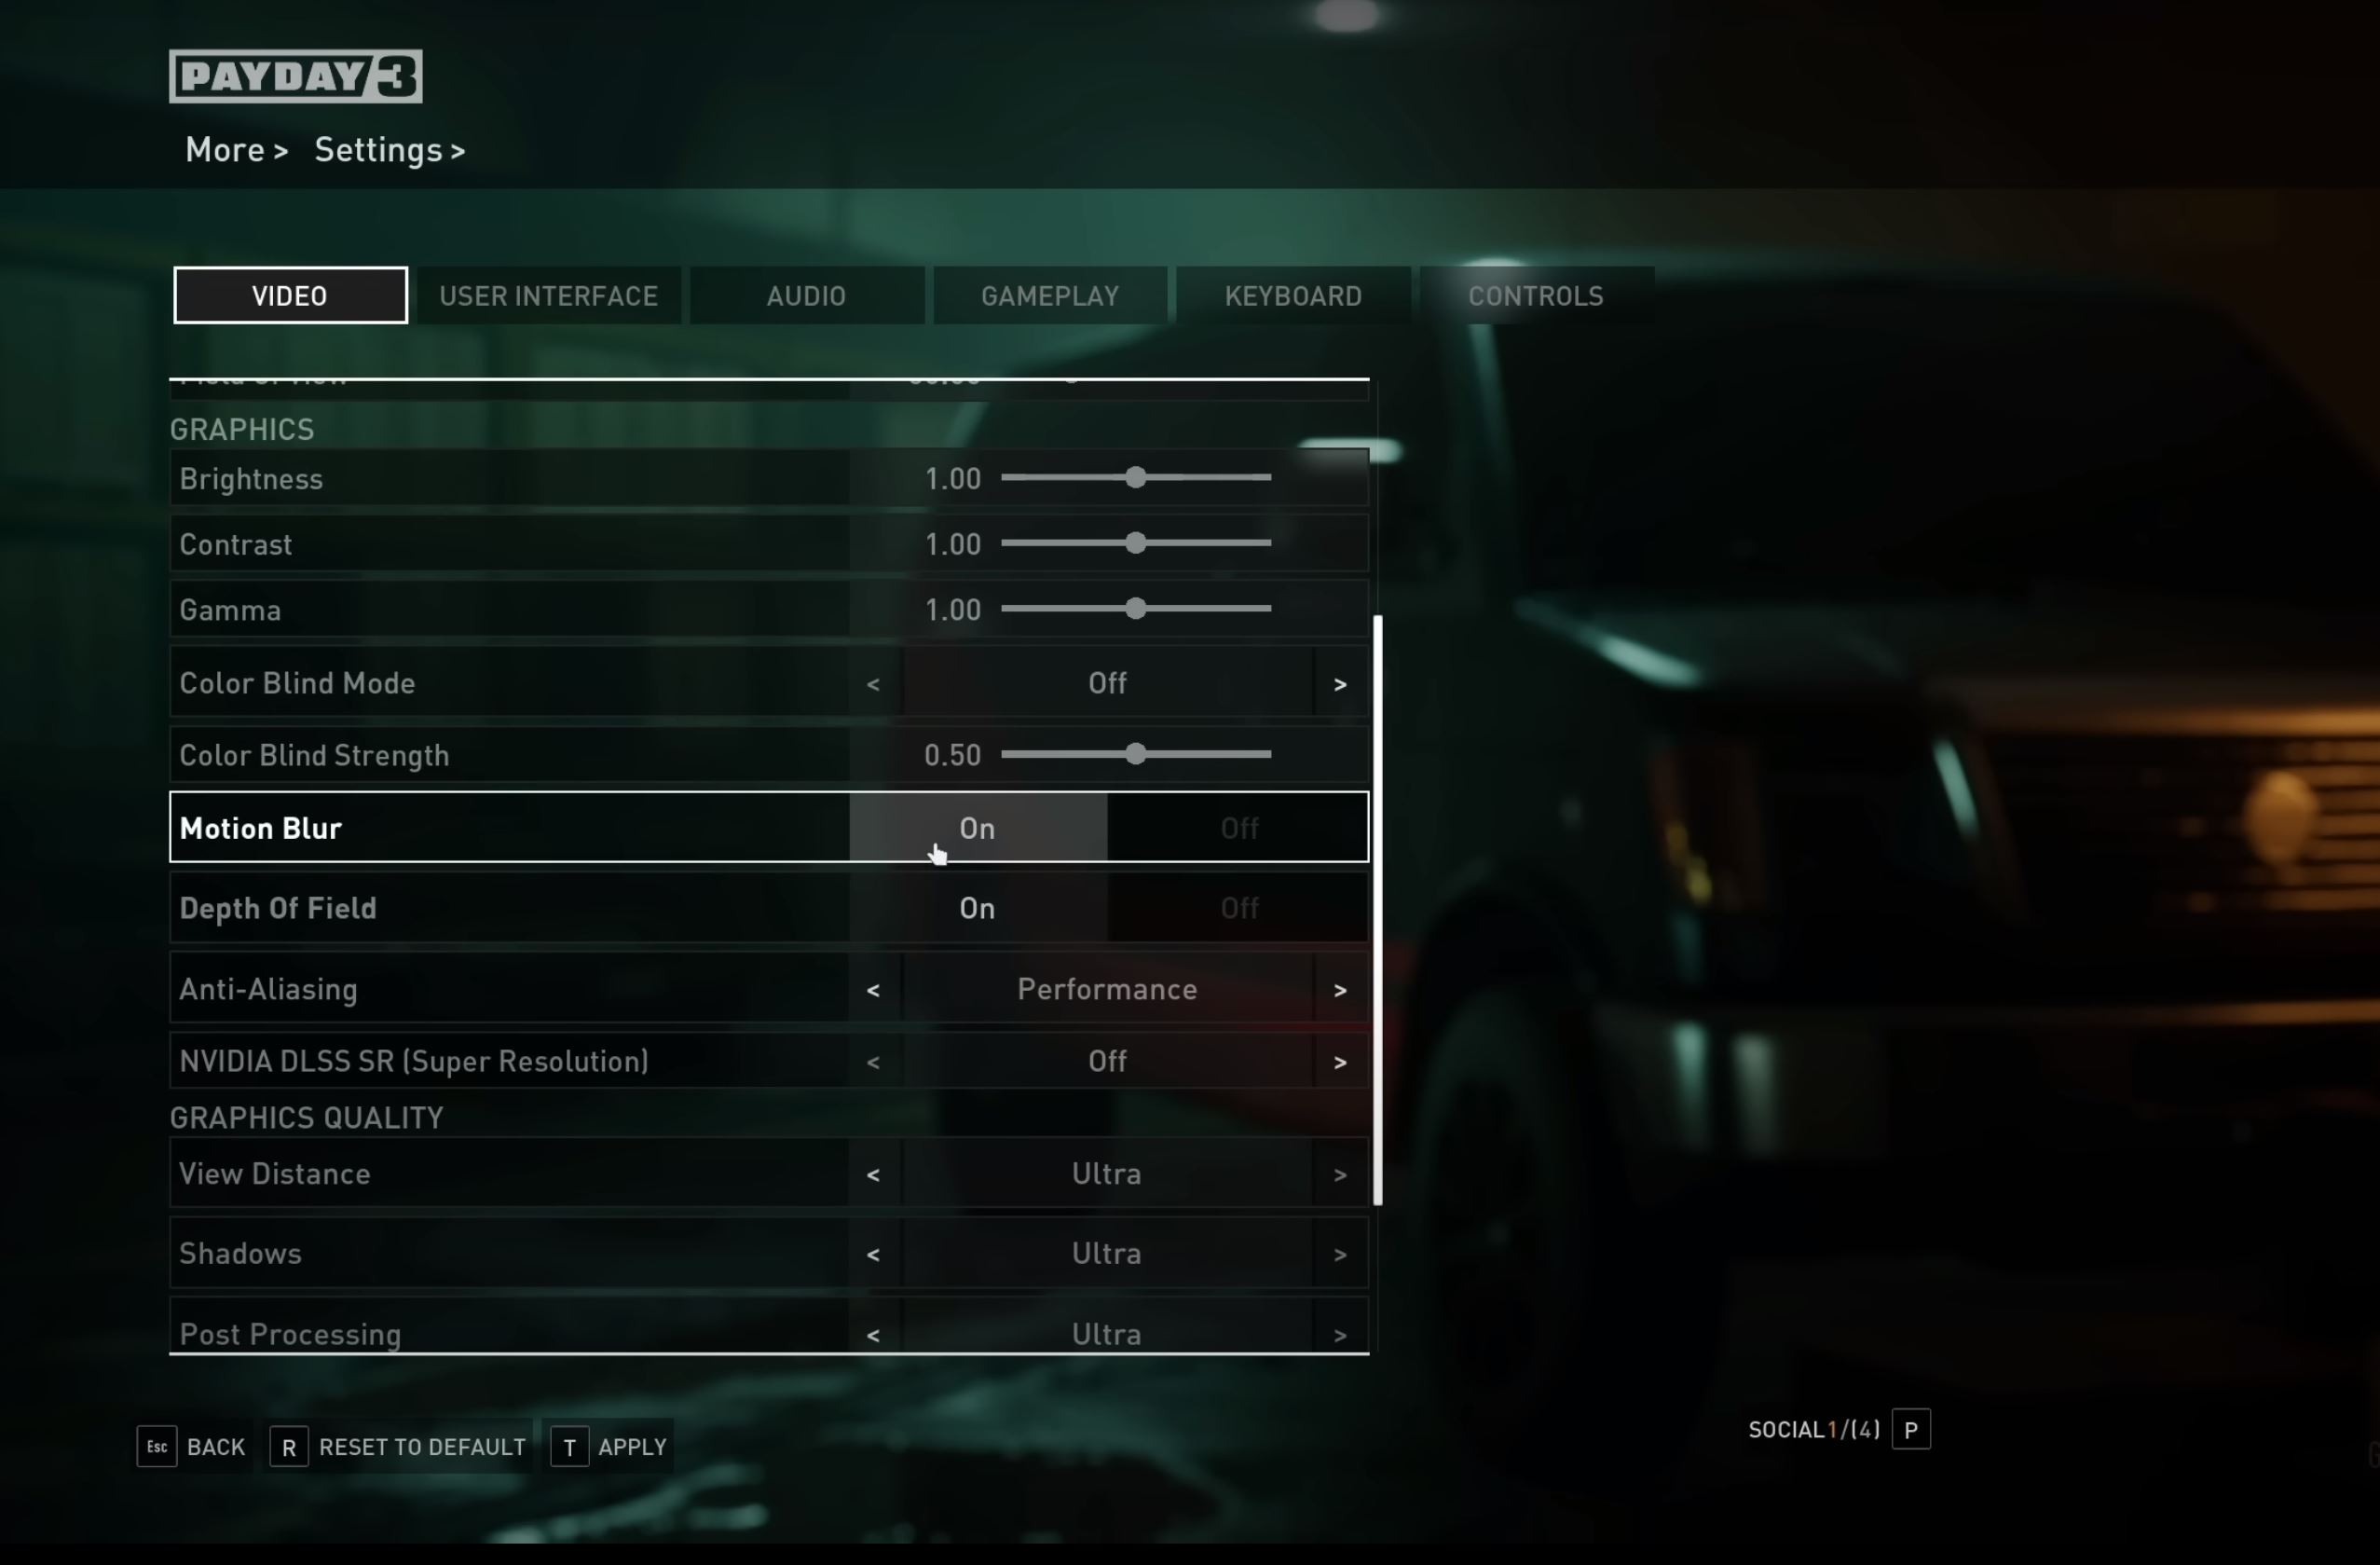
- Motion Blur: Personal Preference
- Depth Of Field: On
- Anti-Aliasing: Performance
- NVIDIA DLSS SR: Balanced
- View Distance: Medium
- Shadows: Medium
- Post Processing: Medium
- Textures: Medium – High
- Effects: Medium
- Foliage: Medium
System Requirements For Payday 3
Before we move on to optimizing settings for Payday 3, getting a feel for how much performance to expect is crucial. The game’s first revealed requirements were slightly changed for the full release. Still, however, you will need a reasonably decent system to get the game in motion.

Minimum System Requirements For Payday 3
- Operating System: Windows 10 (64- Bit Version)
- CPU: Intel Core i5-9400F, AMD Ryzen 5 1400
- Memory: 16 GB RAM
- Graphics Card: NVIDIA GTX 1650 (4 GB)
- Network Type: Broadband Internet Connection
- Storage Space Requirement: 65 GB Available Space
- DirectX Version: DirectX 11
If your hardware matches up neatly with at least these minimum requirements for Payday 3, you are A-Okay. But if you fall short, you might be due for an upgrade if it’s by a lot. In any case, let’s move on to the settings themselves.
Payday 3 Best Display Settings
Payday 3 offers the usual selection of display settings that you would see in any game. Still, there are a few that we should keep a note of. Below is a quick overview of the display settings I am using for the game.
| Window Mode | Full Screen |
| Resolution | Native or 1080p |
| Framerate Limit | Native |
| Vsync | Off |
| Field Of View | 60 |
Now, let me walk you through all of them, highlighting each and telling you how these settings can impact your performance and experience in the game.
Window Mode: Full Screen
Going for Full-Screen is almost always a no-brainer for me in most games. It allows for a no-distraction gaming session with minimum input latency and the best performance. This is simply because Full-Screen is an Exclusive Mode that places the game at a higher priority.
Resolution: Native Or 1080p
Resolution is one of those settings that hit both your performance and the visuals. Thankfully, however, the game already comes with NVIDIA DLSS. So, we will be using that to modify the render resolution.
But, if you don’t have a Nvidia GPU, 1080p is a sweet spot to be on. You can, however, go higher if your PC has the extra juice and Monitor the extra pixels to push.
Framerate Limit: Native
I set this to match my monitor’s native refresh rate, and you should do the same. This is so you don’t push out more frames than you need, giving your hardware a cozy headroom to do other things.
VSync: Off
I prefer to leave VSync Off for Payday 3. As the game is fast-paced, I feel low input lag and lower frame drops to be worth it. However, you should turn it back on if you start getting notable screen tearing (When the bottom half of your frames don’t align with the upper half).
Field Of View: 60
While this is mostly user preference, I prefer FOV to stay at default. This setting changes how much of the world you see in a single frame. While this setting is for the horizontal axis in most games, it’s the opposite in Payday 3. Which I feel is not worth changing in the first place. So, 60 makes for good immersion and peripheral view.
Payday 3 Best Visual Settings
Now that the display settings for Payday 3 are past us. Let’s move on to the not-so-detailed visual settings listed under the Graphics and Graphics Quality sections. Tipping the scale between performance and visuals here is surprisingly easy, so I had to play around with this menu a bit.
Here’s a quick overview of the ones I use in Payday 3.
| Motion Blur | Personal Preference |
| Depth Of Field | On |
| Anti-Aliasing | Performance |
| NVIDIA DLSS SR | Balanced |
| View Distance | Medium |
| Shadows | Medium |
| Post Processing | Medium |
| Textures | Medium – High |
| Effects | Medium |
| Foliage | Medium |
For a game like Payday 3, I feel like you want good visuals as much as good performance to get an enjoyable experience. Below is a quick summary and my reasoning behind each of these settings.
Motion Blur: Personal Preference
Motion Blur has almost no effect on your performance. It generally just makes fast transitions look smoother or ‘life-like.’ Leaving it on or off is entirely a personal preference. I prefer it turned ‘Off’ for a better experience.
Tip: If you suffer from motion sickness, I would advise that you turn the setting off. This would reduce the intensity quite a bit.
Depth Of Field: On
Depth of field is essentially a focus effect that blurs out objects at a distance, making the elements in front of you more noticeable. It’s mostly for making the game more cinematic and giving it a ‘movie-like’ feel. As it does not affect performance, I prefer to leave it turned ‘On.’
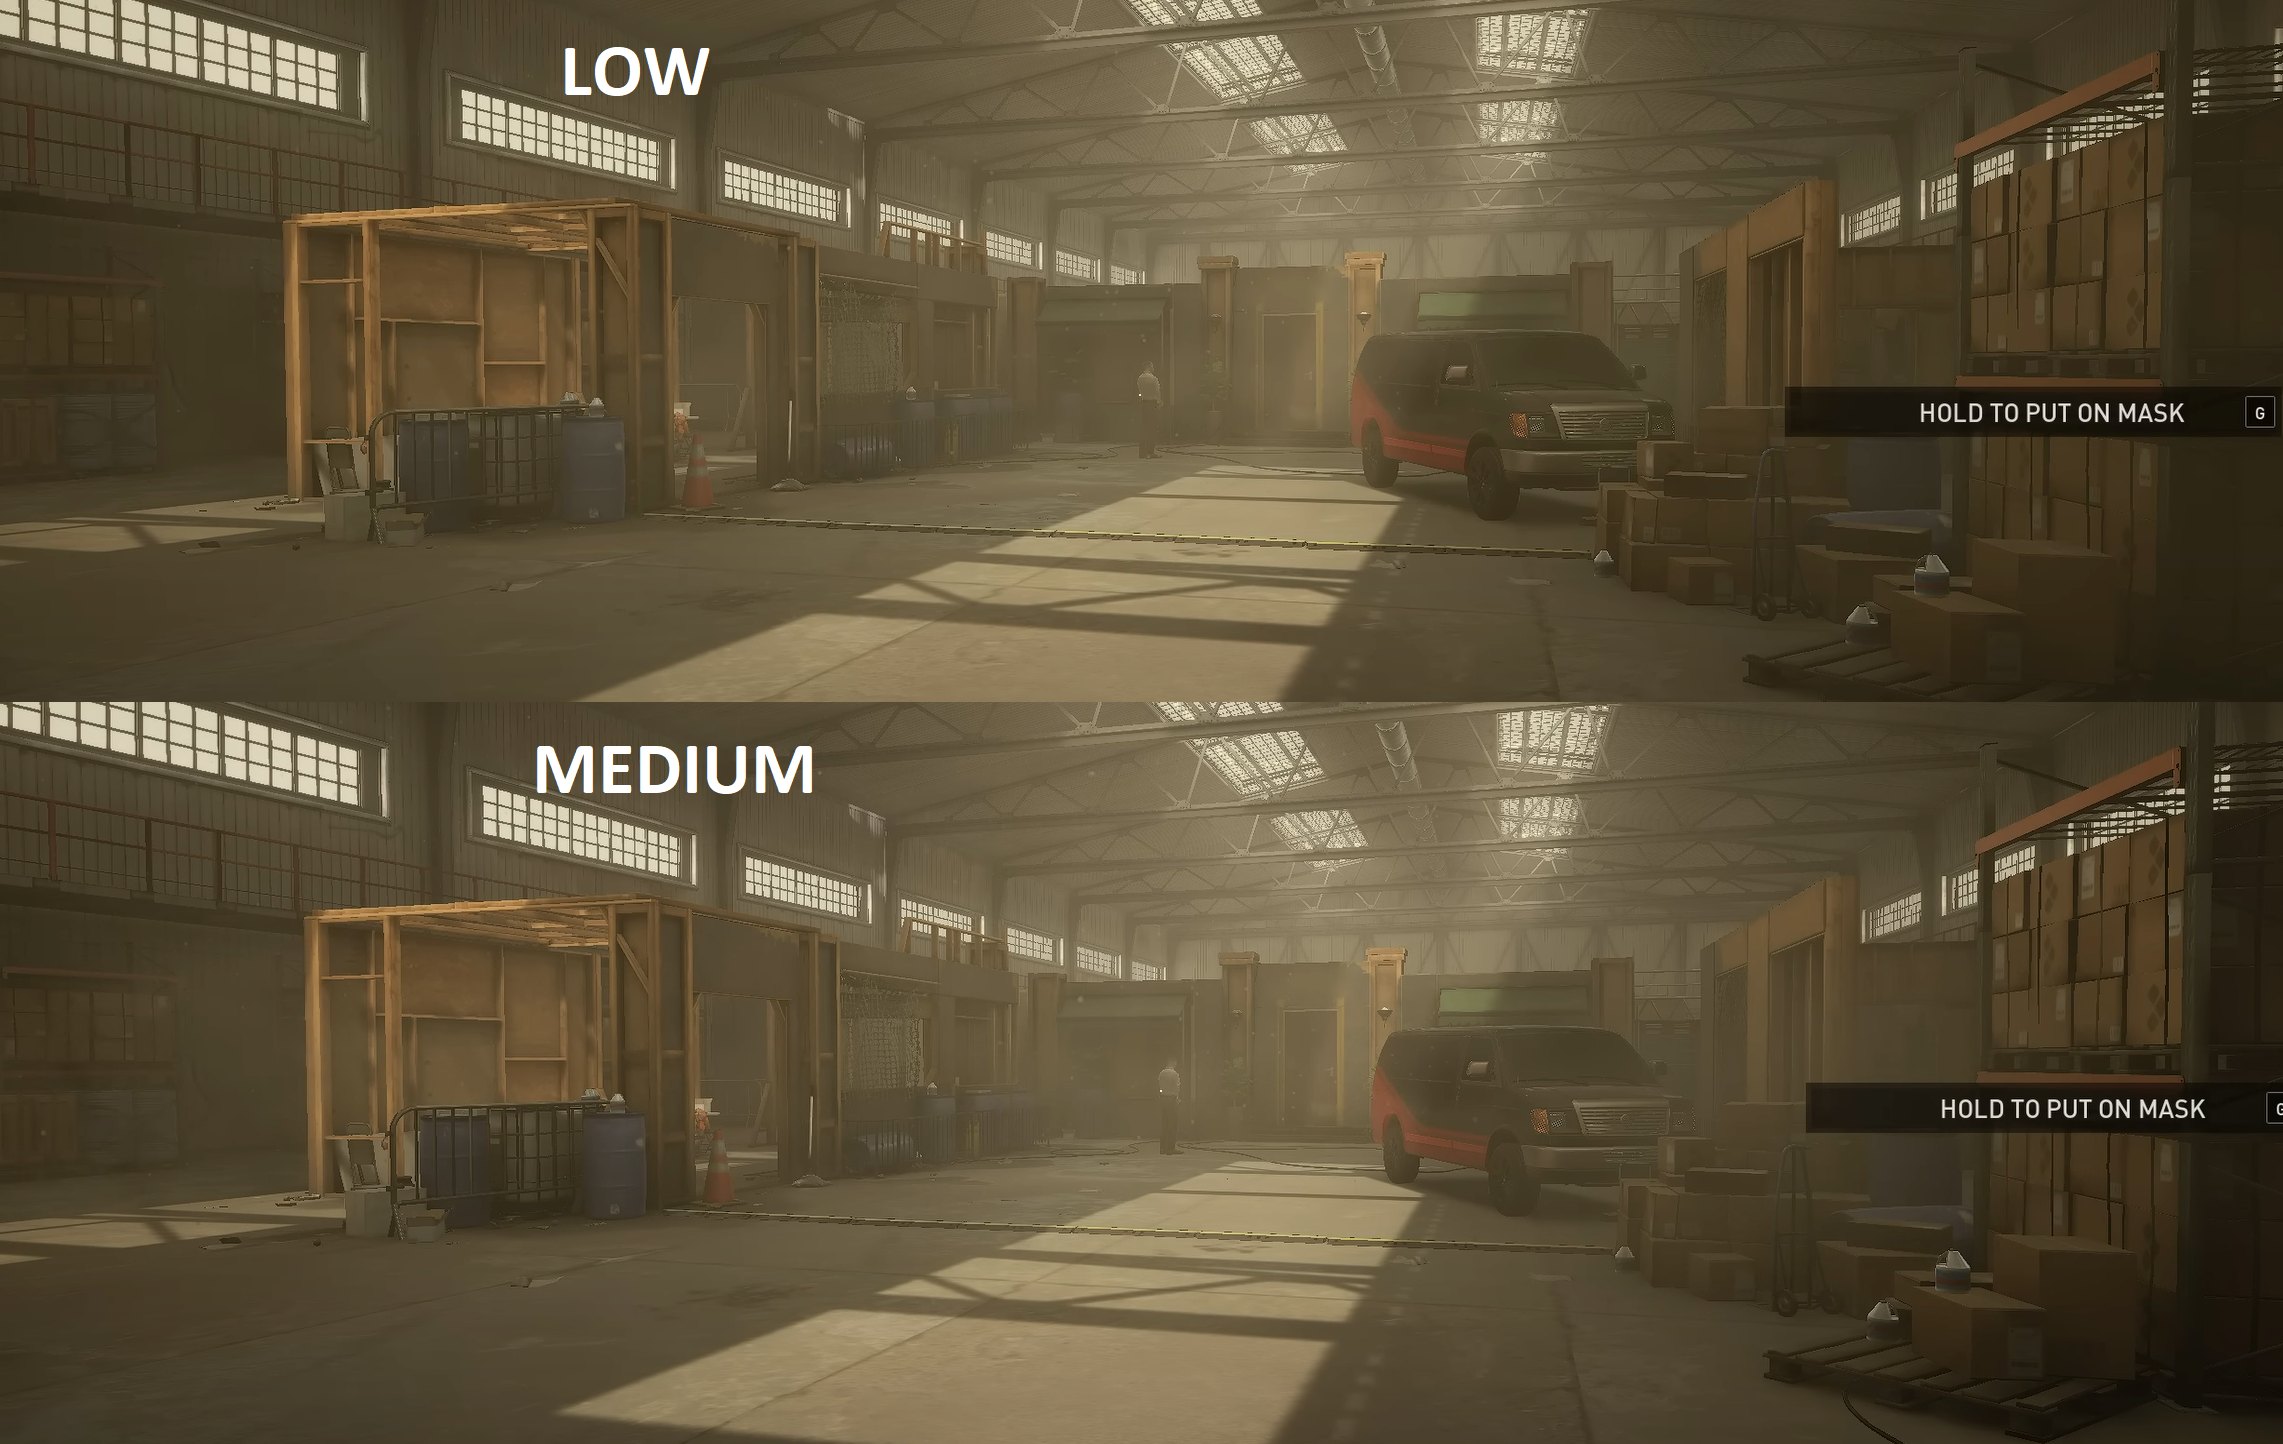
Shadows: Medium
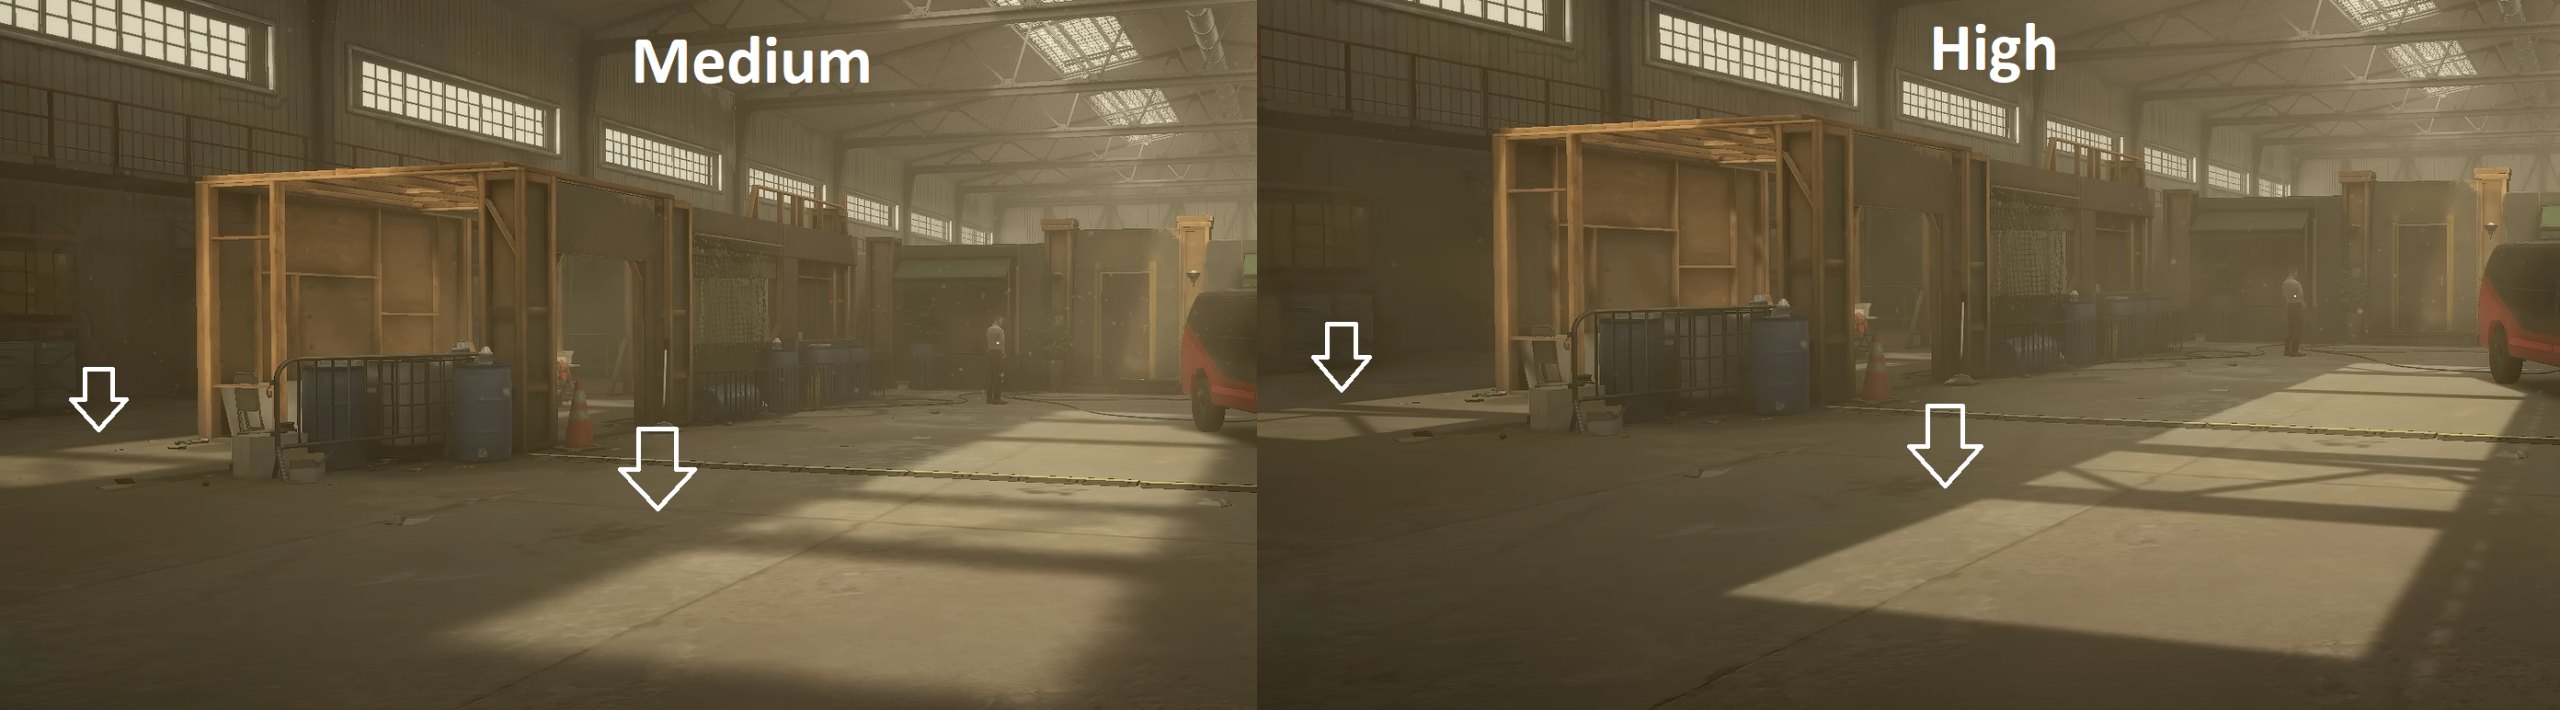
Shadows affect FPS the most in Payday 3. You will likely notice an almost 10-15 FPS drop between low and ultra settings shadows. I prefer “Medium” for this setting, as the game is fast-paced, and I don’t want the performance hit.
My Analysis: As you can see, even though they are much sharper, I didn’t opt for High shadows. This is because I noticed a drop from 110 FPS on Medium to ~<100 on High, around a 10% performance hit.
NVIDIA DLSS SR: Balanced
DLSS SR (Super Resolution) gives a nice anti-aliasing effect and a decent boost in performance. It does this by Image Upscaling and Frame Insertion using Nvidia’s Tensor Cores. The more you move this slider to the performance side, the more the resolution will drop to upscale it to your native one. I found ‘Balanced’ to be optimal with a decent FPS boost.
Anti-Aliasing: Performance
Anti-aliasing fixes the jagged edges around the different objects rendered on your screen. It smoothes out the edges so they look much nicer. In the absence of DLSS, I prefer this on ‘Performance’ mode as it still looks decent and doesn’t hit your frames like a truck.
Post Processing: Medium
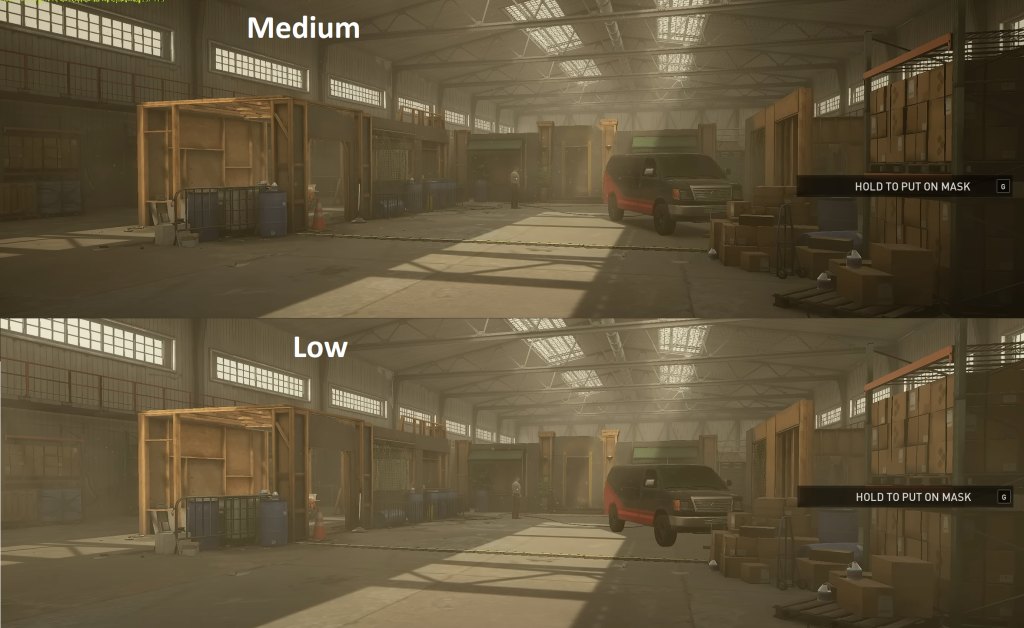
Post-processing is different filters applied to the processed frame, like Vignette or other shading/visual effects. Setting it low disables all of these, giving it a more plasticky look, so ‘Medium’ is the spot you want to be at for an overall better experience.
My Thoughts: As you can see, Vignette is turned on at medium, an effect that I like to have in most games. As I noticed no practical difference going above medium except for a steep FPS drop, I left the setting as such.
View Distance: Medium
View Distance determines how far you can see in the game without moving forward. This means that objects too far in the distance will not be rendered. As the maps are mostly close quarters, I felt no need to go higher than ‘Medium,’ which serves as a good balance for both the immersion and average FPS.
Textures: Medium or High
Textures affect how detailed the models around you look. This entirely depends on the amount of VRAM you have and has no real performance demerits. I set it to ‘Medium’ as I had 4 GB of VRAM. I would recommend you play around with this setting concerning your hardware.
Effects: Medium
The Effects setting is an all-in-one setting for almost every visually pleasing effect the game has. This option also pretty significantly tanks your frames. I failed to see much difference between ‘Low’ and ‘Medium,’ and decided to go with the latter.
My Opinion: The game has little to no effects present, which is a sad look for it. However, I did notice some lens flare and other effects starting from High, but they came with a notable ~10 FPS dip, which is not worth it.
Foliage: Medium
This setting affects how detailed trees or bushes are rendered. But, as there is practically none present in most maps, just leaving it at ‘Medium’ should be fine.
Force DX12 Mode
Now that we are done with the available settings. Let’s turn something On that isn’t natively available. Payday 3 Settings don’t mention DX12/11 and provide no way to switch between the two. However, DX12 can be enabled using Steam‘s Launch Options. Doing so almost doubled my fps.
To force use DX12, simply:
- Open Steam and Locate Payday 3 in your library.
- Right-click > Click on Properties.
- In the General tab > Click on Launch Options.

Steam Launch Options (Image by eXputer) - Write -dx12 > Click on OK.

Did You Boost Your FPS?
With my personally tested settings and the DX12 tweak, I am pretty hopeful that you will be able to gain a significant chunk of performance to make your heisting experience just a tad bit better. While the game is slightly messy right now, hopefully, it will get patched soon enough.
If you are still looking for further optimization, I recommend these detailed optimization guides by eXputer:
Thanks! Do share your feedback with us. ⚡
How can we make this post better? Your help would be appreciated. ✍


![Persona 3 Reload Best Settings [FPS & Performance]](https://cdn.exputer.com/wp-content/uploads/2024/03/Persona-3-Reload-Best-Settings-FPS-Performance-390x220.jpg)