Finding a good armor set right at the start of the game can be quite hard. But the Nidavellir Armor in God of War Ragnarok is easily one of the best armor that you can acquire and use in the early game. Therefore, this guide will show you how to unlock and craft it.
You’ll get the opportunity to unlock the armor almost midway into the second chapter after you unlock the “In Service of Asgard” Favor. It’ll take you to three different rigs, which will give you the Nidaviller Ore, which is needed for crafting the armor.
- To craft the Nidavellir Armor, players must first complete the In Service of Asgard favor unlocked in Chapter 2.
- Raeb will give you this favor in the second part of the Nidavellir Village, in Svartfalheim.
- The favor will mark 3 locations on your map. Head to each location and finish your objective.
- Completion of each location will give you 2 Nidavellir Ores.
- Once all 3l locations are completed, you will be able to craft the Nidavellir Armor with 6 Nidavellir Ores.
- The armor itself has decent stats but the unique thing is it regenerates your health if you kill an enemy with the R3 finisher.
Nidaviller Armor
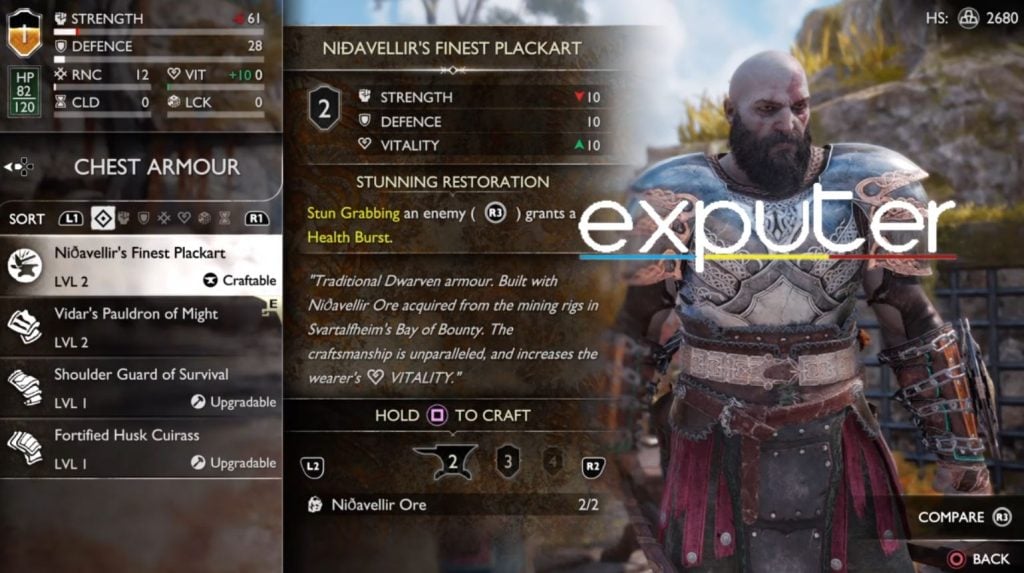
| Armor Piece | Defense | Vitality | Strength |
| Chest Armor | 10 | 10 | 10 |
| Wrist Armor | 12 | 6 | – |
| Waist Armor | 12 | 6 | – |
The armor is great for having more health while also reducing stun drain on your enemies, allowing you to land stun attacks with ease. And if you upgrade the armor, it can easily last you into mid-game.
Unlocking The Armor: In Service Of Asgard Favor
As mentioned, to unlock the armor pieces and craft each one, you need to complete the In-Service of Asgard Favor. You’ll receive the Favor once you reach the second part of the Nidavellir village, where you’ll meet Raeb. Raeb will guide you toward the next main quest, as well as give you the Favor quest.
Modvitnir’s Rig


Hit the paddles twice with your axe, and you’ll be able to move the grapple point in position for you to make it across to the next section. You’ll again need to take out some Wretches. But once you do, take the chain upwards.
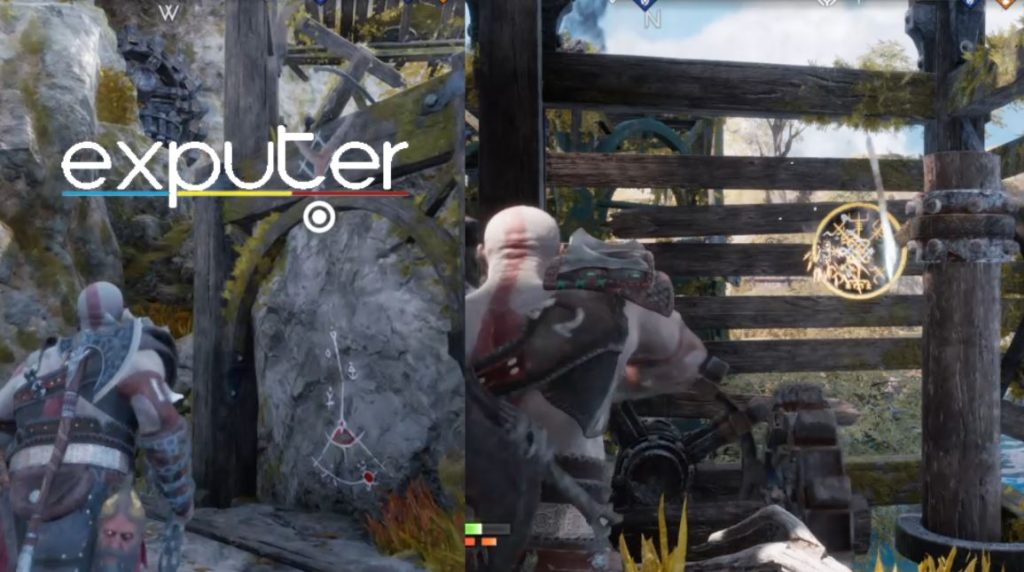
Althjof’s Rig

- Visit Althjof’s Rig to unlock Nidavellir armor in God of War Ragnarok.
- Climb the chain to find a mechanical wheel controlling the grapple point.
- Adjust the grapple point one position above the lowest using the wheel.
- Use the blades to bring down the lift, creating a platform to access the grapple point.
- Blow up barrels on the left, clear a path, and grapple upwards.
- Open the gate on the right, clear the path with a barrel, and climb up.
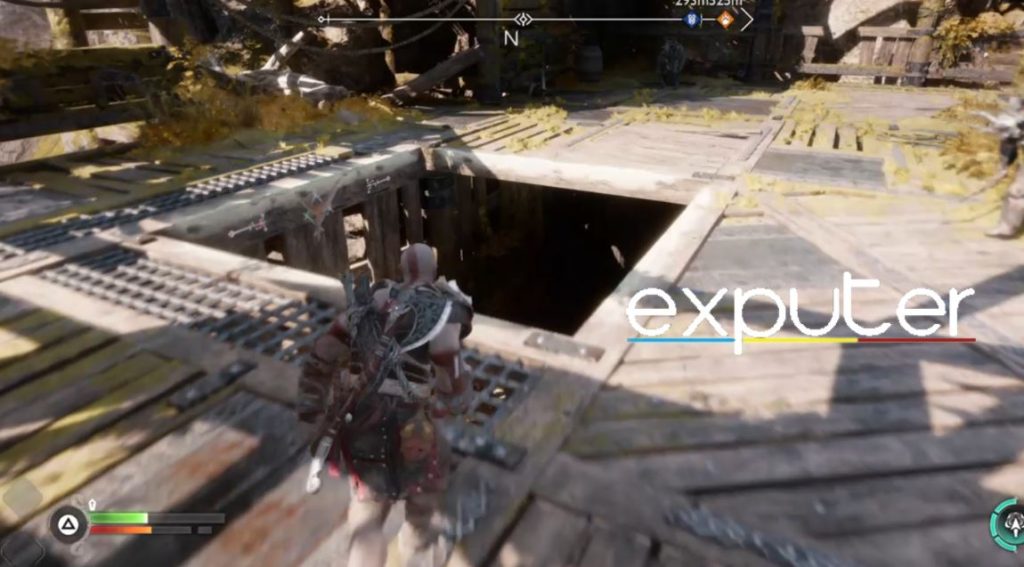
- At the platform’s top, use the action button to create a hole in the ground.
- Defeat monsters in the hole and use chains to push the lift up.
- Head to the mechanical wheel, move up the grappling point, and climb to the door area.
- Jump onto the lift’s roof, grapple across, climb to the top, defeat enemies, and disable the rig.
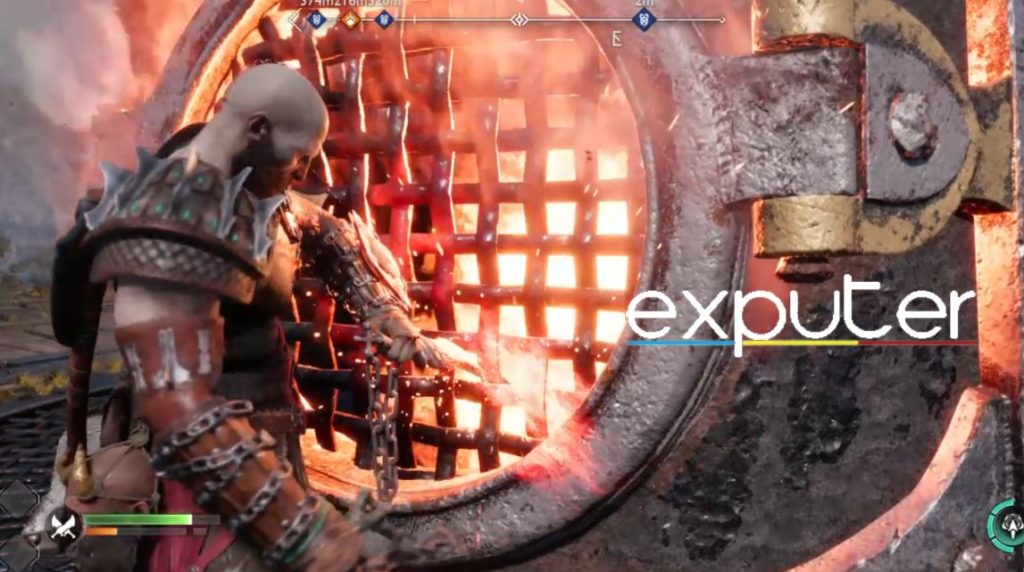
Radsvinn’s Rig

It is worth noting that there are more enemies here than in the previous two rigs, so you might have to be cautious. But once you do defeat the enemies, you can head back down where you came from. You’ll find Sindri there, who can craft the armor for you.
With all of that, you are ready to unlock and equip the Nidavellir Armor in God of War Ragnarok. For a small Favor quest, you get access to a really good armor that can help you conquer many areas for a good portion of the game.
Up next:
God Of War Ragnarok: All Draugr Holes Location
GOW Ragnarok Transmog
God Of War Ragnarok Combat Tips
Thanks! Do share your feedback with us. ⚡
How can we make this post better? Your help would be appreciated. ✍