With myriad alterations available, we have covered the best Rocket League settings after experiencing the gameplay, which even covers the minute details. Using this, you will stand out as a player in the competitive world of Rocket League. While presets are available on Liquipedia used by Pros who participate in the Rocket League Championship Series (RLCS), we recommend you follow our guide.
- Camera Settings: Optimize gameplay quality with camera presets, field of View, camera shake, stiffness, swivel speed, and angle settings.
- Control Settings: Fine-tune your steering, aerial sensitivity, dead zones, ball camera mode, and vibration for improved in-game performance.
- Key Binds: Mastering key binds is essential for player progress. Follow recommended controls for long-term performance.
- Video Settings: Enhance visual quality in three subcategories – window, essential, and advanced settings. Adjust resolution, FOP, render quality, VSync, and Texture details.
- Audio Settings: Customize gameplay and background music to your preferences.
Why Trust Us: Daniyal Sultan Malik has spent 30+ hours on Rocket League, making him highly trustworthy!
All Settings Options In Rocket League
The settings of the game are divided into the following sections, which include countless features:
- Camera Settings.
- Control Settings.
- Binds.
- Video Settings.
- Audio Settings.
You must focus on these sections to get the best Rocket League settings.
Camera Settings
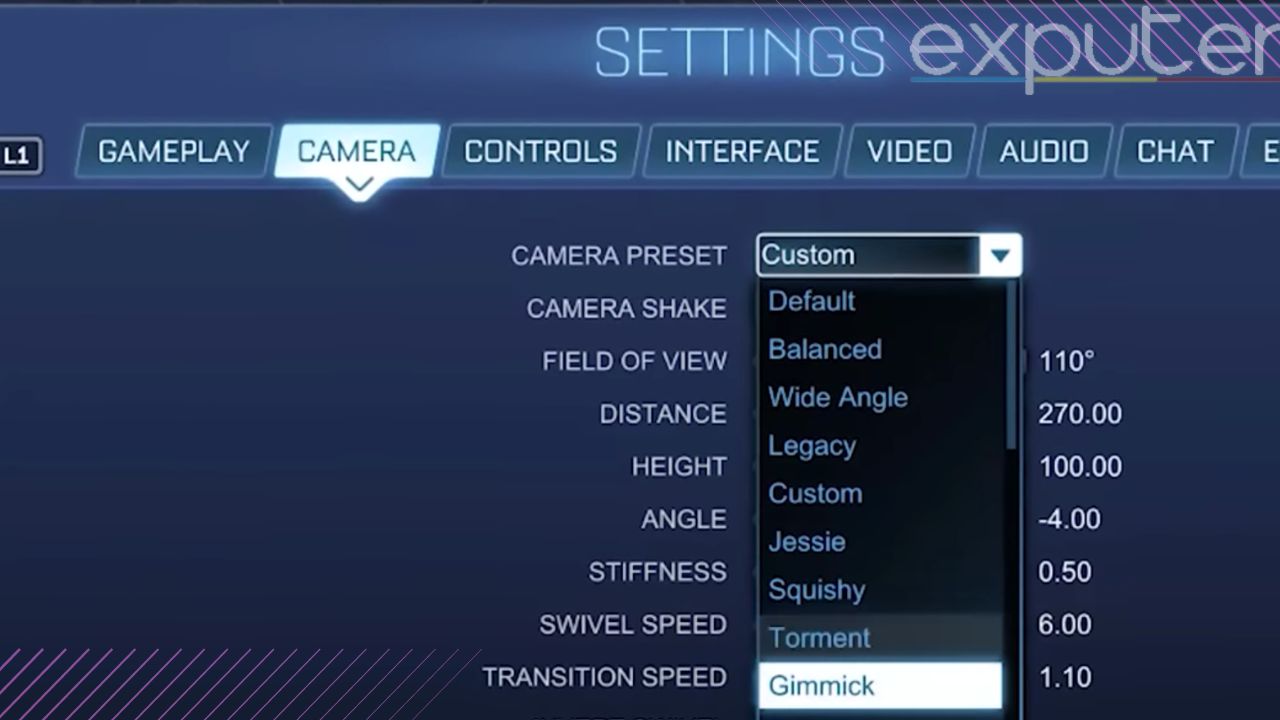
| Camera Preset | Custom |
| Camera Shake | Off |
| Field of View (FOV) | 110 |
| Camera Distance | 270 |
| Height | 100 |
| Angle | -4 |
| Stiffness | 0.5 |
| Swivel Speed | 7 |
| Transition Speed | 1.2 |
| Invert Swivel | ON |
Control Settings
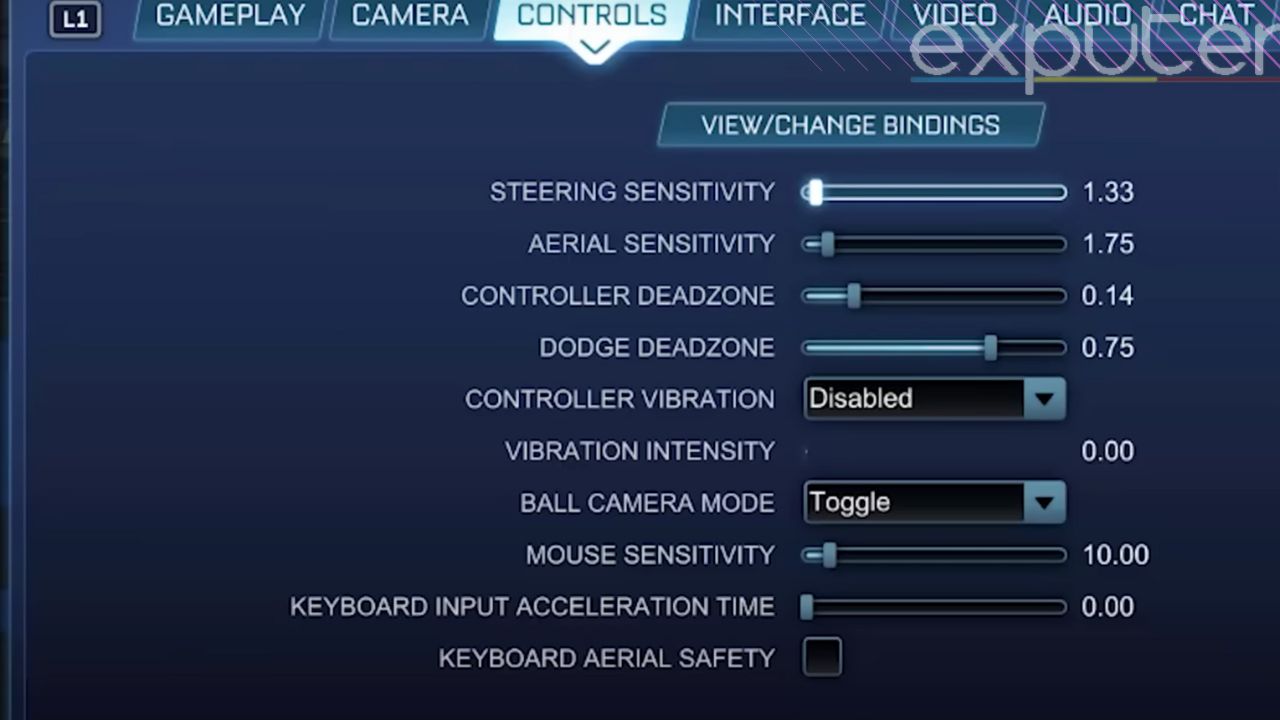
| Steering And Aerial Sensitivity | (steering 1.2 and Aerial 1.4) |
| Controller Deadzone | 0.04 – 0.10 |
| Dodge Deadzone | 0.6 |
| Controller Vibration | Disabled |
| Vibration Intensity | 1 |
| Ball Camera Mode | Toggle |
| Other Settings |
|
In Shooter games like PUBG, sensitivity plays a very significant role in terms of performance in Rocket League. Unlike other typical racing games like NFS Unbound or Forza Horizon 5, where sensitivity is neglected, having the best control settings in Rocket League is very crucial for scoring.
Steering And Aerial Sensitivity – According To Rank

Steering and Aerial Sensitivity in Rocket League:
- Interconnected Precision: In Rocket League, the sensitivity settings for steering and aerial control are closely related.
- On-Ground Precision: For intermediate ranks like Diamond or Champ, prioritize accuracy over speed. Set both sensitivities between 1.2-1.4, but never lower than 1.2. 1.2 is ideal for steering, while 1.4 is optimal for aerial control. If you’re an experienced player, 1.9 may suit you better.
- Starting Point: If you’re experiencing sluggish movement or missing basic shots, begin with lower sensitivities. As your consistency and control improve in both ground and aerial play, gradually increase these settings. Always maintain a lower steering sensitivity compared to aerial.
- Training Benefits: Shifting your sensitivity settings can enhance your training regimen. Studies suggest that changing settings can improve your focus, leading to faster skill development.
Controller Deadzone – 0.04
This function controls the extent to which you need to move your joystick in order to register a movement. This is a very sensitive setting as subtle changes like 0.05 can cause an enormous amount of change in actual controller movement.
Normally, you would want your movement to be very quick and responsive. Whereas, in a constant-motion game like Rocket League, we recommend keeping the controller dead zone low between 0.04 and 0.10.
Dodge Deadzone – 0.60
It determines how far you have to move your joystick to dodge while in the air. People generally find fast aerial difficult, which requires aerial training. The higher you go, the more protected you will be against accidental backflipping during fast aerial.
Controller Vibration – Disabled
Coordination may be affected by rumble effects
Vibration Intensity – 1.00
This is unaffected if the controller vibration is turned off.
Ball Camera Mode – Toggle
Choosing toggle will enable you to switch between ball-focused and free-view camera
Other Settings
Since KBM is not recommended for the game, so we won’t be using the following features.
- Mouse Sensitivity – 0
- Keyboard Input Acceleration Time – 0
- Keyboard Axial Safety – OFF
These were the best control settings for Rocket League which are very crucial to make progress.
Binds
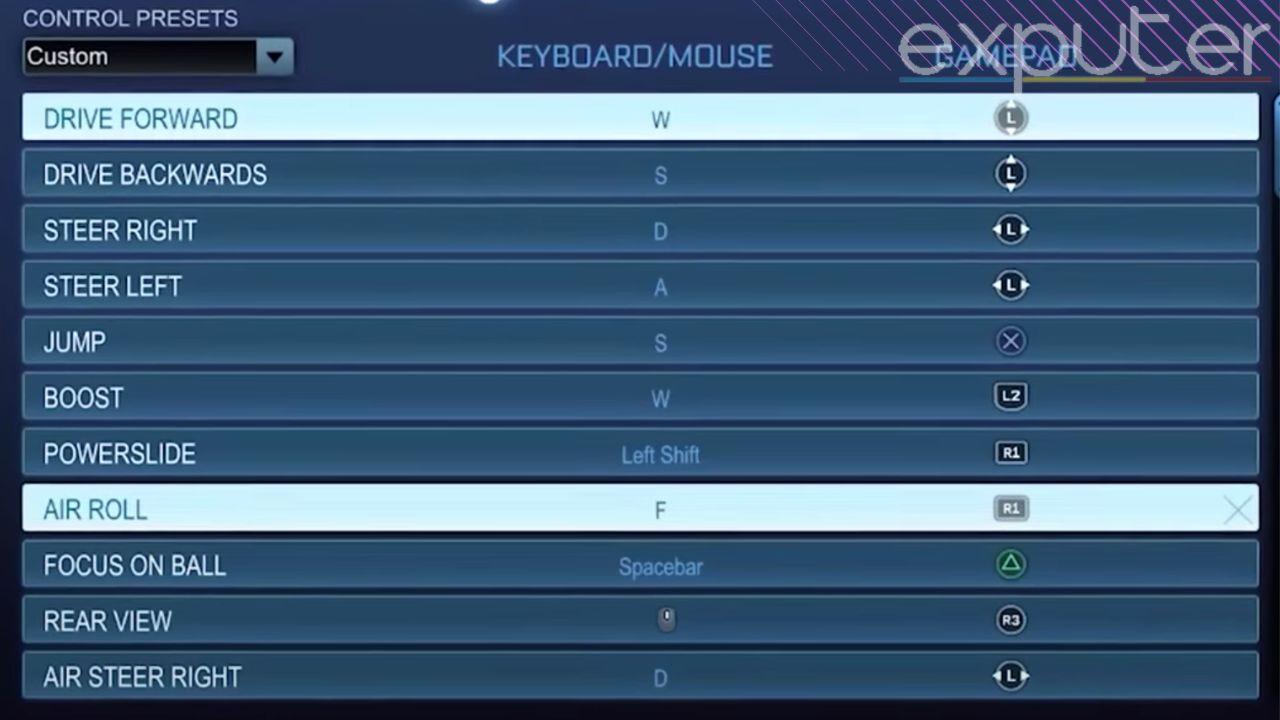
| Drive Forward/Backward | L3 |
| Jump | X |
| Boost | L2 |
| Powerslide/Air Roll | R1 |
| Rear View | R3 |
| Air Roll Left/Right | □ (square button) |
| Camera Swirl | R3 |
| Other Keybinds |
|
Interface Settings
| Name Scale | 200 |
| Colour Blind | OFF |
| Display Scale | 99% |
| Force Default Team Colours | ON |
| Team Coloured Boost Meter | ON |
| Match Notifications | Time Update Only |
| Ball Cam Indicator | OFF |
| Ball Arrow | ON |
| Performance Graphs | None |
You can adjust the interface settings according to your usage.
Other Settings
Set the following settings according to your suitability, or you can also follow them as we have done.
- Team- Coloured Boost Meter – ON
- Notifications During Gameplay – OFF
- Force Default Team Colours – OFF
- Nameplate Scale – 180 %
- Nameplate Mode – Default
- Convert Platform Friends – ON
- Connection Quality Indicators – OFF
- Interface Scale – 93 %
- Metric – OFF
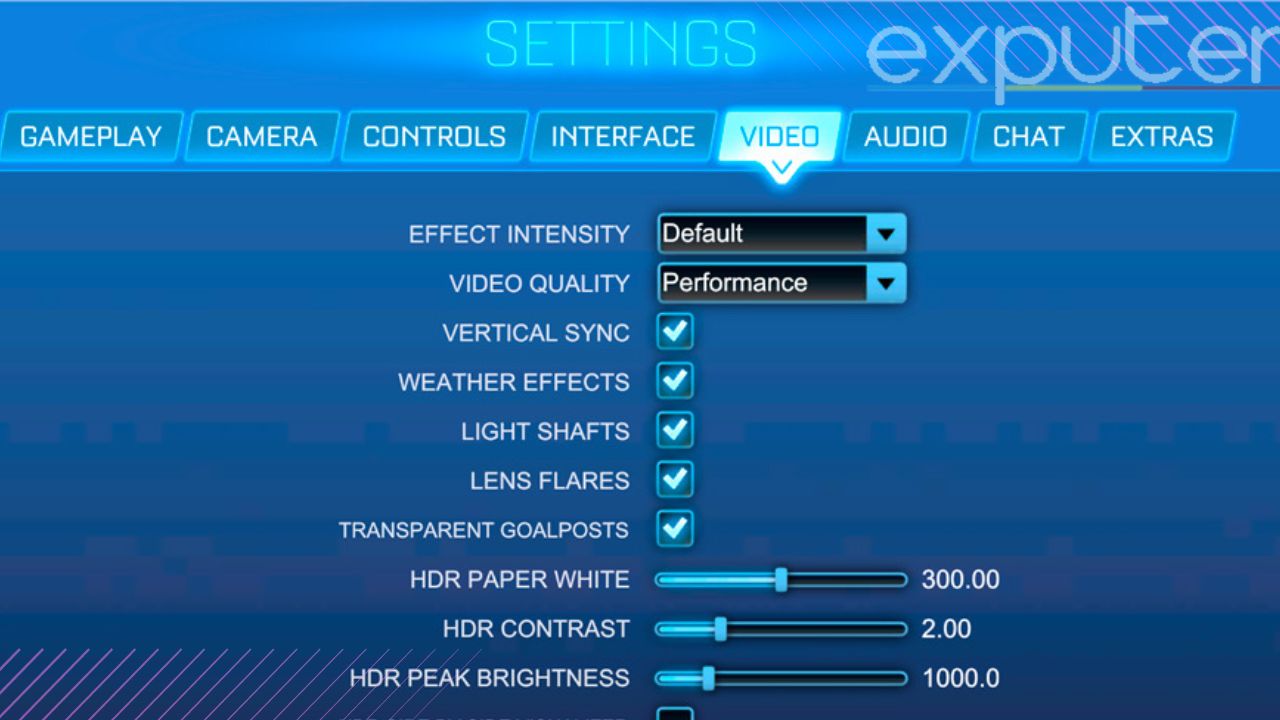
Video Settings

Video settings determine the appearance of the game on the screen and how quickly it runs. They also change factors like reaction time and input delay, which consequently affect scoring and conceding in the game. Ultimately, video settings affect performance, which is the most important parameter in the game.
Window Settings
| Resolution | Set it to 1920×1080 or appropriate to the resolution of your monitor |
| Display Mode | Full Screen |
| VSync | Off |
These settings mainly include resolution and display split.
Advanced Settings
| Texture Details | High Quality |
| World Details | Performance |
| Particle Details | Performance |
| Effect intensity | Low |
| High Quality Shaders | ON |
| Ambient Occlusion | OFF |
| Depth Of Field | OFF |
| Bloom | ON |
| Light Shaft | OFF |
| Lens Flare | OFF |
| Dynamic Shadows | OFF |
| Motion Blur | OFF |
| Weather Effects | OFF |
| Transparent Goal | ON |
Audio Settings
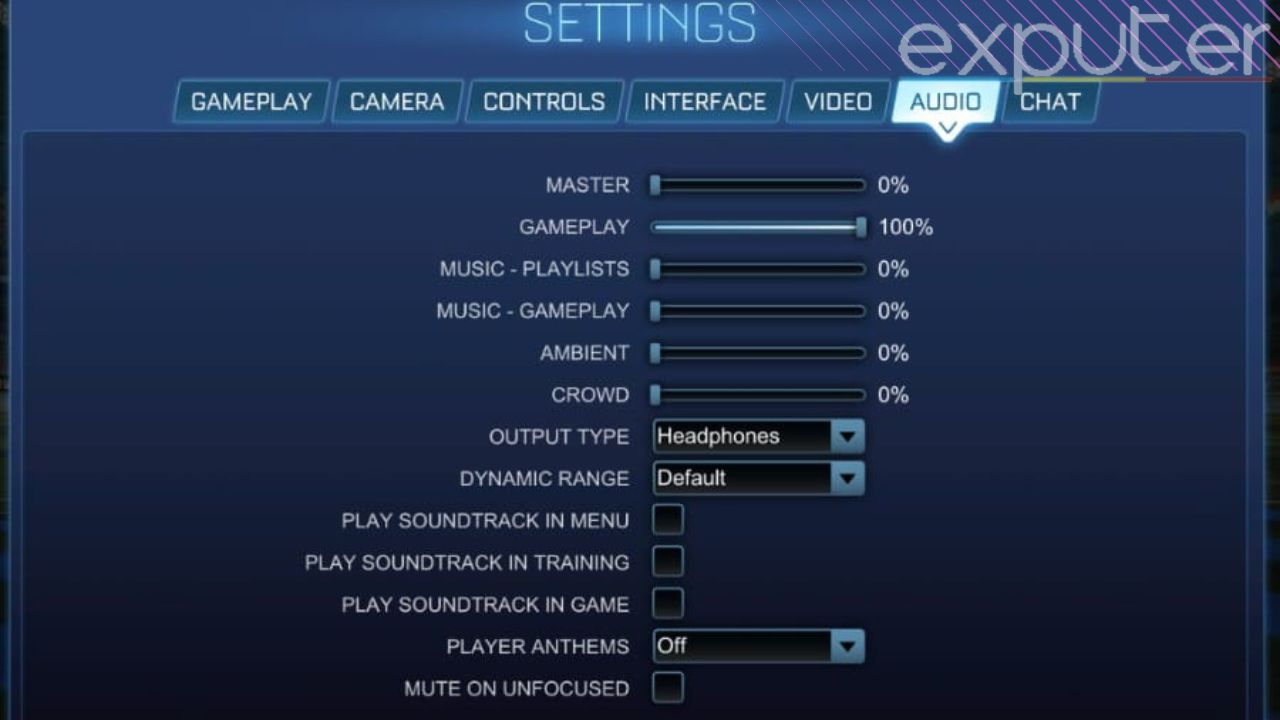
You should choose Audio settings according to your comfort, except for the following settings
- Music Gameplay – OFF
- Music Playlists – OFF
- Ambient – Off
- Crowd – Off
Next:
- NFS Unbound Best Settings
- Best Forza Horizon Settings For FPS And Performance
- Best Valorant Sensitivity Settings
Thanks! Do share your feedback with us. ⚡
How can we make this post better? Your help would be appreciated. ✍
Thanks