Workbenches allow you to access the customization options for the various weapons of Sniper Elite 5. These are especially important for the Sniper Rifles, as they are a part of your main arsenal to use in the game.
Summary of Workbench locations
Mission 1:
- First workbench: Upstairs behind a locked door.
- Second workbench: In a room far north where you disable a gun battery.
- Third workbench: In Marcell’s Safehouse attic.
Mission 2:
- First workbench: Inside the Chateau.
- Second workbench: In a safe house near the orchard fields in the northwest.
- Third workbench: In an armory in the far east.
Mission 3:
- First workbench: On top of a vine-covered wall in the far north.
- Second workbench: Inside a tunnel reached by climbing a ledge in the town.
- Third workbench: In an armory below the fort, at the map’s center.
Mission 4:
- First workbench: In a hatch inside the factory warehouse.
- Second workbench: Upstairs in an armory north of the shipping warehouse.
- Third workbench: In an armory in the control room building.
Mission 5:
- First workbench: At the top of the Church.
- Second workbench: In a safe house left of the underground hospital.
- Third workbench: Inside a room near the northern trenches.
Mission 6:
- First workbench: In a safe house on the bridge’s right side.
- Second workbench: Near the map’s center.
- Third workbench: On the roof of a C-shaped building south of the objective.
Mission 7:
- First workbench: Inside an Axis Armory north of the V2 Rockets.
- Second workbench: In a cave next to a waterfall in the south.
- Third workbench: Downstairs in the Dome building.
Mission 8:
- First workbench: Inside an armory within the sewers.
- Second workbench: In an armory below the northwestern estate, where you kill Yoshikawa.
- Third workbench: In a crypt at the map’s center.
Types of Workbenches
There are a total of three types of workbenches to be found in Sniper Elite 5:
- Rifle workbenches
- SMG workbenches
- Pistol workbenches
Workbench Locations in Sniper Elite 5
| Collectibles | Locations |
|---|---|
| Stone Eagle 1 | At the top of the damaged windmill. |
| Personal letter 1 | Looting the soldies in a deserted village. |
| Classified Document 1 | On a desk of two-story building's room . |
| Classified Document 2 | In a room of the second floor of a building with a Nazi flag. |
| Pistol Workbench | entering the hole in the rooftop. |
| Classified Document 3 | On the top of the wooden crate near the fence. |
| Hidden Item 1 | Near fiery smoke. |
| Personal letter 2 | By looting the bald soldier. |
| Personal letter 3 | Upper portion of the house with blue windows. |
| Stone Eagle 2 | Near the missing giant chunk of the building. |
| Classified Document 4 | Upstair of the last building in the left to the main road. |
| Hidden Item 2 | Inside the hole and on the table. |
| Personal letter 4 | Left side of the green building's room |
| Personal letter 5 | Near artillery cannon |
| Classified Document 5 | In the first bunker. |
| Rifle Workbench | Second floor of the building. |
| Hidden Item 3 | In the dresser near the entrance room of the building. |
| Stone Eagle 3 | Above the Nazi flag. |
| SMG workbench | In the same location of hidden item 2. |
There is a total of 9 missions in the campaign, and each one includes 3 different workbenches except for the last 9th mission, which has no workbenches. So, there are a total of 24 workbenches to be discovered during the entirety of Sniper Elite 5.
Mission #1 The Atlantic Wall
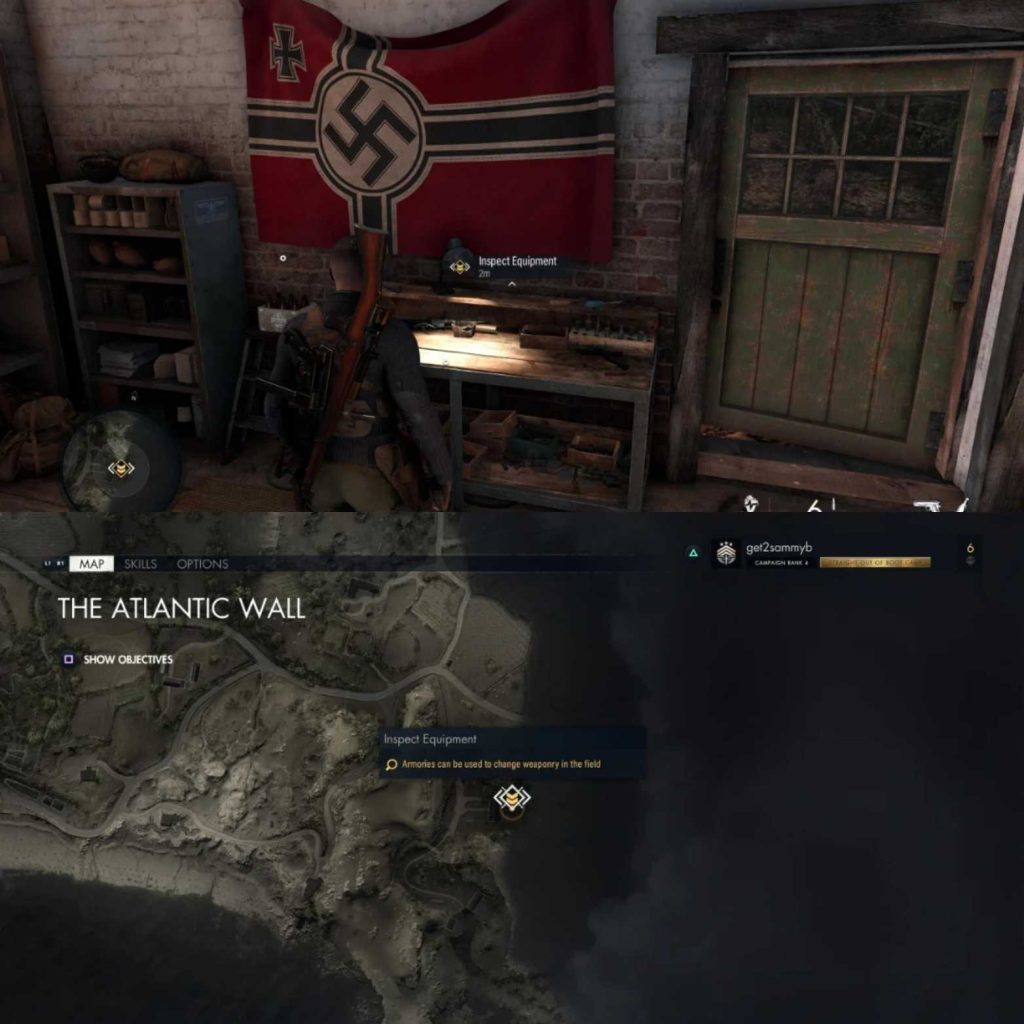
Workbench #1: After meeting up with Blue Viper, head up the stairs and lock pick the door with the Nazi soldier inside. Here the game will also give you a basic tutorial on your focus ability. Quietly kill him and enter the armory for your first ever Rifle Workbench.
Workbench #2: The far north of the map has a gun battery you can disable for one of the mission’s optional objectives. The gun battery itself is placed in a small wooden building. You will need to have access to the key or satchel charge. There should be useful supplies in the surrounding area to find a satchel.
You can even find the patrolling soldier roaming near the shed to obtain the key. So gain access whichever way you prefer and discover the Pistol Workbench.
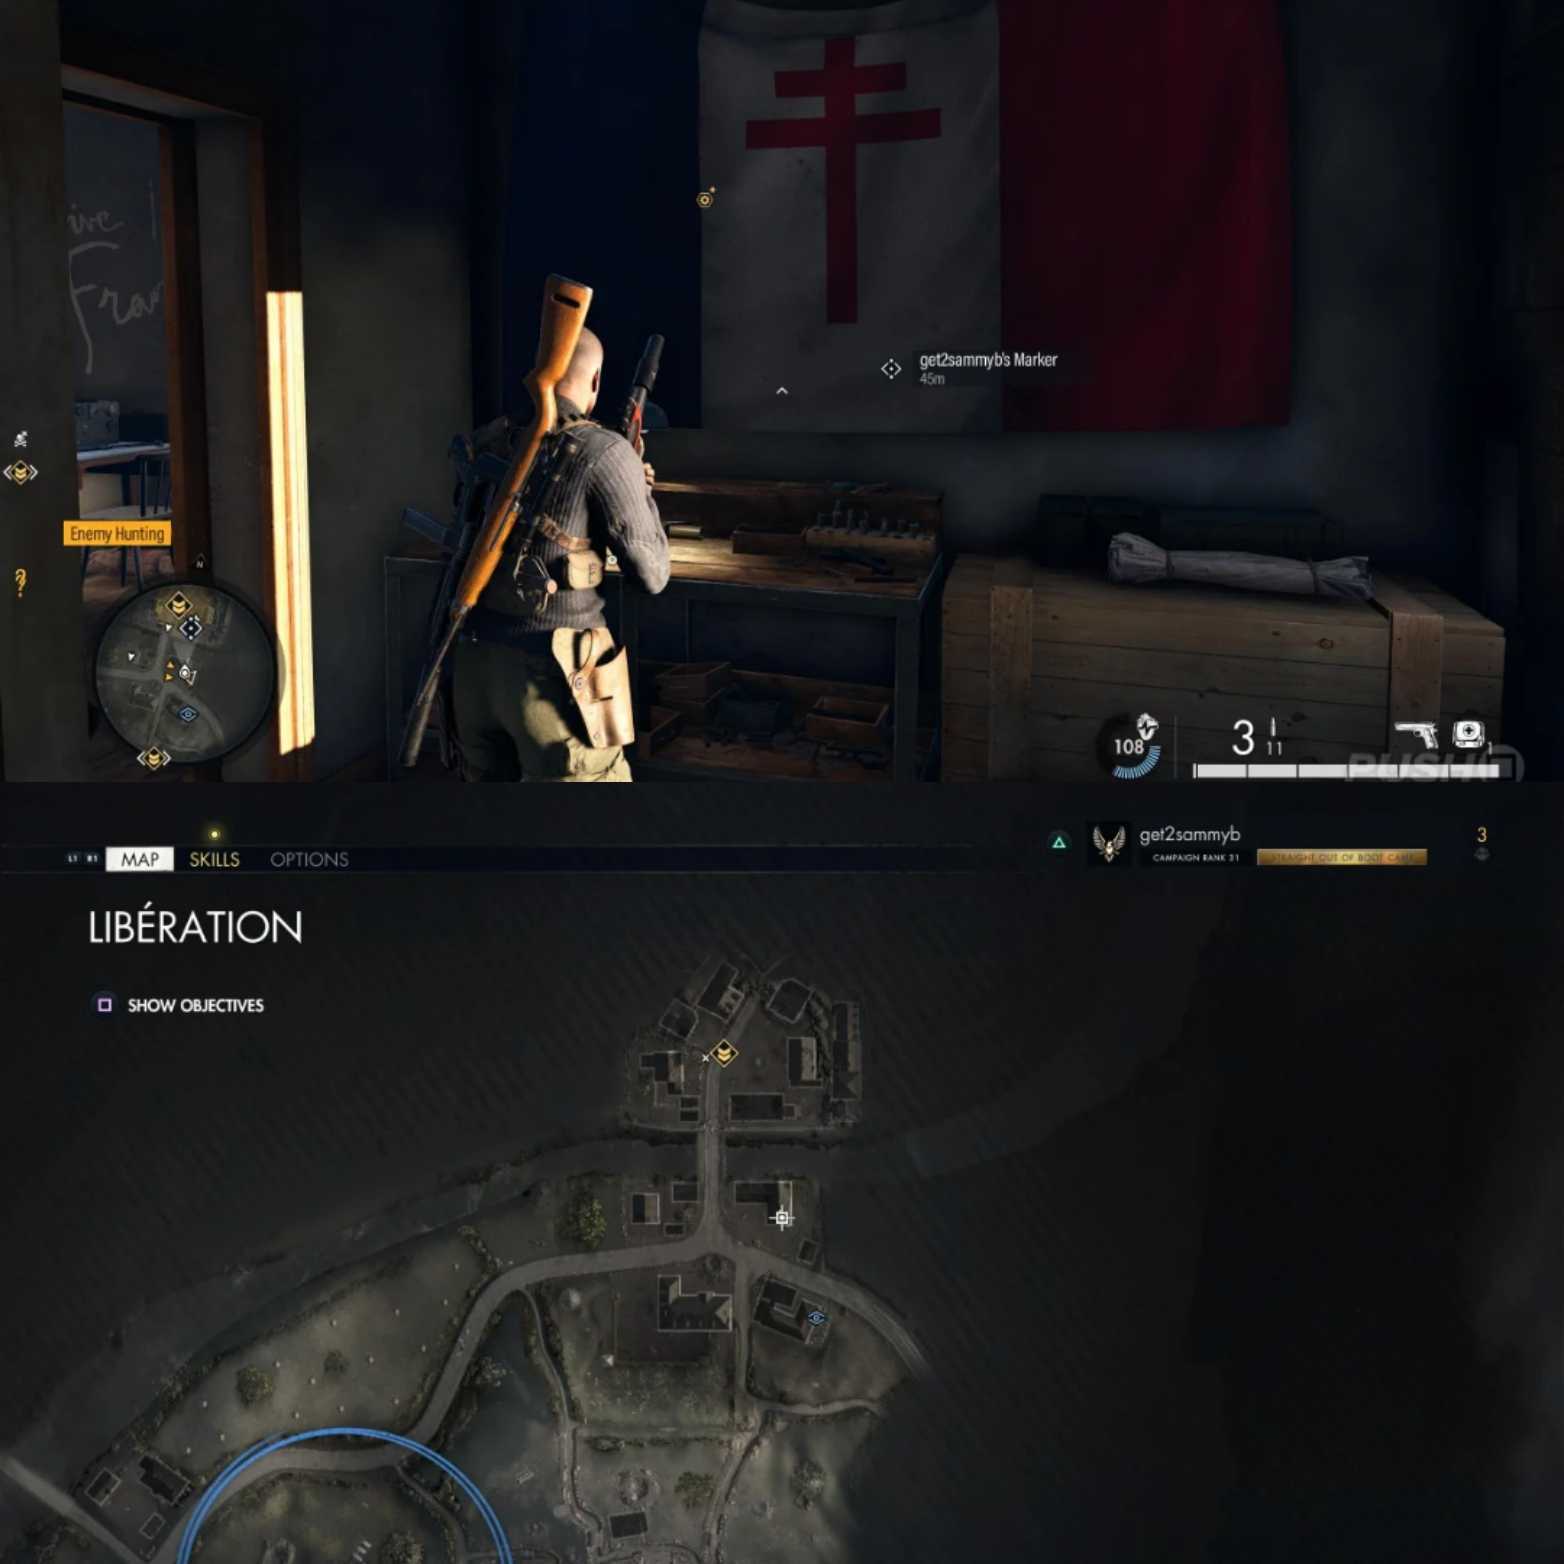
Workbench #3: You will be tasked with finding an NPC called Marcell in the southwestern town. It is the same place where you also find a Kill mission target named Steffen Beckendorf.
You can find Marcell’s safe house in the bottom corner of the town. We have marked the exact location with the cursor on the map in the picture.
Afterward, simply climb up into the attic, and you’ll find Marcell’s body close to other useful loot, including the SMG Workbench. Make sure to interact with it before you open the safe and continue the mission.
Mission #2 Occupied Residence
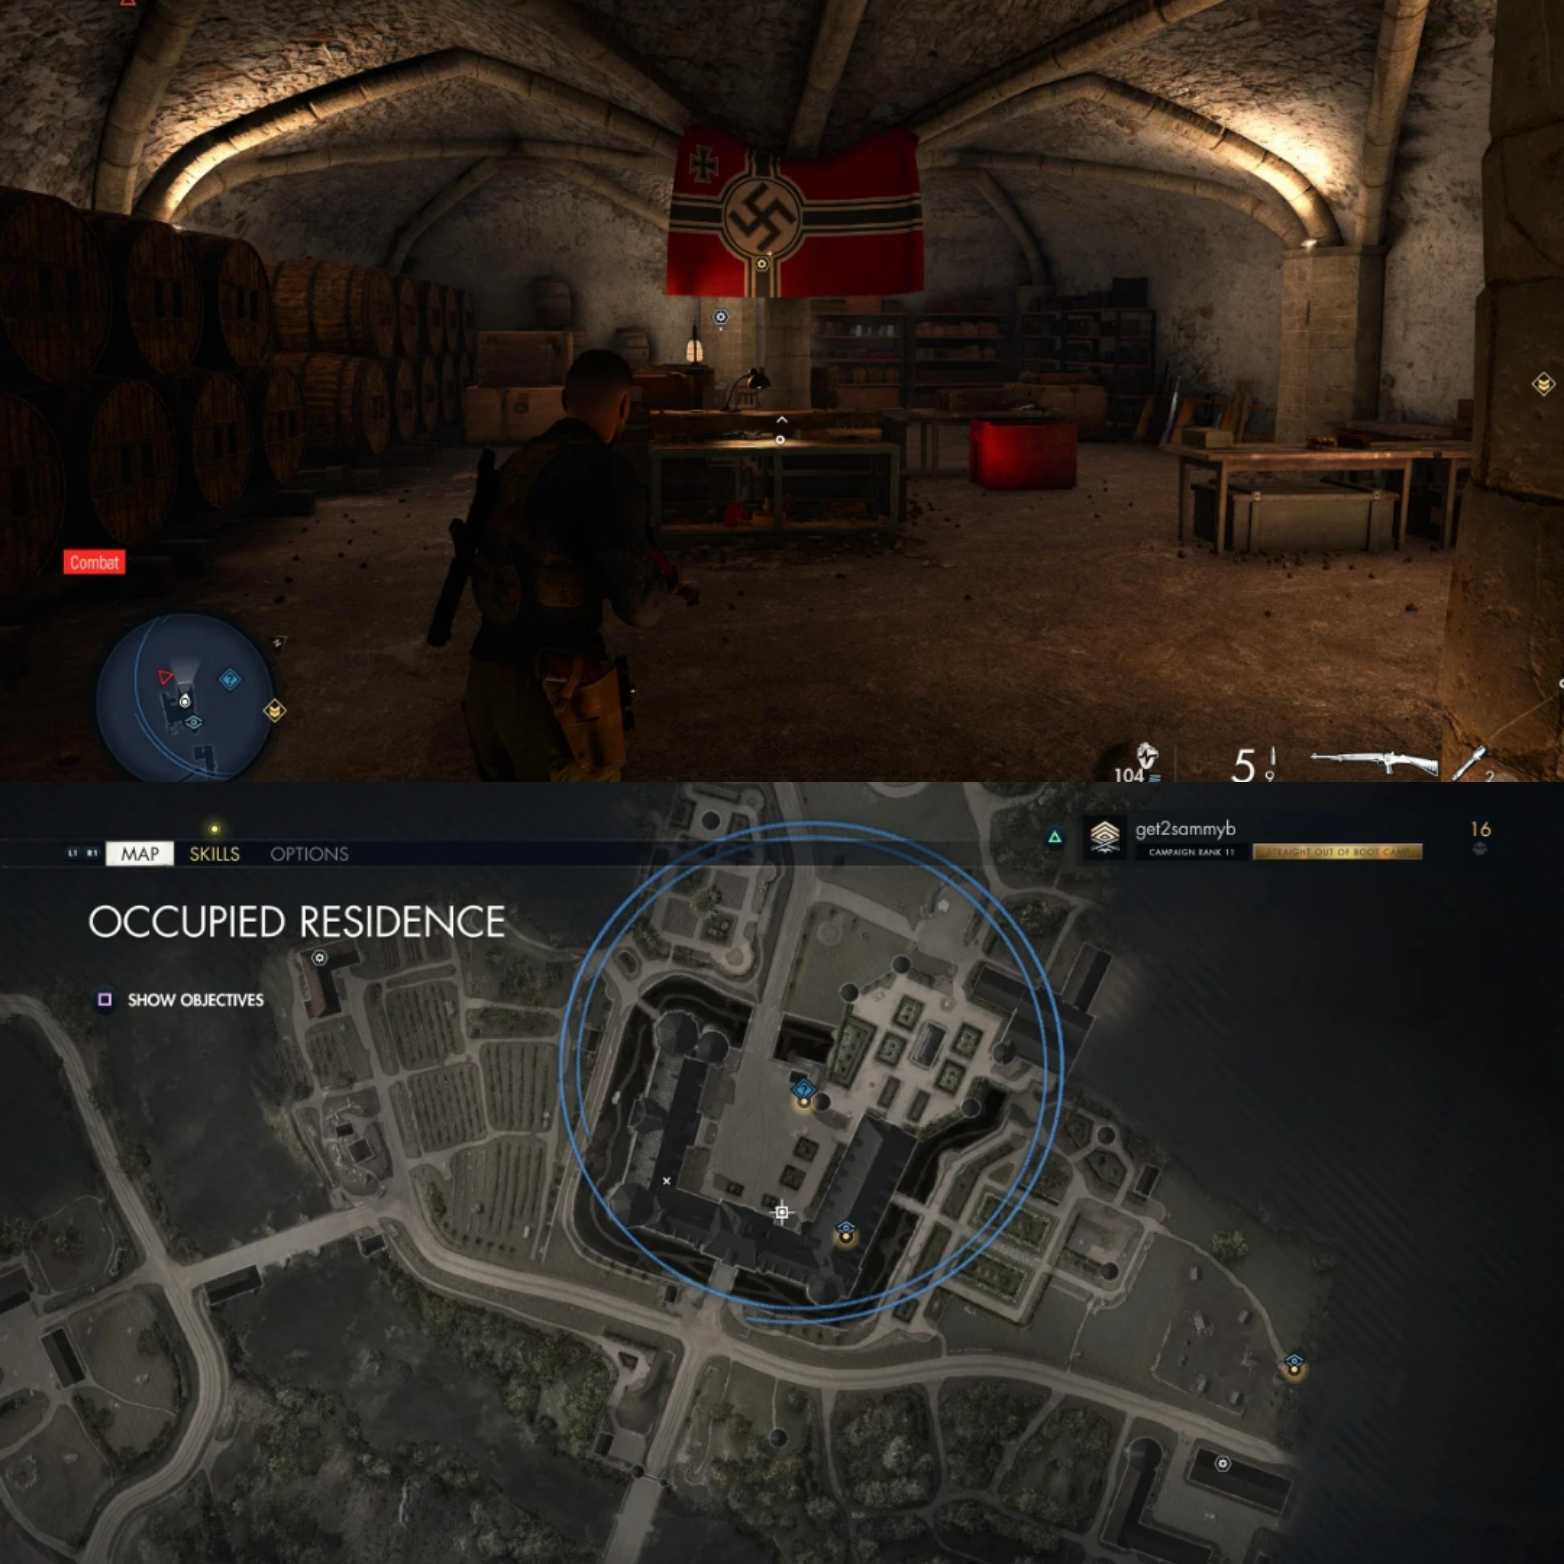
Workbench #1: The second workbench in this mission can be found early on in the Fortress-like villa. Be wary of the various patrolling guards when you enter this area for the first time.
They will be located right inside the workbench room, where you will need to loot the rifle workbench.
Alternatively, players can sneak around the chateau and access the room via the moat. This will also let you sneak up for a stealth attack on the two guards of the room.
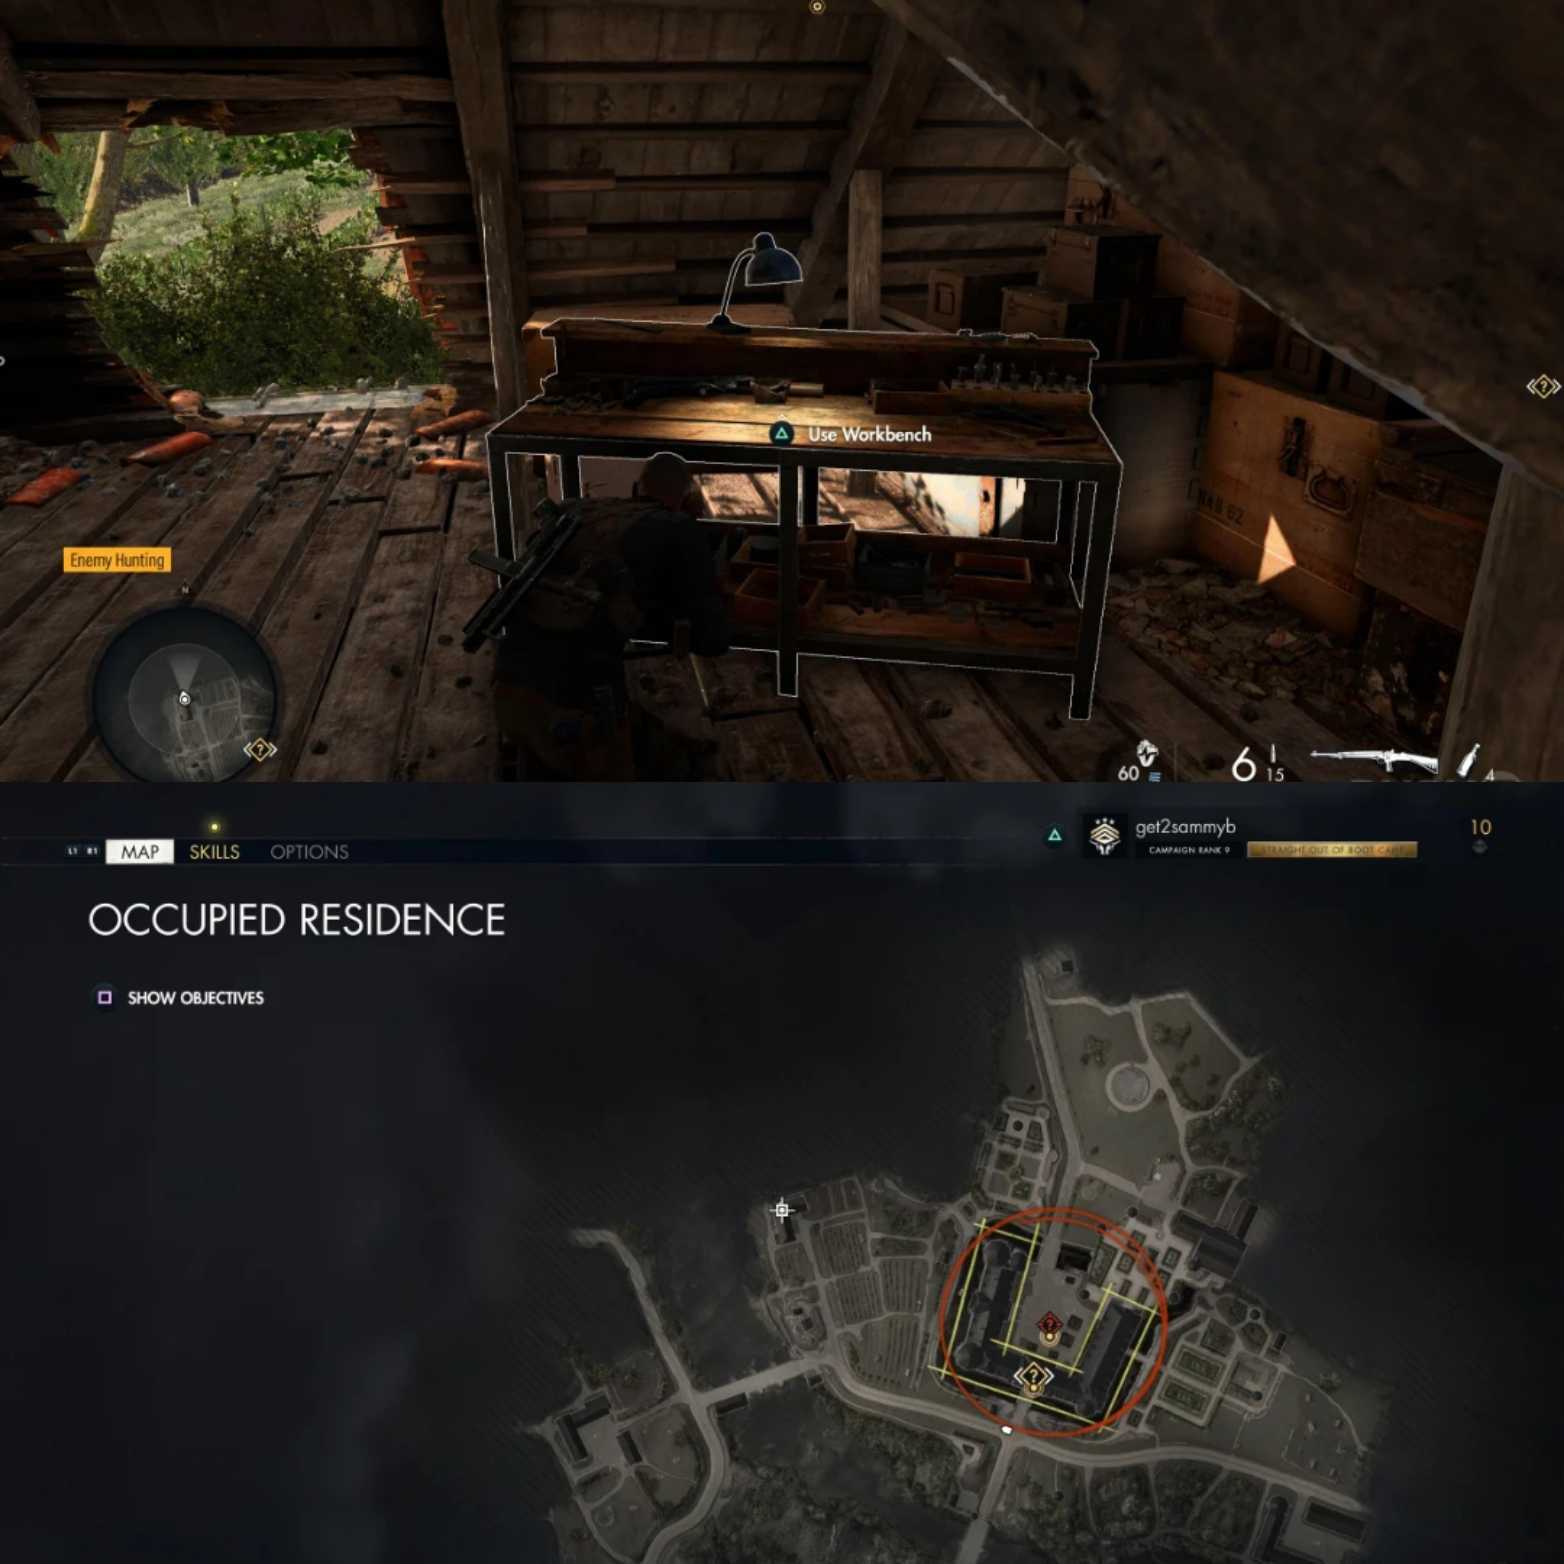
Workbench #2: This workbench can be accessed from the North-West side of the main Chateau building. This safe house will be marked with vines and orchard fields around it. We recommend running across the fields so you can reach it without any patrolling guards to trouble you.
Once you reach the location, simply go around to the back and climb up the vines. You will find the SMG workbench right in front of you soon as you climb up.
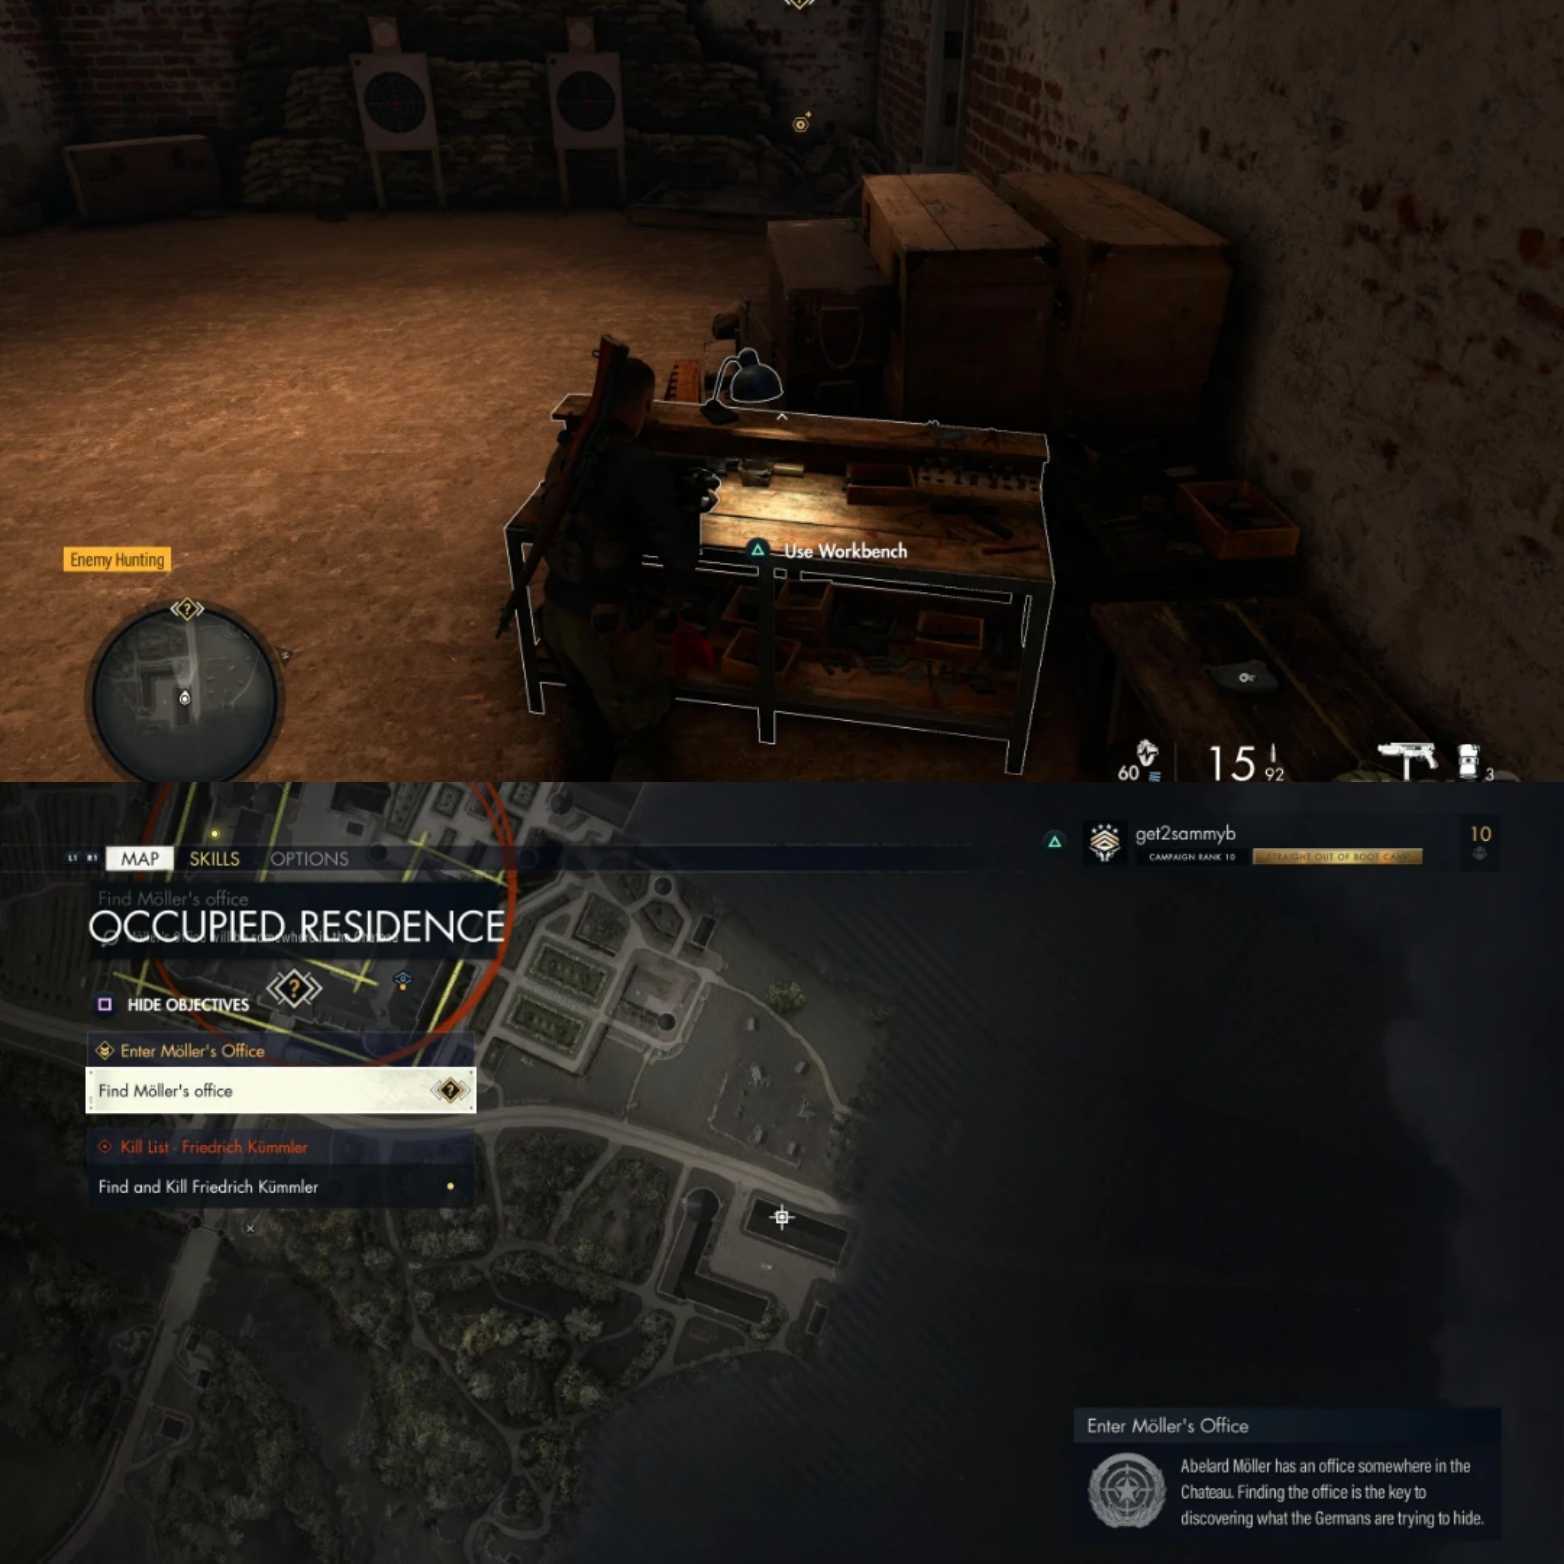
Workbench #3: This workbench can be found on the Far-East side of the mission.
Once you cross the bridge heading into the main Chateau, immediately hook a right. Keep following the right side road and avoid or kill the incoming patrolling guards.
Whichever way you find to get past the guards, you will reach an armory building. You have the option to blow the enclosed doors via satchel charges.
However, you can also loot a Key from a nearby soldier to unlock it. Inside it, you can find the Pistol Workbench; as a bonus, players can also find a hidden collectible. It is the classified document: “Immediate request for attic repairs”.
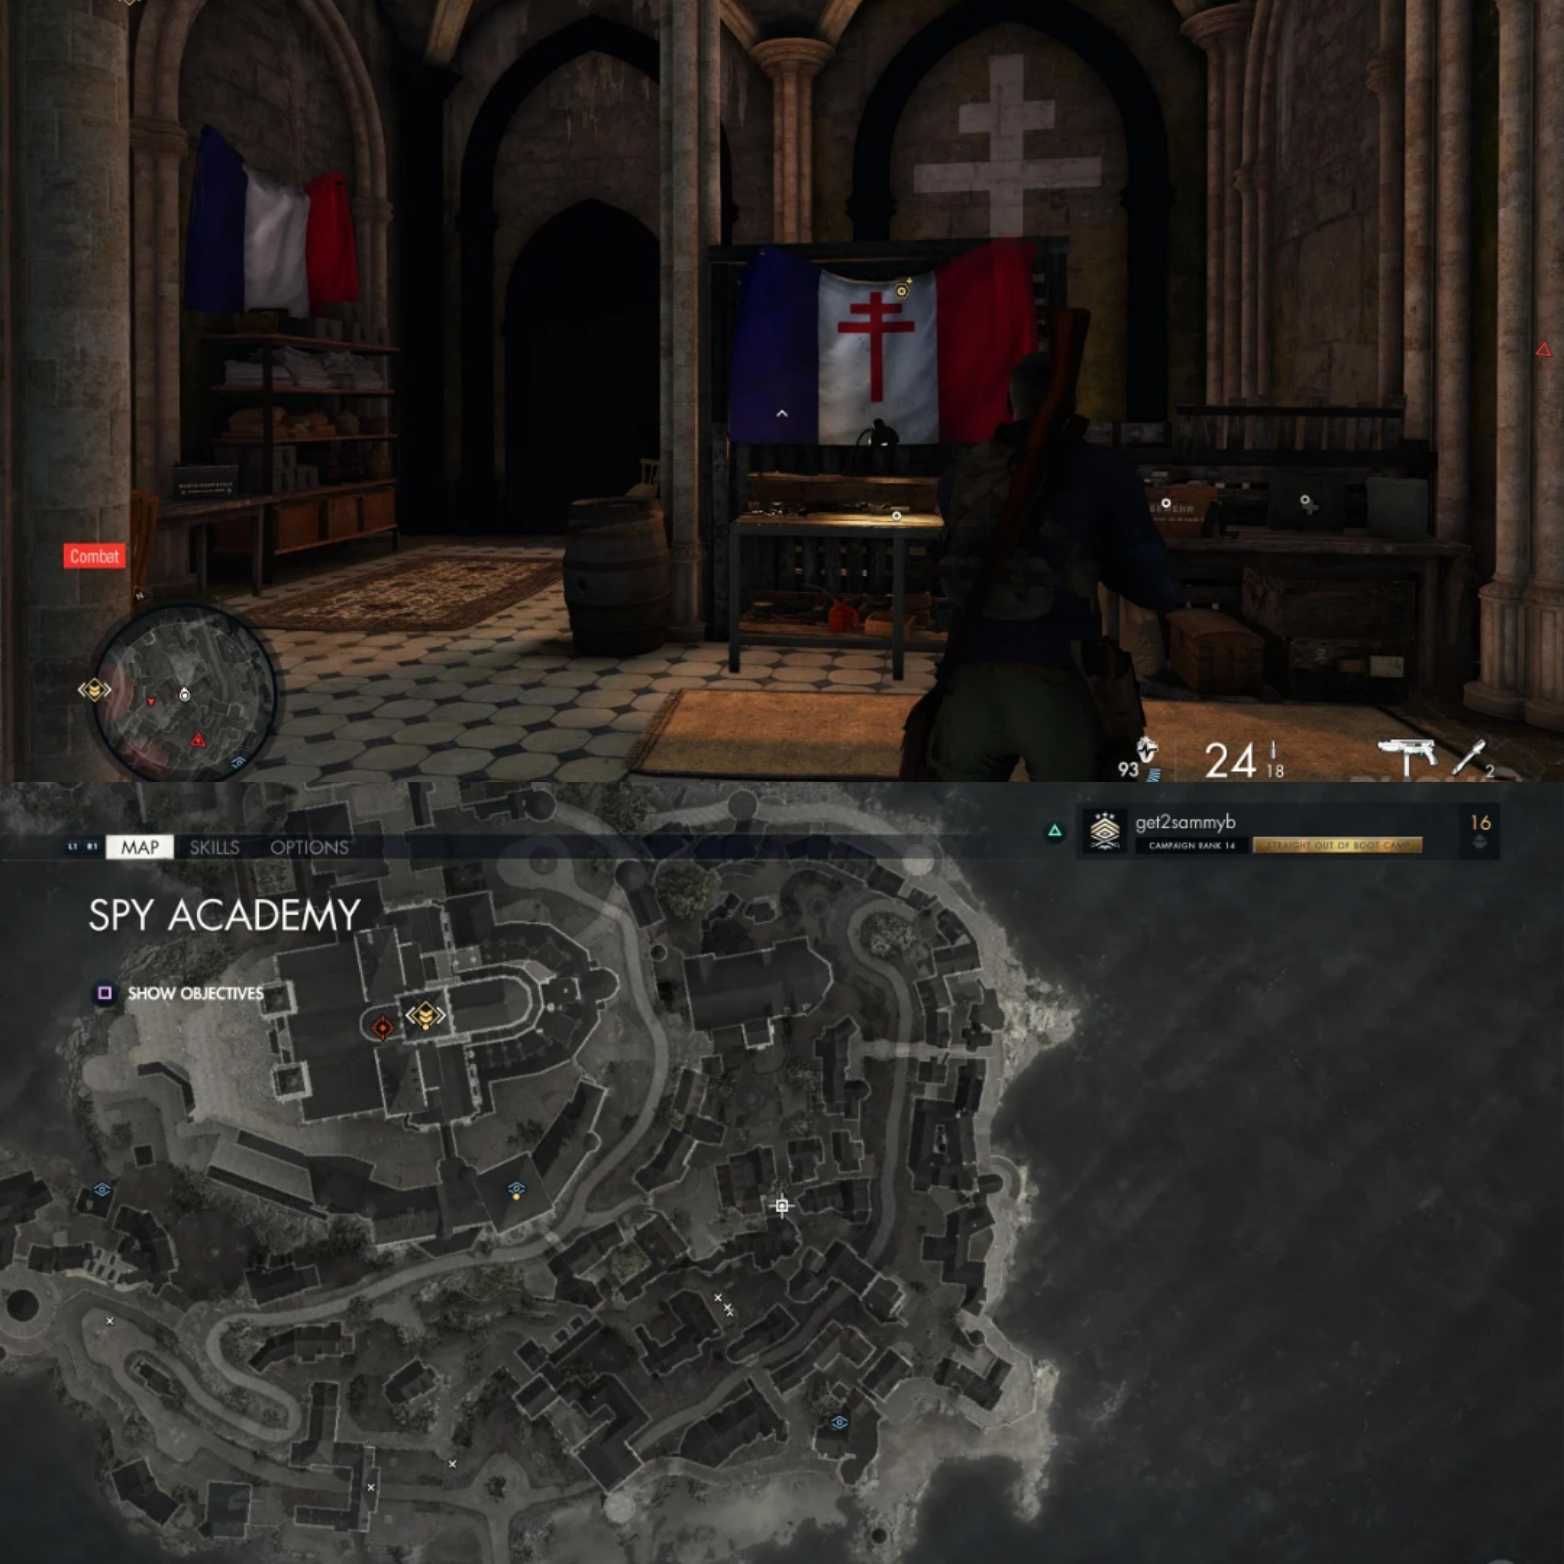
Mission #3 Spy Academy
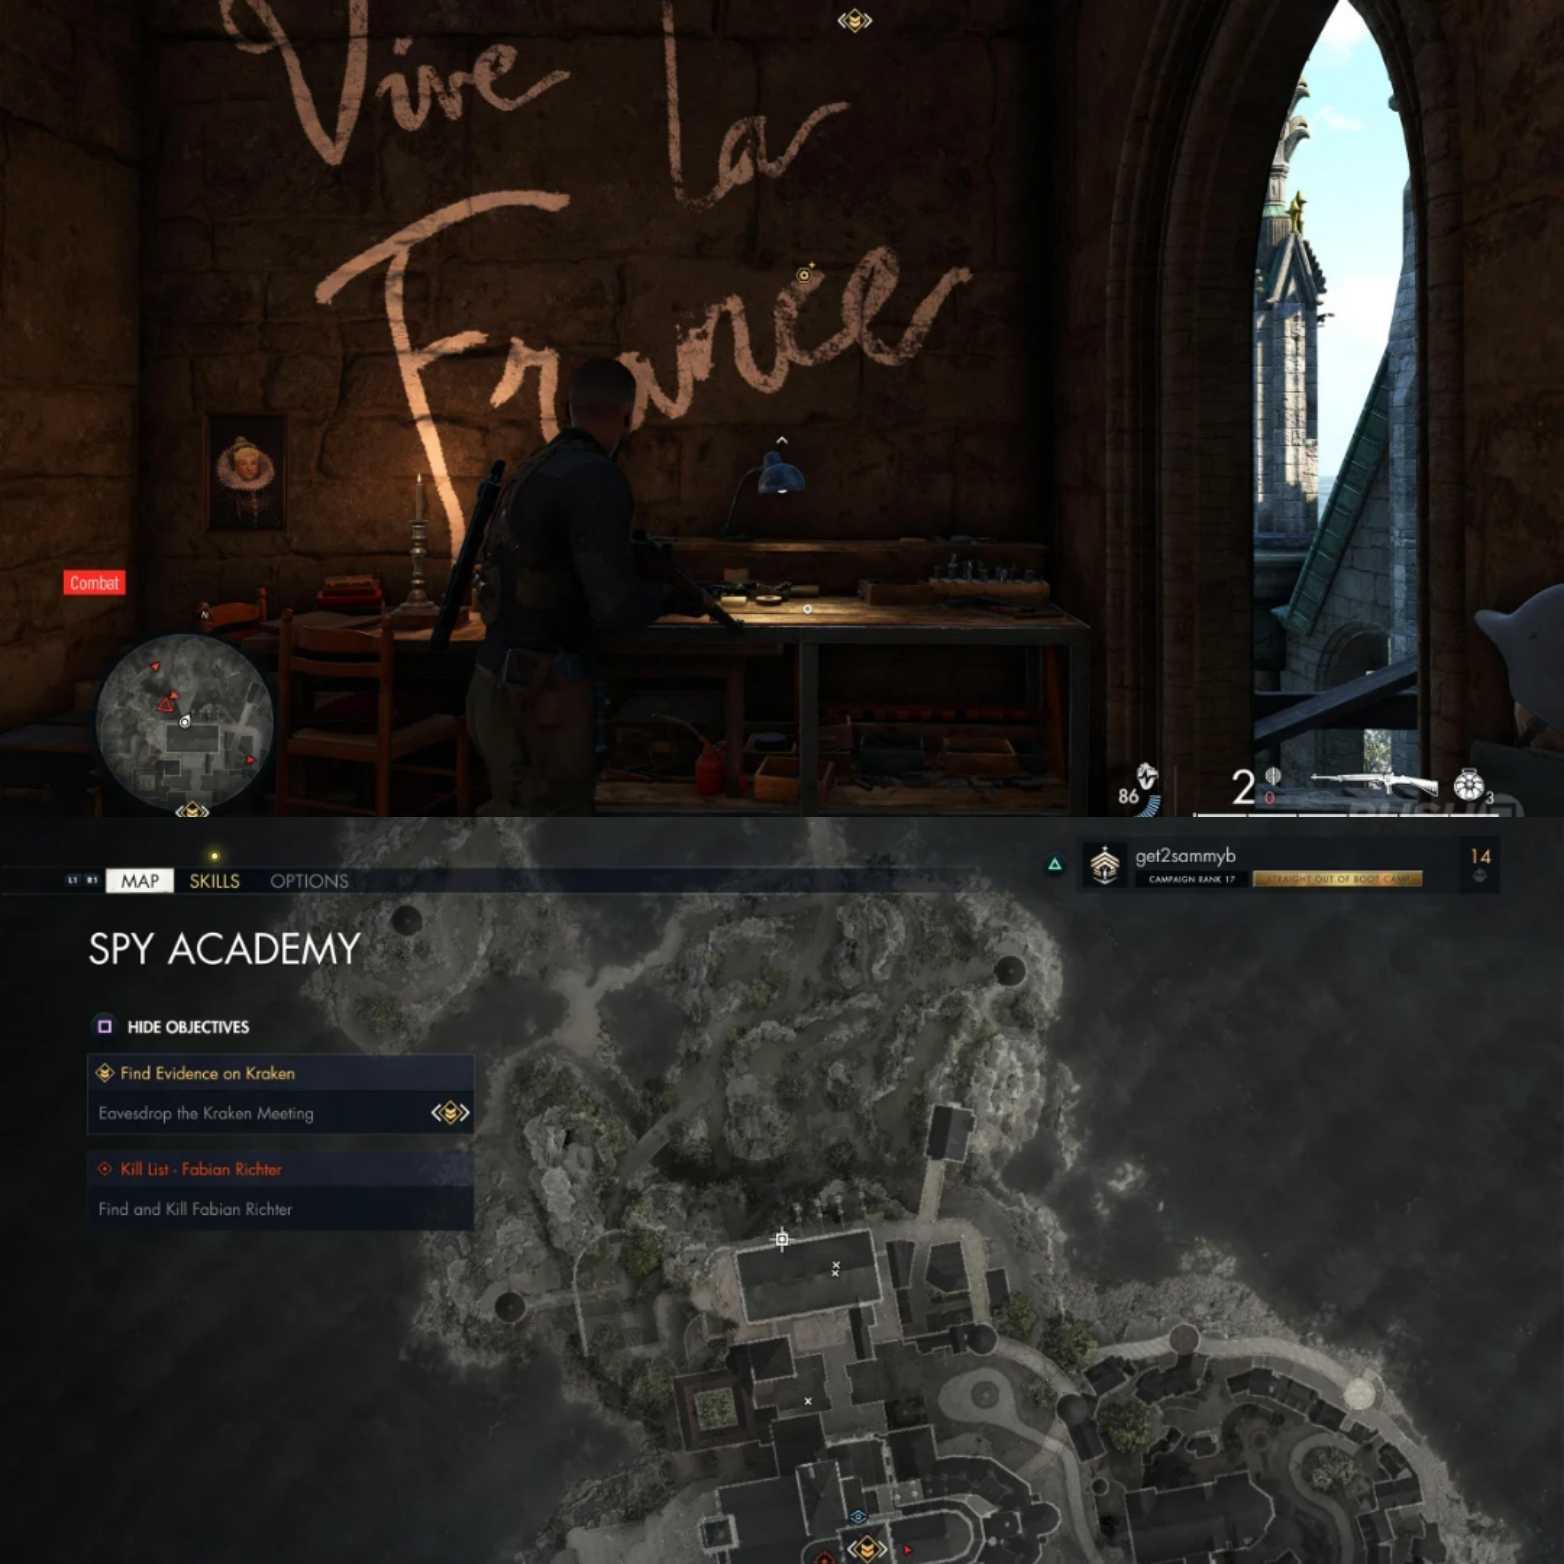
Workbench #1: This workbench location can be tricky to find in Sniper Elite 5. It is located in the Far-North of the island, which is the building shown in the image above. You can identify the site easily by eavesdropping on the Nazi Soldiers training for “Operation Kraken”.
Go around to the back of the building where the beach is located. Limb up the vines until you reach a cellar. You will be in a training room of sorts where you need to head to the West side. The Key here will be used to unlock the East side to find the Rifle workbench.
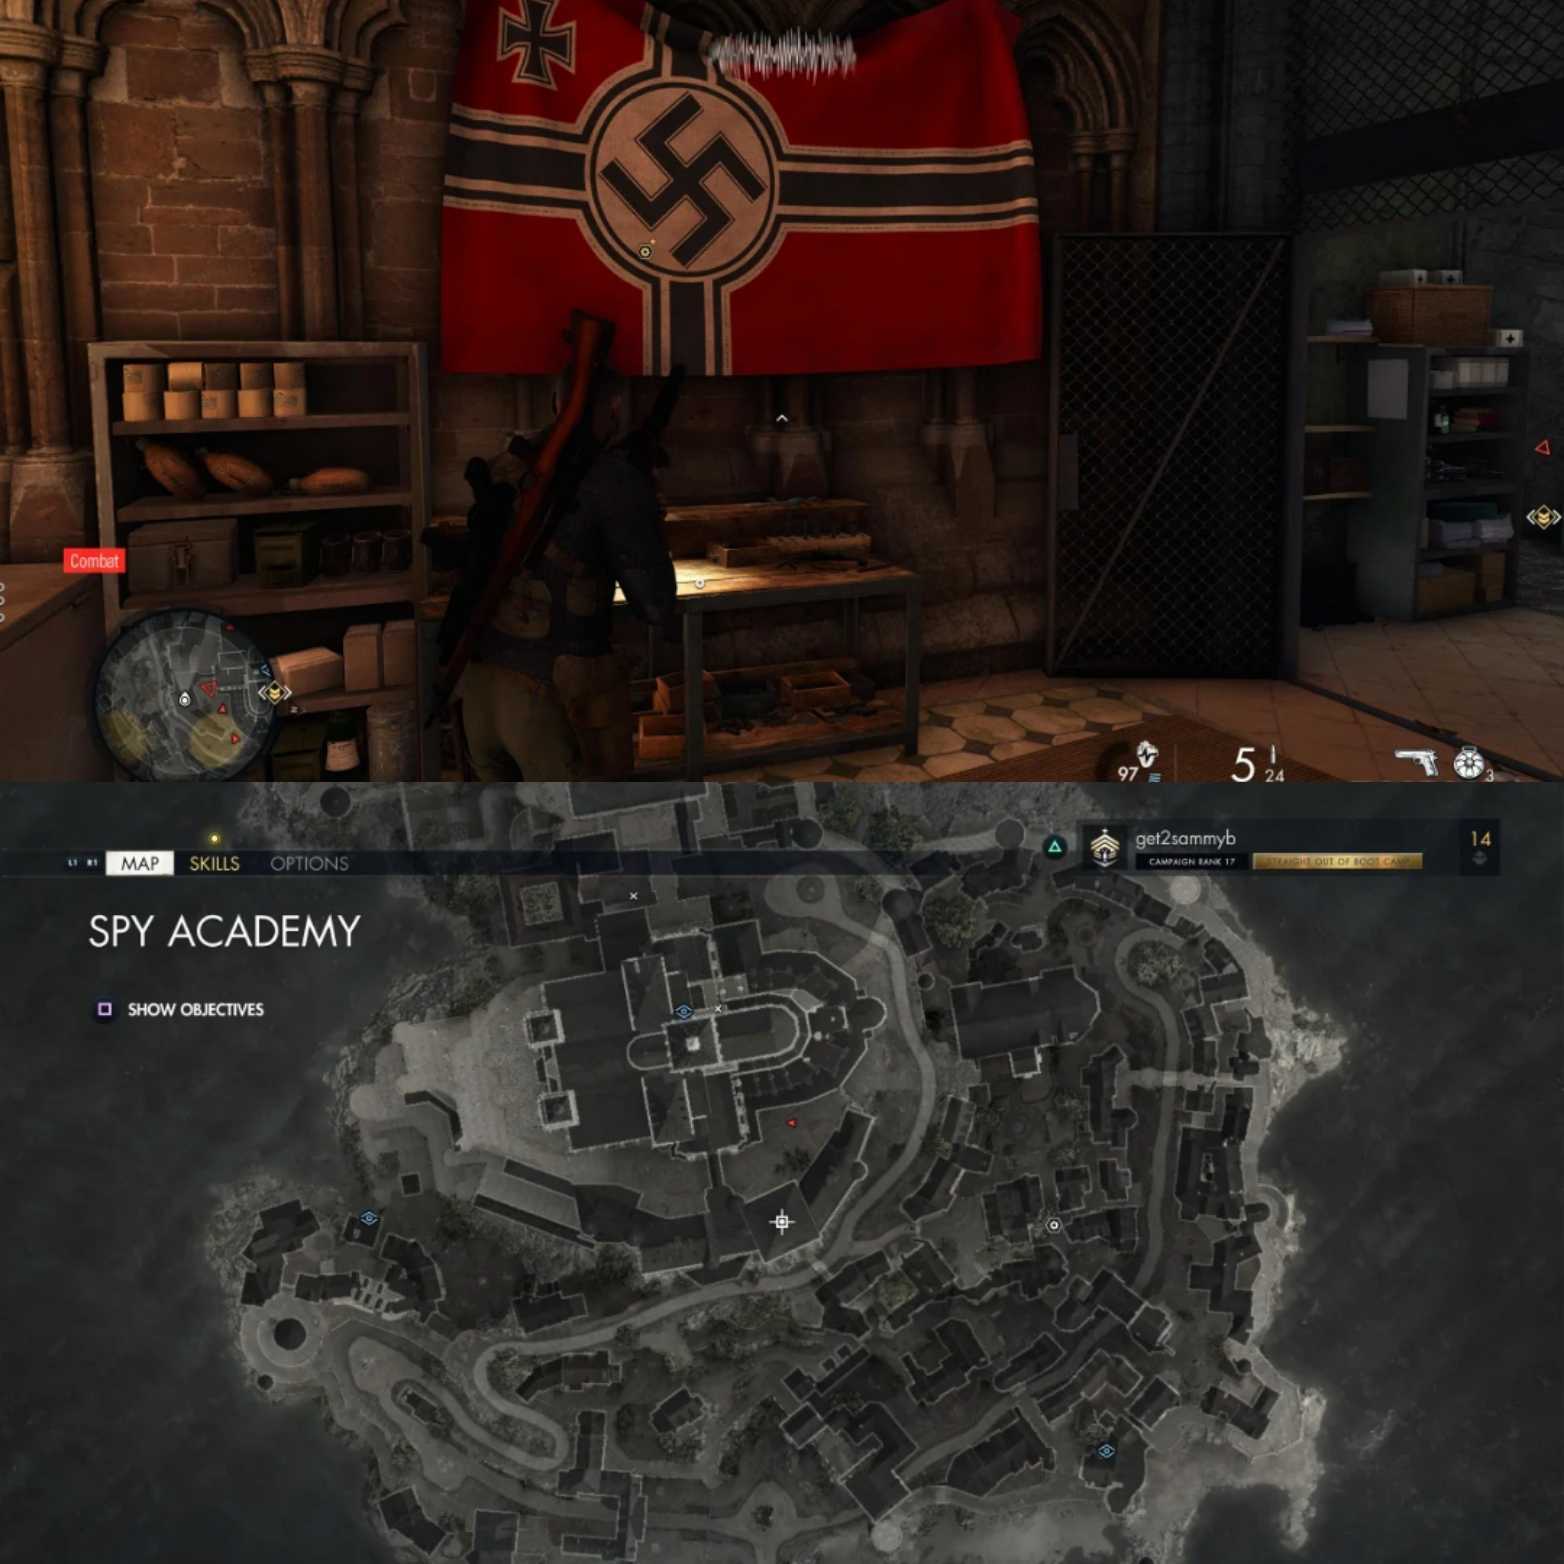
Workbench #2: This workbench is pretty straightforward. You need to enter the main town square from the Eastern side simply. Continue to follow the narrow streets until you see a ledge to grab and climb.
After climbing up on the ledge railing with the building, you should spot an open door leading inside marked by the resistance logo. The room will contain some useful supplies aswell as the SMG Workbench.
Workbench #3: The final location of the workbench can be found fairly in the center of the map. This is located below the massive fort structure. Here you will find an entrance to an armory located on the ground level.
You will either need a satchel to blast open the door. Preferably, you can loot a key from the lurking officer near the east entrance to the main compound. Once inside, you can grab some rewards and the Pistol Workbench.
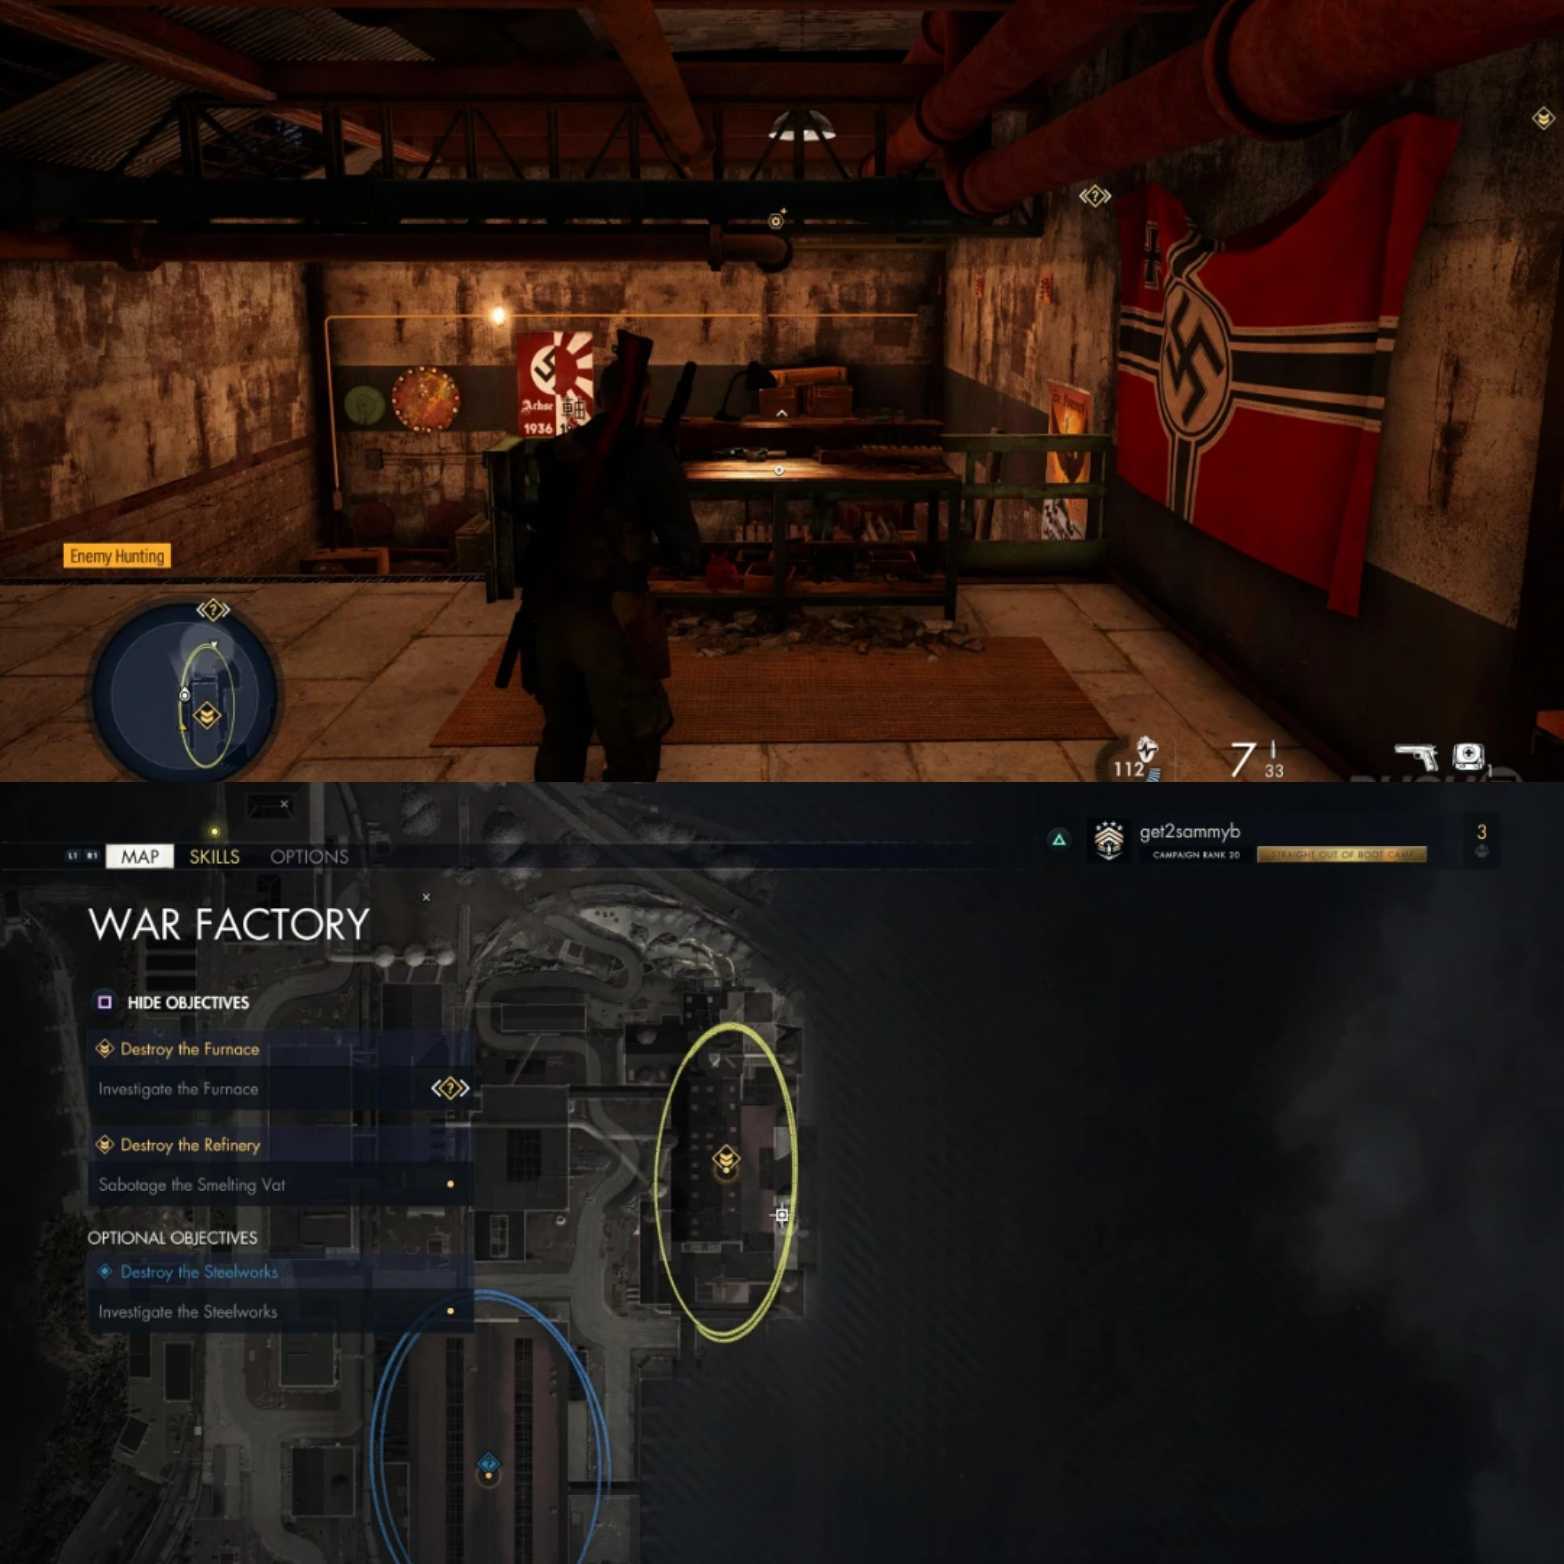
Mission #4 War Factory
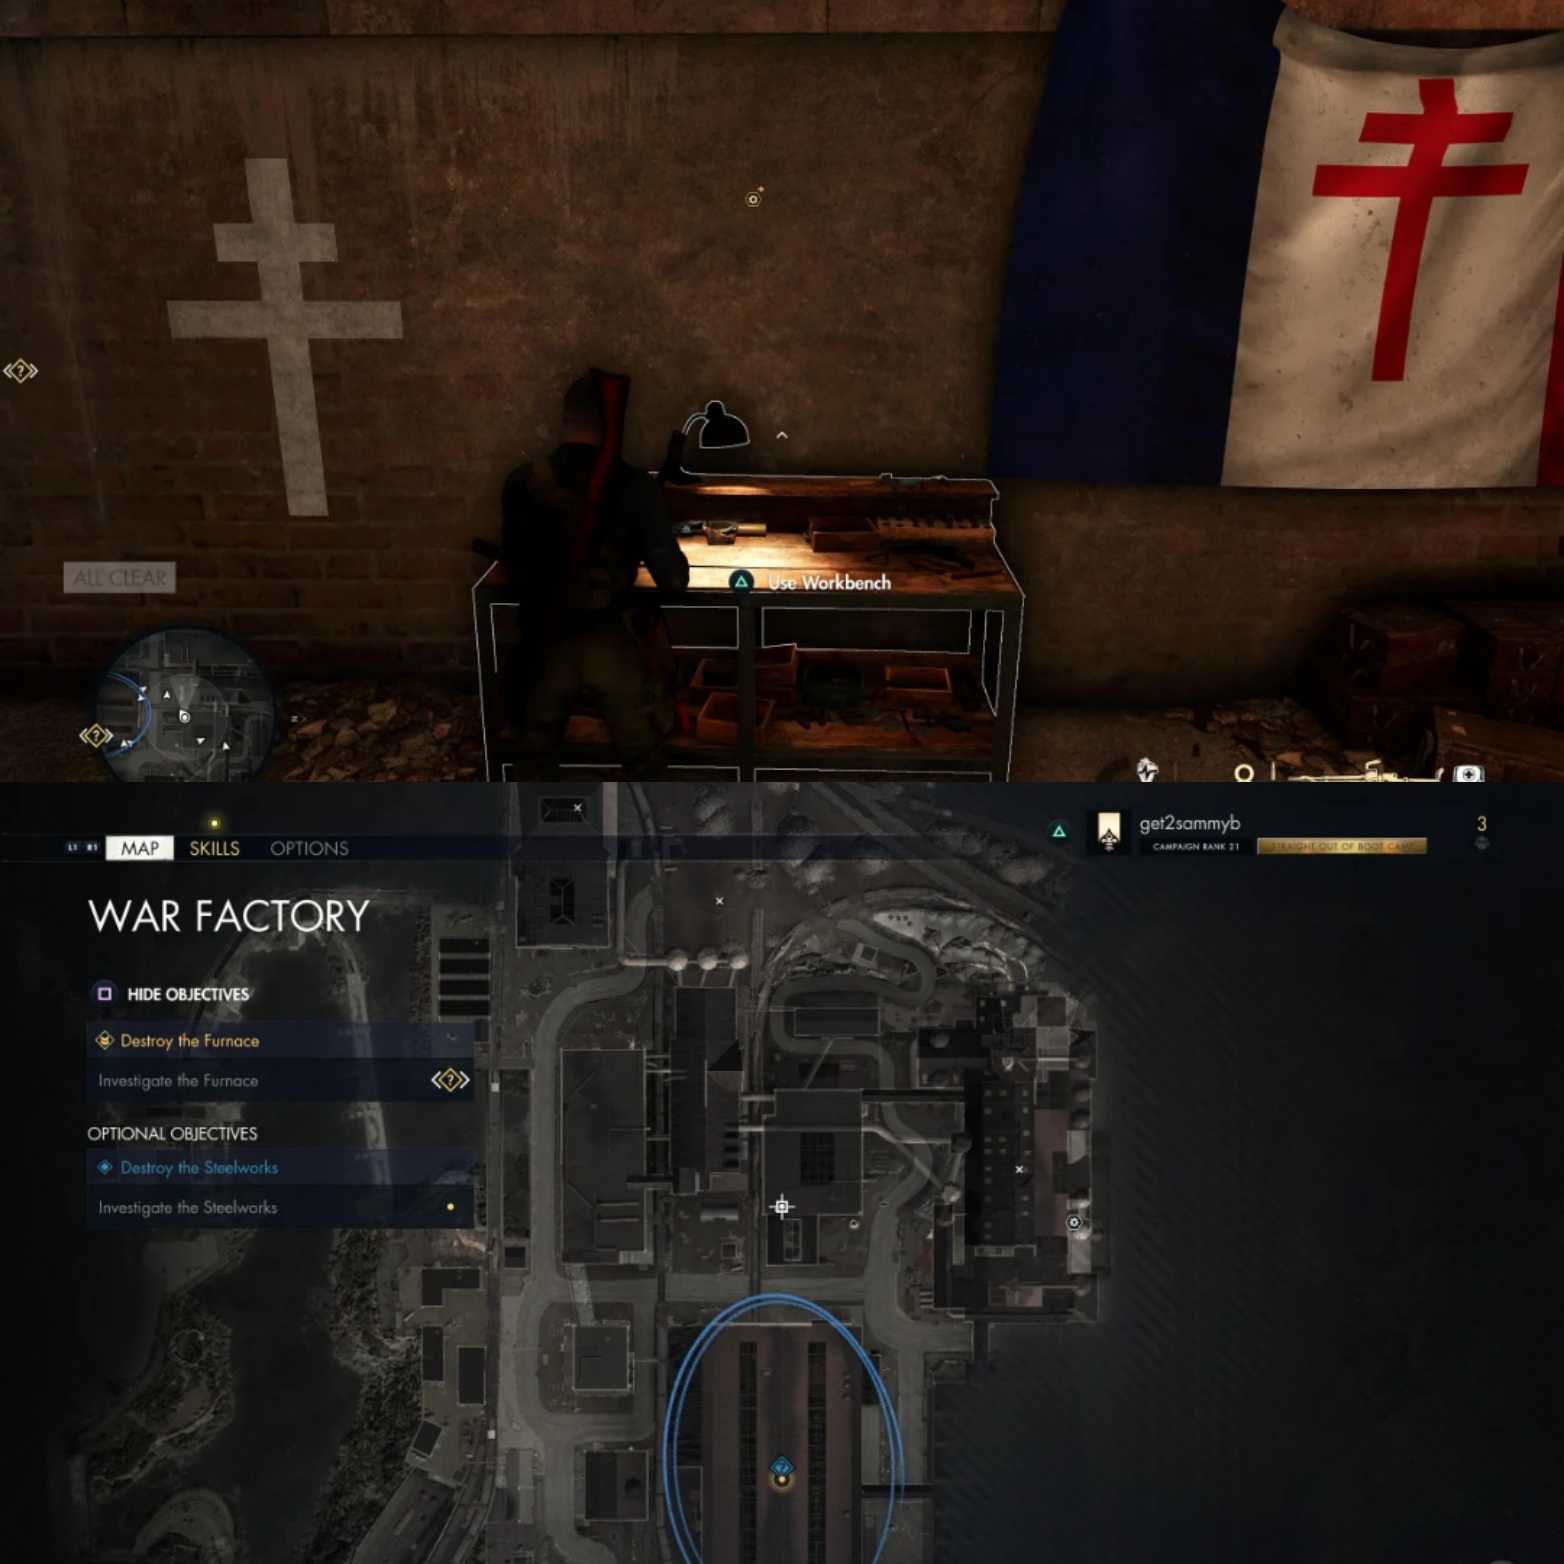
Workbench #1: This workbench is located below the factory warehouse. It is marked by the image above. You can enter the warehouse through the many side doors. However, caution is extremely advised. Since this area will be swarming with enemy Nazi soldiers.
Once you kill everyone, you will be able to find a key. This key will lead you to a large room. There is nothing extraordinary in this room.
Although, your main focus will be a hatch with a ladder leading downwards. This is where you will find the rifle workbench and a nice suppression kit for your troubles.
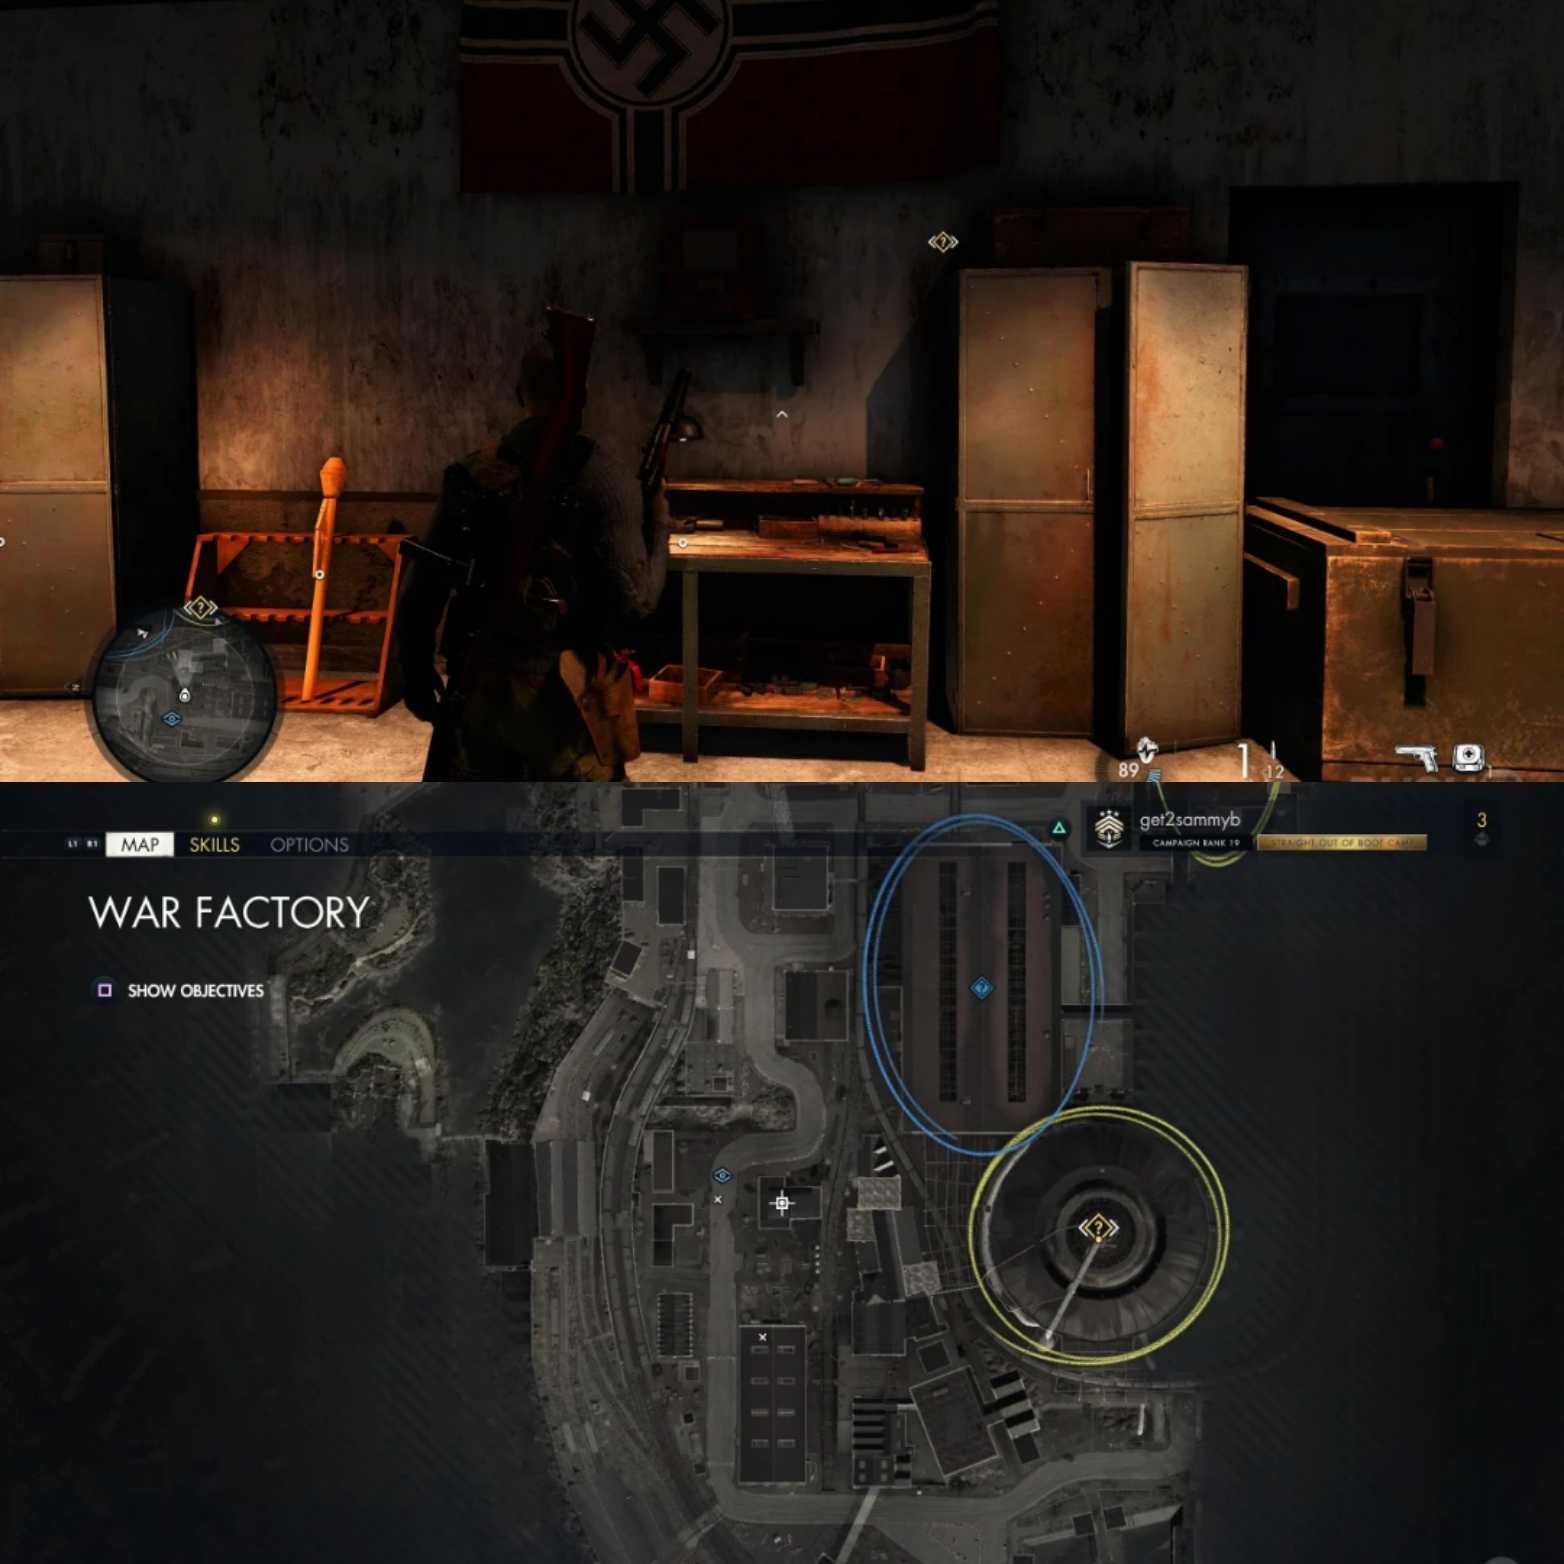
Workbench #2: This one is pretty easy. As shown in the image above, there’s an upstairs armory just north of the shipping warehouse.
You will either need to loot the key from a nearby soldier or use a Satchel Charge to get inside the room.
Once you’re inside the room, the SMG Workbench is directly opposite the doorway.
Workbench #3: The building shown in the image above will have two side doors leading inside to a control room of sorts. Further inside, you should be able to find the armory.
Just like before you can either blow up the locked doors with a satchel charge or loot a key from one of the patrolling soldiers nearby. Here you will find a pistol workbench.
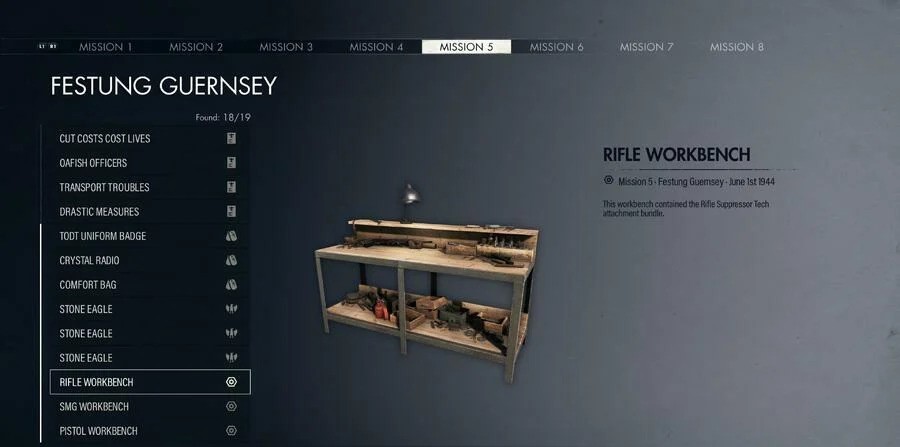
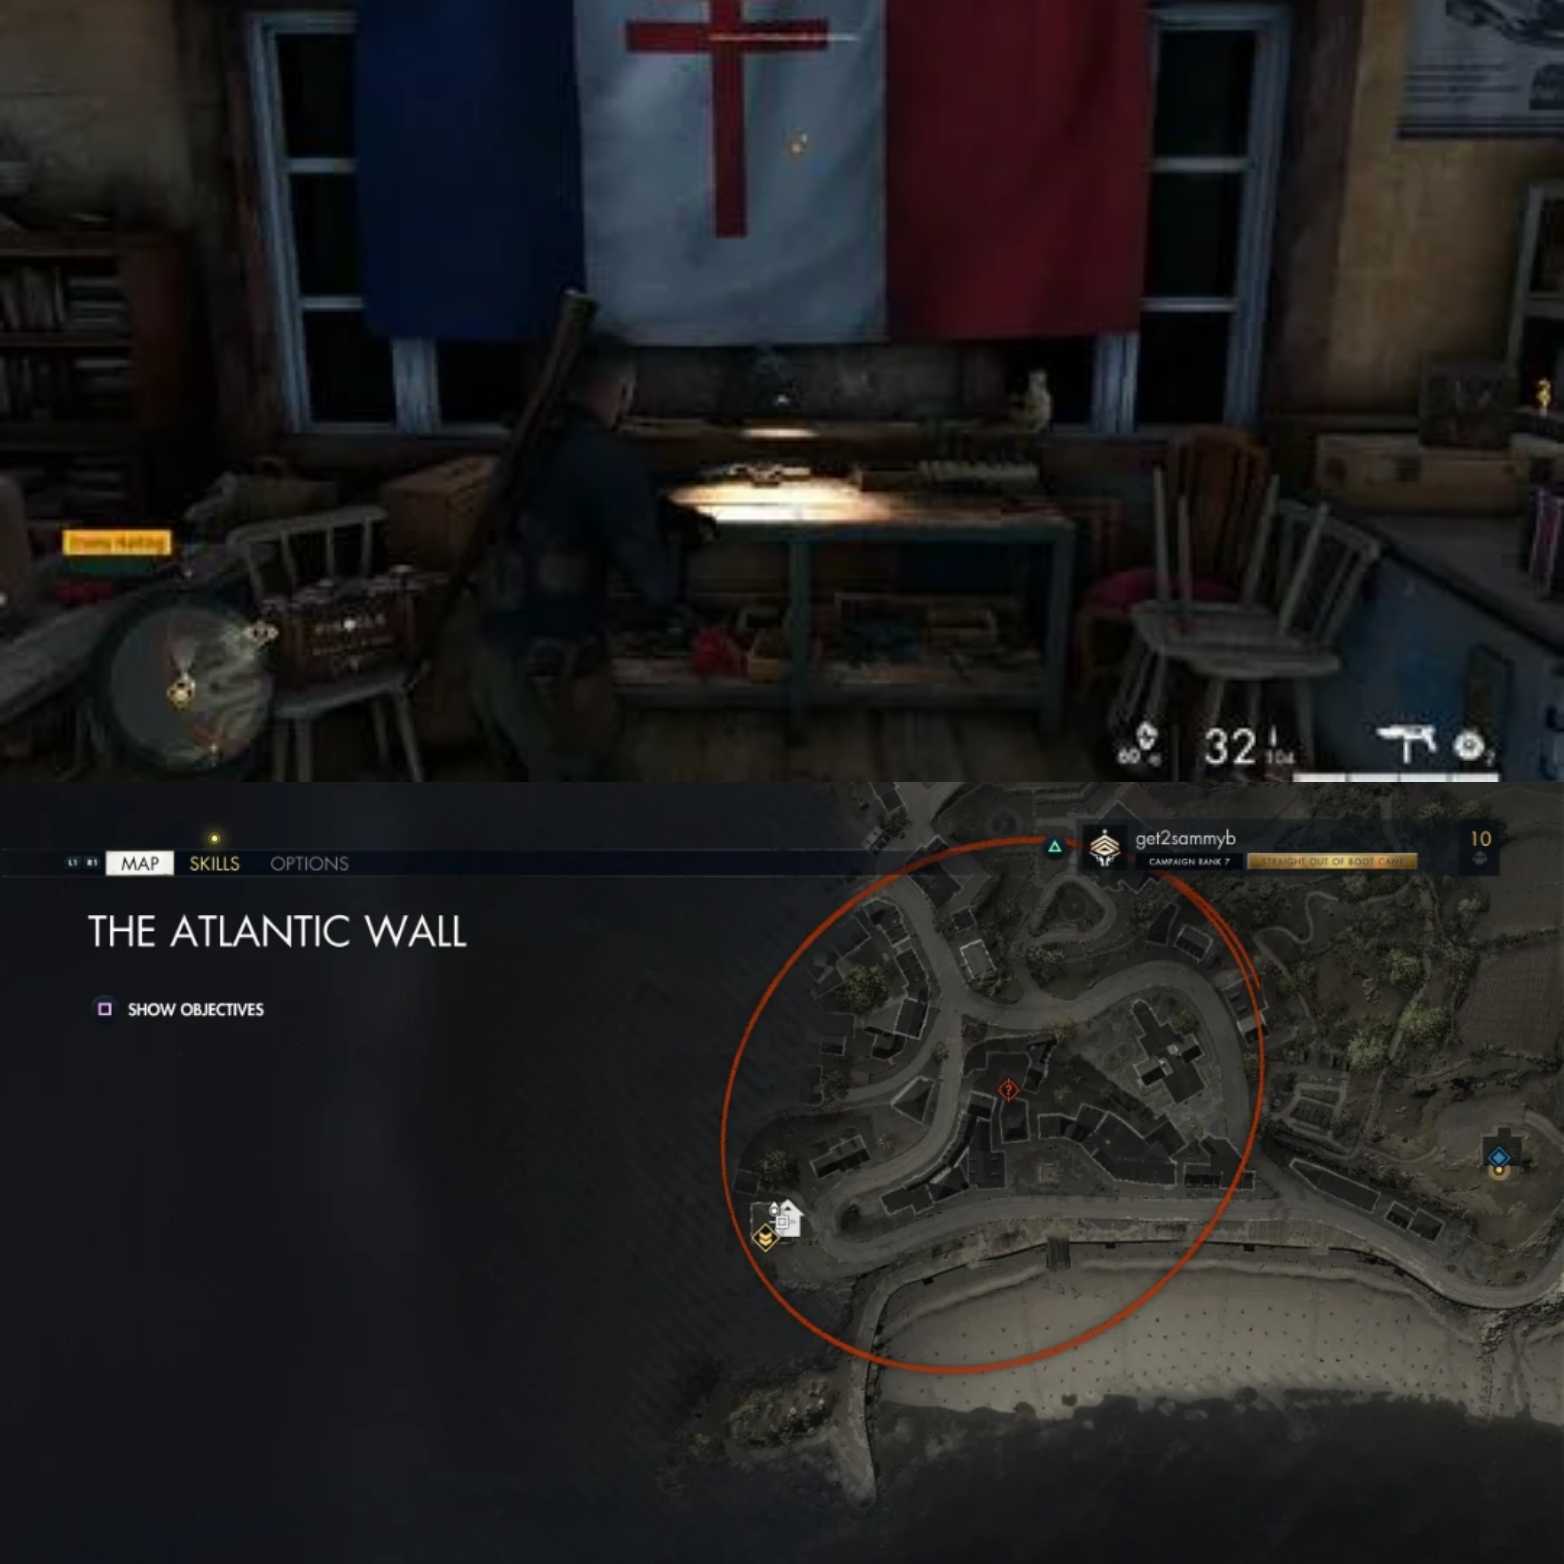
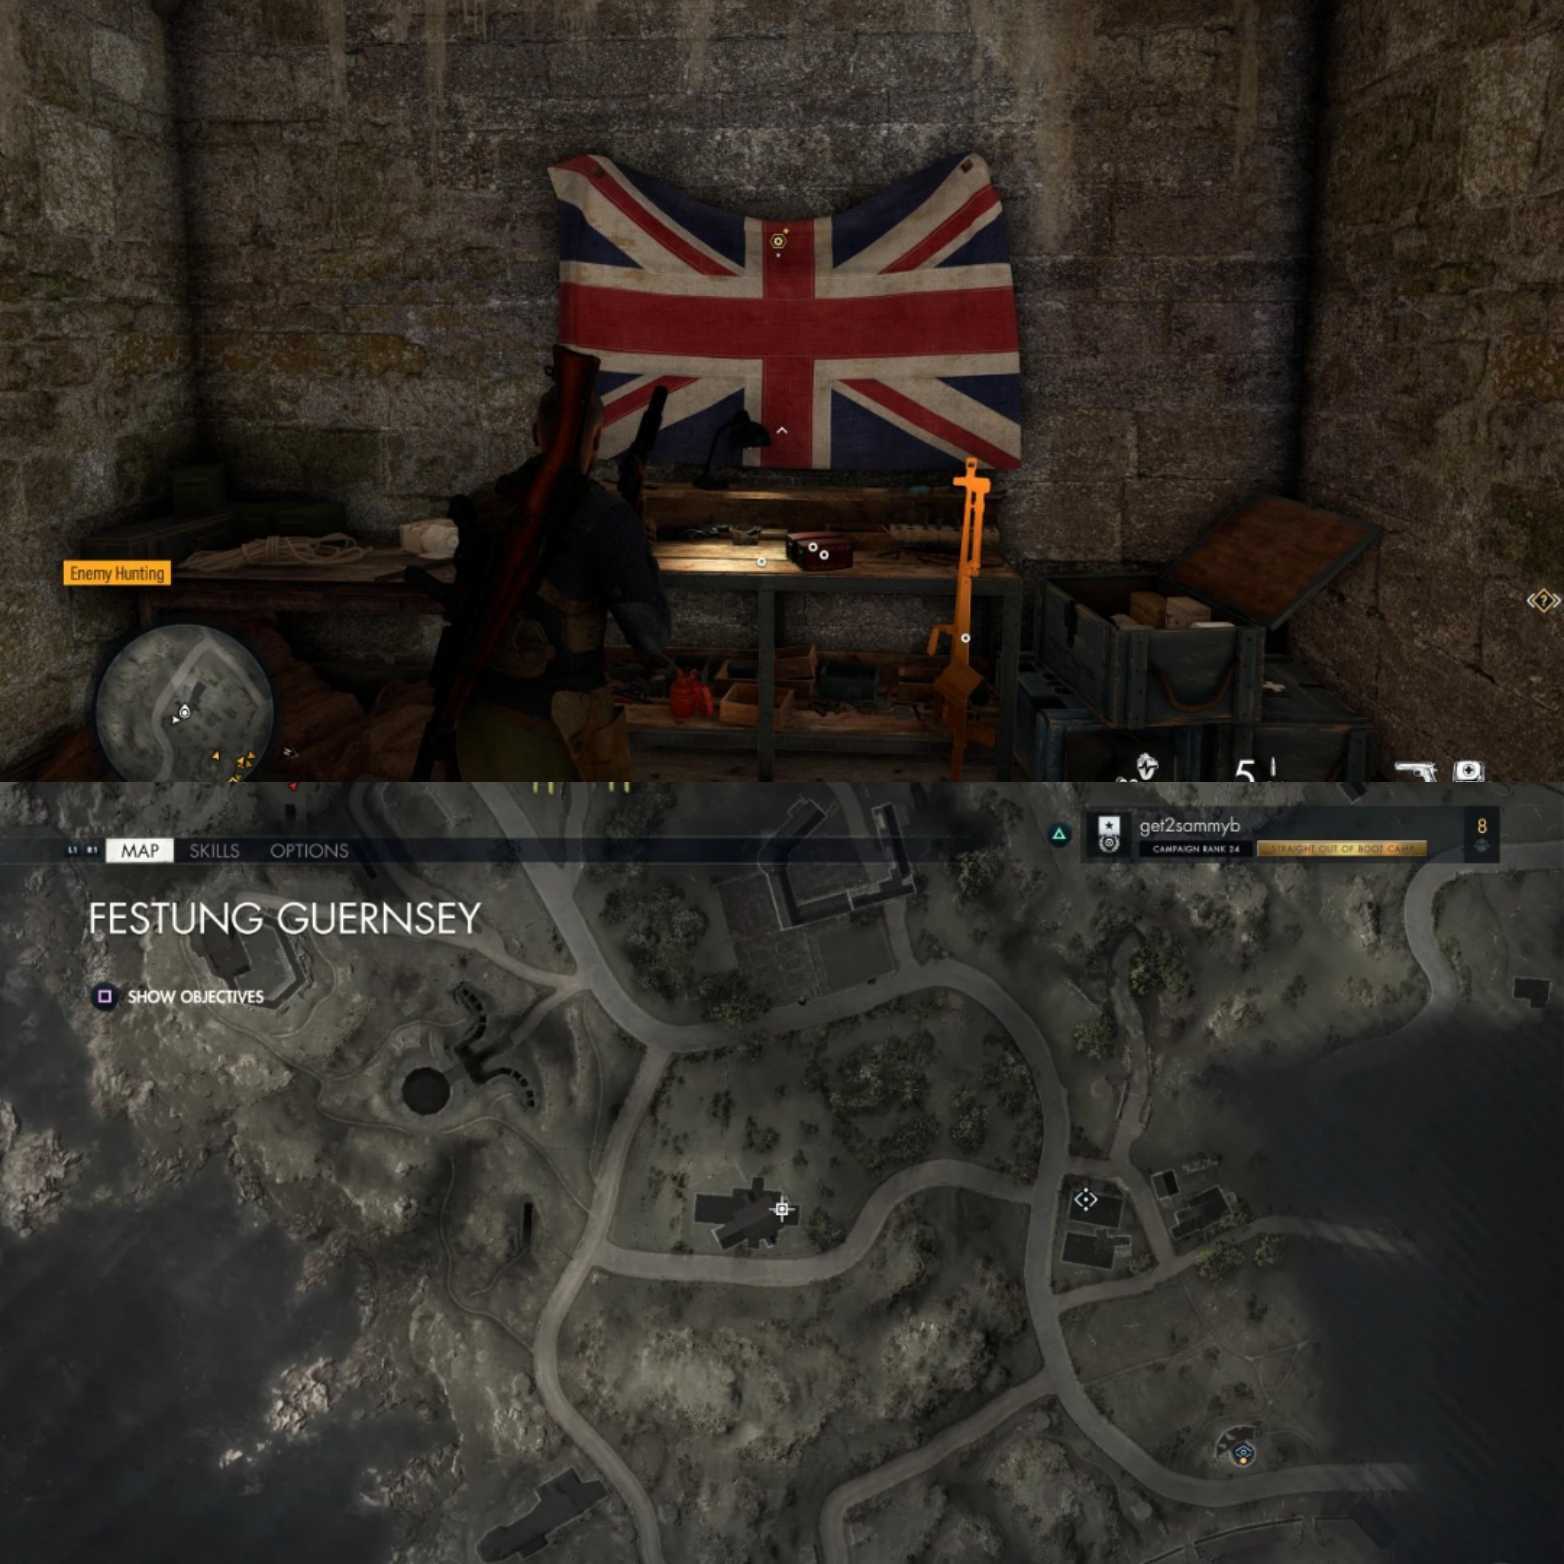
Mission #5 Festung Guernsey
Workbench #1: There is a church located in the direct center of the map. The workbench will be at the top of the church so you will have to climb the vines to reach it. Followed by iron bars to grab up top.
Here you will find the rifle workbench in front of you.
Workbench #2: This particular workbench is hidden away in a safe house to the left of the underground hospital. Simply go to the location shown in the image above.
Here you will find the SMG workbench as well as the Personal Letter #5: “Harass the Huns” collectible.
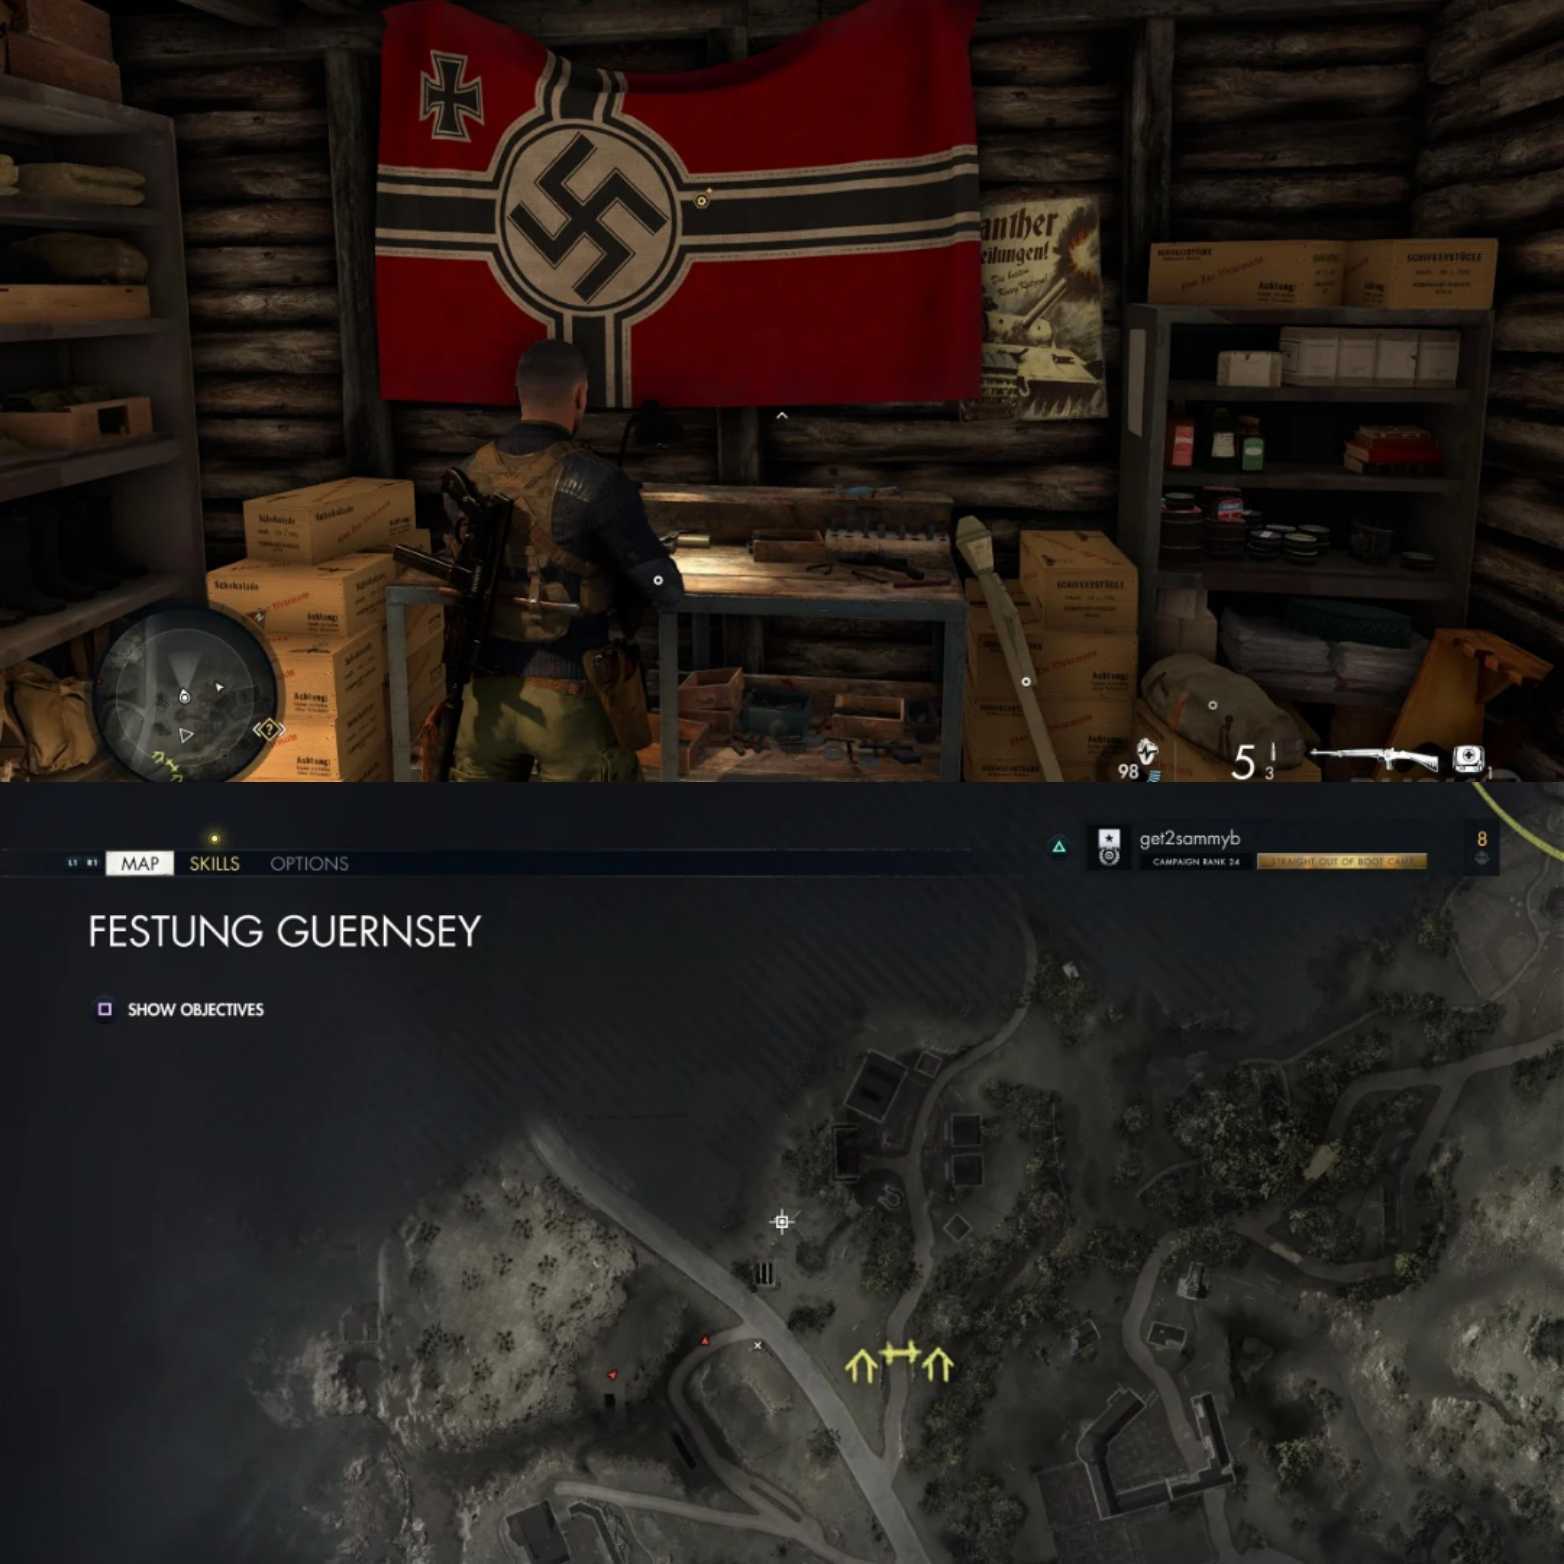
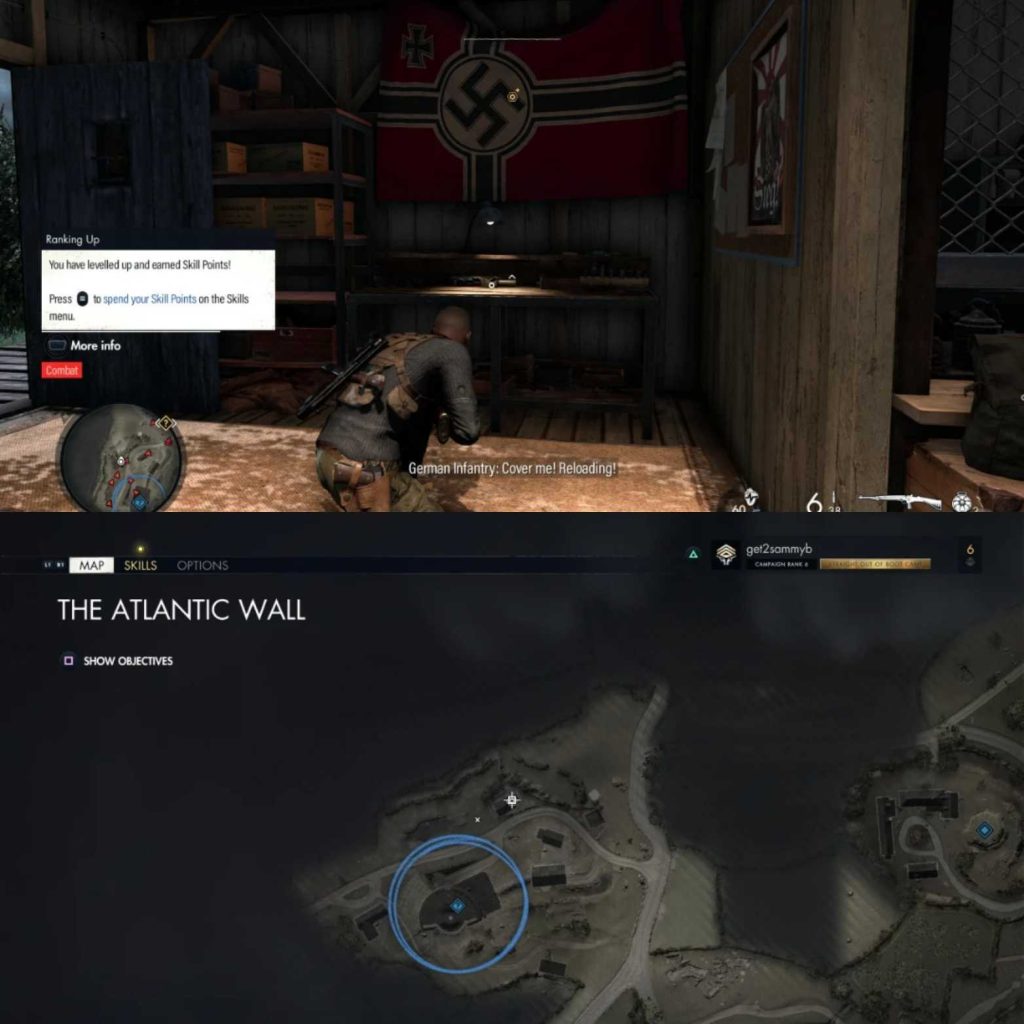
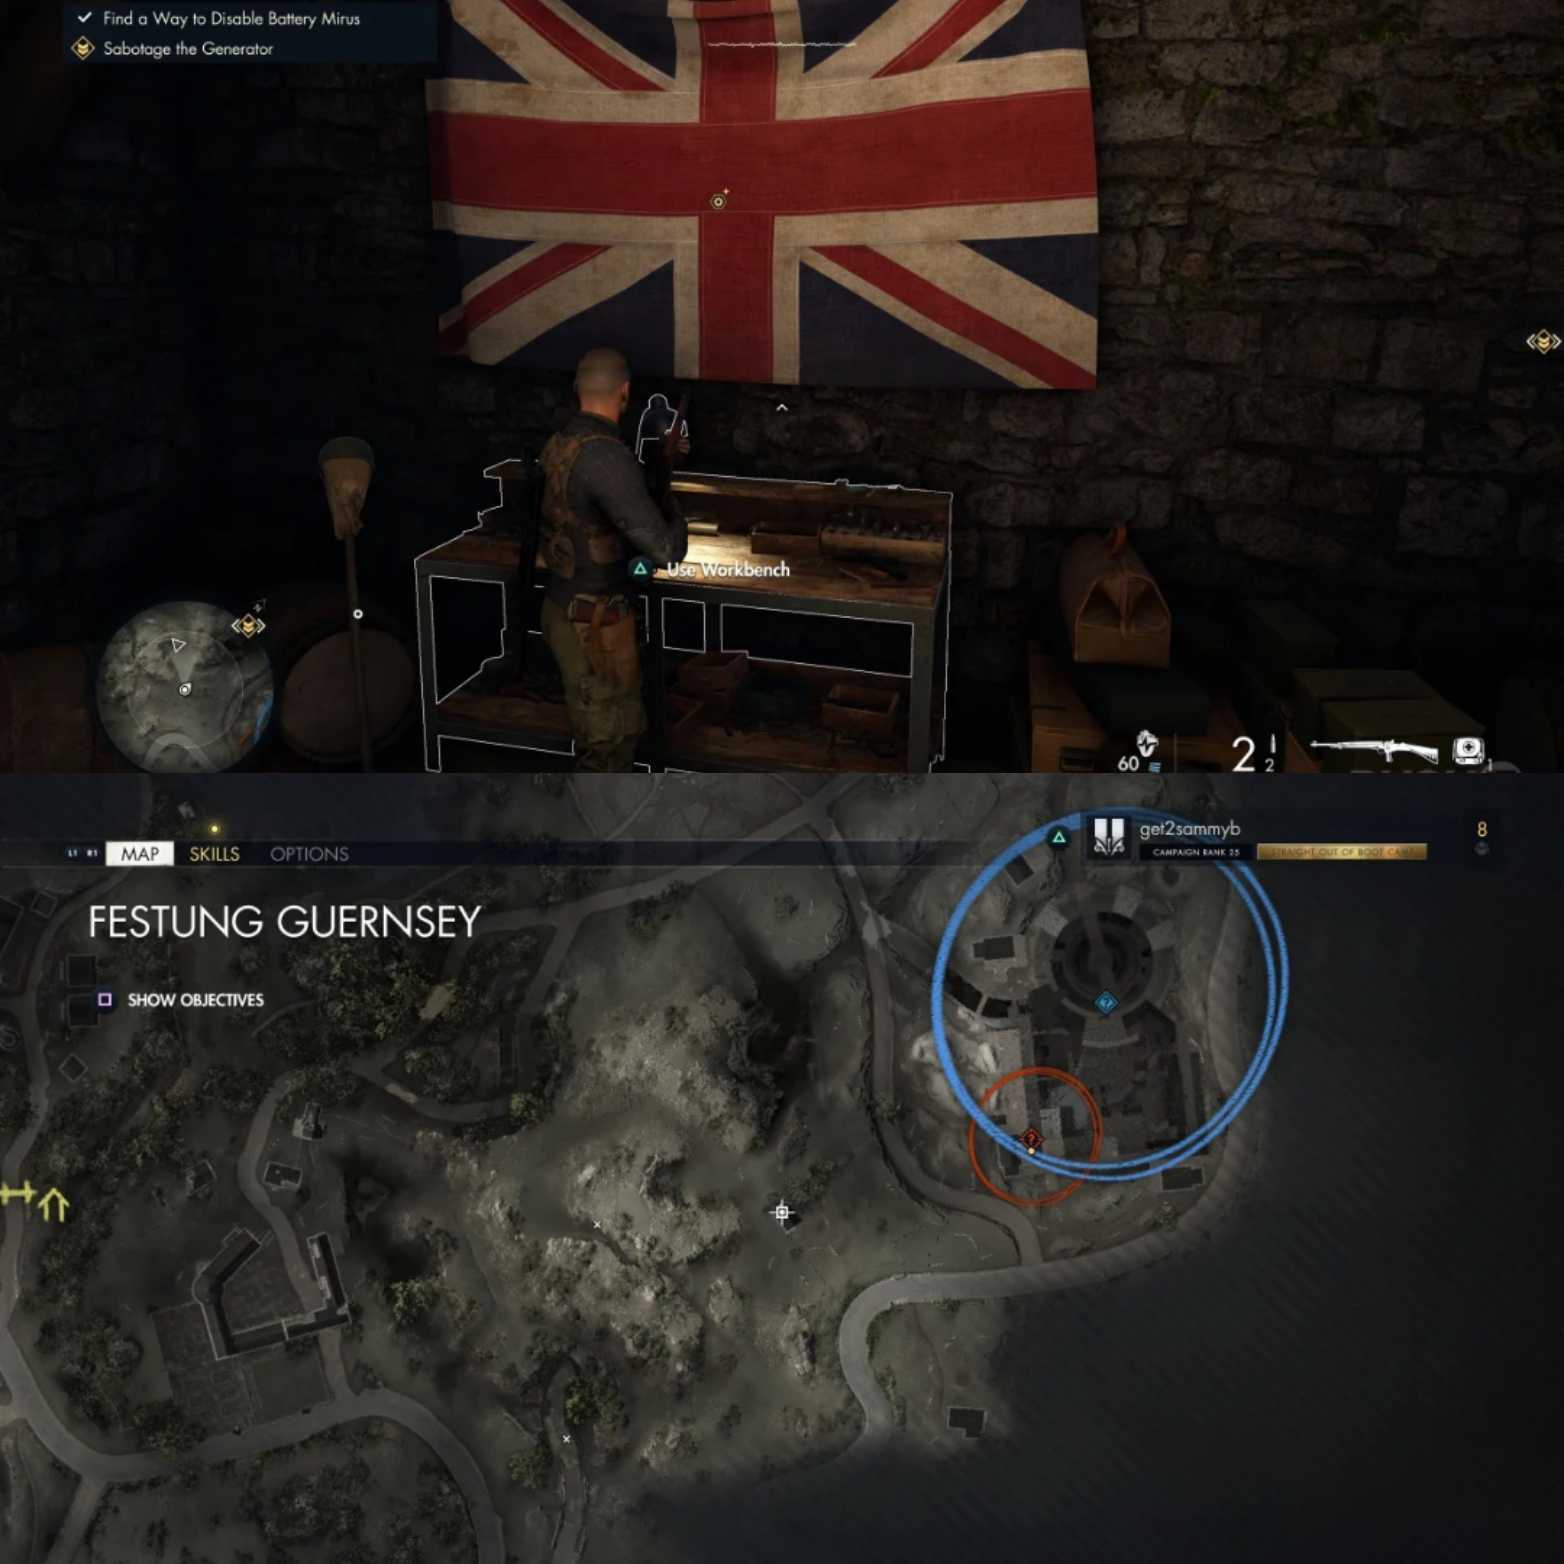
Workbench #3: This final workbench is relatively close to the infiltration objective you need to do. There are some trenches in the Northern part of the map, just east of the Operation Kraken prototype objective.
This is quite a crowded area with a tank too. So you should bring some explosive artillery to destroy it easily. Once you finally clear the area, head inside one of the sided rooms to find the pistol workbench.
Mission #6 Liberation
Workbench #1: Right before the bridge leading to some buildings. You have to detonate some explosives. Before you cross the bridge there should be a safe house on the right side as indicated in the image.
Simply climb up the wall on the side to access the window, and then enter the room for a rifle workbench.
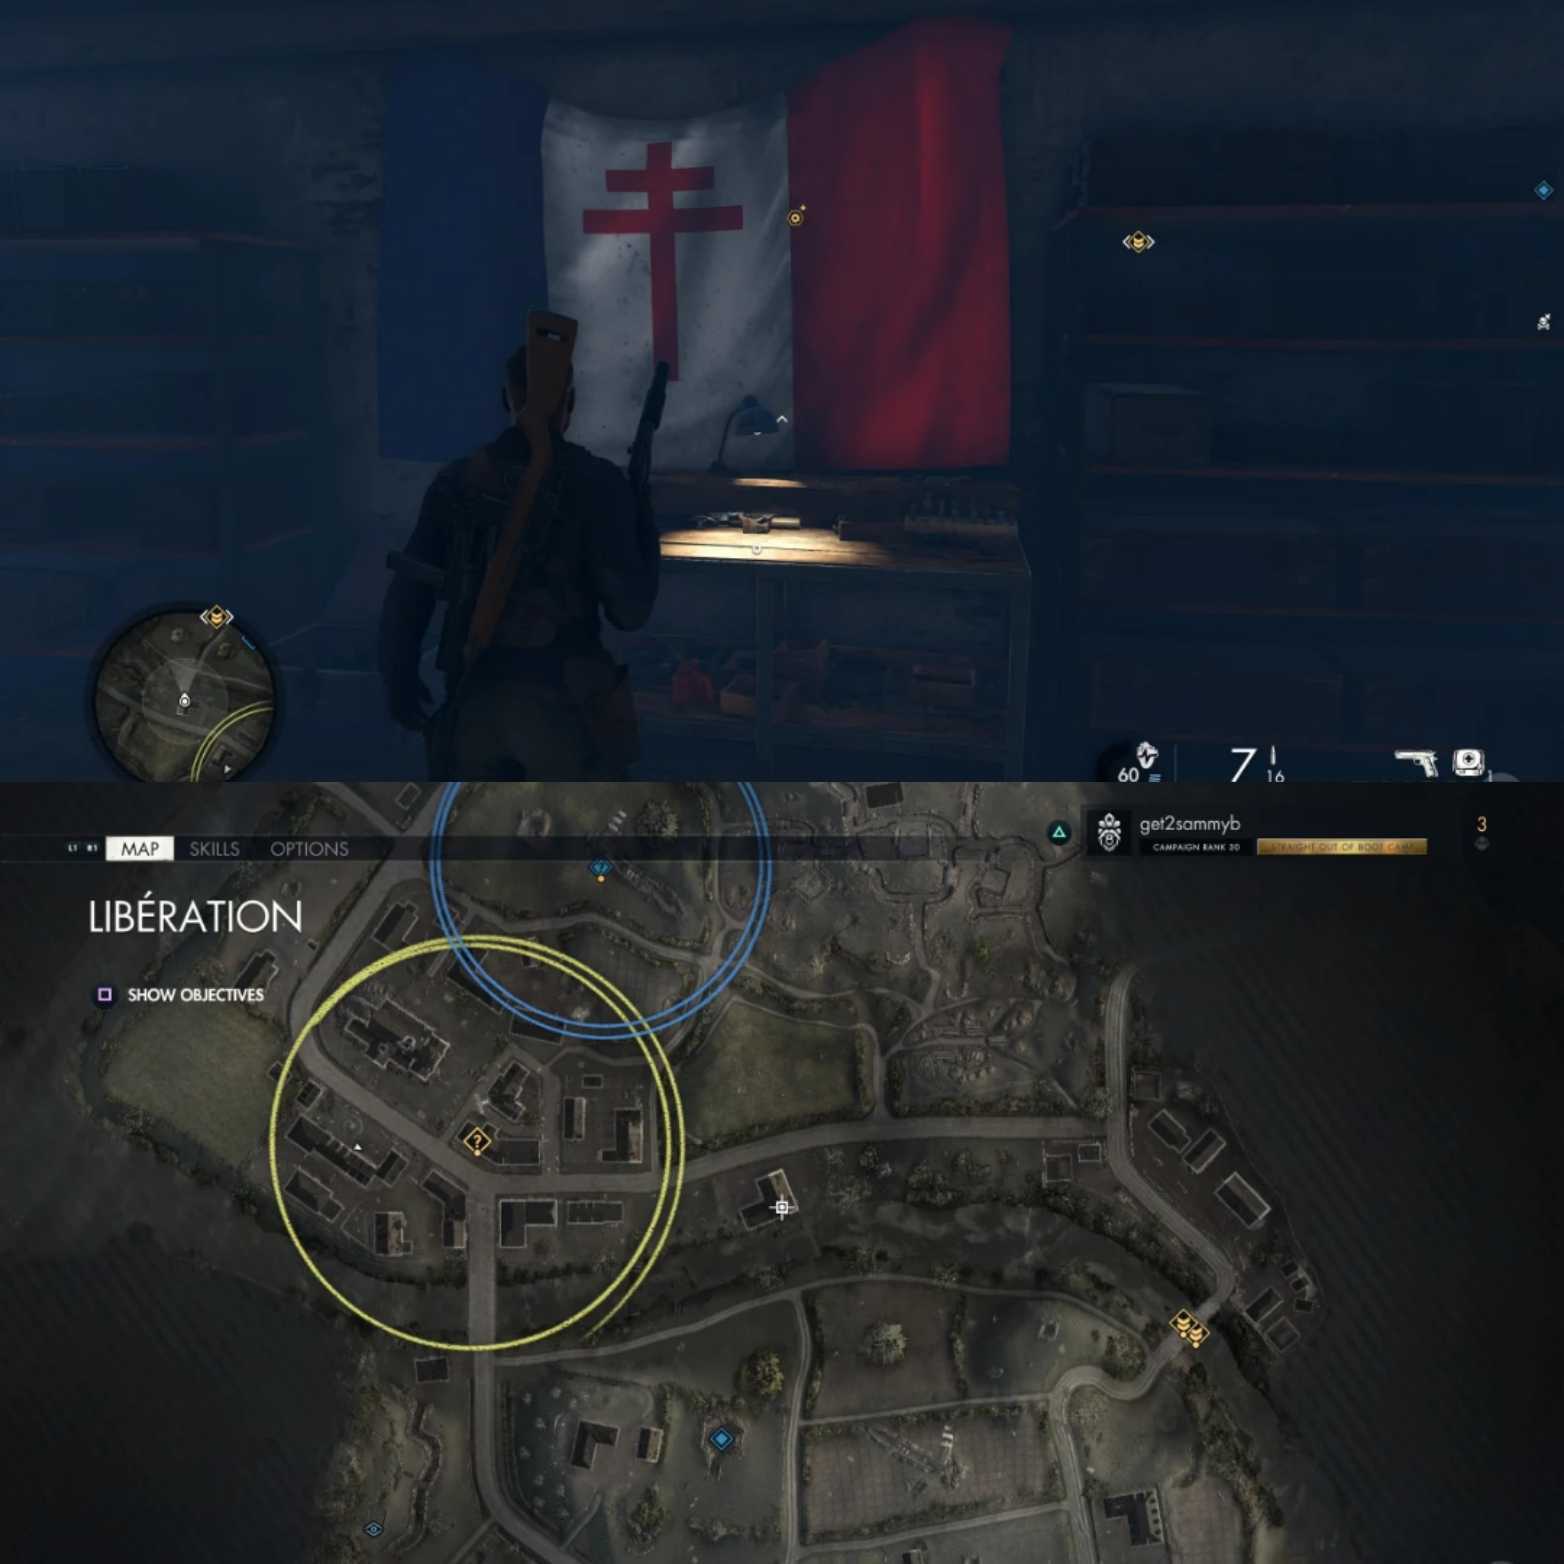
Workbench #2: This workbench is simple enough as you need to go to the location shown above. This is another resistance safe house in the middle of the map.
In the underground cellar area of the building, you will find the SMG workbench.
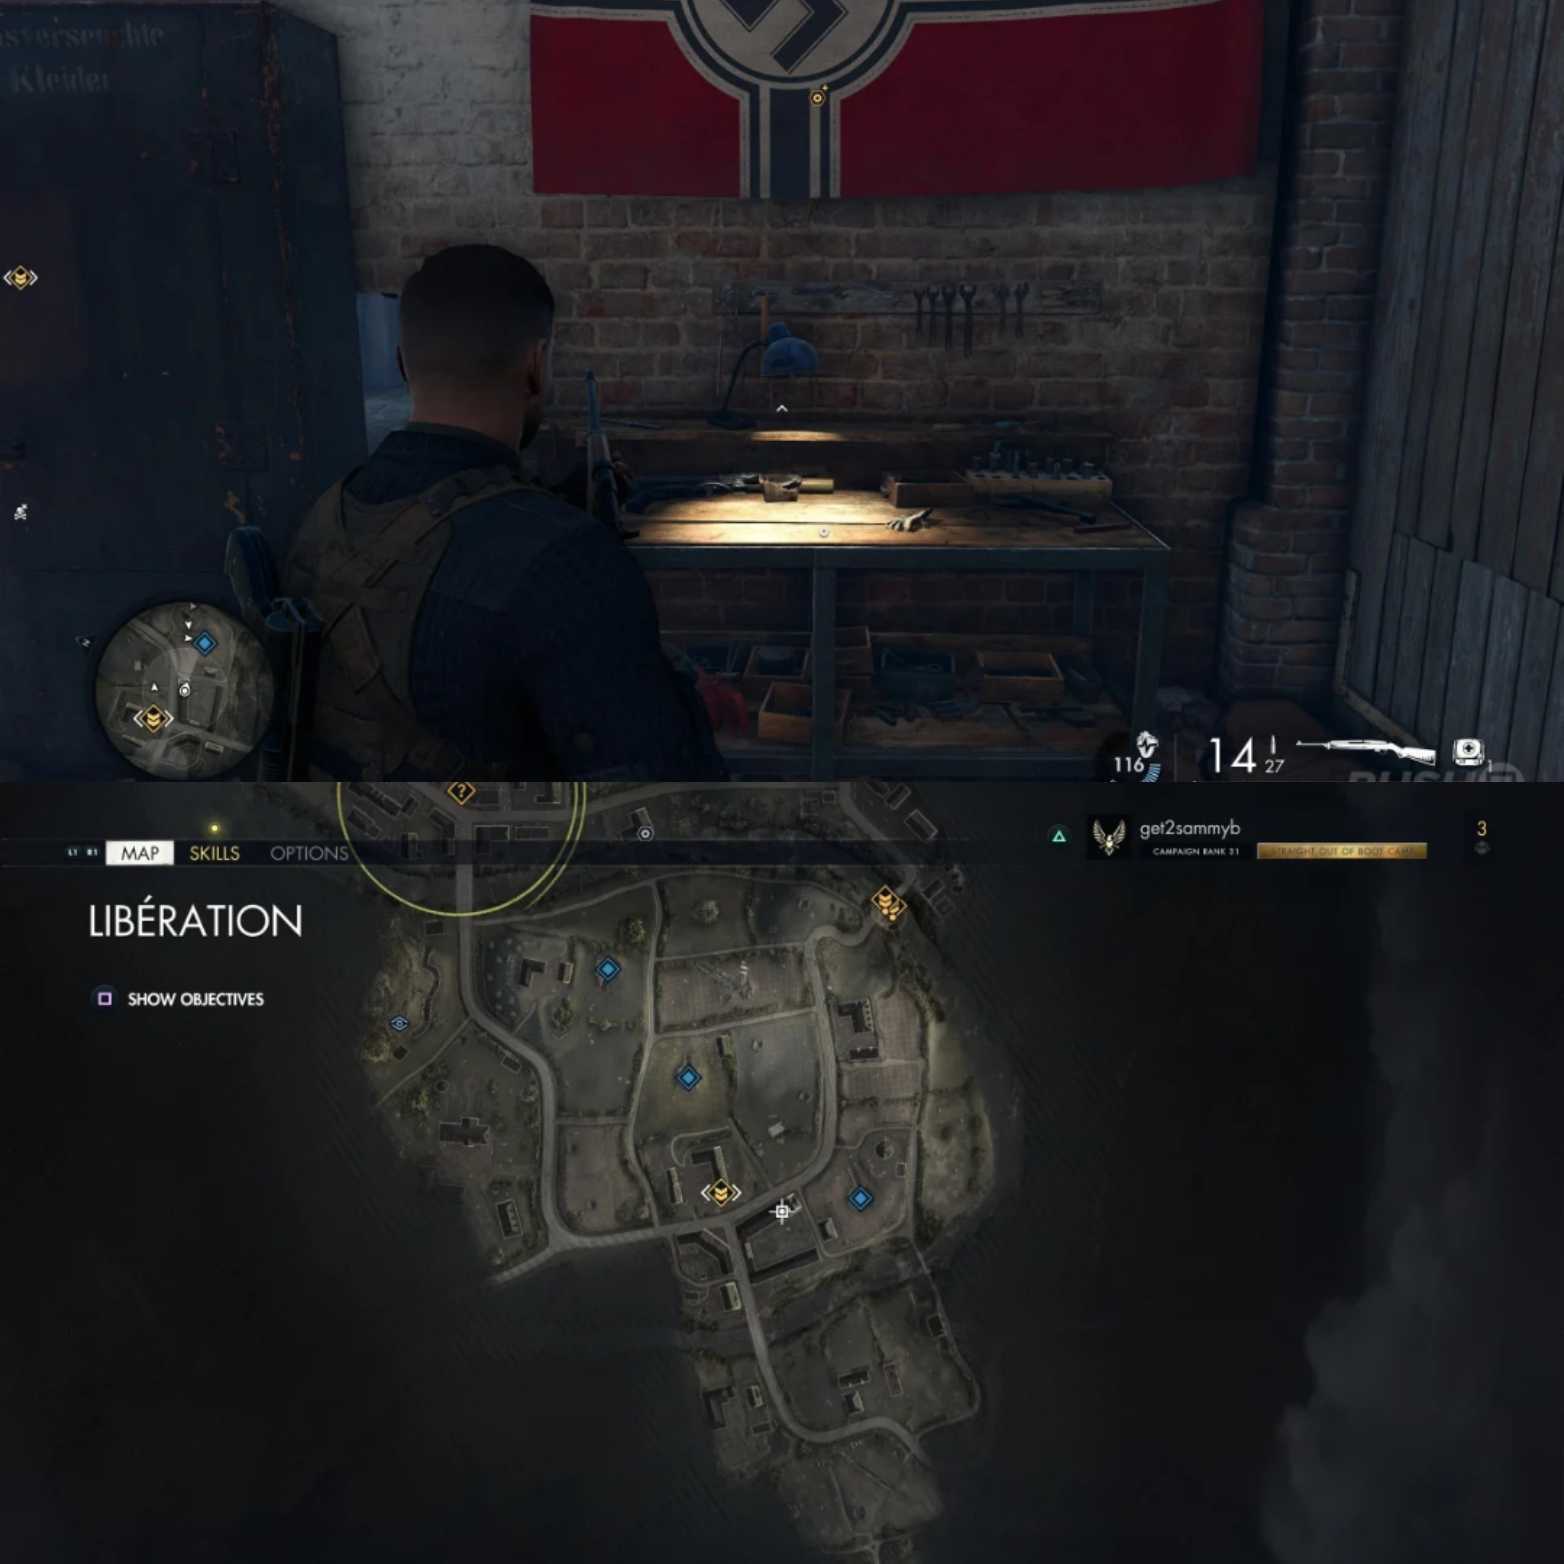
Workbench #3: Directly south of the main objectives, there should be a large C-shaped building. Once you head up there you should spot some scaffolding to climb up.
Follow that scaffolding around outside which will lead you back inside to a hole on the roof. There will be a room here with the Pistol Workbench.
Mission #7 Secret Weapons
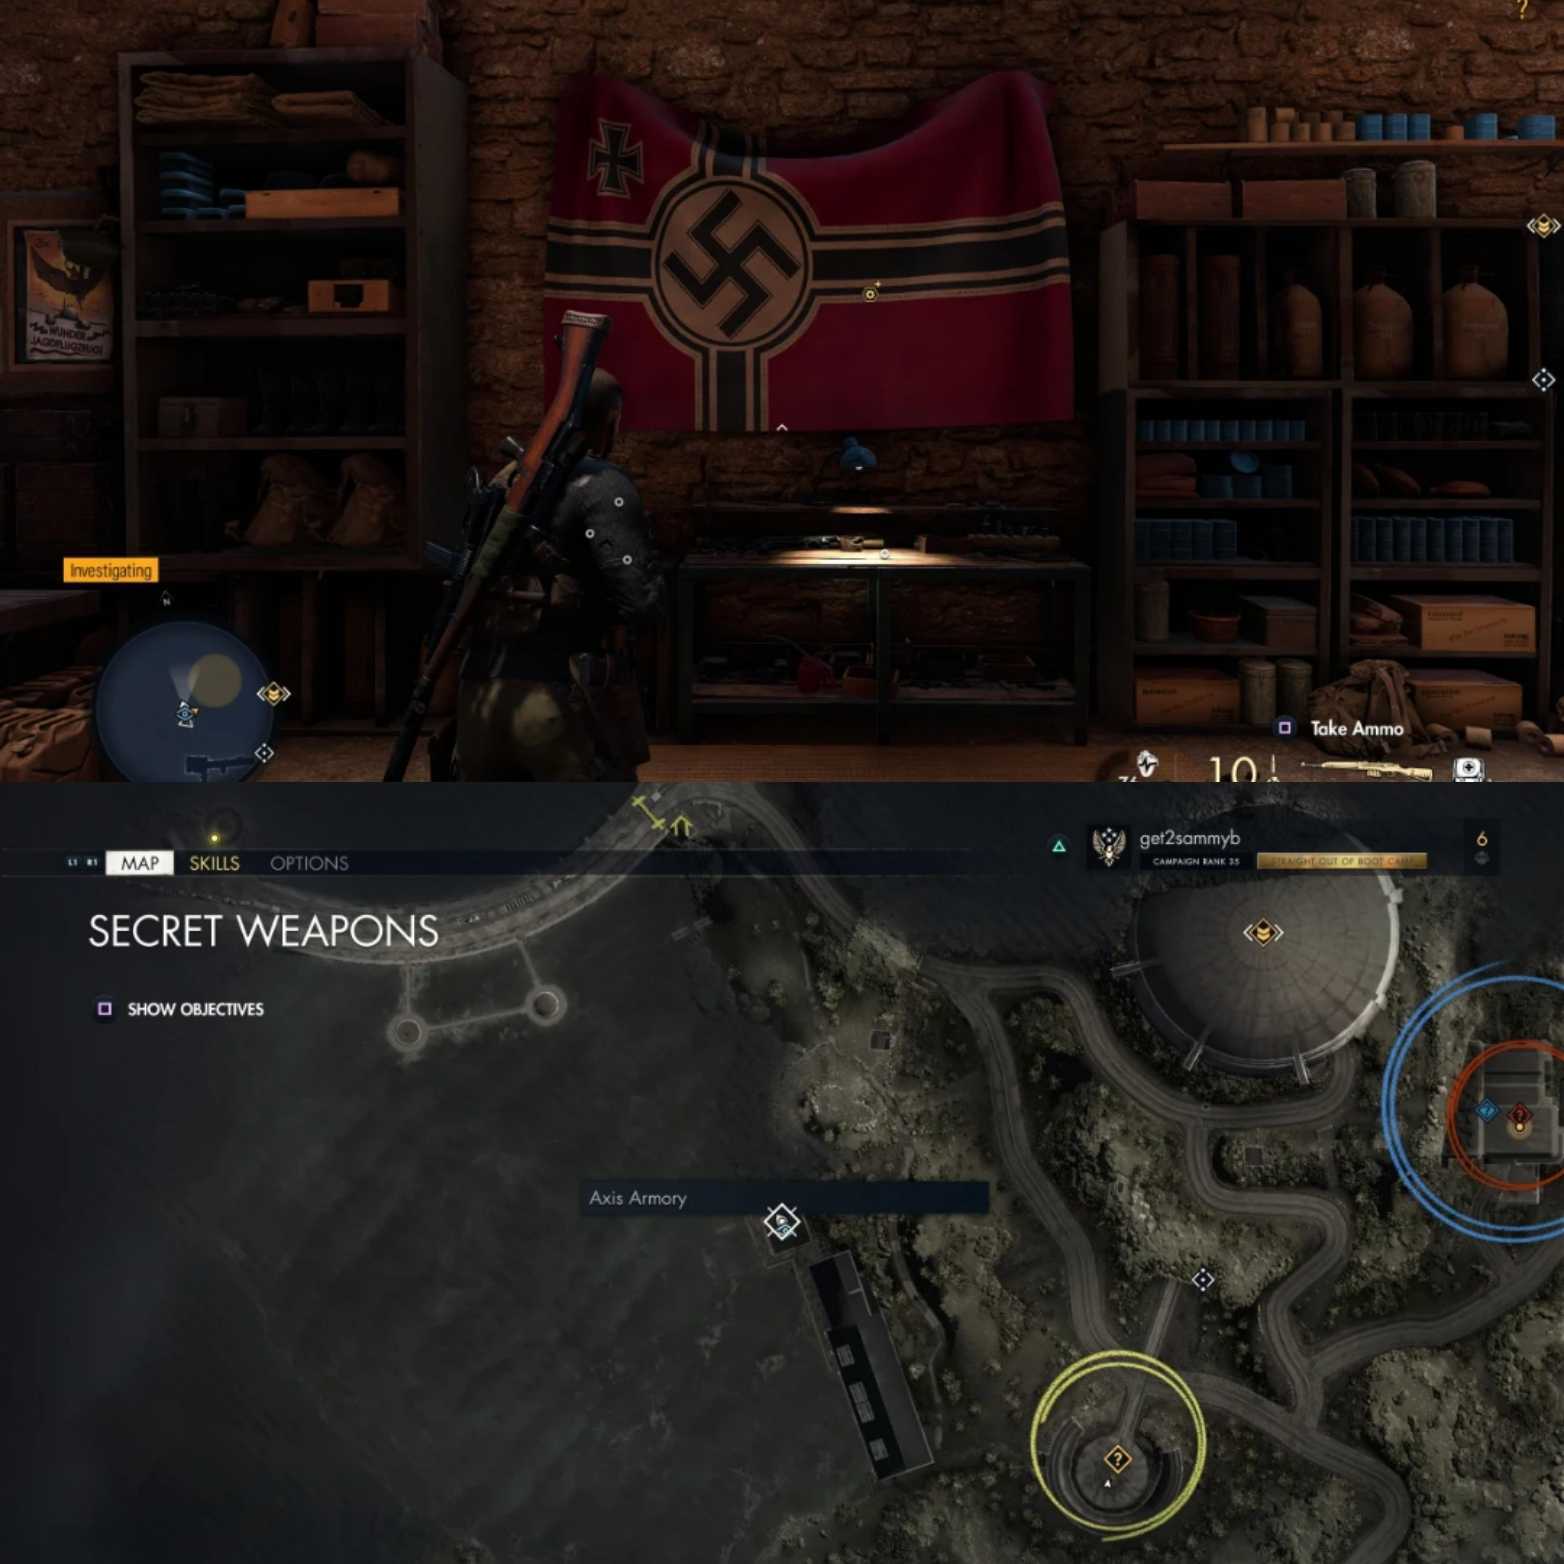
Workbench #1: North of where you sabotage the V2 rockets, there’s a small building which is an Axis Armory. As always you can blow it open via satchel charges or unlock it via a key from a nearby soldier.
Inside the armory, you will find the rifle workbench.
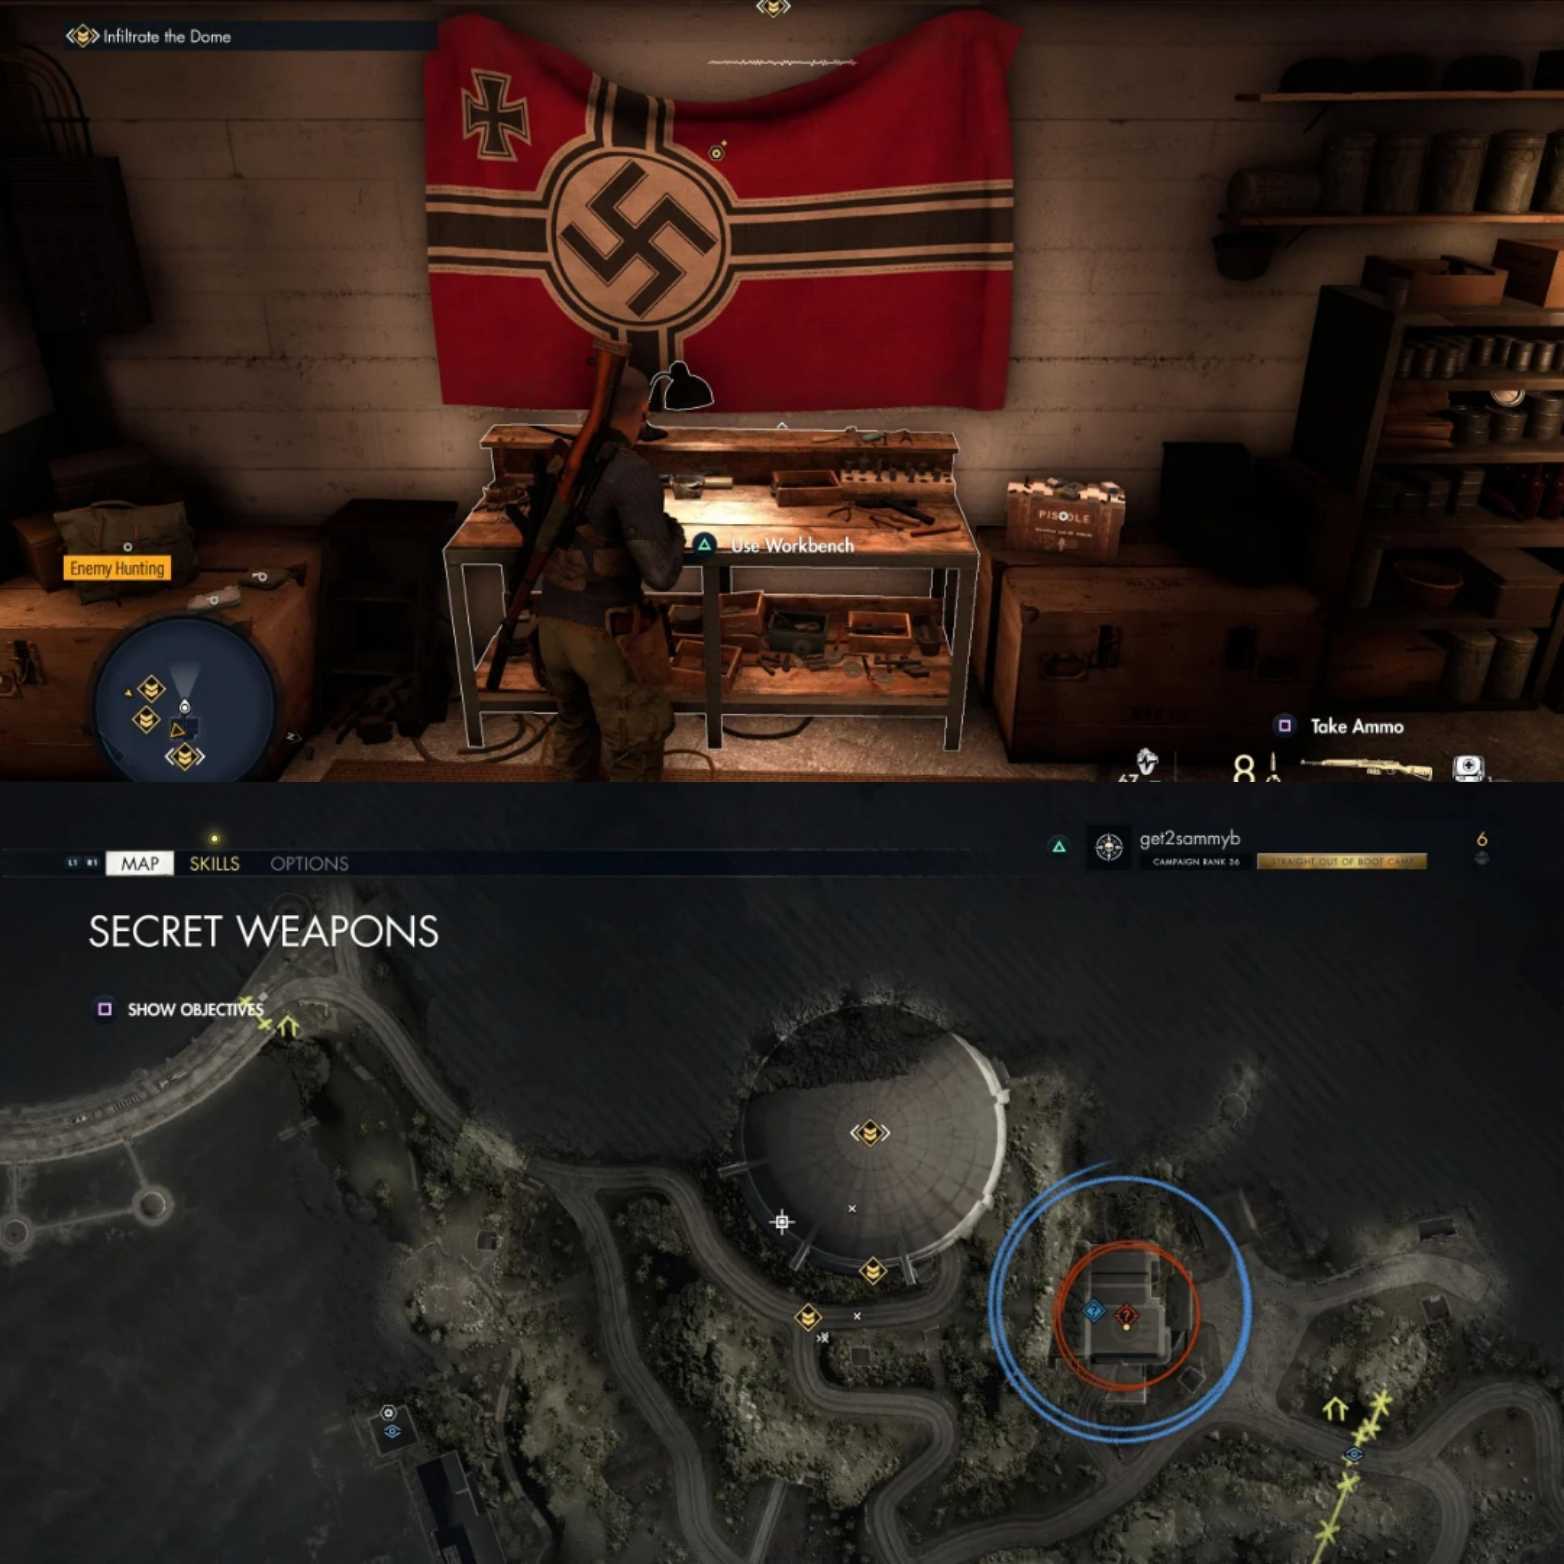
Workbench #2: You need to enter the large dome structure from the V2 launch site area. This should lead you through a corridor with a downward spiral staircase. Take the first exit into a room with showers and bedrooms.
Loot one of the soldiers for the Master Dome Key and unlock the door at the far end for the SMG workbench.
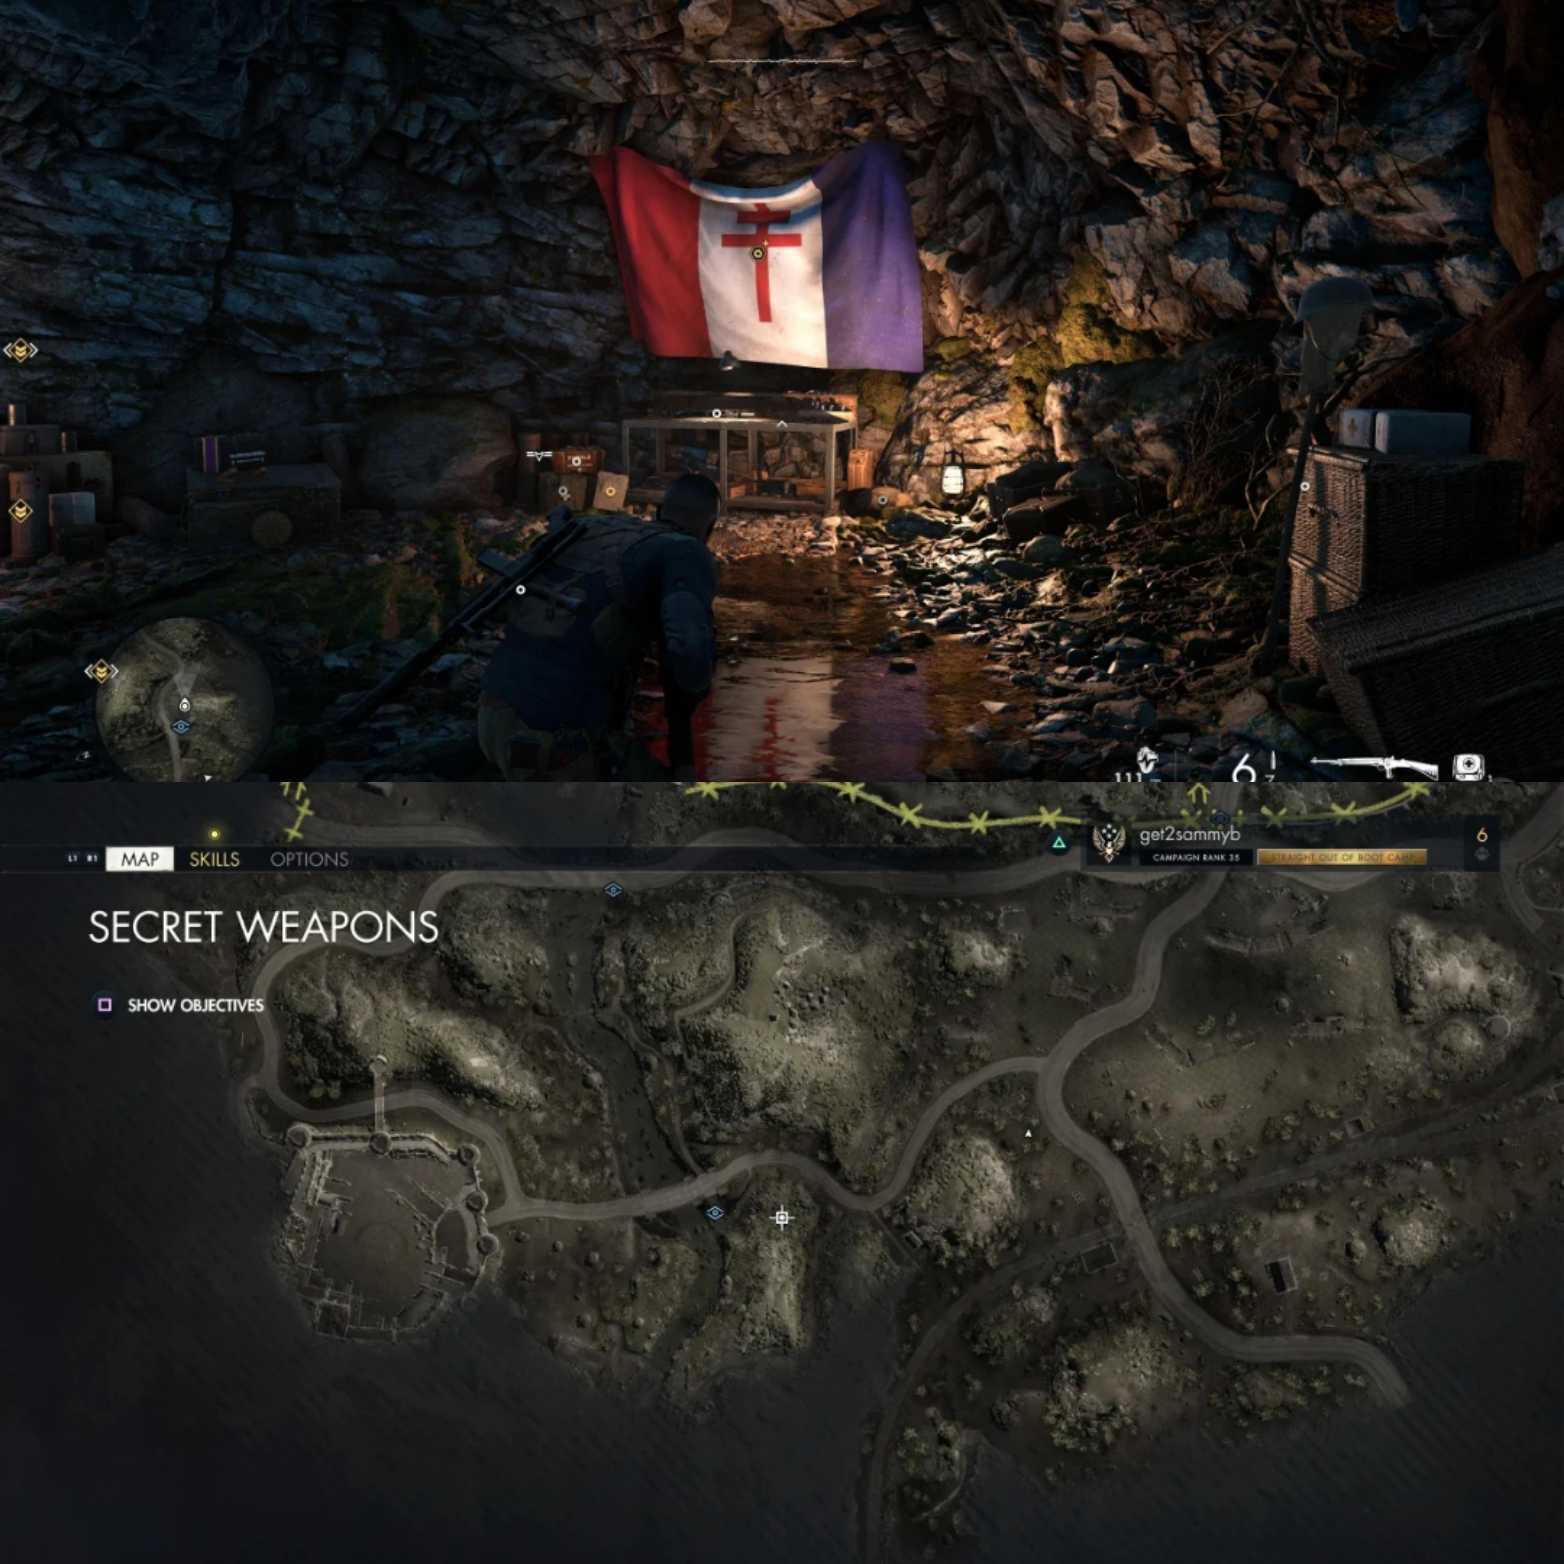
Workbench #3: The exact location as shown in the image above will be next to a Waterfall. It is located in the South part of the map and right next to the Castle area.
There is a cave alongside the waterfall. Break open the wooden panels to enter it and gain access to the Pistol workbench hidden inside it.
Mission #8 Rubble and Ruin
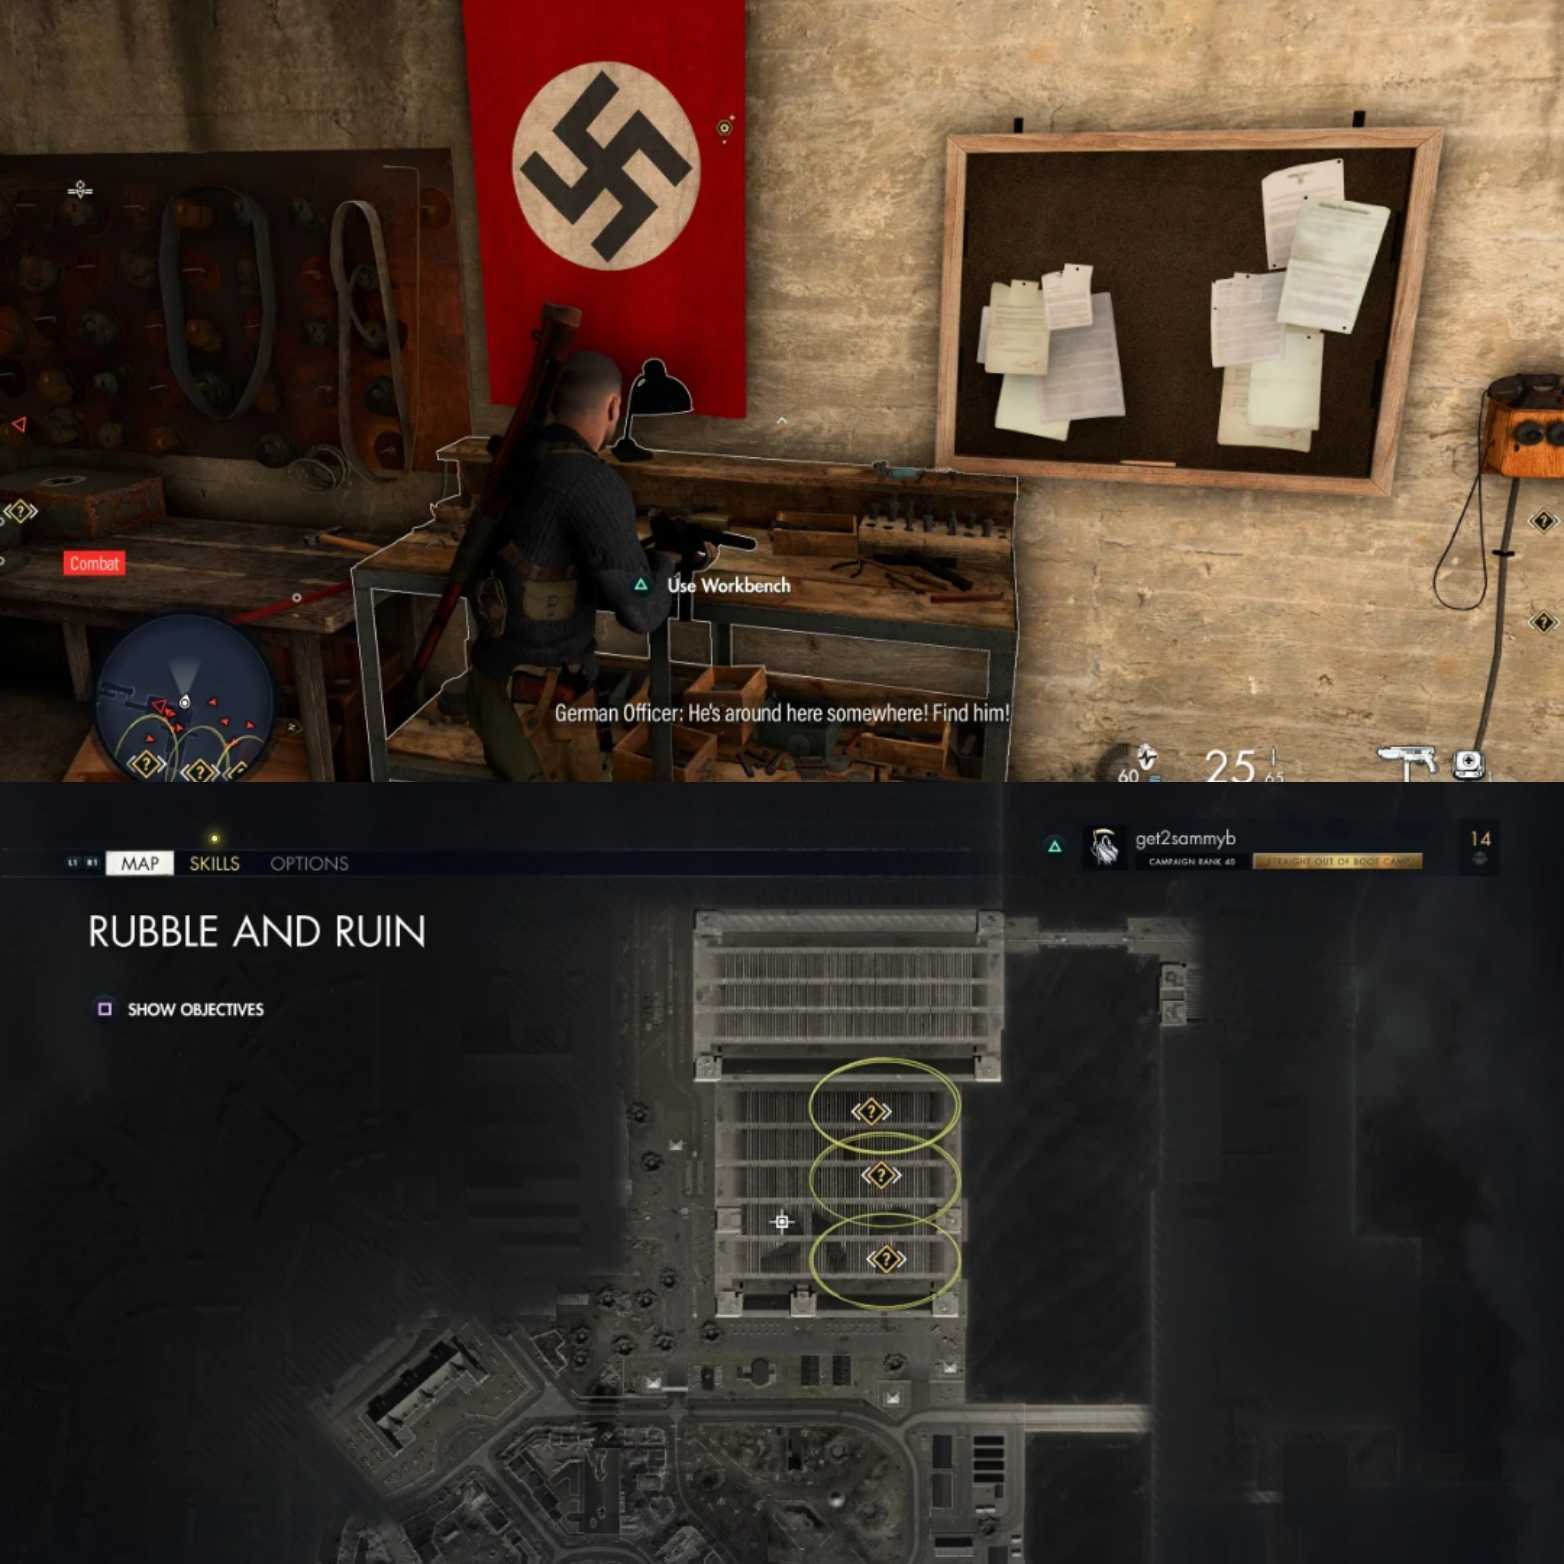
Workbench #1: This workbench can be found in the sewers area of the map. Right in the first zone where you fight the Nazi soldiers. You will find an Armory on the left side.
The soldiers standing in the center of most of the room will have the key to unlock it. Loot the key and unlock the armory to find the rifle workbench.
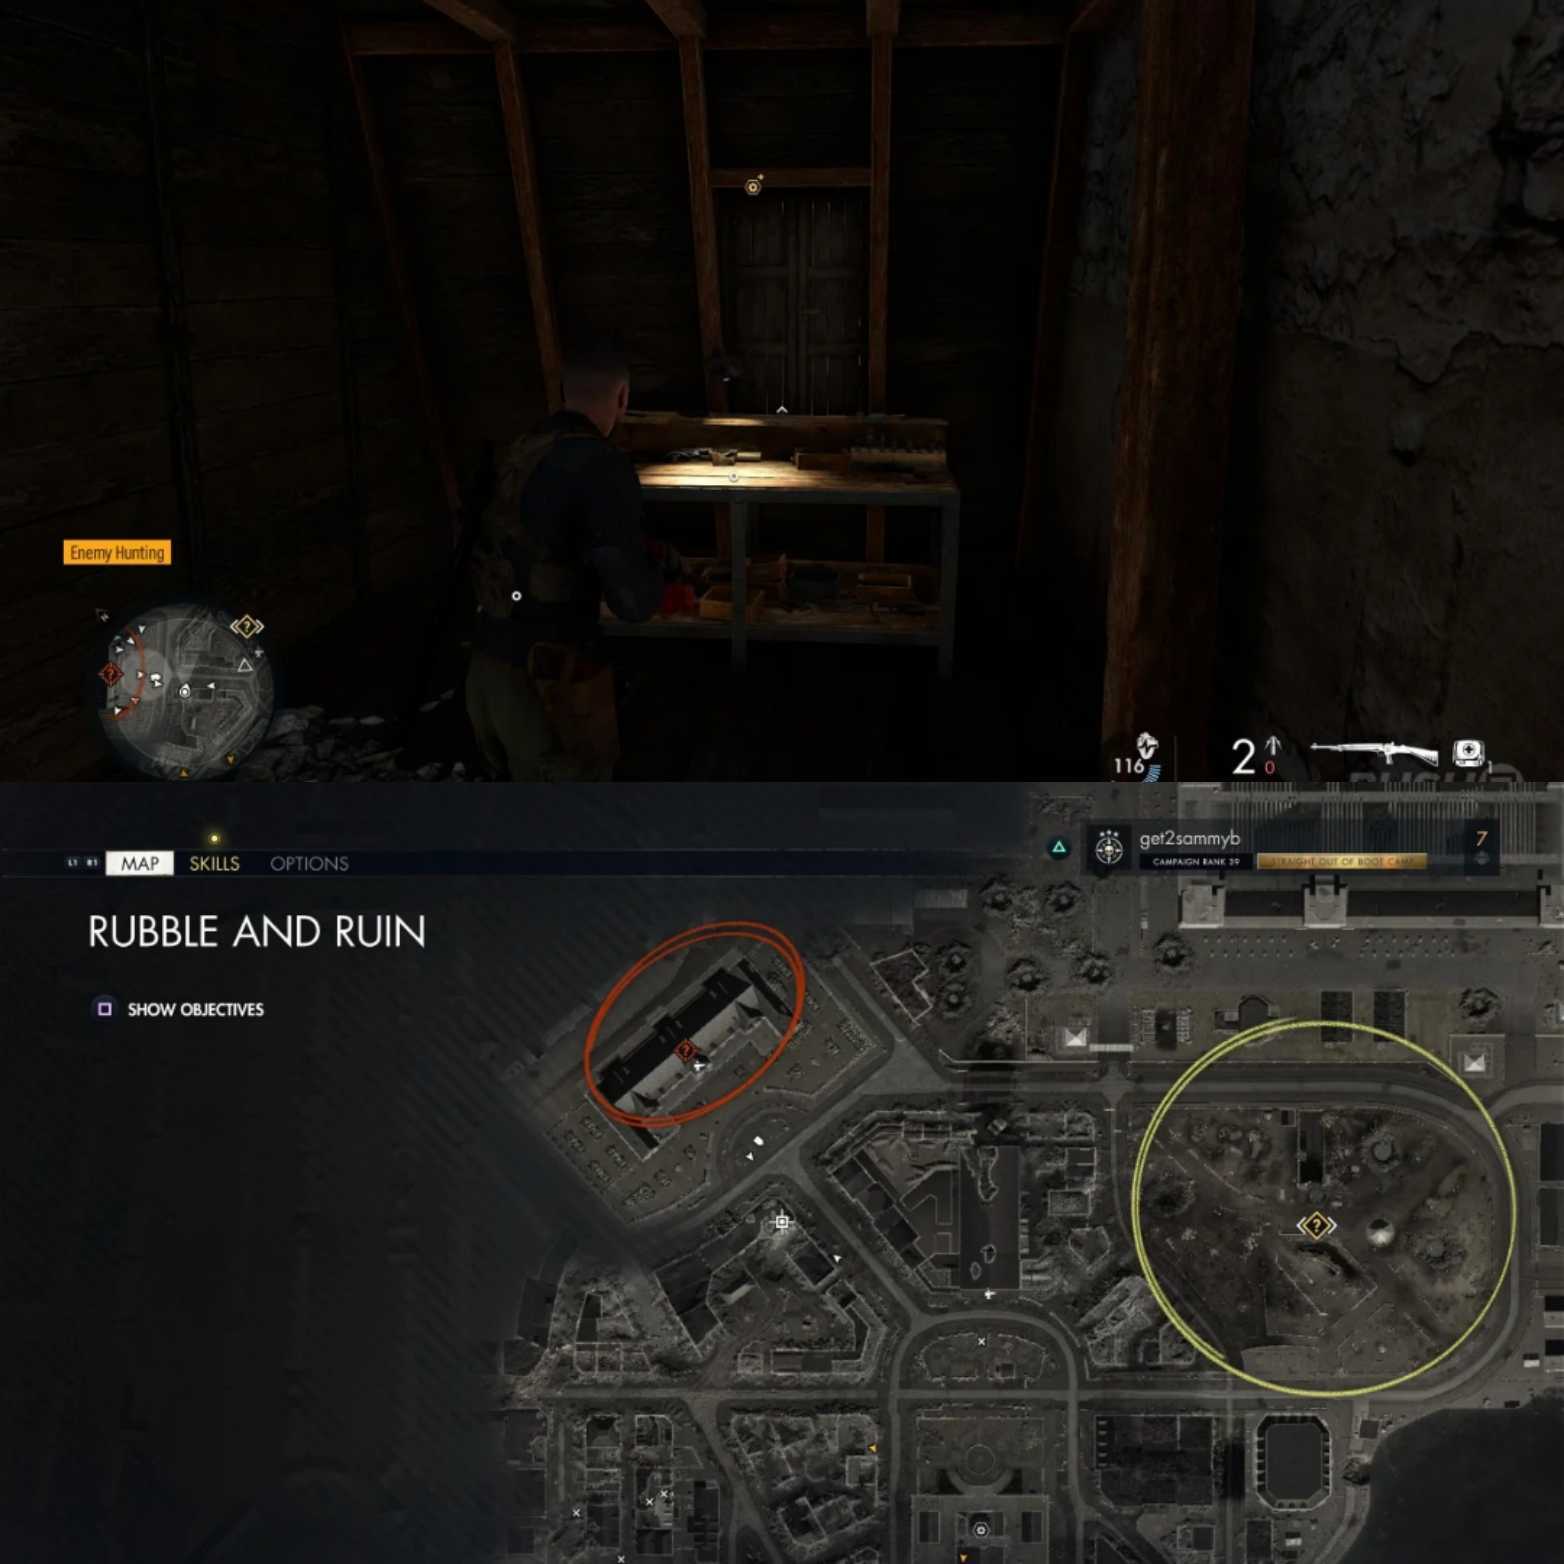
Workbench #2: This workbench is located on the North-West side of the map. It is exactly below the estate where you need to kill Yoshikawa for a kill mission. It is a resistance armory.
Simply climb up the building and jump across some damaged floorboards to reach the SMG workbench.
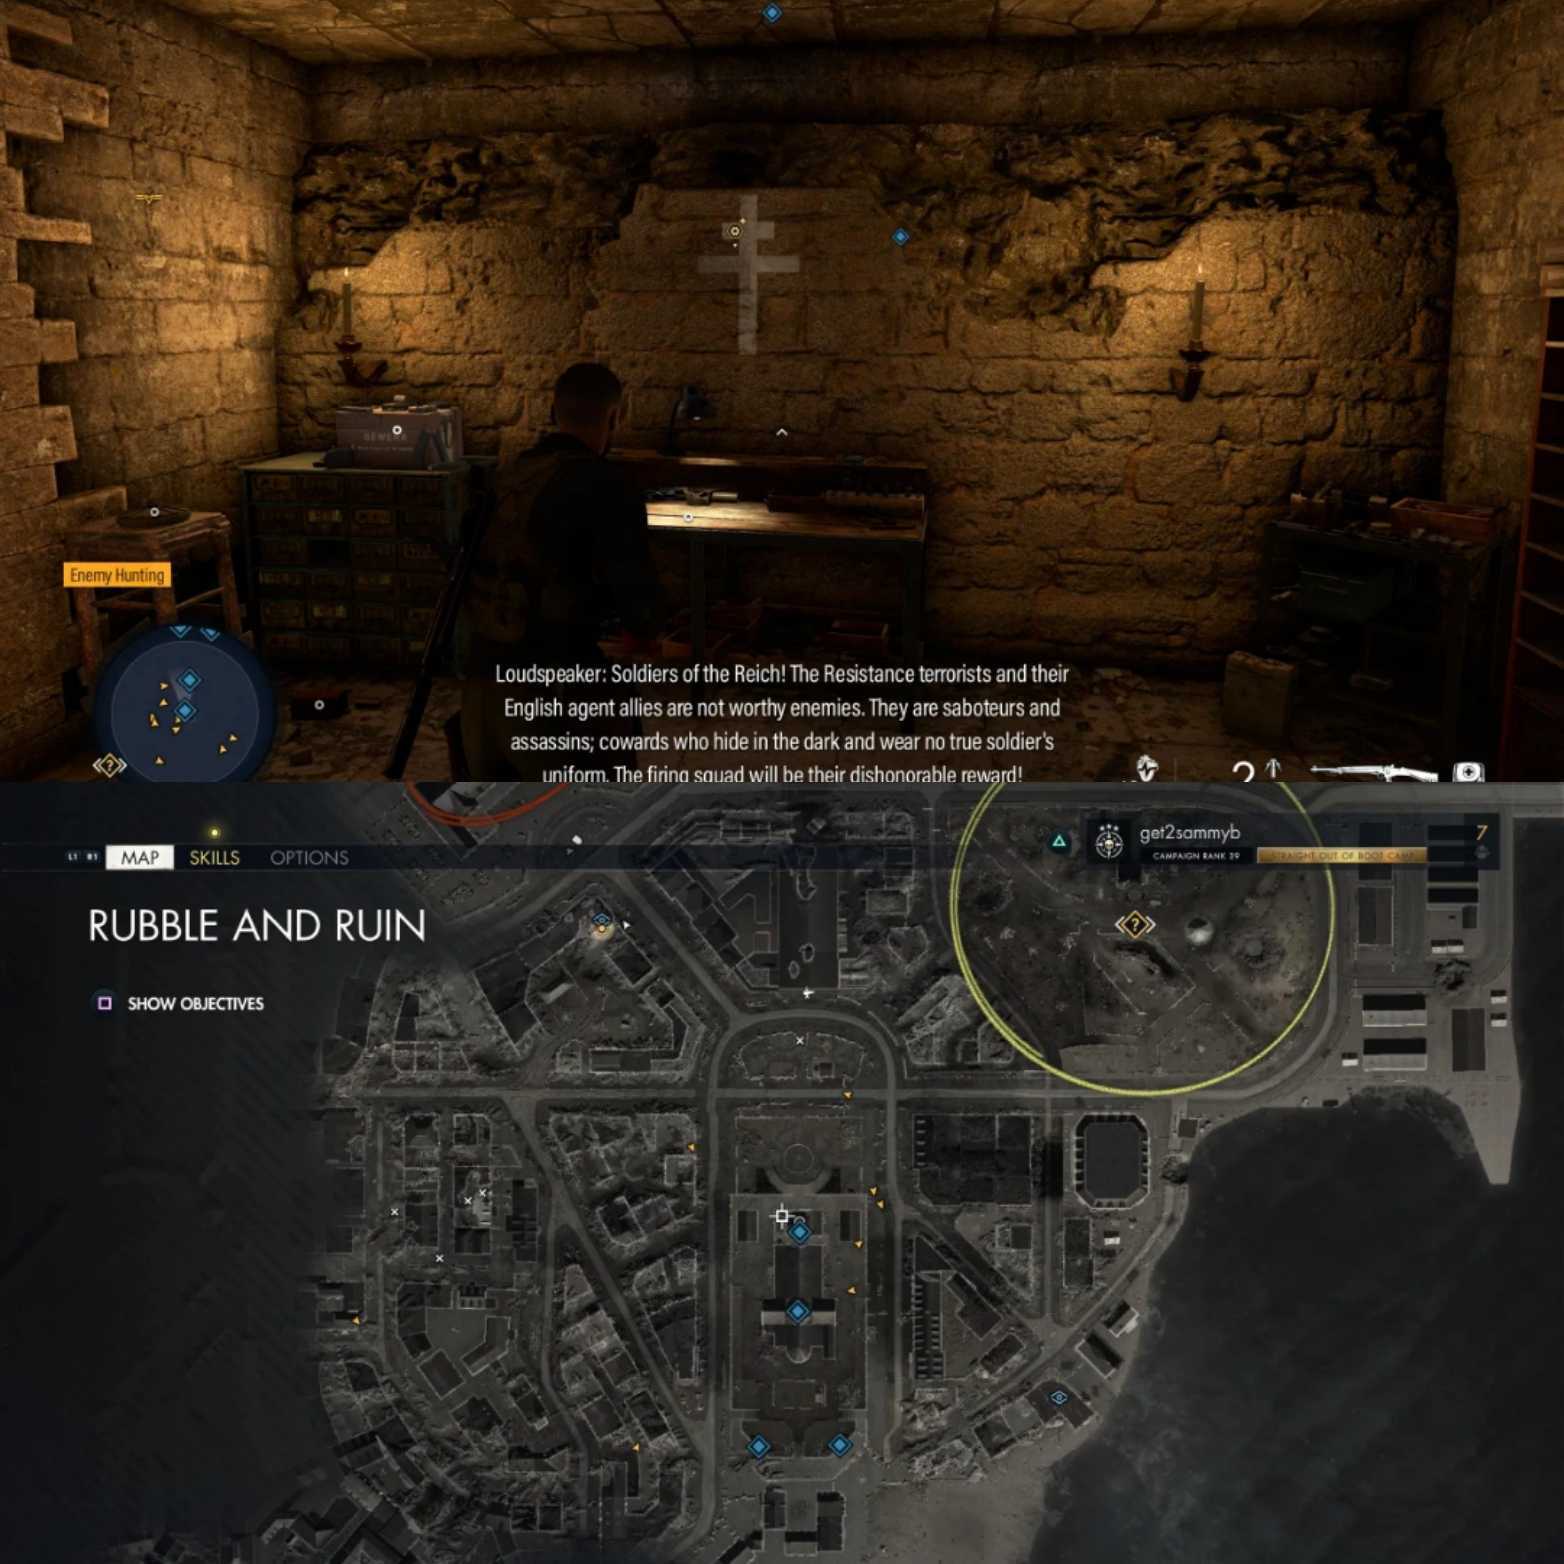
Workbench #3: The third and final workbench of this guide is located in the direct center on the map. You should be able to find a crypt key on the upper floors of this church.
Afterward, head back down to the ground floor and unlock the hatch opening in the floor. This will lead you to a room that will contain the pistol workbench.
The final Mission #9 Loose Ends does not have any workbenches to collect.
This concludes our in-depth guide on all the workbenches and their locations throughout Sniper Elite 5. Feel free to ask any questions related to the guide or location in the comments down below!
Thanks! Do share your feedback with us. ⚡
How can we make this post better? Your help would be appreciated. ✍