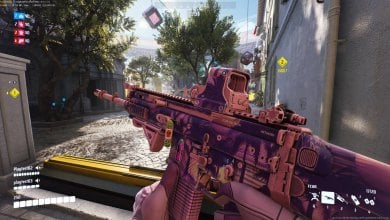
So you finally decided to hop on the hype train for THE FINALS, the blockbuster of a videogame on everyone’s to-play list, and you wanna know the best settings to maximize your FPS and game performance. Well then, you definitely came to the right place.
Not to brag, but I’ve been playing THE FINALS since its open beta, so I definitely know a thing or two about getting the most out of the game’s performance capabilities.
So sit back, relax, and read on as I let you in on my secrets to get the best FPS and performance in THE FINALS.
I’ve benchmarked The Finals on a PC with the following specs:
- OS: Windows 11 Pro 23H2
- System: Lenovo Legion 7i Laptop
- CPU: Intel i7-11800H
- GPU: NVIDIA RTX 3070 8GB
- RAM: 32GB DDR4
- Storage: Samsung 1TB SSD Gen 4
You’ll at least need to have an Intel i5-6600K or AMD Ryzen R5 1600 CPU, NVIDIA GTX 1050 Ti or AMD Radeon RX 580 GPU, and 12 GB RAM to run The Finals on your PC.
The settings below have a major impact on your in-game FPS the most:
- Ray Tracing
- View Distance
- Anti-Aliasing
- Shadows
- Post-Processing
- Foliage
- Shading
The Finals is really great to run on PC with minimal to no performance issues that I’ve experienced. Even though the game features great visuals and destructible environments, I’ve rarely encountered FPS drops even in the most intense situations. I was averaging around 80 FPS on launch at high to ultra settings (no RT) on 1600p resolution.
The FINALS Video Settings
Before getting into the details of why I picked these as THE FINALS’ best settings, here’s a quick preview of my recommended video settings for all players to squeeze out every last FPS from this game.
Overview Of Video Settings
| Setting | Recommendation |
|---|---|
| Window Mode | Fullscreen |
| Resolution | Native |
| V-Sync | Disabled |
| NVIDIA Reflex Low Latency | On |
| Resolution Scaling Method | NVIDIA DLSS |
| NVIDIA DLSS | Performance |
| Field Of View | 100 |
| Motion Blur | Disabled |
| Lens Distortion | Disabled |
| NVIDIA RTX Global Illumination | Dynamic |
| Overall Quality Level | Custom |
| View Distance | Medium |
| Anti-Aliasing | Low |
| Shadows | Low |
| Post-Processing | Low |
| Texture | Medium |
| Effects | Low |
| Foliage | Low |
| Global Illumination Resolution | Low |
| Graphics API | DirectX 12 |
Click on Settings > “Video” Tab to access these video settings.
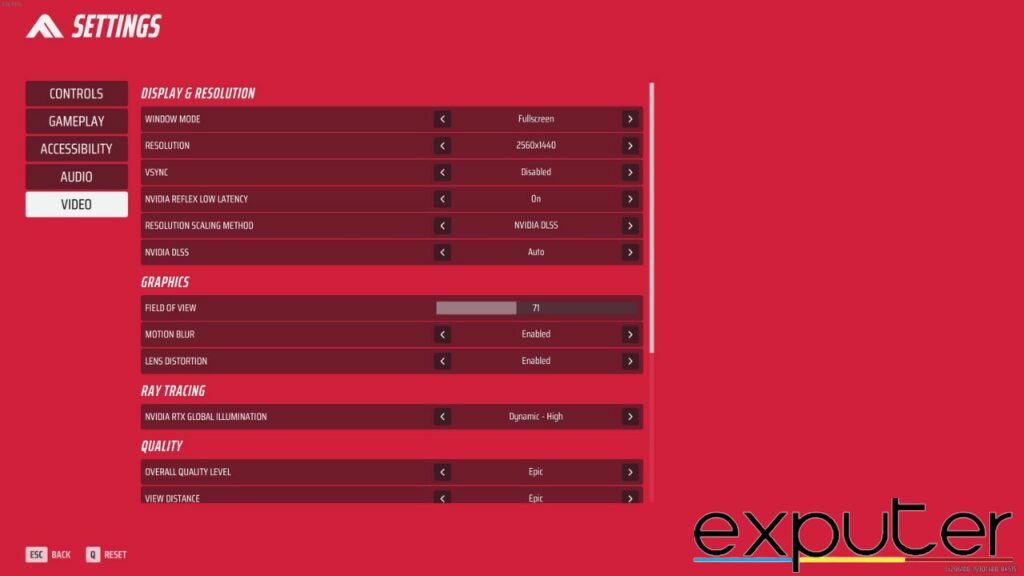
Read below as I have detailed why these specific settings are the best possible settings to boost your gameplay to the next level.
Window Mode: Fullscreen
In the world of competitive gaming, choosing fullscreen mode is crucial for maximizing performance. It grants exclusive access to your GPU, reducing input lag and ensuring smoother gameplay. Personally, it allowed me to enjoy the full potential of my monitor’s resolution and refresh rate, enhancing my gaming experience.
Resolution: Native
Native resolution means the game runs at the monitor’s optimal display settings. This results in the most efficient utilization of your graphics card and CPU, reducing the need for unnecessary upscaling or downscaling. All these factors contribute to a faster refresh rate aka more FPS and I, myself, saw a visible difference in my game quality by choosing the Native option.
V-Sync: Disabled
I’m well aware that V-Sync is helpful in reducing screen tearing, but the problem is that it can cap your frame rate to your monitor’s refresh rate.
By turning it off, your GPU can render frames at its full potential, leading to higher FPS and smoother gameplay. This ensures that you have a competitive edge in fast-paced scenarios, and in my experience, those split-second reactions can make all the difference.
NVIDIA Reflex Low Latency: On
This feature minimizes input lag by synchronizing GPU rendering with your mouse and keyboard inputs. With reduced latency, your reactions become more immediate, ensuring you stay ahead in critical moments. This not only enhances your competitiveness but also allows your hardware to work more efficiently.
In addition, I recommend turning on the “On + Boost” setting if you really want those extra crispy reaction rates.
Resolution Scaling Method: NVIDIA DLSS
Opting for NVIDIA DLSS as your resolution scaling method is a surefire way to supercharge your FPS and overall performance! DLSS leverages AI-driven upscaling to maintain visual quality while reducing the rendering load on your GPU.
For me, this resulted in a substantial increase in FPS, so I’m sure you’ll benefit greatly from this setting too.
NVIDIA DLSS: Performance
This option sacrifices a bit of visual effects to significantly boost frame rates, ensuring smoother gameplay, especially in intense, competitive scenarios. Now I know we all want our game to look the best, but with DLSS set to “Performance“, your GPU can render frames more swiftly.
Field Of View: 100
This one’s more of a preference setting and doesn’t actually have an impact on your FPS and game performance but it will define how the experience of playing the game is for you.
For me, I set my Field Of View to 100. I generally recommend choosing an FOV between 80-100 which allows you to focus properly while keeping your in-game surroundings in check.
Motion Blur: Disabled
Motion Blur, for me, is one of the most useless features in a competitive game and it hinders the game’s FPS. It adds visual effects that can strain your GPU, reducing overall performance. Thus, this decision provided me with a considerable competitive advantage, allowing me to react swiftly to in-game events and maintain a consistent, high FPS.
Lens Distortion: Disabled
One of the best settings for THE FINALS is to turn off Lens Distortion. Lens Distortion adds complex visual effects that can place a heavy load on your GPU, potentially causing frame rate drops and reducing overall performance.
So by deactivating this feature, you’ll get a more buttery gaming experience with consistently high FPS, allowing you to focus on gameplay and competitive success.
NVIDIA RTX Global Illumination: Dynamic
Now ray-tracing has always been a preference option but I want my game’s visuals to look good too so I opt to keep it on and set it to Dynamic.
Dynamic mode optimizes the use of ray tracing technology. This ensures a balance between visual quality and performance, allowing your system to still deliver good FPS without sacrificing the benefits of ray tracing.
Overall Quality Level: Custom
I’ll keep this one simple for you. By selecting custom, you’re basically telling the game the overall quality should be according to your PC’s specs and how much high-quality rendering it can handle. This essentially allows your PC to choose the quality level best suited for providing the maximum amount of frames.
View Distance: Medium
If you’re like me and you’ve been playing games like these for a long time, then it should come as no surprise to you that the universally agreed-upon option for view distance is about medium quality.
This takes the pressure off of your PC to render objects far away in the distance in-game and instead, your system can focus on providing better FPS and other quality improvements while having not much effect on the game itself.
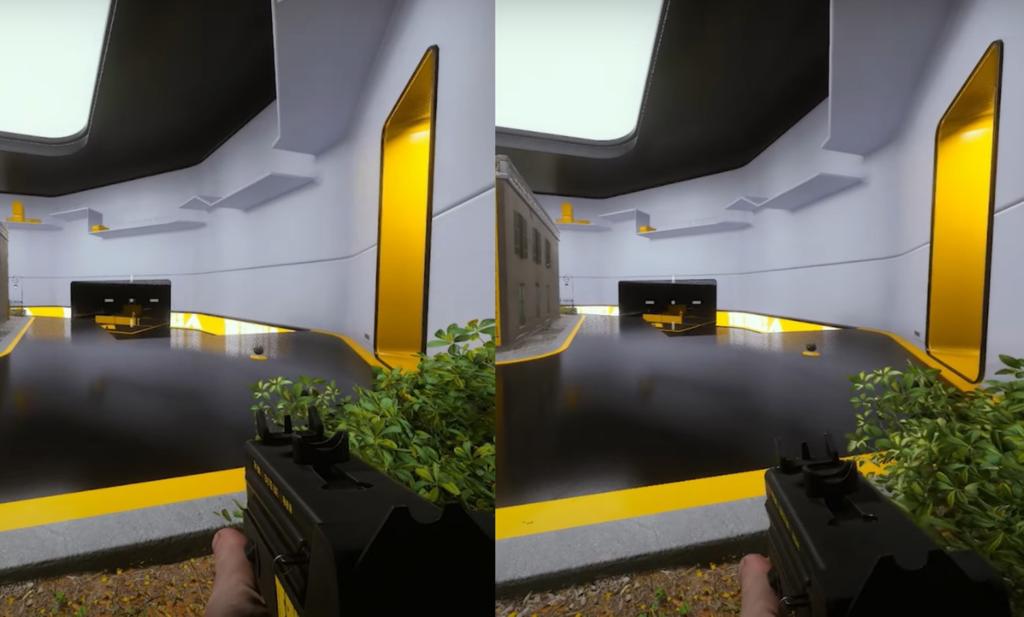
Anti-Aliasing: Low
Anti-aliasing smooths out jagged edges in the game’s visuals, but higher settings demand more processing power. By setting it to “Low,” you allow your GPU to focus on rendering frames efficiently. This results in a higher and more stable frame rate, providing a competitive edge in fast-paced scenarios.
Shadows: Low
Much like Anti-Aliasing, adjusting the Shadows setting to “Low” is a smart choice for achieving maximum FPS and top-tier performance. Shadows, while adding depth and realism, can be demanding on your GPU.
By setting them to “Low,” you minimize the graphical workload, allowing your hardware to allocate more resources to other essential aspects of the game.
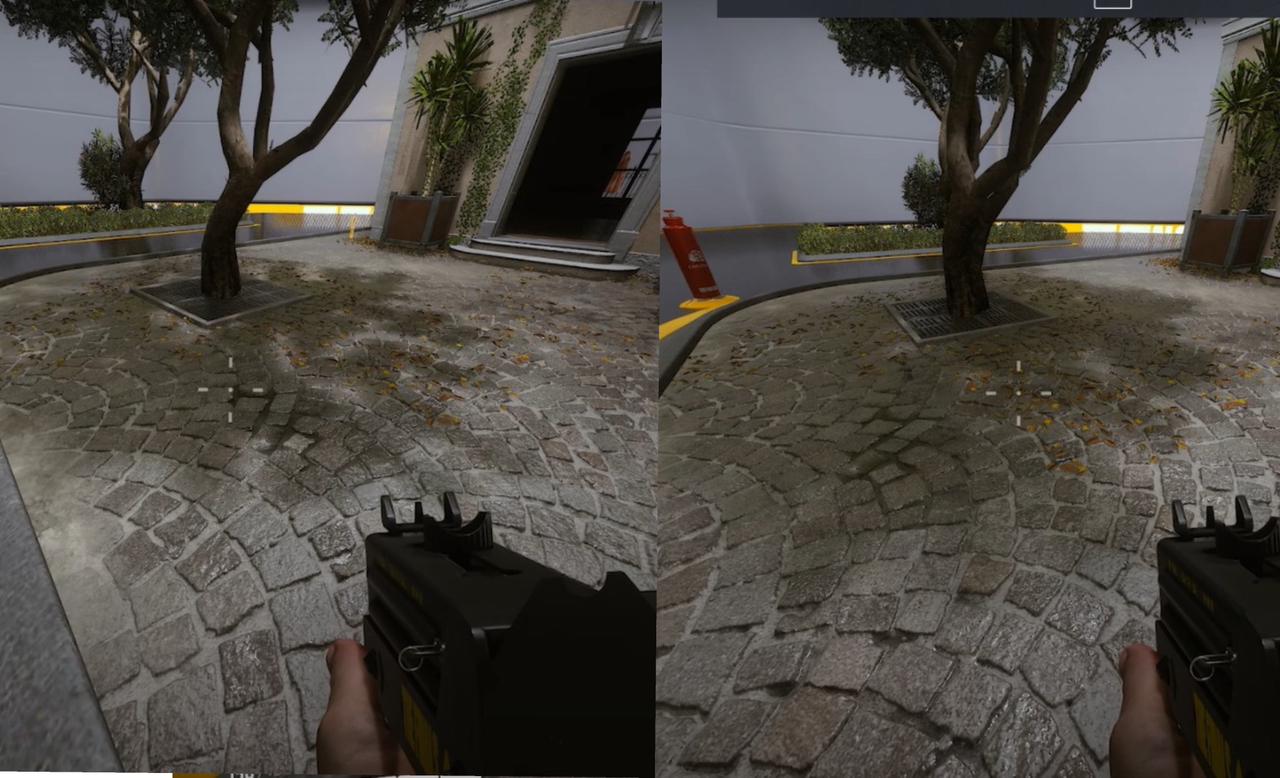
Post-Processing: Low
Post-processing effects enhance visual aesthetics but can be resource-intensive. By choosing the “Low” setting, you reduce the demand on your GPU, enabling it to focus on rendering frames efficiently. This setting, personally, really helped reduce frame drops in my matches.
Texture: Medium
I like to always pick the medium setting for textures in my competitive games as “Medium” strikes a balance between visual quality and performance, resulting in smoother gameplay and improved FPS. This choice is ideal for me to maintain my competitive performance.
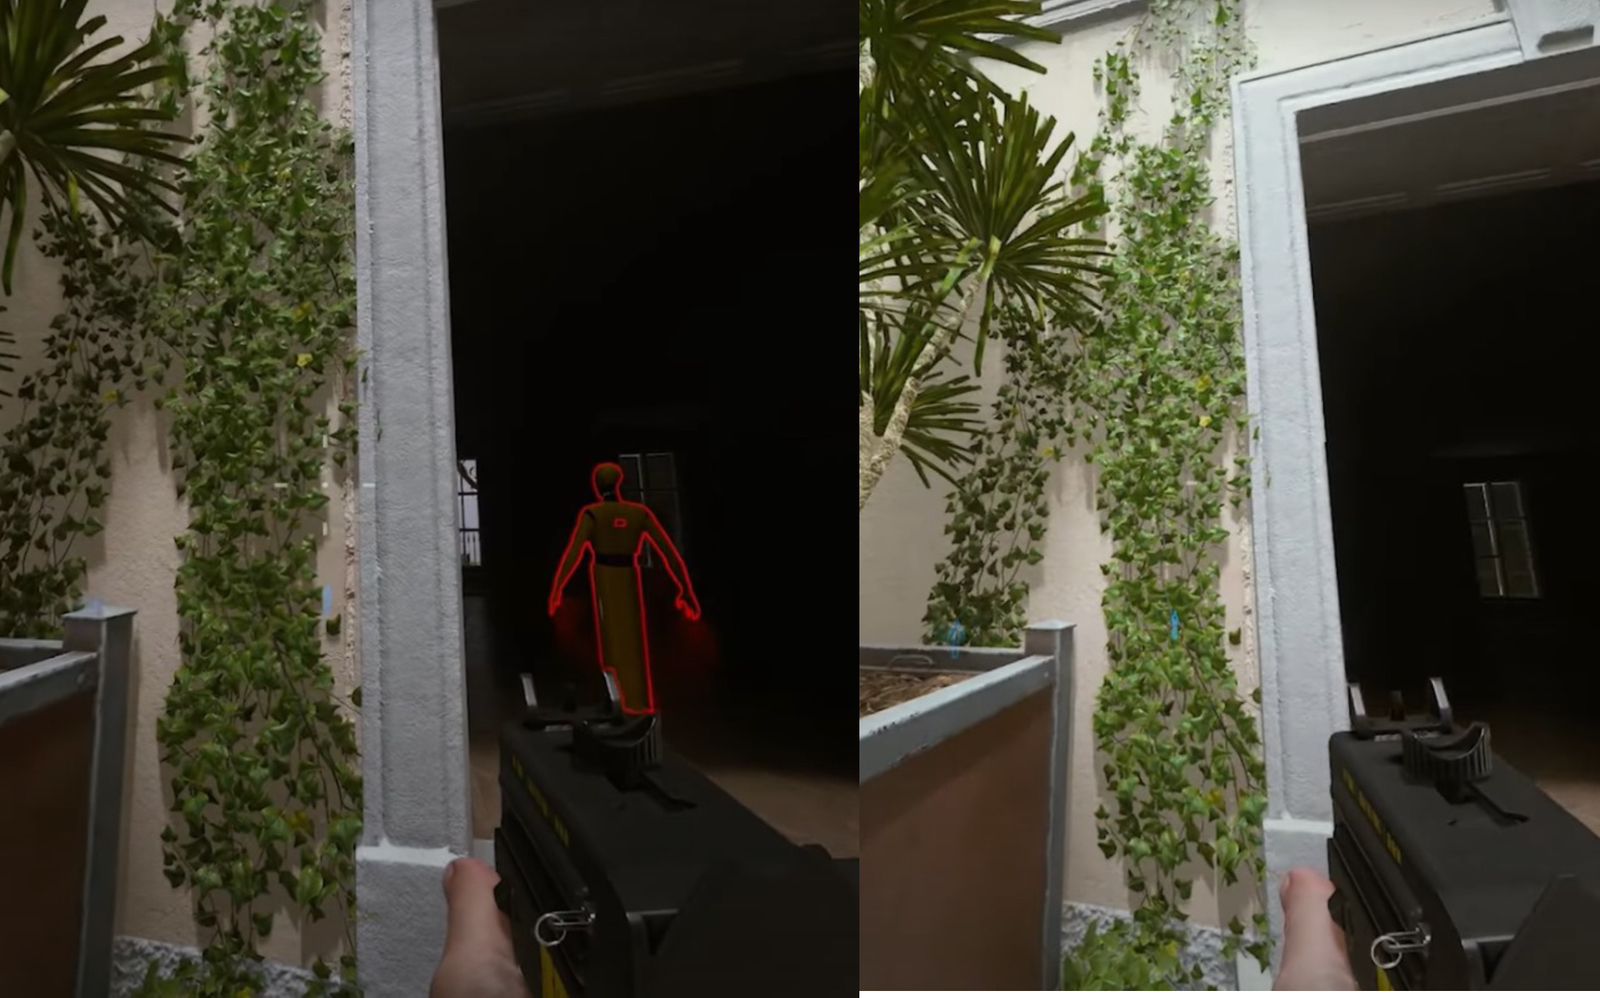
Effects: Low
Opting for a “Low” Effects setting is a pretty good, lesser-known, strategy to ensure your system operates at its peak, delivering the maximum FPS and unrivaled performance. By keeping this setting at a lower level, you lighten the GPU’s workload, permitting it to dedicate more resources to rendering frames efficiently.
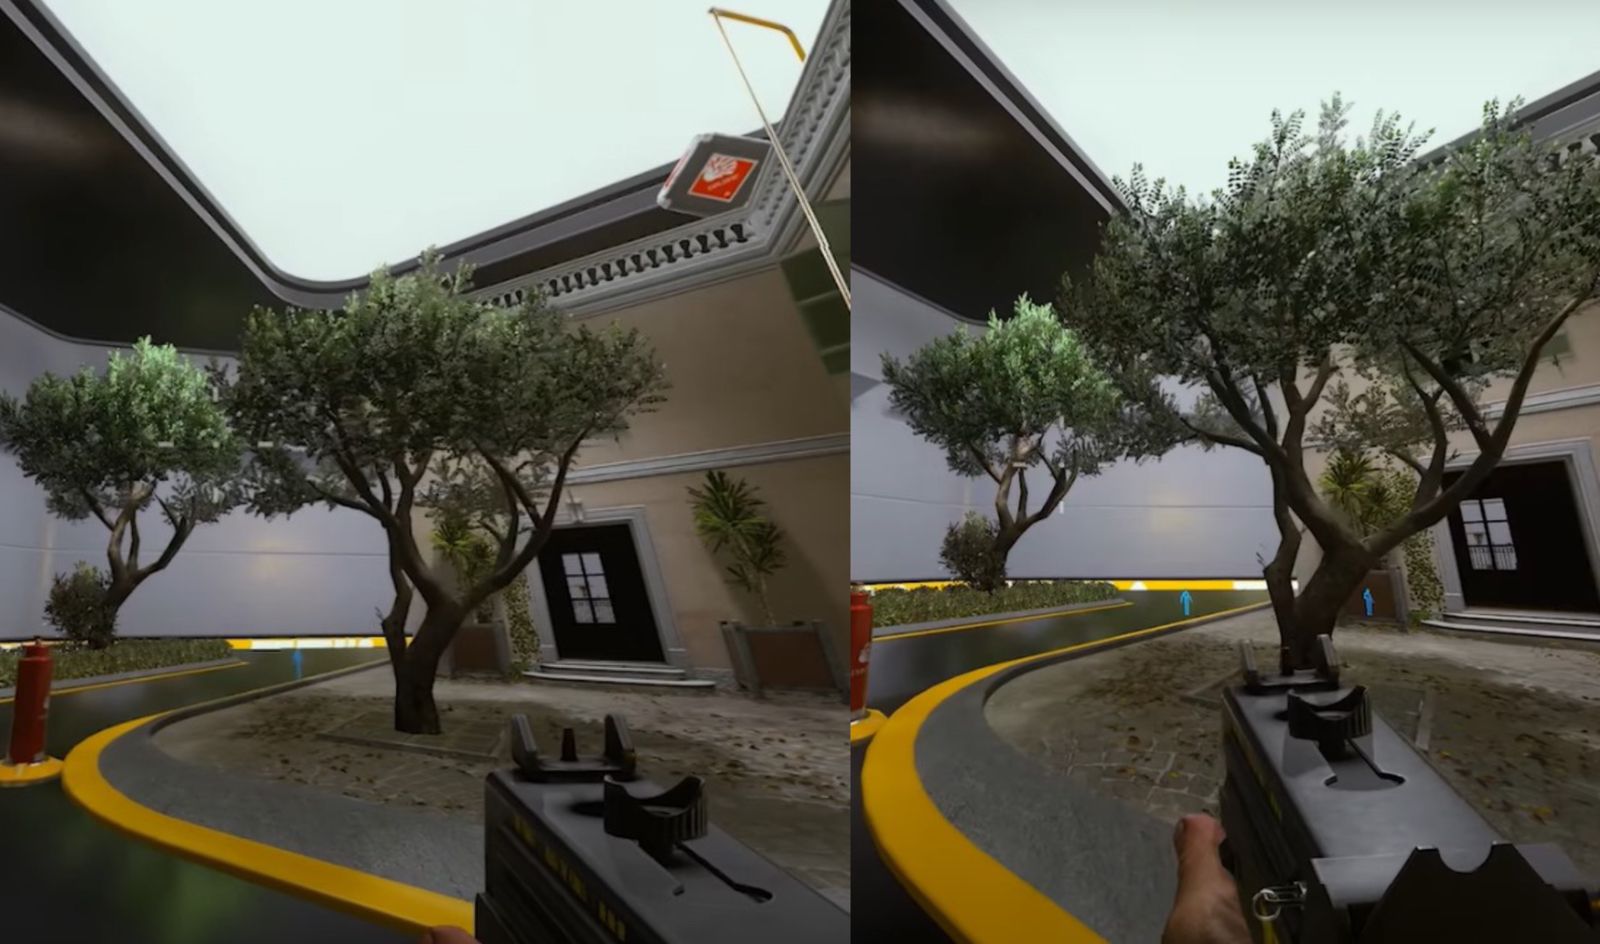
Foliage: Low
Foliage elements, while enhancing the game’s aesthetics, can strain your system’s resources. By keeping this setting on the lower end, you reduce the demand on your GPU, allowing it to process frames with greater efficiency. So I recommend you always set this to Low.
Shading: Low
Similar to Shadows, I found setting shading to Low to be the best option for maximizing my FPS. This is mainly due to Shading using too many resources of your CPU to add certain defined borders and textures to objects in-game that otherwise look completely fine without high shading.
Global Illumination Resolution: Low
Since you already (presumably) have ray tracing on, then this setting basically does nothing so setting it to Low will have next to no effect on the game but I do recommend setting it as Low just in case it’s eating frames in the background.
Graphics API: DirectX 12
DirectX 12 offers improved multi-core CPU utilization and lower overhead, resulting in better resource management and higher frame rates. By choosing this API, you can ensure a smoother gaming experience with reduced input lag. So definitely go for DirectX 12 as it is one of the options that I can confidently say worked the best for me.
Windows Optimizations
We can’t just rely on the game settings themselves for maximizing our FPS and performance but just for you, my fellow competitive game junkie, I’ll tell you about the best Windows settings that helped me gain more FPS while playing THE FINALS.

GPU Driver Settings Tuning
For me, fine-tuning my graphics settings significantly impacted my gaming FPS. When using NVIDIA or AMD GPUs, access the control panel for your graphics card and configure settings for maximum performance.
Overclocking Your Hardware
Overclocking my hardware was a game-changer when it came to squeezing every bit of performance from my system in THE FINALS. However, it’s essential to proceed with caution, as overclocking can potentially damage your components if not done correctly. Regardless, here are some tips and steps to consider:
- GPU Overclocking: Overclocking my graphics card led to substantial FPS gains for me. I recommend utilizing software like MSI Afterburner or EVGA Precision to gradually increase your GPU’s clock speed and memory frequency. Monitor your temperatures and ensure stability through stress testing.
- CPU Overclocking: Since I had a CPU with an unlocked multiplier, I overclocked it for improved performance. Access your motherboard’s BIOS settings and adjust the CPU multiplier and voltage carefully. Stress test your CPU to ensure stability.
- RAM Overclocking: Faster RAM led to much smoother gameplay for me. Access your BIOS settings and increase RAM frequency, taking into account your motherboard’s limitations. Ensure the RAM is stable through testing.
- Cooling Solutions: Overclocking generates more heat. I’d recommend investing in proper cooling solutions like aftermarket CPU coolers and extra case fans to keep your components at safe temperatures.
- Benchmarking: Use benchmarking software to measure the impact of your overclocking efforts. This helped me find the sweet spot between performance and stability.
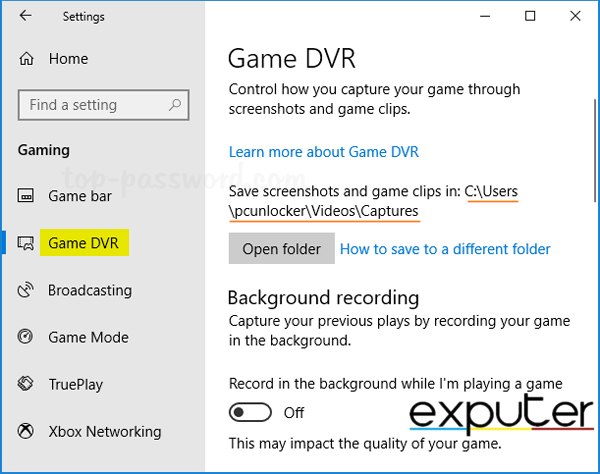
Disable Game DVR
For THE FINALS’ best settings, While Windows offers some gaming-related features, not all of them are beneficial to your FPS. Game DVR, for instance, can consume precious system resources. Because of this, by disabling these features in the Windows settings I was able to reclaim those resources for gaming and this improved my FPS, particularly in THE FINALS.
Follow these steps to disable Game DVR on your system:
- Go to Settings.
- Click on “Gaming.“
- Disable the “Game DVR” to conserve system resources.
Final Thoughts
By following these tips, you can unlock the full potential of your PC and elevate your performance in THE FINALS. So, go ahead and apply these settings to see a significant improvement in your gaming experience, and I’ll see you on the battlefield!
Thanks! Do share your feedback with us. ⚡
How can we make this post better? Your help would be appreciated. ✍


