Destiny 2 has been received well by critics all across the spectrum, all thanks to its enticing gameplay elements and tons of exploration to do. It’s widely regarded as the title that will never bore you out. However, it will sometimes cause you to scratch your head in confusion as you experience the Destiny 2 crashing PC issue on your desktop.
The crashes are reportedly caused due to a lack of computer resources or corrupted game files.
- First and foremost you should try testing your internet connection, and updating the game if an update is available. Doing so will ensure the problem isn’t on your end.
You can fix the Destiny 2 crashing issue by applying the following fixes:
- Restart the game through Task Manager.
- Allow Destiny 2’s access through the Windows Firewall.
- Verify the integrity of game files.
- Optimizing your graphic settings.
- Disabling the steam overlay.
- Using your Dedicated GPU.
Destiny 2 Common Errors: An Overview
Destiny 2 can crash due to many reasons, many of these reasons include errors you may encounter in the game.
- These errors include the Destiny 2 Beetle Error and the Destiny 2 Antelope error which disconnects you from the Destiny 2 servers, causing you to be unable to access multiplayer features. Another similar error is the Destiny 2 Currant Error which also disconnects you from the servers.
- The Destiny 2 Broccoli Error crashes the game with an error message related to your GPU. The Destiny 2 Cabbage Error and the Destiny 2 Cat Error also crash the game due to mismatched versions of your game and server.
- The Destiny 2 Centipede Error and the Destiny 2 Chicken Error prevent multiplayer access too. The Destiny 2 Bee Error removes you from the game world with an error message and crashes the game.
These errors are solved by verifying game files or switching to a different server region, restarting your router or modem, updating your graphic drivers, and contacting Bungie support.
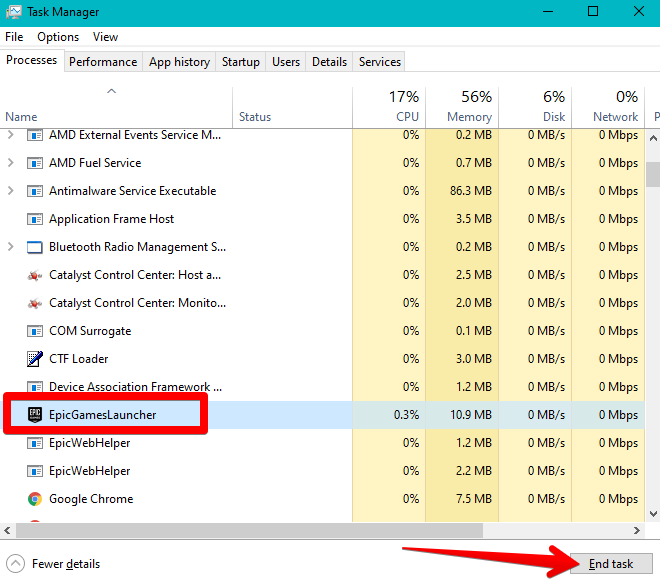
End the Game From Task Manager and Restart It
Ending the game from Task Manager will clear its current processes and cached data which can sometimes resolve issues caused by temporary glitches or memory leaks like at the time of connecting to the Destiny 2 servers.
To end a game from the task manager, perform the following steps:
- Launch Task Manager by pressing the “CTRL,” “Shift,” and “Esc” keys together.
- Locate Destiny 2 by scrolling through the background processes list.
- After finding it, give it a click and select “End Task.”

Ending a Task in the Task Manager (image by eXputer) - Once you’ve terminated the Destiny 2 application, relaunch it from your Steam client and see if it crashes again.
Check Destiny 2 Server Status
When Destiny servers suddenly become offline, it can lead to Destiny 2 crashing issues. If you are in the middle of an activity like a strike, raid, or PVP match when the servers go offline, the game will likely crash when it loses connection to the servers and tries to return you to the main menu.
Similarly, the crashing can also occur if you are in a social space like the Tower or The Farm at the time of the server disconnect.
The game undergoes scheduled maintenance activities occasionally to improve server efficiency and add more features.
You can check Bungie’s official “Help” page to confirm whether your game crashed due to servers being offline or not.
If servers are offline, just wait until they’re back up. To avoid crashing and losing any progress, avoid playing 30 minutes before scheduled maintenance.
Allow Destiny 2 In Windows Firewall
An easy-to-do fix for Destiny 2 crashing PC revolves around Windows Firewall, which is your device’s strong line of defense.
There’s a good chance that Firewall is treating Destiny 2 as a threat to the operating system, shutting it down as soon as it launches.
It can also cause issues when trying to connect to the Destiny 2 servers which would result in the game crashing. That is why I suggest you allow Destiny 2 in Windows Firewall so it becomes an exception and isn’t scanned by the latter on start-up.
Verify the Integrity of Destiny 2’s Game Files
The “Verify integrity of game files” tool analyzes the files of Destiny 2 stored on your computer and compares them with the files of the actual server.
I recommend verifying the game files so that if any anomalies are detected, such as missing files or configuration errors, Steam will promptly fix the issue. This fix also helped players online.
Use Dedicated GPU For Destiny 2
The Destiny 2 keeps crashing error can be occurring because of Windows 10’s built-in gaming settings. The system might be preventing the game from launching because of an incompatibility in the graphics settings.
The default Windows settings can sometimes be configured to use your Intel card which obviously doesn’t meet the minimum requirements of the game in most cases.
I suggest selecting your dedicated GPU in the Windows 10 built-in game settings to ensure that Destiny 2 is using the right card.
Disable Steam Overlay
Steam Overlay is a convenient interface feature that lets players do more than play the game. It opens the door to other types of access, such as chatting with other players while in the game, browsing the web, and purchasing DLC.
However, using the overlay can cause extra resources to be used while the game is running and cause instability problems like fluctuating fps, especially in lower-end PCs.
It can also cause glitches when screenshots are taken by interfering with the game’s code. I recommend disabling this feature momentarily and checking if Destiny 2 still keeps crashing.
My Thoughts on Destiny 2 crashing
Destiny 2 is one of the best free-to-play massively multiplayer online games with a looter shooter gameplay loop that keeps the experience fun and refreshing. However, if your game is constantly crashing every few minutes, that fun quickly vanishes.
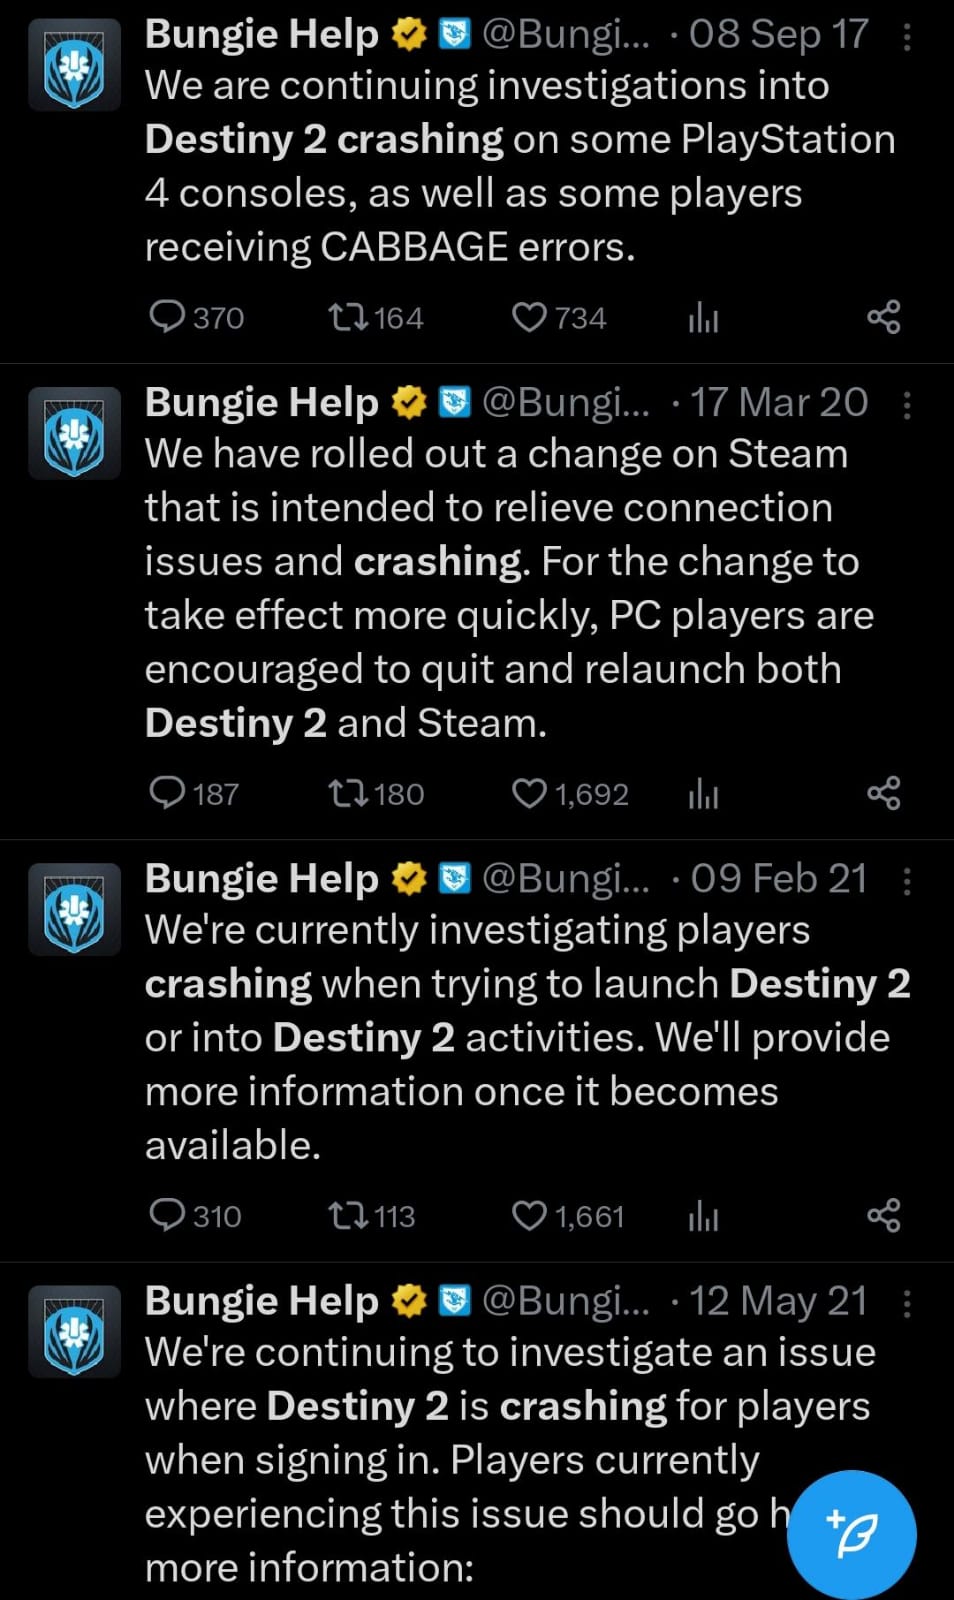
People can be seen talking on forums like the Bungie Forums, Steam, and Reddit. Even on Twitter people can be seen trying to bring the issue to the developer’s attention.
Destiny 2 keeps crashing before I can even enter the game. Suggestions?
— abord (@im_abord) March 3, 2022
These crashes are sometimes caused because of a problem on the player’s end but recently they have been due to the unoptimized updates the developers release.
The developers have taken notice of the crashing error on the game’s official Twitter account, but due to the unoptimized updates before, the issue never seems to go away.
FAQs
Try updating your game, disabling the Steam overlay, allowing it through the Firewall, and trying all the other methods I have mentioned above.
It is because the developers do not properly address the optimization of the game when releasing new updates.
Thanks! Do share your feedback with us. ⚡
How can we make this post better? Your help would be appreciated. ✍