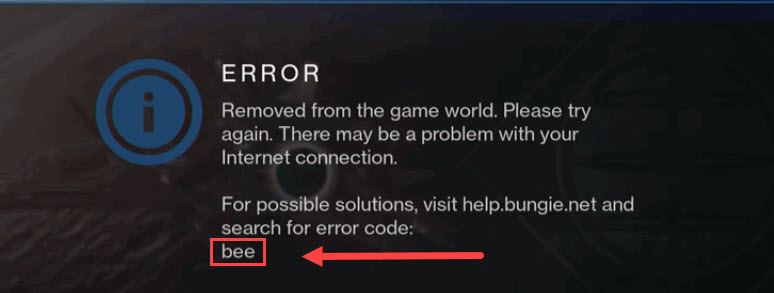
What Is Error Code Bee In Destiny 2

The bee error code corresponds specifically due to a network-related issue in your game. It can cause severe disruptions to your gameplay. Most of the time, players will end up encountering the problem while they are playing an important activity in the game like the Nightfalls. It will usually be followed up by the game booting them out of the activity, and back to the Orbit menu screen.
However, whatever the case may be, the problem has a slight chance to fix itself since the malfunction can be rarely originated due to the background scheme of things such as Bungie‘s backend servers getting disturbed. But if not, then more than likely, it is gonna be on your end and it will not resolve unit you administer a working fix to alleviate the problem.
According to the Official Bungie troubleshooter guide on the error code bee in Destiny 2, it states that the issue is generally caused by a disconnection in the traffic routes between your internet and the backend servers. It can even be caused by packet loss or the router and its wiring having disorganized implications. These can all be easily avoided by registering a few short fixes that can help you cure the error code as quickly as possible.
- Bungie classifies their errors into codes such as Bee, which occurs due to traffic disruption between the player and the game servers.
- The error usually happens during gameplay and kicks the player out of any activity and back to the main Orbit screen.
- Try restarting your game; if the problem continues, try restarting your PC or Console. You can also try Power Cycling by keeping your device unplugged for a few minutes.
- Secondly, check if the game’s servers are under maintenance by checking Bungie’s Up-to-date Maintenance List, as the developers may take down the servers to fix bugs or release patches.
- Steam has a feature to check for corrupt game files. You can use it by going to the Local Files tab in the game’s Properties from your Steam Library and clicking “Verify integrity of game files”.
- As described in the guide, you can also set up a Static IP Address and Port Forward Destiny 2. This allows your device to have a more stable connection to the servers.
- You can also try to use a VPN to connect with the game’s servers, as it sometimes resolves the problem.
- Windows Firewall can also prevent the game from connecting to the servers. You can fix this by adding Destiny 2 to the list of apps allowed through Windows Defender Firewall.
- And lastly, you can upgrade your connection to ensure a smooth and stable connection. We also recommend using an ethernet cable instead of a WiFi connection.
- Before we Begin: Destiny 2 Error Code Centipede
How To Fix The Bungie Error Code Bee
Thankfully the error code bee isn’t something that will require you to perform rocket science levels of tasks in order to successfully resolve it. At the end of the day, Destiny 2 is a game where everything is constantly in motion, and your data is shared through a steady internet connection and the stability of its backend servers.
There have been numerous threads about the error code bee on the Official Forums of Bungie, as well as the multiple community platforms of Destiny 2. It is all thanks to the players in the Reddit and Discord groups of the game who were kind enough to share some workarounds that managed to work for them.
Players encountering the issue have had it resolved thanks to some loopholes and methods, which we are now going to discuss as briefly as possible. We highly encourage you to follow each one carefully as even using these fixes can help you cure the stress of this problem within a few minutes. They are mostly centered around your network connection as well as a few other fixes that are related to the hardware side of things.
- More From eXputer: As Dusk Falls Multiplayer Not Working
Restart The Game Or The System

Starting off with the first workaround or fix that is easily one of the oldest tricks in the book revolves around simply restarting your game, or even better, the console or PC. It is one of the most essential tricks that you should apply first to kickstart any video game that is causing random issues or has gotten stuck unexpectedly.
It is a universal fix that most gamers have been using since the dawn of the time when video game consoles first started existing in the 70s. You can instantly force quit most games on your PS5 or Xbox Series X by simply quitting or closing the application from the main dashboard of the console. After which you should have no trouble relaunching it again to see if the error code bee persists or not at the login screen in Destiny 2.
Meanwhile, PC users can opt to instantly force quit Destiny 2 by pressing the ALT + F4 keys together which lets you instantly close out an application or software on your desktop. It is one of the handiest features that are solely available to Desktop users of Destiny 2 that can let them instantly close out and restart the game
We highly suggest booting up the game a couple of times to ensure it isn’t the one acting weird by prompting you with an error code out of the blue. Furthermore, you can also boot up and log in to the game relatively fast and quickly if you have it installed on any of the high-speed storage devices such as an SSD or M.2 drives.
However, if restarting the game just doesn’t work out then it might be time to reboot your console or PC to see if it fixes the error code from persisting. It will then refresh the state of their functionality or the software if it’s the one causing any major issues to the game application. Preferably, if you have your Windows OS installed on an SSD drive then you can pretty much boot it up within a short span of a few seconds.
Alternatively, you can also try “Power Cycling” your PC or console. It isn’t too complicated to do and ensures the OS of your PC runs with increased efficiency across the board. Just completely shut off your PC and unplug its power cable from the main switch output. Give it a couple of minutes and then plug everything back into place and boot it up. Head back into the game and check if the Error Code Bee is resolved or not in Destiny 2.
Evaluate The Destiny 2 Server Status
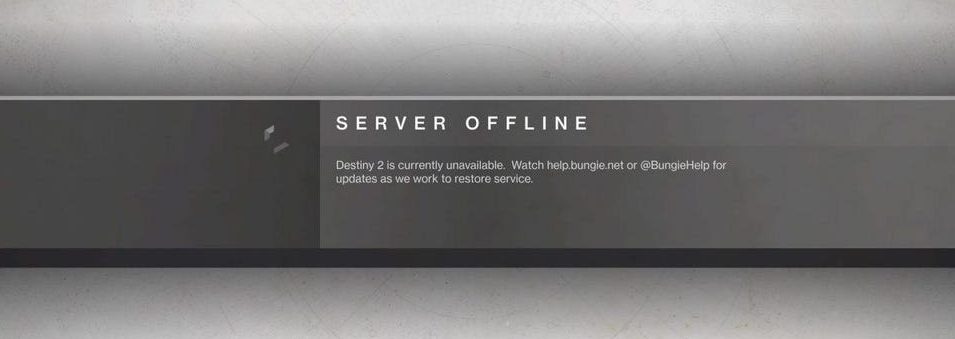
The next step that all guardians of Destiny 2 should take is to check if there is no ongoing maintenance happening in the game at the moment. The backend servers in massively multiplayer games like Destiny 2 are the backbones for their proper working subroutines. There are different regional servers for the game which all connect back to the main ones at Bungie so that players can connect to the game in peace.
However, developers will often need to take the game offline for immediate purposes such as resolving game-breaking bugs or glitches. It is the same case with D2 as the game undergoes scheduled maintenance for a brief period of time, especially before an expansion launches or to send out a crucial patch to its playerbase. In fact, these actually help to provide stability and firmness to the general ecosystem of the game.
So for those who are unaware, the game will let you know most of the time when maintenance is about to occur with an in-game notification once you’re in the orbit screen. But there is a quick and easy way to check that beforehand too and that is by visiting and following the Bungie Help Twitter page.
It is essentially the Technical support page by the developers who will constantly update users with any ongoing issues to the game or any sort of major problems for which the game will momentarily be taken offline.
Furthermore, you can also check out the Up-to-Date Maintenance List by the developers at Bungie which lets you know about any future offline statuses for the game. So be sure to always verify the status of the servers before you play the game using the sites provided by Bungie in order to ensure you don’t run into issues such as the error code bee in Destiny 2.
Verify Integrity Of Game Files On Steam
Steam by Valve is easily the most accessible and widely used game launcher on the market, even with the rise of the Epic Games Store, it has managed to retain its popularity after all these years. The launcher itself has many useful features that go missed by users, especially the one that lets you verify and scan the integrity of the directory files of the games in your library on the platform.
The “Verify Integrity of Game Files” feature will allow users to review the game files in their directory that have gone either missing or corrupted to cross-check with the ones stored in the internal servers of Steam. Doing the process with Destiny 2 will let you assure that any deleted game files are the ones causing the error code bee. You can easily accomplish this by following the exact step-by-step procedure we have listed for you:
- First things first, launch the Steam client application by either typing its name in your Windows Search bar or you can also have it permanently pinned under your taskbar to open it in an instant.

- Once you have launched Steam, look upwards to the interface of different options and head into your “Library” and here you should see the list of your games in the left sidebar menu. Locate Destiny 2 and Right-click on it to open up a small sub-menu, here click on the ‘properties’ option to get to the next step.

- The Properties menu has a variety of features that can let you tinker with the characteristics of the game from managing its beta versions and even manually checking for any updates pending on them. But our main focus here is to just navigate towards the “Local Files” option. Select it and lo and behold, you should now have the option to verify the game files of Destiny 2 by simply clicking on the option as shown in the image.

It is worth keeping in mind that the verification process can take upwards of roughly 10 to 20 minutes but it all mostly depends on the size of the game as well as the missing files. If there is any vital file that has gone absent from the directory of the game, Steam will notify you of it at once and put it in your downloads section. Once it is done head back into Destiny 2 and check if the error code bee is resolved so we can move on to the next step.
Enabling Static IP Address
Bungie has already summarized in their official troubleshooting that the issue may stem from your router wiring or the internal connection in it. Thankfully there is a way to bypass that roadblock completely without having the need to contact your Internet Service Provider. Users can essentially enable a Static IP address on their Desktop which in comparison to dynamic IP addresses will improve their connection with outgoing servers.
Doing this entire process will also let you enable Port Forwarding to Destiny 2 but before we even do that, let’s go over the exact steps to get the necessary information about your router so you can use that in order to set up the Static IP in your Windows system:

- First of all, you will need to clarify and gather the details of your router network connection which isn’t hard at all. Thankfully, these credentials can relatively be found with a simple check from a menu box.
- Open up the Windows Command Box by pressing the Windows + R Keys in conjunction.
- Type ‘CMD’ in the search box and then proceed to run it.
- that opens up, paste the text “ipconfig /all” and hit the enter button.
- You should now be able to notice and access your IPv4 Address, Subnet Mask, Default Gateway, and DNS Servers information which we are going to use to organize a static IP address.
Next up is assigning the static IP to get a secure connection of your System to your internet router or modem, which is covered in the following step-by-step process:

- Just like before, press together the Windows + R key to open up the Windows command box.
- Type in “npca.cpl” and hit the Enter key to continue.
- You should now have a list of your currently available Network connections including wireless and ethernet-connected ones displayed on the screen.
- Select the one you currently use on your desktop and click on its Properties.

- Select and open up the Internet Protocol Version 4 (TCP/IPv4) menu, as shown in the image above, and click on properties to modify its options.
- In the next menu, click on the setting to “Use the following IP Address” instead of an automatic one.
- Fill in the relevant information we discovered in the first steps of the process, which are the following router data: IP address, Subnet mask, Default gateway, and DNS servers.
- Alternatively, you can opt to use the Official Google DNS settings which is done by inputting ‘8.8.8.8′ in the Preferred DNS Server box and in the Alternate DNS Server box, simply typing ‘8.8.4.4’ should do the trick. The Google DNS is a great way that has helped a few users in the past and present to successfully establish stable connections.
Console players of the game will unfortunately need to access their network settings in order to get the information and you might need to modify the router settings themselves. We recommend contacting your ISP to do that since every router menu is different than the others in most instances.
Back to the finishing touches, simply click on OK to apply the changes on your internet connection, and then head back into Destiny 2 to verify if it fixed the bee error code, if not then it’s time you unlocked the ports of the game on your system or console, provided by Bungie themselves.
Port Forwarding Destiny 2
Once you have successfully enabled a static IP address, you can then move on to applying port forwarding to the game by setting it up manually through your router or by contacting your ISP. It is an added benefactor that can ensure your private network is firmly connected through its peer-to-peer connections (P2P). Port forwarding can boost the connection speed, and any chance of latency or lag plus improve your overall multiplayer gameplay.
It basically involves heading into the main router settings and inputting the various port numbers from two different port destinations: TCP & UDP. Just keep in mind that the router menu may differ for everyone, so here is how you can enable ports in Destiny 2:
- The Default Gateway IP address will be your key to logging into your router mainframe, it is different for everyone but luckily, you should already know about it as we covered it in the Static IP methods above.
- The tricky step will be to locate the actual menu in the router interface to set up the ports but it shouldn’t be too difficult to find since in most cases, it tends to have its own special menu or under the IP settings.
- Once you locate the menu, if it asks for it then fill in your Static IP address.
- You should now notice different rows to paste in the Port digits for Destiny 2, which you need to accordingly with all of the TCP and UDP port routes tailored for the PC version of the game:
- TCP: 80, 443, 1119-1120, 3074, 3724, 4000, 6112-6114, 7500-7509, 30000-30009
- UDP: 80, 443, 1119-1120, 3074, 3097-3196, 3724, 4000, 6112-6114, 27015-27200
This is generally considered as the most beneficial workaround to fix most of the network connection errors of Destiny 2 since Bungie has already stated that the Bee error code coincides with the ‘Lion’ and ‘Fly’ codes too on their troubleshooting website.
There have been numerous threads on the subreddits of the game where users have managed to potentially fix the problem by port forwarding the correct routes associated with their console or PC to the Destiny 2 backend servers. However, if it still doesn’t work out, then worry not as we have a couple of more tricks up the sleeve to alleviate the error in the game.
Swapping To a VPN Connection
There is a constant evolution in the genre of the multiplayer title, games like Apex Legends and Fortnite are such heavy-hitters that have garnered the attention of millions who actively play them on a regular basis. But most of the time, that increase in the surge of players trying to log into the game or playing it can ultimately crash other users. To combat this issue, users will more often than not, switch to a VPN connection to play without any issues.
The VPN essentially stands for a Virtual Protocol Network. It basically provides users with a secured accessway to private and public networks with ease as well as bypasses any barriers of issues or problems when connecting to the backend servers of Multiplayer-only games such as Destiny 2.
Players will rely on a VPN to log into most games with relative ease if the regional servers are malfunctioning or if the game itself is posing random issues for no specific reason. The network error codes in Destiny 2 such as the Bee or Weasel will kick you back to the login screen, so it is here that you are advised to use a VPN which will hopefully prevent any of these issues from occurring at all.
Thankfully there are tons of options to choose from when it comes to a verified and stable VPN service, there is a wide variety of options to use that can get your various region-locked video games and applications up and running safely.
There is the option of well-known and popular premium services such as NordVPN and ExpressVPN which will easily get the job done. If you are not a fan of paying for premium subscriptions, then you might surely consolidate with the offerings of Windscribe or ProtonVPN, which have excellent free trials you can use.
They are all excellent and high-quality VPNs, trusted by popular by many Tech Gurus on the internet that can let you browse anonymously without having to fear that your data is getting leeched away or publicly accessed. It is the best way to smoothly log into Destiny 2 without any hindrances.
Allow Windows Firewall Defender Access
One of the few nifty tricks that should be worth applying is to allow your multiplayer games to have permission through the Windows Firewall Defender. It is essentially the gateway from the Windows OS that allows applications and software to access your Public and Private networks. Permitting Destiny 2 through both of these domains will make sure it freely has access to connect to the backend servers, without causing any problems.
Most of the time when you launch a game for the first time, you will be notified immediately by your Operating System if you want to grant the application access to the Private and Public networks of your location. But if by the slight chance you missed that prompt, we have got you covered on how to manually do it on your desktop:

- First of all, open up the “Firewall and network protection” section of Windows Security on your PC. Users can do that by simply searching for it using the Windows Search bar, heading into the security settings of the OS, or just simply heading into the Control Panel.

- You will now be in the Windows Security options and the next steps will involve you needing to navigate through some self-explanatory menus after clicking on the “Allow an app through firewall” option.

- You will now be in the Windows Firewall settings where you will be able to browse through the long list of applications and software found on your PC to grant access to your private or public networks. It is here where you need to only add the ‘Exe’ or the Executable file of Destiny from its main directory.
- Browse through your PC and locate the file and add it to the list.
- Once you have added the application to the list, you now just have to check the boxes next to it as shown in the image above to allow it to access both your Private and Public networks. Lastly, don’t forget to click on OK at the bottom to apply these changes.
- Head Back into Destiny 2 and inspect if the error code bee has been cured by playing any activity like a strike or crucible match without it booting you out of it, otherwise, we recommend moving on to the last method in our list.
Improving Your Network Connection
Destiny 2 is a live-service title that is constantly shifting its algorithms and functionality instances as you are playing the game on a daily basis. The game requires a steady stream of internet connection so that it can run without any hiccups or interruptions.
According to Bungie on their Official Error code Bee guide, they stated that they “…recently detected a 25% packet loss from the UK at the same time a number of users located there saw errors”. What it means is that the error code might just be stemming from poor or weak network connections of several users.
We have already discussed how you enable a Static IP which will establish a proper link for private networks such as yours and other destiny 2 players to connect effectively to the backend servers. You can further boost that potential by adding in a Google DNS and most importantly, by port forwarding the TCP and UDP routes.
However, an even better safeguard would be to switch from a wireless internet connection to an ethernet cable one as it will greatly improve your overall speed. If by any chance, your router is located in another part of the house or office we strongly recommend wiring an ethernet wire back to the modem or device. Doing so, you will notice a dramatic change in bandwidth and connectivity.
Furthermore, in a game such as Destiny 2, your poor internet connection will also affect other players in your lobby such as in the PVP matches in the Crucible. What it means is that enemy players may be affected by the latency and lag that you experience, making it unfair for your opponents to hit you back at all. It will end up getting you reported for weak and unstable connection so refrain from playing under insecure internet speed.
We strongly suggest contacting your ISP and asking for an upgrade in your internet package or better yet, for a professional to come by your establishment and reroute an ethernet cable to your PC or console. It is the surefire way that you can get back into the game, especially if you were previously using a Wi-Fi connection.
Thanks! Do share your feedback with us. ⚡
How could we improve this post? Please Help us. ✍