One of the major captivators in any MMORPG is the variety of roles and classes it has to offer. Whether you prefer to get up close and personal with a plethora of melee weapons or wreak havoc from afar with destructive magicks and other long-range armaments, FFXIV has a class, or as we call it, a job for everyone. In our Machinist rotation guide, we will go over one of those jobs and break it down for you so that not only is it easier to pick it up but also equips you with the knowledge to perform well.
Key Highlights
- A Machinist is a physically ranged DPS in FFXIV.
- It focuses on executing actions with its pistol from a safe distance away.
- Machinists have strong options for attacks against both single targets and mobs.
- It also has decent party utility with Tactician.
Foundation Of A Machinist
A Machinist (MCH) in FFXIV is a ranged damage dealer, available from Level 30 onwards. It has evolved from a complex job in Stormblood to a more user-friendly and enjoyable one in Shadowbringers, offering free movement compared to certain melee jobs.
A fundamental principle for all jobs in the game is “Always Be Casting” (ABCs). This means consistently using your job actions on the global cooldown (GCD), with some exceptions. The GCD is the time it takes for actions to refresh after use, typically set at 2.5 seconds, but can be reduced with better gear, melding, and buff foods. Failing to use your GCDs effectively can have negative consequences, particularly in high-level content.
Related Guide: Styled For Hire FFXIV
First up in our Machinist rotation guide, we will break down the actions in the job’s arsenal.
Basic GCD Actions
- Split Shot (turns into Heated Split Shot at Lv.54 )
- Slug Shot (turns into Heated Slug Shot at Lv.60 )
- Clean Shot (turns into Heated Clean Shot at Lv.64 )
- Spread shot (Frontal Cone AoE action; turns into Scattergun at Lv. 82)
- Heat Blast (Lv.35)
- Auto Crossbow (Frontal Cone AoE action; Lv.52)
GCD Actions With A Separate Recast Timer
- Drill (Lv.58)
- Hotshot (turns into Air Anchor at Lv.76 )
- Flamethrower (Frontal Cone AoE action; Lv.70)
- Bioblaster (Frontal Cone AoE action; Lv.72)
- Chain Saw (Straight line AoE action; Lv. 90)
Offensive Abilities off the Global Cooldown (oGCDs)
- Gauss Round (Lv.15)
- Ricochet (Radial AoE action; Lv.50)
General Machinist Buffs & Abilities
- Reassemble (Lv.10)
- Hypercharge (Lv.30)
- Rook Autoturret (Lv.40 & turns into Automaton Queen at Lv.80)
- Rook Overdrive (Lv.40 & turns into Queen Overdrive at Lv.80)
- Wildfire (Lv.45)
- Tactician (Lv.56; recast goes down to 90 seconds at Lv.88)
- Barrel Stabilizer (Lv.66)
Before we proceed with our Machinist guide on how these actions come together, we must first look at its job gauge. Machinist has two gauges: the Heat Gauge & the Battery Gauge. The bar on top shows the amount of Heat you’ve accumulated, along with the duration of the Hypercharge. The one underneath it shows you how much battery power is amassed during a fight while simultaneously displaying your summon duration.

The former allows the usage of actions such as Hyperchage, while the latter allows you to place your turret and summon the Automaton Queen in battle later on.
Understanding The Combat
- Combat starts with a 2.5-second GCD, becomes dynamic with oGCD abilities.
- Weaving oGCDs between GCDs enhances combat speed and complexity.
- Example: Standard Combo: Split Shot → Slug Shot → Clean Shot Weaved Combo: Split Shot → Gauss Round → Slug Shot → Ricochet → Clean Shot
- 1 or 2 oGCDs can be weaved between GCDs in 2.3-2.5 seconds.
- Some actions have different GCD times, affecting weaving.
- Heat Blast and Auto Crossbow have a 1.50-second recast timer, limiting weaving to one.
- Standard combo grants 15 Heat points and 10 battery points.
- At 50 Heat points, use Hypercharge for 20% action potency boost for 7.5 seconds.
- Unlock Heat Blast and Auto Crossbow at levels 35 and 52 with faster recast times.
- Accumulate 50 battery points to summon a combat turret.
Basic Multi-Target Combo
When it comes to your AoE rotation, Machinist doesn’t have a combo per se, but you do have several AoE abilities that can be used in combination to get the job done. Spread Shot (turns into Scattergun at Lv. 82), Auto Crossbow, Ricochet, Flamethrower, and Bioblaster are the actions that form your multi-target arsenal. The universal rule is to use AoE skills when facing three or more enemies. Using these skills against two or fewer adversaries will result in damage loss.
A Similar Read: FFXIV Trust System Guide
Extreme Firepower – A Machinist’s Arsenal
In the previous section, we went over the foundation of your standard GCD combo, building your gauges, a bit on the idea of weaving, and the AoE actions at your disposal, along with breaking down some of the early actions and what their functions are. In this one, we will go a bit deeper into the Machinist’s skill set and discuss some of its hard-hitting actions and buff abilities. With that being said, the first three actions on the agenda are as follows.
Hard-Hitting Actions:
- Drill, Air Anchor & Chain Saw:
- High potency skills defining rotation
- Add 20 points to Battery Gauge
- Chain Saw: Linear AoE, 60s cooldown
- Reassemble:
- Buff with 55s cooldown, guarantees critical direct hit on next weapon skill
- Pair with Chain Saw or Air Anchor
- Wildfire:
- Core debuff lasting 10s
- Increases potency with each weapon skill, capped at 900
- Explodes at end, use Detonator to control timer
- Cooldown: 120s
Buff Abilities:
- Barrel Stabilizer:
- Raises Heat Gauge by 50 points
- Enables Hypercharge
- Use in combat without overlapping Battery and Heat gauges
- Cooldown: 120s
- Automaton Queen & Queen Overdrive:
- Summons AI Machina with 50 Battery Gauge points
- Lasts 20s, ends with Pilebunker and Crowned Collider
- Queen Overdrive triggers Pilebunker prematurely, best saved for boss’s final moments
AoE Skills:
- Bioblaster:
- Frontal cone AoE with potency 50
- Inflicts damage over time
- Use against three or more enemies or prioritize Drill in single-target or 2-enemy encounters
- Flamethrower:
- Situational skill with 60s cooldown
- Frontal cone AoE lasting 10s with potency 80
- Avoid in most cases, favor other skills for multiple mobs or two-enemy encounters
Utility And Role Actions
It’s not just about dealing damage in a raid. Mitigating incoming damage and preventing the boss from taking specific actions are part of it, too. To that end, the Machinist has some actions at its disposal. In this section, we will go over those actions and how they can lead to a much less painful raid experience.
- Tactician:
- Reduces incoming damage by 10% for 15 seconds
- Cooldown: 120s (90s with Enhanced Tactician)
- Cannot stack with Dancer’s Shield Samba or Bard’s Troubadour
- Second Wind:
- Restores HP with 500 cure potency
- Cooldown: 120s
- Arm’s Length:
- Applies 20% Slow debuff on attackers and prevents knockback
- Cooldown: 120s
- Head Graze:
- Interrupts specific enemy actions
- Cooldown: 30s
- Peloton:
- Increases party members’ movement speed for 30s
- Deactivates upon entering battle
- Cooldown: 5s
- Leg Graze:
- Slows enemy movement by 40%
- Useable against filler mobs
- Cooldown: 30s
It All Comes Together
In the world of Machinist, your rotation starts with an opener, which can be impacted by latency, so adjustments may be necessary.
A basic opener looks like this:
- Reassembled Air Anchor (Gauss Round + Barrel Stabilizer)
- Drill (Ricochet + Gauss Round)
- Split (Ricochet)
- Slug (Gauss Round + Ricochet)
- Clean
- Reassemble + Wildfire + Chainsaw
- Automaton Queen + Hypercharge
- Heat Blast x5 (Gauss Round + Ricochet)
- Drill
After the opener, maintain a rolling GCD, ensuring you continuously use Gauss Round and Ricochet charges to avoid overlapping. Don’t forget Drill, Chain Saw, and Air Anchor, as they are also on the GCD and should be used when off cooldown.
Weaving two oGCDs (Gauss Round + Ricochet) with each GCD in the opener is known as double weaving and is the optimal way to play.
You might find this interesting: FFXIV City Of The Ancients
How To Prevent GCD Clipping
Timing Hypercharge is crucial in relation to Drill, Chain Saw, and Air Anchor. A full Hypercharge cycle lasts 7.5 seconds, accommodating 6 GCDs. These phases are where you deal most of your damage, especially in the opener.
To avoid clipping, never enter a Hypercharge cycle if any of those three actions have less than 8 seconds on cooldown. Timing Hypercharge too early results in missing the sixth GCD, causing clipping. The concept applies to other jobs with similar abilities, like Wildfire and Hypercharge. You can find more guidance on this in tutorials by experts like Xenosys Vex.
Video Source: How to time your oGCDs
Rotation Cycle And Raid Content
In a way, a typical rotation is a cycle of openers or burst phases with downtime in between that repeats throughout the battle. Depending on the fight, the timing of each phase needs to be adjusted.
This is a trial and error thing, as the more you know about a fight, the better you will be at adjusting to it. Being comfortable with your rotation in order to focus on the mechanics without stressing over job actions is crucial. Such fights are too many to count, but some examples would be Savage Raids like Edenverse or specific Extreme Trials with multiple mechanic set pieces such as Zodiark’s Fall and Hydaelyn’s Call.
Next is Ultimate Raids. It’s the highest tier of content and requires you to be knowledgeable about your job and the game at its core. Going into these without sufficient experience will hold you back from performing at your peak while also impacting the group at large.
Consistency And Experimentation
We will now delve into the section of our Machinist rotation guide, where we will focus on achieving consistency and improving your rotation. It’s no surprise that you need to put in the practice and effort into any area where you want to see progress. To that end, you have the option to practice your rotations in-game at various striking dummies across Eorzea’s several maps. Here’s a quick list of the locations for the striking dummies in the base game and each expansion.
Striking Dummies (A Realm Reborn):
- Central Shroud – The Bannock (X: 24.0, Y: 19.5) (X:23.4, Y: 20.5)
- Middle La Noscea – Summerford Farm (X: 26.2, Y: 17.4)
- Western Thanalan – Scorpion Crossing (X: 26.3, Y: 24.7) (X: 26.3, Y: 23.7)
- Coerthas Central Highlands – Whitebrim Front (X: 13.1, Y: 17.1)
- Coerthas Central Highlands – Whitebrim Front (X: 13.5, Y: 16.8)
Striking Dummies (Heavensward):
- Coerthas Western Highlands – Falcon’s Nest (X: 31.5, Y: 38.7)
- The Dravanian Forelands – Tailfeather (X: 32.7, Y: 24.7)
- The Dravanian Hinterlands – The Collector’s Quarter (X: 22.8, Y: 16.7)
Striking Dummies (Stormblood):
- The Fringes – Castrum Oriens (X: 9.9, Y: 11.8)
- Yanxia – Namai (X: 31.0, Y: 16.5)
- The Azim Steppe – Reunion (X: 34.0, Y: 27.0)
- The Lochs – Porta Praetoria (X: 10.5, Y:20.5)
Striking Dummies (Shadowbringers):
- Kholusia – Stilltide (X: 35.7, Y: 26.9)
- Amh Araeng – Mord Souq (X: 27.4, Y: 14.6)
- The Tempest – The Ondo Cups (X: 32.0, Y: 19.3)
Striking Dummies (Endwalker):
- Thavnair – Yedlihmad (X: 23.4, Y: 34.0)
- Labyrinthos – The Archeion (X: 31.3, Y: 13.5)
- Ultima Thule – Base Omicron (X: 30.6, Y: 26.9)
Stone, Sky, Sea
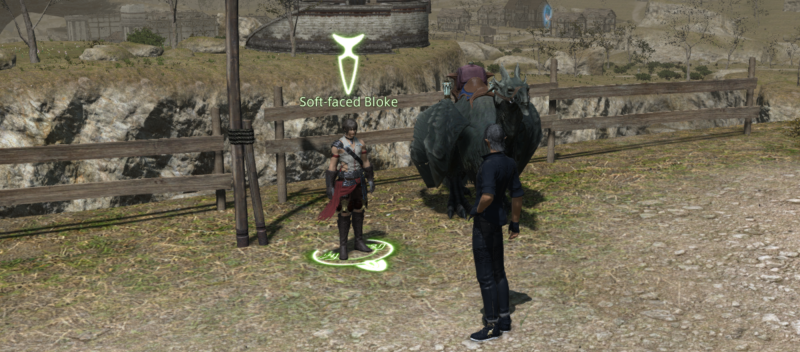
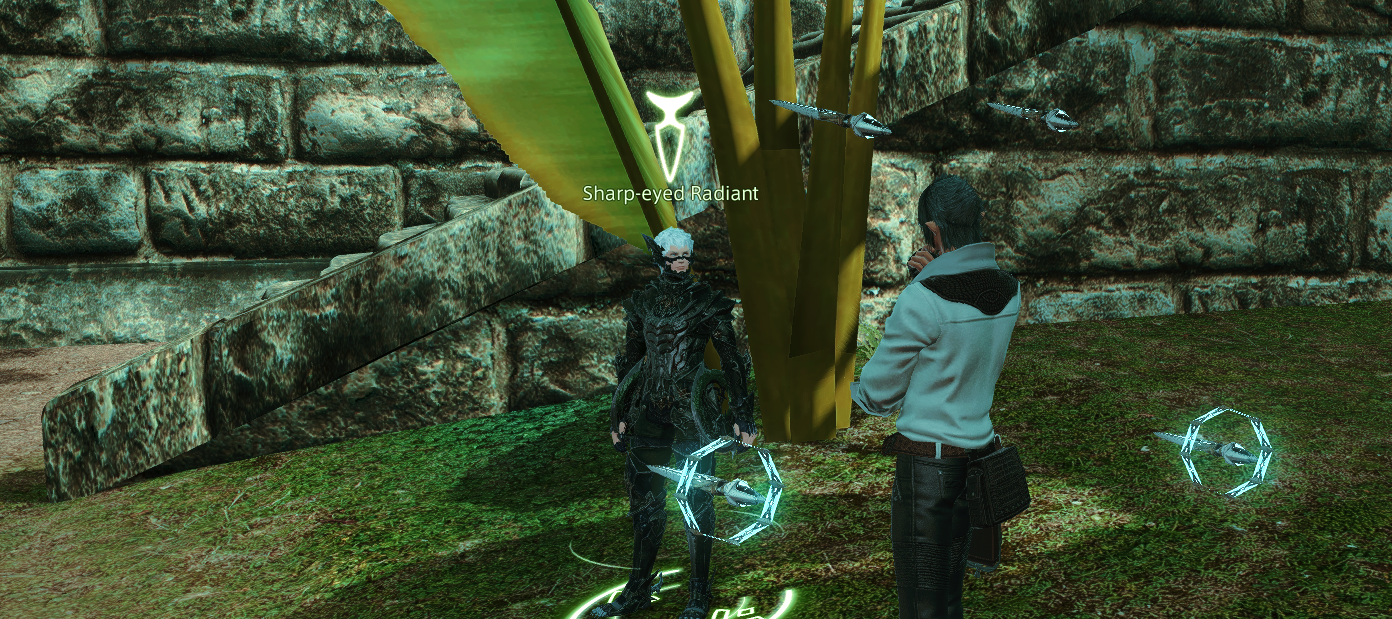
You can also unlock Stone, Sky, Sea in Kholusia and Thavnair for their respective expansions. This will allow you to see how well you’re doing in simulated content based on whether you can clear the test battle or not. Complete the prerequisite quest found in Idyllshire at (X:7.4, Y:6.1).
Then talk to the NPC in Eulmore – The Derelicts at (X:9.2, X:10) to unlock the training area for Shadowbringers. Subsequently, speak to the NPC at the Radz-at-Han Aetheryte plaza to get the quest for Endwalker’s location. You could also purchase or craft a level 80 dummy for use at your personal or Free Company estate.
Latency And Gameplay
Latency can affect your gameplay. With latency over 150ms, double weaving becomes inconsistent; opt for single weaving instead to maintain damage. While usually subpar, single weaving offers more consistent performance due to reduced damage loss and GCD drift.
Adapt your opener based on fight mechanics, as some fights have scripted downtimes. Timing your GCDs leading into burst abilities like wildfire and hypercharge is essential. Check out The Balance, a helpful community with updated resources for job optimization, tincture usage, and more.
Learning a new raid’s mechanics and structure is crucial. Mistakes are normal, so practice without stressing. Familiarity with your job allows for better adaptability when tackling new content.
Potency Adjustments In Endwalker
With Endwalker’s release, all potency and gearset values have been readjusted. As stated by the dev team, this was to prevent number inflation on-screen and lower computational stress. The overall changes have not impacted the balance of FFXIV, and the game performs as well as before.
Analysis has shown that, as of now, the values are somewhat based on patch 4.5 before the release of Shadowbringers. Overall, the performance of jobs in relation to content is as good as ever and shouldn’t be a cause for concern.
That brings us to the conclusion of our Machinist rotation guide. Our goal was to ensure you gain knowledge about the fundamentals of Machinist and its practical application. We hope you find this guide helpful as you go up against Fandaniel and Zenos amidst the Final Days. Forge ahead, Warrior of Light!
Next: FFXIV Mystery Miners
Thanks! Do share your feedback with us. ⚡
How can we make this post better? Your help would be appreciated. ✍