Ah… I’ve finally found a reason to smash my old controller into bits while being consumed by rage and despair. That’s what Souls games are all about. And Elden Ring is a testament to the fact that they can still get tougher over the years. So, after a lot of painful hours and a few aching fingers, I’ve finally brought the best Elden Ring settings guide for PC.
I’ve tested out Elden Ring on a PC with the following specifications:
- OS: Windows 11 Pro 23H2
- System: Lenovo Legion 7i Laptop
- CPU: Intel i7-11800H
- GPU: NVIDIA RTX 3070 8GB
- RAM: 32GB DDR4
- Storage: Samsung 1TB SSD Gen 4
To run Elden Ring on your PC, you’ll at least need an Intel I5-8400 or AMD Ryzen 3 3300X for the CPU, Nvidia GTX 1060 or AMD Radeon RX 580 for the GPU, and 12 GB of RAM.
The following settings seem to impact in-game FPS a lot for Elden Ring on PC:
- Texture Quality
- SSAO
- Reflection Quality
- Shader Quality
- Grass Quality
Elden Ring’s performance on PC suffered from constant FPS drops, stuttering, and graphical glitches. Despite running the game on a good GPU, the game’s optimization prevented the game from running smoothly. One of the biggest problems was the textures not properly loading in (also mentioned in Abdul Haddi’s Elden Ring review).
Best Graphics Settings
Alright, let’s optimize Elden Ring’s performance by using the best Elden Ring settings for in-game graphics options. Elden Ring has a slew of graphical options you can tweak to find the sweet spot between performance and visuals
A Summary Of Best Settings
| Best Graphics Settings | Option |
| Screen Mode | Fullscreen |
| Resolution | Your Monitor’s Native Resolution |
| Auto-Detect Best Rendering Settings | Off |
| Quality Settings | Custom |
| Texture Quality | Medium |
| Antialiasing Quality | High |
| SSAO | Medium |
| Motion Blur | Off |
| Shadow Quality | Maximum |
| Lighting Quality | High |
| Effects Quality | High |
| Volumetric Quality | High |
| Reflection Quality | Medium |
| Water Surface Quality | High |
| Shader Quality | Medium |
| Global Illumination Quality | High |
| Grass Quality | Medium |
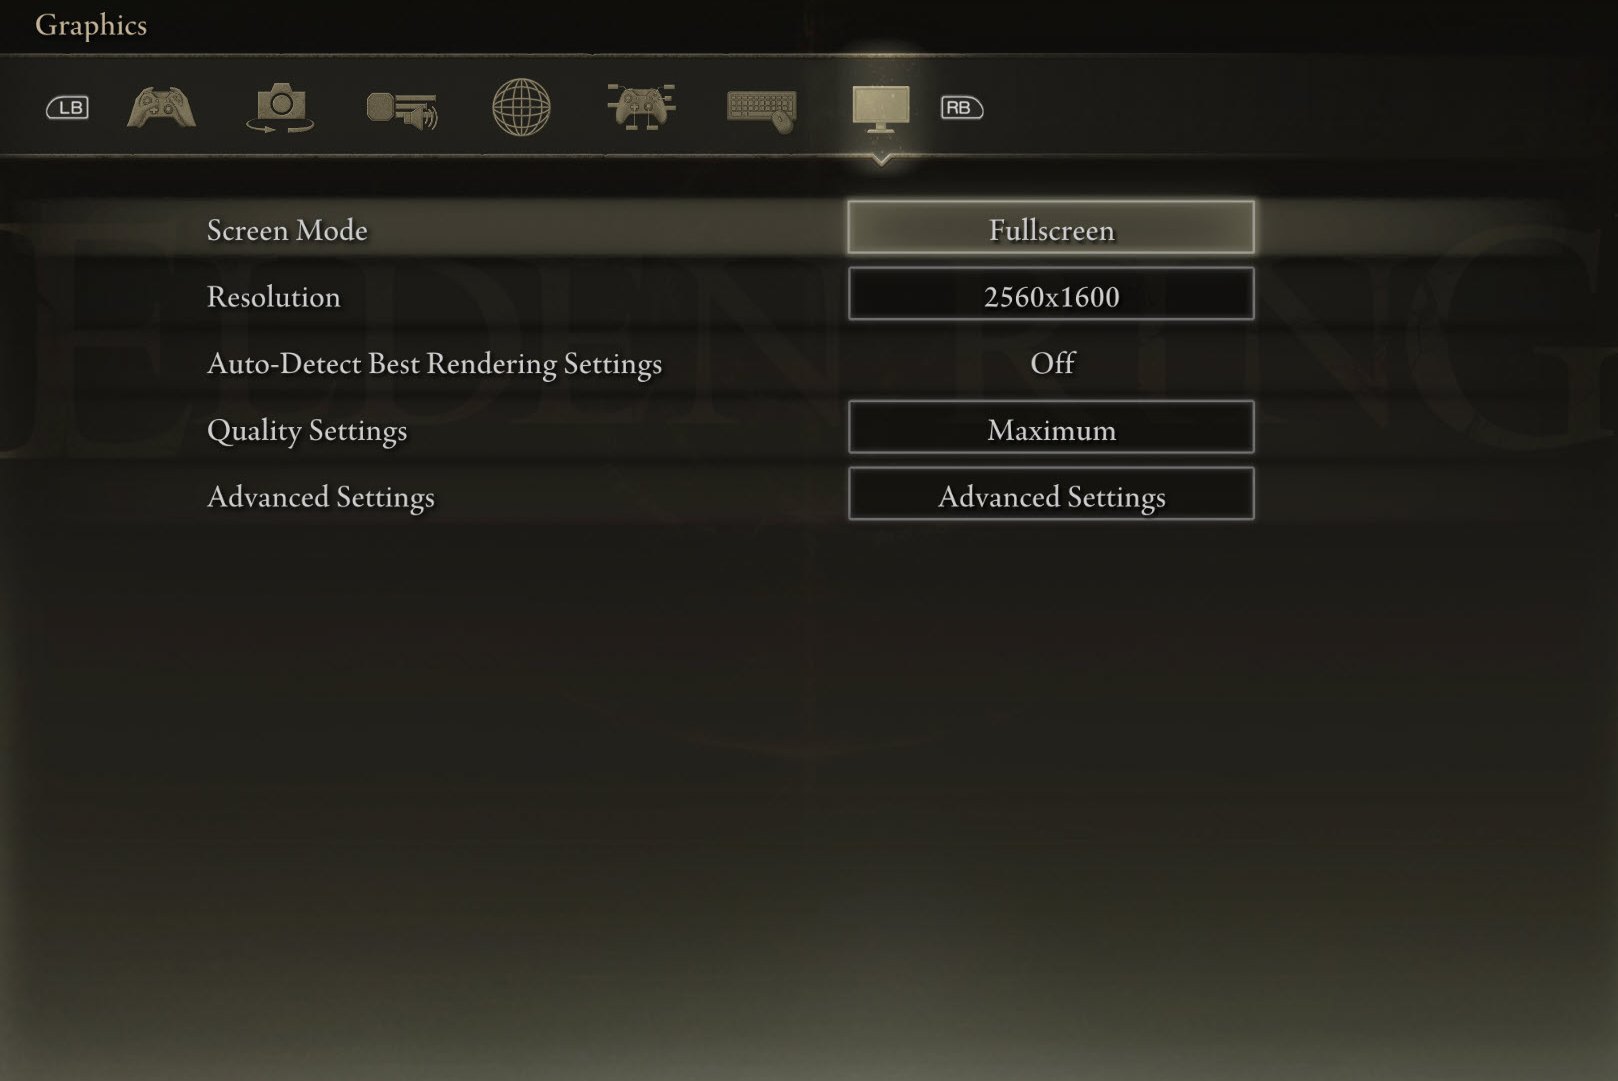
Screen Mode: Fullscreen
Set the Screen Mode to FullScreen to maximize the performance of the game. Exclusive FullScreen mode helps your PC divert resources to Elden Ring better increasing performance.
Resolution: Your Monitor’s Native Resolution
Using your monitor’s native resolution is the best option here. If you want to use a lower resolution, it’ll give you a huge boost in performance but also heavily degrade texture quality.
Auto-Detect Best Rendering Settings: Off
Auto-Detect Best Rendering Settings is a great feature in Elden Ring. It helps the game automatically decide the best rendering according to your hardware specs. This would be naturally be set to on. However, taking the game’s bad optimization into consideration, this option ends up slowing down the game with high rendering quality. Hence, it’s best turned off.
Quality Settings: Custom
We’ll fine-tune each graphical setting Elden Ring has to offer. So, we won’t be selecting any particular Quality Setting Preset. Instead, it’ll be automatically set to custom.
Make sure to save these basic graphics settings before you jump into the “Advanced Settings” section.
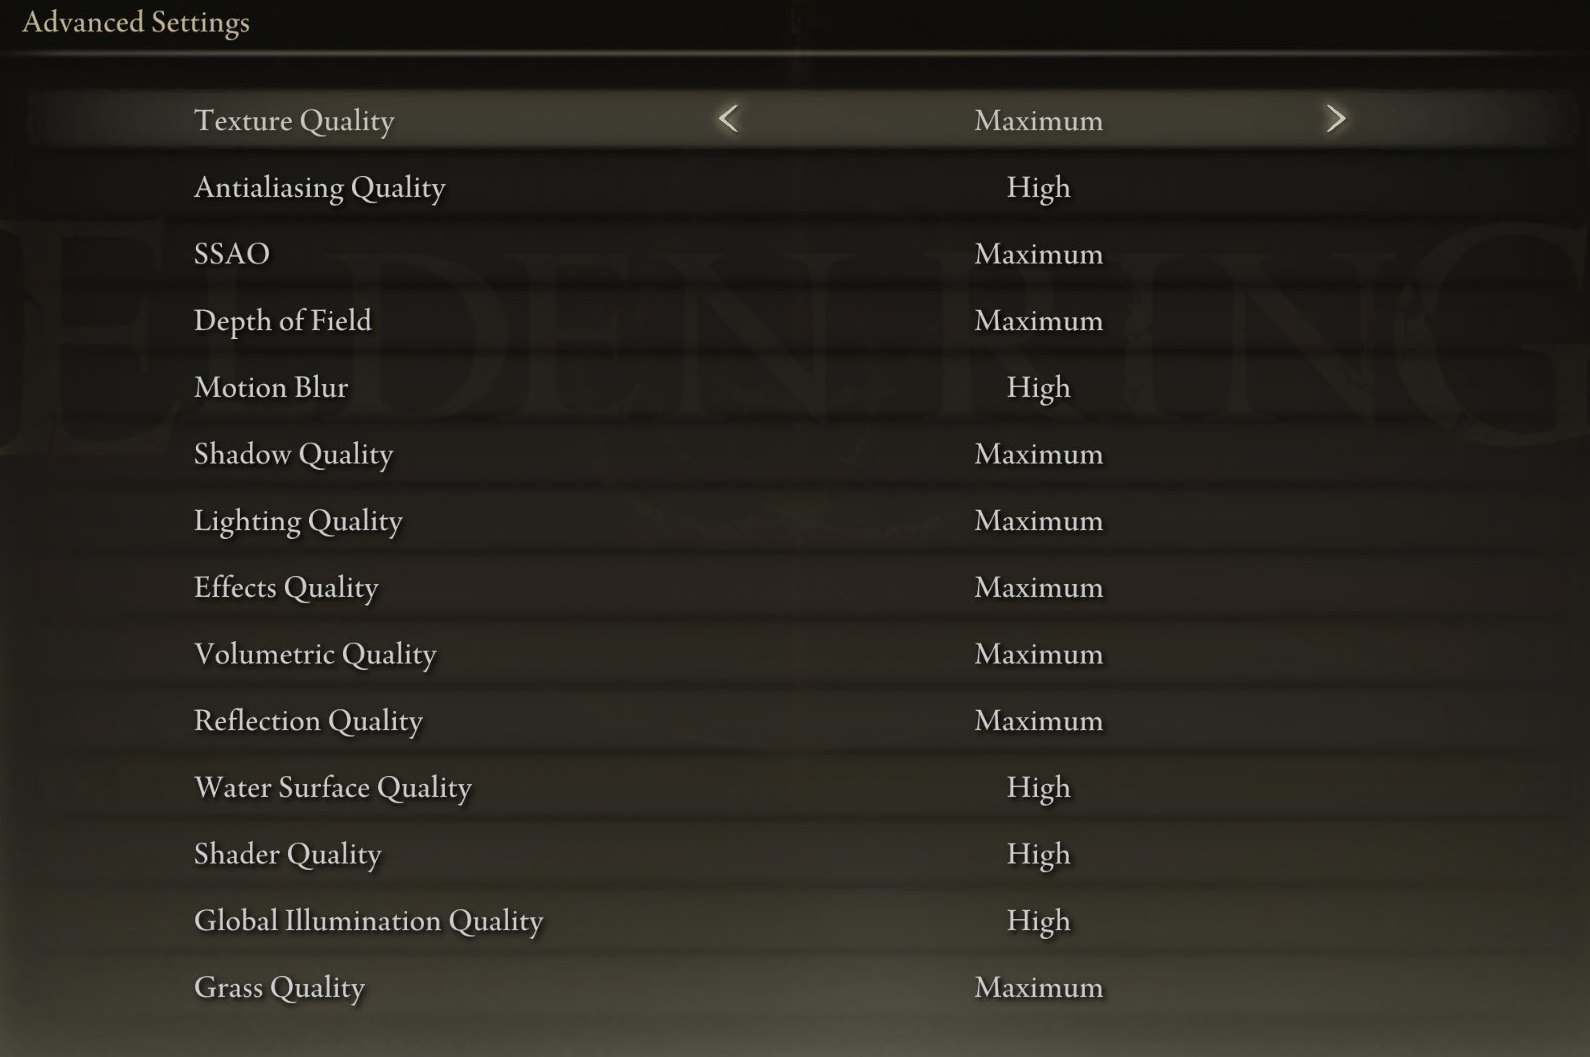
This is where we’ll squeeze out as much performance as we can from Elden Ring. Try to configure them according to the following settings. You can later increase or reduce any particular setting according to your preference.
Texture Quality: Medium
Texture Quality is one of the most taxing settings compared to others. Lowering or increasing it will provide the most noticeable performance changes. Medium is a sweet spot between high performance and decent visuals.
Antialiasing Quality: High
Lowering Antialiasing Quality isn’t really worth it in Elden Ring graphics settings. High provides decent visuals without jagged edges at a minimal performance cost.
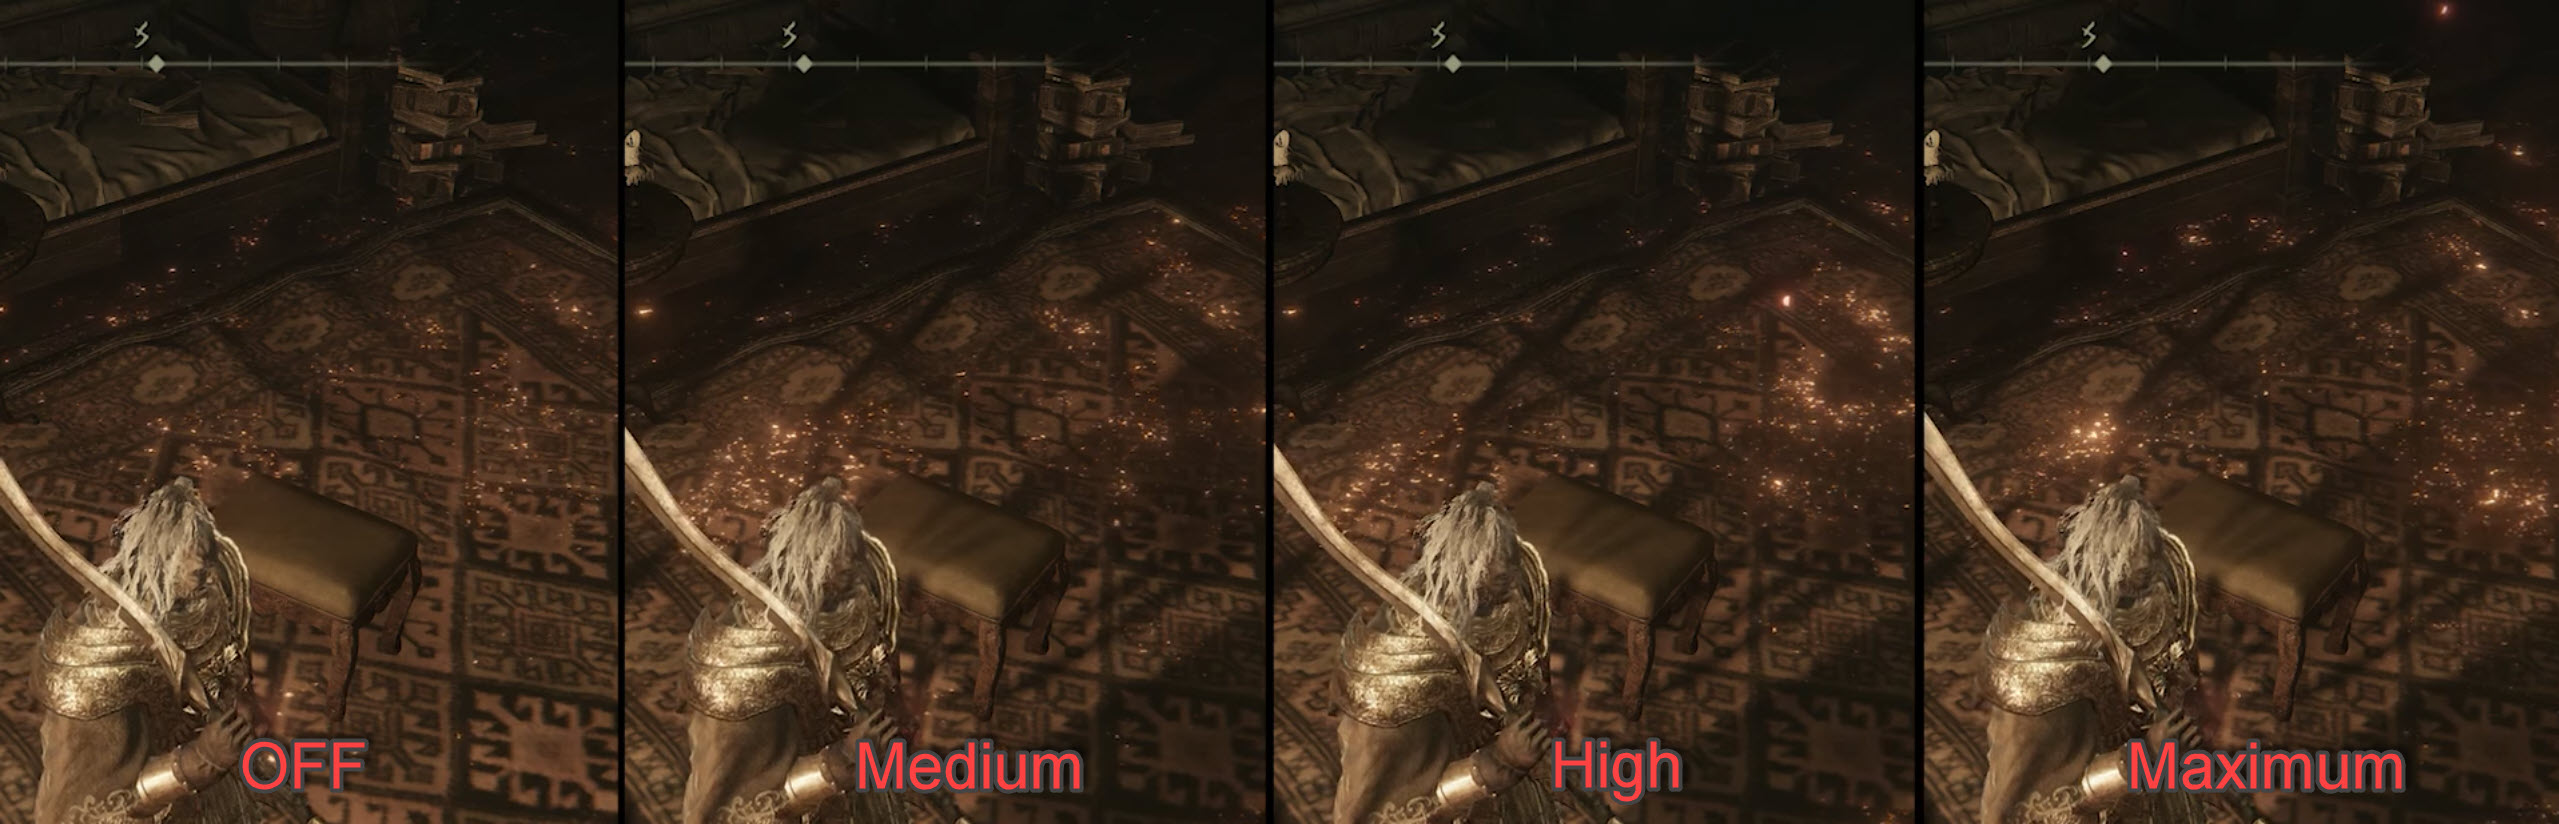
SSAO: Medium
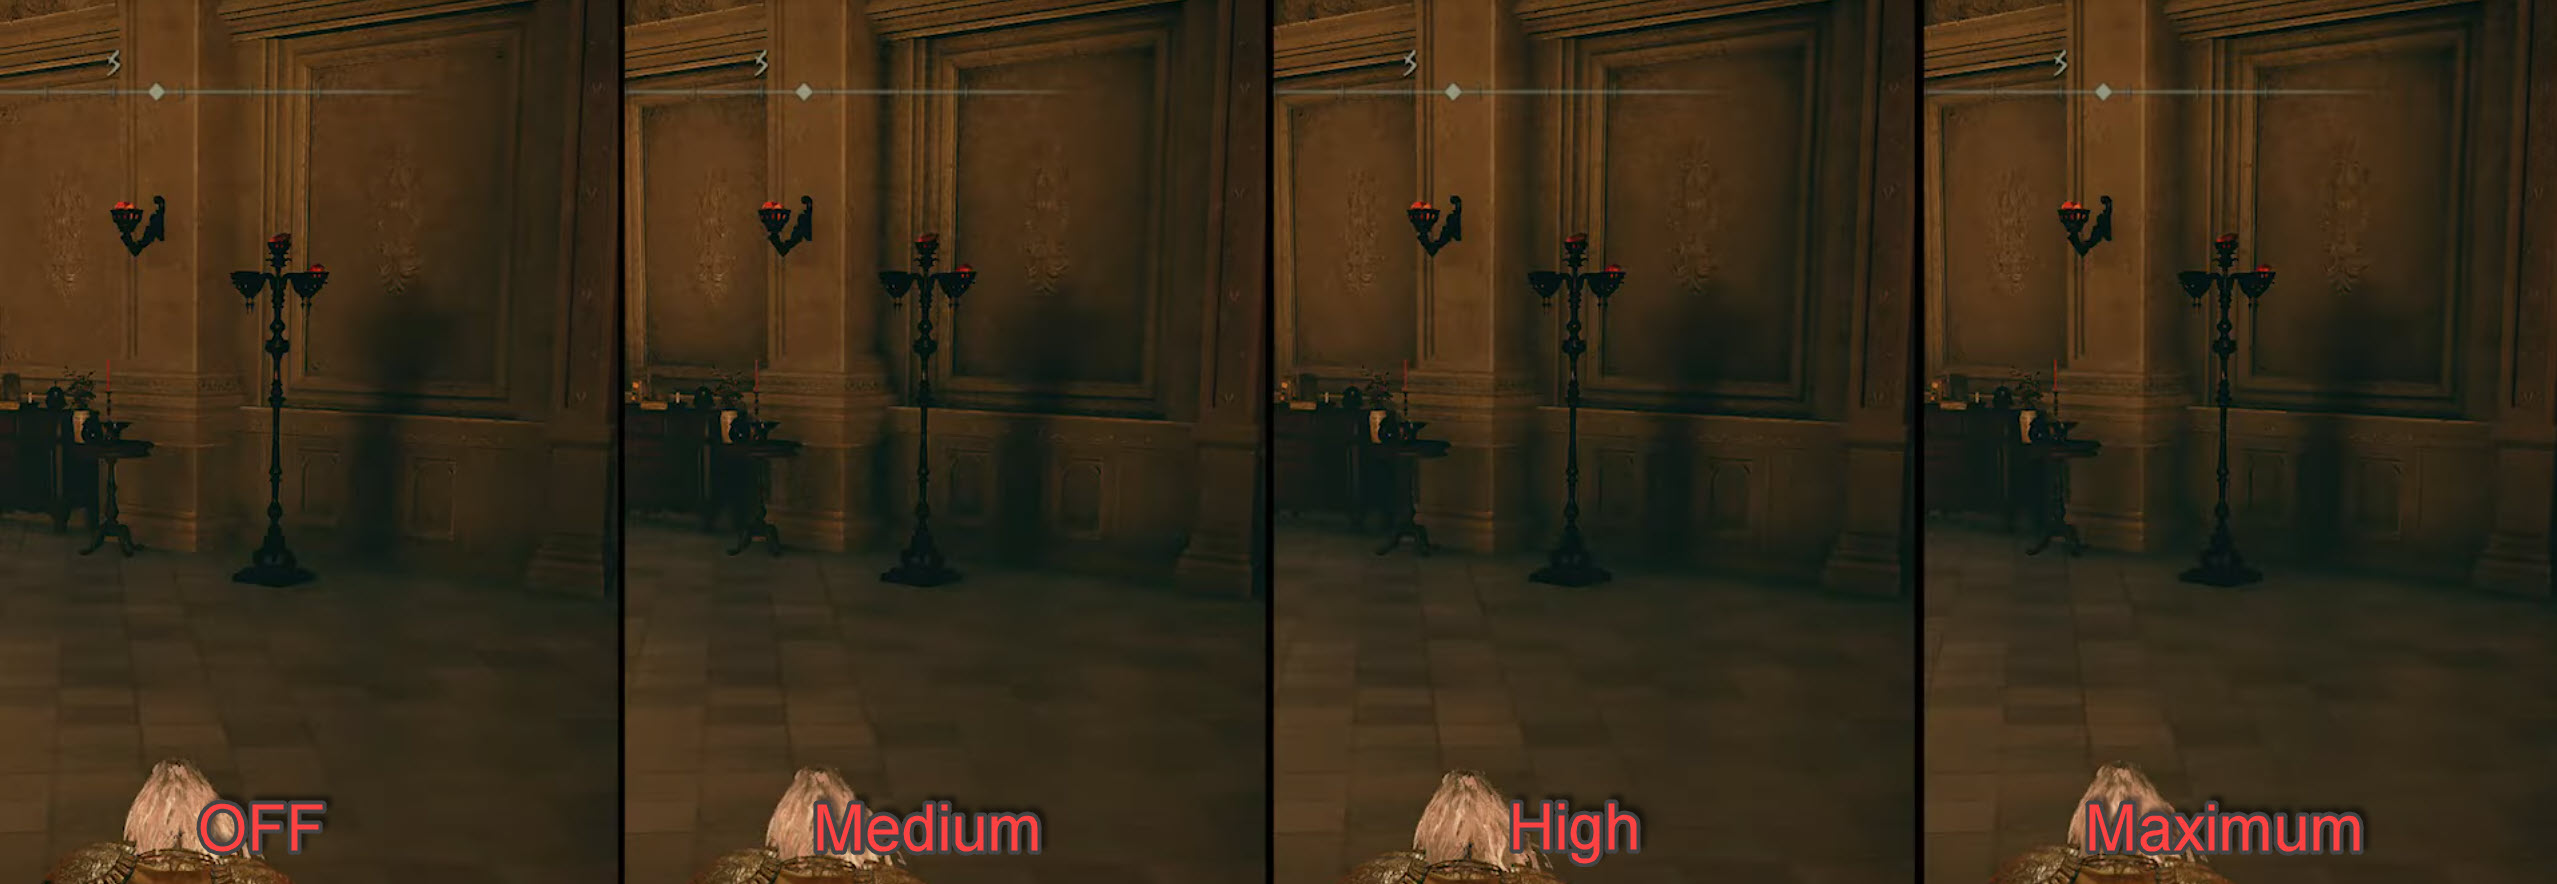
Dropping SSAO from high to medium provides a decent performance improvement and doesn’t affect visuals that much. Medium is the best option to set SSAO on.
Motion Blur: Off
Motion Blur in Elden Ring is not necessary, even as just an aesthetic graphical feature. It’s because you’ll be dodging, rolling, and quickly spinning the camera around during enemy encounters. Having constant motion blur while fighting enemies can cause unnecessary blurriness and even negatively affect your gameplay.
Shadow Quality: Maximum
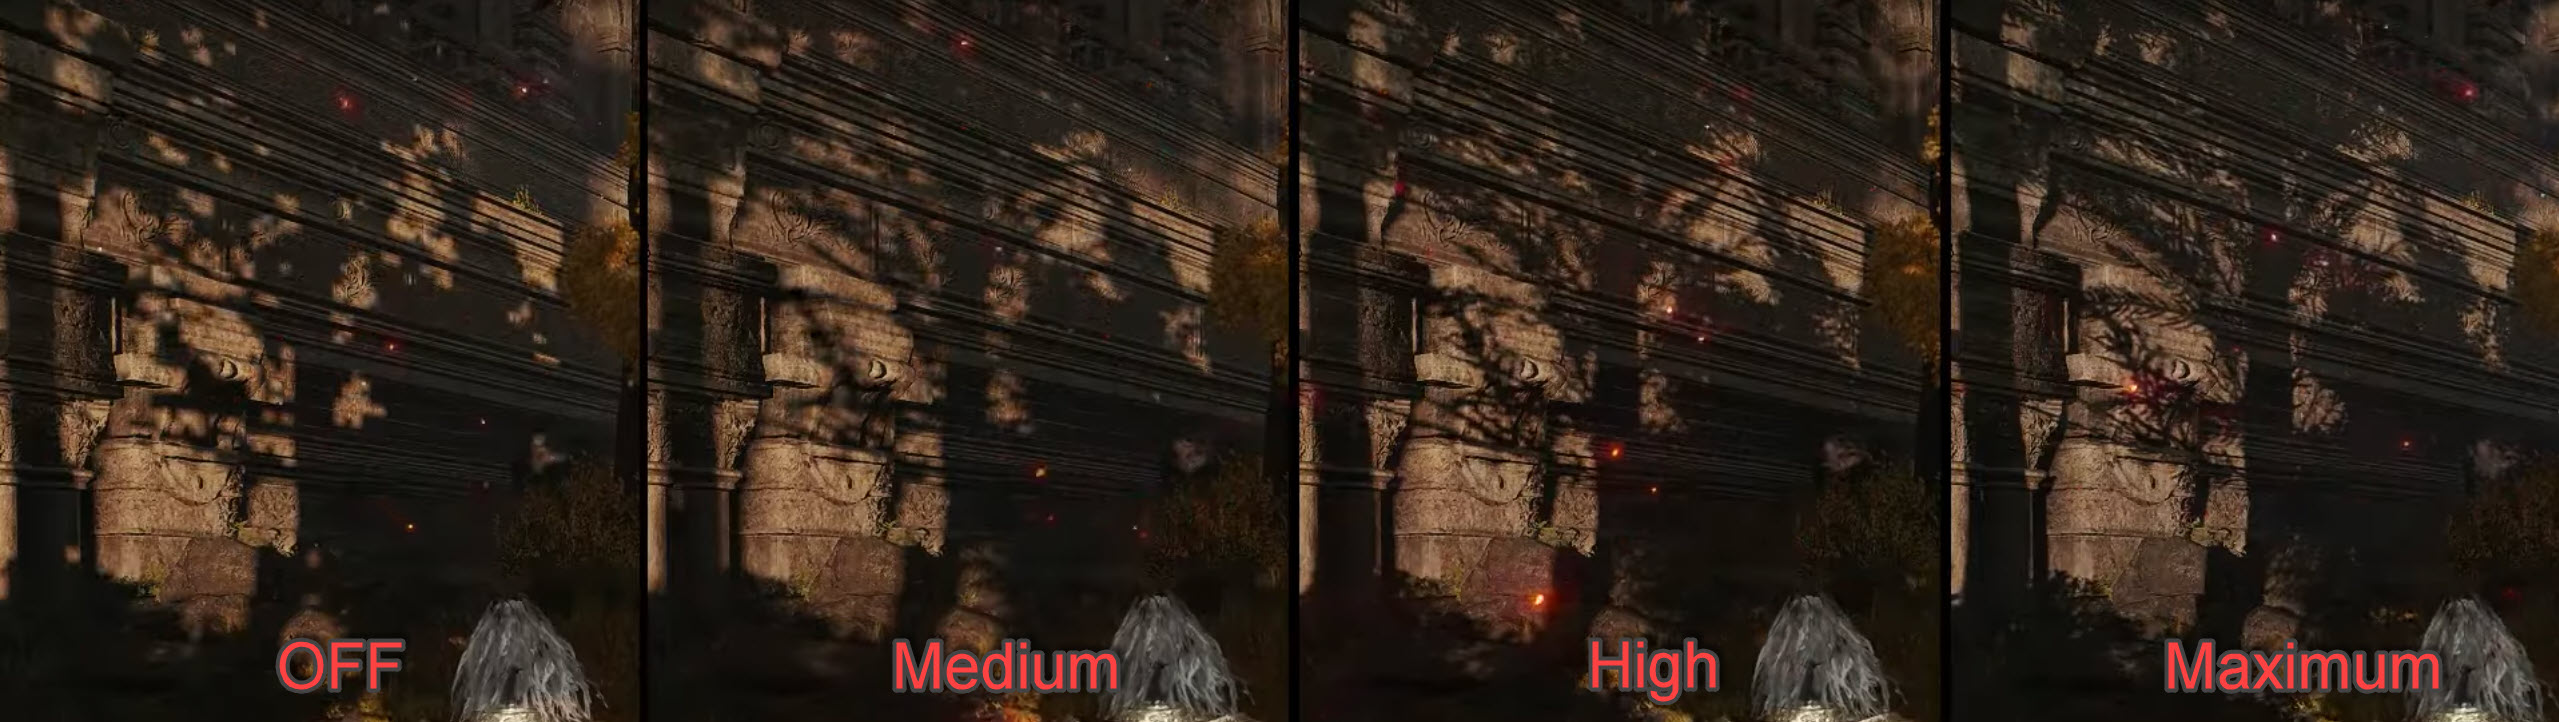
Yes, put Shadow Quality to the maximum to avoid weird shimmering in textures. As far as I know, it’s a graphical bug that’ll get fixed in upcoming updates. But until that happens, keep Shadow Quality to Maximum. After it’s fixed in future updates, you can safely drop it down to Medium or Low.
Lighting Quality: High
Lowering Lighting Quality doesn’t really improve performance. Keep it too High to enjoy the fluorescent glow of the world around you in Elden Ring.
Effects Quality: High
Effects Quality also didn’t really improve performance when set to Medium or Low. Hence, keep it at High to avoid any unnecessary graphical downgrade.
Volumetric Quality: High
Volumetric Quality enhances the overall look of the world of Elden Ring. However, lowering it too much didn’t really add to the performance. Keeping it at either Medium or High is the best option here.
Reflection Quality: Medium
At this point, I believe these settings are either broken or these settings work in mysterious ways. Lowering even Reflection Quality did not yield any performance improvement. Even though Reflection Quality is one of the most taxing settings in other games, in Elden Ring it has little to no effect on performance when lowered. To be on the safe side, keep Reflection Quality to Medium.
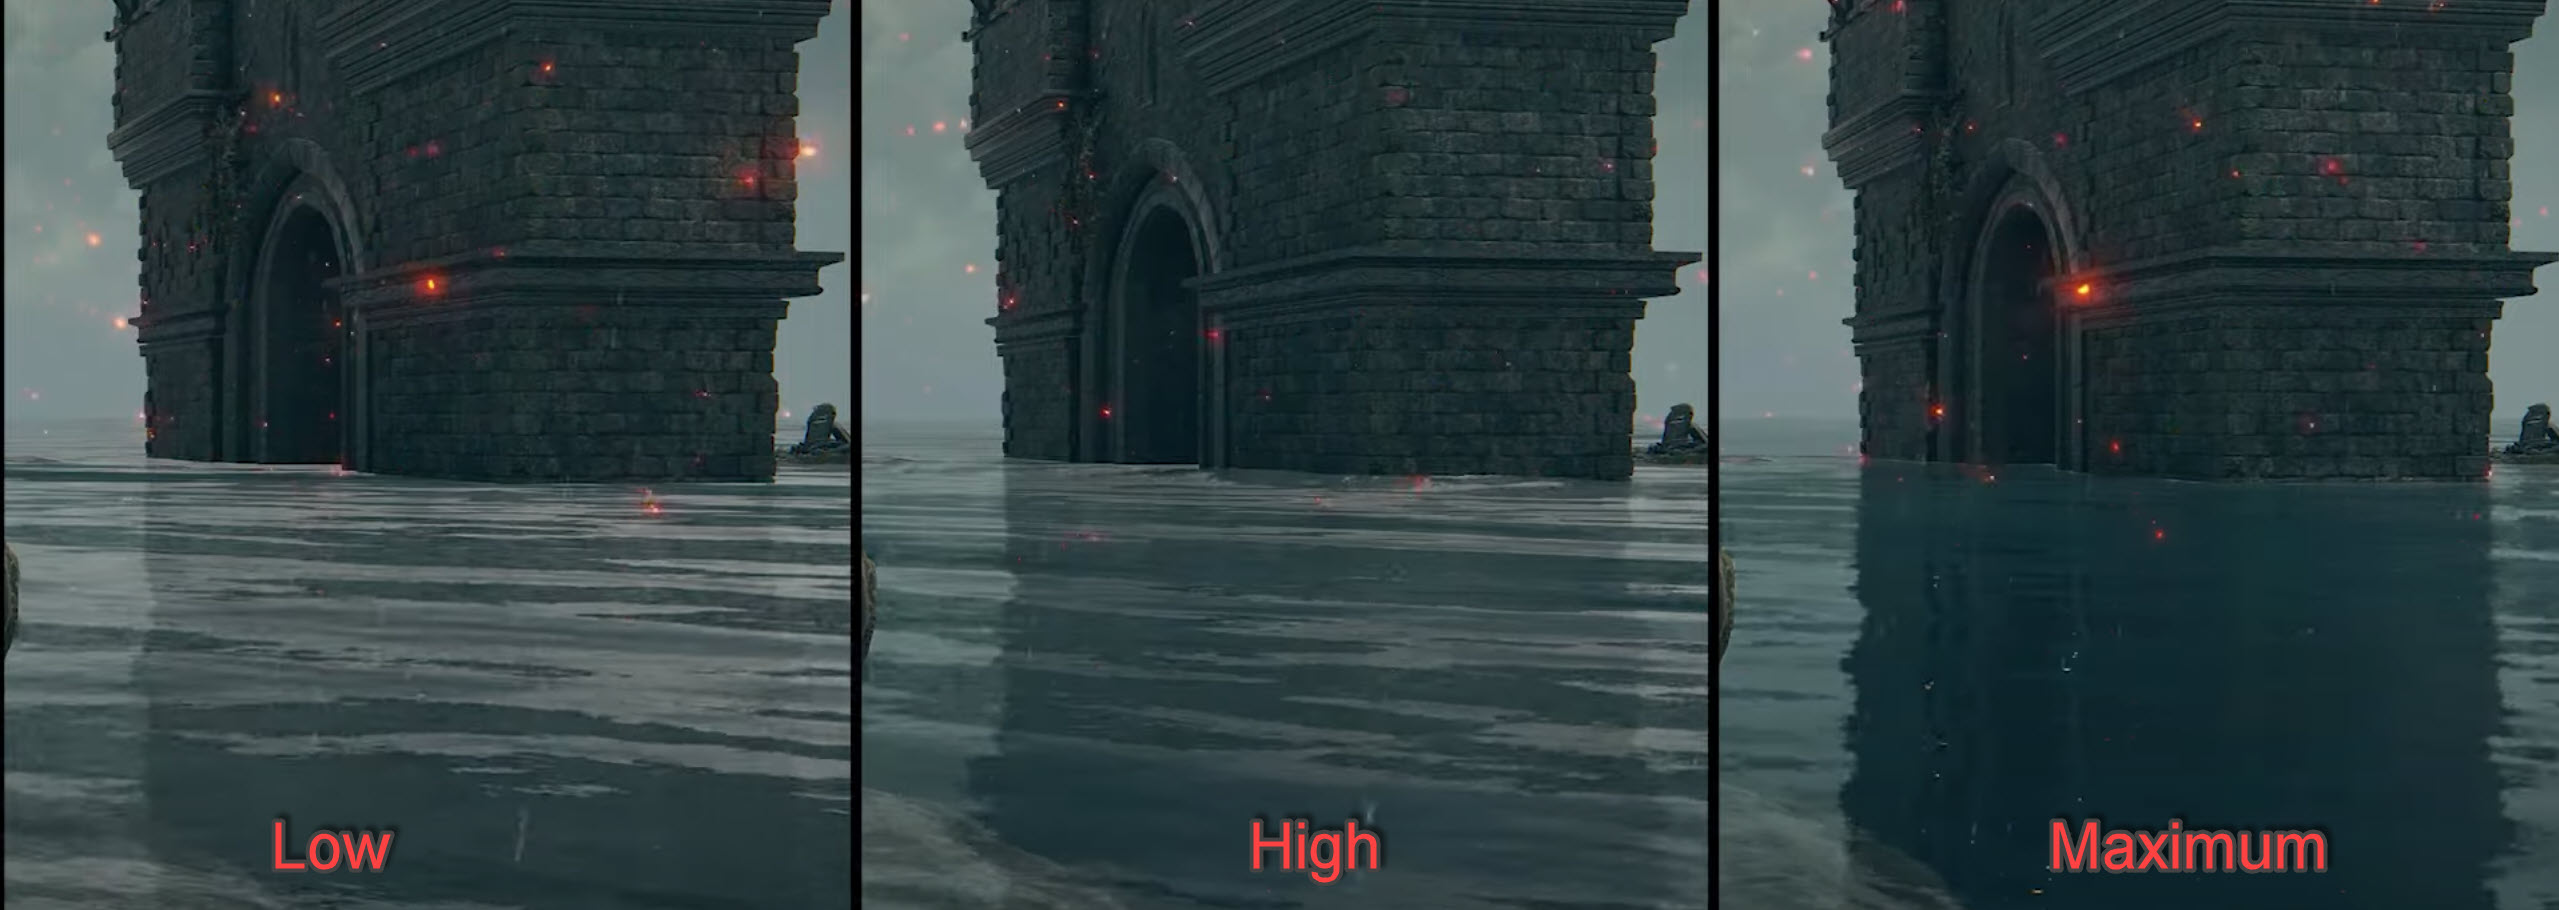
Water Surface Quality: High
Lowering Water Surface Quality didn’t really impact performance by quite a lot. Even while testing this setting I spent most of my time around water bodies. If you’re looking to gain even the slightest performance, you could keep it at Low.
Shader Quality: Medium
Shader Quality is a setting that finally gave me about 5-6 FPS, going from High to Medium. The visuals weren’t really affected that much so it was a good change overall.
Global Illumination Quality: High
Global Illumination Quality is also one of those settings that don’t really provide any improvement in performance when lowered. So it’s best to keep it at high to avoid reducing visual quality for nothing.
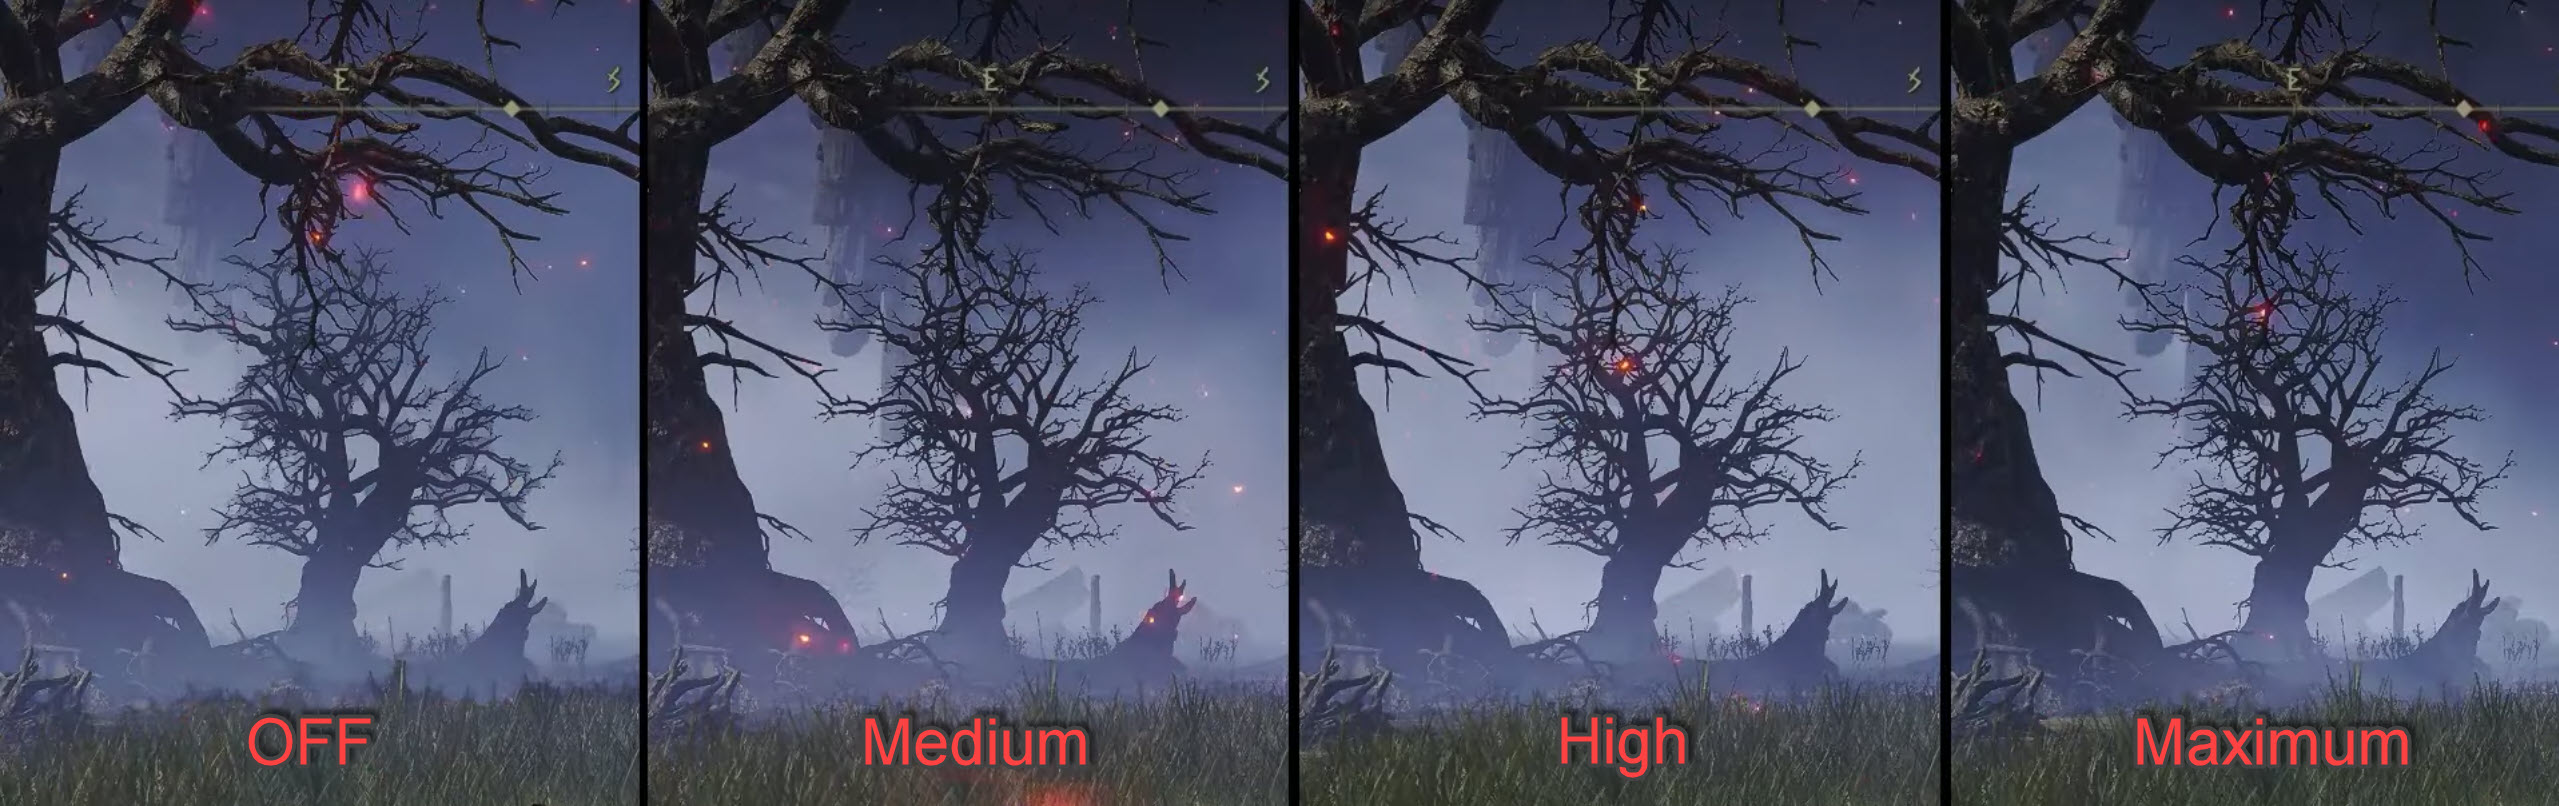
Grass Quality: Medium
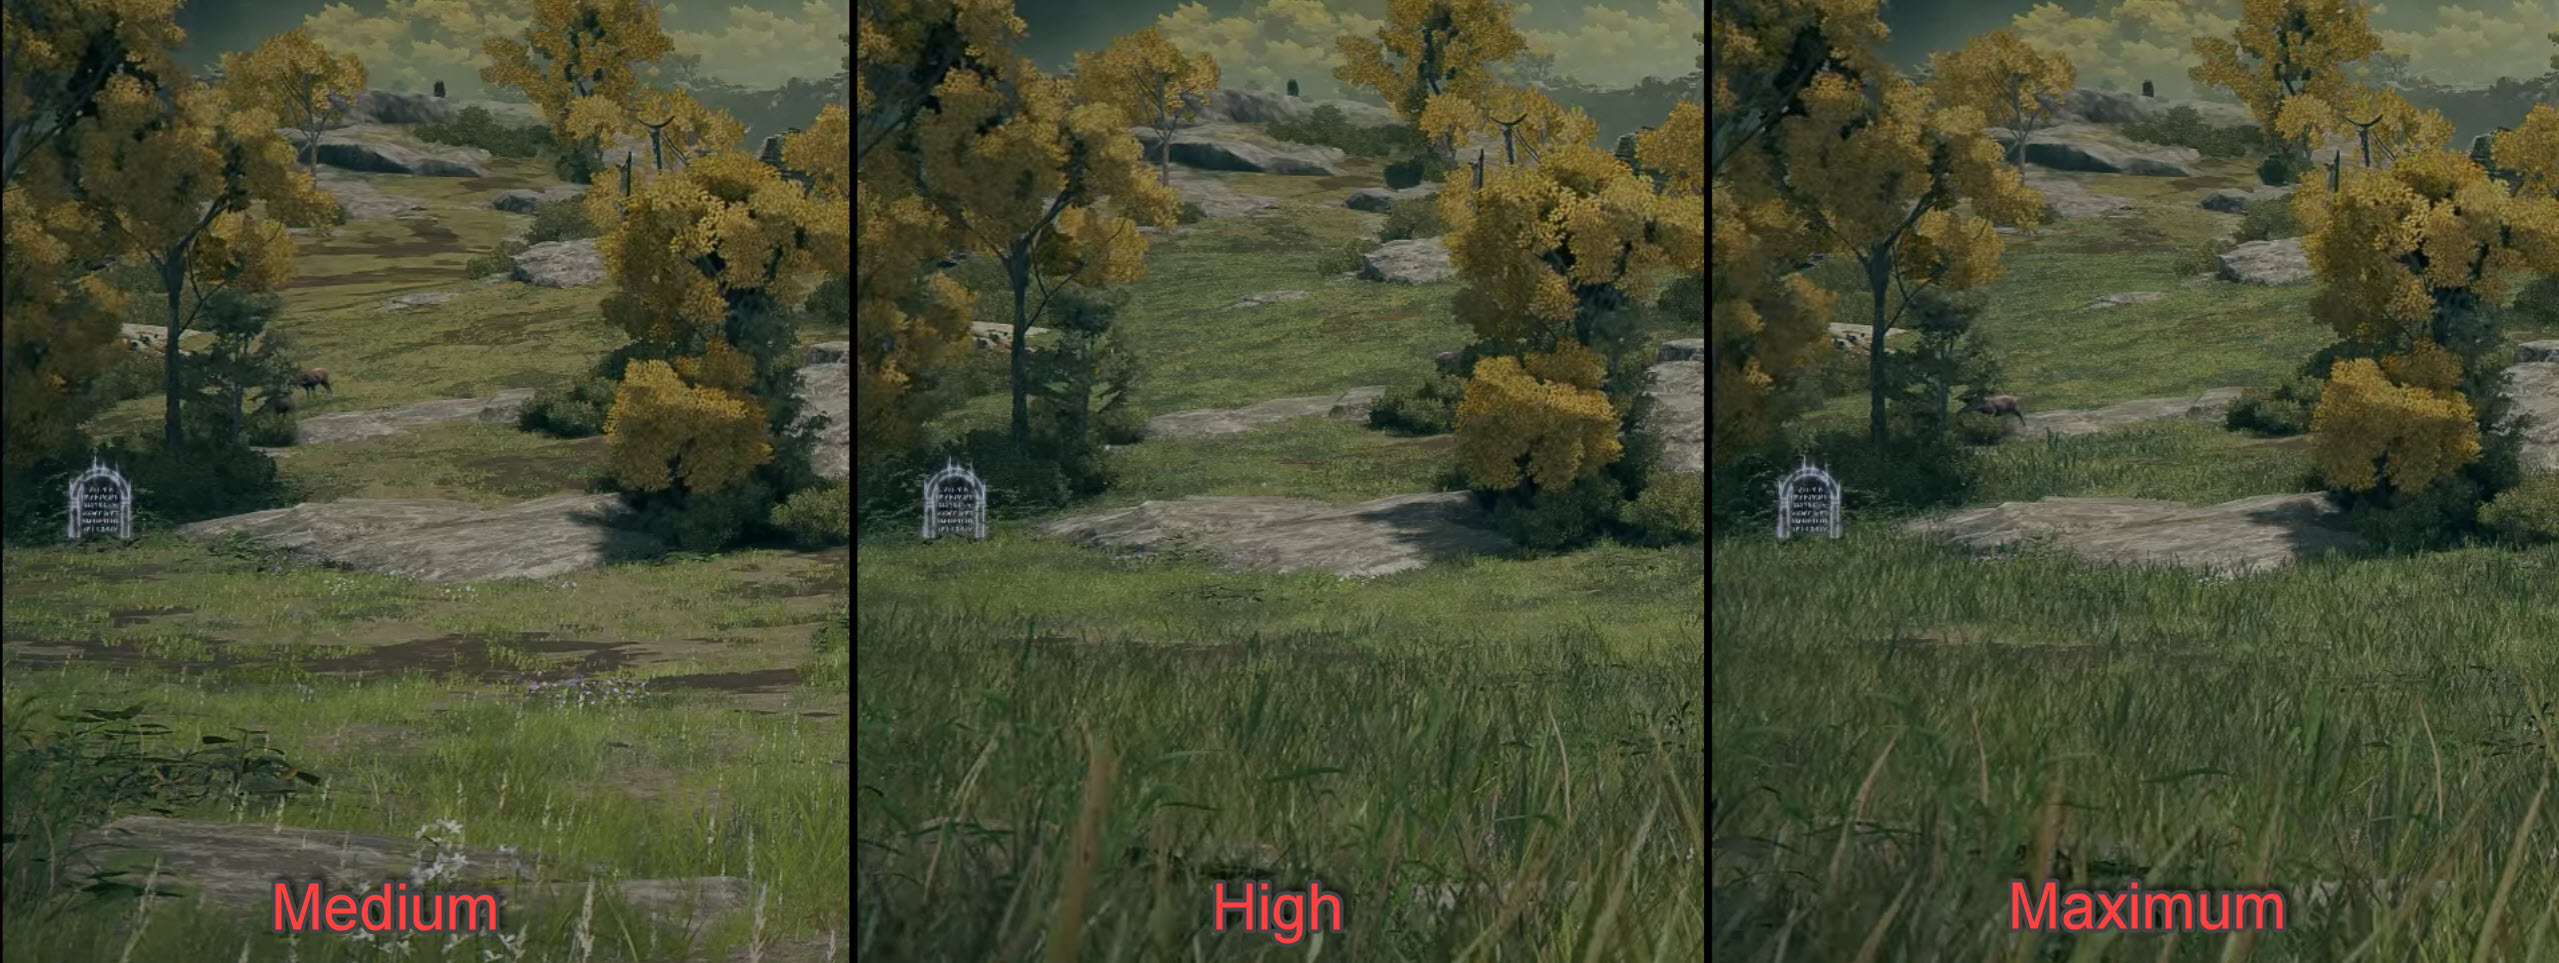
Lowering Grass Quality from Maximum to Medium gave me over 7 FPS in-game which was a surprising improvement. You may get slightly better performance at low too but you’ll have to deal with low-quality grass.
And that’s about it. These are all the best Elden Ring graphics settings you need to use to get the max performance.
Now keep in mind that simply lowering some of these settings to low won’t give you a significant impact on performance. However, if you wish to squeeze every ounce of performance, you may proceed to turn every setting low. However, the graphical downgrade isn’t really worth it.
Nvidia Settings for Elden Ring PC
I recommend configuring your Nvidia Control Panel with the settings I’ve suggested below for maximum performance benefit.
Nvidia Settings Summary
| Nvidia Settings | Option |
| Image Sharpening | Off |
| Anisotropic Filtering | Off |
| FXAA – Antialiasing | Off |
| Background Max Frame Rate | 20 |
| Low Latency Mode | On |
| Max Frame Rate | Off |
| Power Management Mode | Prefer Max Performance |
| Monitor Technology | G-Sync |
| Multi-Frame Sampled AA (MFAA) | Off |
| Anisotropic Sample Optimization | On |
| Quality – Texture Filtering | High Performance |
| Trilinear Optimization – Texture Filtering | On |
| Threaded Optimization | On |
| Triple Buffering | Off |
| Vertical Sync | Off |
You can also check out our complete dedicated Best Nvidia Control Panel Settings guide for further information.
AMD Settings for Elden Ring
If you own an AMD GPU, I also recommend that you optimize your Radeon panel settings as well.
AMD Settings Summary
| AMD Settings | Option |
| Radeon Anti-Lag | Enabled |
| AMD Radeon Chill | Disabled |
| Radeon Boost | Disabled |
| Image Sharpening | Disabled |
| Radeon Enhanced Sync | Disabled |
| Wait for Vertical Refresh | Always off |
| Frame Rate Target Control | Disabled |
| Antialiasing | Use Application Settings |
| Antialiasing Method | Multisampling |
| Morphological Antialiasing | Disabled |
| Anisotropic Filtering | Disabled |
| Texture Filtering Quality | Performance |
| Surface Format Optimization | Enabled |
| Tessellation Mode | Override Application Settings |
| Maximum Tessellation Level | Off |
| OpenGL Triple Buffering | Disabled |
| Reset Shader Cache | Perform Reset |
Now that’s all, the AMD settings you just configured will be instantly applied and you’ll see a significant boost in Elden Ring’s performance.
Windows Optimization for Elden Ring
Now we’ll optimize different Windows components to get maximum performance. There are several optimization options and settings in Windows that can boost your in-game performance. Let’s begin tweaking them.
- Update Your Windows: To gain the best performance in games and regular PC use, updating your Windows is crucial as updates contain crucial performance tweaks, bug fixes, and security patches.
- Run the Game as Admin: Running Elden Ring with administrator privileges ensures that no other system policy or application affects your game’s performance. Most crashes or game stability issues get fixed once you run it as admin. You can do this by going into installation files > Right-clicking on main exe file > Properties > Compatibility Tab > Check-mark run as administrator.
- Enable Hardware-Accelerated GPU Scheduling: This feature takes the load off the CPU and lets the GPU push frames out faster resulting in better performance across the board. You can enable it by going into Settings > System > Display > Graphics > Choose default graphics settings > Enable the setting here.
- Terminate Unnecessary Background Programs: There are several programs running in your background that you don’t know about. They are only hogging your system resources leaving no breathing room for games causing performance issues. You can terminate the useless ones through Task Manager.
- Turn on Game Mode: It’s a feature baked into the windows that helps increase the game’s performance. It actively finds apps and programs and either closes or reduces resources towards them while the game is running. It helps the game perform better in most cases. You can turn it on in Settings > Gaming > Game Mode.
Before optimizing the game, I was averaging around 40 FPS with all settings turned to high at 1600p resolution. Turning down grass and reflections gave me an instant 15 FPS boost. Using the optimized settings I’ve suggested above, I could play the game at a solid 65-70 FPS without RT shadows. There were minor performance hiccups in fights with intense particle effects, but not very significant.
And there you have it, folks. After tons of hours invested into a Souls game, I never thought I’d play, I have got kinda of hooked. The agony of dying over and over again may break my spirit, but winning a fight after that struggle is what matters. Just like I finally managed to create this best setting guide for Elden Ring even though I struggle with Souls games.
I really hope this guide provided some value to your experience with this legendary game. Hopefully, developers will start pushing out updates for the game that will include performance fixes. Until then, I hope our settings guide for Elden Ring provides you with a decent gaming experience. Until next time readers, peace!
Thanks! Do share your feedback with us. ⚡
How can we make this post better? Your help would be appreciated. ✍
I downloaded Elden Ring and everytime that I tried to run it it returned me to the desktop. I called my nephew and he said to turn down the graphics in the game. I havent tried that yet because I have been reading these 30+ pages. Wow, and I have the latest tech, I feel for the gamers that have old computers.
Good stuff. Antialiasing and grass are major culprits for poor performance
Grass really thanks the FPS, but most of the beauty is from that too.
Excellent work on this article! It’s detailed, easy to follow, and covers all the crucial settings.
: Thank you for this comprehensive guide. It’s exactly what I needed to get Elden Ring running smoothly on my PC.
Thank you
these setting were helpful for my RX 570 as well
Helpful article but can you maybe add more info which helps out with the recent DLC?
these settings made my old PC worthy of gaming my GTX 1060 can give good frames but on 720p ;-;
![Elden Ring The BEST Parry Shields And Ashes Of War [Top 5] featured imaage](https://exputer.com/wp-content/uploads/2023/10/Elden-Ring-The-BEST-Parry-Shields-And-Ashes-Of-War-Top-5-390x220.jpg)