In Stardew Valley, when you start to plan your best farm layout past the fundamentals, you have various options. You should consider your daily goals and the Stardew Valley map you have picked for your crops. Crops, cattle, equipment, or even flowers might be the focus of a farm.
Key Takeaways
- Stardew Valley’s best farm layouts help you grow crops, make more money, and manage resources effectively.
- Advantages: Simplifies progress and reaching higher farming levels.
- Disadvantages: Some layouts may lack space or features.
- Income Generation: Certain designs are optimized for maximizing earnings.
- Ginger Island Farm: Ideal for players seeking easy money through honey, crops, and Crystalariums.
Stardew Valley’s Best Farm Layouts
Following are the list of Stardew Valley’s best Farm layouts that you can optimize:
| Farm Layouts | Specifications |
|---|---|
| Crops Central | -Map Type: Standard -Best For: Crop growth |
| Wood Planked Farm | -Map Type: Forest -Best For: Trees |
| Industrial Stone | -Map Type: Standard -Best For: Producing a range of resources |
| Deep Forest Farm | -Map Type: Forest -Best For: A combination of grazing and agriculture |
| Flowery Forest | -Map Type: Forest -Best For: Honey and Aesthetics |
| Lush, Wealthy Beach Home | -Map Type: Beach -Best For: A range of Artisan goods |
| Can’t Resist Beautification | -Map Type: Ginger Island -Best For: Different Crops |
| Tropical Crops | -Map Type: Ginger Island -Best For: Trees and Crops |
| Crystal Maze | -Map Type: Hill-Top -Best For: Mining |
| Late-Game Laid Back | -Map Type: Standard -Best For: Aesthetics and Variety of resources |
| Riverland Paradise | -Map Type: Riverland -Best For: Making the most of the little islands' little area |
| Greenery Pastures | -Map Type: Standard -Best For: Aesthetics, gems, and woods |
| Self-Sufficient Farm | -Map Type: Standard -Best For: Animal Raising |
| Rural Brewery | -Map Type: Standard -Best For: Brewing Alcohol |
| Fish Central Layout | -Map Type: Riverland -Best For: Fish |
| WinterFell Farm | -Map Type: Standard -Best For: Different Crops and resources |
| Orchard Farm | -Map Type: Ginger Island -Best For: Crop growth |
| Junimo Farm | -Map Type: Ginger Island -Best For: Junimo Huts |
| Varied And Organized | -Map Type: Standard -Best For: Crop growth and Animal grazing areas |
| Ginger Island Madness | -Map Type: Ginger Island -Best For: Honey, gems, and crops |
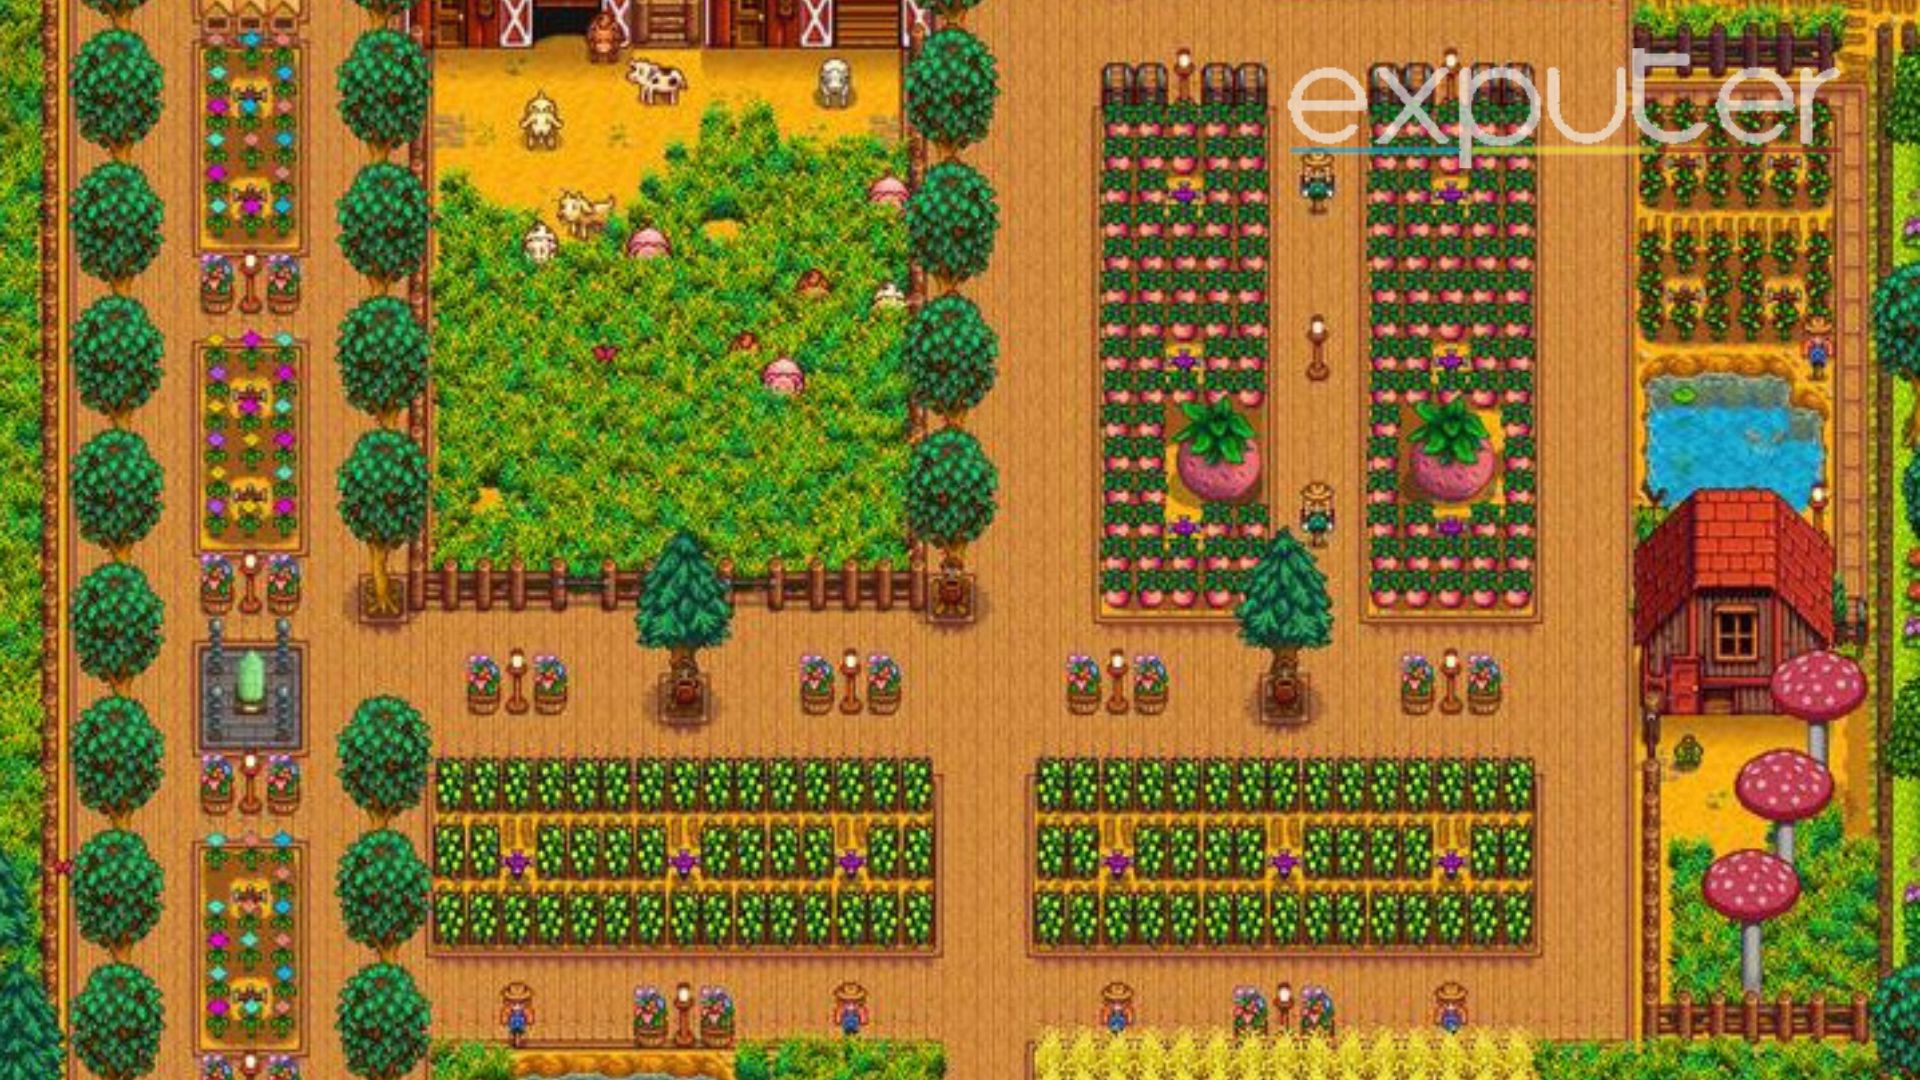
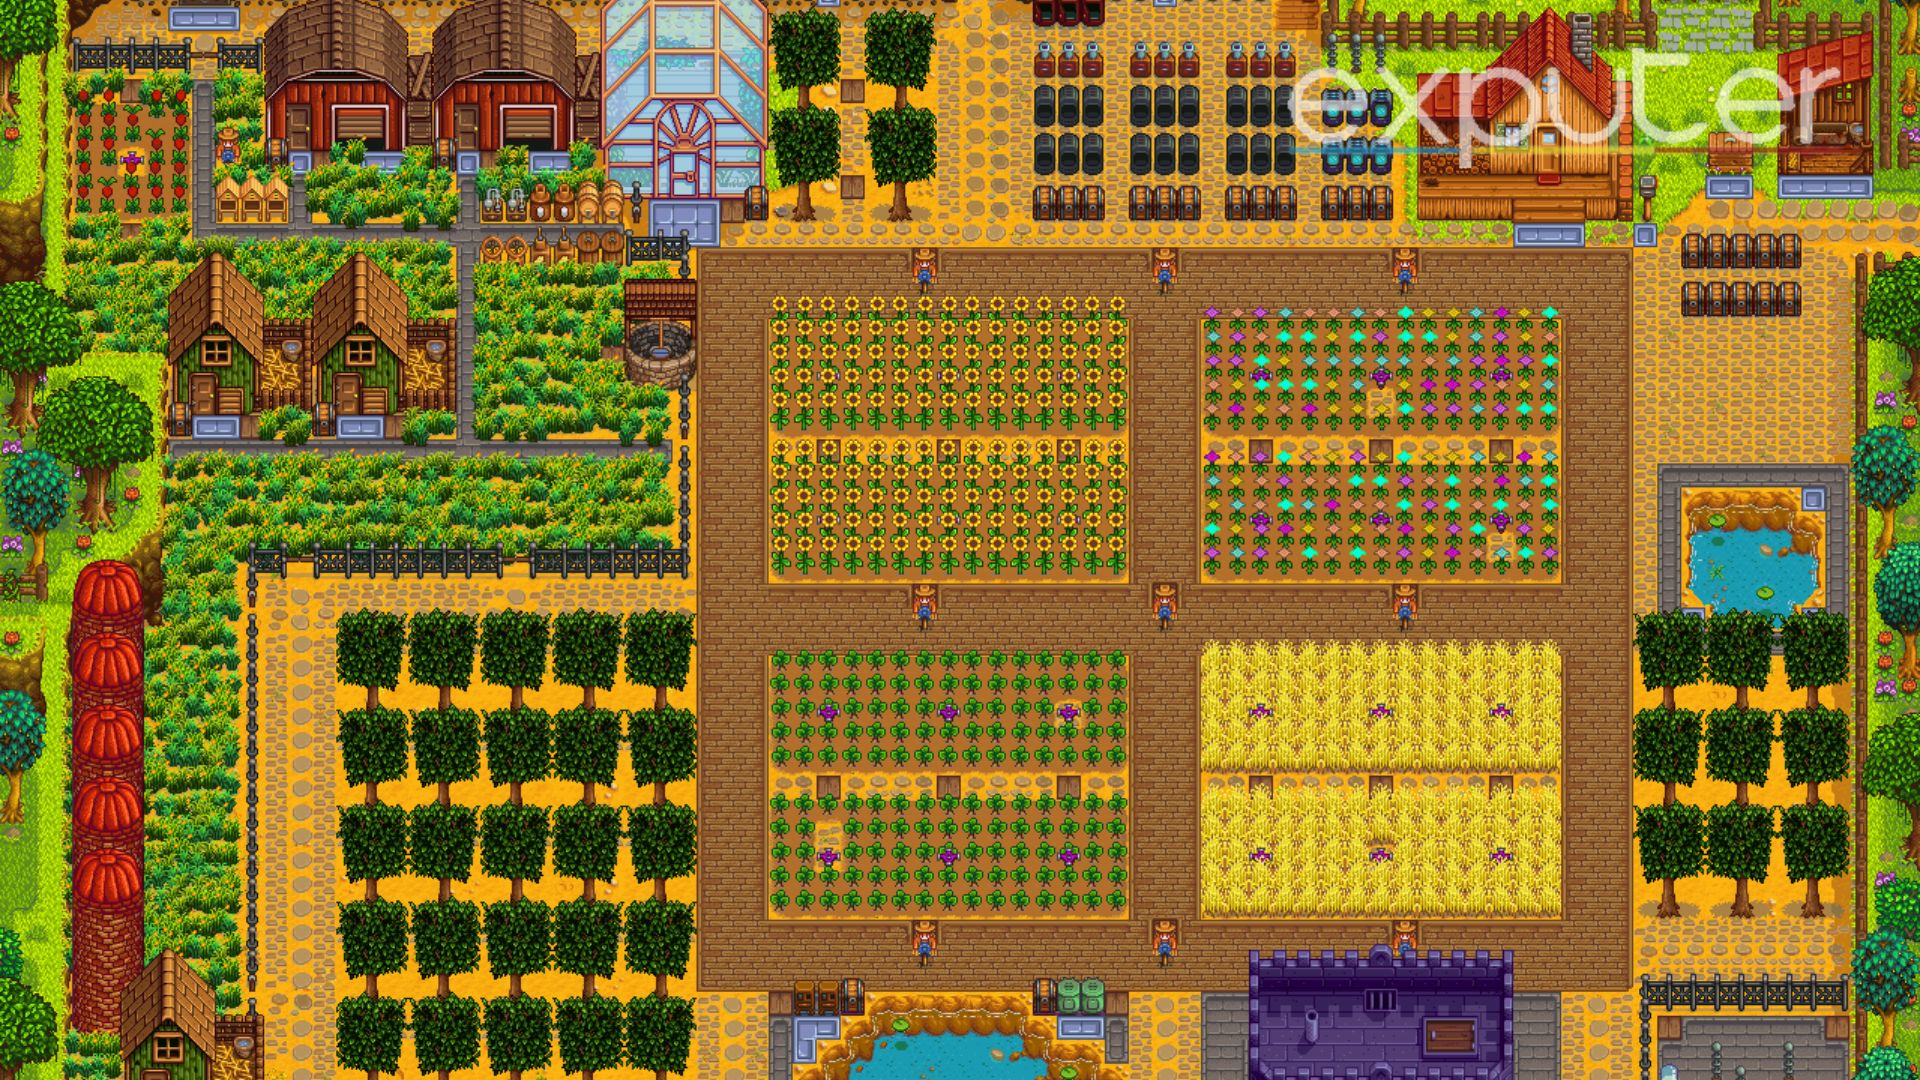
1. Crops Central

- You can house animals while emphasizing the crops if you place barns and coops near the top of the map.
- The huts along the edge of the map may function as a small brewery by housing kegs or marmalade jars.
- Additionally, you may easily ride your dependable steed into town from the stable near the entrance.
2. Wood Planked Farm
- This farm’s distinctiveness more than makes up for its lack of output.
- The use of wood boards throughout prevents substantial growth as the seasons change.
3. Industrial Stone
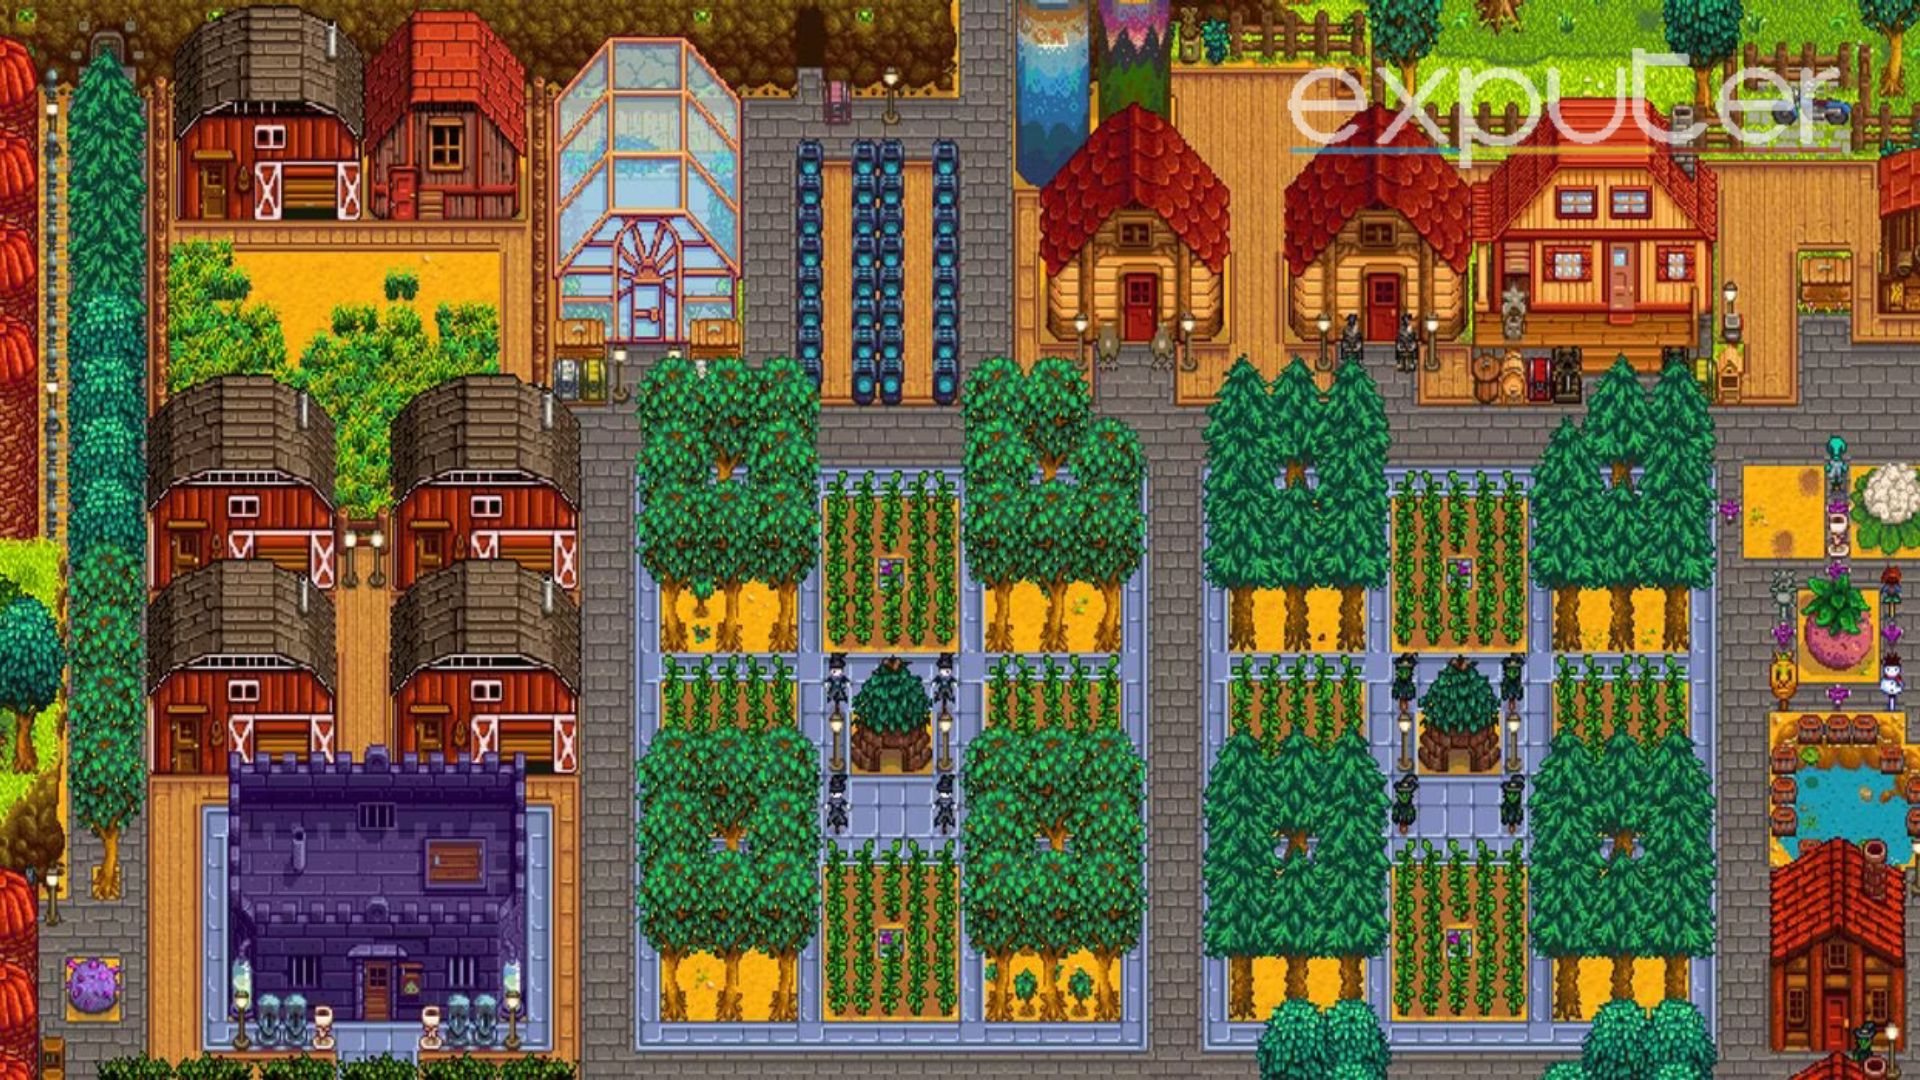
- The middle section is for crops and trees to maintain a consistent wood supply and agricultural revenue.
- Every animal is on the far-left side, with a limited and condensed grassy space.
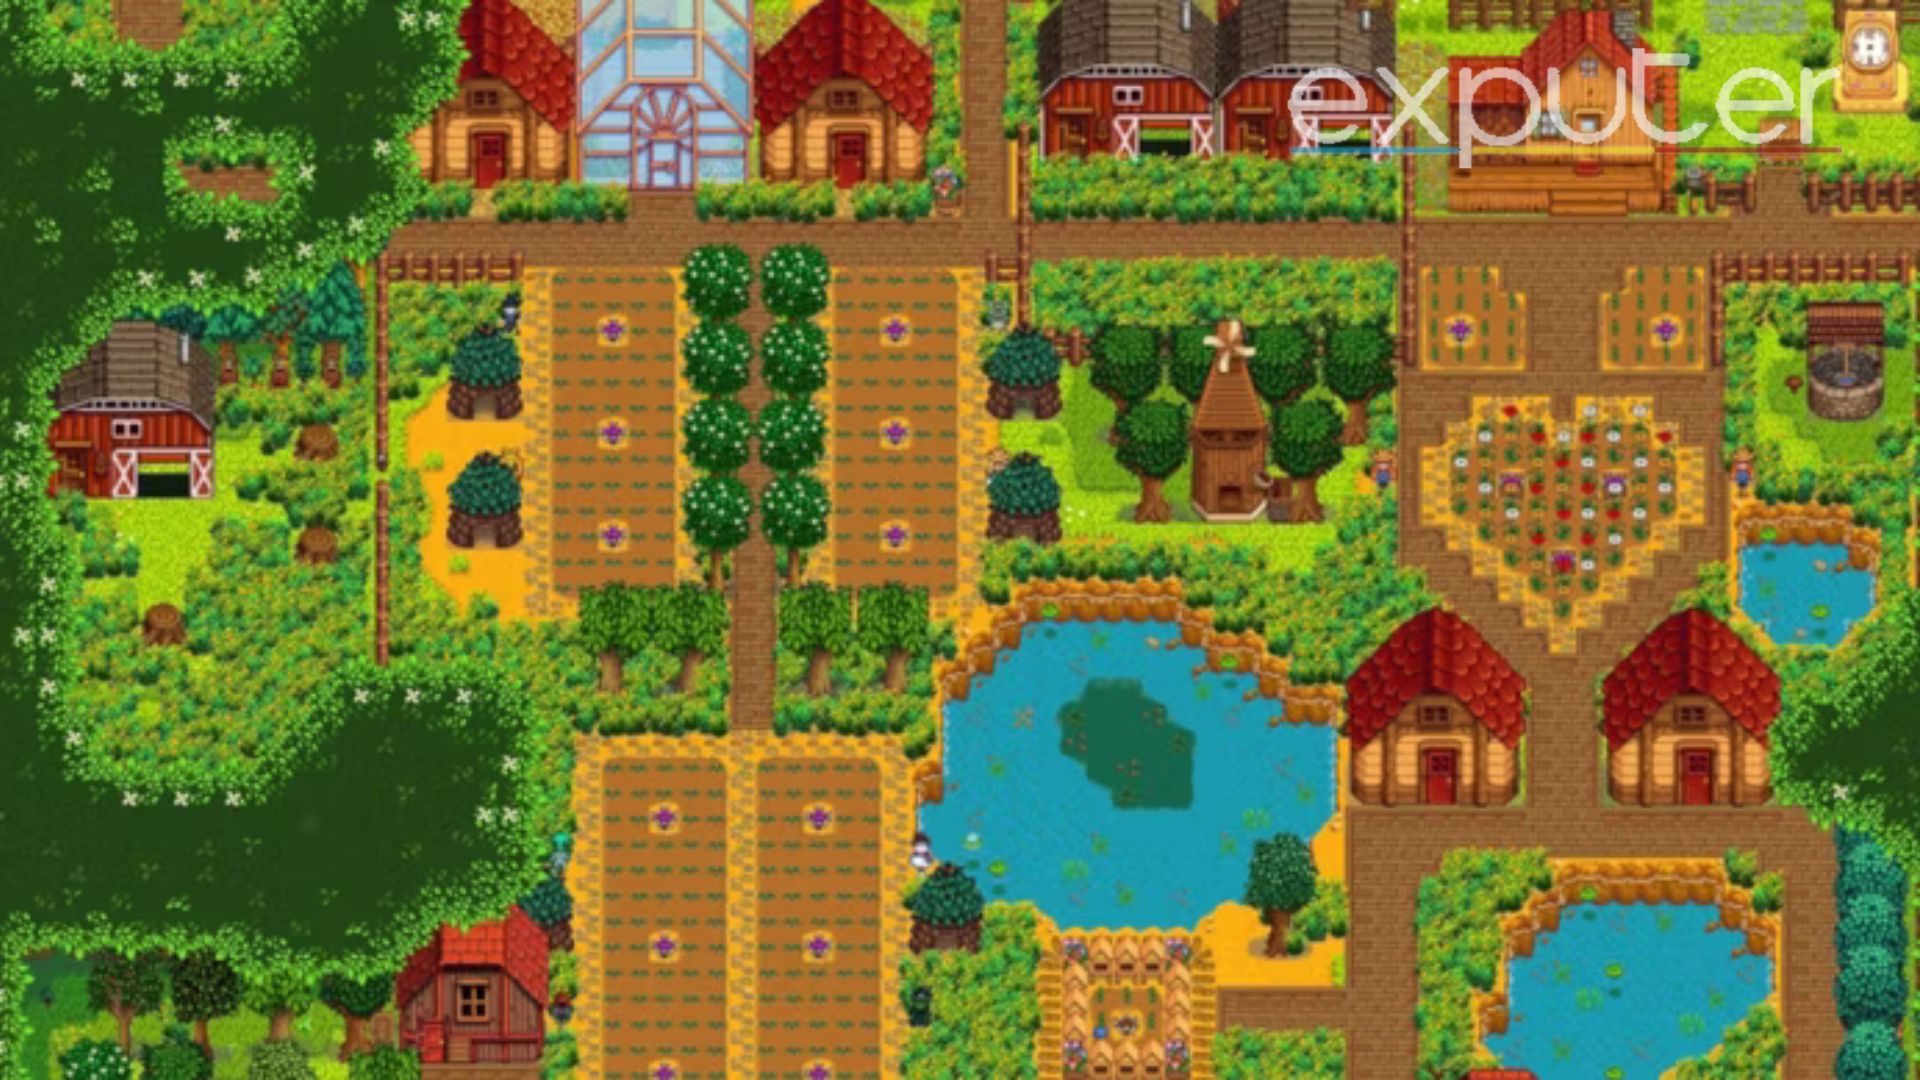
4. Deep Forest Farm
- Wherever space permits, crops are neatly arranged in the middle of the scene.
- The farm animals are housed in somewhat more natural enclosures using the remaining open area.
- A clear line separates the concrete paths from the green fields in front of the barns.
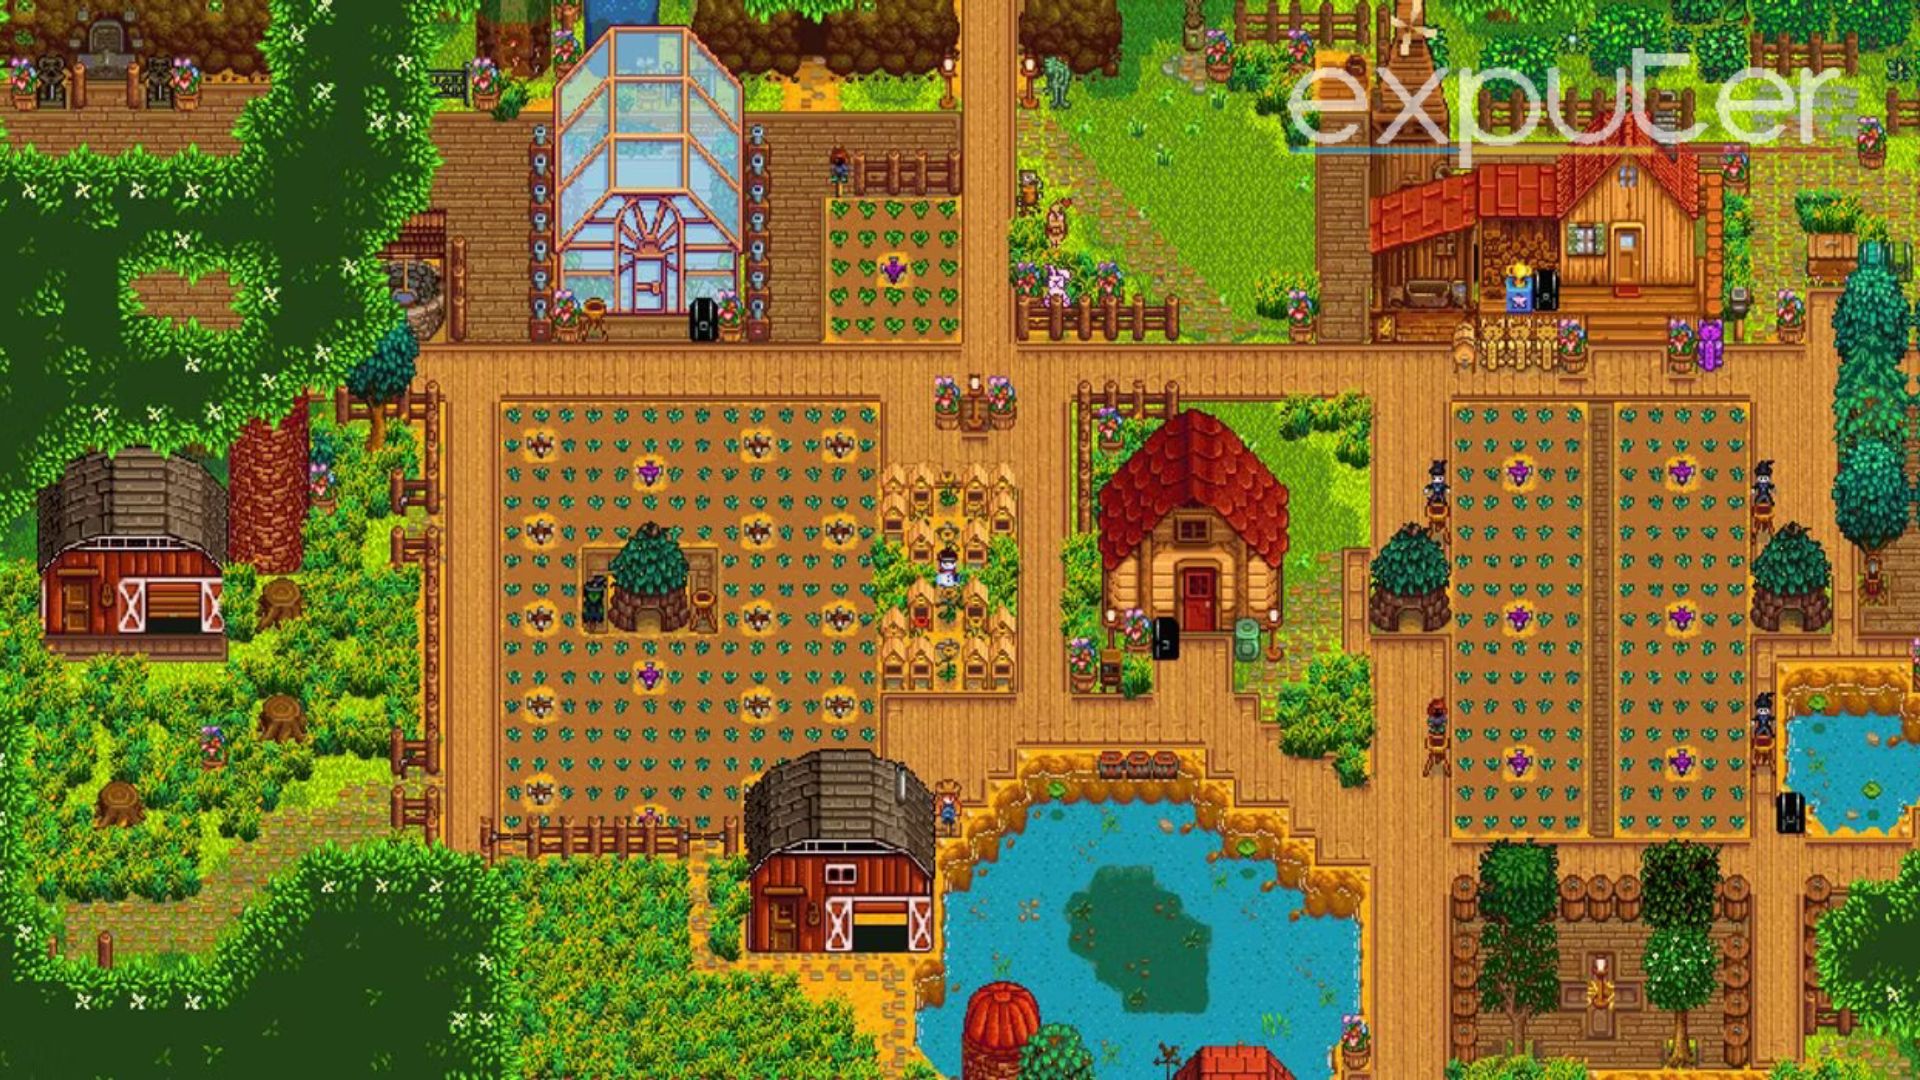
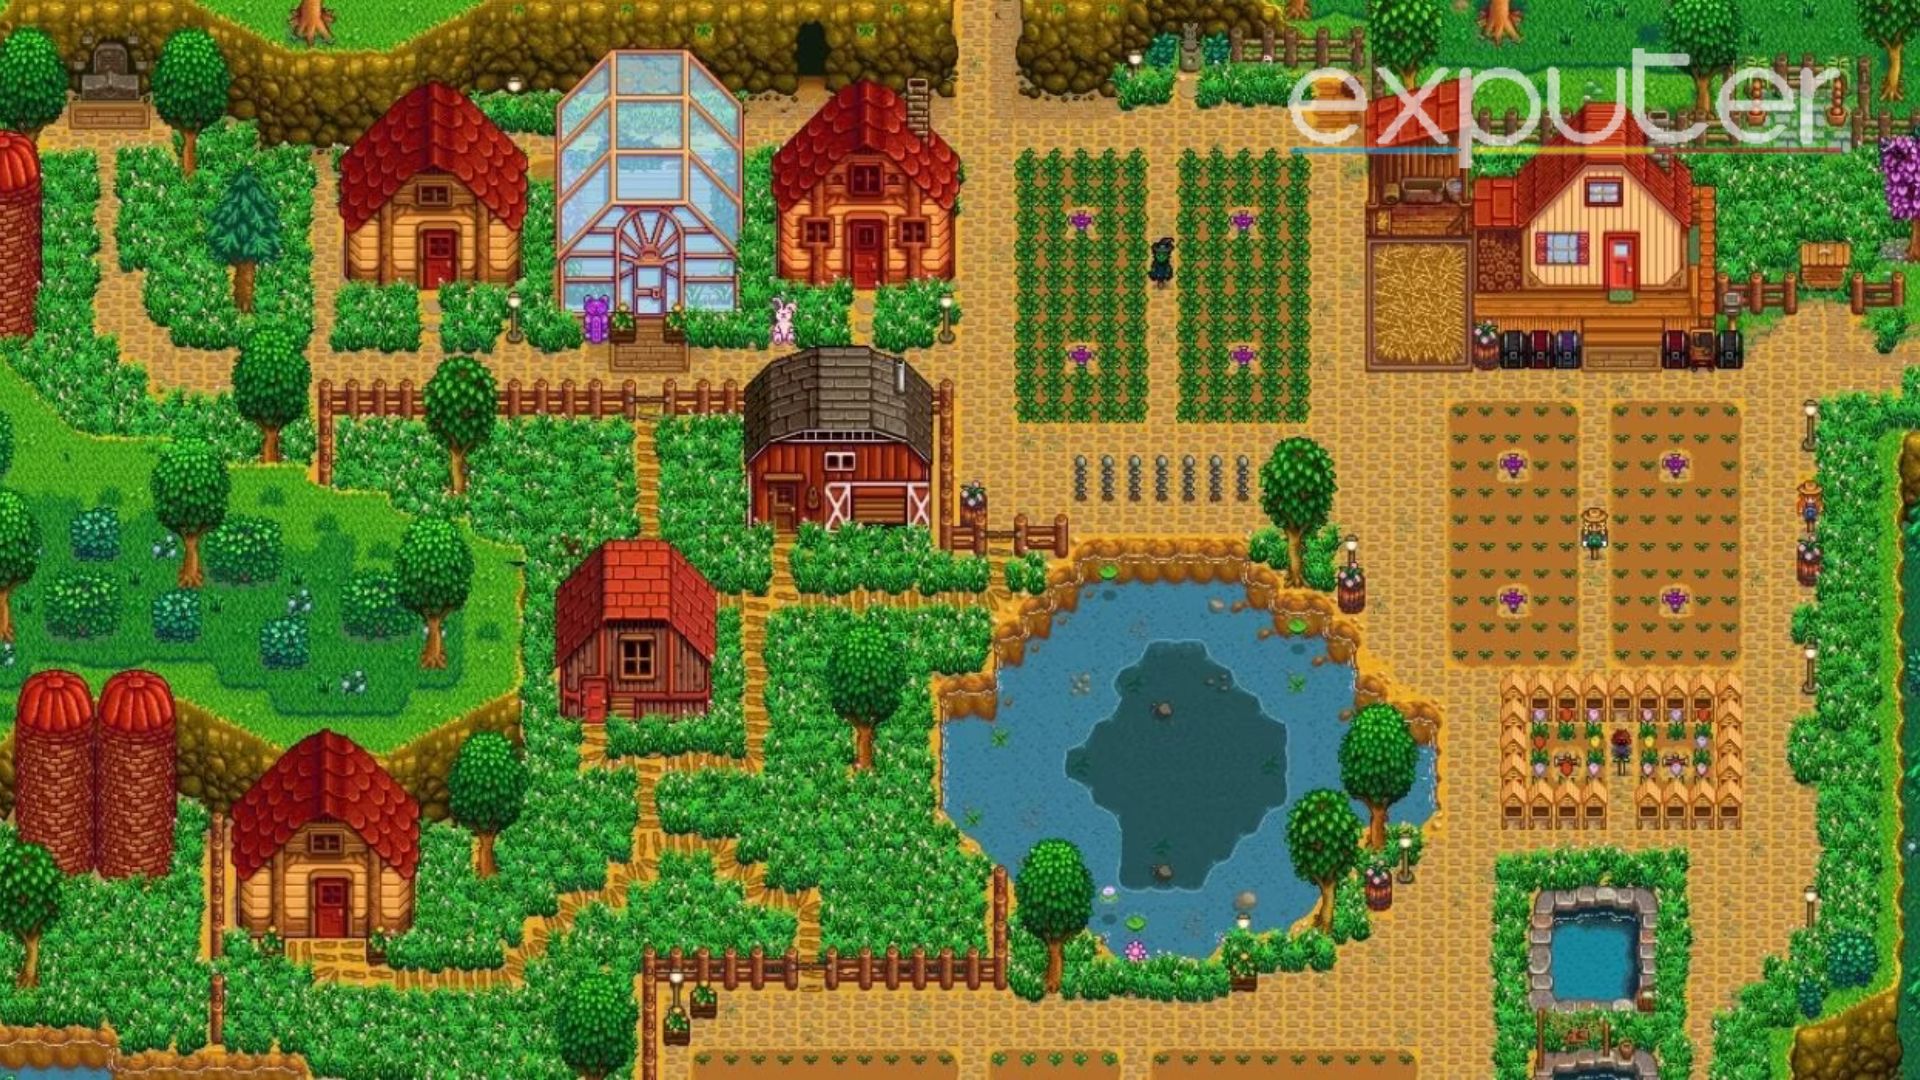
5. Flowery Forest
- The bee homes allow you to produce honey all year, save for the winter.
- The windmill also works well as the centerpiece.
- Placing the sheds on each side of the greenhouse is a good idea.
- The Flowery Forest Layout lets you quickly move year-round crops to kegs or jars, making production faster and easier.
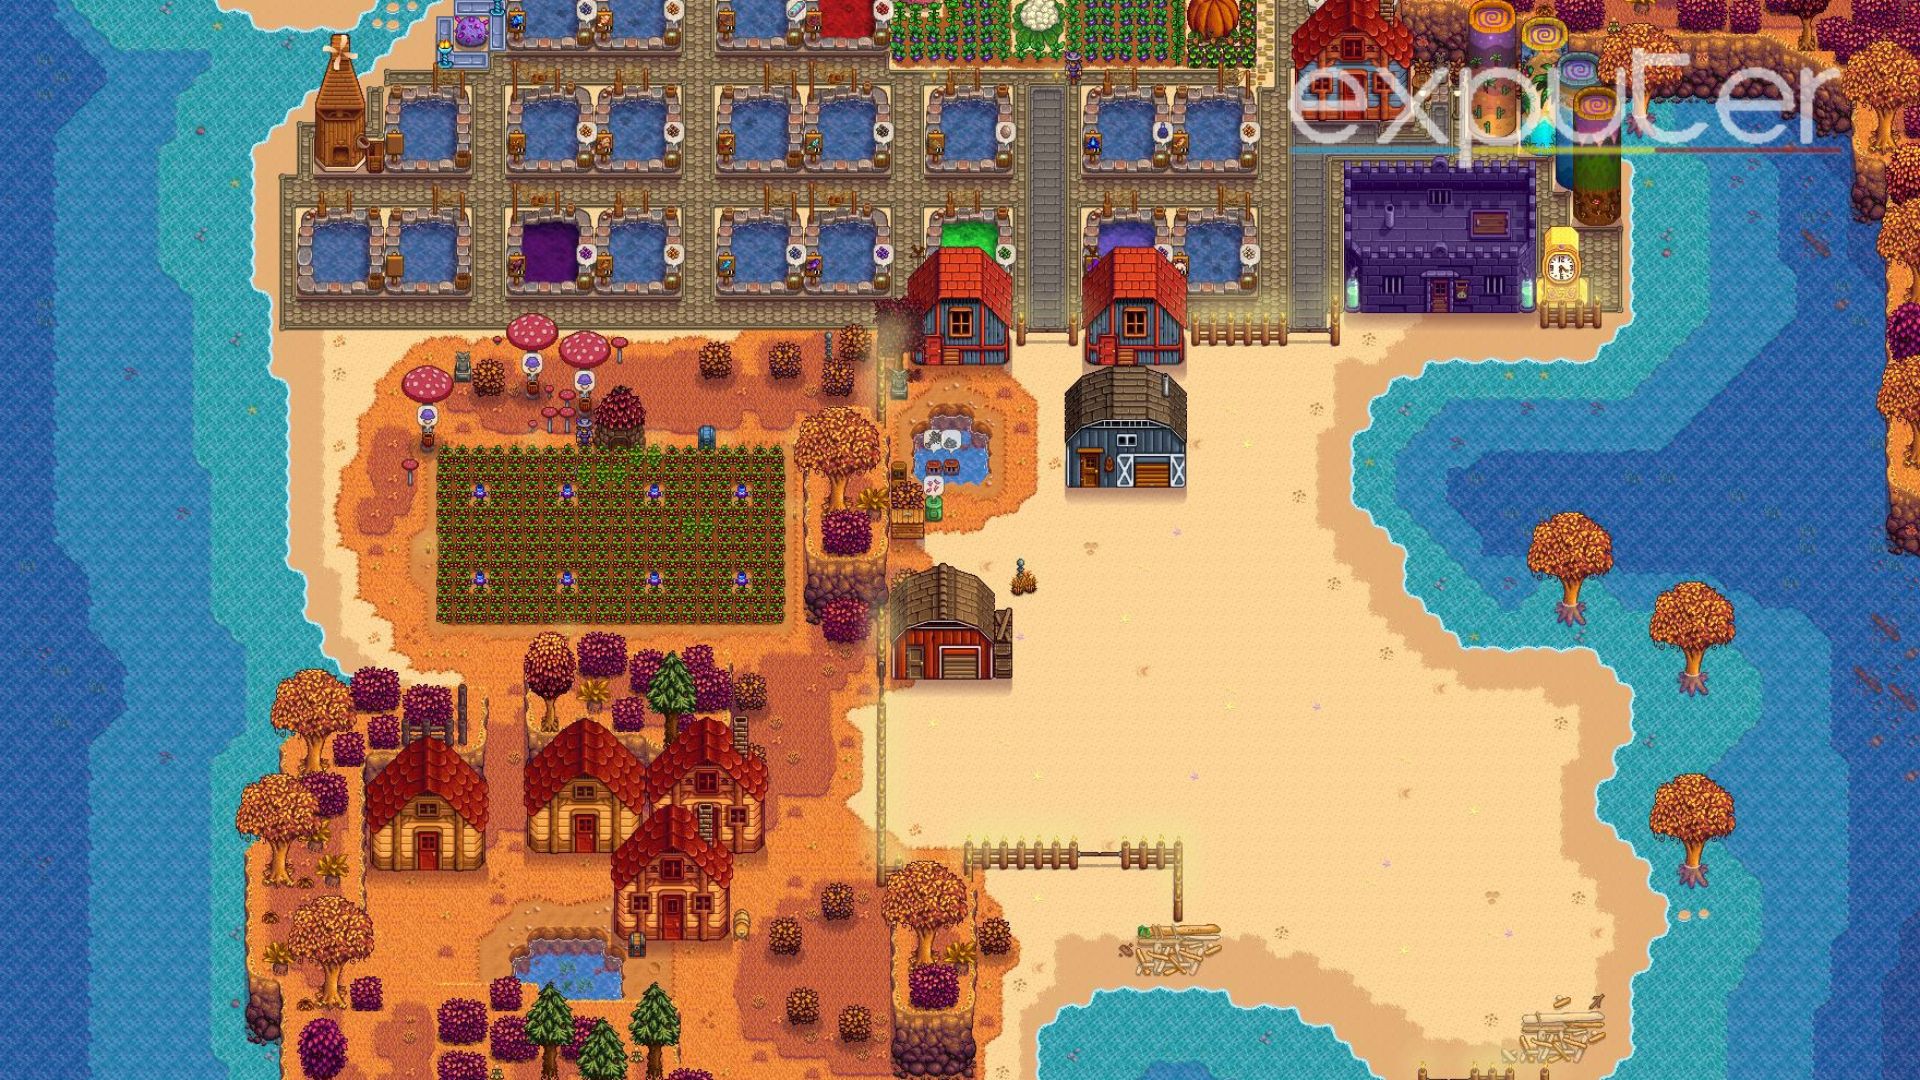
6. Lush, Wealthy Beach Home
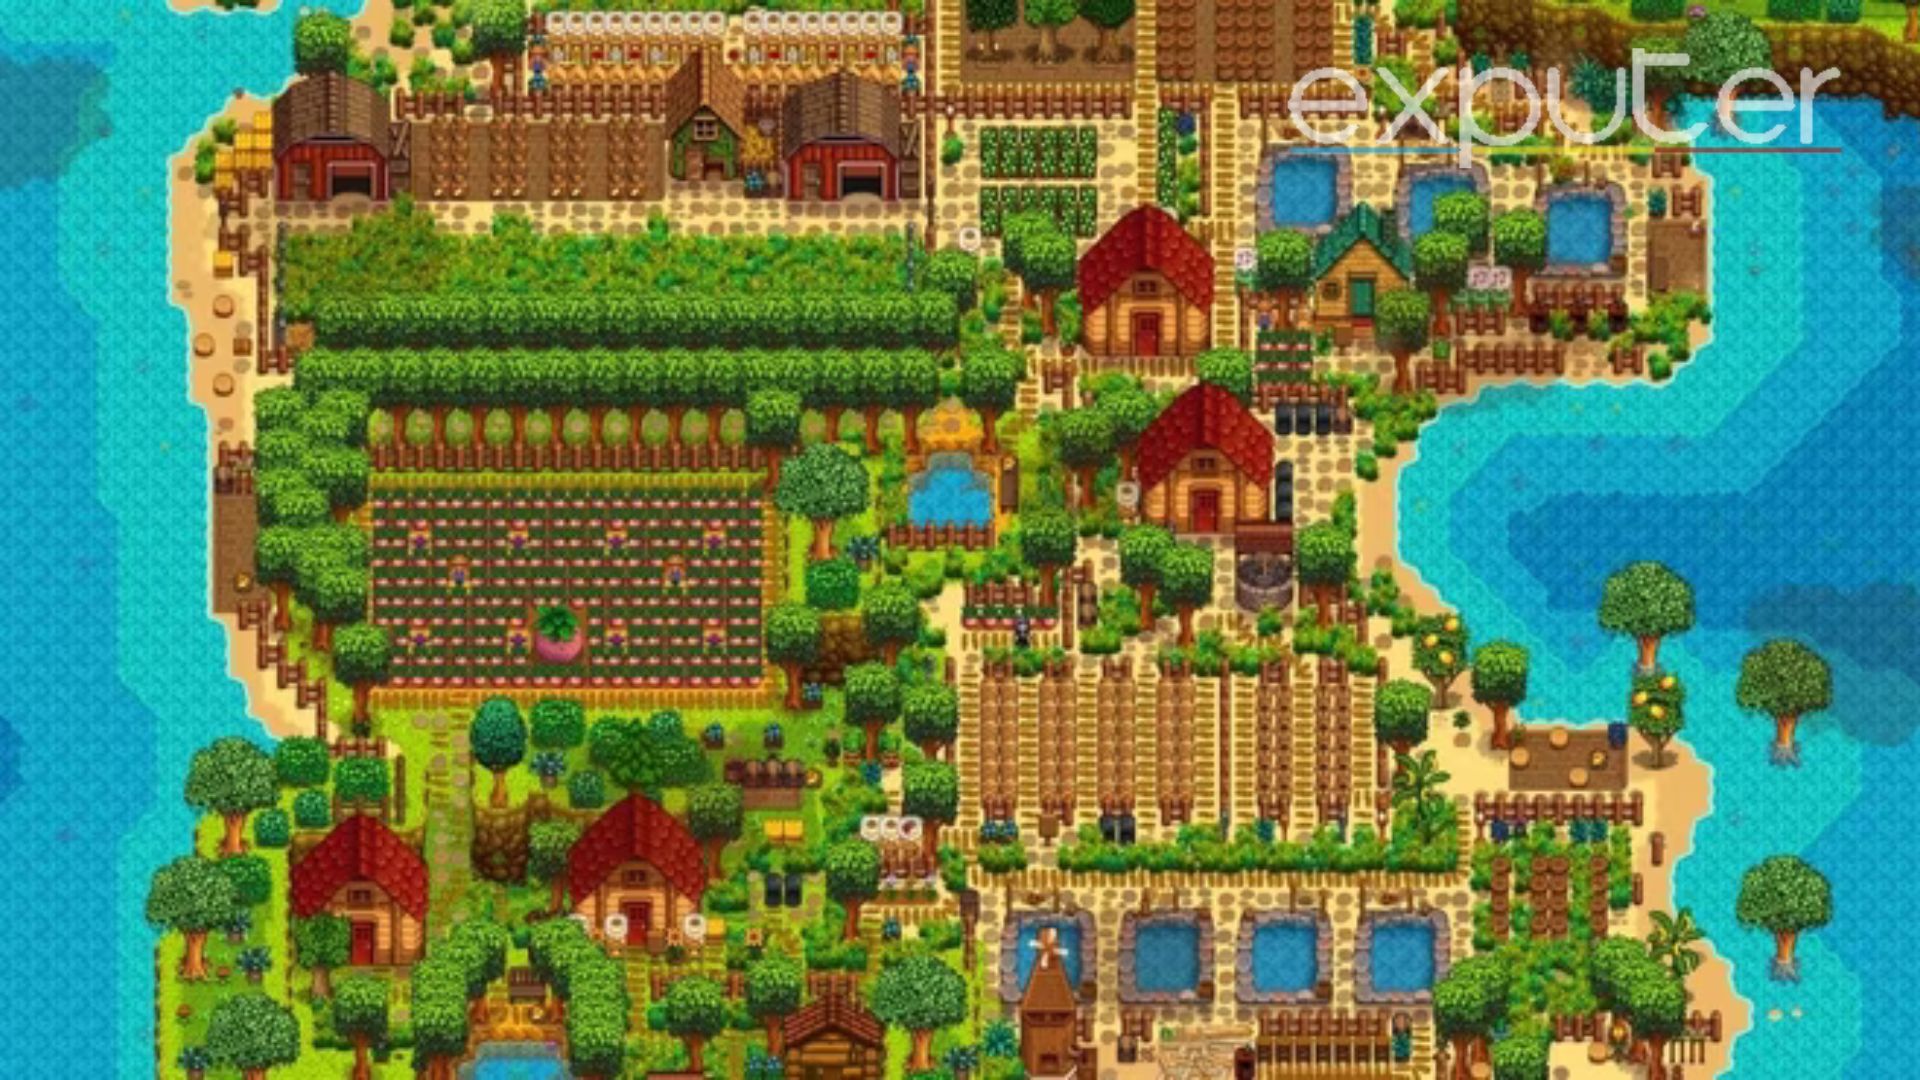
- You can optimize this layout by emphasizing all the various artisan items more than it does on the crops.
- For various functions, the whole beach has been partitioned into pieces.
- In the north, there are coops, barns, fresh grass, and room to make cheese and mayonnaise.
- There are woods for abundant timber, fruit, and kegs in the south.
7. Can’t Resist Beautification
- The garden is divided in half by a lovely walk lined with trees, and the varied plant and tree types offer splashes of color.
8. Tropical Crops
- Any crop may grow here throughout any season, much like a greenhouse.
- Making the most of your recent investment and producing pricey crops here all year is advised.
- Ancient Fruit or Starfruit are excellent options for this farm layout.
- Adding more trees around the farm’s perimeter and on the shore, the Tropical crop Stardew layout offers the best crop space.
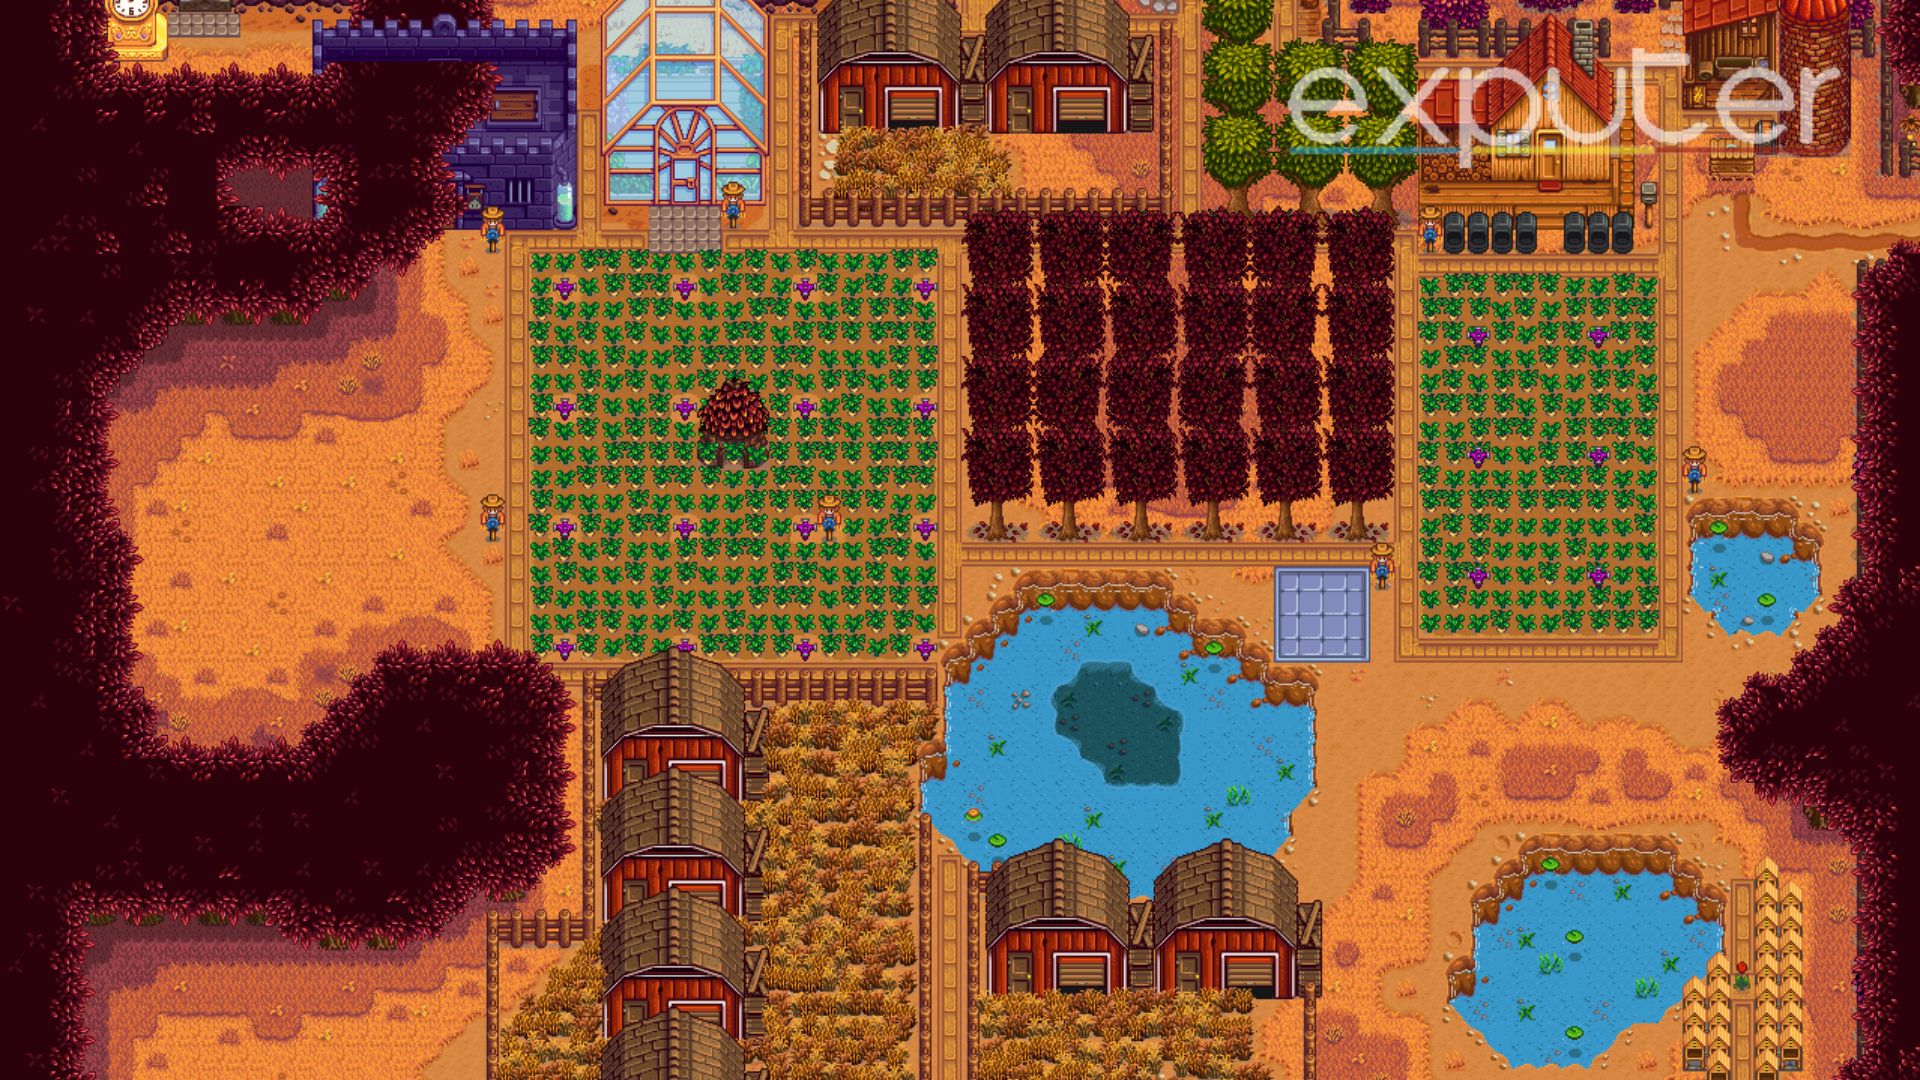
9. Crystal Maze
- Stone flooring covers the region where the crystal floor is utilized as a route.
- The vineyard region in the bottom-left corner functions well; the sprinklers enable many columns of crops to develop, with room to move between them for the purpose of harvesting the produce.
- The crops are compacted in the center of the map owing to the scarecrows’ cozying up to them.
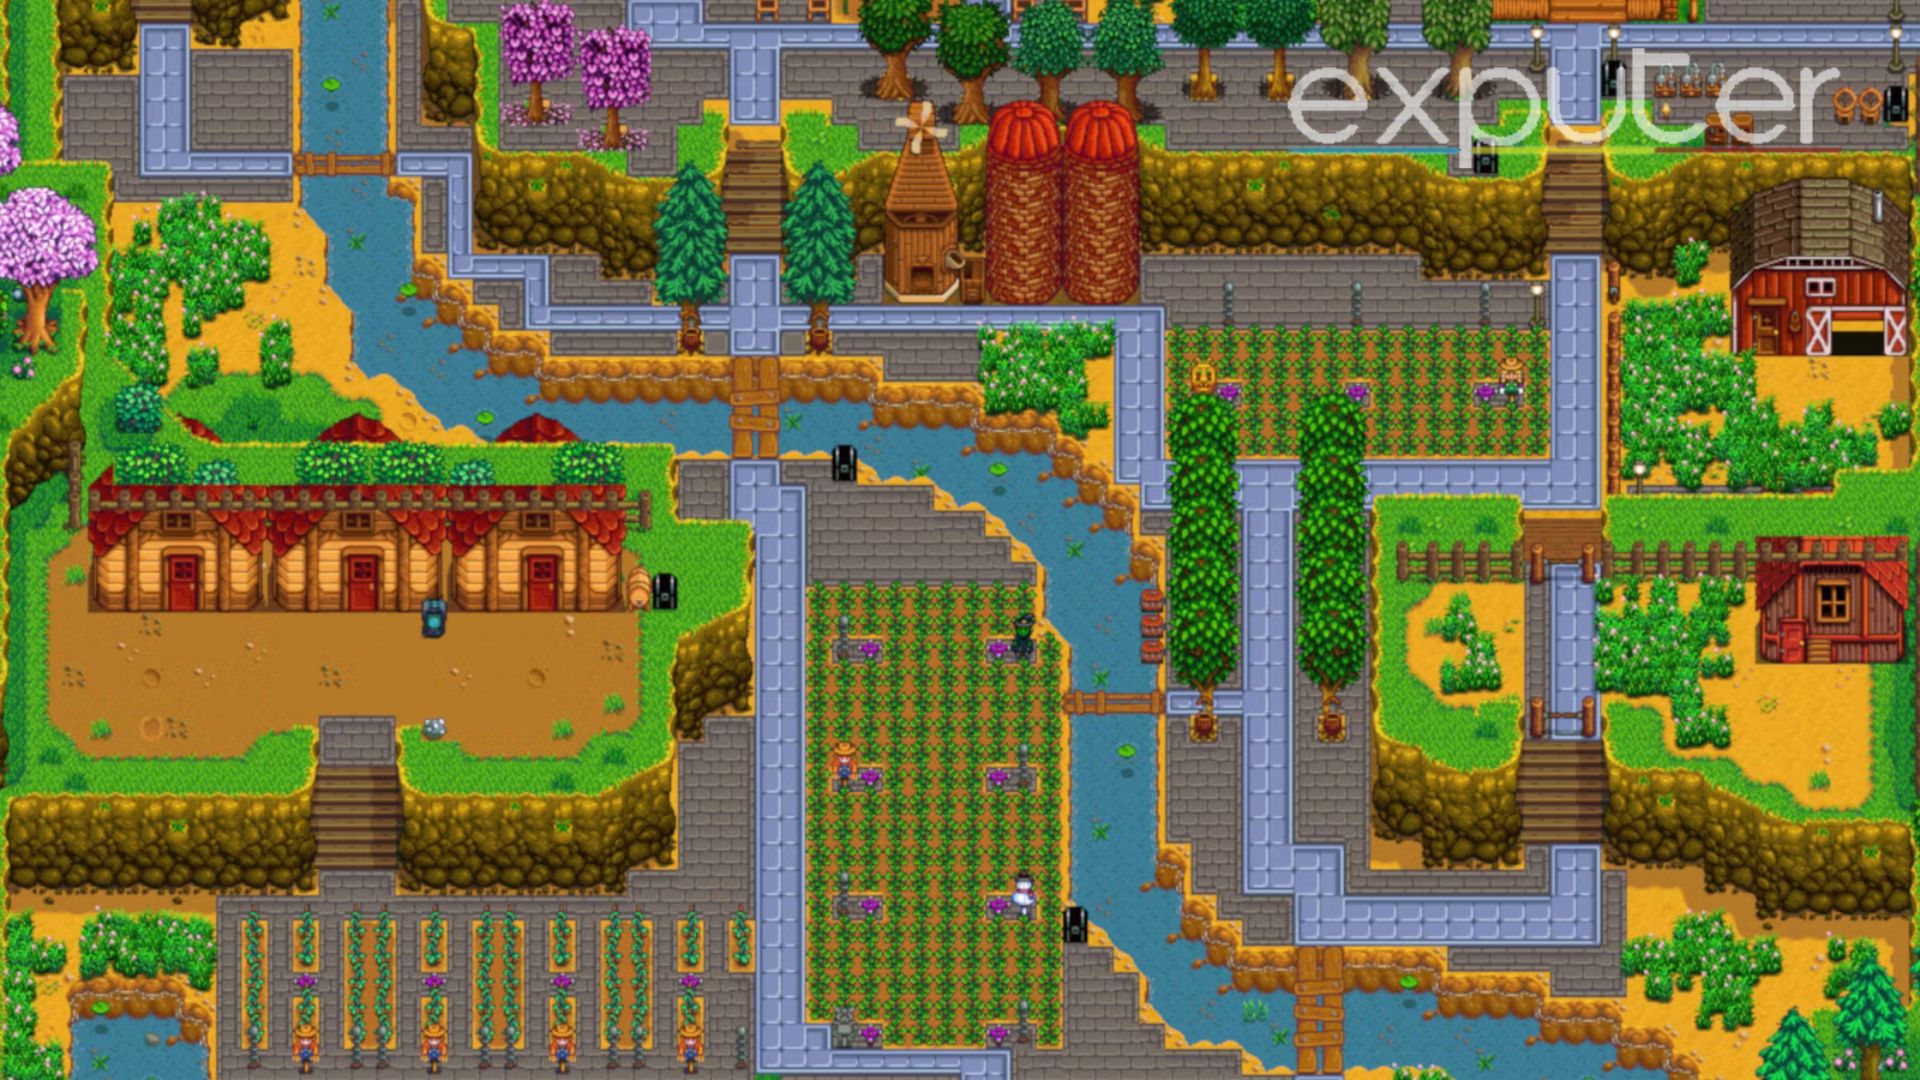
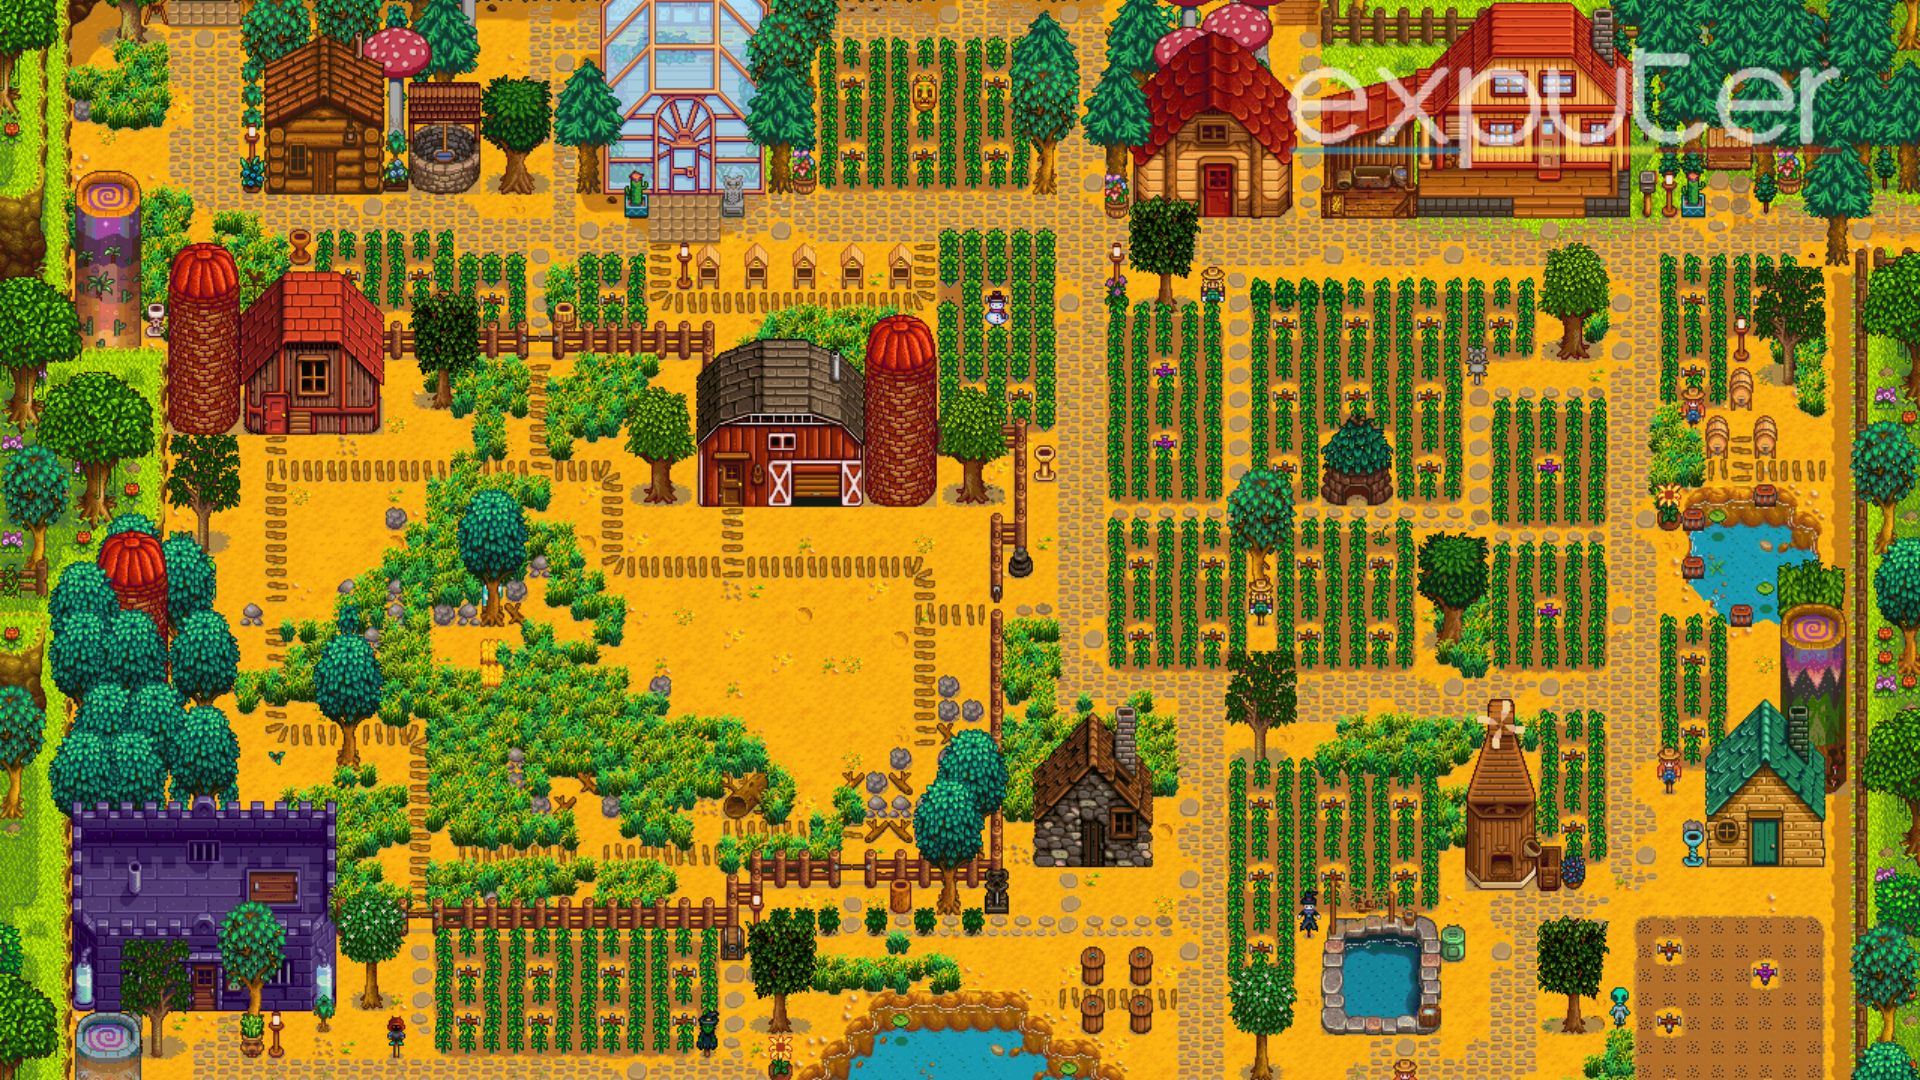
10. Late-Game Laid Back
- This layout is able to manufacture only a small amount of everything since it already has plenty.
- You have time and room to add ornamental items to your farm as you do not feel the need to fill it with crops, fishponds, or barns.
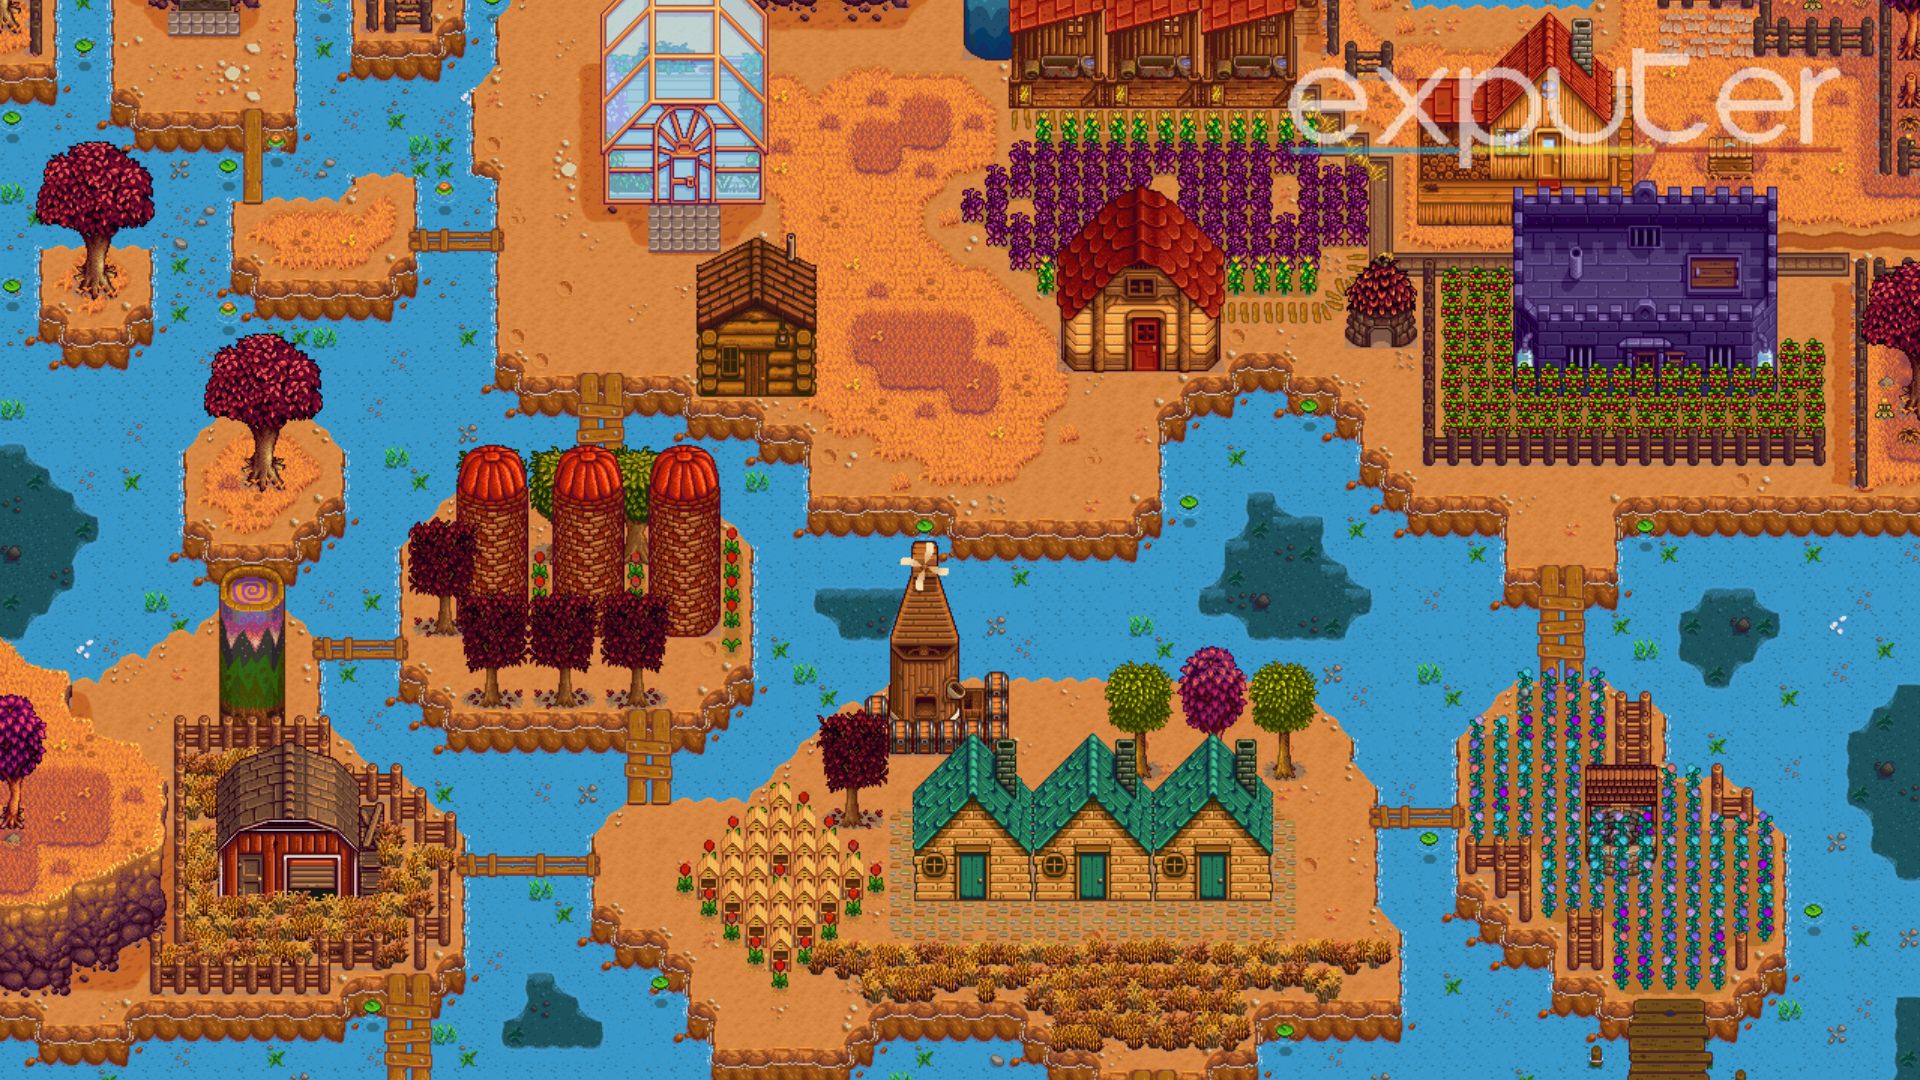
11. Riverland Paradise
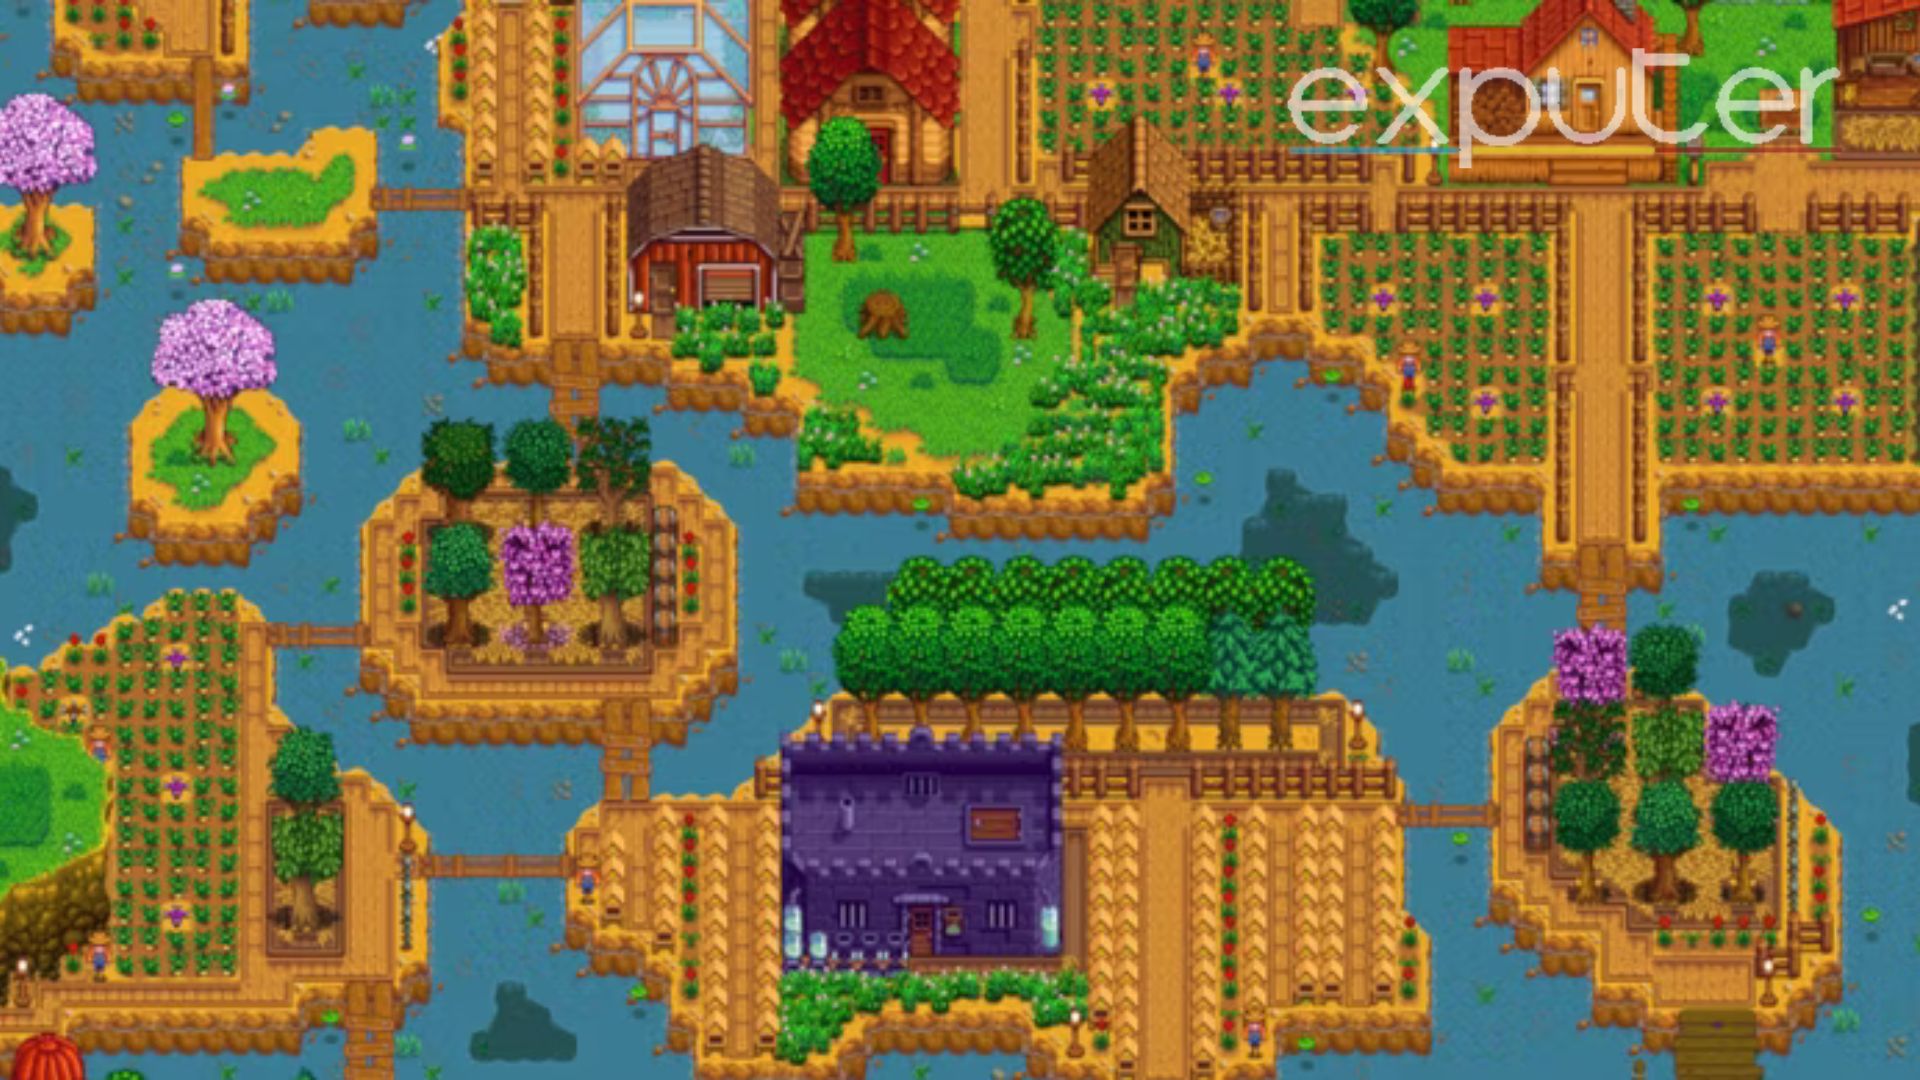
- The area is diverse in using all resources, with some islands devoted to fruit trees and others having a mix of crops and structures.
- Having the primary crop field close to the home is a good idea since it makes getting to the box for shipping easier.
- The bee homes are arranged in closed rows, making it simple to collect honey.
- There is also room for the Slime Hutch, which can raise slimes and gather slime balls.
12. Greener Pastures

- The Crystalariums’ color pattern and quantity are similar to the Slime Hutch regarding gem replication.
- To simplify organization, the barn and coop are located separately and in distinct parts of the map.
- It is possible to store everything neatly and secretly within the sheds by installing cheese and mayonnaise makers.
13. Self-Sufficient Farm
- The crop portion is well organized, with different crop sizes to provide variety, and the fences ensure everything is in its place.
14. Rural Brewery
- A Rural Brewery farm layout enables optimum income since, when the barrels have finished fermenting, they will generate wines and liquids that bring in much more money than the initial crops.
- In addition to keeping things like furnaces and baiting bins at the extreme border of the map
15. Fish Central Layout
- However, by designing a farm plan that prioritizes fish, you can observe the three lines of fishponds on this farm, where you may raise your own fish spawn.
- There is also room for grain fields, several sheds, barns, and coops, as well as some Obelisks on the privileged side of the map.
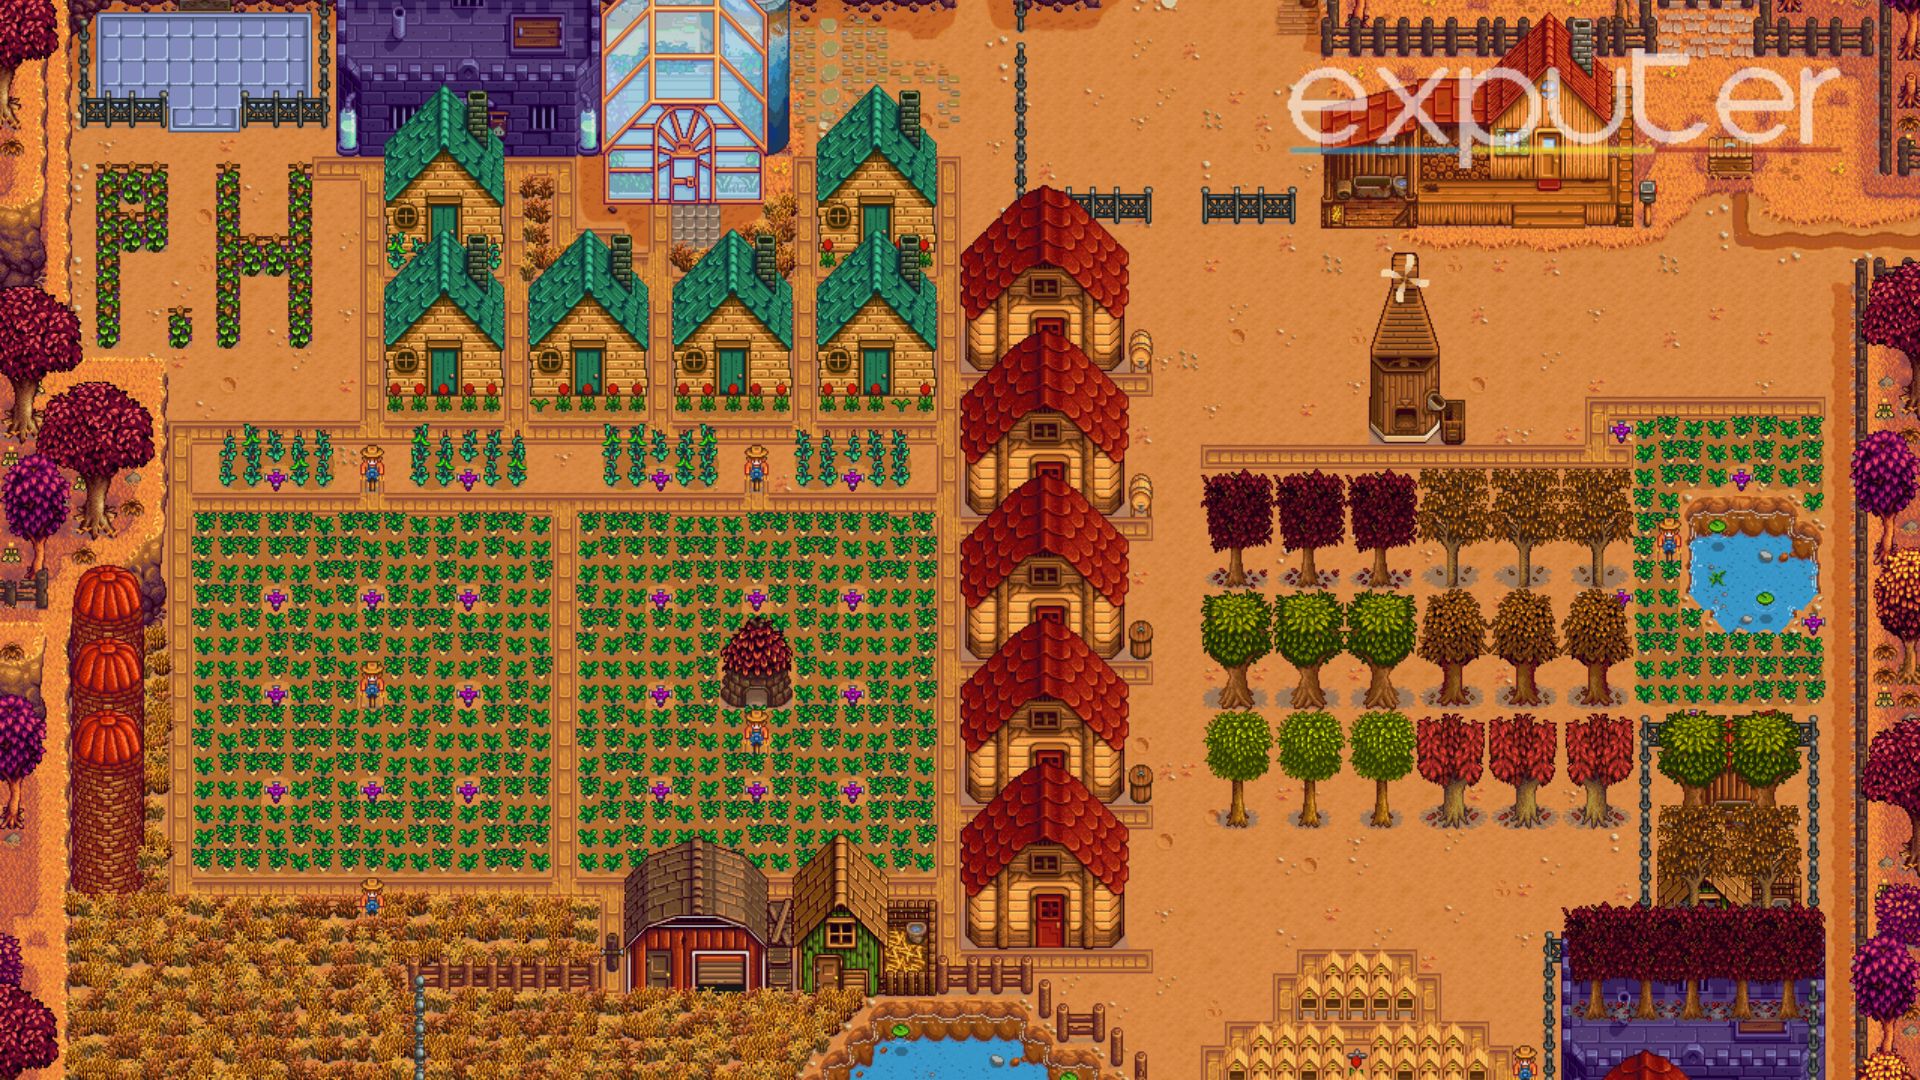
16. WinterFell Farm
- The Winterfell farm layout is renowned for minimizing these flaws by making very effective but imaginative use of the buildings and pavements.
- You are not missing out on anything; the agricultural fields are still separated as they should be.
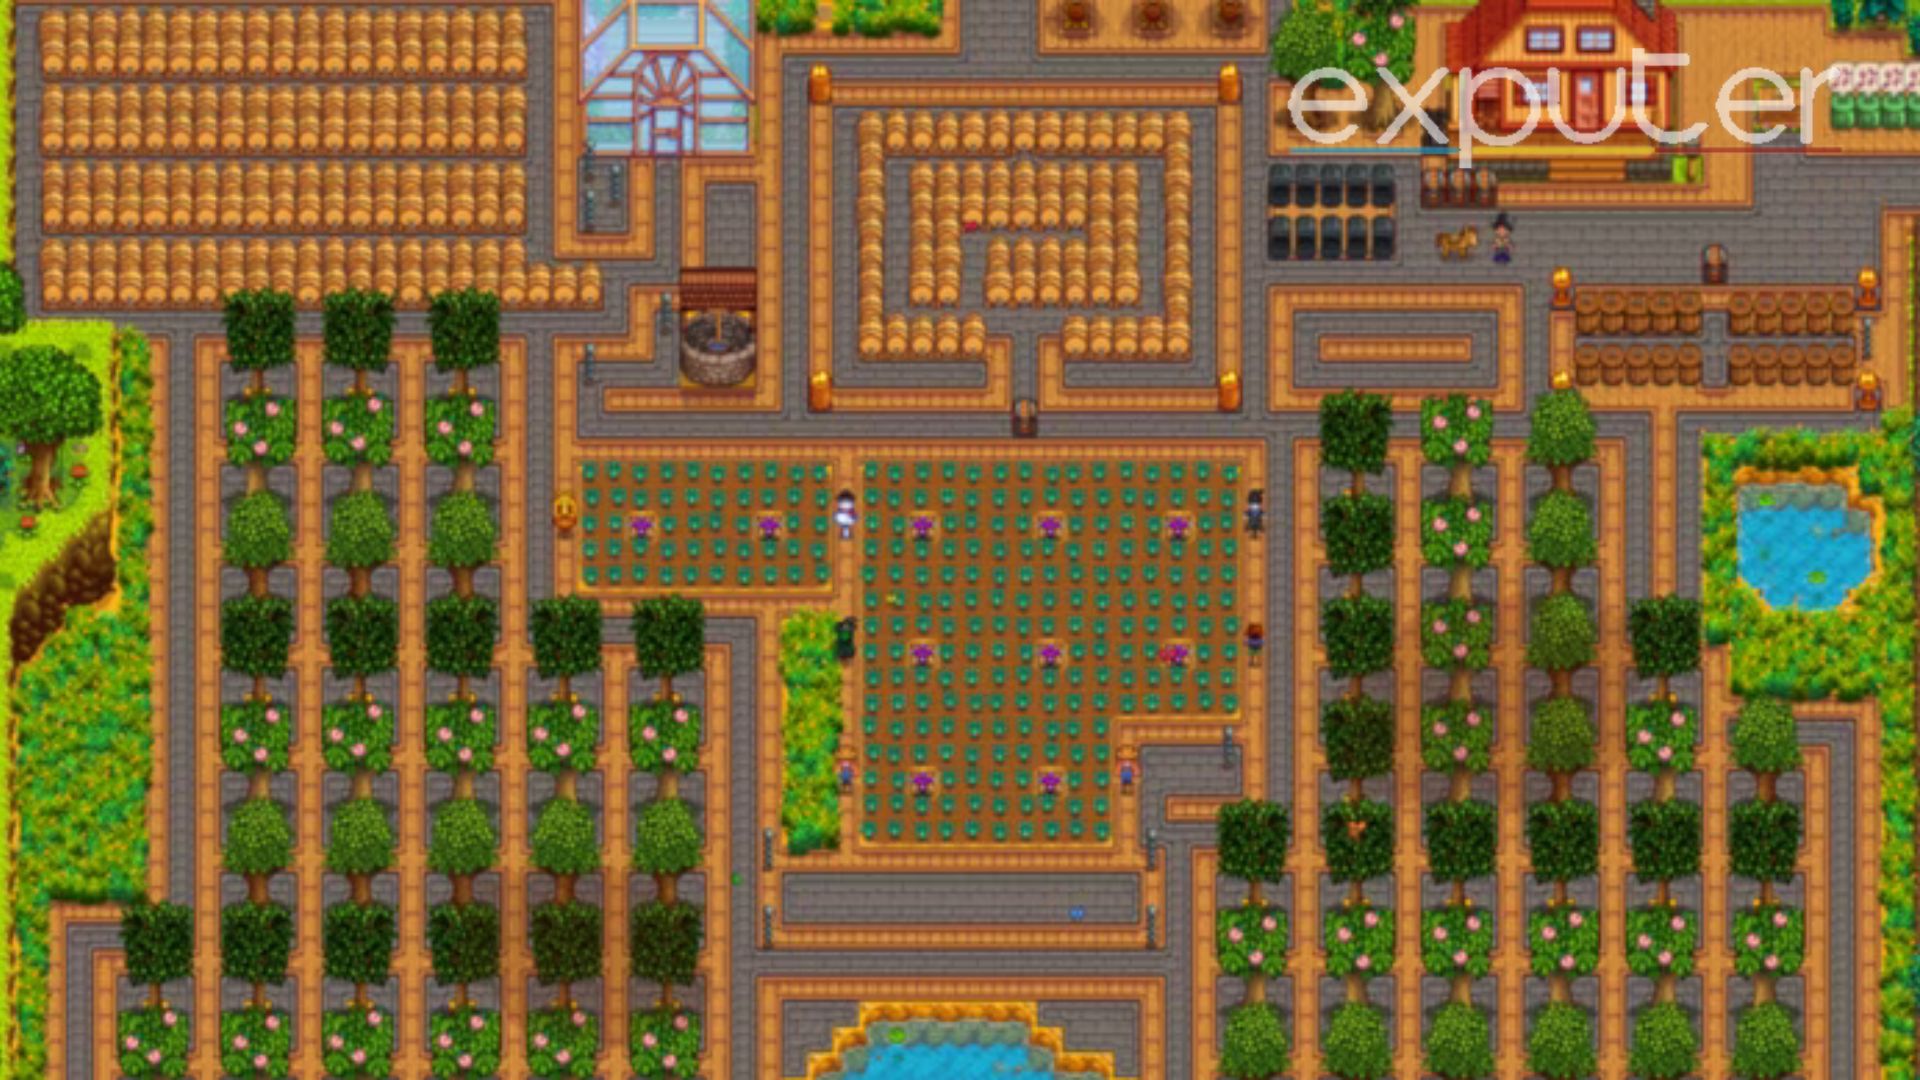
17. Orchard Farm
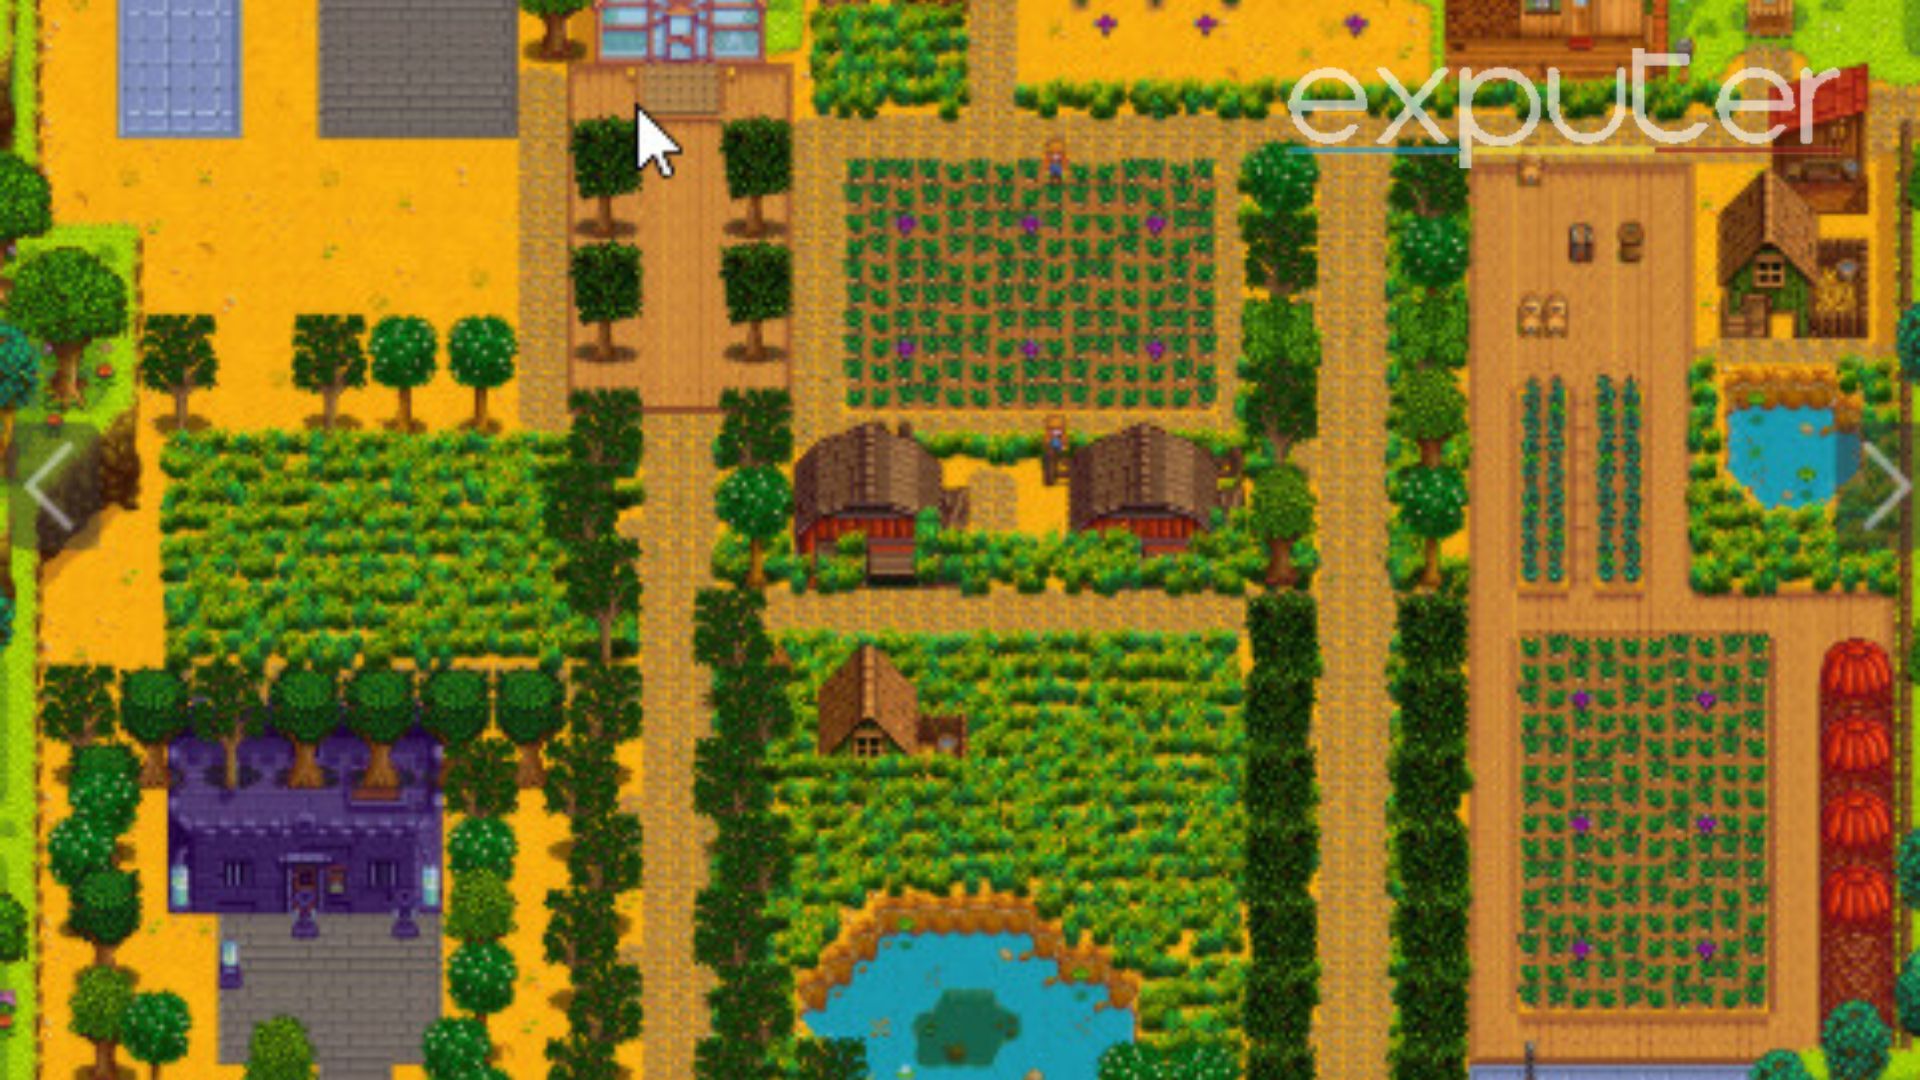
- This arrangement emphasizes fruit trees more by using the farm’s lengthy lines.
- You may increase your wine along with juice output and turn a healthy profit by planting additional trees.
- The style keeps the far-left corner almost vacant for all your inventive needs.
18. Junimo Farm

- The uniformly spaced Junimo Huts on the farm allow automatic crop collection.
- Each quadrant has iridium sprinklers that automatically irrigate the nearby crops.
- Although this design has a farming theme, it does not discount the other aspects of any farm.
19. Varied And Organized
- Because the coop and barn share space, big animals and coop animals will eat together.
- With sufficient plants for creating most of the Junimo aids, the square crop plots keep things easy.
20. Ginger Island Madness
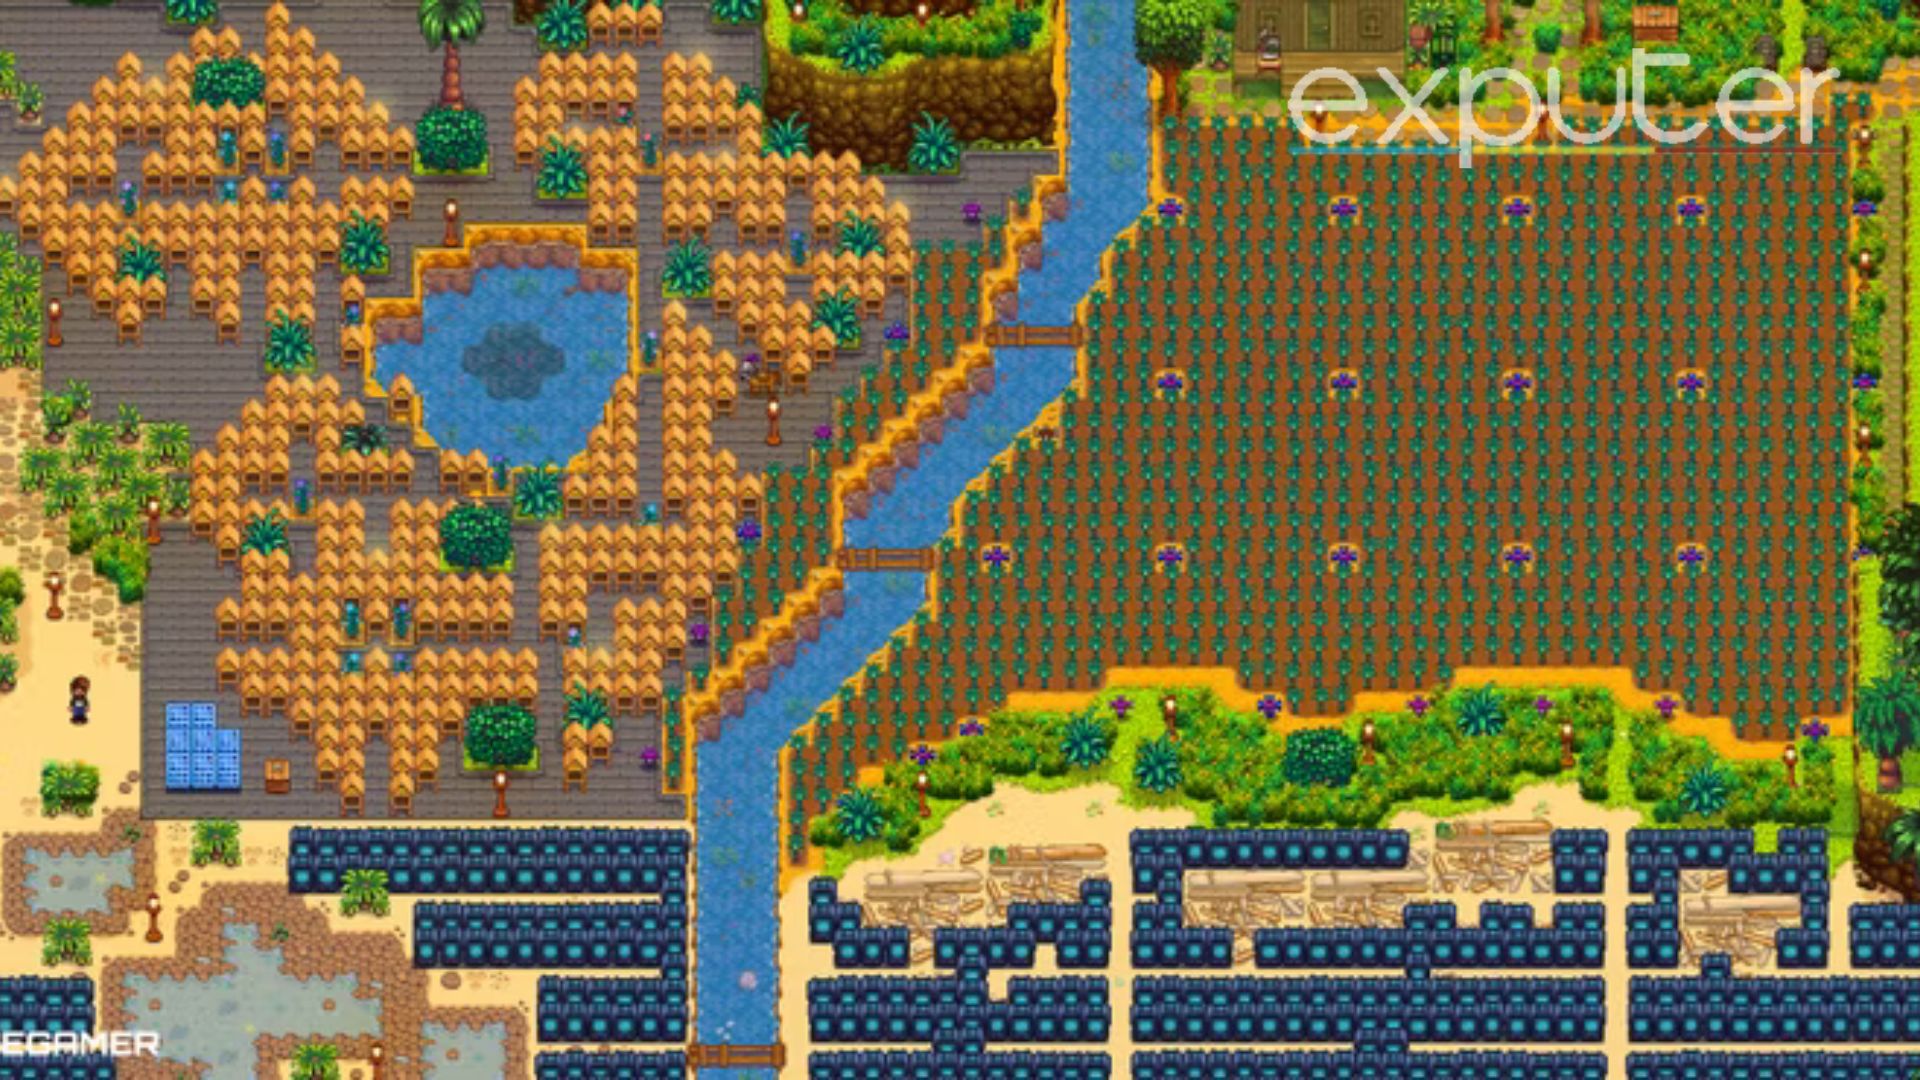
- Ginger Island Farm generates 550,000 gold daily, depending on the amount you earn when you sell things separately.
- It produces honey made from fairy roses, duplicates gems for the Crystalariums, and cultivates starfruit for wine.
Let’s wrap up the guide! While you’re here, why not check out the Best Summer Crops To Maximize Profit in Stardew Valley, which details everything about the best summer crops and their production? This concludes my guide on Stardew Valley’s farm layout.
Next:
Did you find this helpful? Leave feedback below.
Thanks! Do share your feedback with us. ⚡
How can we make this post better? Your help would be appreciated. ✍
Summary