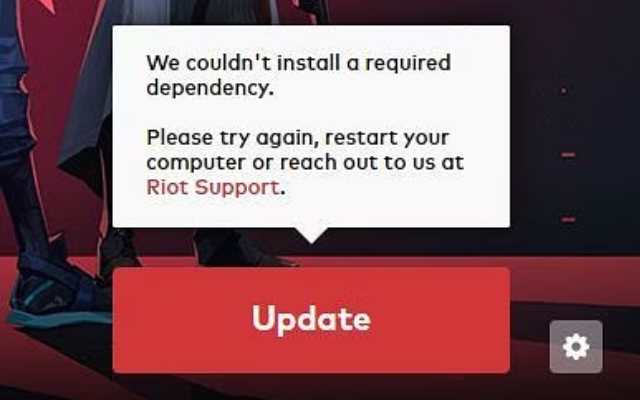
Valorant, like many other online first-person-shooter games, is susceptible to serious bugs, errors, and glitches. Players report that whenever they try to launch Valorant from Riot Launcher, an error message pops up on the screen that says, “We couldn’t install a required dependency”.
The error usually occurs when crucial game files are either corrupted or missing from the game’s installation folder. This article discusses possible fixes to the Required Dependencies error in Valorant that prevents you from playing the game.

Here are 5 Best fixes for the required dependencies error in Valorant:
- Restart Riot Game Client
- Verify if the VGC service is enabled or not
- Test Mode being enabled that causes Vanguard to stop running
- Delete VGC and VGK files.
- Contact Riot Games Support for further guidance.
- Before getting into the more detailed fixes, try all the basic troubleshooting options: testing your internet connection. Simply wait 5 to 10 minutes before trying to log in again, restart your network router, and restart the NFS game launcher.
Restart Riot Game Client
Let’s start with a simple fix first. Riot Games Client is the primary application that’s in charge of starting up and running Valorant on your PC. If it becomes buggy or has a faulty launch, it could cause issues in the Valorant itself.
To resolve this, simply restart the game along with the Riot client. As aforementioned, a faulty start-up often causes this error. So, the first thing to do is restart the game and the client.
Here’s a quick and simple guide to doing it:
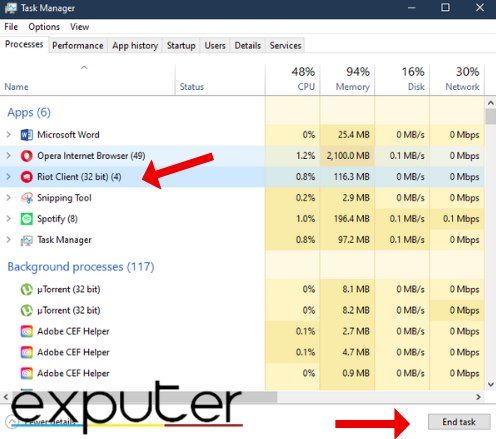
- To open Task Manager, use the shortcut key combination “CTRL” + “SHIFT” + “Esc”.
- In the apps list, find Valorant and Riot Client.
- Right-click on the running programs and select End Task.

Re-Enable VGC
VGC service detects and then blocks unauthorized software or modifications to prevent cheating and hacking in online multiplayer games. If it becomes disabled, it can cause the game to face an error.
Follow the steps below to enable this service:
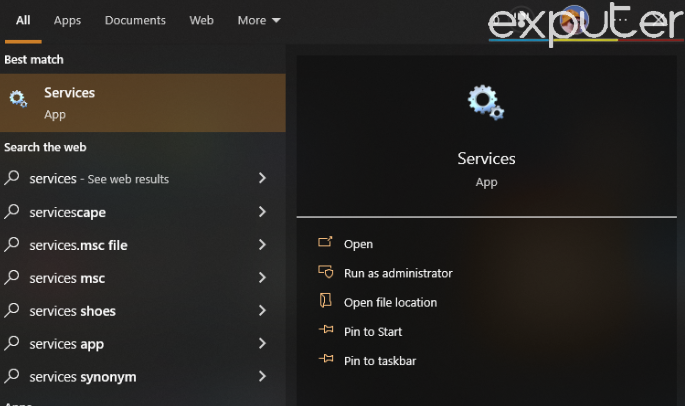
- In the Windows Start Menu, search for “Services”.

Opening the Services App (Image by Exputer) - Then, select the application and run it as an administrator for the best results.
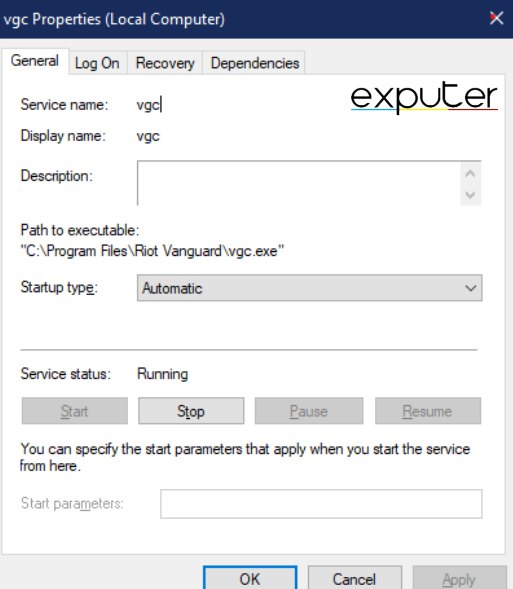
- A window will appear with a list of different types of services. Scroll down to look for the VGC service.

Accessing VGC Properties (Image by Exputer) - Right-click the VGC service
- Promptly select “Properties” from the available options.
- In the next step, click on the bar beside Start-up. A drop-down menu will appear.
- Next, click on “Automatic” and select Start.
- Finally, click on OK to finish the process, and then you may close the window.

If the VGC service had ceased working earlier, it has now begun working again. We recommend restarting your system after enabling the VGC service to apply the changes you made.
Disable Test Mode
Test Mode allows the installation of drivers and software that haven’t been digitally signed by Microsoft. Having test mode enabled can cause Vanguard to stop running, which ultimately causes the error.
I suggest disabling test mode and seeing if that helps solve the error:
- Click on the Windows Icon at the bottom-left corner of your screen.
- Type Command Prompt and select it from the search results.
- Enter the code “bcdedit -set TESTSIGNING OFF”.

Disabling Test Mode (Image by Exputer) - Close Command Prompt.
- Reboot the PC.
Delete VGC and VGK Files
Deleting VGC and VGK files and then reinstalling Valorant has proven to be one of the most effective ways to solve the issue, as any corrupted files will be reinstalled, and the old ones will be removed.
Here are the steps to do this:
- Look up Command Prompt in the Start Menu.
- Select Command Prompt and run it in administrator mode for best results.
- Enter the command “sc delete vgc”.

deleting VGC file (Image By Exputer) - Next, enter the command “sc delete vgk”.

Deleting VGK file (Image by Exputer) - Restart your PC after you’re done.
- After the restart, go to the C drive and look for the Program Files folder.
- In the Program Files folder, find the Vanguard folder and delete it,
- Now, relaunch Valorant. A message will pop up asking you to relaunch it.
- Finally, relaunch the game, and the Vanguard will reinstall automatically,
Once you have completed all these steps, your game should run smoothly without glitches or errors.
My Thoughts
So far, the solutions I have covered are the best solutions to fix the Required Dependencies error In Valorant. I have been playing the game for quite some time, and this issue is not hard to fix or serious and usually solves itself by re-enabling VGC.
The Required Dependencies error in Valorant is quite prevalent according to player reports. Similarly, error codes like VAL 46 and VAL 81 impede playability and ruin the game’s immersive experience. The issue, however is not hard to fix, and the developers have said that reinstalling the game can easily fix the issue.

Crucial game files either become corrupted or go missing from the game’s installation folder, causing the error to occur. The game’s anti-cheat system, known as Riot Vanguard, is not functioning properly, resulting in the required dependencies error. Oftentimes, the computer system forces the anti-cheat software running in the background to shut down to free up some space, leading to the aforementioned error. If none of the solutions works out for you, then we would advise you to contact Riot Games Support simply. They may hopefully guide and assist you in resolving your issue. Valorant: We Couldn't Install A Required Dependency- FAQs
Thanks! Do share your feedback with us. ⚡
How can we make this post better? Your help would be appreciated. ✍


![Valorant Error Code Van 1067 [FIX]](https://exputer.com/wp-content/uploads/2023/05/Valorant-Error-Code-Van-1067-390x220.jpg)

