Diablo 4: All Waypoint Locations To Fast Travel

Get around the map with ease by discovering all 7 waypoints in Diablo 4.

Waypoint locations in Diablo 4 are shown as glowing points of interest, also referred to as Fractured Peaks. They’re found in almost every main area in the game. While most can be unlocked by simply approaching them, certain waypoints require you to complete specific objectives in order to get access to the waypoint.

Important: You’ll need to interact with each of the waypoints before you can actually start using them to fast travel.
Key Takeaways
  • Waypoint locations in Diablo 4 are known as Fractured Peaks and can be used for Fast Travel.
  • From what I’ve uncovered, there are seven different waypoints in Diablo 4.
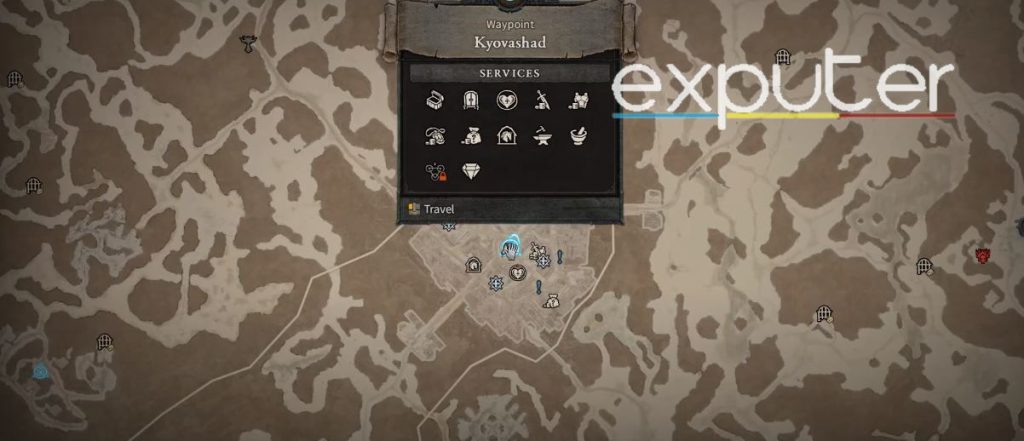
    1. The first waypoint you’ll come across is in Kyovashad, the capital of the region.
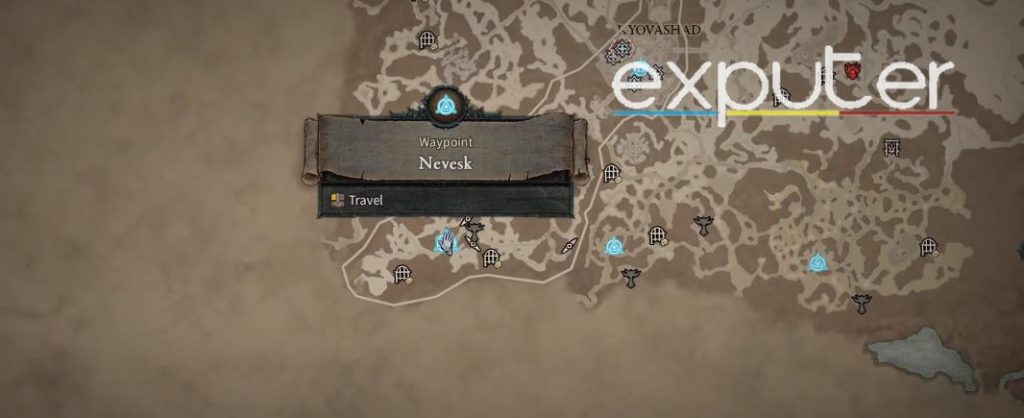
    2. The next waypoint you’ll discover is in Nevesk, one of the major towns encountered early on in the game.
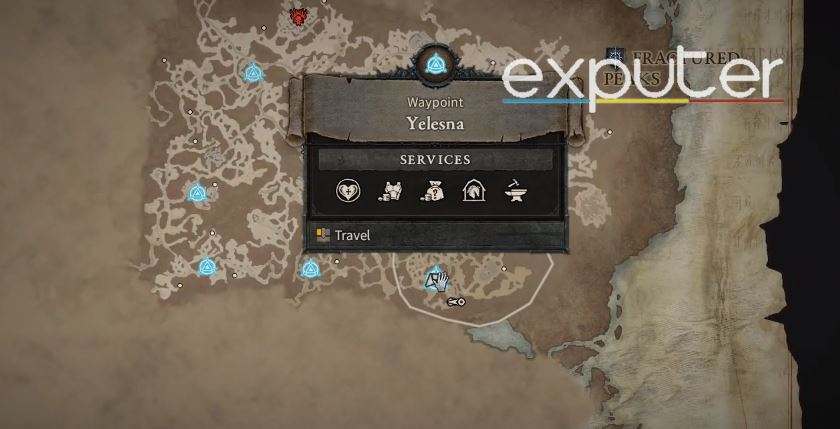
    3. While following the main quest, you’ll discover the Yelesna Waypoint.
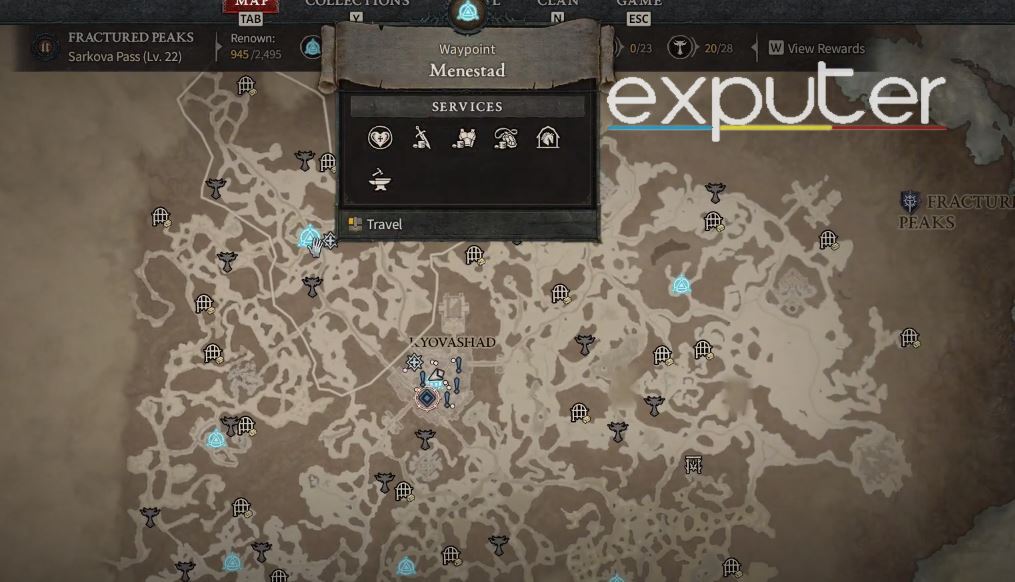
    4. The Menestad waypoint is found in the northwest region of the map.
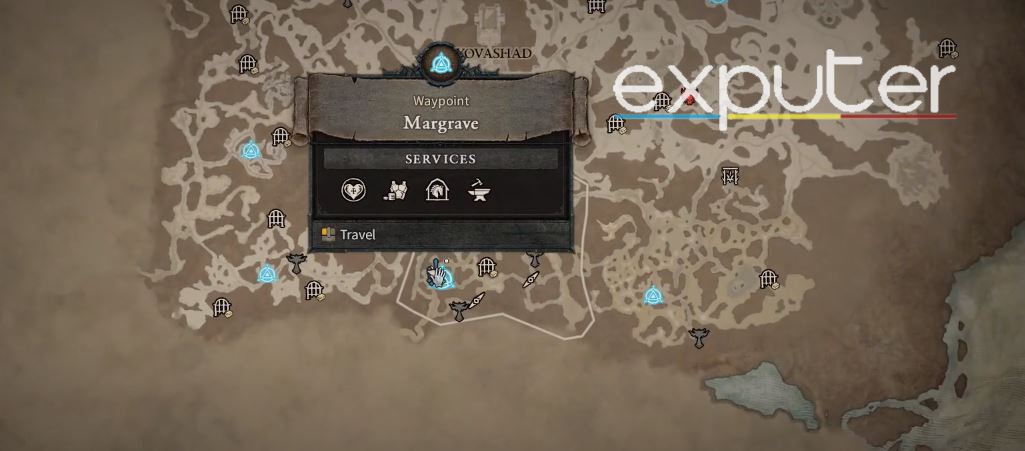
    5. Directly south of the capital, you’ll find the Margrave waypoint.
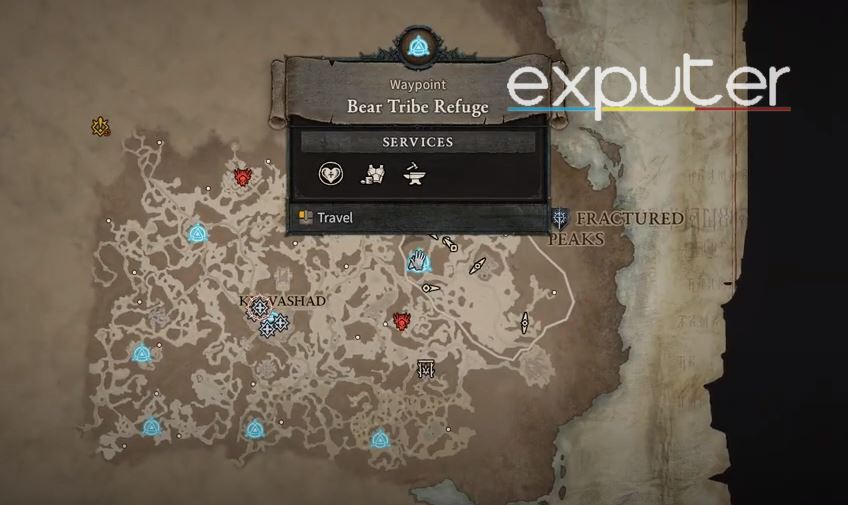
    6. The Bear Tribe Refuge waypoint is the only waypoint in the eastern regions of the map.
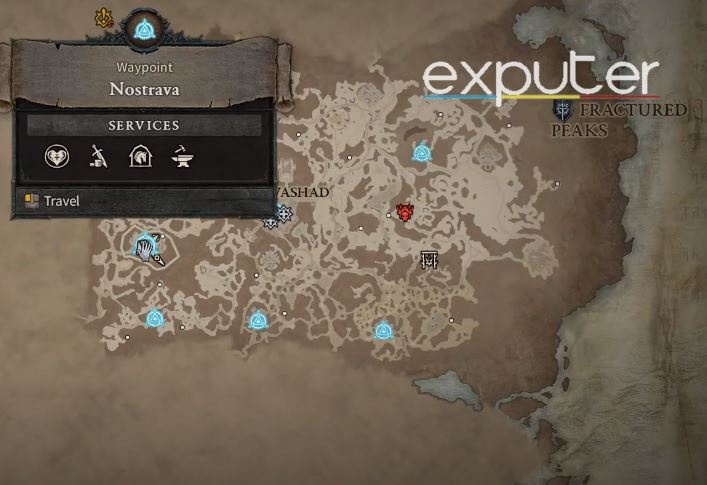
    7. The final waypoint is in Nostrava and requires you to clear the area by killing multiple enemies before unlocking the waypoint.
  • You can fast-travel to any of the waypoints regardless of where you are, making it easy to get out of dungeons where you’ve acquired too much loot.
  • Alternatively, you can open up a portal to the capital and travel there.

1. Kyovashad Waypoint

all waypoint locations in Diablo 4
Kyovashad Waypoint Location [image by eXputer]
Kyovashad is essentially the capital of the region, so you’ll likely be visiting the area quite often, which is why having a waypoint here is essential. It almost acts as a hub with many NPCs for you to interact with. You’ll unlock the area early on in the game. The waypoint in Kyovashad is pretty much at the center of the area.

2. Nevesk Waypoint

Nevesk
Nevesk waypoint location on map [captured by eXputer]
After Kyovashad, the first major town that you’ll encounter while making your way through the campaign is Nevesk. Although something tragic happens to the folk in the area, causing you to leave ultimately, it is still an area that you might want to come back to and explore due to certain unlockables and enchantments. And the fact that the waypoint is in the southwest region of the map makes it useful for reaching certain distant areas, in my opinion.

3. Yelesna Waypoint

Yelesna Waypoint location in diablo 4
Yelesna Waypoint Map location [screenshot by eXputer]
While following the main quest, you’ll eventually make your way to Yelesna, which is in the southeast region of the map. In my experience, the waypoint will be quite useful as you’ll make your way to Yelesna quite often for other nearby objectives.

4. Menestad Waypoint

Menestad waypoint in diablo 4 location
Menestad waypoint map location [screenshot by us]
Up next is Menestad, which is found in the northwest region of the map. Menestad is a small hamlet but still near many useful locations.

5. Margrave Waypoint

diablo 4 margrave waypoint location
Margrave Waypoint location on map [image by us]
Similar to Menstad, Margrave itself isn’t a major place as it is a small hamlet as well. But due to it being located directly in the south region, the waypoint can be useful to reach areas between Nevesk and Yelesna.

6. Bear Tribe Refuge Waypoint

Bear Tribe Refuge
Bear Tribe Refuge Waypoint map location [image by eXputer]
While trying to complete tasks or reach objectives in the northeastern regions of the map, the Bear Tribe Refuge waypoint will be quite useful as there’s no other waypoint nearby, not even in the eastern areas.

7. Nostrava Waypoint

Nostrava
Nostrava Stronghold waypoint map location [image by eXputer]
The Nostrava Waypoint is quite unique and different from the rest as it is found inside a Stronghold in a demon-infested area. Before you can even use the waypoint, you need to get rid of the corruption.

I have given an overview below of how you can unlock the waypoint:

  1. Head to Nostrava and investigate the village.
  2. Enter the church with a red skull icon inside it.
  3. Fight off the Negala and Crazed Villagers.
  4. Investigate the Villagers’ Homes by entering the house in the southwest of the village and destroying the Demonic Effigy
  5. Go inside the marked houses on the map and destroy the Effigies inside them while also defending yourself from demons that’ll try to attack you.
  6. Head back to the Chapel and fight off against Negala, Torvala, and Kozira.
  7. After defeating all enemies, interact with the Wanderer’s Shrine to unlock the waypoint.

How To Fast Travel In Diablo 4

There are two major methods for Fast Travel in the game.

  • The first method is to open your map, simply select a waypoint, and travel to it.
  • The alternate method is to open up a portal to the capital (by pressing T or down on the D-pad).
  • The great thing about both of these methods is that you can use them regardless of where you’re currently stationed.
  • That makes it useful for cases where you’re in a dungeon and need to stash away your loot.

With that, you know all about the Diablo 4 Waypoint locations and each of their locations. They can be useful for getting around the map with ease. Each of the waypoints is located such that you can get to almost any objective quickly if you pick the right waypoint. There’s still much more that you can discover in the game, such as getting a wolf pet or learning about the different editions.

Up Next:

Did you find this article helpful?

Thanks! Do share your feedback with us. ⚡

How can we make this post better? Your help would be appreciated. ✍

Get up-to-speed gaming updates delivered right to your inbox.

We don’t spam! Read more in our privacy policy.


Atik Younas is a Junior Guides Writer on eXputer with decent experience writing about games. He’s an avid 3D designer and a coding wizard who gets fascinated by the technical aspects of the latest games. He’s got a Bachelor’s Degree in Computer Science and loves enjoying well-written stories and combat mechanics in games. Atik has been playing games for more than 10+ years now. Most notably he has spent 1,000+ hours on GTA V Online and Minecraft! Feel free to get in touch with Atik on his gaming profile at Xbox and PSN. Experience: 2+ Years || Education: Bachelor's in Computer Science || Written 200+ Guides || Mainly Covers Game Strategy Guides on eXputer

Related Articles