Sometimes, when you try to use Steam, you might bump into a problem where it can’t connect to its network. It’s frustrating because it happens suddenly without warning. This issue stops you from logging in and playing your games.
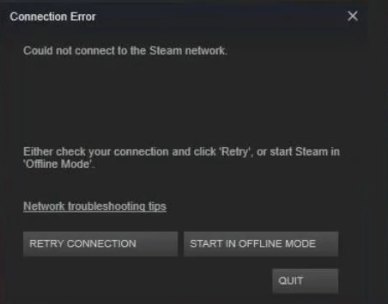
When you open Steam, you might see a message telling you to check your connection and try again or start Steam in Offline Mode. Clicking “Retry” doesn’t usually fix it. It leaves you stuck and unable to access your games unless you do something about it.
- Basic Fixes: Before you head on ahead to the guide, make sure to run Steam as an administrator, allow it through firewall, update your network drivers and reboot your internet modem.
These are all the possible solutions to tackle this issue:
- Check the Steam server status.
- Restart the Steam Client Bootstrapper.
- Modify the target address of the Steam app (-TCP).
- Reset IP using Command Prompt.
- Use an alternative DNS server.
- Perform a network reset (Windows 11).
- Reinstall the desktop Steam launcher.
Check Steam Server Status
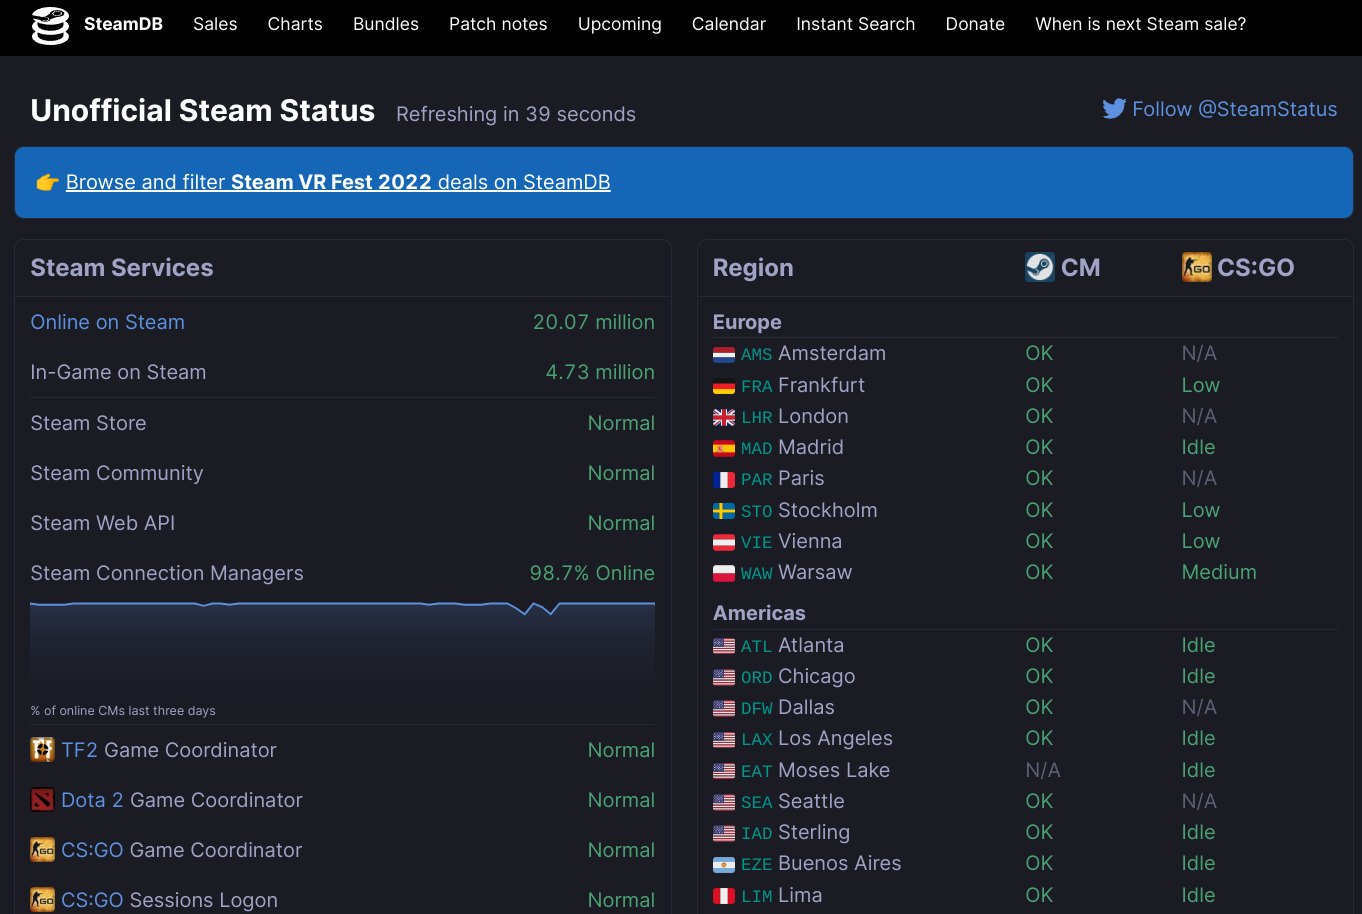
Steam Launcher heavily depends on its servers running optimally. When they aren’t, you’ll face problems with running Steam, such as being unable to connect right from the get-go.
The quickest way to ensure that your device or internet connection isn’t the culprit to blame is to authenticate Steam’s server status. This fan-curated website is your best bet regarding the matter at hand.
Restart The Steam Client Bootstrapper Service
If Steam isn’t properly working, most of the time, it’s the bootstrapper that’s bugging out. It’s responsible for Steam’s operations, and if it bugs out, it can cause various issues, from games failing to launch and connectivity issues.
Hence, restarting the Steam Client Bootstrapper process on your Windows PC.
Let’s follow a step-by-step process for it:
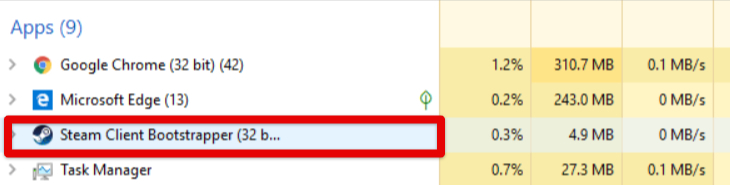
- The first step is to shut down the Steam Launcher completely. Make sure you top it off from the Task Manager as well.
- Secondly, restart the Steam Client Bootstrapper process. This will also be done from the Task Manager as you can comprehend from the screenshot below.

The Steam Client Bootstrapper Process - Launch Steam and see whether you can finally start it up.
Modify The Target Address Of The Steam App
One more trick has been working like a charm for those who cannot get the Steam launcher to work on their end. It pertains to modifying the “Target” address of the Steam application. By incorporating another protocol in the mix, we can get through this annoying error code that we’re up against.
Therefore, all you have to do is fire up the “Properties” of the Steam application, locate the “Target” section, and add another entry at its far end.
The following steps are going to help you in this:
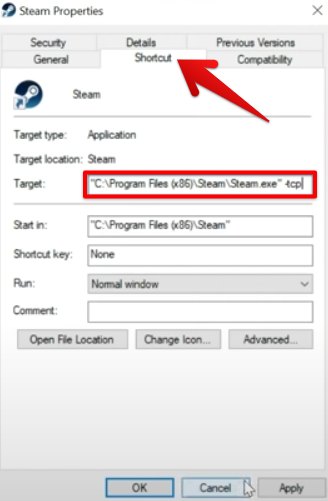
- Right-click on the Steam > “Properties.”
- Select the “Shortcut” tab > Click on the box beside “Target,” > Move the cursor to the end of the text > Press the space bar once.
- Here, add “-tcp” to it.

Modifying the Target Address of the Steam App - Finally, click on “Apply” and press the “OK” button. You should be done in a moment.
That’s all about modifying the “Target” address of the Steam app. Try starting the launcher now and see whether it starts up.
Use The Command Prompt To Reset Your IP
Next, we’ll utilise the Command Prompt to tweak some of our IP-related settings on the Windows PC. Renewing your IP address through this high-end system utility potentially resolves Steam’s network-centric issue since it removes any and all IP conflicts with the server. There’s a guide up on eXputer on how to reset your IP, you should give it a look.
Use An Alternative DNS
If you’re having frequent network problems with Steam or any other application, another thing you can try is changing up your DNS server.
DNS is an essential component of computer devices that makes access to various IP addresses feasible and allows connections with web servers an actual possibility. In other words, if Steam is having issues connecting to the servers, using a DNS like Google’s or Cloudflare’s will make things smoother, essentially resolving your issues.
Perform A Network Reset
A “Network Reset” is an exclusive Windows 11 feature that can help you refresh your device’s connectivity. If any network settings are becoming a hurdle between Steam and its connection to the sevrers, this will fix it.
Here’s how you can Reset Network Settings in Windows:
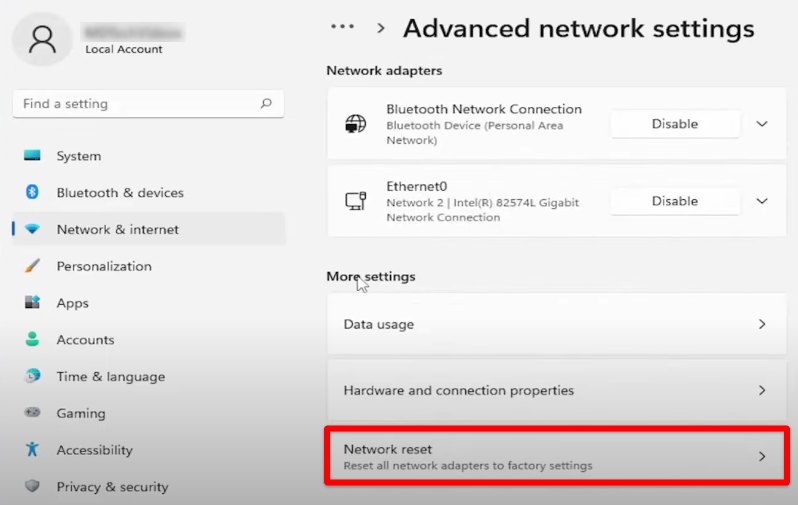
- Open “Settings” > “Network and Internet” tab > “Advanced network settings.”
- Now select “Network reset” under the “More settings” subsection.

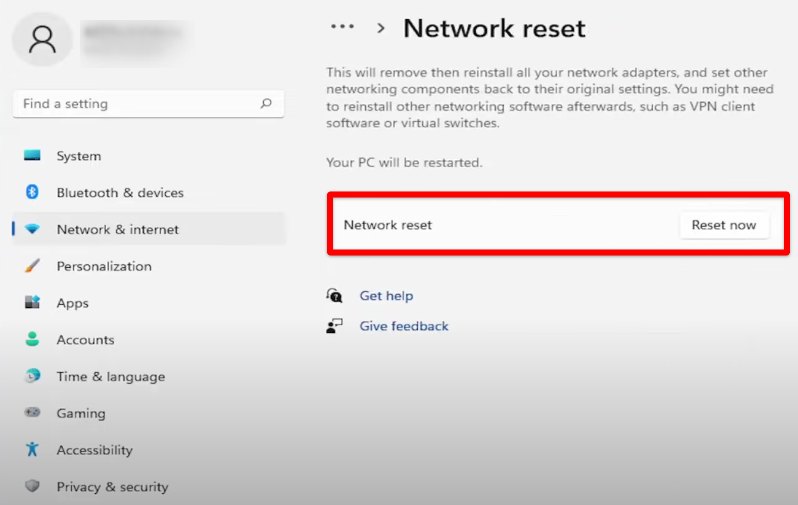
Selecting “Network Reset” - Here, click on “Reset” beside “Network reset.” Once you click on the button, things should roll into motion for you.

Resetting the Network
That’s about it! Restart your PC and launch Steam as soon as it boots back on. There’s a high chance you’ll be able to play your games swimmingly from here on out. If you still can’t, we’re afraid there’s only one more potential fix left to shoot your shot at.
My Thoughts
The “Could not connect to Steam network” problem isn’t widespread, but it’s a serious problem nonetheless. Steam even has a proper network troubleshooting guide that suggests various fixes, including the ones I’ve mentioned above.
There are some ways to fix it, like checking Steam’s server status, restarting parts of Steam, and changing some computer settings. People on forums and Twitter are frustrated and trying different solutions, but there’s no surefire fix.
This isn’t an issue recently sparked among the community after an update or anything else. This can pop up randomly while booting up Steam or playing a game. As I’ve discussed above, the issue usually stems from back-end server issues for Steam or your own internet. So keep a lookout for these two factors to steer clear of this problem.
Other Steam Error Guides That We’ve Covered on Exputer:
- How To Fix Steam Error Code E8
- How To Fix Steam Confirmation Error [2024]
- 10 Ways To Fix Steam ‘No Internet Connection’ Error
Thanks! Do share your feedback with us. ⚡
How can we make this post better? Your help would be appreciated. ✍