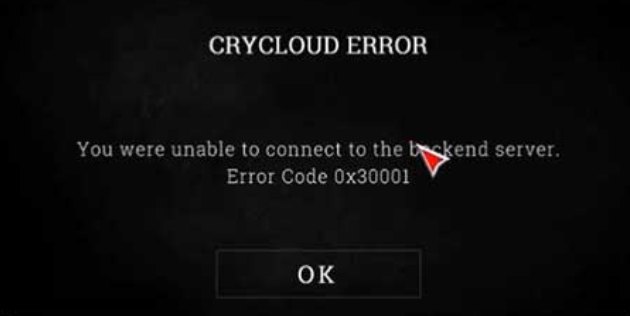
Whether you’re hunting down bounties alone or in a group, it can be infuriating to encounter the 0x30001 Error Code in Hunt Showdown. The bug is also known as the Crycloud Error and was recently reported by a multitude of players online. Luckily, there are a few fixes and workarounds you can try to solve the problem.
- The Hunt Showdown Error 0x30001 is often caused when the limit of players exceeds in the servers.
- To resolve the 0x30001 issue, keep trying the reconnecting button which is an effective fix for getting rid of the error.
- You can also cross-check the files installed on your system with the ones that Steam has stored on its own servers using the ‘verifying integrity of game files’ feature.
- Players can also try turning their Antivirus software off (both Windows Defender and any third-party program) on their PC, this has proven to be the most prominent 0x30001 error fix.
- Try connecting using an Ethernet connection and turn off the Steam or GeForce Overlay by going to the General tab in the main menu.
- At last, try reinstalling the game if nothing from the above methods works.
What Is Error 0x30001 In Hunt: Showdown?

From what we can gather after personal experience and researching around in community forums, the error code 0x30001 Hunt Showdown originally surfaces due to a cap placed by the developers on servers. This is in an effort to avoid oversaturation of the front-end to the point where the servers aren’t able to bear the load of the masses anymore.
With that said, the latter isn’t the only reason you could be suffering from the problem in question. A wide variety of issues pertaining to your internet connection are also to blame, depending on the situation. You have to verify whether you’ve got blocked ports or your antivirus is barring the FPS’ servers from running appropriately.
How To Fix Hunt Showdown Error Code 0x30001
The following is our cherry-picked collection of all the different ways people have been using to fix the irksome Hunt: Showdown error code at hand. Do note that the entries ahead take confidence that you’ve restarted your game, PC, and even router a bunch of times beforehand. In the case that you haven’t done that already, fire away with no further ado.
Keep Trying To Reconnect
Some players were able to get back into the game just by repeatedly clicking on the “Reconnect” button. This is one of the oldest tricks in the book, but is albeit an effective one that we can definitely vouch for. Try the stratagem on your end and see whether it helps or not.
We presume that this potential fix has something to do with the Hunt: Showdown operating as a background process and then finding the exact time to connect to the servers in its idle state. Whatever the scenario may be that goes down in the regard at hand, it’s worth keeping at it in case you get lucky.
However, if you’ve tried a serious number of times reconnecting to Hunt: Showdown’s servers, but the issue still doesn’t budge from its annoying position, keep on reading to try other measures.
Verify The Integrity Of Files On Steam
Steam, being one of the most expansive and feature-filled game launchers in the world, doesn’t come without its unique catalog of diverse features. You can use the famed platform to check whether all installed game files are in place and working properly.
The “Verify integrity of game files” feature cross-checks the files installed on your system with the ones that Steam has stored on its own servers.
If any discrepancies are found, the files will be tended to accordingly and you’ll finally be able to enjoy the well-grounded action-adventure title just like new again. Follow the steps listed ahead to learn how to use this in-built Steam feature and get around the Hunt Showdown 0x30001 error.
- The first step is to launch the Steam desktop client on your Windows PC. Do this from the Taskbar if you have the application pinned there or simply look for it using the Windows Search bar.
Launching Steam - After you have Steam up and ready, click on the “Library” section within the interface of the application and find all of your installed games in the sidebar to the left. From here, hover over Hunt: Showdown and double-tap on it. Doing so should reveal multiple options on the screen for you. Select “Properties” to get to the next step.
Accessing Game Properties on Steam - A small-scale window will appear on the screen for you right afterward. Click on the “Local Files” section on the left next. Once done, choose the “Verify integrity of game files” option to commence the process.
Verifying the Integrity of Game Files
That’s about it for this potential fix. After you click on the aforementioned area, a progress-tracking prompt will appear, taking you through the completion of the assigned task. This shouldn’t take any more than a couple of minutes, so do rest assured and hope for the best.
Verifying the integrity of game files on Steam does the trick most of the time, and you should hopefully be able to launch your copy of the title now. If, however, going through with even this fix didn’t help you out, we’ll have to nudge you toward the next solution in line.
Run The Executable File With Administrator Privileges
One more measure that you can take in order to get Hunt: Showdown back on track pertains to running it with admin privileges. Usually, you do not need to tick off this specific prerequisite for most programs. However, some software do require you to take care of administrator-grade requests beforehand, so any potential hiccup is avoided right from the get-go.
It’s a simple enough procedure to give a shot, so you shouldn’t be too troubled by it either way. All you have to do is fire up the “Properties” of the main Hunt: Showdown executable file and get going with providing it admin privileges. You’ll find the option to do that in the “Compatibility” tab within the program’s “Properties.”
With that said, if you’re not in the mood to do any of that, a similarly effective approach is to double-click on the game icon on your desktop and select “Run as administrator.” That is sure to do the trick for you. Try getting into the game afterward and connect to a server to see if the Hunt Showdown error 0x30001 still doesn’t cease to exist.
Allow Game Through Windows Firewall
A noteworthy trick to apply in our case is to make sure that Hunt: Showdown isn’t being treated as some sort of a threat to your Windows PC and is being allowed to run like it needs to. That way, you’ll be negating a ton of problems on your end right from the get-go.
If you’re not sure how to test whether it is Windows Firewall that isn’t letting the first-person shooter breathe in peace, follow the steps given ahead. You’ll shortly be learning the process of allowing an app through the Windows Firewall program.
- Your first task is to open the “Firewall and network protection” section of Windows Security on your PC. You can do that by simply searching for it using the Windows Start menu.
Opening “Firewall and network protection” - Once done, a new window will launch and it’ll be a part of the Windows Security department, as mentioned earlier. You now have to click on “Allow an app through firewall” to get to the next step.
Clicking on “Allow an app through firewall” - You now have to make a couple of clicks in the following window that opens after completing the last step. Click on “Change settings” first to make the “Allow another app” option accessible. Once done, click on the latter and see yourself opening another window.
Setting Up the App to be Allowed Through Firewall - A small-scale window will open up just after you complete the next step. This is where you’ll have to click on “Browse” and search your computer for the main Hunt: Showdown executable game file application. From what we can gather, you only have to add a single distinct process of the game to the designated area in this step.
- Once you have found the Hunt: Showdown executable file application, select and add it to the list of inclusive apps. This will take you back to the previous small-scale window where the game file will be listed with a specific name under the “Apps” section. Click on “Add” to allow the game app through Windows Firewall. You’ve made most of the progress completing this step.
Adding the Hunt: Showdown Application to Windows Firewall - You now just have to go through one more simple step now to finalize the process. Check the box for “Public” and “Private” connections for Windows Firewall on the “Allowed apps” window. You have to do this for the Hunt: Showdown executable file. Lastly, don’t forget to click on “OK” as soon as you’re done.
That’s about it for this potential solution for the error 0x30001 Hunt Showdown issue. Now that you’ve finally allowed the game through Windows Firewall, launch it on your end to see if it brings favorable results.
Turn Off Your Antivirus Program Briefly
Turning off the antivirus software, both Windows Defender and any third-party program that you might have installed on your PC is flat-out the most prominent Hunt Showdown 0x30001 error fix.
In addition to this, a whole swath of users in the overall community claims that Avast Antivirus is the main culprit behind this error code. Upon disabling the application entirely, the game started working again and the issue disappeared in thin air.
Therefore, we encourage uninstalling any third-party antivirus that you might have installed on your Windows PC. Don’t be afraid of impending security threats since we’ll only be doing this for a brief while in order to confirm the antivirus program’s link to the error code affect Hunt: Showdown players.
Simply look up the “Remove apps and programs” section in the Windows Search bar and you’ll get taken straight to the area from where you can uninstall your antivirus software.
Select the antivirus that you have installed on the system and remove it from the device. Once done, restart your PC to shut down Hunt: Showdown if it’s running and refresh the computer. Launch the FPS as soon as the PC boots back up to see if the bug still exists.
Other than that, if you do not have any other anti-malware software installed, you’ll need to turn off Windows Defender then, which is the operating system’s default antivirus system. This can be simply done in the following steps just as well.
- Get started by searching for “Windows Security” in the Windows Search bar. Click on the application when it pops up to get to the next step.
Opening Windows Security - Right after that, select the “Virus and threat protection” section to move forward. In the final step, you should be able to disable your Windows antivirus software.
Selecting the Virus and Threat Protection Settings - In the final step, simply turn off the following features in the “Virus and threat protection settings” section. All you have to do is click on the respective toggle underneath each setting to disable it. This should be fairly simple to complete.
Disabling All of the Virus and Threat Protection Settings
That’s about it for this potential fix. Try it on your end and let us know down in the comments section whether the strategy paid off for you or not. Keep on reading to discover other potential ways to resolve the problem.
Update Your Graphics Drivers
Keeping your dedicated graphics drivers up-to-speed with their respective manufacturer always bodes well for a PC, especially if you play games on it. Hunt Showdown’s consistent connectivity issues on the device might possibly be resulting from this particular reason as well, given that you might not have fully updated drivers on your PC.
We’re leaving links for two of the most popular graphics card manufacturers’ websites below, so you’ll find it easier to jump to them on the fly.
Visit the official support page on the site using the given links and enter your product’s information to download the relevant updates. Shouldn’t be too hard to do that. As soon as you’ve confirmed that your graphics drivers are all fully updated, proceed toward getting into Hunt: Showdown and see if your efforts come to fruition.
Try An Ethernet Connection To Log In
A wired connection is leaps and bounds above a wireless one. There is a bevy of reasons supporting this statement as Wi-Fi setups can come off as fairly inconsistent from time to time. On the other hand, an Ethernet connection is so much more proper and paves the way to a stable multiplayer experience most of the time.
Gigabit routers, in particular, are much faster than even the latest iteration of Wi-Fi, which is Wi-Fi 6, and boast consolidated security. Lesser traffic interruptions, more dedicated bandwidth, and little to no network outages are some of the defining features of an Ethernet connection.
Set up a wired connection with your console or PC and fire up Hunt: Showdown. Try logging into the game’s online servers and see if you can go through the whole affair without a disconnection. Many players have reported that they experience a significant bump in multiplayer connectivity after slapping on an Ethernet connection.
Toggle Off Steam Or GeForce Overlay
Steam Overlay is a launcher feature that enables players to use the platform’s various community-centric features while in-game. It primarily lets you take a quick glance at your friends, their activity, the latest and ongoing news highlights, and, of course, your achievements panel.
It’s a fairly decent utility, but it’s known to interfere with the prime functioning of Hunt: Showdown. That is why we need to try disabling the Steam Overlay functionality to see if it would do anything for the connection issue of the FPS at hand. This may not work for some of you out there, but it’s definitely worth a shot.
Turning the feature off is pretty effortless. All you have to do is open up the “Properties” of the game in question, make sure you’re within the “General” tab, and click on the toggle beside “Enable the Steam Overlay while in-game.” That should promptly do the trick for you.

The same goes for GeForce Overlay, which is yet another overlaying application featured in the official Nvidia GeForce Experience software. Turn it off as well if you’ve got it enabled for the best results.
As soon as you’ve gone through the process, try launching Hunt: Showdown again to see if you’ve managed to fix the issue. Continue reading to try yet another potential solution if the issue still wasn’t resolved.
Reinstall Hunt: Showdown
From Lost Ark Not Loading and Warzone Error Code Vivacious to Fall Guys Invite Not Working and Skyrim SE Won’t Launch, a reinstallation is something that almost always pays off when titles start bringing the heat. We can go on and on about the efficiency of the strict methodology, but it’s already understood at this point that reinstalling the action RPG is the only way to resolve our pertinent worry with Hunt: Showdown.
Plenty of players managed to sit out the installation times of the title and get back into the multiplayer action of the action-packed FPS briefly after reinstalling it completely. In the case that you’re on PC playing the game through Steam, or on any of the major consoles, delete the game from the system and proceed toward installing it again.
Download the relevant updates and try finding a match to see if you can make your way inside the FPS without the connection issue popping up anymore. If that is the case, you’re all set. It’s finally time to shoot down those spine-chilling bosses.
Submit A Ticket

If the Hunt Showdown 0x30001 error fails to go away no matter what you try on your end, it’s certainly worth submitting a ticket over at the official Hunt: Showdown support page. When you get the developers to cast a lens on your situation, you’ll be better able to receive official assistance.
The problem shouldn’t linger on after trying all of the aforementioned solutions, so it’s better to involve Crytek—Hunt’s developer—at this point. Explain the issue in detail to them while also mentioning everything you’ve tried so far to resolve the problem yourself.
With some spell of luck, the developers should be able to get you back on track or at least address the matter and respond accordingly.
Thanks! Do share your feedback with us. ⚡
How could we improve this post? Please Help us. ✍