With another iteration of the Final Fantasy franchise released in 2017, players found themselves in Final Fantasy 14: Stormblood, a role-playing multiplayer masterpiece with endless potential. In patch 4.25, a somewhat controversial addition was presented in the form of The Forbidden Land of Eureka. The gameplay of this particular FFXIV series is reminiscent of 2000s MMORPGs, which offers a dive into the sweet nostalgia for older players, and allows newer gamers to experience what MMOs of that era felt like. This article will help you as a FFXIV Eureka leveling guide.
Key Highlights
- In Patch 4.25 of FFXIV, The Forbidden Land of Eureka made its debut.
- Players must have good knowledge of the Magia Board system to ensure progress.
- It is important to kill monsters closer to your level.
- Try to join as many parties as you can for fast farming.
Understanding the Eureka Leveling System
Eureka is a unique leveling system within Final Fantasy XIV that introduces Elemental levels and other mechanics. Here’s a breakdown of key elements of the Eureka leveling system:
Elemental Levels
- When you enter Eureka, you start at Elemental Level 1.
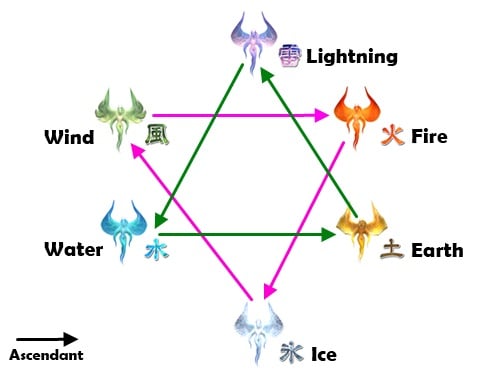
- Eureka has six elemental affinities: Earth, Fire, Ice, Lightning, Water, and Wind.
- Monsters in Eureka have varying strengths and weaknesses to these elemental affinities.
- As you progress, you can strengthen your character’s elemental affinity through the allocation of magicites.
Whether in Eureka or future expansions like the upcoming Endwalker, stay leveled up through our FFXIV Leveling Guide 60-70.
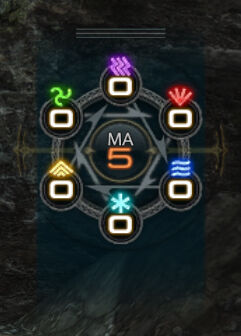
Magia Board
- Completing Krile’s quests allows you to earn up to 5 magicites.
- Magicites should be stacked on the same element to maximize your elemental strength.
- The Magia Board is a mechanism for changing your character’s elemental affinity.
- You can dynamically adapt to monsters by rearranging your magicites on the Magia Board.
Magia Medler
- The Magia Medler, found in the settlement, is used to distribute magicite crystals and recharge the Magia Board.
- Recharging the board is essential to switch between elements effectively.
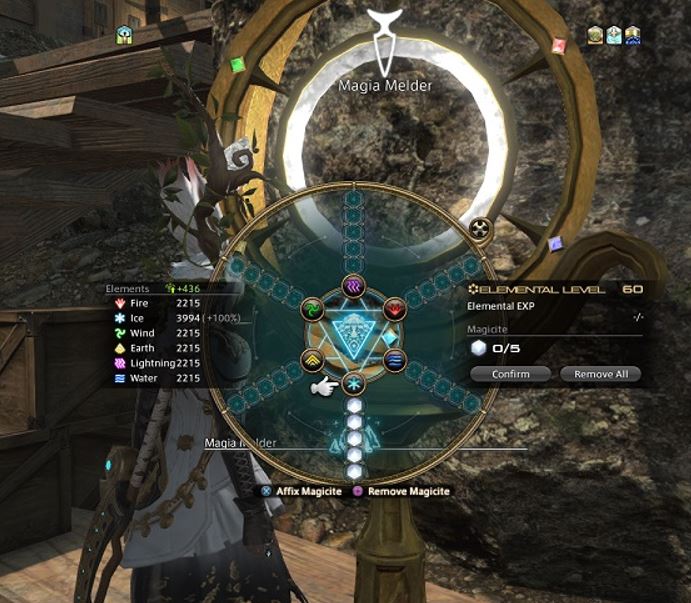
Note: Players can recharge the board by killing monsters, but given the penalty for dying, we wouldn’t recommend that.
Death Penalties
- Death penalties apply in Eureka, unlike the rest of FFXIV: Stormblood.
- Before reaching level 6, players can die without any penalty.
- After reaching level 6, a portion of collected EXP is deducted for every death if not resurrected in time.
- Traveling with a party is an effective way to minimize EXP loss.
- After reaching level 11, dying can result in losing an entire level of experience, making it crucial to avoid death.
Done with Eureka, then move on to FFXIV City Of The Ancients Guide: How to Find It.
Unlocking Eureka
To unlock FFXIV Eureka and access this expansion, follow these steps:
- Reach Level 70: It’s advisable to be at least level 70 or higher before entering Eureka.
- Visit Rhalgr’s Reach: Travel to Rhalgr’s Reach, a location in Stormblood.
- Accept the Quest: Pick up the quest titled “And We Shall Call it Eureka” by speaking to Galiena in Rhalgr’s Reach.
- Meet Rodney in Kugane: After completing the initial quest, you’ll be directed to Rodney in Kugane.
- Unlock Eureka: Speak to Rodney to unlock Eureka, allowing you to enter the expansion area.

Items to Take to Eureka
When preparing to enter Eureka in FFXIV, consider these items to enhance your leveling experience:
- Armor: Purchase either two Cryptic Seals (for physical classes) or three Damascene Cloths (for magic classes) from Pier #1 near Rodney. Exchange these items for either Kirin’s Osode of X (physical) or Vermilion Cloak of X (magic) to gain an elemental bonus and haste, boosting your power and speed during grinding.
- Harmony Potions: These potions provide a 10% elemental EXP boost, allowing you to level up faster. Consider buying and using them to speed up your progression in Eureka.
Starting the FFXIV Eureka Leveling
One of the most crucial aspects in our FFXIV Eureka leveling guide is how you level up: Once your prep-work is down and you are completely ready to get a taste of Eureka, leveling up is next on the agenda.
Consider the following strategies:
Playing Solo
- Focus on killing monsters at your own level or 1-2 levels higher.
- Use Eurekan potions to enhance your regeneration capabilities and take on tougher monsters.
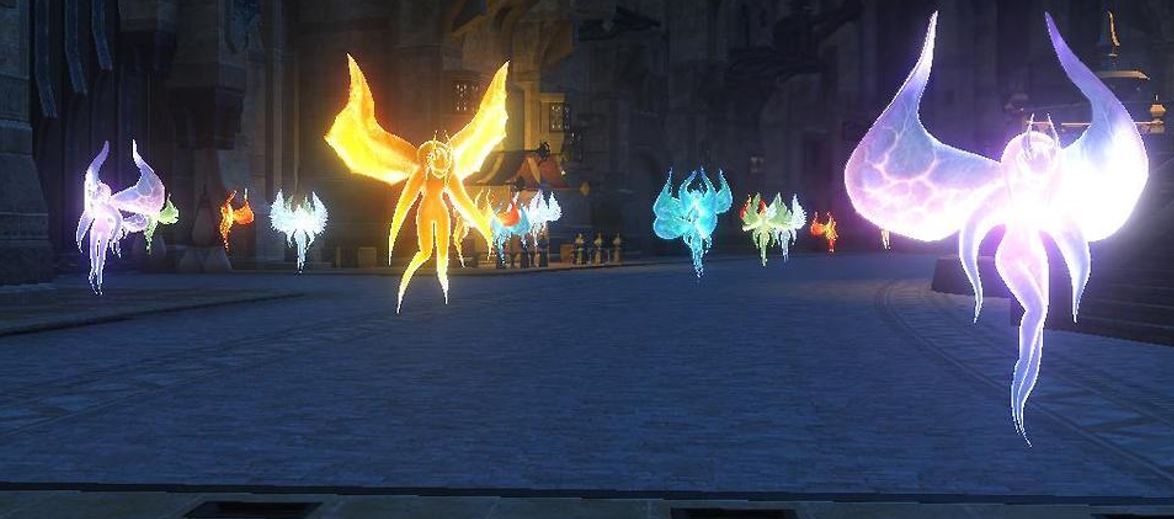
- Look out for elementals that grant buffs like EXP, Damage, Regeneration, and Echo.

Elementals
Playing in a Party
- Join a party for more efficient leveling.
- In a 4-member party, you can take on monsters up to 2 levels higher than your own.
- Form an 8-member party to tackle monsters up to 5 levels higher.
- Parties allow you to chain multipliers faster and maintain longer chains.
Fighting Notorious Monsters (NMs)
- NMs are boss-level opponents that spawn as Full Active Time Events (FATEs).
- Defeat large numbers of monsters to trigger NM FATEs.
- NMs provide substantial EXP, crystals, and loot.
- Never attempt NMs solo, especially at higher levels with increased penalties.
By following these strategies, you can effectively level up in FFXIV Eureka and progress through the content more efficiently, whether you choose to play solo, in a party, or engage in NM FATEs.
How to Obtain Artifact Armor and Relic Weapon in Eureka
Lastly in our FFXIV Eureka leveling guide: These items are essentially the reason most players embark on their journey to Eureka.
To obtain Artifact Armor and Relic Weapons, follow these steps:
- Exchange Antiquated Gear: Begin by exchanging your antiquated armor and weapon to start your journey.
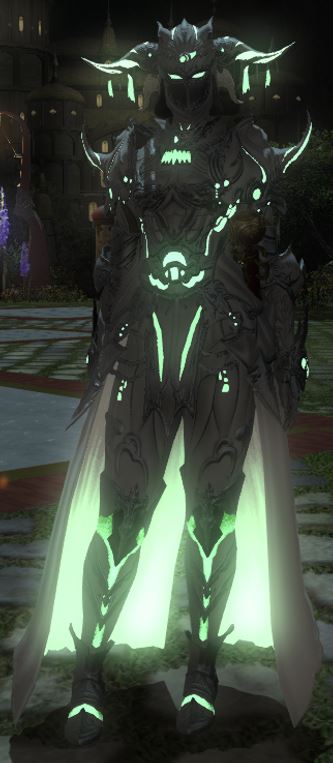
- Progress Through Variants: The goal is to upgrade your weapon to the Anemos variant, allowing for customization and a shrouded elemental glow.
- Collect Protean Crystals: Protean crystals are essential for these upgrades and can be obtained by defeating monsters and NMs in Eureka.
- Obtain Anemos Crystals: To reach the final Anemos variant, you’ll need Anemos crystals, which can be collected similarly to Protean crystals.
- Acquire Pazuzu Feathers: Pazuzu feathers are essential for weapon augmentation. You can purchase them from a vendor located at x19 y31.3 for 300 Protean crystals each. Previously, they were only available by defeating Pazuzu with a gold completion.
Thanks! Do share your feedback with us. ⚡
How can we make this post better? Your help would be appreciated. ✍