Locating and activating the tri-laser device is the very first major goal that you are supposed to accomplish when grinding your way through Grounded. A question that many newbies playing Grounded have is how to fix the mysterious machine. This Grounded guide intends to deliver the procedure of activating the two broken lasers associated with the device, all the while addressing certain issues that you are bound to face while embarking on this journey.
To repair the Mysterious Machine in Grounded, follow these steps:
- Approach the Mysterious Machine, a large white object with a glass top and circuitry inside.
- Interact with the switch to activate the machine.
- Repair the machine by fixing the two blocked lasers:
- To fix the first laser, use a Pebblet Axe (crafted from 1 Crude Rope, 2 Pebblet, and 3 Sprig) to cut the obstructing blade of grass.
- To fix the second laser, engage in combat with the Mites that are chewing on the cable. Use either the Pebblet Axe or Pebblet Spear as a weapon to eliminate them.
- While you’re in the area, consider building a shelter for the night. Craft a Lean-To using 2 Sprigs and 3 Clover Leaf to provide a safe place to rest.
By repairing the lasers, you will restore functionality to the Mysterious Machine and progress in the game.
Locating The Mysterious Machine
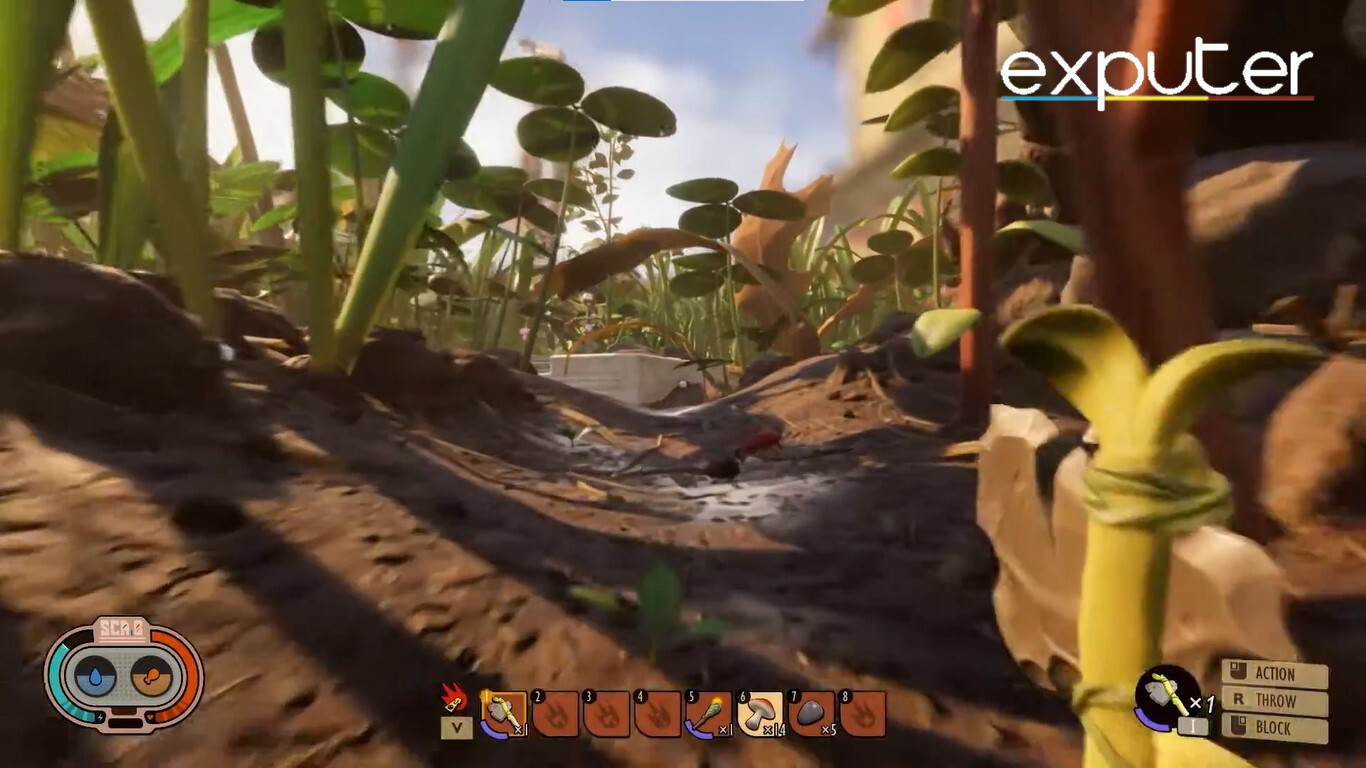
We will begin our navigation from the Field Station. There are loads of things to explore in the area. From the Field Station, you are to move in the direction with the uneven path, which is damp with dirt and slime. You will see a red Mite eating on the corpse of a Gnat. You have the option to take hold of the Gnat corpse granting you some new recipes, but at the same time to be avoidant of the Mite since you have no offensive weapons at hand at the present.
Once you are done scavenging the corpse, look ahead in the clearing for a particular large object.
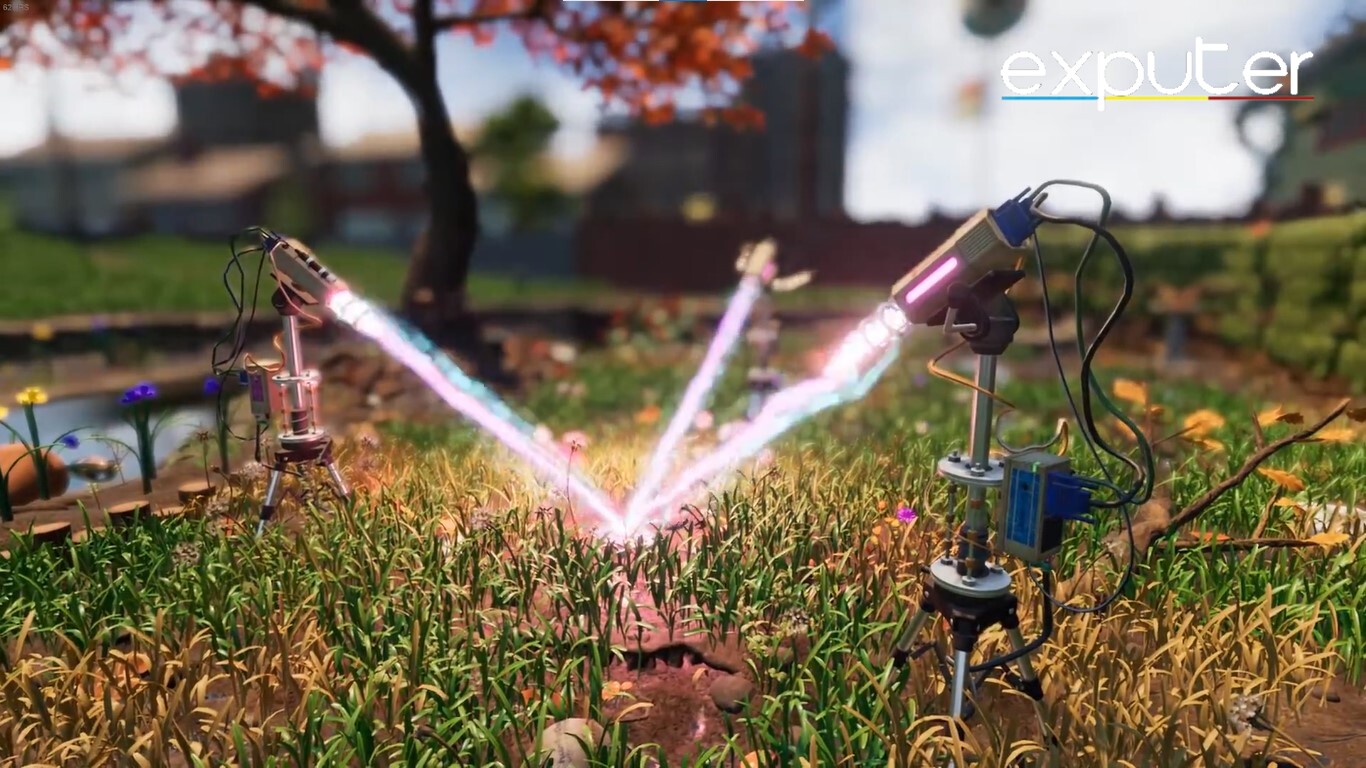
The Mysterious Machine
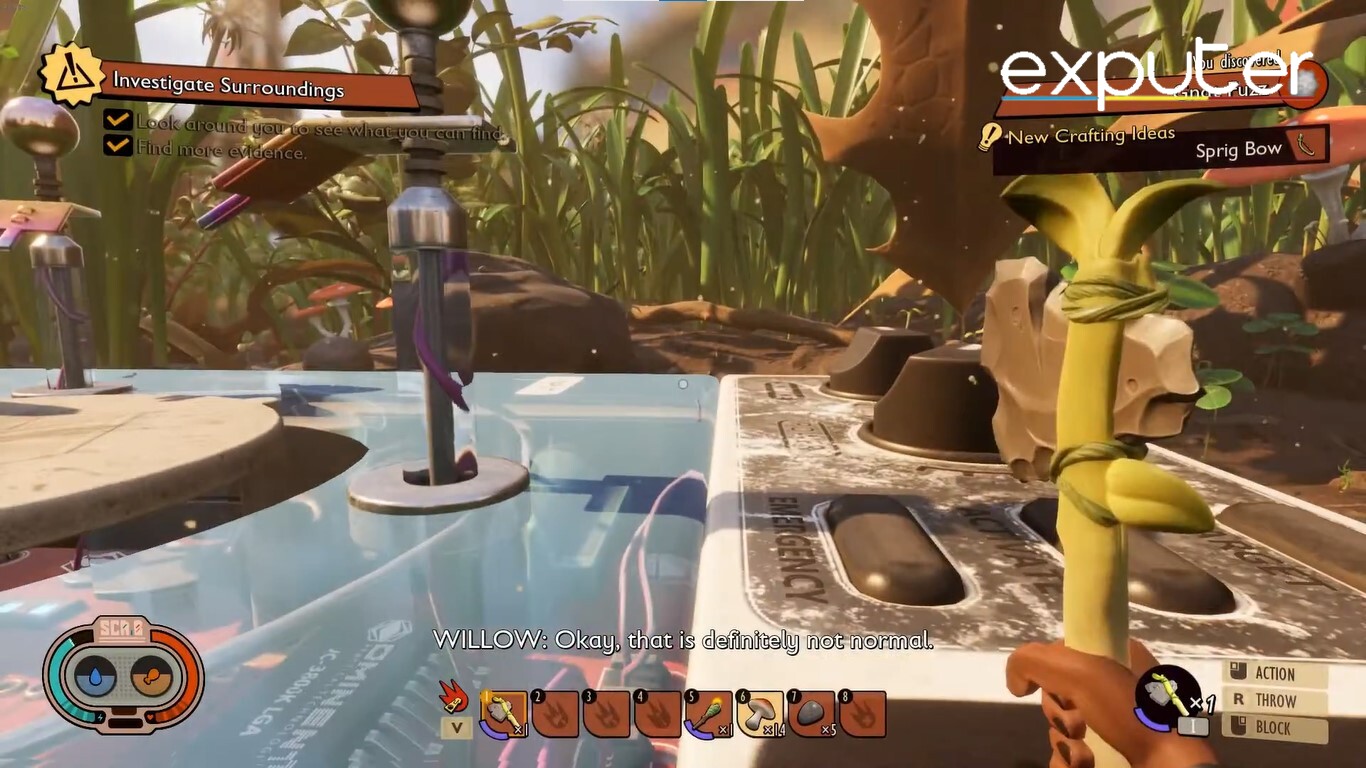
As you approach the large white object, you will see that the object has a top made of glass with circuitry on the inside. This circuitry can be explored and interacted with by entering through the holes on the object. Do note that there is nothing particular to collect here, thus no need to waste time exploring the insides. Just climb to the top and try interacting with the switch.
This is the point where you find out that only one of the set of lasers actually works. Now you are supposed to fix the other two in order to fix and activate the Mysterious Machine.
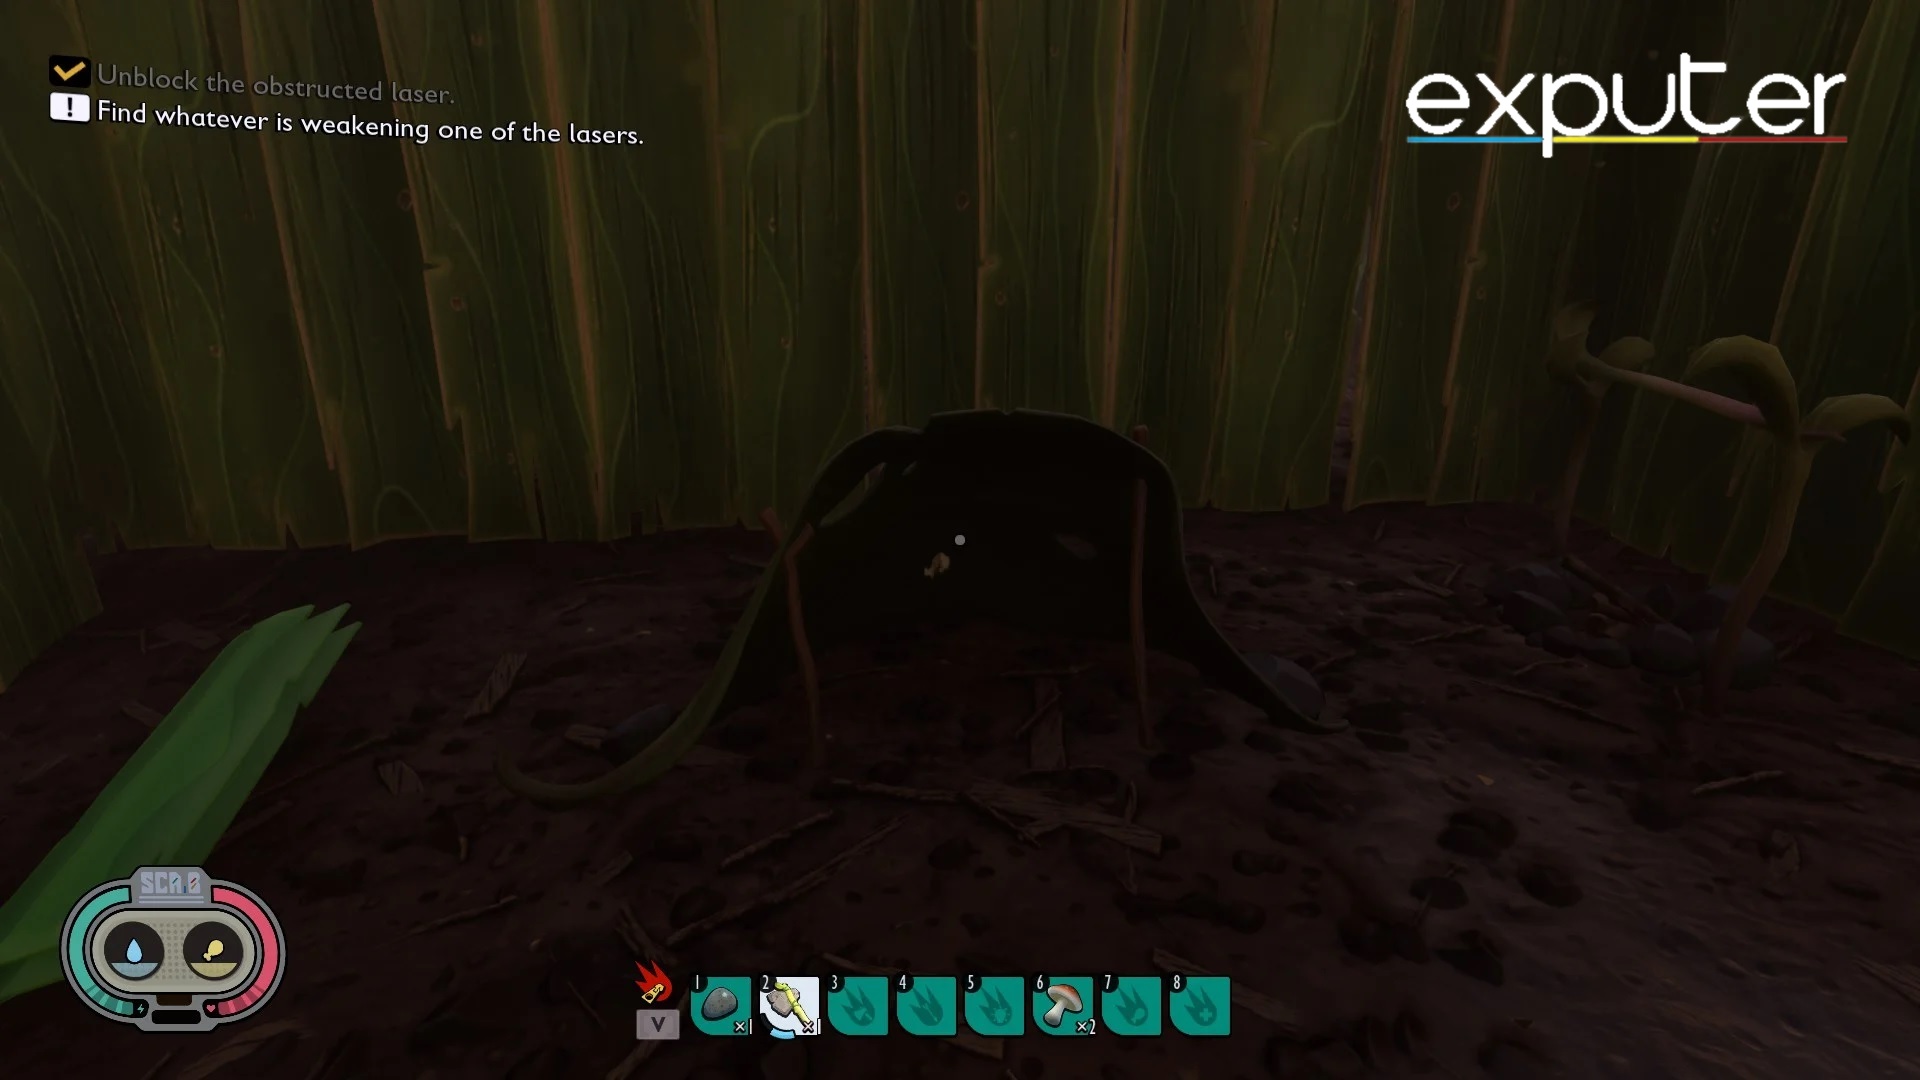
The Blocked Laser
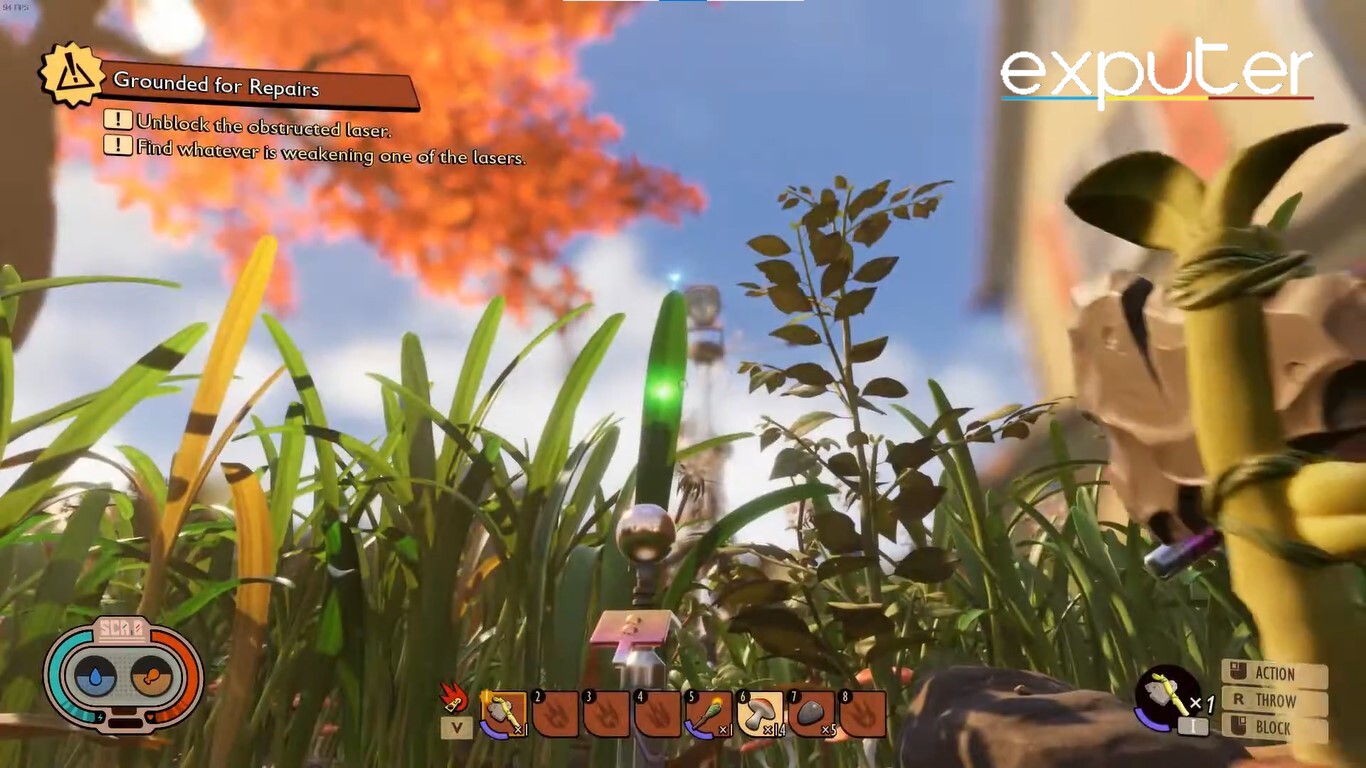
Look exactly toward the end of the platform in the direction opposite to that of the switches, and then look upwards. You see that a certain tall blade of grass is the culprit behind the laser being blocked from reaching the device. This is where you cut the blade of grass, with a Pebblet Axe.
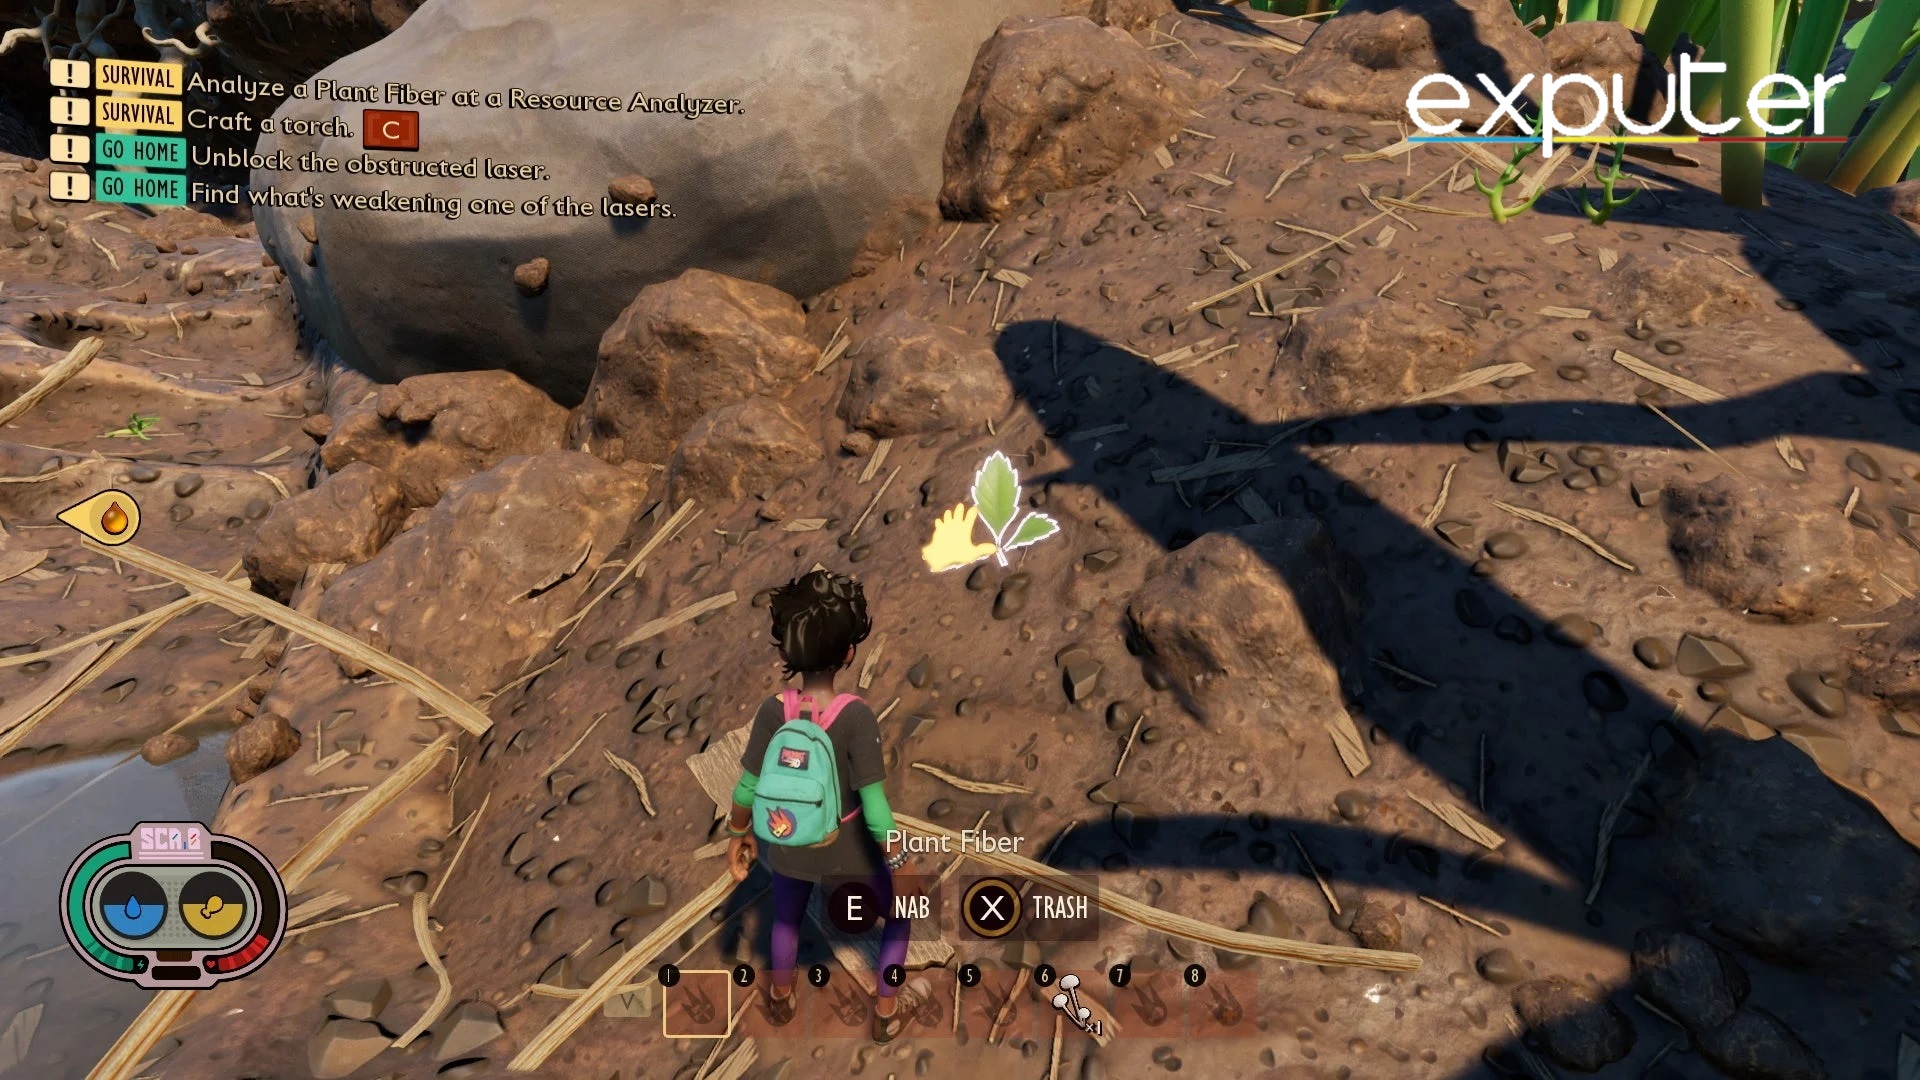
Now the Pebblet Axe can be crafted using a certain recipe of items, but in order to be able to do so, you need to have analysed the Pebblet at the Field Station earlier to unlock the recipe for the item. You should also make sure to have analysed the Plant Fiber, so that you have the Woven Fiber recipe with you.
Crafting The Pebblet Axe
The Pebblet Axe can be crafted using the following items:
- 1 Crude Rope
- 2 Pebblet
- 3 Sprig
Pebblets can be found in abundance in the starting area. Sprigs are small sprouts with two leaves, which are also found growing in ample amount in the starting area. In order to make Crude Rope, you need to have Plant Fiber, the very reason we specifically instructed for you to have learned the Woven Fiber recipe. Plant Fiber, unlike the other two items, is a little more difficult to find. It appears from small sprouts which are particularly close to the ground.
Once you manage to salvage Plant Fiber, craft a Crude Rope. Once all three ingredients are complete, you can go ahead and craft the Pebblet Axe, using which you are to cut the obstructing grass strand down, restoring direct connection with the laser.
Do note that grass strands which are chopped leave behind at the very least three grass planks. These can be used to craft a number of necessities, although they come with a price of being too big to fit into your inventory.
Building A Shelter
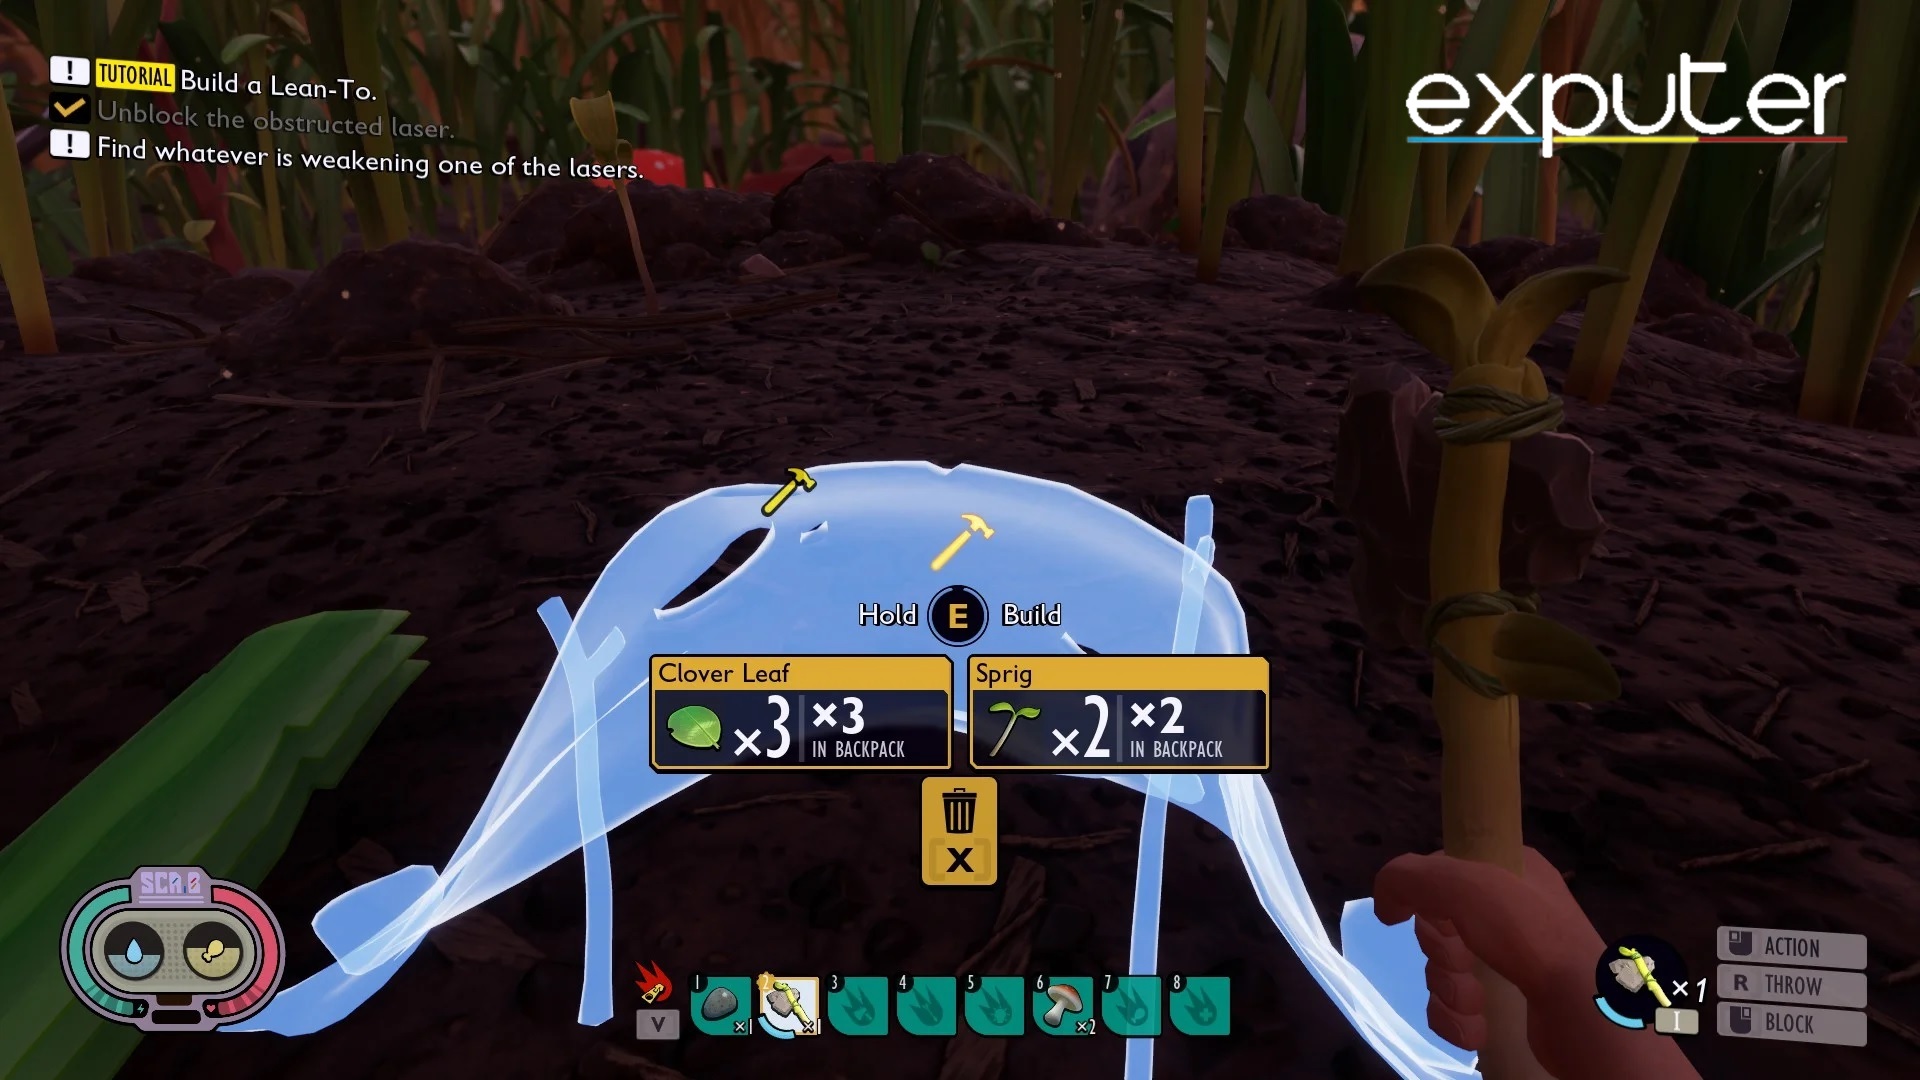
At this point, you will receive an alert about proceeding to build a shelter in preparation for the impending nightfall.
To build a shelter in Grounded, follow these steps:
- Receive an alert to build a shelter as night approaches.

Shelter to sleep (Image credit: eXputer) - Use your axe to chop a clover stalk.
- Analyze the clover leaf at the field camp to unlock crafting for a Lean-To.
- Place the blueprint on the ground and craft the Lean-To, requiring:
- 2 Sprigs
- 3 Clover Leaves
- You can place the blueprint even if you lack all the ingredients and add them later.
- Build the Lean-To once all ingredients are added.
- Stay near the Mysterious Machine when setting up your camp for safety and easy quest progression.
- Interact with the Lean-To and choose to sleep for 8 hours to restore health but reduce hydration and fullness.
- Collect dry grass for future use.
Remember, a shelter can also serve as a respawn point, but you lose all inventory items upon respawn. Consider building shelters when exploring or near important locations. Additionally, you can create a Cooking Spit using dry grass strands to cook insect parts for meals, reducing hunger frequency.
Fixing The Second Laser
Although fixing the first laser did not come with any potential threats or instances of combat, but that does not happen to be the case for the second laser.
To fix the second laser, follow these steps:
- Be prepared for combat. You can use the Pebblet Axe or Pebblet Spear as a weapon.
- Craft Fiber Bandages using sap for health restoration during combat.
- Have a torch ready for this mission.
Locating the emitter:
- Look up to the skies to trace the laser’s origin.
- Navigate through dense grass to reach the emitter’s base.
- You may encounter ants along the way, avoid engaging with them as they are too strong for you at this stage.
Fixing the problem:
- Upon reaching the emitter, you’ll find that the issue is caused by Mites chewing on the cable.
- Eliminate all the Mites along the entire cable length to restore functionality.
- Be cautious, as Mites can unite and overwhelm you, despite being easy to defeat individually.
Combat readiness, caution, and patience are key to successfully fixing the second laser in Grounded.
The Cave
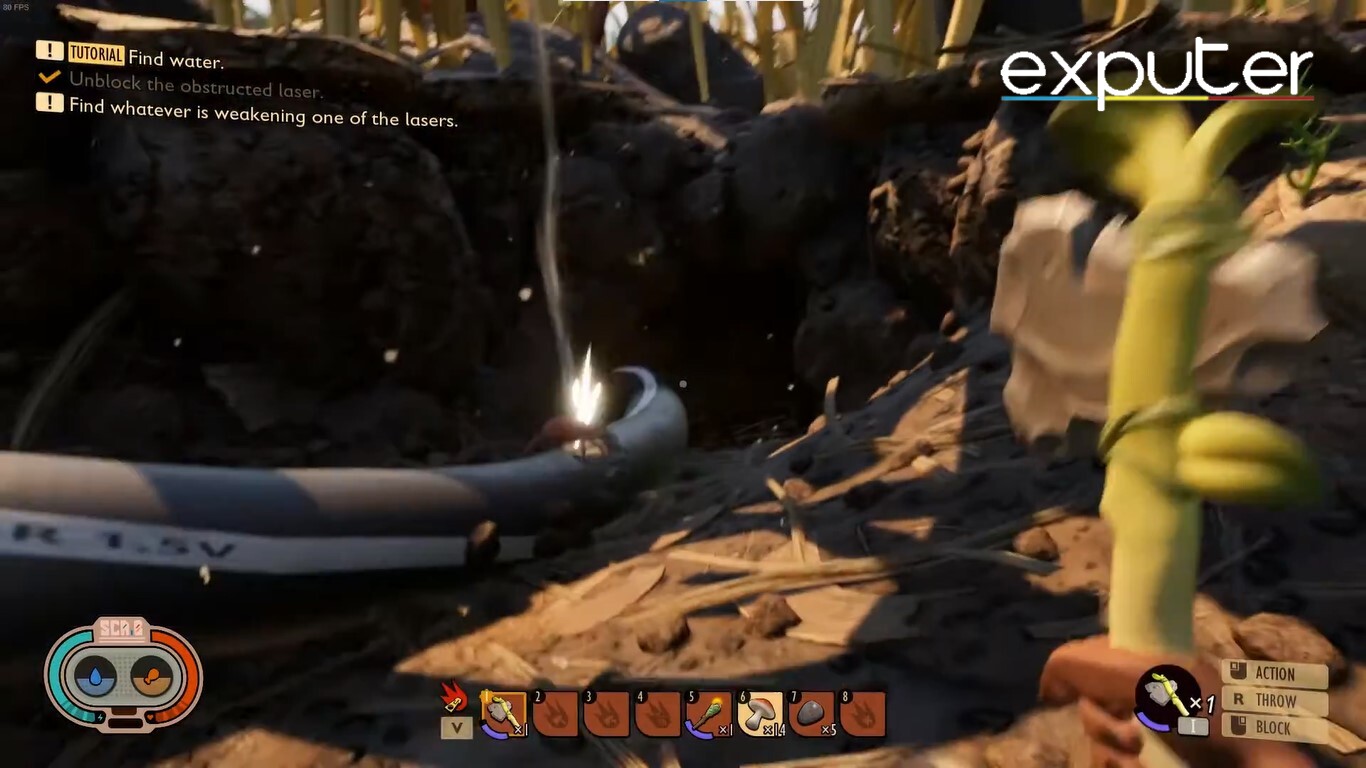
Keep on following the cable coming down from the laser emitter until you reach the opening a small cave. This is where you will be needing the torch to proceed further into the cave. You can equip a torch along with any given main weapon. Be vary of some stray Mites that might sneak up on you and attack from the depths. Keep eliminating the Mites chewing on the cable at the same time.
As you approach the end of the cave, you will come across some fluorescent slime mold-ish substance above the Mites. Make sure to pocket this mold, as it will come in handy for crafting items as you progress further into the game. You will also find some stone and quartz deposits here. Use a Pebblet Hammer to harvest resources from these.
Activating The Mysterious Machine
Once you are finished obliterating the last one of the Mites damaging the cable, head back to where the Mysterious Machine is. Now that the Mysterious Machine has been fixed, when you activate it this time around, it will fire up. This executes a huge explosion near the big oak tree in the yard. This is, as you must have guessed, your cue to move in that direction to proceed further.
And The Mysterious Machine Has Been Fixed
This has been a guide on how to fix the Mysterious Machine in Grounded. We hope that upon going through this guide, all your questions and troubles would have been sorted out as you venture through the green world in an attempt to fix the Mysterious Machine. If you still have any queries or wish to discuss any aspect of the game, do leave a comment down below.
Next Up:
- Grounded Best Controller & Keyboard Settings
- How Ziplines Work In Grounded (Complete Guide)
- 15 Best Grounded Armour: Ranking Gear Pieces
- Grounded Floors: How To Unlock And Build
- Grounded BEST Settings: FPS & Performance
Thanks! Do share your feedback with us. ⚡
How can we make this post better? Your help would be appreciated. ✍
Very good