Legend of Zelda Tears of the Kingdom features many shrines throughout the map, and each shrine is paired with its own challenges. The Jio Sin Shrine requires the Ultrahand ability, so before you begin your conquest on this path, make sure you have this ability. This shrine teaches how to solve shapes using Shape Rotation and use them to your own advantage. This way, you can move from Point A to Point B just by moving a few shapes around. In this guide, we will talk about the Jio Sin Shrine Tears of the Kingdom, where to find it, and how to solve it!
Key Takeaways
- The Legend of Zelda Tears of the Kingdom includes multiple shrines, including the Jio Sin Shrine.
- To get the Jio Sin Shrine In Zelda Tears of the Kingdom, you will have to complete a variety of tasks.
- Having the Ultrahand Ability is a requirement for completing the Jio Sin Shrine Puzzle.
- The Shrine is located South of the Lookout Landing, at the Hyrule Field.
- The Jio Sin Shrine is based on puzzles, and you will have to complete 3 different puzzles in 3 separate rooms.
- Completing the puzzle will grant you a Hasty Elixir and the Blessing of Light.
Jio Sin Shrine Location
There are multiple shrine locations scattered throughout the map in The Legend of Zelda Tears of the Kingdom. To locate the Jio Sin Shrine, I have marked the location on the map below, and you can use them to find it for yourself!
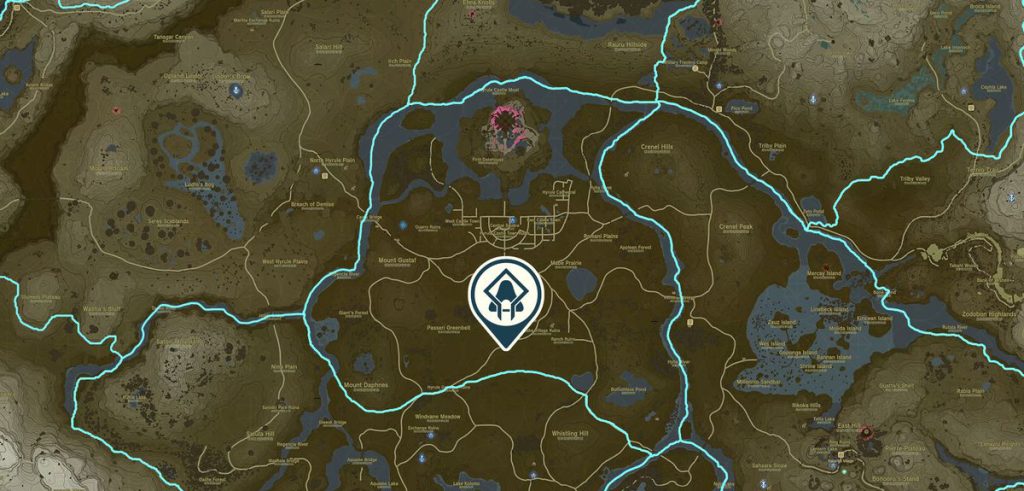
To visit the shrine, turn south from the Lookout landing and head on straight. The Jio Sin shrine will be found in the Hyrule Field.
Jio Sin Shrine Puzzle Solution
Once you have successfully navigated to the Jio Sin Shrine Tears of the Kingdom, you can begin solving the puzzle. Check out the steps below and learn how to do so.
Entering into the Shrine location, there will be a room on the left-hand side. This is marked by a large ‘X’ on the wall. Enter into this room from the main area. Inside this room, there are 3 rectangles that are joined together. Using your Ultrahand ability, pick up this dissimilar structure and walk towards the wall you just entered through.
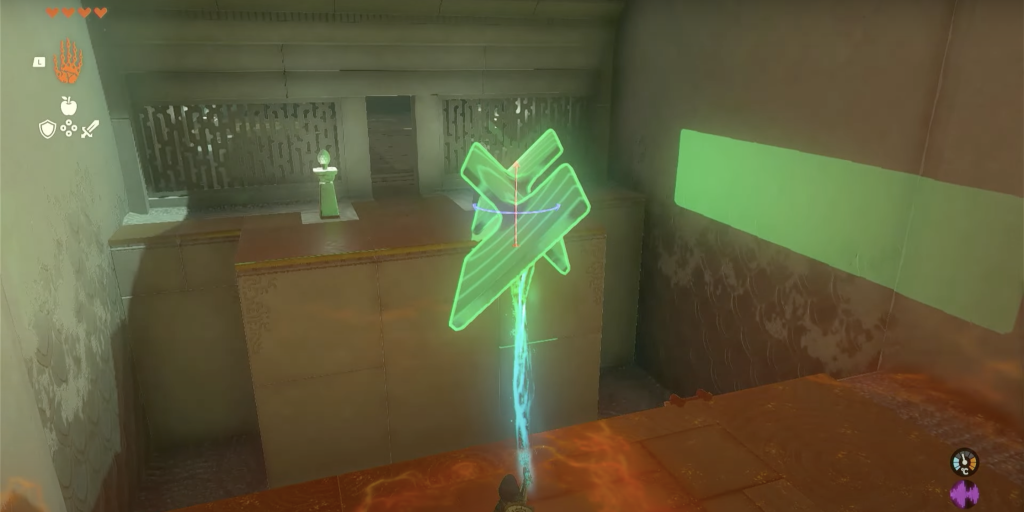
At the large ‘X’ on the wall, you can fit the obscure shape you have just picked up in the room. Rotate the structure until it can fit into the ‘X,’ which may require quite a few rotations. Then, push the structure into the main room using your ultrahand ability once again.
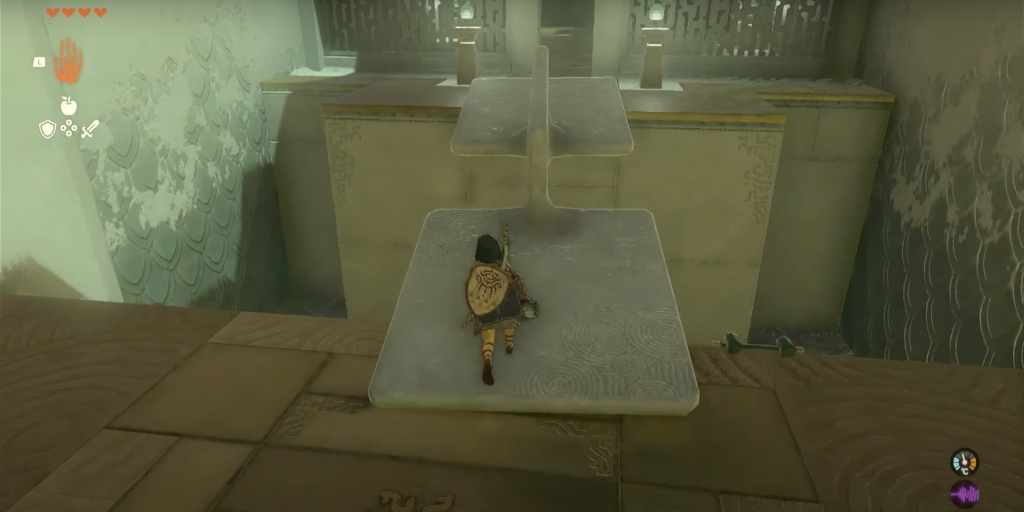
Walk back into the main room through the doorway and join the structure. Pick up the structure again, which will now be used to act as a bridge to the next platform. Rotate the structure so that the 2 rectangles are flat and 1 is horizontal. Walk atop the flat rectangle, and jump over the horizontal one to get across the bridge.
Once across, walk in the door at the very end to get to the next landing. Here, there are rooms on the left and right alongside a chest at the top of a vertical platform at the very end of the room.
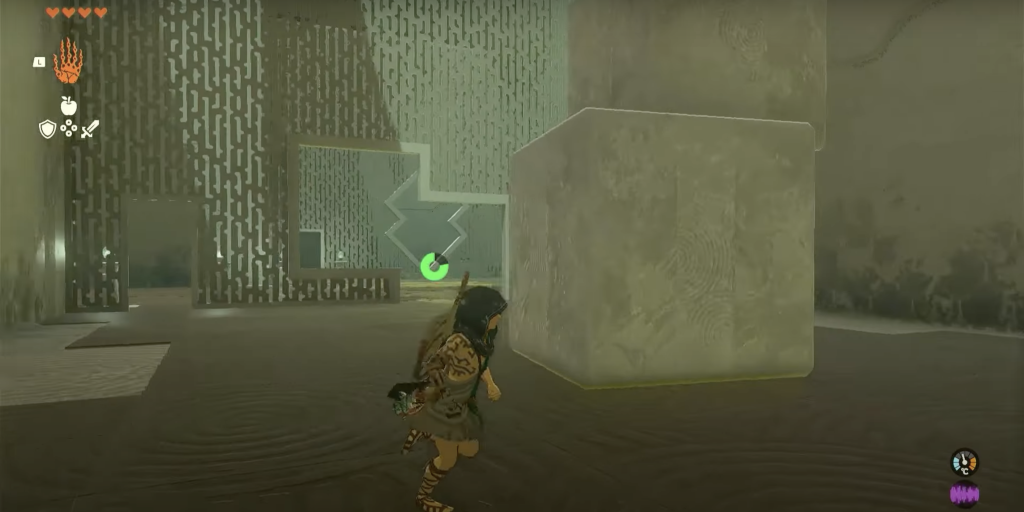
Firstly, walk to the door on your right-hand side and enter inside. In this room, there will be 2 cubes merged together, creating another odd shape. If you look closely enough, the 2 cubes also fit in the hole in the wall that divides this room from the main one outside. Using Ultrahand Ability, rotate the shape as many times as necessary and move it outside the room by fixing it in the wall.
Walk back outside, and you will notice that the area beside the chest has been lowered quite a bit so much so that your new structure can be snugged into the position. Now hop on the cubes, using them as stairs, and reach the chest at the top. Inside the chest is a Hasty Elixir, which can increase Link’s speed.
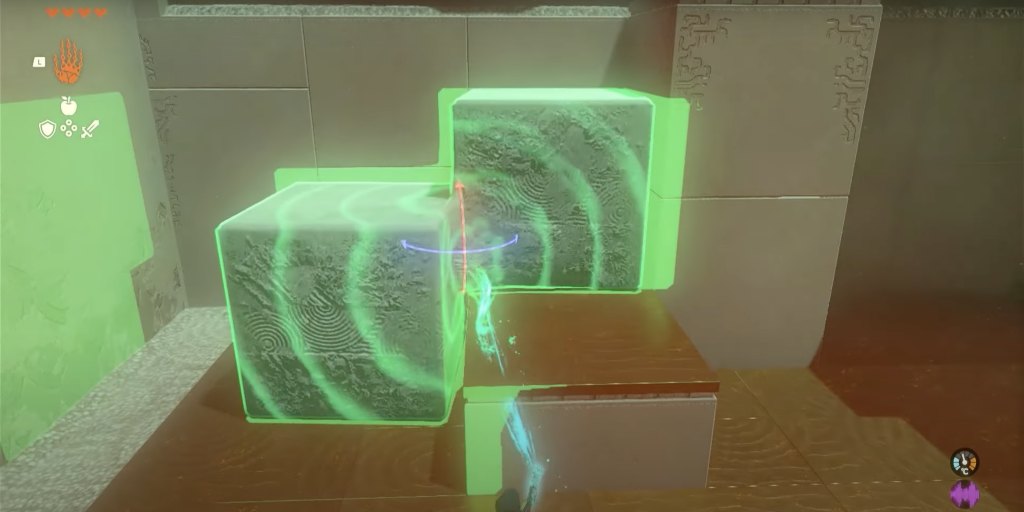
After hopping down, walk towards the other room, denoted by a diamond-shaped opening in its wall. Once inside the room, pick up the cube structure here and rotate it to fit inside the opening and send it back to the main room.
Again, you will find a couple of steps have revealed themselves since the last time you were in this room. These steps lead to a doorway which is the final area of the shrine. The issue here is that Link cannot climb up these stairs, and the use of the cube you just moved comes in again.
Set the cubes in such a way as to make stairs that will be accessible by Link. These stairs will be a tad unconventional, conforming to a sort of zigzag style, but they do work.
Climb to the very top of this Link-made structure and make your way into the doorway. Here you will collect the Light of Blessing for the Jio Sin Shrine Tears of the Kingdom and have completed this shrine successfully!
Wrapping Up
This is all there is to know about the Jio Sin Shrine Tears of the Kingdom, and by following the steps I have mentioned above, you will complete the mission in no time! The tasks can be tricky at some times, with the odd structures not fitting into their respective wall openings. They do actually fit, though, but you will need a few attempts and maybe have to pick it up from a different angle to get it through easily.
I found it of great help knowing the Best Horses in Tears of the Kingdom since they do help a lot in getting through the map quite easily. Also, knowing how to Get Paraglider in Tears of the Kingdom helps a lot. However, if you need help navigating throughout the game, the Beginners Guide for Tears of the Kingdom will help you through everything you need!
Up Next:
- Zelda Tears Of The Kingdom Master Mode
- Zelda Tears Of The Kingdom: Energy Cells
- Zelda Tears Of The Kingdom: Hookshot
- Zelda Tears Of The Kingdom: Wind Tears
Thanks! Do share your feedback with us. ⚡
How can we make this post better? Your help would be appreciated. ✍