Last of Us just got a remake, and it seems like an even more interesting storyline will have veteran and newer players hooked. Amongst other collectibles, players can also collect training manuals. Our Training Manual Locations guide will uncover all 12 manuals players can see.
- Collecting Training Manuals in Last of Us Part 1 gives you upgrades such as:
- Bomb Shrapnel.
- Containment.
- Molotov Construction.
- Deployment.
- Health upgrades.
- Melee Techniques.
- When you’re near a Training Manual, a pamphlet icon appears, at which point the player can press the triangle button to pick it up.
Let’s now briefly review each Training Manual in the table below, along with their effects:
| Training Manual | Name | Chapter | Section | Upgrades | Effect |
|---|---|---|---|---|---|
| #1 | Shiv Sharpening | Bills Town | Safe House | Shiv durability | Shivs last one hit longer |
| #2 | Health Splinting | Pittsburgh | Alone and Foresaken | Health Kits | Health kits are now 33% stronger |
| #3 | Shiv Reinforcement | Pittsburgh | Hotel Lobby | Shiv durability | Shivs last for an additional hit |
| #4 | Melee Knots | Pittsburgh | Hotel Lobby | Melee weapons | Modifications last one hit longer |
| #5 | Molotov Construction | Pittsburgh | Escape the city | Molotov cocktails | Explosion radius is now 1.5x wider |
| #6 | Bomb Containment | The Suburbs | Sewer | Nail bombs | Explosion radius is now 1.5x wider |
| #7 | Melee Techniques | The Suburbs | Sewer | Melee weapons | Modifications last an additional hit longer |
| #8 | Smoke Chemistry | Tommy's Dam | Hydroelectric Dam | Smoke bombs | Smoke lasts ten second longer |
| #9 | Health Sterilization | The University | Go Big Horse | Health Kits | Health kits are now 67% stronger |
| #10 | Molotov Deployment | The University | Science Building | Molotov cocktails | Explosion radius is now 2x wider |
| #11 | Smoke Shaping | Lakeside Resort | Cabin Resort | Smoke bombs | Smoke lasts 20 seconds longer |
| #12 | Bomb Shrapnel | Bus Depot | Underground Tunnel | Nail bombs | Explosion radius is now 2x wider |
Shiv Sharpening
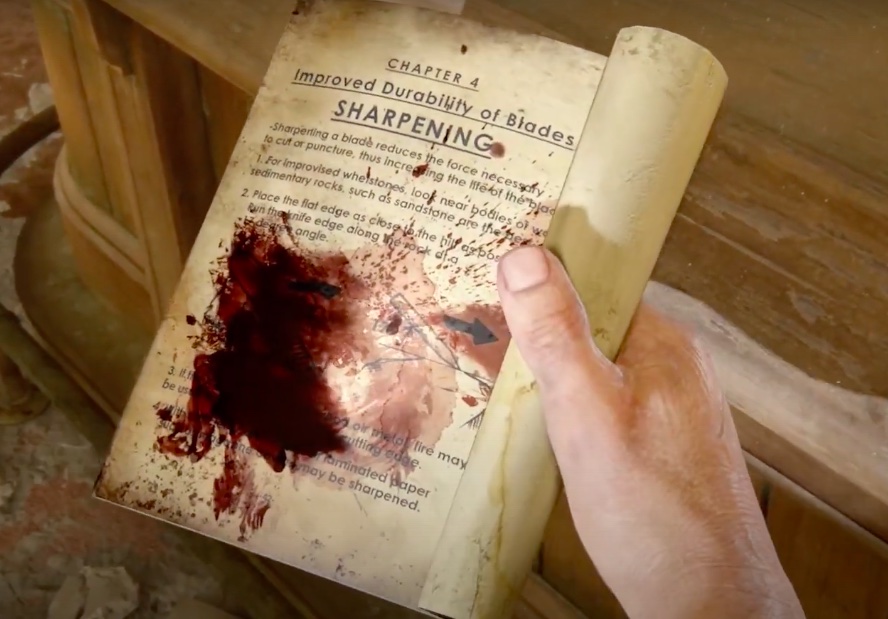
| Chapters | Bill’s Town |
| Section | Safe House |
| Upgrades | Shiv durability |
| Effects | Shiv lasts for one extra longer hit |
In Last of Us Part 1, find the first training manual, “Shiv Sharpening,” in Bill’s Town. After a rescue by Bill and a cutscene, he drops you at an abandoned bar called the Safehouse.
The bar is dusty and cluttered with tools and accessories. Walk through, passing a wooden table. Reach the bar with five stools, two of them overturned. You’ll discover the first training manual just beyond these stools on a table.
Health Splinting
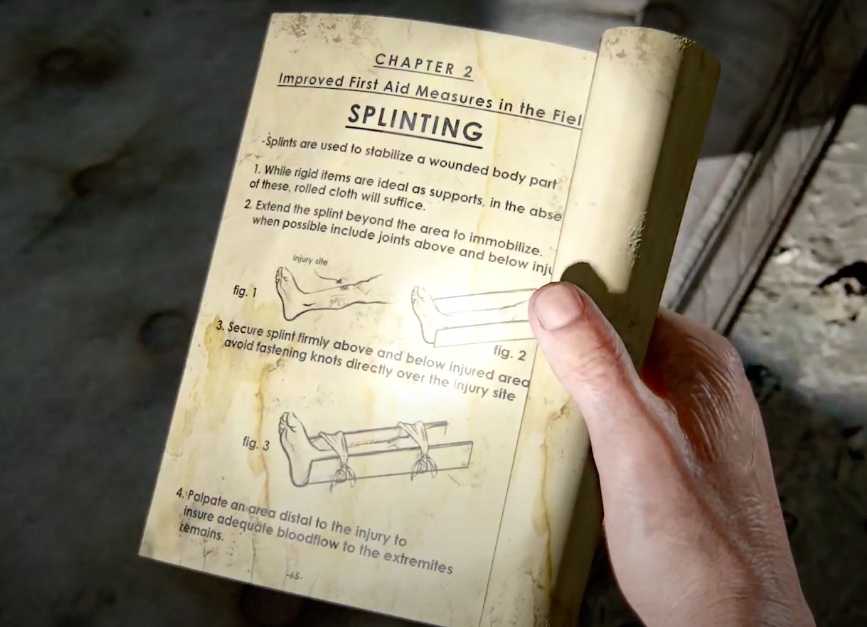
| Chapters | Pittsburgh |
| Section | Alone and Forsaken |
| Upgrades | Health Kits |
| Effects | 33% stronger Health kit |
Moving on, the next location of Training Manual in Last of Us Part 1. Once players enter the Pittsburgh level, they will quickly discover the building where the Health Splinting training manual will be located.
After entering a creepy room with a lifeless man and blood splatters, leave by heading left. Take the first set of stairs, do a 180-degree turn, and ascend another set of stairs. On the second floor, you’ll find scattered storage cases and an entrance to a room. Inside, on a mattress, you’ll discover the Health Splinting manual.
Shiv Reinforcement
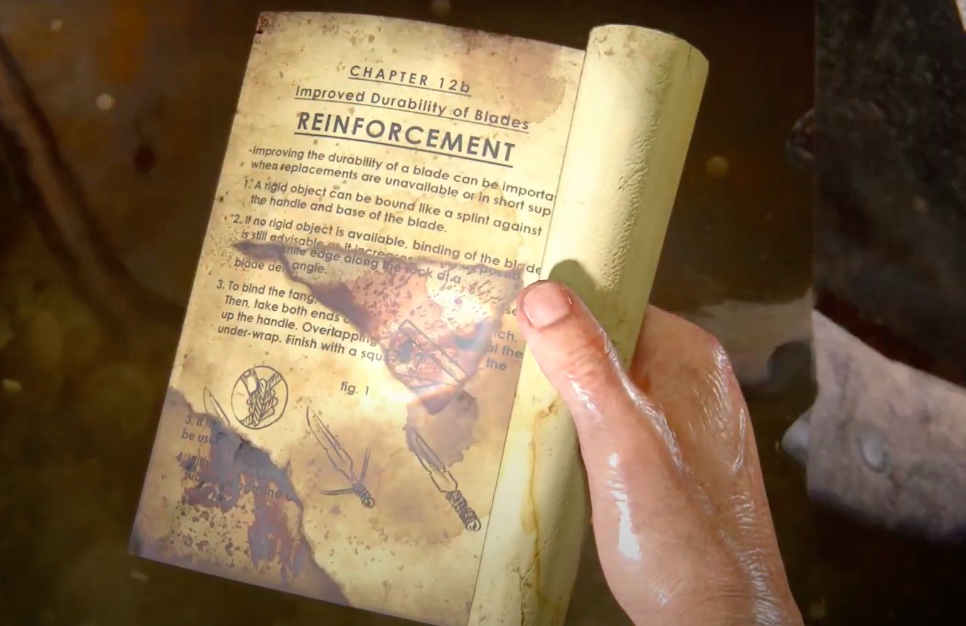
| Chapters | Pittsburgh |
| Section | Hotel Lobby |
| Upgrades | Shiv durability |
| Effects | Shiv lasts for one extra longer hit |
At the Pittsburgh level, after finding the Health Splinting manual, players can locate the Shiv Reinforcement manual. In the hotel lobby, follow these steps:
- Climb a ladder on the left end.
- Reach the top floor, turn right, and find broken stairs.
- Descend and ascend these stairs.
- Walk along the wall edge.
- Head straight and then up the stairs.
- Stop at the top of the stairs.
- Sprint to the end of the first corridor without taking the right turn.
- Collect a paper with a code.
- Unlock a safe in a room using the code to obtain the Shiv Reinforcement manual.
Melee Knots
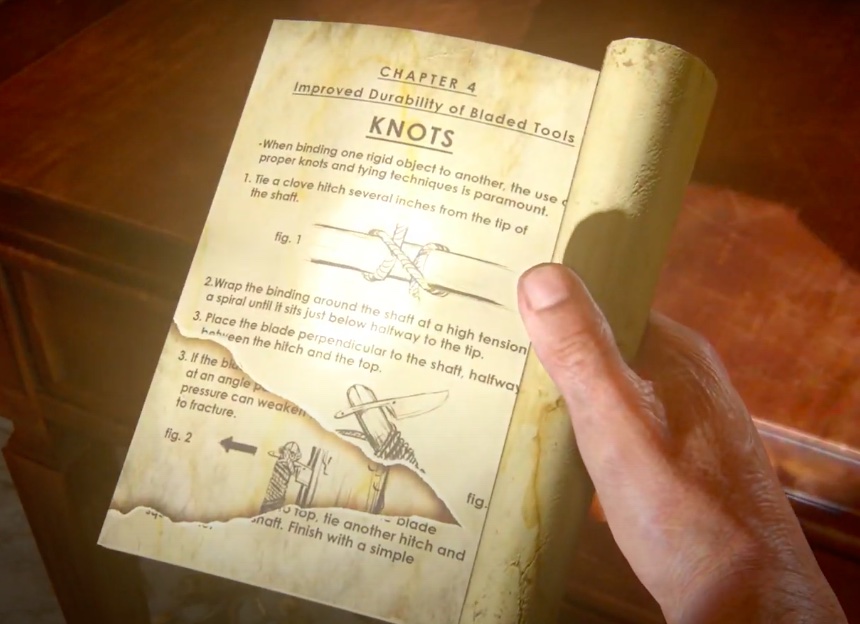
| Chapters | Pittsburgh |
| Section | Hotel Lobby |
| Upgrades | Melee weapons |
| Effects | Modifications last an extra one longer hit |
In the Pittsburgh level, players find the melee knots training manual in the hotel lobby after escaping a basement using a keycard. Ellie, a character, rescues them by eliminating a pursuing hunter.
In the hotel lobby, look for the hallway at the back. There’s not much of note here since the lobby is abandoned. Head past the woman by the wall.
At a small intersection, you can turn right, but it’s not necessary. Continue forward. On the dining table, you’ll find the melee knots training manual.
Molotov Construction
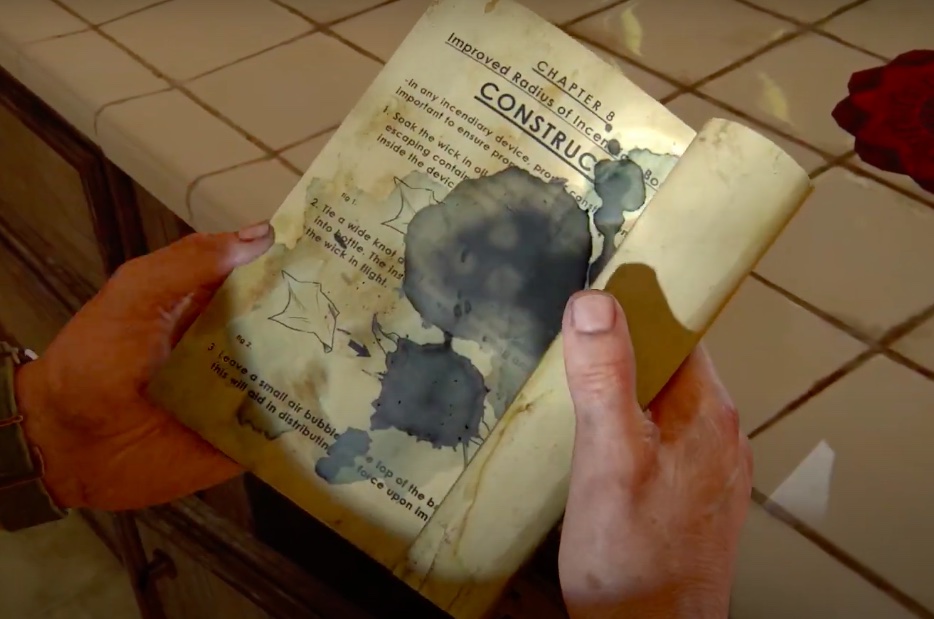
| Chapters | Pittsburgh |
| Section | Escape the city |
| Upgrades | Molotov cocktails |
| Effects | 1.5x wider Explosion radius |
While in the Pittsburgh level, players can find the Molotov Construction manual. After encountering Henry and Sam, a cutscene triggers, and players end up in an abandoned establishment. They’ll spot the manual in the kitchen area on the left corner of the marble kitchen counter. Pick it up, and it’s added to your inventory.
Bomb Containment
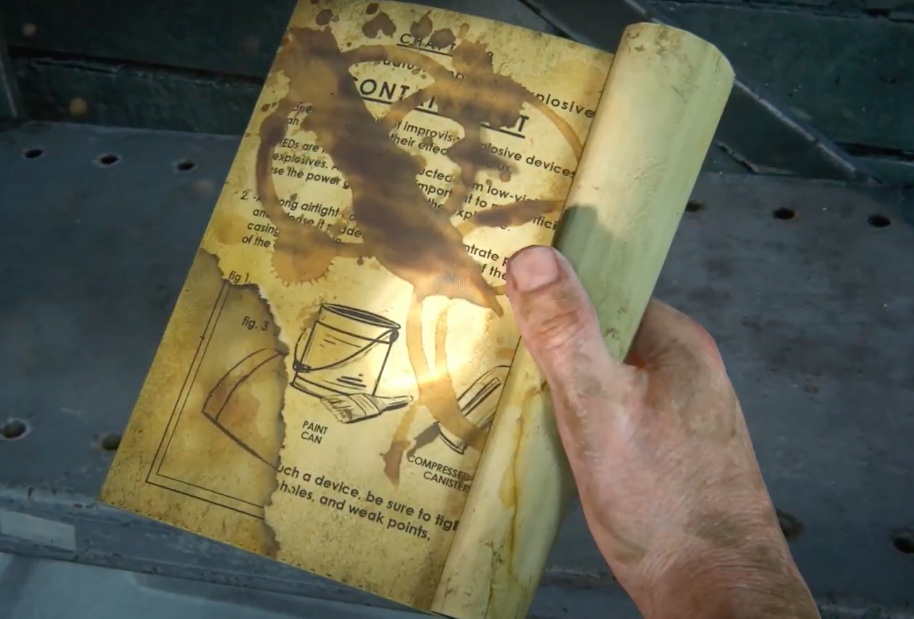
| Chapters | The Suburbs |
| Section | Sewer |
| Upgrades | Nail bombs |
| Effects | 1.5x wider Explosion radius |
You’ll find a yellow bag hanging from the ceiling near your starting point in the suburban sewers. Turn on your flashlight and move forward cautiously. Jump over obstacles like tables and wooden planks to proceed. Avoid side paths at intersections to stay on track.
At the end, two large metal storage shelves will appear – one on the left and one on the right. Click on the pamphlet on the left shelf to add it to your inventory for future use.
Melee Techniques
| Chapters | The Suburbs |
| Section | Sewer |
| Upgrades | Melee weapons |
| Effects | Modifications last an extra long hit |
After obtaining the Bomb Containment training manual from the sewers in the suburbs, head outside. You’ll find two abandoned vehicles, a van and a car. Turn your camera toward an elevated house accessible by a flight of stairs. Go up, and an open mesh door allows immediate entry. Remember to use your flashlight for better vision.
Ascend the stairs and pull a hanging rope inside the building instead of entering any rooms. Ellie will assist in retrieving the Melee Techniques manual, though it won’t lead to the attic.
Smoke Chemistry
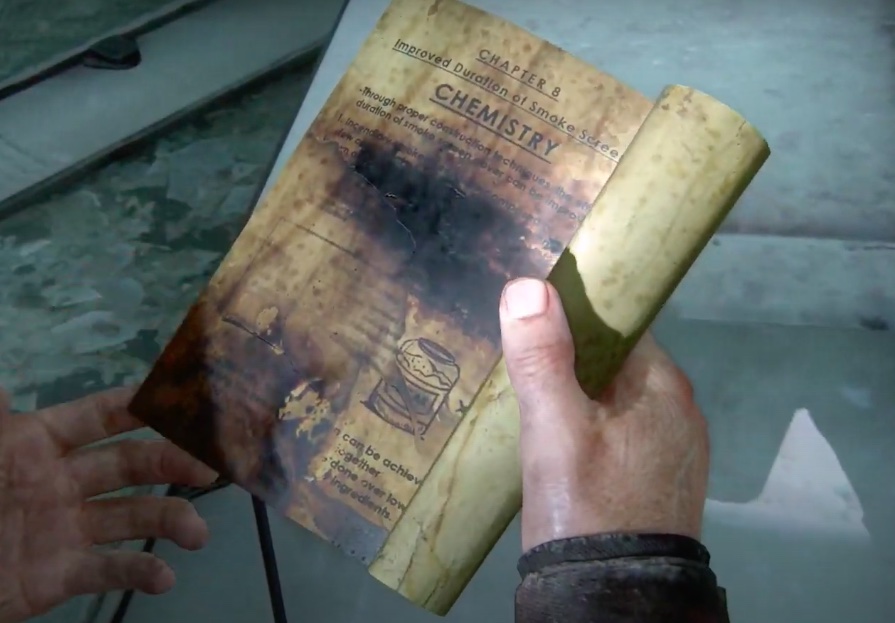
| Chapters | Tommy’s Dam |
| Section | Hydroelectric Dam |
| Upgrades | Smoke bombs |
| Effects | Smoke duration has been increased by 10 seconds |
Moving on with the list of Training Manual Locations in Last of Us Part 1, there is also a training manual that can be found in a location known as Tommy’s Dam, specifically the hydroelectric dam.
Once you can get into the dam area, pan your camera towards the left and start heading into the left area; you will find an open door. Once you turn to your left, the pamphlet will be placed on a table.
Health Sterilization
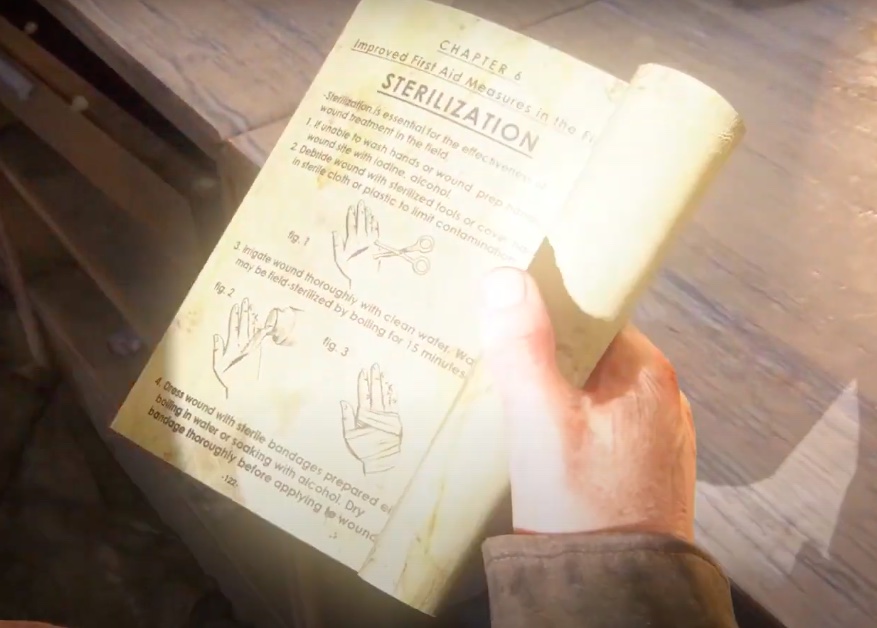
| Chapters | The University |
| Section | Go Big Horse |
| Upgrades | Health Kits |
| Effects | 67% stronger Health kit |
Once you head into the university, this is the place where players will be able to encounter the Health Sterilization training manual. Players will start by either being on horse or foot, and they will be in front of an entrance that will be barricaded; make sure to turn around and start heading back.
Start heading down the flight of stairs, and steer a bit to the right until you encounter another short flight of stairs (about 4 or 5 stairs). From there, there will be two main pathways separating the area, and you want to steer left and keep heading on until you can drop off from the horse.
There will be a white flight of steps, and from here, you can go up them, and then through the exposed window, turn left and go into the door, and take a second to look into your current surroundings.
There will be a wooden table, and on top of the table, the manual will be located.
Molotov Deployment
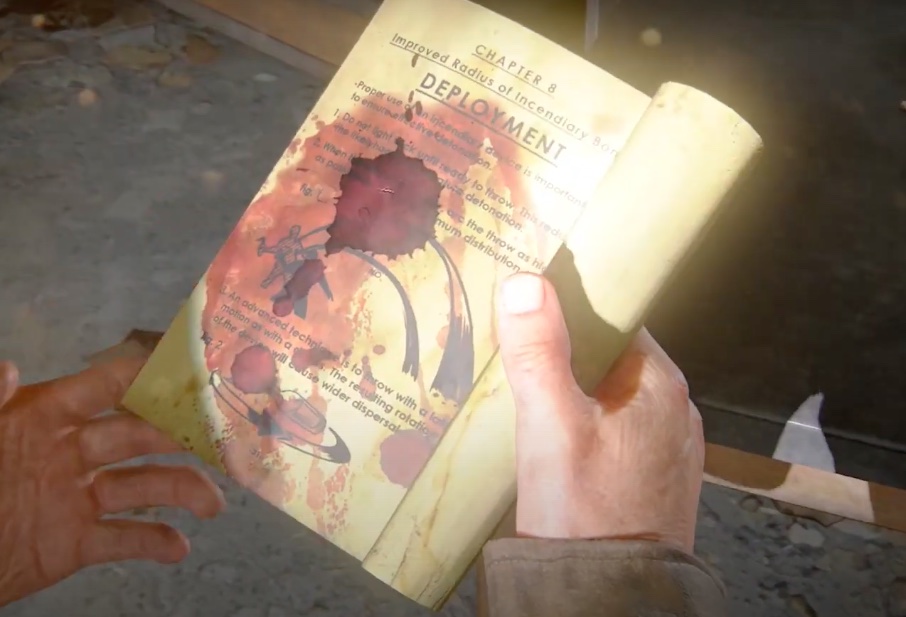
| Chapters | The University |
| Section | Science Building |
| Upgrades | Molotov cocktails |
| Effects | 2x wider Explosion radius |
As for the next training manual for players to collect, they will need to go deeper into the university and the science building. Once you are in the corridor, keep heading forward, and you will come across two crossways. One door will lead out, and one will be heading deeper into the corridor.
Instead of going out of the building through the door, you need to go deeper into the corridor and past the red vending machine, the blue chair, and head into the room colored blue. Once you are in the room, while it will be completely scattered and abandoned, the pamphlet will be placed on a table.
The table will be colored black with wooden legs, and the pamphlet will be on the farthest corner of the table, and you can pick it up and add it to your inventory.
Smoke Shaping
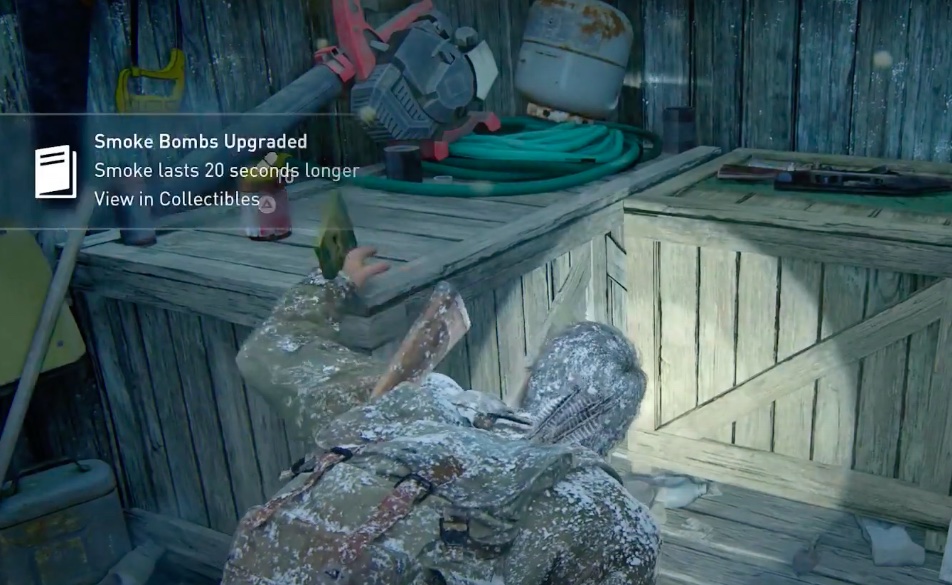
| Chapters | Lakeside Resort |
| Section | Cabin Resort |
| Upgrades | Smoke bombs |
| Effects | Smoke duration has been increased 20 seconds |
To find the second-to-last manual, head to Lakeside Resort. Upon arrival, locate a cabin resort. Look for a speed limit sign as your starting point. Proceed forward, passing a petrol pump with nothing of note. Continue until you reach a broken-down motel sign and a snow-covered car parking area.
Inside the room in front of the abandoned car, keep moving forward to find a door on your right leading to a deserted bathroom. From there, jump out of the window. You’ll encounter a cabin door with wooden planks that’s closed. Use the “A” button on your controller to open it. Enter the cabin and interact with the Smoke Shaping Training Manual to obtain it.
Bomb Shrapnel
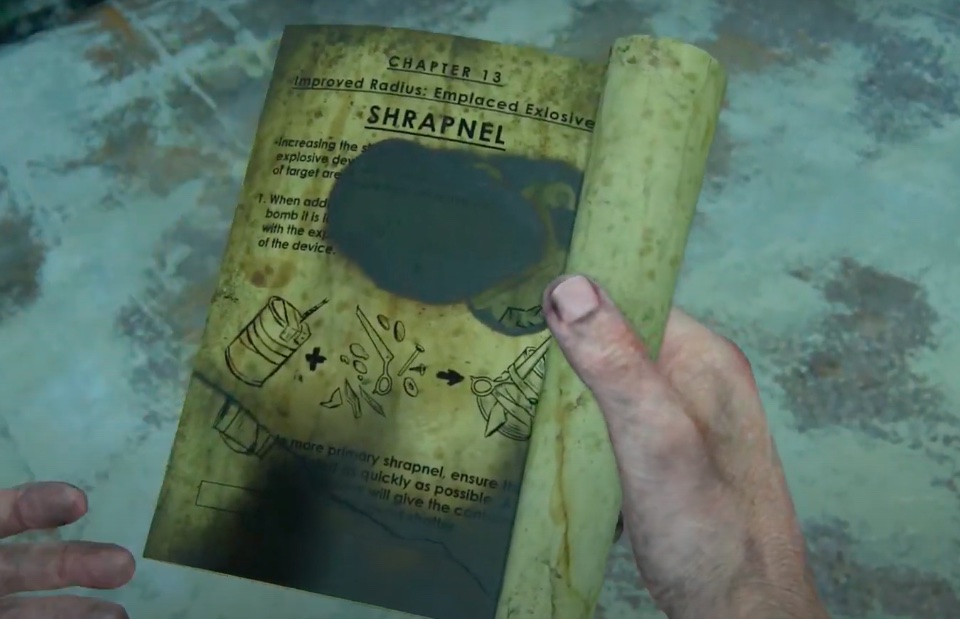
| Chapters | Bus Depot |
| Section | Underground Tunnel |
| Upgrades | Nail bombs |
| Effects | 2x wider Explosion radius |
Last but not least, the Bomb Shrapnel manual will be present at the bus depot in an underground tunnel. To retrieve it, start by being on a platform, and you want to start heading forth.
Make sure to carefully tread your way through the water and cross the cars that have been abandoned, including all the trucks. Step onto the broken cement pieces completely covered by overgrown grass.
From there, steer right, and the final manual will be located on top of the truck. With that, we will end our Last of Us Part 1 Training Manual Locations guide! Don’t miss out on our Last of Us Part 1 Things To Know guide!
Make sure to read up on our:
- Last of Us Part 1 Weapon Tier List
- Last Of Us Part 1 Firefly Pendant Locations
- BEST Last Of Us Part 1 Skills
- Last Of Us Part 1 Best Weapon Upgrades
Thanks! Do share your feedback with us. ⚡
How can we make this post better? Your help would be appreciated. ✍