Resident Evil 4 Remake is finally upon us, and with re-imagined puzzles for players to solve, getting items like keycards can become daunting. Therefore, players might need assistance finding the Resident Evil 4 Remake Keycard Locations to free Ashley from her locked cell.
- There is essentially one main keycard that players can get & upgrade it to Level 2 and Level 3.
- Level 1 Keycard:
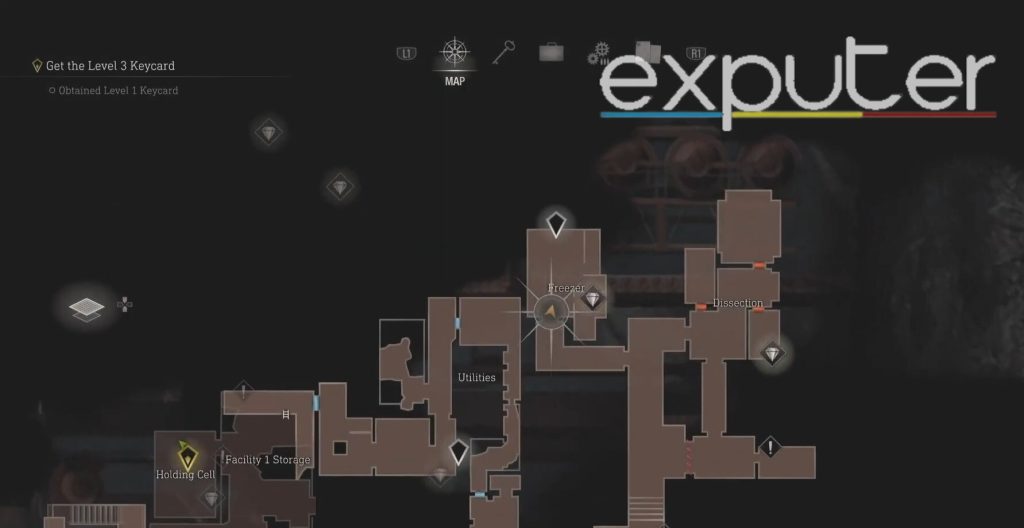
- Head to the Dissection Room.
- Solve the Calibration Puzzle by allowing power to flow through the power lines in order to obtain the keycard.
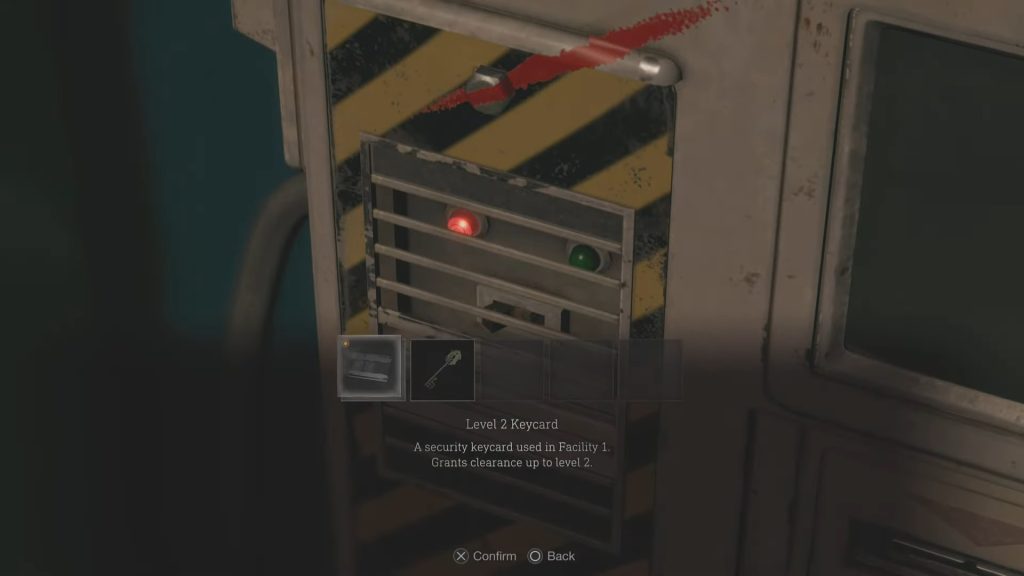
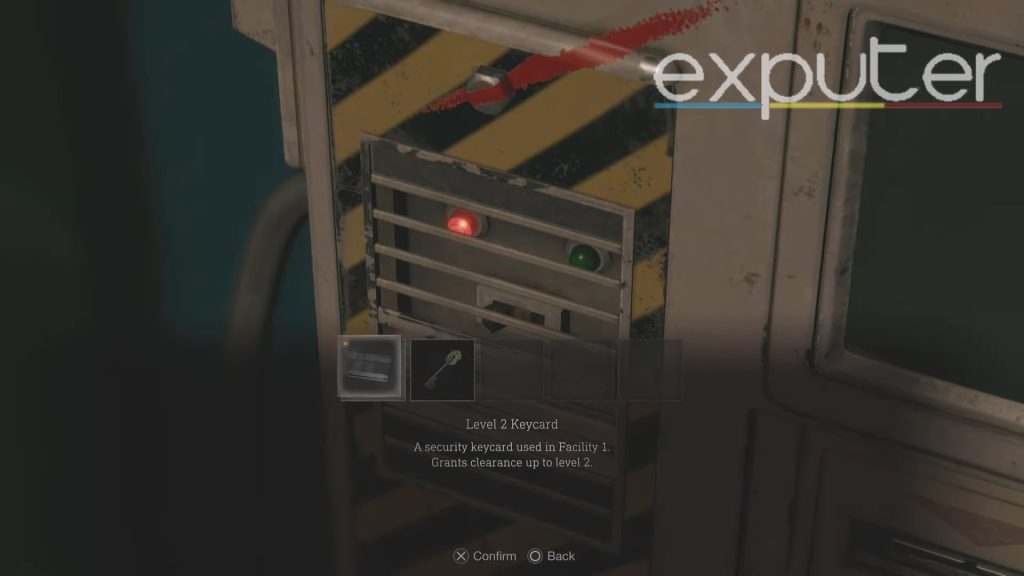
- Level 2 Keycard:
- Use the Level 1 Keycard to unlock the Freezer Room.
- Solve another calibration puzzle to access the LE5 weapon in the same area.
- Level 3 Keycard:
- Go to the Incubation Lab across the hallway from Facility 1 Storage.
- Find a Biosensor scope at the back of the room.
- Attach the scope to one of your weapons.
- Obtain a wrench to overwrite the terminal and defeat the Regenerator released from the purple glass tube to acquire the wrench.
- Use the wrench to upgrade your Level 2 Keycard to Level 3.
How To Get Level 1 Keycard
Kicking things off, there are 3 level keycards that players will need to get to let Ashley out of her cell, and the entire process can get pretty daunting. Players need to get their hands on the level 1 keycard to get to the freezer.
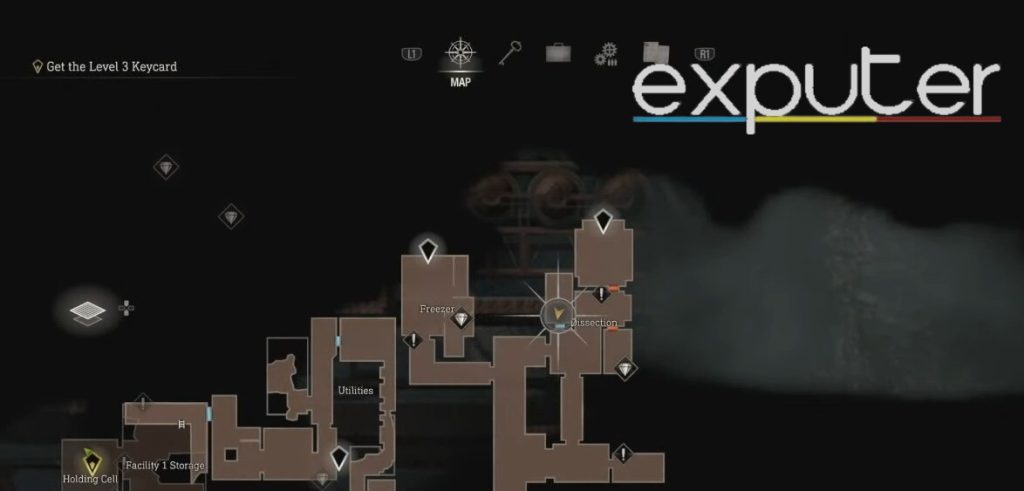
- Players need to be able to transfer power to Dissection, which is where a massive puzzle awaits them, and for first-time players, it can be quite daunting to solve it.
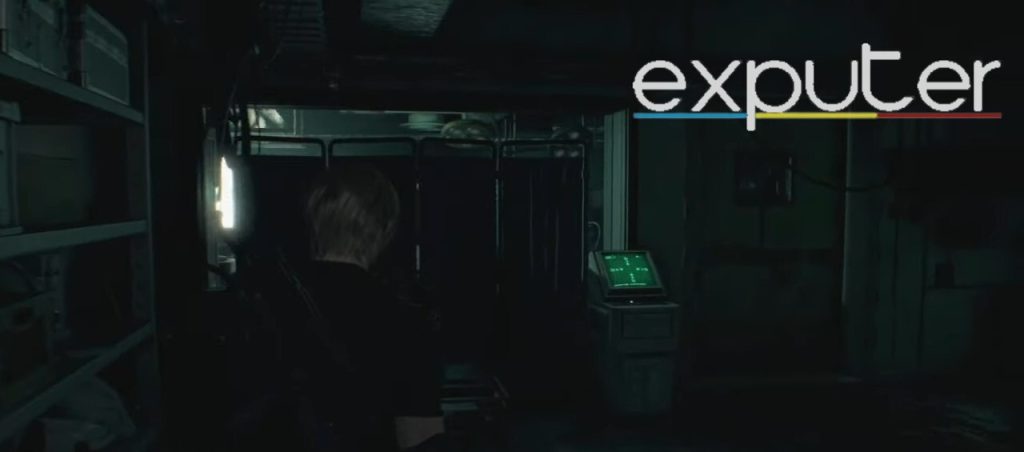
- Heading into the Dissection room, players should be able to note a machine placed towards the far end of the room beside a wall and 4 separators.
- Walk up to the machine, and players can easily interact with it.
How To Solve The Calibration Puzzle
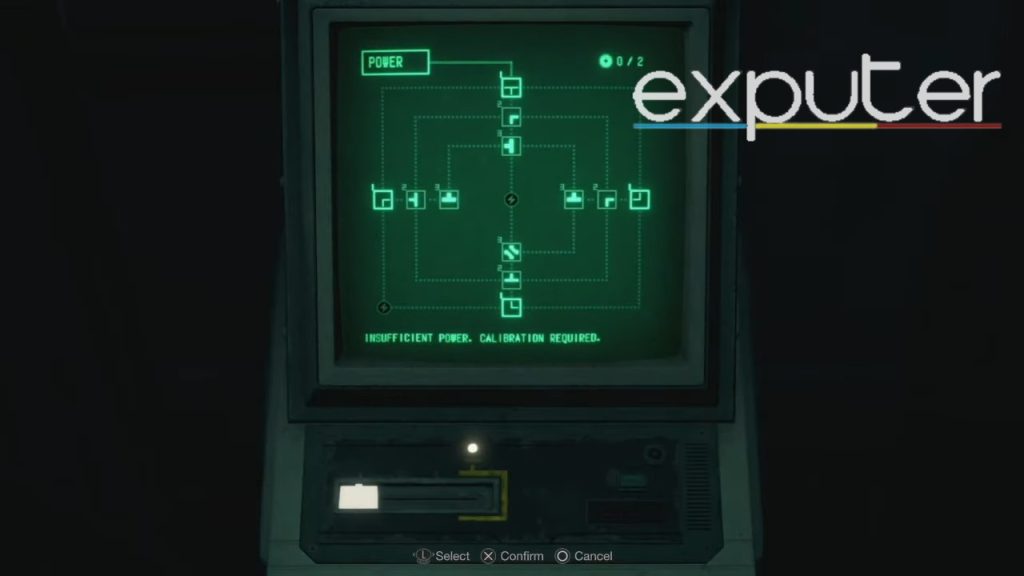
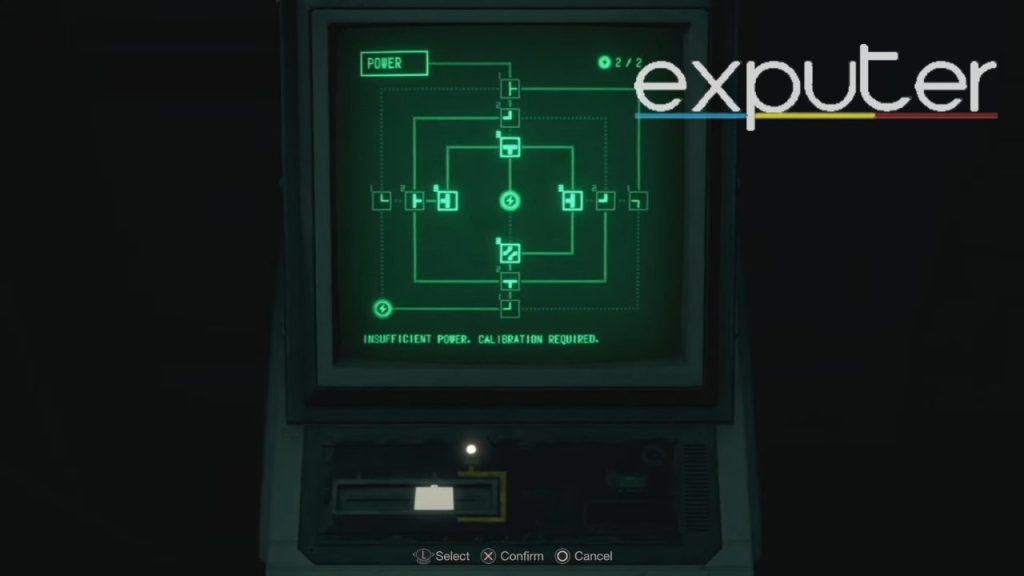
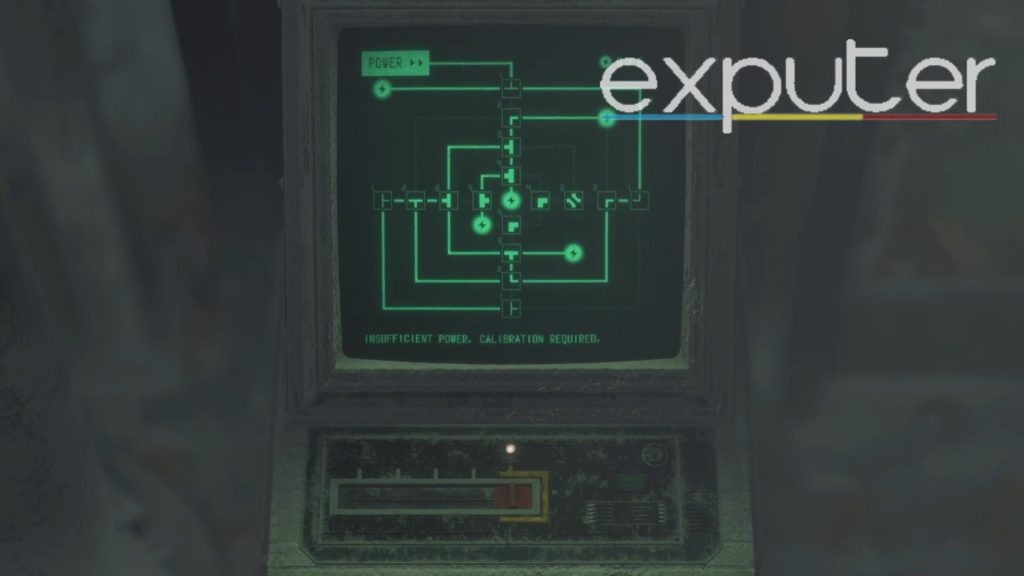
Now, whenever players go to the puzzle, the machine tells them there is insufficient power and that calibration needs to be carried out. The puzzle itself is quite tough. Therefore, this is how players can solve it.
- There are essentially nodes that are present on the machine. These T nodes allow players to position them so the machine can let power travel through the power lines on both ends.
- As players can see, the dotted lines indicate no power flowing; therefore, players need to position the nodes so that the dotted lines become green lines indicating power is flowing properly.
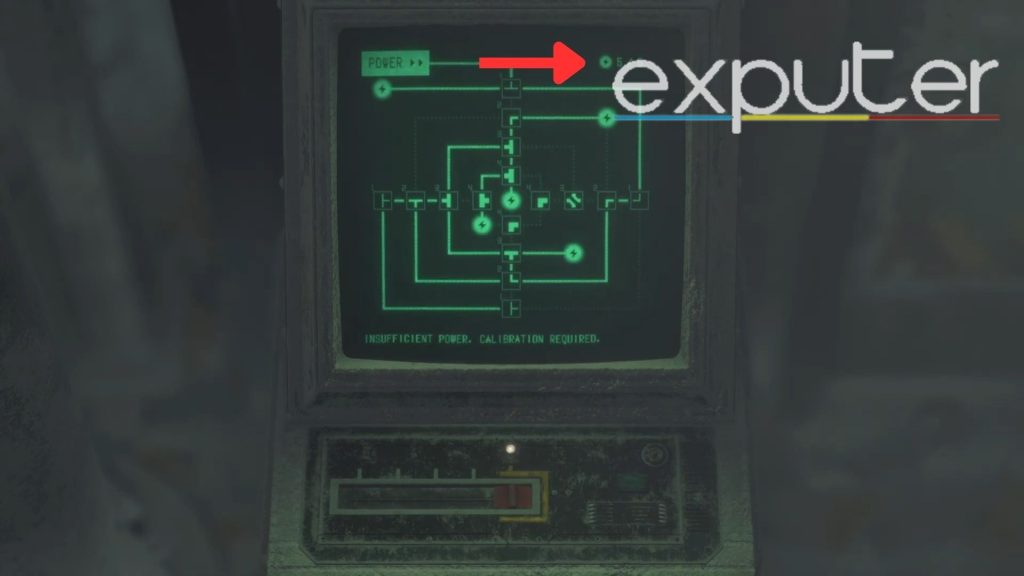
- The number on the corner indicates the total nodes that the player has activated.
Solving Calibration Puzzle
Now that players know how the calibration puzzles work let’s see how this can be solved.
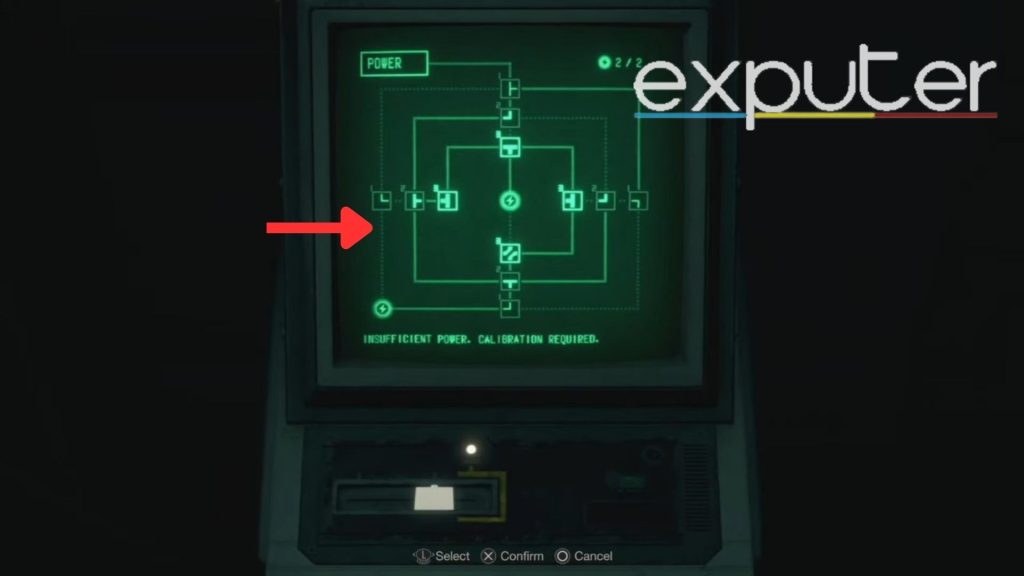
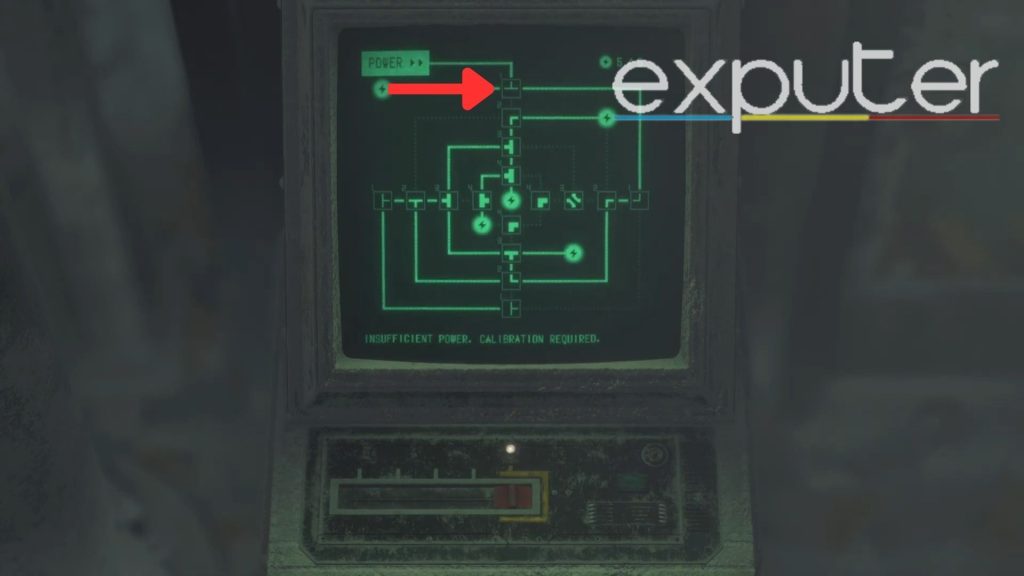
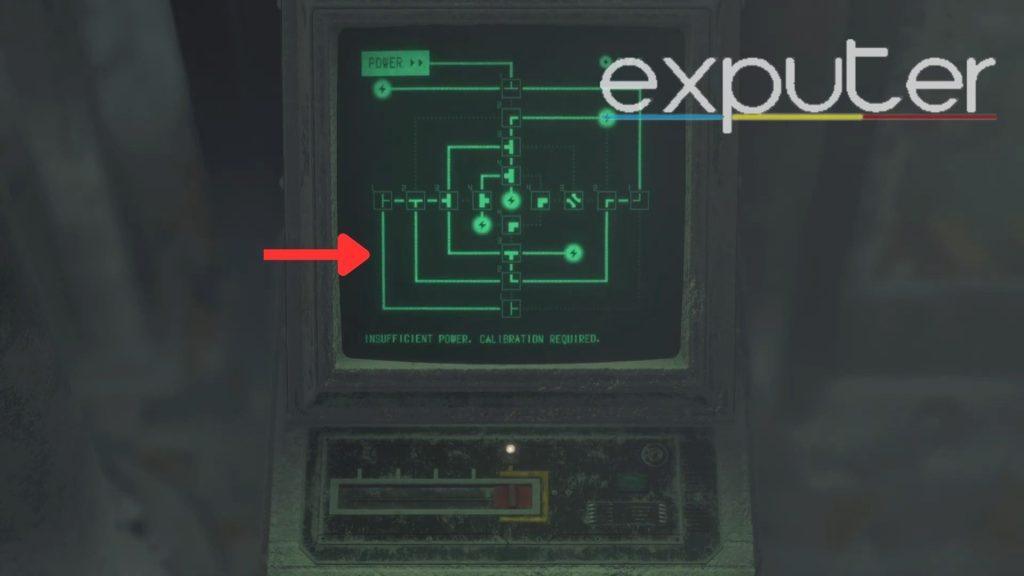
- From the first green power line, the power starts to flow from the very top, and payers need to turn the T node so that it is facing right, and the power flows through the first right line.
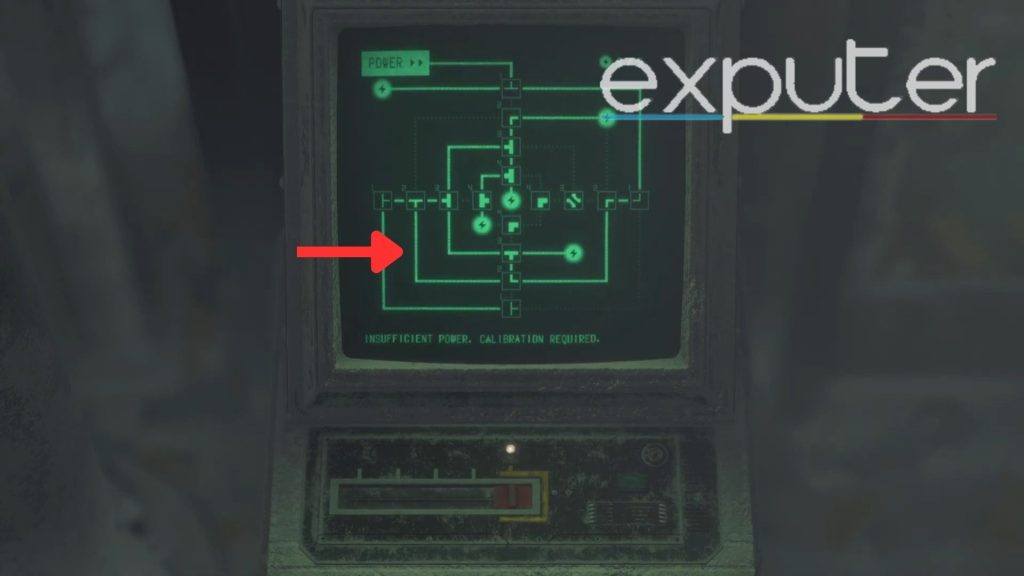
- From here, move on to the second line and follow these 4 symbols.
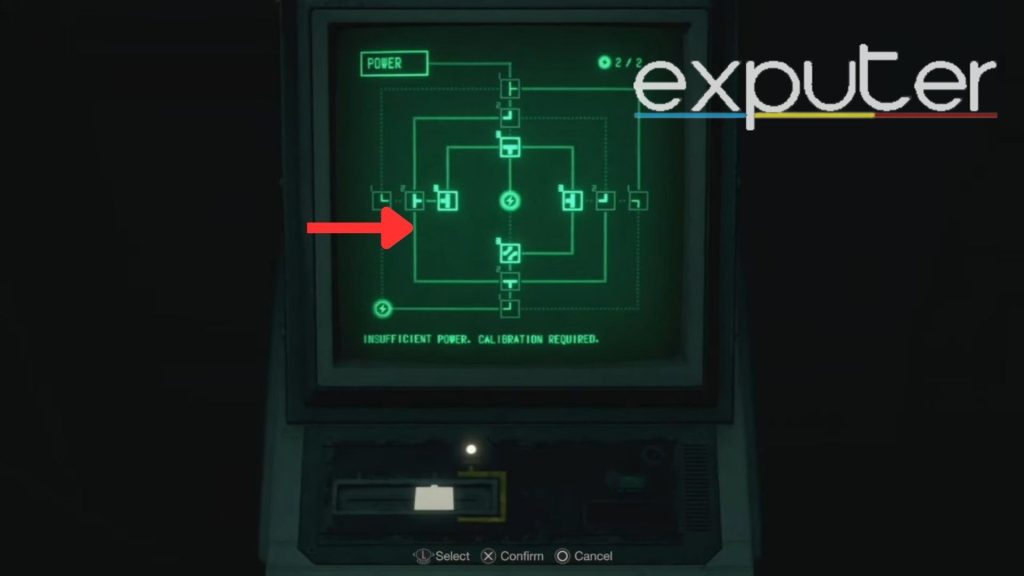
The symbol on the top should be facing right, while the T on the left should be facing right too. The T on the bottom should be facing down, and the symbol on the right side of the line should be facing left. That diverges the power to the bottom left of the node as well.
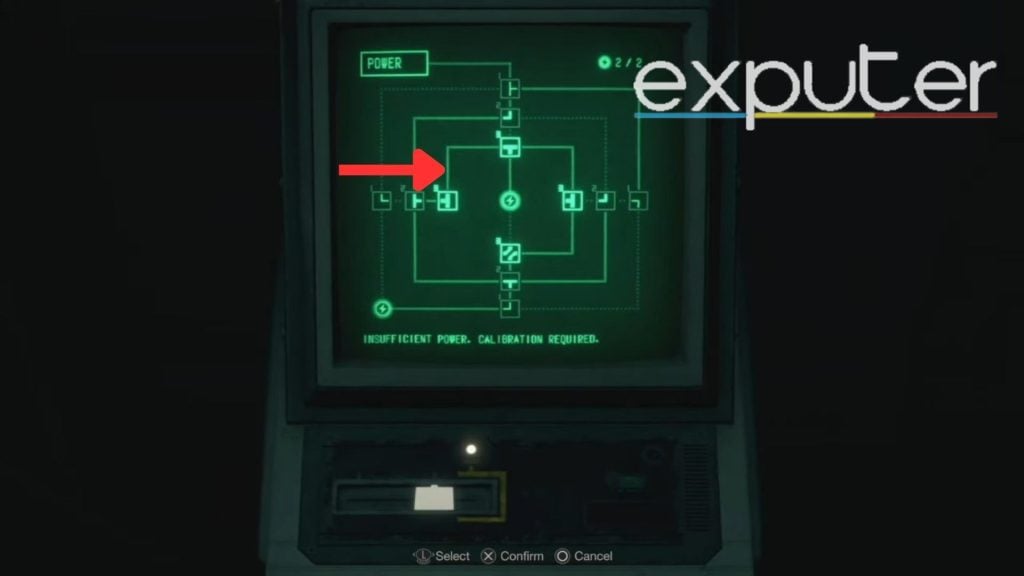
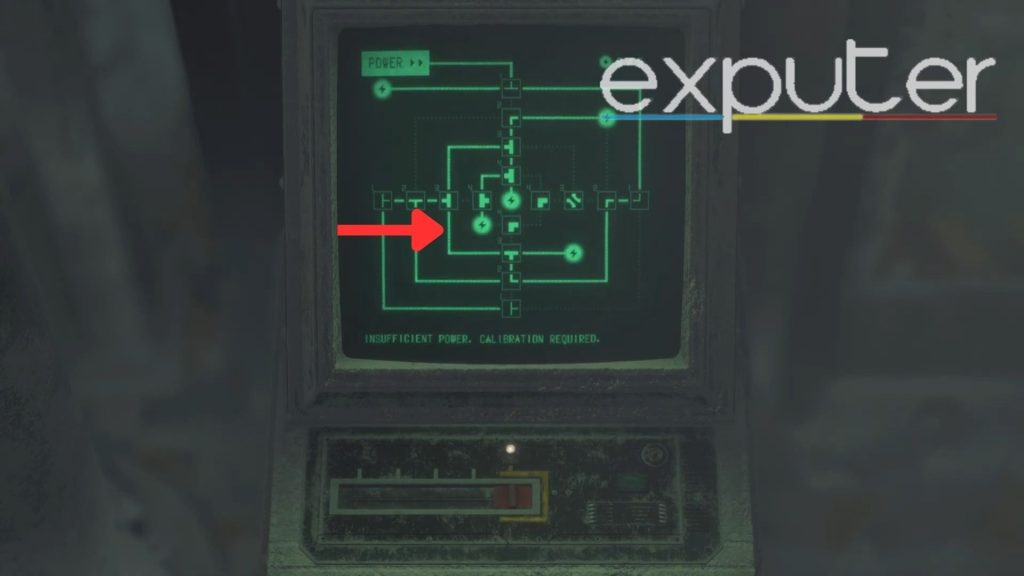
For the third power line, arrange the T-shaped symbols as follows:
- The top T should be facing down to enable power flow to the final node.
- The left T should face left to connect to the second power line.
- The right T should also face the left, and the symbol at the bottom should connect the second and third power lines.
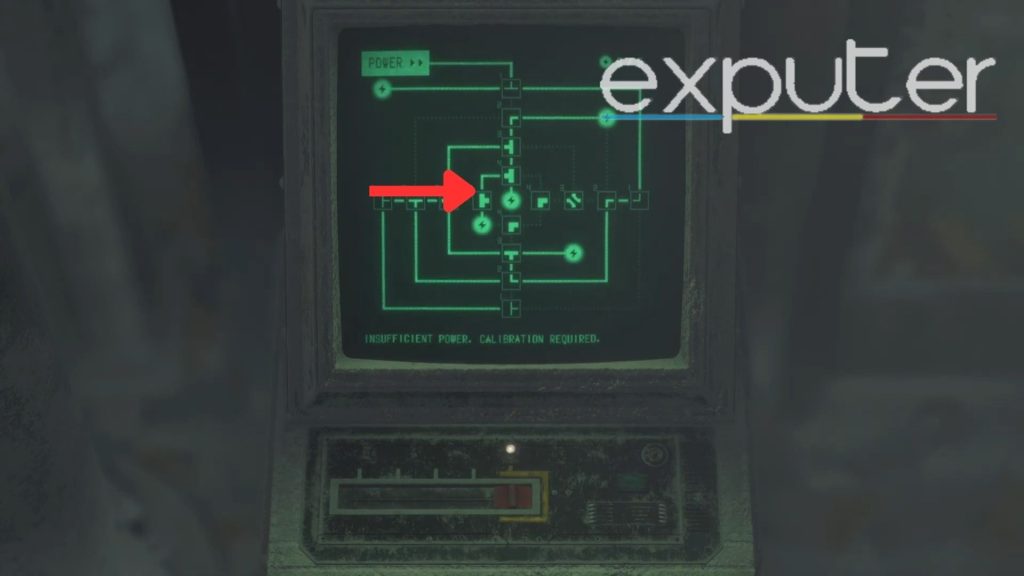
Completed Puzzle (Image Credits Exputer)
- This completes the puzzle, and the system is restored with the Auxiliary security being deactivated. After that, the level 1 keycard can be obtained.
Level 2 Keycard
To get your hands on the level 2 card and find the RE4 Remake Keycard Locations, players need to make a detour and start making their way to the Freezer room, which can be accessed by using the level 1 keycard.
- While players are here, there is also another calibration puzzle that players can do to get their hands on a pretty solid weapon. The puzzle is beside a wall as you turn right into the room.
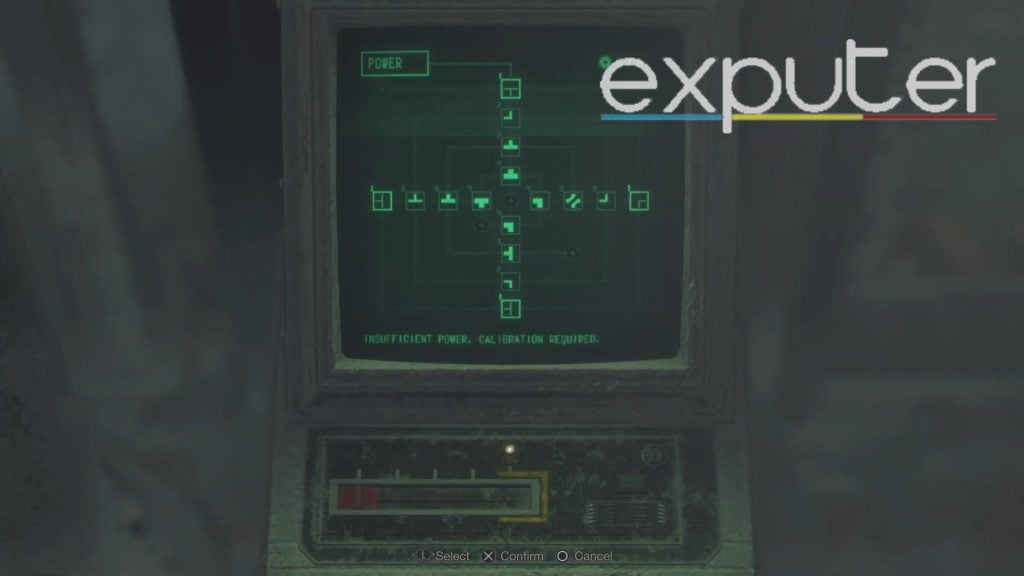
- 4 power lines need to be lit up.
- In the first line, the T node on the top must be facing up, the symbol on the right must be facing left, the T node at the bottom should be facing right, and the one on the left should be facing right.
- In the second line, the top symbol should be facing right, the one on the right should be facing right, the one on the bottom should be facing right, too, and the T node on the left should be facing down.
- In the third line, the T node on the top should be facing left, the T node on the left should be facing left, and the one on the bottom should face down.
- In the fourth line, the top T node should be facing the left, the one on the left should be facing the right, while the symbols on the right and down don’t need to be connected.
- This allows players to get their hands on the LE5 weapon while at it.
Level 3 Keycard
Getting Level 3 Keycard in Resident Evil 4 Remake is crucial to allowing Ashley to flee from her cell.

- For this keycard, players need to make their way over to the Incubation Lab; it is located after you cross a hallway after you pass by the Facility 1 Storage, turn left, and then you can see the lab.
- There may be a few enemies like the Regenerators that might trail alongside you before you enter the lab, and you may encounter opponents that you need to defeat, but they will be easy.
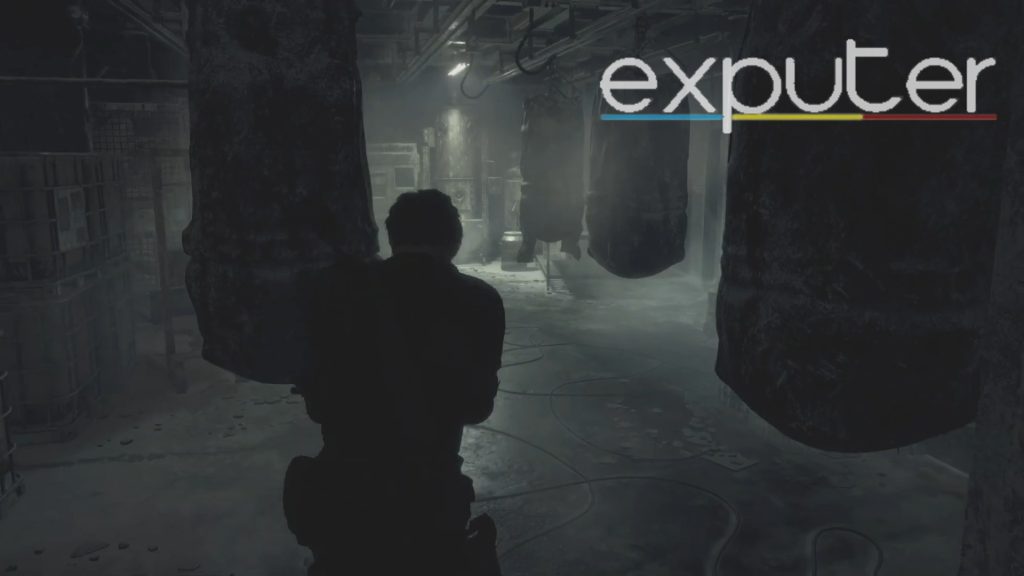
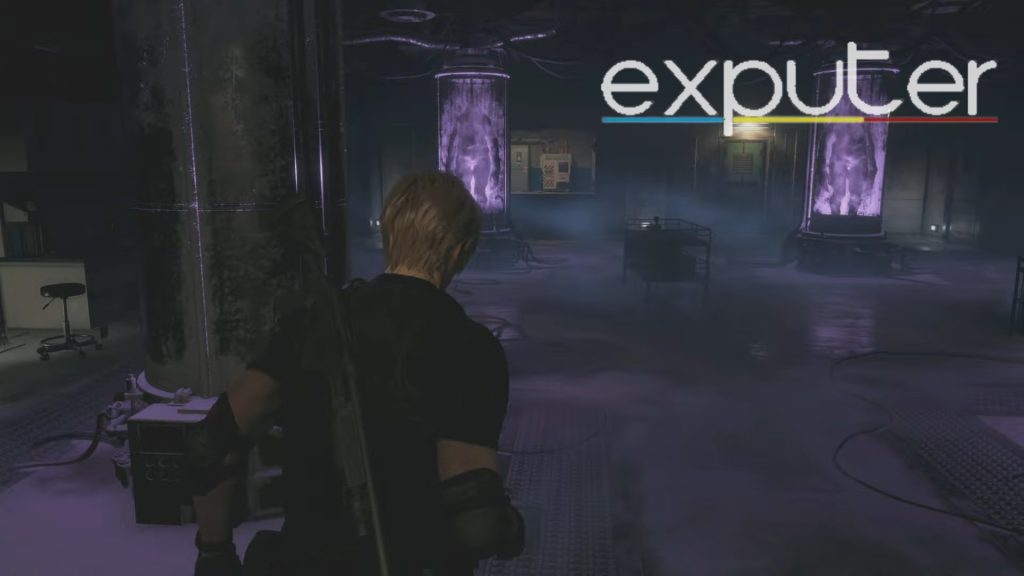
- Once you’re in the lab, right in front of you, there should be two purple glass tubes.
- Start passing the glass tubes and run toward the very back of the room.
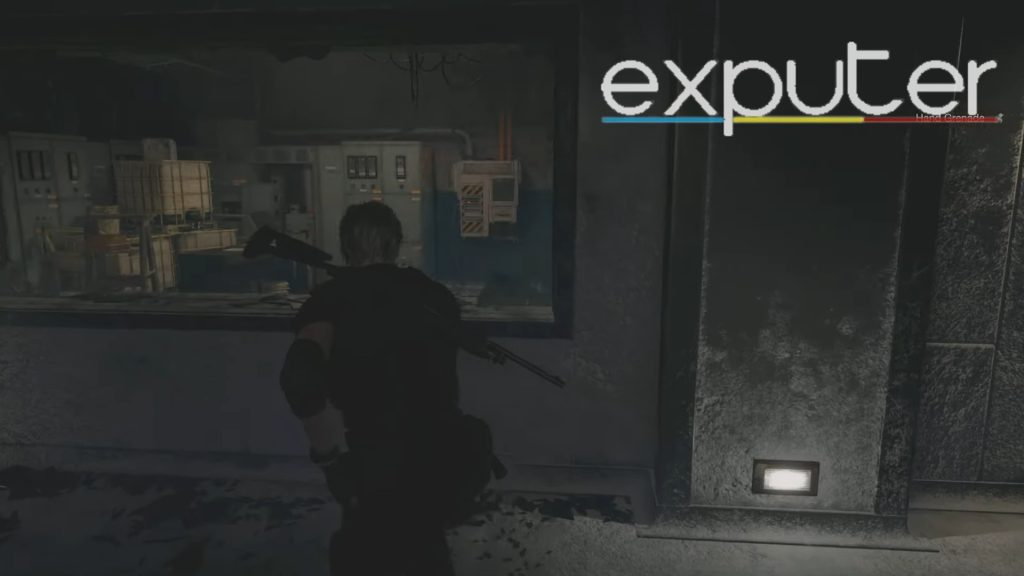
- There is a broken window that players can approach, and once they do so, you should be able to jump across the window and enter the room.
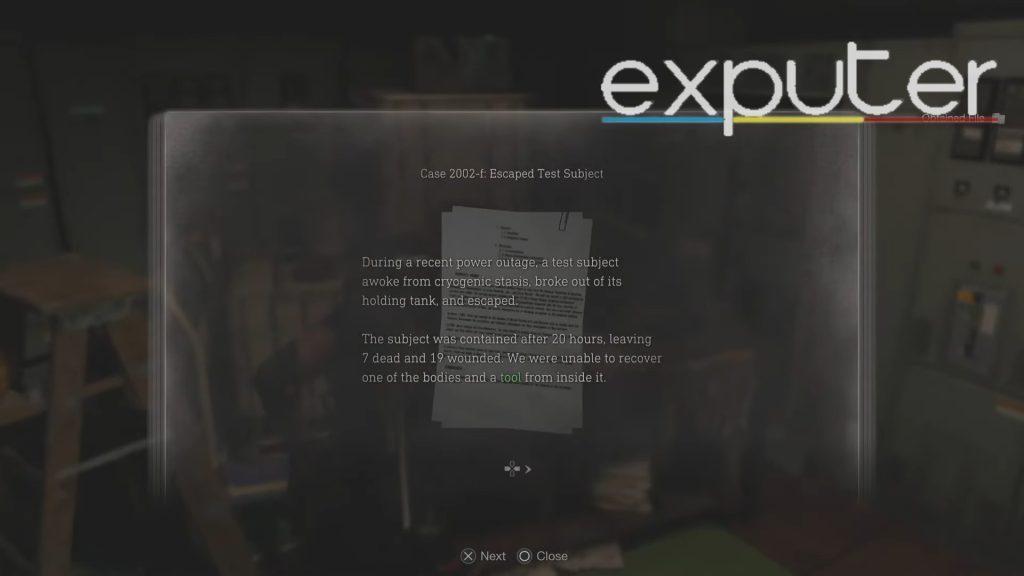
- On the table to the far left, there should be a few items, such as a Case 2002 document mentioning an escaped test subject and a crucial item that players will need to access the RE4 Remake Keycard Locations, the Biosensor Scope.
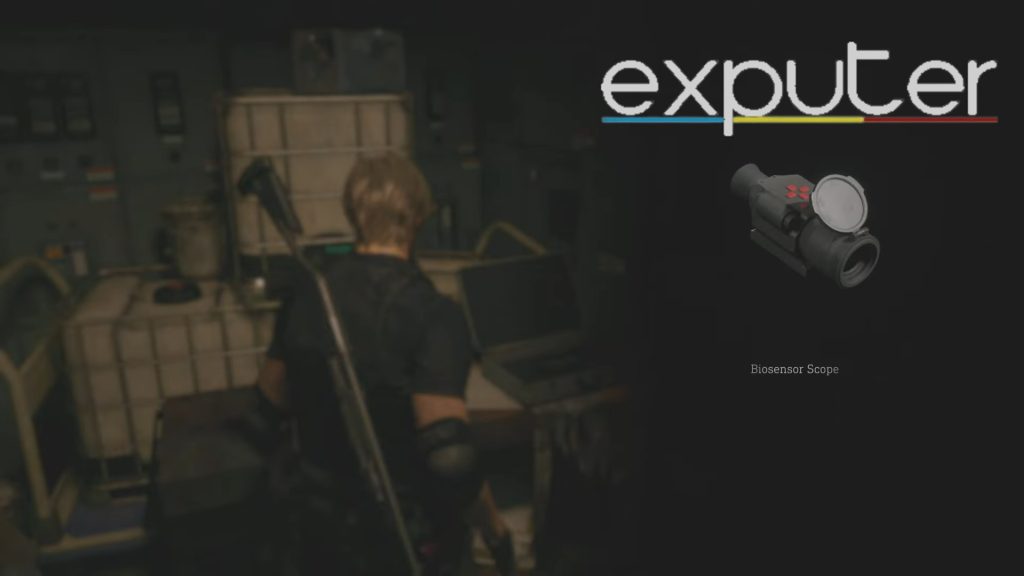
After you’ve grabbed the Biosensor scope, players should be able to dig into their inventory and see the Biosensor being placed there. The Sensor is a special scope that can highlight biological entities and creatures and can even be mounted onto rifles and other weapons.
- Mount it onto one of your weapons from your inventory and exit the inventory.
Overwrite Terminal
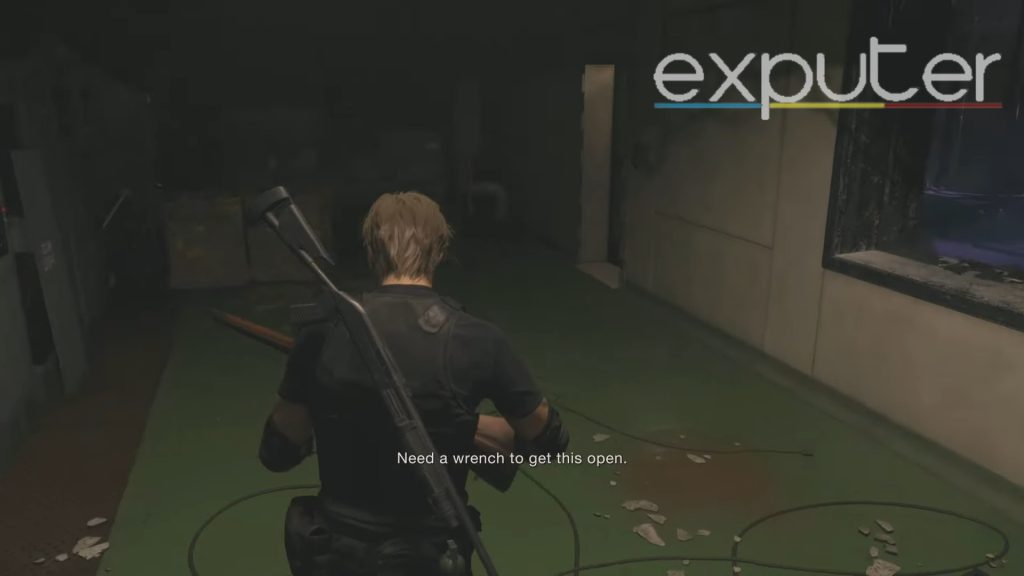
From there, players need to overwrite the terminal, and if you turn right around, there should be a terminal you can interact with. For this, players are not able to overwrite it until they access a wrench, as can be explained by the character.

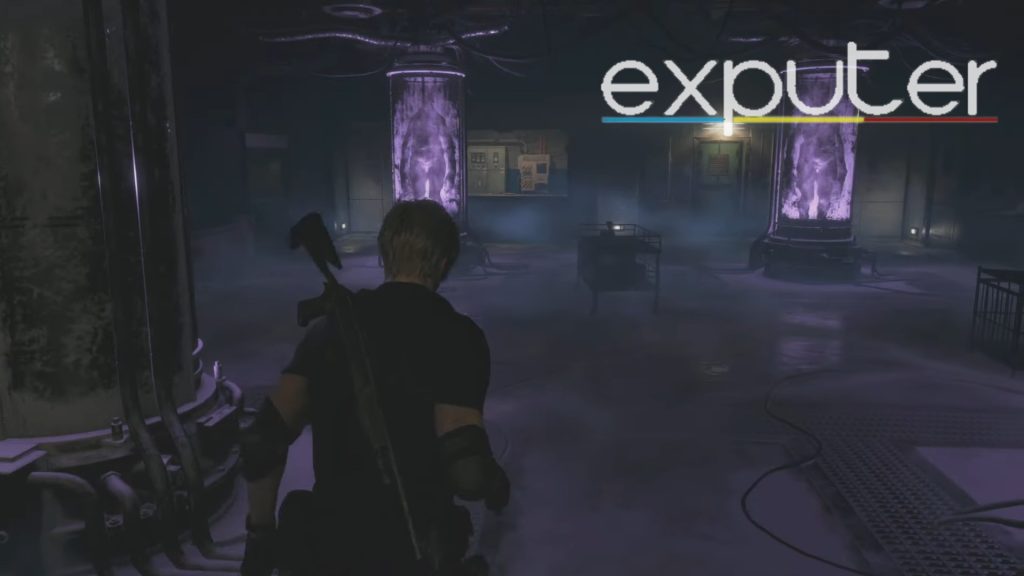
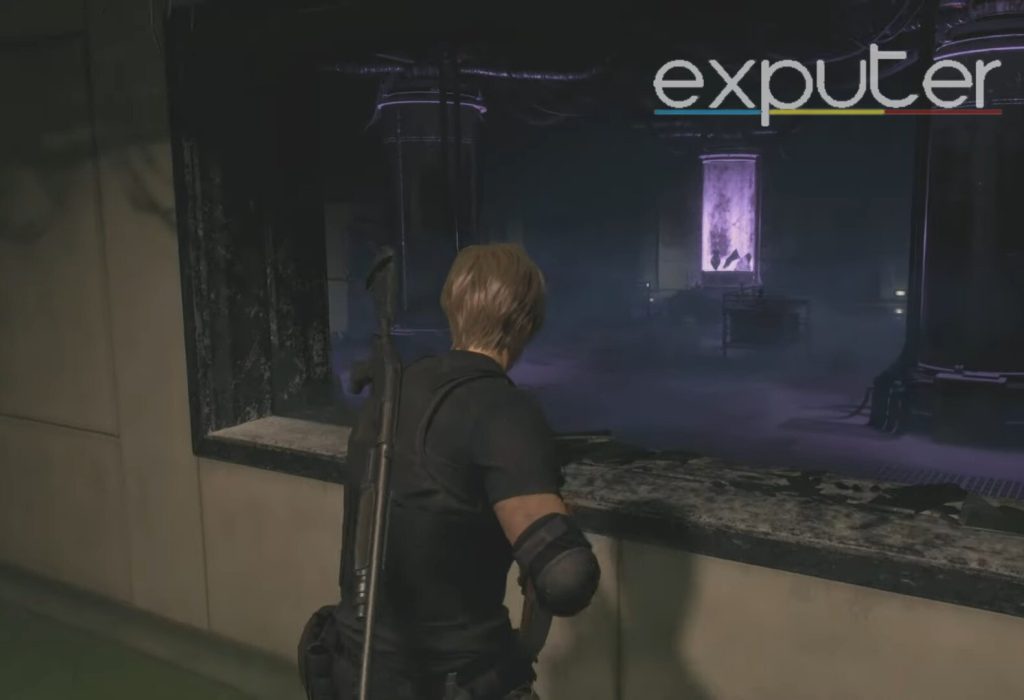
- Turn right around and look outside the window where you are standing.
- From here, players want to take hold of their weapon, aim at the purple tube on the left, and shoot at it.
- If you take a look at the creature inside the cell, the wrench is gutted inside the creature. Therefore, players must annihilate the creature before getting the wrench.
- After you shoot at the tube, the glass shatters, and the creature falls to the ground before standing up and running toward you.
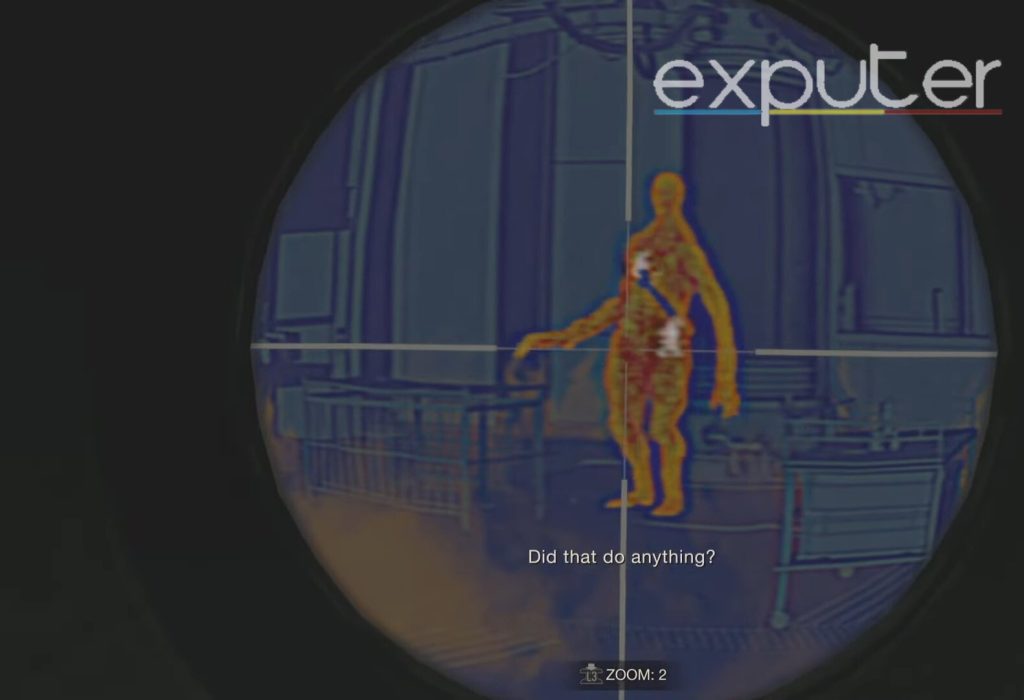
Inside the Regenerator are two places where players need to aim and shoot. One of the places is towards the left thigh, towards the bottom end of the wrench.

- Shoot at it, and it ends up staggering the Regenerator, and another place where you need to aim is at the top of the wrench.
- Aim and shoot at it, and it ends up causing the opponent to explode and fall to its death.
- From here, players can grab the wrench that falls out of the creature.
- Return to the terminal and use the wrench order to turn the bolt twice before it falls out.
- From here, you can overwrite your keycard to get it to a level 3 keycard in Resident Evil 4 Remake.
My Thoughts On The Level 1 Keycard Section
As someone who’s spent over 22 hours in the Resident Evil 4 Remake, the Level 1 Keycard section was a standout moment during my gameplay experience. It brilliantly combines the game’s atmospheric tension with cerebral challenges, a hallmark of the Resident Evil series. The intricate calibration puzzle, with its intricate power line manipulation, adds a layer of complexity that keeps players engaged and immersed in the game’s world.
This section, while daunting at first, serves as a prime example of the game’s ability to balance action with puzzles, a trademark of the series. It’s moments like these that make Resident Evil 4 Remake a must-play for both series veterans and newcomers, offering a fresh take on classic survival horror elements.
In the game, you will also need to know how to parry; our Resident Evil 4 Remake How To Parry guide can help you through it!
Apart from this, you can also read our Resident Evil 4 Remake vs. Original Comparison guide so that veteran players can know what changes were made to the game! Last, our Resident Evil 4 Remake Voice Actors guide can spill everything players need to know about each character and their VAs!
Up Next:
- Resident Evil 4 Remake All We Know
- Resident Evil 4 Remake: All Editions
- Resident Evil 4: How To Get Punisher
- Resident Evil 4 Remake Best Weapons
Thanks! Do share your feedback with us. ⚡
How can we make this post better? Your help would be appreciated. ✍