Best Borderlands 3 Settings

Borderlands 3 Stuttering? Look no further, this guide will completely enhance it!

Developed by Gearbox Software, Borderlands 3 is an iconic role-playing first-shooter game that emerged as one of the best Multiplayer games in 2019. Its feature, which allows players to compete in both single-player and multiplayer, is brilliant, but it has a few problems. Now, let’s identify the logic before going into the Borderlands 3 Settings.

Key Takeaways
  • Borderlands 3 has several stuttering issues that can get very confusing to deal with.
  • First of all, verify that your PC has hardware equivalent to, or better than NVIDIA GeForce GTX 680 2GB and Intel i5-3570.
  • For Windows settings, disable hardware acceleration, turn off the Xbox game bar and download the latest update for Windows, if needed.
  • In-game graphic settings include putting the game in fullscreen mode, disabling vertical sync, selecting unlimited for frame rate limit, and making field of view 90.
  • For players looking to play multiplayer, make sure to use a LAN cable and pick a server in the region closest to you.
  • Additionally, all players should use custom launch options for the game. 
  • Nvidia Graphic card owners should confirm that the latest device drivers for their GPU are installed.
  • For the Nvidia graphic settings, use CUDA GPU, select your primary graphic card, and set power management mode to maximum performance.
  • AMD graphic Settings include enabling Radeon anti-lag, disabling Radeon chill along with Radeon enhanced sync, setting Wait for Vertical Refresh to always off, and more.
  • In the display tab, enable AMD FreeSync, set the scaling mode to Preserve Aspect Ratio, and disable the rest.

Other Borderlands 3 Guides: Borderlands 3 Moze Iron Bear Build

Firstly, Borderlands 3 has various Stuttering issues, which get even more complex when looking at the Recommended System Requirements. Nonetheless, all these performances, stuttering, and FPS issues will be highlighted and addressed in this guide. We will go through some extension methods that will guarantee Maximum Performance without the loss of visuals.

Other Borderlands 3 Guides: Axton In Borderlands 3: How To Find The Commando

Check out the best settings you should be using: 

Setting NameWhat to Set it to
Radeon Anti-LagEnabled
Radeon ChillDisabled
Radeon BoostDisabled
Radeon Image SharpeningEnabled
Sharpness80%
Radeon Enhanced SyncDisabled
Wait for Vertical RefreshAlways Off
Anti-Aliasing MethodMultisampling
Morphological Anti-AliasingDisabled
Anisotropic FilteringDisabled
Texture Filtering QualityPerformance
Surface Format OptimizationEnabled
Tessellation ModeOverride Application Settings
Maximum Tessellation LevelOff
OpenGL Triple BufferingDisabled
Pixel FormatDisabled
GPU WorkloadGraphics
Perform Reset on Reset Shader Cache-
AMD FreeSyncEnabled
Virtual Super ResolutionDisabled
GPU ScalingDisabled
Scaling ModePreserve Aspect Ratio
Integer ScalingDisabled

Borderlands 3 System Requirements

Before we do that, your System Requirements must be on par or above the required ones. Here are Borderlands 3 System Requirements as of 2021.

Minimum Specs For 1080p Gaming

  • OS – Windows 7/8/10
  • Processor – AMD FX-8350 (Intel i5-3570)
  • Memory – 6GB RAM, Higher is Better.
  • Graphics card – AMD Radeon™ HD 7970 (NVIDIA GeForce GTX 680 2GB)
  • HDD – 75 GB

Recommended Specs For 1440P Gaming

  • OS – Windows 7/8/10 (latest service pack)
  • Processor – AMD Ryzen™ 5 2600 or (Intel i7-4770)
  • Memory – 16GB RAM
  • Graphics card – AMD Radeon™ RX 590 or (NVIDIA GeForce GTX 1060 6GB)
  • HDD – 75 GB

Now that you have made sure your System Specifications are worthy enough to run Borderlands 3. Let’s jump right into the actual guide, which is divided into three segments. The first would be all about necessary Windows 10 Optimizations. The second would focus on Nvidia/AMD Settings, and the third is the major ones, which includes Borderlands 3 Settings itself.

Windows 10 Optimizations For Borderlands 3

This section will look at numerous Windows 10 tweaks that have a slight to high impact on Borderlands 3. Similarly, once these settings are changed and improved. You will notice higher FPS in not just Borderlands 3, but across all games.

Switch To Ultimate Performance

First things first, you will have to unleash the maximum potential of your Hardware through Ultimate Performance. This isn’t any software or tool, but a setting within Windows 10 itself, that removes all power thresholds and allows the hardware to work at its 100% potential. Suppose, you are wondering what would change? By default, Windows 10 comes equipped with a Balanced Power Plan that is meant to be used for optimal conditions. This isn’t particularly good for modern games like Borderlands 3, which require more than just a chunk of performance.

Here is how you can enable Ultimate Performance.

  1. Under Start > Type Windows PowerShell > Open it with Administrator Privileges.
    Best Borderlands 3 Settings
    Windows PowerShell
  2. Now Enter this code, and you will get a message indicating Ultimate Performance is enabled.
  3. powercfg -duplicatescheme e9a42b02 -d5df -448d -aa00 -03f14749eb61
  4. Afterward, Go to Start Again > Edit Power Plan > Power Options.
    Borderlands 3 Settings
    Power Options.
  5. Now Checkmark “Ultimate Performance” that has a description, “Provides Ultimate Performance on Higher end PCs.”
    Borderlands 3 Settings
    Ultimate Performance
  6. It may not show up in some instances, so you would have to click on “Hide Additional Plans.”

Subsequent to enabling this, do not expect instant FPS Boost, because we have more settings to tweak as well.

Disable Hardware Acceleration

One of the core reasons why stuttering in Borderlands 3 occurs is due to Hardware Acceleration. This is an advanced feature that comes packed with third-party applications, allowing them to run through a different procedure. Although, there have been many debates about whether this complex procedure is efficient or not. Many always agree that this isn’t necessary, because firstly, it has a huge impact on performance. Secondly, this does not change the main purpose of this application.

Similar Borderlands 3 Reads: How To Find Borderlands 3 Anointed Gear

Besides, it always requires a chunk of power to run, which ultimately causes your Borderlands 3 Gameplay problem. Nevertheless, we will disable this across common applications, and it’s your job to check it within others.

  1. Open Spotify > View > Disable Hardware Acceleration
    Borderlands 3 Settings
    Hardware Acceleration In Spotify.
  2. Under Google Chrome > System Settings > Uncheck Hardware Acceleration when available.
    Borderlands 3 Settings
    Hardware Acceleration in Chrome
  3. Discord also has it available by default; head over to App Settings > Appearance > Uncheck Hardware Acceleration.
    Borderlands 3 Settings
    Discord Optimization

All in all, after you disable this across the majority of applications. You will see tremendous smoothness while playing Borderlands 3 and a slight reduction in CPU/Memory Usage. Once you are done, however, it’s also recommended that we disable unnecessary applications that run in the background. Read more about this down below!

Delete Temp Files

Perhaps the most masterful touch you could add to this optimization guide would be deleting Temp Files. I know some of you would be thinking of wasted files, and how could it make any difference in Borderlands 3? Yes, this analogy is somewhat right. However, to give you a deeper perspective on why Temp Files need to be deleted.

You first need to understand, that these aren’t just wasted files. They also contain virus-infected leftover files that you think are completely gone. Some of them are automatically restored from Recycle Bin, while others can still harm your PC and run simultaneously in the background while you play Borderlands 3.

You will save space and make your Hard Drive/SSD run more efficient while playing Borderlands 3. But, you will also get rid of the potential virus, and increase performance across all games.

  1. Inside Run > Search and Open
    best borderlands 3 settings
    Temp Folder
  2. As you can see in my case, there is 5.5 GB worth of data that is completely useless and could be harmful.
    Borderlands 3 Settings
    How Temp Files pileup
  3. Under the new folder > Click on CTRL + A to select all > Hit the delete button on your keyboard.
    Borderlands 3 Settings
    Delete temp files

Change Startup Application And Services

Have you ever wondered why the CPU Usage and Memory are always high, despite not being inside the game yet? That is correct, and to explain why it happens. You must first acknowledge that many applications are running in the background that constantly squeezes a chunk of power from both Ram and Processor. This ultimately results in less availability of Ram and CPU while you are playing Borderlands 3, causing stutters, fps problems, and complex issues like crashing.

In order to get rid of all these unnecessary applications and have no additional programs while running Borderlands 3. Follow the steps down below.

  1. Open run through Search Bar.
    best borderlands 3 settings
    run
  2. Afterward, type “msconfig” and press enter.
    best borderlands 3 settings
    msconfig
  3. Once in, head over to Services Tab, Checkmark “Hide all Microsoft Services” to prevent important ones from getting disabled. Now, from the new list, disable all unnecessary services that might be burdening your hardware.
    best borderlands 3 settings
    Hide all Microsoft Services
  4. Done with services? now go to the startup section, and do the same there aswell.
    Borderlands 3 Settings
    Startup
  5. Apart from performance improvement in Borderlands 3, you will also see dramatic increase in Boot times.

Enhance Pointer Precision

Similar to Hardware Acceleration, there is also Enhance Pointer Precision, which ultimately does the same thing but with a larger drawback. This isn’t good for shooting games, because when enabled, the Enhance Pointer Precision consistently changes your Sensitivity, and that too with the help of additional hardware power.

As expected, this does cause huge performance loss in Borderlands 3 and makes your aim very inconsistent. Just in case, you might be wondering, how this mouse feature works? Well, Enhance Pointer Precision changes your DPI every second, which further expands on sensitivity and more.

  1. In order to disable Enhance Pointer Precision, Open Mouse Settings through Start.
  2. Then proceed to Additional Mouse Options
    best borderlands 3 settings
    Additional Mouse Settings
  3. Now Under Mouse Options, Uncheck Enhance Pointer Precision and Reconfigure your DPI, which would have likely been changed.
    best borderlands 3 settings
    Getting rid of Enhance Pointer Precision
  4. Once done, click on Apply and Ok to save changes.

Disable Unnecessary Animations That Burden CPU And Memory

As we discussed earlier, disabling unnecessary applications is essential because they are constantly squeezing a chunk of power. Likewise, In Windows 10, there are also fancy Animations that aren’t good for low and mid-range PC’s, because they can put up a significant burden on the hardware. These animations do not provide any extra feature apart from transcending beautiful animations that are useless and a limitation over our High FPS Borderlands 3 Guide.

As you disable these unnecessary animations, you will notice a significant increase in overall Windows 10 Speeds and also smoother gameplay in Borderlands 3. Besides, there aren’t any drawbacks, so do not worry about potential loss.

best borderlands 3 settings
Advanced System Settings

Under Start > Search And Open “View Advanced Windows Settings.”

Get Rid of Game Bar

Similar to various other procedures we have gone through in this guide. Game Mode in Windows 10 has an equal impact on low performance, as it has few features that trigger automatic recordings and screenshots that aren’t easy to notice. These Recordings and Screenshots are triggered through some unknown keybinds, and apart from that, it has other features as well like Broadcasting and more. Microsoft does say Game Mode enabled is better for gaming; however, over the years, and through our benchmarks here at eXputer. We have always noticed a slight reduction in performance whenever enabled.

Related: Best Cyberpunk 2077 PC Settings

Anyhow, To get a decent performance Boost in Borderlands 3, you will have to disable Game Mode. Here is how it’s done.

  1. Under Search > Type and Open Game Bar Settings.
    best borderlands 3 settings
    Game Bar Settings
  2. Afterward, disable everything across these three sections.
    borderlands 3 settings
    Game Mode

As you make the tweaks suggested above, you won’t notice see any irrelevant Xbox notifications popping up at the corners of your screen. Besides, there will also be a slight performance improvement, and you will also ensure that no unwanted recordings are running in the background. 

More from Borderlands 3: Borderlands 3 Collector’s Edition: Is It worth it In 2021

Update Windows 10 To The Latest Version

The last and most significant improvement that could put the cherry on top of all the steps, would be updating Windows 10 to the latest version. Time and time again, numerous reports have proven that updating Windows 10 to the latest version continuously improves performance across all games. There are multiple reasons as to why this happens; however, most enthusiasts always agree that newer Windows 10 Updates have better support for the Hardware Drivers. The compatibility between Windows and Hardware is very important, which is always sorted out through the latest updates.

Here is how you can make sure that Windows 10 is updated to the latest version.

borderlands 3 settings
Check for Updates

Search and Open “Check for Updates.”

Best Borderlands 3 Settings

Now that you are done with all the necessary Windows 10 Optimizations suggested above. It is time that we finally move over to the major settings, which include in-game tweaks of Borderlands 3. These tweaks are completely going to transform your gameplay, both in terms of visuals and FPS. We tested Borderlands 3 heavily for a few days and concluded that the following are the best Settings on PC.

Display Mode: Full Screen

-This feature makes a tremendous difference both in terms of Frames and Gameplay. In Borderless and Windowed Screen, you do not benefit from high refresh rate monitors and don’t get stable priority.

Target Display: Select your Primary Display/Monitor.

Aspect Ratio: Native Aspect Ratio

The Aspect Ratio would also be an important part, because selecting the wrong Aspect Ratio would cause several black bars and also not give you the sharpest visuals. You can check your native Aspect Ratio through the Nvidia Control Panel (Insert Screenshot)

Resolution: Native Or Highest

Select the highest available Resolution for the most pleasing Graphics. Similarly, If you have a custom resolution or something competitive planned, you can also go with that.

Resolution Scale

If you set the Resolution Scale at 100%, all the pixels rendered will be the same as your native resolution. On the other hand, If you decide to lower Resolution Scale, by let’s suppose 20%, the newly rendered pixels would be very blurry, since they are now being rendered on a lower resolution. This does seem to be personnel preference, but there is no denying that a resolution scale lower than 100% would have very bad graphics. Our recommendation is to keep it at 100%, and If you have one of the newer-end Graphics Cards, like RTX 3070 or 3080, you can upscale it to 120% for more sharper visuals.

Vertical Sync: Off

Although Vertical Sync does smoothen the gameplay, it also comes with the drawback of input lag, which ultimately has a range of disadvantages in multiplayer gameplay. On the other hand, If you are not too keen on getting more than 60 FPS and are happy with single-player, Vertical Sync wouldn’t be a bad idea.

Frame Rate Limit: Unlimited

Always select unlimited under Frame Rate Limit, because when there is a specific value set. The game does not allow the hardware to render more frames than that. And, if the hardware does render, these are then wasted, so you are not running your Graphics Card at max potential. It’s always better to let the hardware run at maximum potential and generate max amount of frame rates.

 Field of View: 90

Similar to Camera works, Field of View(FOV) decides how many pixels you can see at a time. A higher, FOV would result in a wider camera, therefore, allowing players to see more pixels at a time. This does sound like a good feature; however, it has its consequences, resulting in a considerable downgrade in performance. In order to get the best possible FPS and also decent FOV, it does signify personal preference, but for this guide, we will recommend keeping it under 90. If you decide to go against this and lock it at 100 or more, the Graphics Card will be forced to render more pixels, thus significantly impacting performance. Find the correct combination, depending upon your monitor size and screen adjustment.

The Vehicle Field of View should be the same as the primary FOV.

Graphics API: DirectX 11

Over the past few months, there has been a reasonable amount of misconception regarding the Graphics API in Borderlands 3. If you come across any Video or Article that recommends using DirectX 12 without proper reasoning, then it’s without a doubt misleading.

The only reason you should go with DirectX 12 is in the case of a low-end CPU, or an Ampere/Turing/RTX-based Nvidia and AMD Cards. Subsequently, If you enable DirectX 12 on Pascal Cards, there will be no extra gain; instead, you will face slight performance loss due to compatibility problems between ASync. The newer generation of cards on the other hand, would do tremendously well.

Performance Stats: All

Overall Quality: Very Low

Volumetric Fog: Disabled

During our benchmarks here at eXputer, we noticed a 30% FPS difference while messing with this option. The Visual quality hadn’t changed drastically.

Foliage: Disabled

Similar to Volumetric Fog, this also had huge impact on performance, while showing little to no improvement in visual sectors. If you somehow find any visual improvements and want to turn it on. Do not go far out; only keep it at low.

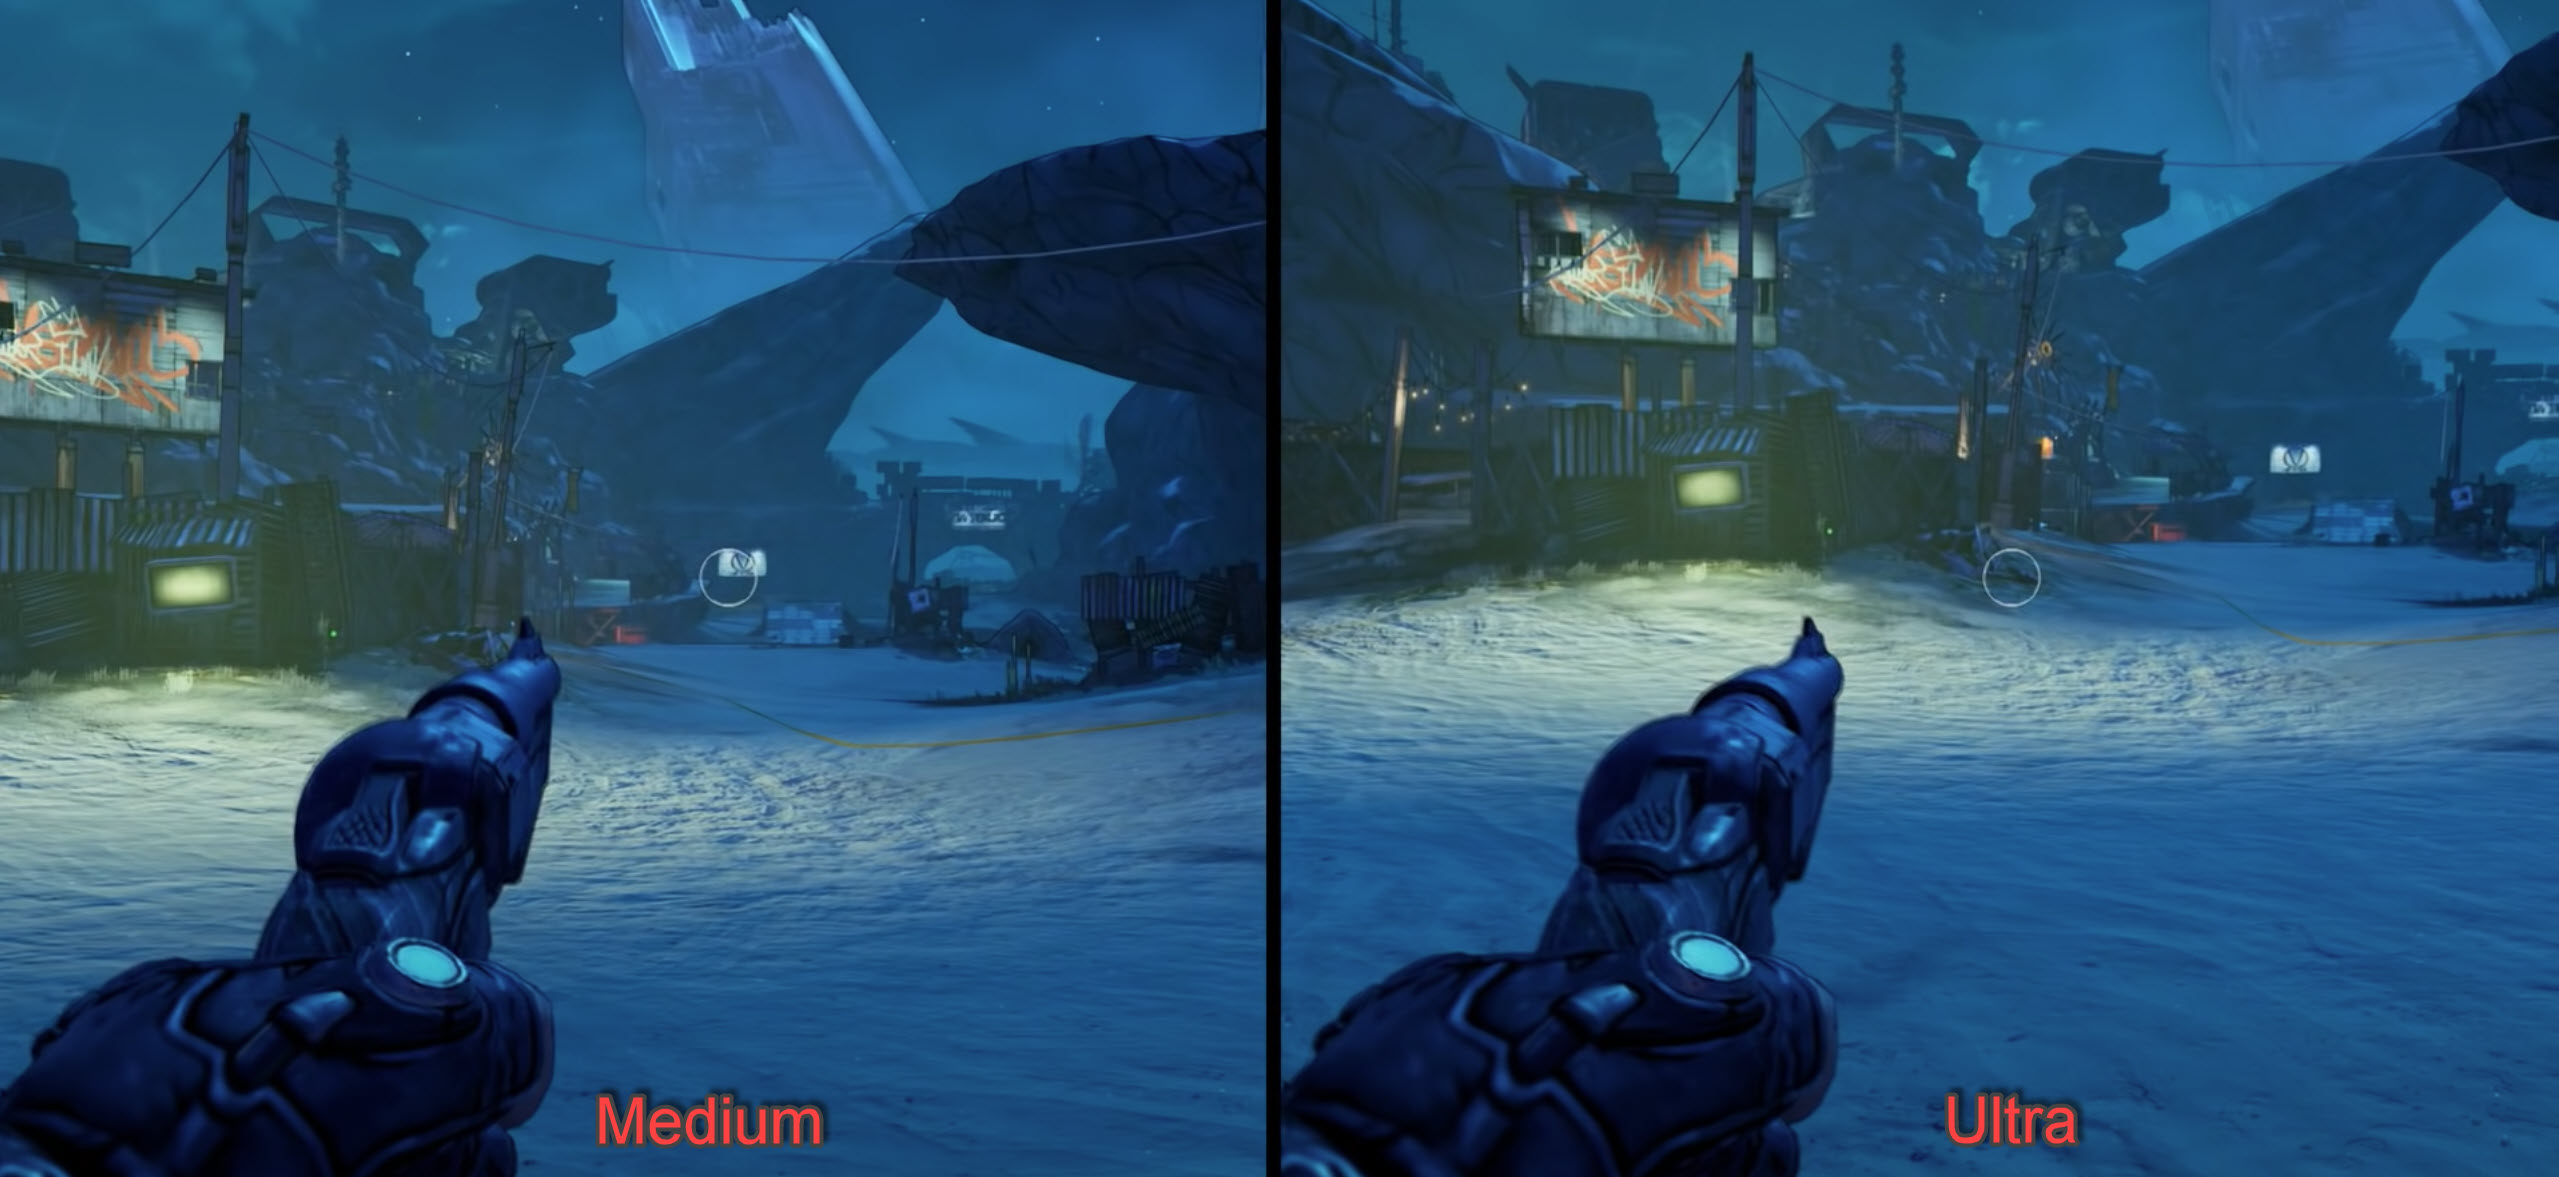
Anisotropic Filtering: 16x or 8x

This is one of the key graphical elements that showed tremendous improvement across all sectors. When turned off, the images look very washed out, and you also don’t see clarity in distanced objects. In addition to all this, the performance difference between turning off and 16x was very low, and looking at the improvements; it was clear that Anisotropic Filtering had to be turned on. For players, who are using low-end PC’s, in accordance to system requirements, should go with 8x, while those capable of generating higher frames can go with 16x.

Ambient Occlusion: Medium

For the highest possible performance in Borderlands 3, you should keep Ambient Occlusion Low. Subsequently, for a bit more optimized settings and If your System Requirements are on par with the required ones. Keeping it at Medium won’t hurt too much, especially since the trade-off with visual quality is too good.

Character Detail: High

Alongside Material complexity, the Character Detail Graphics element is also CPU-oriented. You can keep it at High for good detailing, but keep in mind; it is recommended for those using High-End Processors like Ryzen or Intel i7’s.

FPS Game Settings: How To Get High FPS In Apex Legends

Texture Streaming: High

Keeping Texture Streaming at High would help you get better and faster results. In the same vein, If you have a low-end PC, keeping it at Medium wouldn’t be too bad, and at ultra, there is no lateral difference across all factors.

Material Complexity: High

Once again, there is not too much difference in terms of quality between High and Ultra. Likewise, Medium seems to be notably bad, and High looks to be the most optimized option. In case, you don’t know much, Material Complexity ensures that the rendered elements have added features, thus providing a more detailed look.

Material Complexity: Low

We were bugged about this setting, because whenever we tried to enable it. The difference in performance was high, while it took us a while to notice any improvements across the graphical sector. If you also faced a similar problem, and are stressed about Material Complexity in Borderlands 3. Then it is evident that this setting seems to be unnecessary on 1080p/1440p. As a result, we would recommend keeping it at Low.

To top these settings off with few more incredible tweaks. You should enable Full-Screen Optimization and head down below for the Best Launch Options to make things easier.

Screen Space Reflections: Ultra
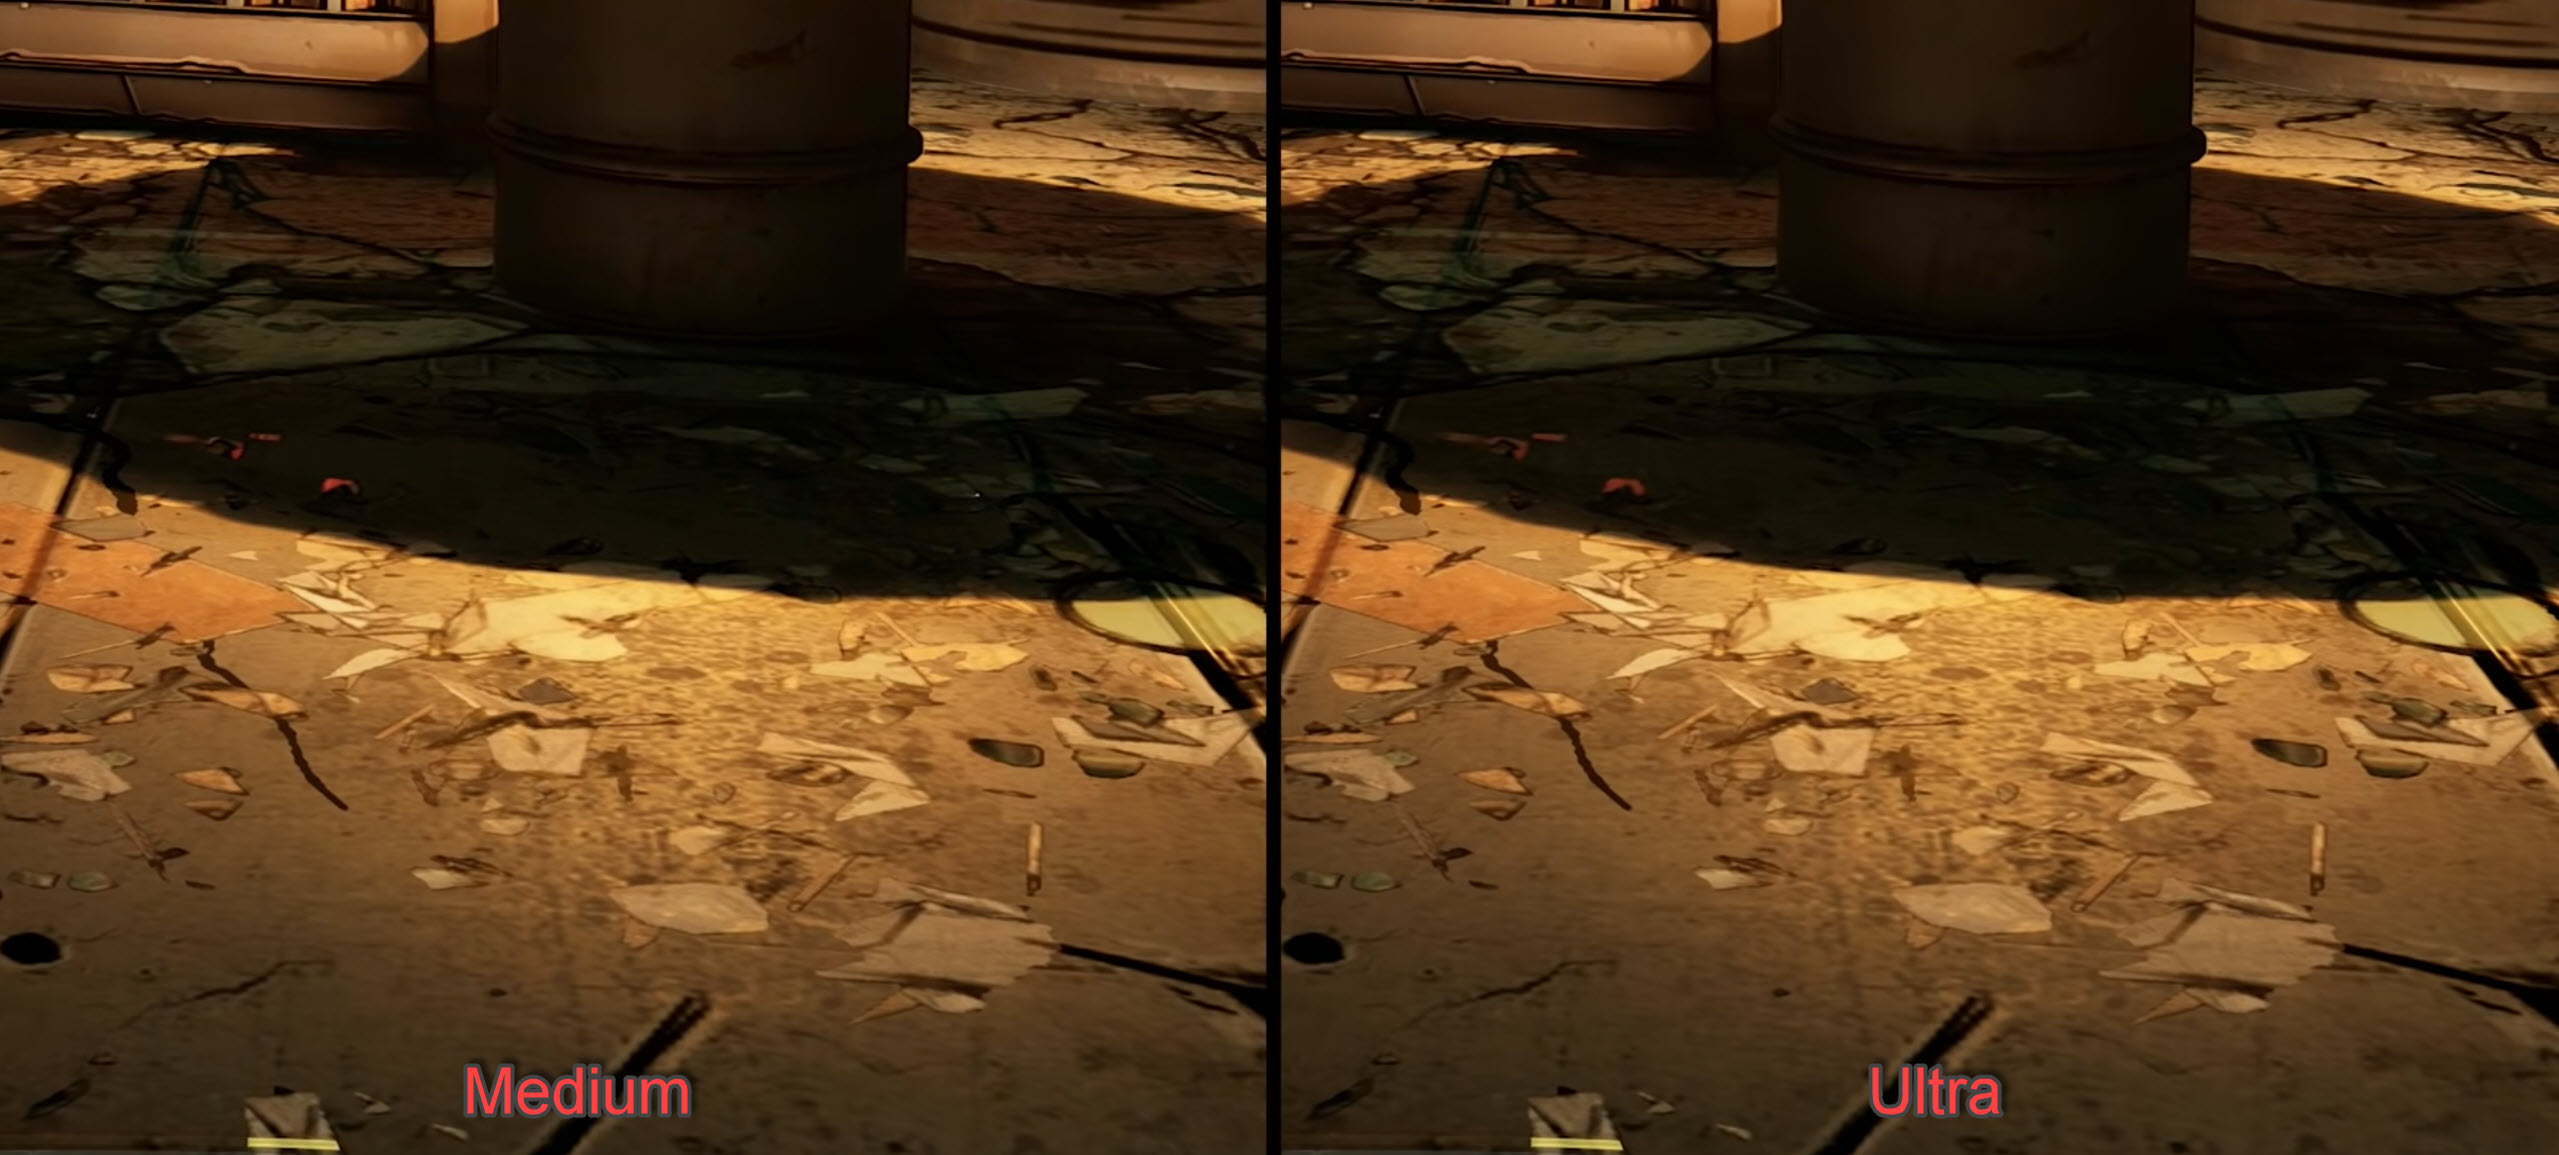
We were very concerned about the graphics before using Nvidia FreeStyle for additional vibrance because they looked too noisy. The elements seemed to be extremely sharp in nearly all places, and after messing around all settings, we finally reached Screen Space Reflections (SSR). Likewise, as we configured this setting and changed it to Ultra. The noisy grain was gone, and all graphics fitted the game well. It was also apparent that the performance loss was untouchable, while the improvement was massive. Our recommendation is to keep SSR at Ultra for the best possible Reflections. However, If you aren’t facing the noisy problem, go with High, because that would work too.

Character Detail: High

The Character Detailing feature was very impeccable with its benefits. We noticed major improvements across all characters and the amount of detailing in whatever they carried. Alongside that, the impact on performance was slightly lower than other major settings, and it was apparent that Character Details were best to be kept at High.

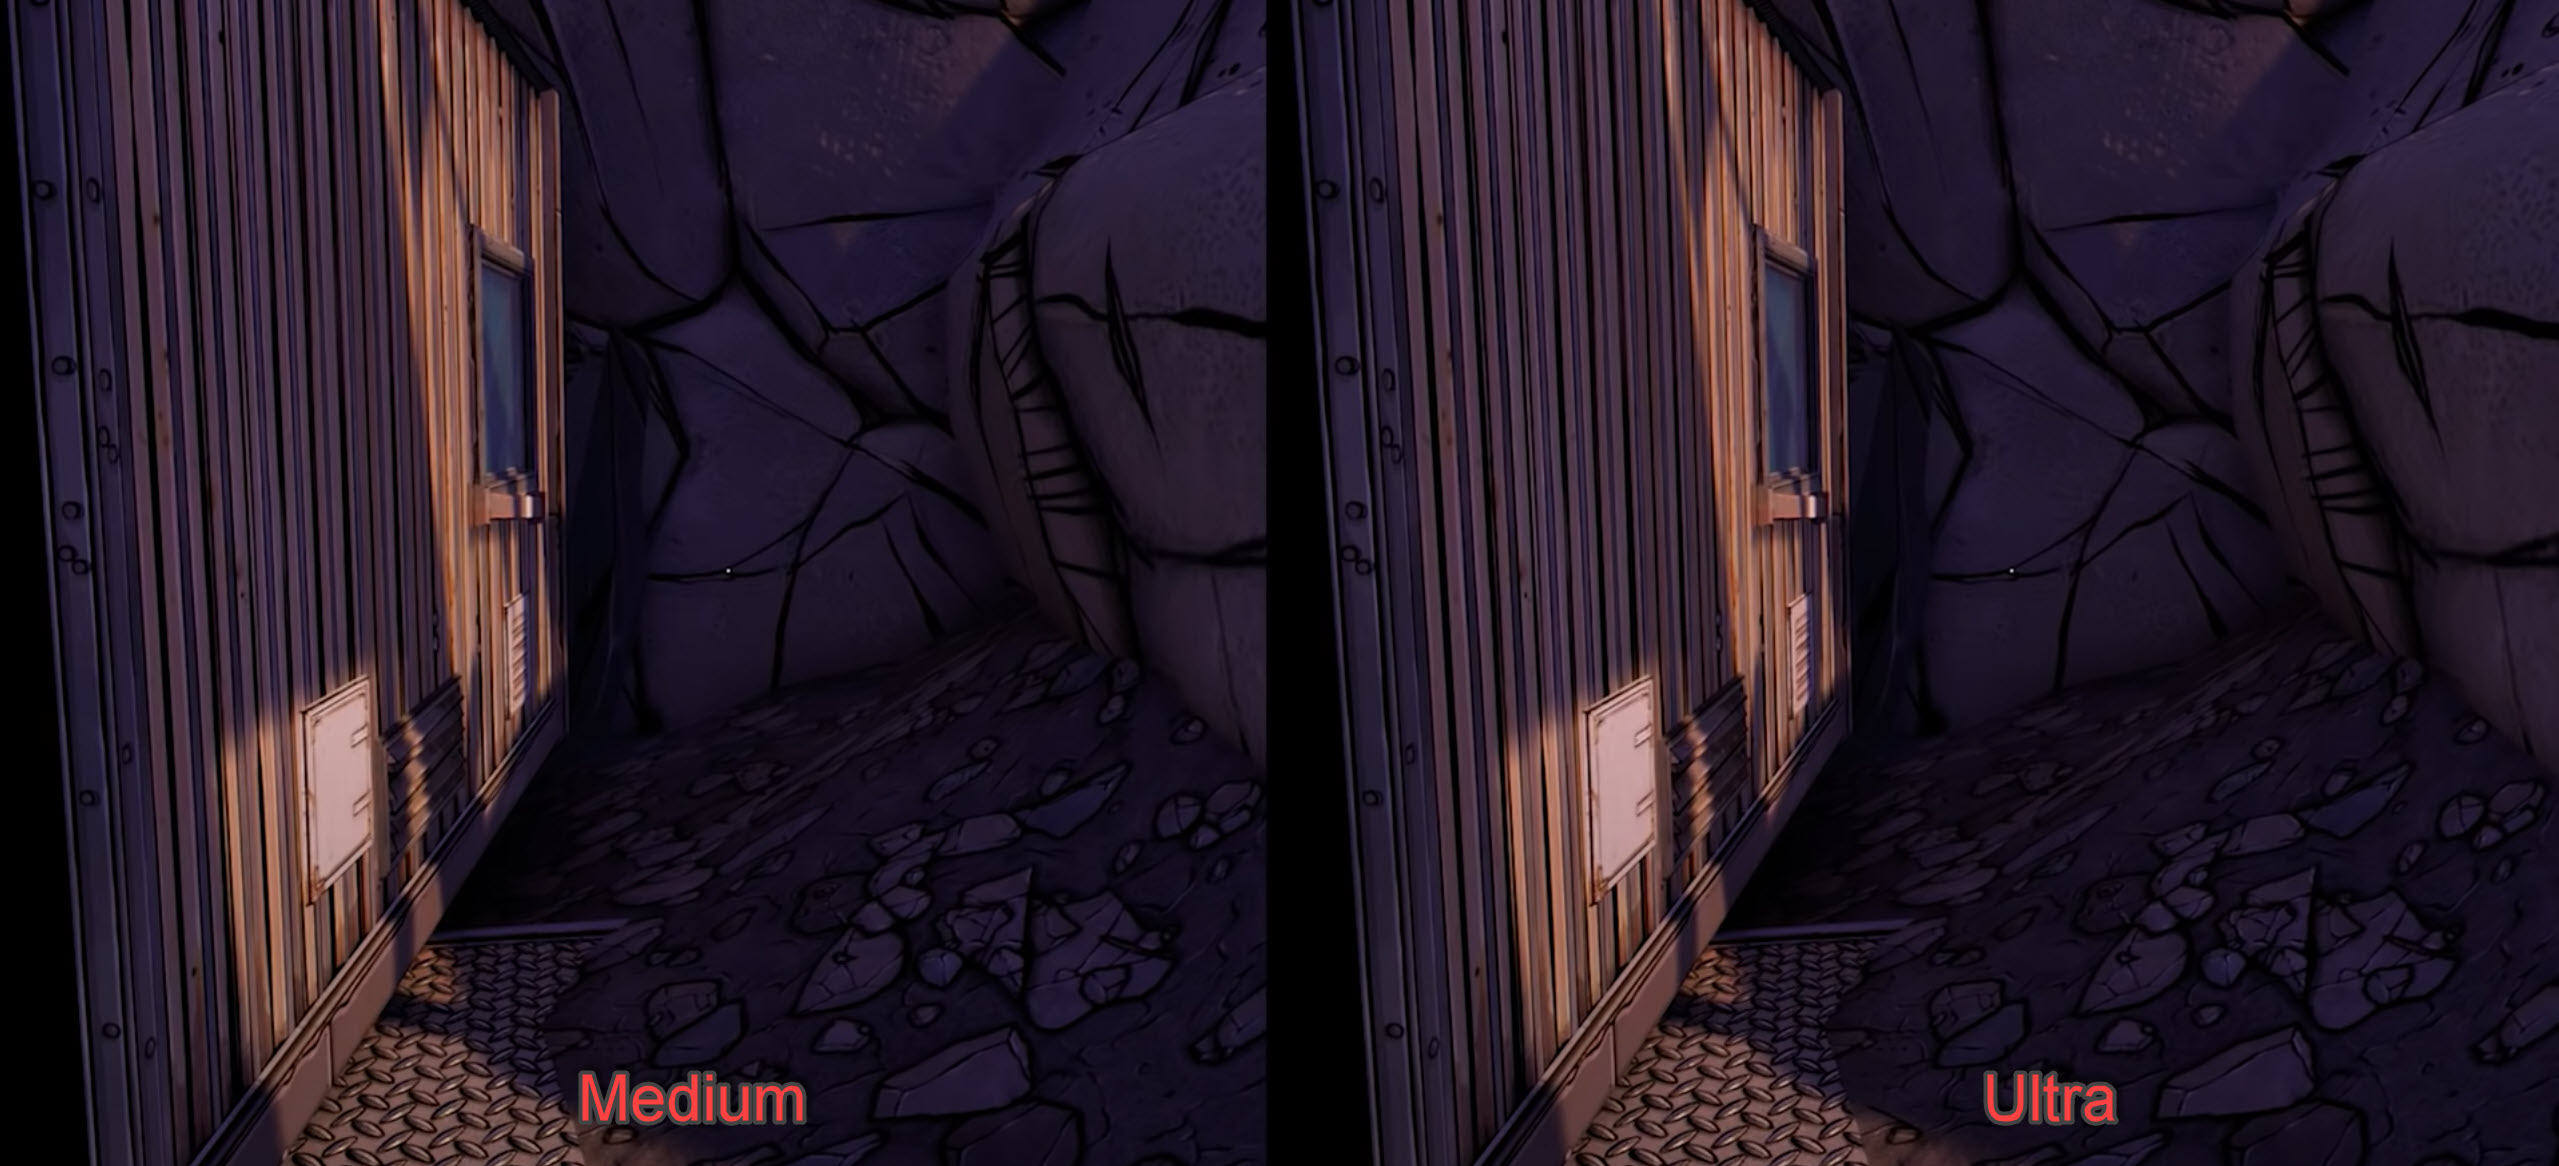
Environmental Detail: High

Another setting that had us bugged was Environment Detail. We were unable to notice a difference in Ultra, while at High, the performance difference was relatively 20%. Environment Detail provides added geometric features that result in more depth of objects while also enhancing the fundamental factors. It does improve the overall interactivity, and as per our benchmarks, graphics looked significantly better at High.

Camera Motion Blur: Off

As always, Motion Blur needs to be turned off. My opinion on this setting hasn’t changed the slightest. It’s purely unnecessary when finding ways to increase FPS. The setting does not bring any value to the gameplay, and from it has always seemed. Motion Blur is only useful in cinematic gameplay trailers.

Terrain Detail: High

Terrain Detail doesn’t have loads of benefits, but it does help improve the detailing in specific scenes. You can certainly keep this at High, and there wouldn’t be too many performance issues.

Object Motion Blur: Off

Once again, the same problem, and no need to keep it enabled. You do not want to waste all the performance saved up for this.

Shadows: High

Subsequent to Motion Blur, you would come across Shadows, which need to be kept High. Realistically, these are the game-changer, and with Shadows Medium or Low, you would notice very unrealistic graphics. Moreover, there will also be a slight advantage in spotting enemies through their shadows.

Draw Distance: High

Here at eXputer, we prioritised Draw Distance, while benchmarking Borderlands 3. The main reason being, that with lower Draw Distance, you are essentially missing key graphical elements that spoil the entire visual meta. Besides, when looking to spot differences in performance, there was none between Ultra and High. Similarly, while checking it up on Medium and Low, we only noticed a slight change in FPS while the difference in visual quality was massive.

Foliage: High

Similar to Draw Distance, the Foliage Graphical Element acts within the same meta, providing additional density and distance at which the pixels are rendered. This setting does have a slight impact on performance. Therefore, you should keep it at Medium, in the case of Low-End PC.

Similar Reads: Best Red Dead Redemption 2 Settings

FidelityFX Sharpening: Off

The FidelityFX topic is often very confusing among players, because although this shows up to both Nvidia and AMD Users. The benefit is minimal, and they mainly aim towards AMD Users. Likewise, as I said, “limited benefits” is true, because apart from ensuring that objects are stabilized and sharped. The FidelityFX Sharpening does nothing more. Users have reported all sorts of performance impacts, and while we weren’t able to test this thoroughly on Borderlands 3. It is evident that the same sharpening can be changed through AMD FreeStyle or Nvidia’s Game Filter with a guarantee that there will be no performance impact.

Our Recommendation regarding FidelityFX Sharpening would be to disable it and make use of FreeStyle and Game Filter.

Disable Full-Screen Optimization

Often debated, but proven that Full-Screen Optimization is an unnecessary feature that results in Low FPS and Stuttery. The common reason why this happens is solely related to the weird Hybrid Borderless meta to which the feature forces. This causes immense compatibility problems within the game’s settings and forced Windows 10 Optimization. Luckily, it’s no big deal, and once disabled, you will notice quick ALT Tabbing (Minimizing) and no heavy burden.

  1. Head over to the Borderlands 3 Application Folder
  2. Right-click on the game > Compatibility > Uncheck Full-Screen Optimization
  3. Along with that, also head over to DPI Scaling and Checkmark Override High DPI Scaling

Network And Social Settings

Group Privacy: Players focusing on single-player only should Select Local. Others who wish to go for multiplayer can enable Lan and Open to Public.

Matchmaking Region: It’s best to be aware of your region; nonetheless, Automatic also works.

Suppose you aren’t interested in Multiplayer and more. All the rest of the options should be disabled, as these features run parallel while playing game, causing a slight impact on performance.

  1. Text Chat: Off
  2. Social Notification Frequency: Off
  3. Social Notification Duration: Normal
  4. Trade Requests: Off
  5. ECHOcast Twitch Extention: Off
  6. Rare Chest Event: Off
  7. Badass Event: Off

Borderlands 3 Launch Options

Yes, time and time again, we have heard the most rational Borderlands 3 thing ever, Stuttering and Random Crashes. However, these do require a topic of their own to share the most effective method of stopping them both be these two launch options. A few months ago, certain Proton Borderlands 3 users came across these launch options that have guaranteed fix stuttering and crashing for the majority of users. We haven’t tested this personally because it seems that in 2021 the game has gotten better. Anyhow, If you were to use these following launch options, you would also get rid of the loud Gearbox Opening Movie, and see tremendous smoothness in the gameplay sector.

PROTON_NO_ESYNC=1 %command% -NoStartupMovies -notexturestreaming
  1. If you are on Epic Games Store > Settings > Borderlands 3 > Checkmark “Additional Command Line Arguments.” > Paste the code shared above.
  2. Steam Users can Right Click on Borderlands 3 > Properties > Paste Code in Launch Options Tab.
  3. For those who are having trouble utilizing all cores while playing Borderlands 3. It is highly recommended that you also enter the following sets of code.
-high -USEALLAVAILABLECORES

Borderlands 3 Nvidia Settings

As explained earlier, the later segments of the guide will contain instructions related to AMD And Nvidia Graphics Cards. If you have followed all the instructions shown above, and still didn’t notice FPS Boost and Visual Clarity, these advanced enhancements through the AMD/Nvidia Control Panel are all you are going to need.

The majority of these settings are available inside the game as well; however, setting them up through the Control Panel ensures more advancement from the core. Consequently, If you are skipping these settings, you are likely to miss the significant performance improvements.

Nvidia Graphics Card owners should first ensure that their drivers are updated to the latest version. This can be done through the GeForce Panel, and suppose, you are wondering why is that necessary? Well, once again, as per our research, some months ago, Nvidia rolled out new Updates that contained tremendous improvements for Borderlands 3. It also brought forward various bug fixes, and sharpening problems that needed to be addressed earlier. Besides, new drivers continuously improve Graphics Cards performance.

borderlands 3 settings
Borderlands 3 Nvidia Settings

Inside Nvidia GeForce Experience > Settings > Drivers > Check For Updates. As you can see in my case, new drivers are available to download.

Following drivers updates, head straight down below to Nvidia Control Panel Tweaks.

  1. Proceed to Manage 3D Settings > Program Settings > Add Borderlands 3
  2. After the game is added to the list, make the following changes in the Nvidia Control Panel.
  3. CUDA – GPUs – Use these GPU’s, and select your primary Graphics Card
  4. Power Management Mode: Prefer Maximum Performance

AMD Settings For Borderlands 3

Luckily, AMD users can also benefit from this guide, and apply these changes for further FPS Boost and Performance in Borderlands 3. Also, keep in mind that we will configure Radeon Anti-Lag, which, as per many users, is the cure to Stuttering in Borderlands 3. We recommend configuring these changes for Borderlands 3 Specifically; however, you can also do this for all games. It all depends on you and how you maintain the profiles in Radeon Control Panel.

Before we jump to the Settings, first make sure that your drivers are updated to the latest version. This can be done through the AMD Website, which auto-detects and installs the latest drivers. Afterward, do the following.

  1. Open AMD Crimson > Proceed to the Graphics Tab > Checkmark ESports
  2. Radeon Anti-Lag: Enabled – The Radeon Anti-Lag is the number one go-to for fixing stuttering problems in Borderlands 3.
  3. Radeon Chill: Disabled
  4. Radeon Boost: Disabled
  5. Radeon Image Sharpening: Enabled
  6. Sharpness: 80% – You can also configure this through the AMD FreeStyle while playing game.
  7. Radeon Enhanced Sync: Disabled
  8. Wait for Vertical Refresh: Always Off – It’ll limit your FPS to 60, which is a drawback, especially if you use a high refresh rate monitor.
  9. Under Advanced Tab, Select Use Application Settings Under Anti-Aliasing. This will avoid conflict between Borderlands 3 and AMD Control Panel.
  10. Anti-Aliasing Method: Multisampling
  11. Morphological Anti-Aliasing: Disabled
  12. Anisotropic Filtering: Disabled
  13. Texture Filtering Quality: Performance – If you have a graphics card that exceeds the one require in recommended system requirements. Then I’d recommend selecting Standard. However, If you are still stuck on RX 460 or 480, then Performance is the best choice for High FPS.
  14. Surface Format Optimization: Enabled – Many debate over this setting and its advantages, and that is true to some extent because Surface Format Optimization might not work in all scenarios. It only changes rendering surface formats where applicable. Nonetheless, AMD Recommends turning it on for high fps and performance.
  15. Tessellation Mode: override Application Settings
  16. Maximum Tessellation Level: off
  17. OpenGL Triple Buffering: Disabled
  18. Pixel Format: Disabled
  19. GPU Workload: Graphics
  20. Perform Reset on the Reset Shader Cache
  21. Move to the Display Tab and make the following changes
  22. AMD FreeSync: Enabled – Depending on your monitor and preference, we would recommend keeping AMD FreeSync Enabled
  23. Virtual Super Resolution: Disabled
  24. GPU Scaling: Disabled
  25. Scaling Mode: Preserve Aspect Ratio
  26. Integer Scaling: Disabled

Summary

All in all, these were the essential tweaks for Borderlands 3, that would dramatically increase your FPS while still showing sharp visuals. Other than that, the Windows 10 Tweaks are extremely safe, and do not have any drawbacks. Besides, they also improve performance across all games and increase the responsiveness of the overall PC.

More Game Settings Guide: The Division 2 Best Settings

Suppose, you are still struggling to find a fix for stuttering in Borderlands 3. We highly advise checking temperatures, background applications, and sensitive overclocks that might have made your Graphics Card de-stabled. Another reason why this could still happen might be related to the virus, which wouldn’t be easy to uninstall. Therefore, you should reinstall Windows 10.

These Borderlands 3 settings were put to work after hours and hours of testing. They are, without a doubt best in 2021, and If your PC is still unable to generate more than 60 FPS. There is a good amount of chance your hardware might be below the Minimum Required One.

More from Borderlands 3: Best Borderlands 3 Amara Melee Build Guide

Did you find this article helpful?

Thanks! Do share your feedback with us. ⚡

How can we make this post better? Your help would be appreciated. ✍

Get up-to-speed gaming updates delivered right to your inbox.

We don’t spam! Read more in our privacy policy.


Moiz Banoori is the brains behind eXputer. Having worked at various Video Game sites, with 8 years of Content Writing Experience and a Journalism Degree at hand, he presently monitors teams, creates strategies, and publishes qualified pieces through his aptitude at eXputer. Feel free to get in touch with him through his gaming profile on Steam and PSN.

Experience: 8+ Years || Manages Teams, Creates Strategies, and Publishes Guides on eXputer || Education: Bachelors in Journalism.

Related Articles