Valorant Error Van 1067, similar to other Valorant errors like Error Van 0 and Error Van 81, can be frustrating to deal with. When you experience Valorant error 1067, a pop-up window will display the following text, “Connection Error: Valorant has encountered a connection error. Please relaunch the client to reconnect.“.
- Valorant Van Error Code 1067 is a connection error that occurs due to a disabled TPM 2.0 and Secure Boot.
You can fix error code Van 1067 on your PC by doing the following:
-
- Enabling TPM 2.0 and Secure Boot is essential to solve this error.
- Updating your Windows 11 to the latest version can also help.
- Simply closing Discord is the easiest solution that you can try.
- VGC services can also be the culprit of this error, so restart them.
- Every BIOS menu will be different due to having different motherboards.
Why Does Valorant Error Van 1067 Occur
The error stems from the release of the newest Windows 11 update, as many users are upgrading their computer systems from Windows 10 to Windows 11 for better features like Auto HDR and an enhanced UI. However, many users started facing errors like this after switching to Windows 11.
The main cause of this error seems to be because of two things: the secure boot and TPM 2.0. These may not be working properly or disabled, although both are essential for Windows 11 security and are enabled automatically upon installation. Other than these, outdated Windows, third-party software, and stopped VCG services can also cause this error to pop up.
How To Fix Error Van 1067
We will go over a few solutions in detail, so be sure to follow the entire guide for a complete solution. These include:
- Enable Secure Boot
- Enable TPM2.0
- Restart VGC Services
- Close The Discord Application
- Update Windows 11
Enable Secure Boot
Secure Boot is a new feature of UEFI that protects users of Windows 11 from security threats, and it is essential for Valorant to work. So follow the steps below to enable them:
First, you will check whether or not Secure Boot is disabled before moving on to enabling it.
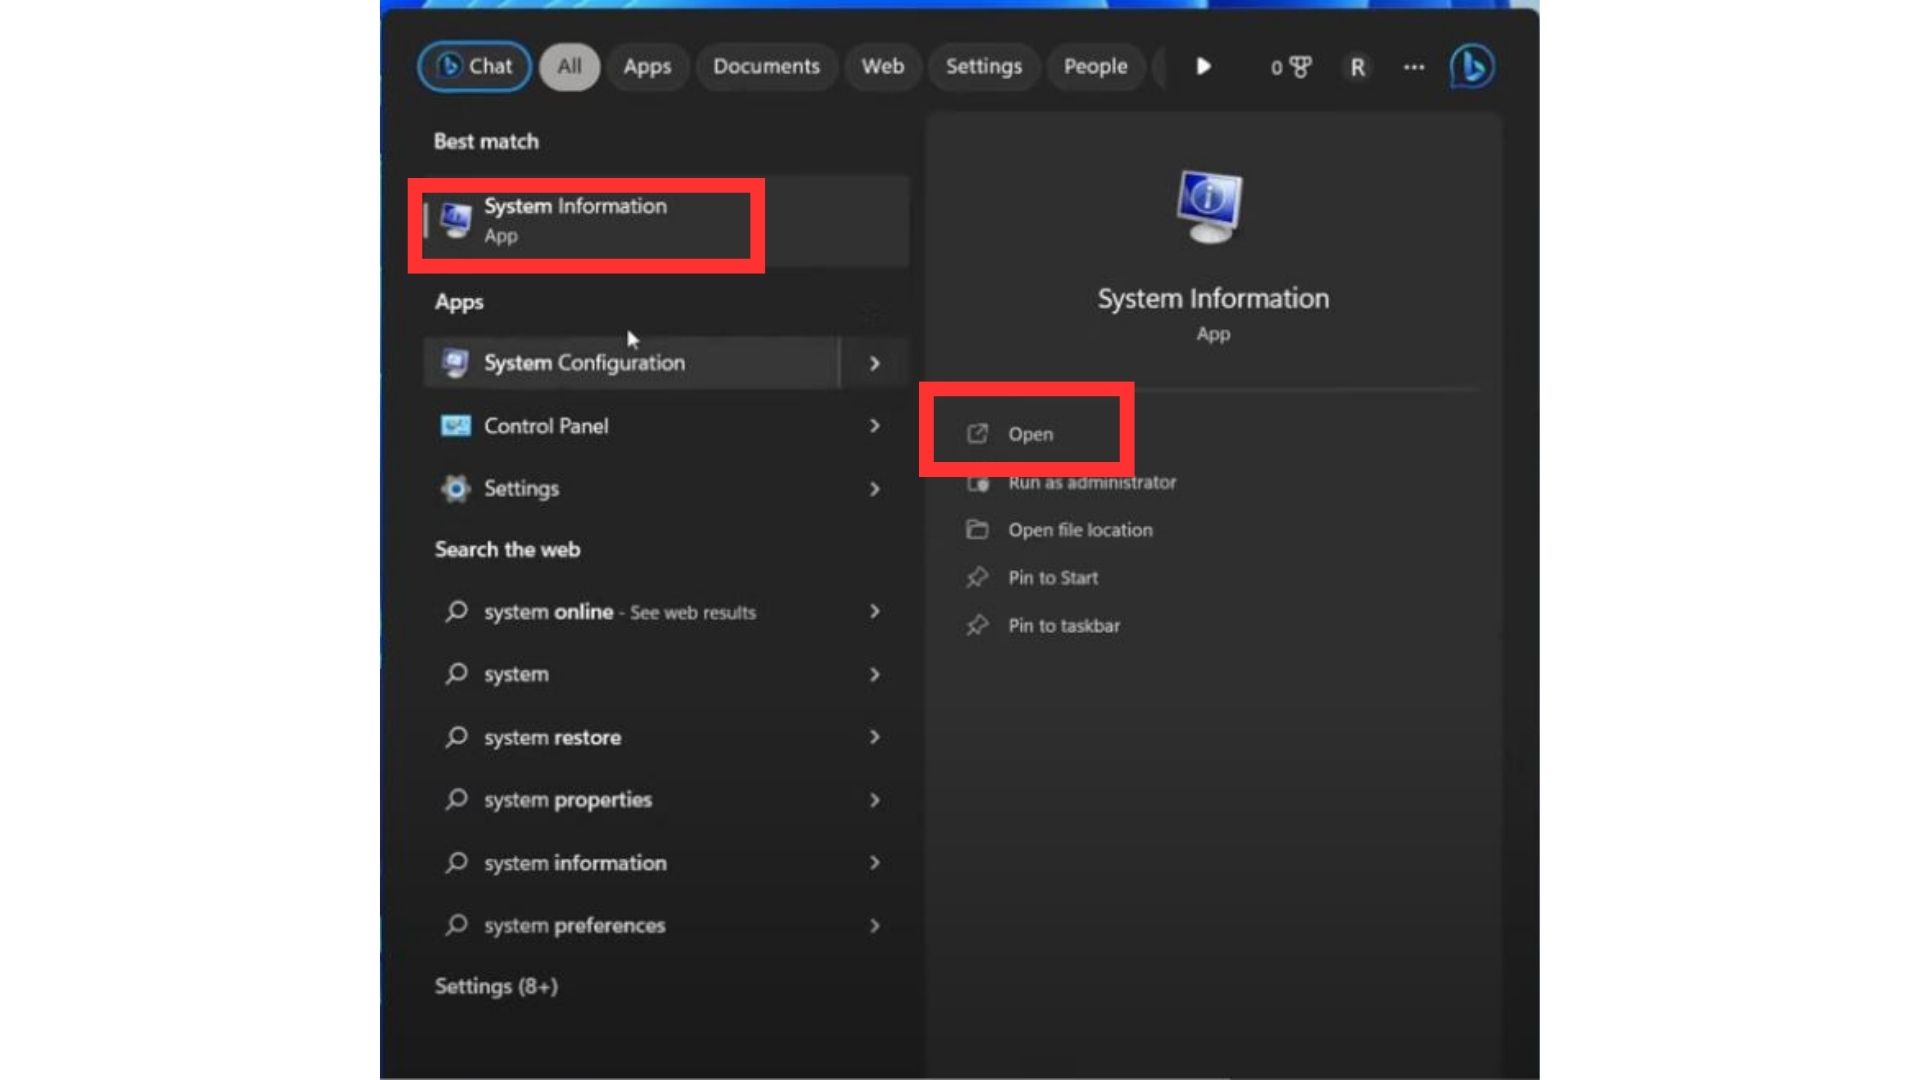
- Type “System Information” in the Windows Search bar and click on System Information.

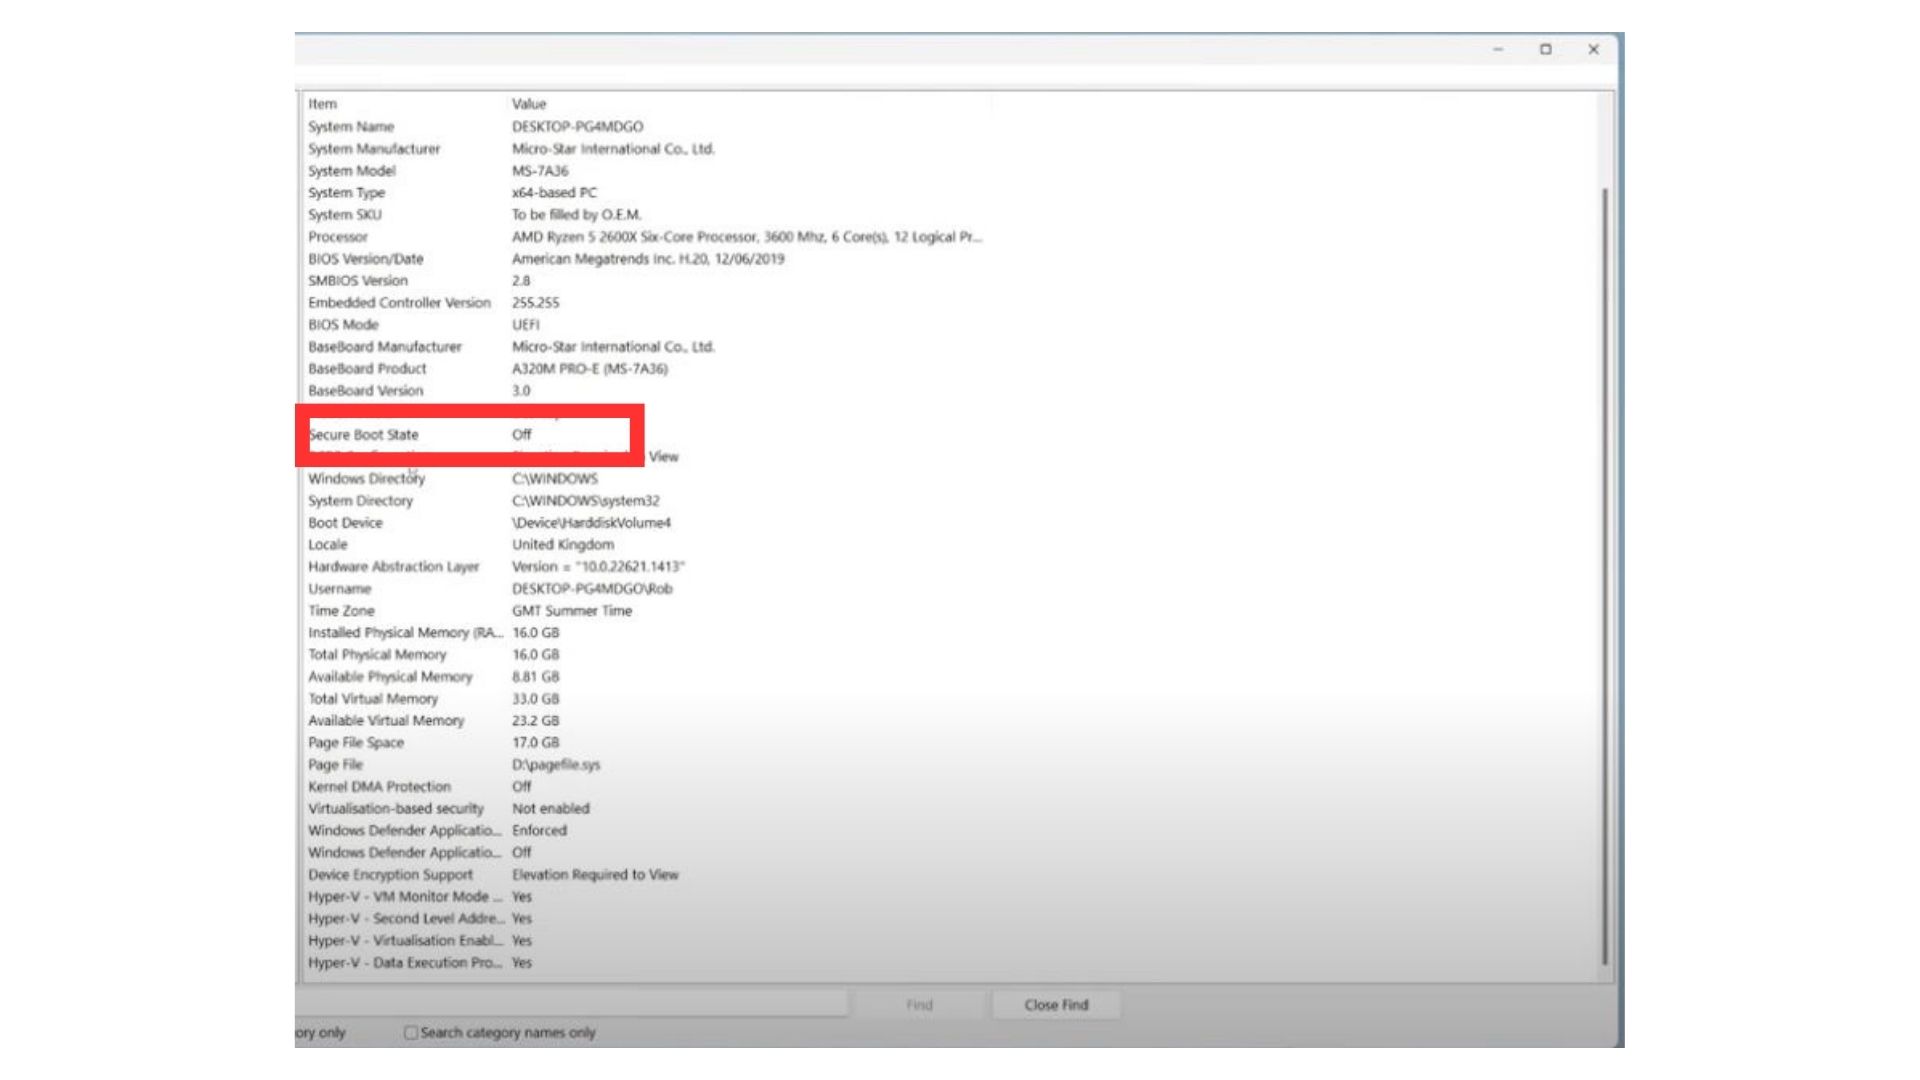
System Information Settings (Image Captured by eXputer) - Next, scroll down and look for “Secure Boot State” and check whether it’s on or off.
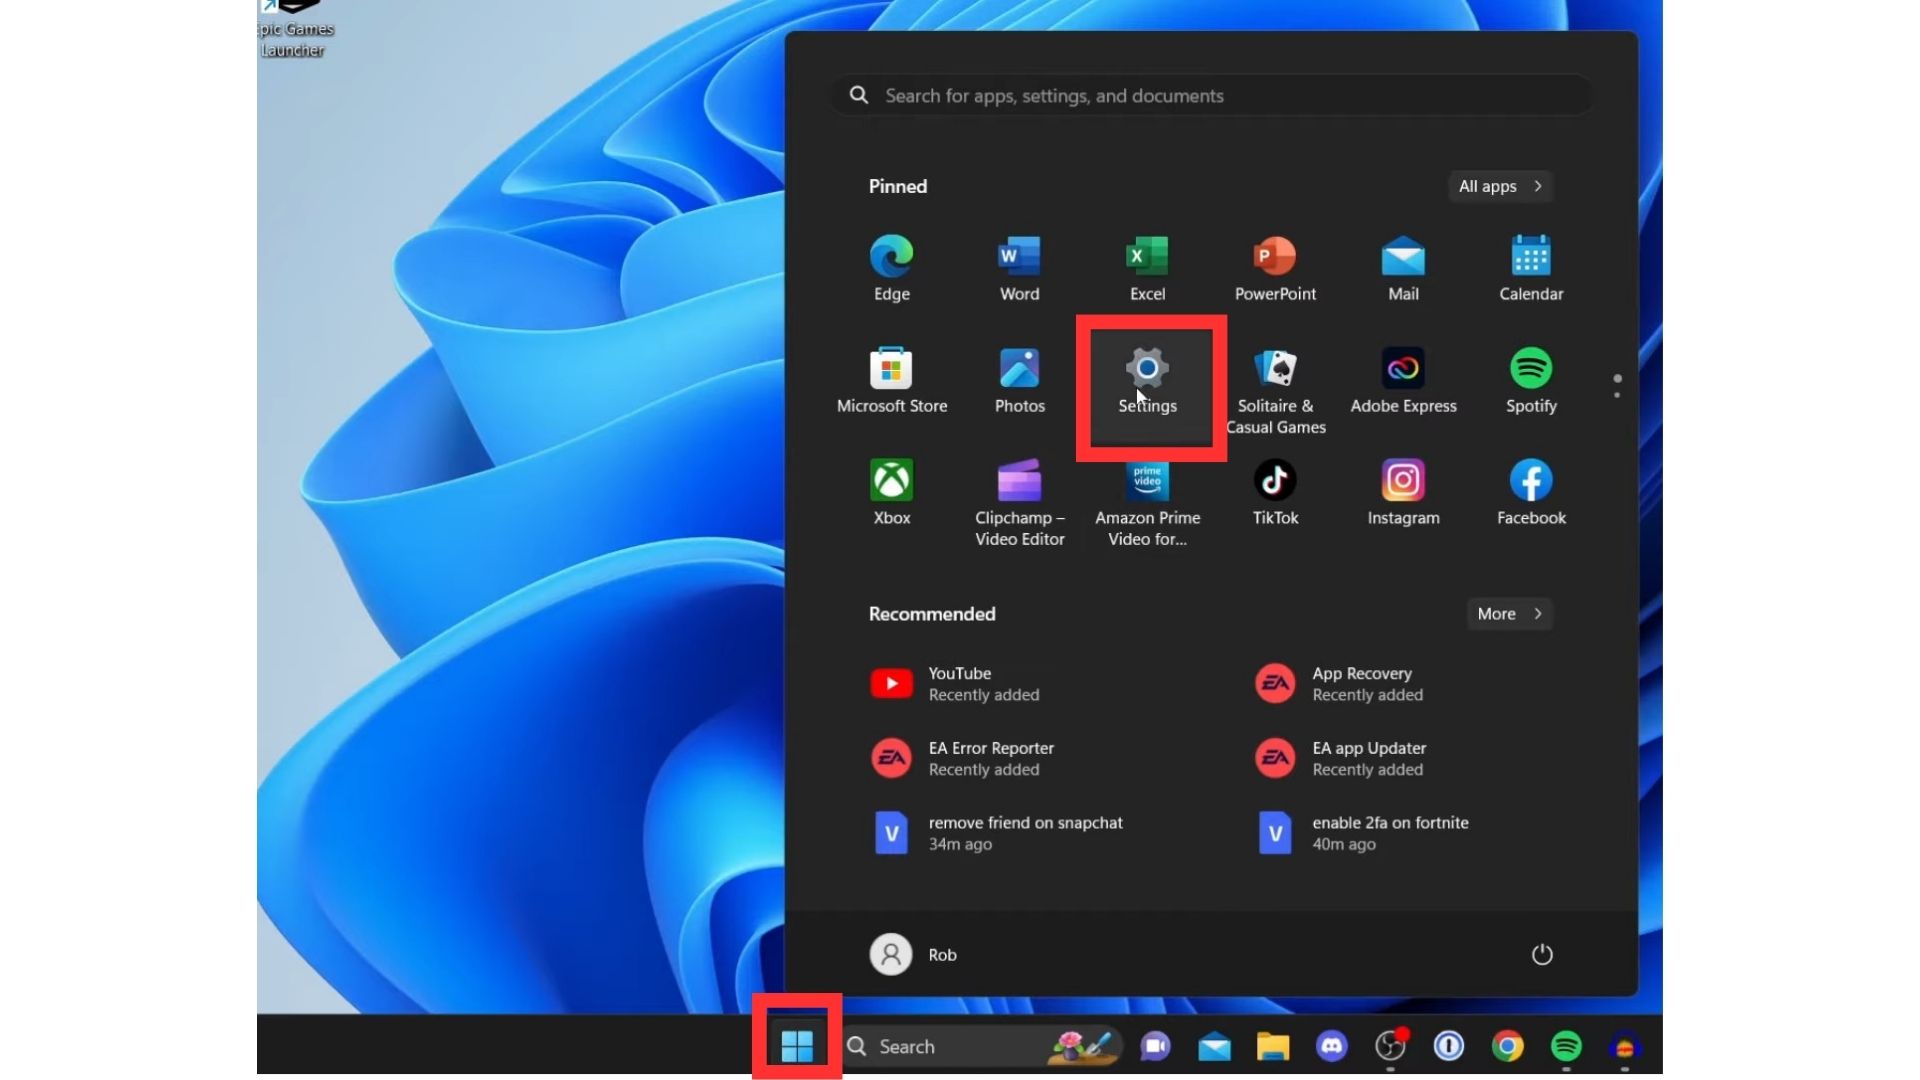
Secure Boot State (Image Captured by eXputer) - If Boot State is on, you can move on to the next methods. If the state is off then you must enable it. To do this, press the Windows Start button on the bottom of your screen and then click on settings.
Settings (Image Captured by eXputer) - Then, on the left-hand side, look for the Windows Update option and press it.
Windows Update (Image Captured by eXputer) - Next press Advanced options>Recovery>Advanced startup.
- After this, press “restart now,” and your device will restart, so wait for it to boot.
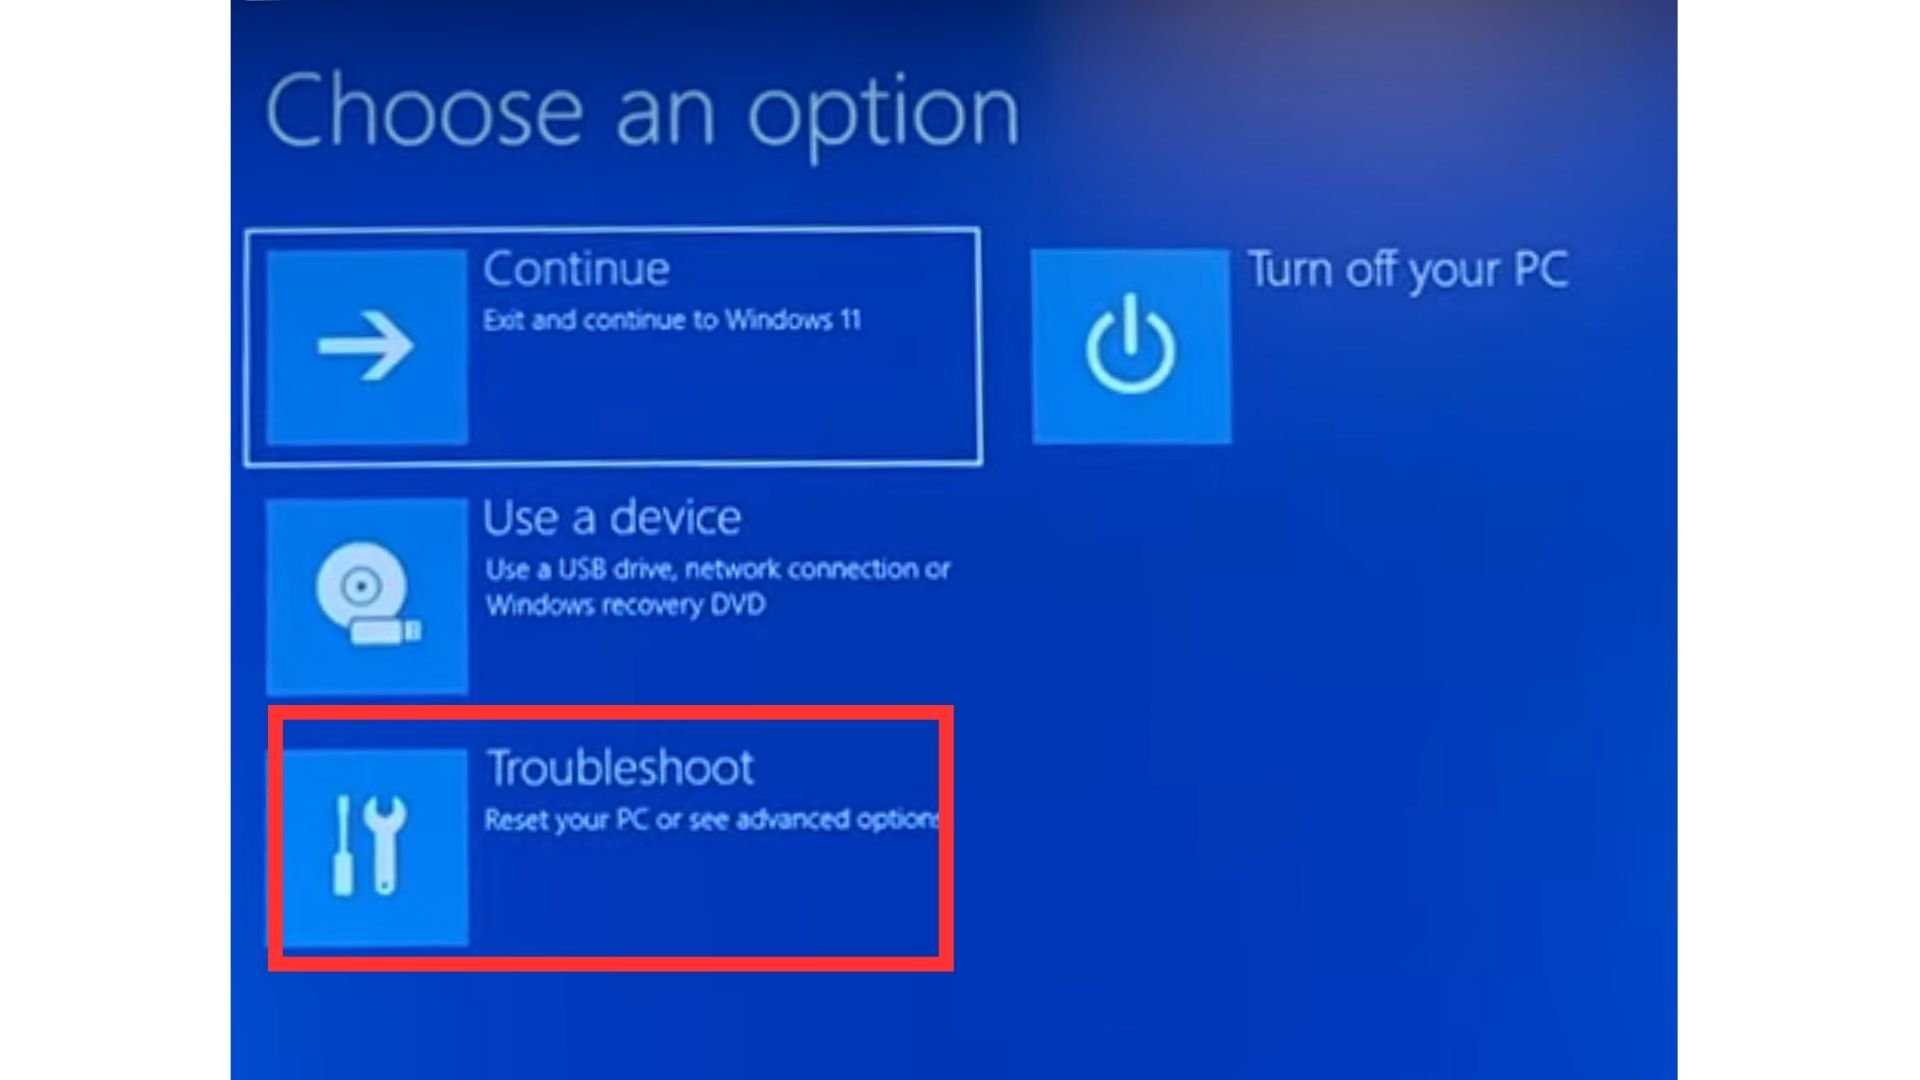
- When the blue screen appears with a few options, press on Troubleshoot>Advanced options>UEFI Firmware Settings.
Troubleshoot Windows (Image Captured by eXputer) - After this, you will restart your system once again. This will reboot your device in BIOS.
- In your BIOS menu, you can use the arrow keys to move around, the Enter key to select any option, and the ESC key to return to the previous menu. Navigate to the Settings option.
- Since you may have a different motherboard, you will have different options displayed, but do not worry, search among them for Secure Boot Settings. If you’re having trouble locating the Secure Boot settings, search Google for it.
- After you have located the Secure Boot settings, make sure you change the Secure Boot Control to enabled.
- Lastly, you will exit the BIOS menu by pressing the ESC key or the close button on the top right. Make sure that the configuration is saved before you exit BIOS mode. After exiting your system will restart your Windows with Secure Boot enabled.

Enable TPM2.0
TPM 2.0 is a hardware device that protects your computer identity and data. It does this by storing and generating encryption keys, which makes it harder for malicious software to access them. You can enable your computer’s TPM 2.0 by following the steps below (your BIOS screen may vary because of different motherboards, but the overall process will be similar):
- Restart your computer and go into BIOS mode by pressing the Delete key while booting up.
- Locate and press the Advanced mode option on your screen.
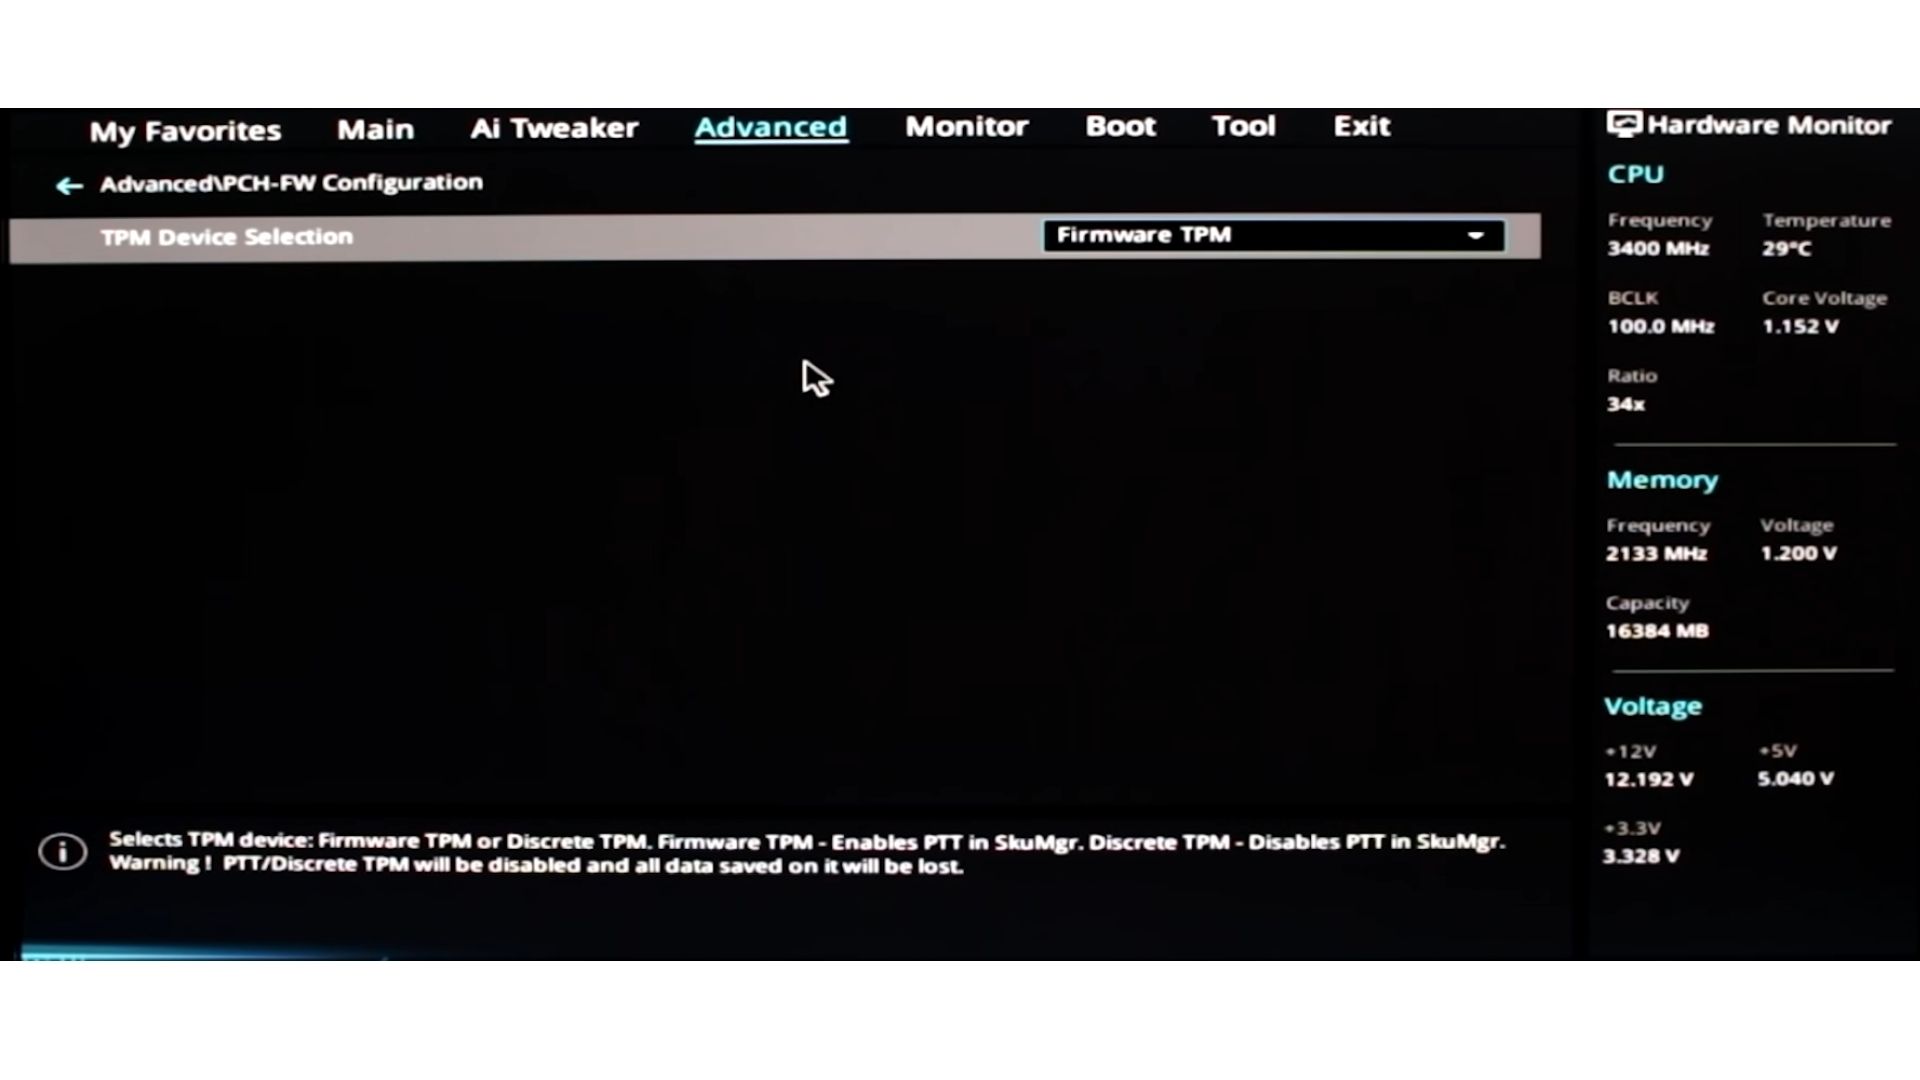
BIOS Advanced Mode (Image Captured by eXputer) - Then, go to the Advanced tab>PCH-FW Configuration.
Advanced Tab (Image Captured by eXputer) - Make sure that TPM Device Selection is set to Firmware. Select the drop-down menu and change it to Firmware TPM if it is anything else. This will enable your TPM 2.0.
TPM Firmware Enabled - Finally, you can exit and reboot your system to Windows 11.


After you have enabled Secure Boot TPM 2.0, the error should not bother you anymore, but if it persists, try a few of these smaller solutions as well.
Restart VGC Services
VGC Services prevent hacking and cheating in online multiplayer games; it could be the case that Valorant thinks you have disabled your VGC services which may lead to error Van 1067. So you will restart the services to make sure they are working correctly. For more information on restarting VGC services, click here.
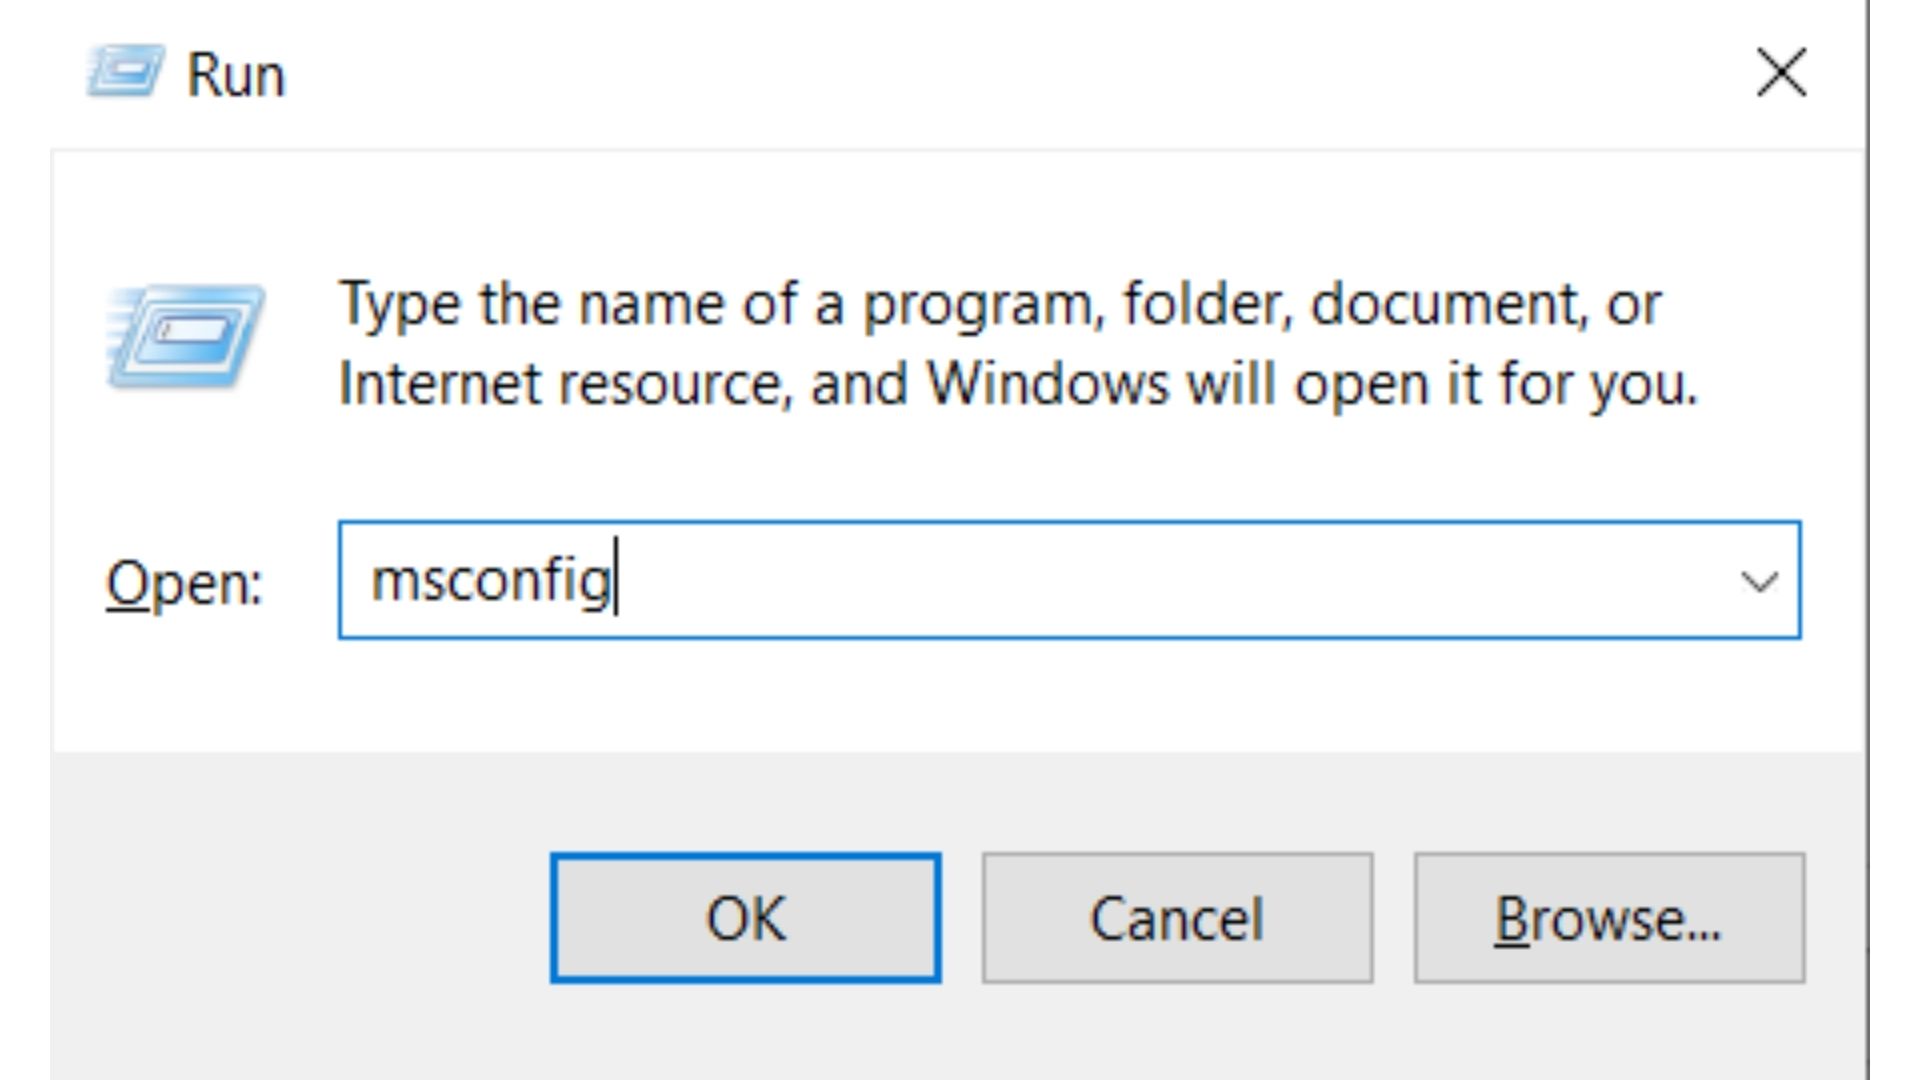
- Press the Windows+R keys to open the Run Box.
- Type “msconfig” in the text box and press OK.
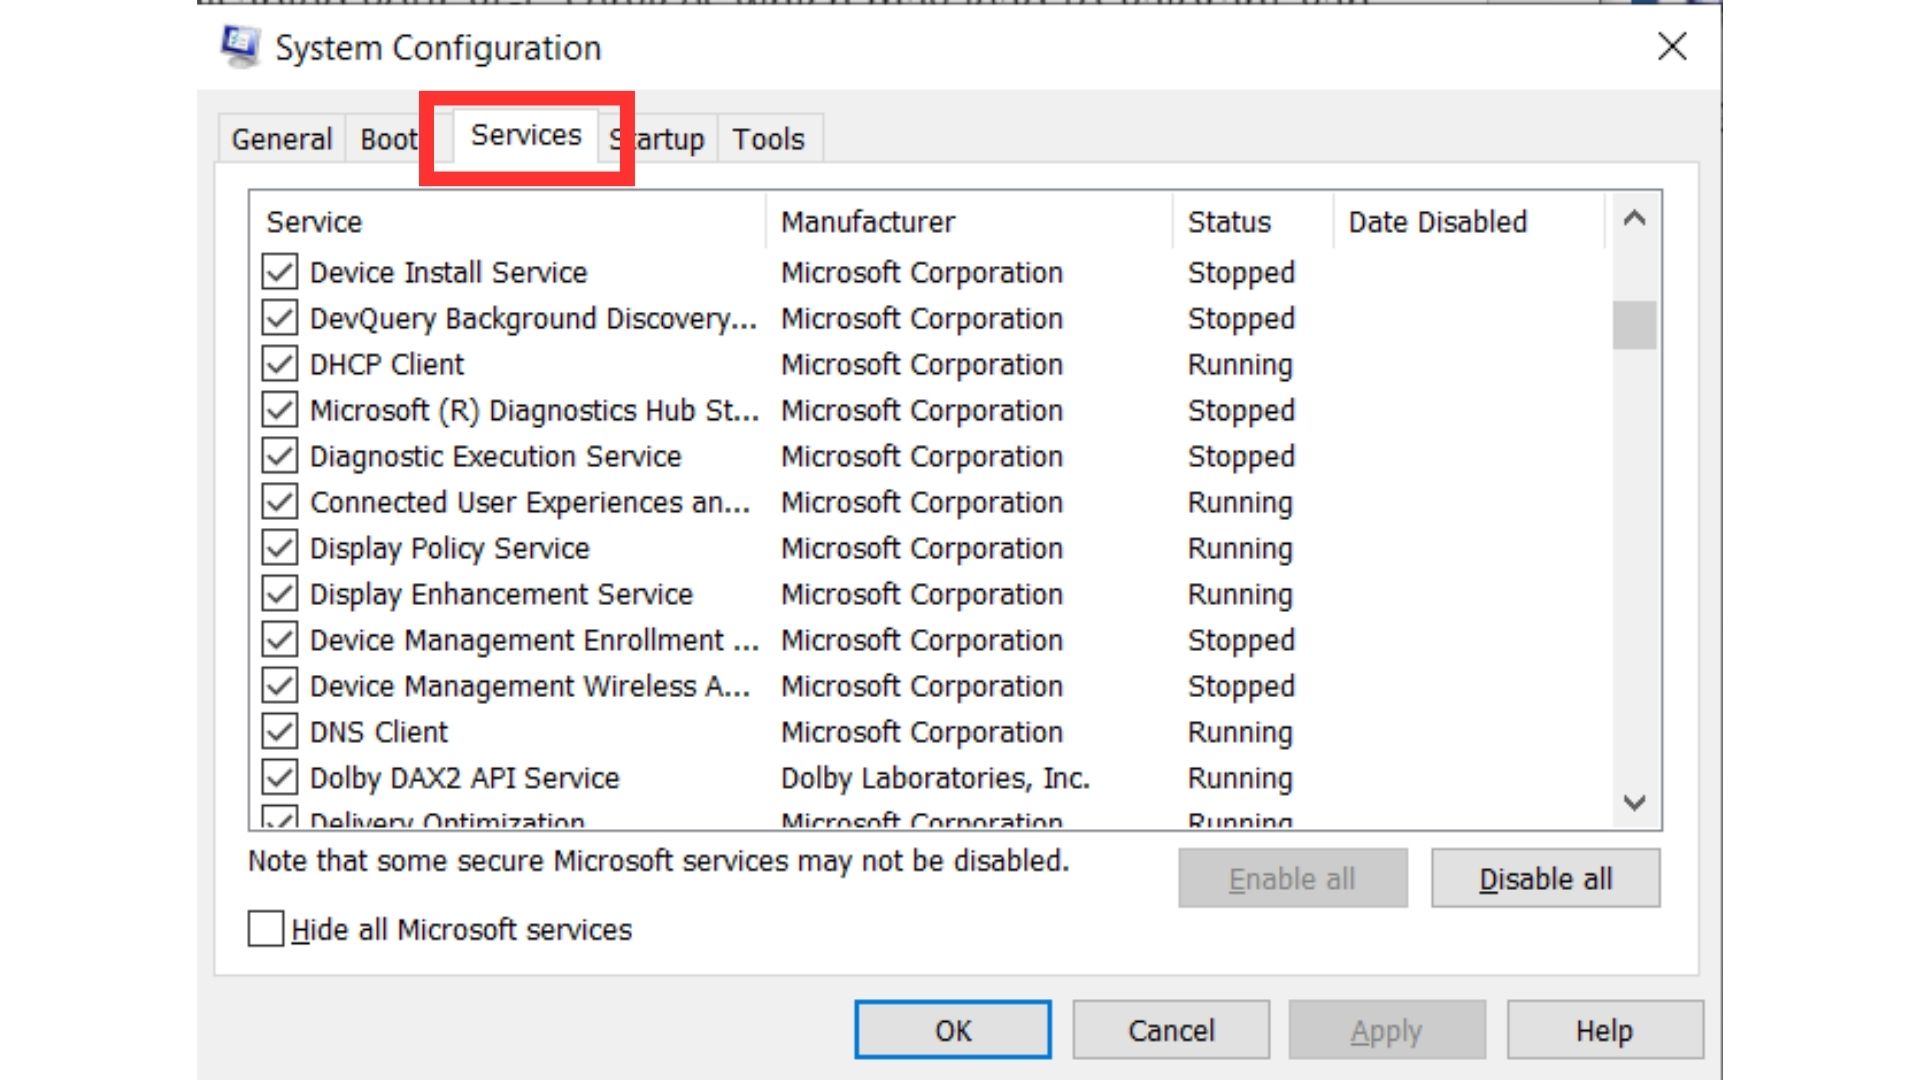
Run Box: “msconfig” (Image Captured by eXputer) - In the System Configuration window, press the Services tab at the top, and locate VGC in the list of services.
Services Tab (Image Captured by eXputer) - After you have located it, mark the check box to enable it and press Apply, and then OK.
- Finally, you will be prompted with an option to restart your computer to apply this change. So, click restart, and you will be done.
Close The Discord Application
Discord is a famously used app to communicate while gaming. It can sometimes lead to problems with Valorant which may cause error Van 1067. So, close the Discord application and then disable it. To disable Discord, right-click the Discord icon and then choose the Quit Discord option.
Update Windows 11
This may be a long shot, but it is worth trying if your error Van 1067 survives the previous solutions. Some users have reported that updating your Windows 11 to the latest version helps eliminate the error. So to do this:
- Press the Windows+I keys to open your settings.
- Then below the Windows Update tab, check for updates and install them to your computer.
Final words
Valorant’s error Van 1067 can be a frustrating issue for players who have updated to Windows 11, but by understanding the issue at hand and its causes, you can easily deal with this problem and continue gaming. You must pay special attention to TPM 2.0 and Secure Boot and ensure they are enabled. You can also try updating your Windows, disabling Discord, and restarting your VGC services. Fixing error Van 1067 can be arduous and frustrating, but with our simple troubleshooting guide, we hope you can solve the issue.
FAQs
The error fix solutions we’ve discussed above apply to Windows 10 as well.
Valorant has many error codes. Errors labeled Van are usually those related to connection issues.
Though it is not permanent, Van 152 can ban your account for up to 4 months.
Check out other Valorant error fix guides covered on eXputer:
- Ultimate Guide To Fix Valorant Error Code 5
- FIXED: Valorant Error Code 39
- Fixed: Valorant Error Could Not Enter Matchmaking
- Valorant: A Critical Error Has Occurred
- FIXED: Valorant Error Code Van 68
- How To Fix Valorant Van 0 Error Code In 2023
Thanks! Do share your feedback with us. ⚡
How can we make this post better? Your help would be appreciated. ✍