Cyberpunk 2077 was initially released in 2020, and saying it had a rocky launch is a vast understatement. From bad performance to game-breaking bugs, it had everything. Cyberpunk 2077 update 2.0 launched alongside the Phantom Liberty DLC which pretty much delivered on the initial promise and more. Since the game’s performance has now improved, we will take it even further with my Cyberpunk 2077 Phantom Liberty 2.0 Best Settings guide.
I’ve benchmarked Cyberpunk 2077 on the following PC specs:
- CPU: AMD Ryzen 3600X
- GPU: Nvidia GTX 1080Ti
- RAM: 16 GB
- Storage: 1TB NVMe SSD
- OS: Windows 10 Pro
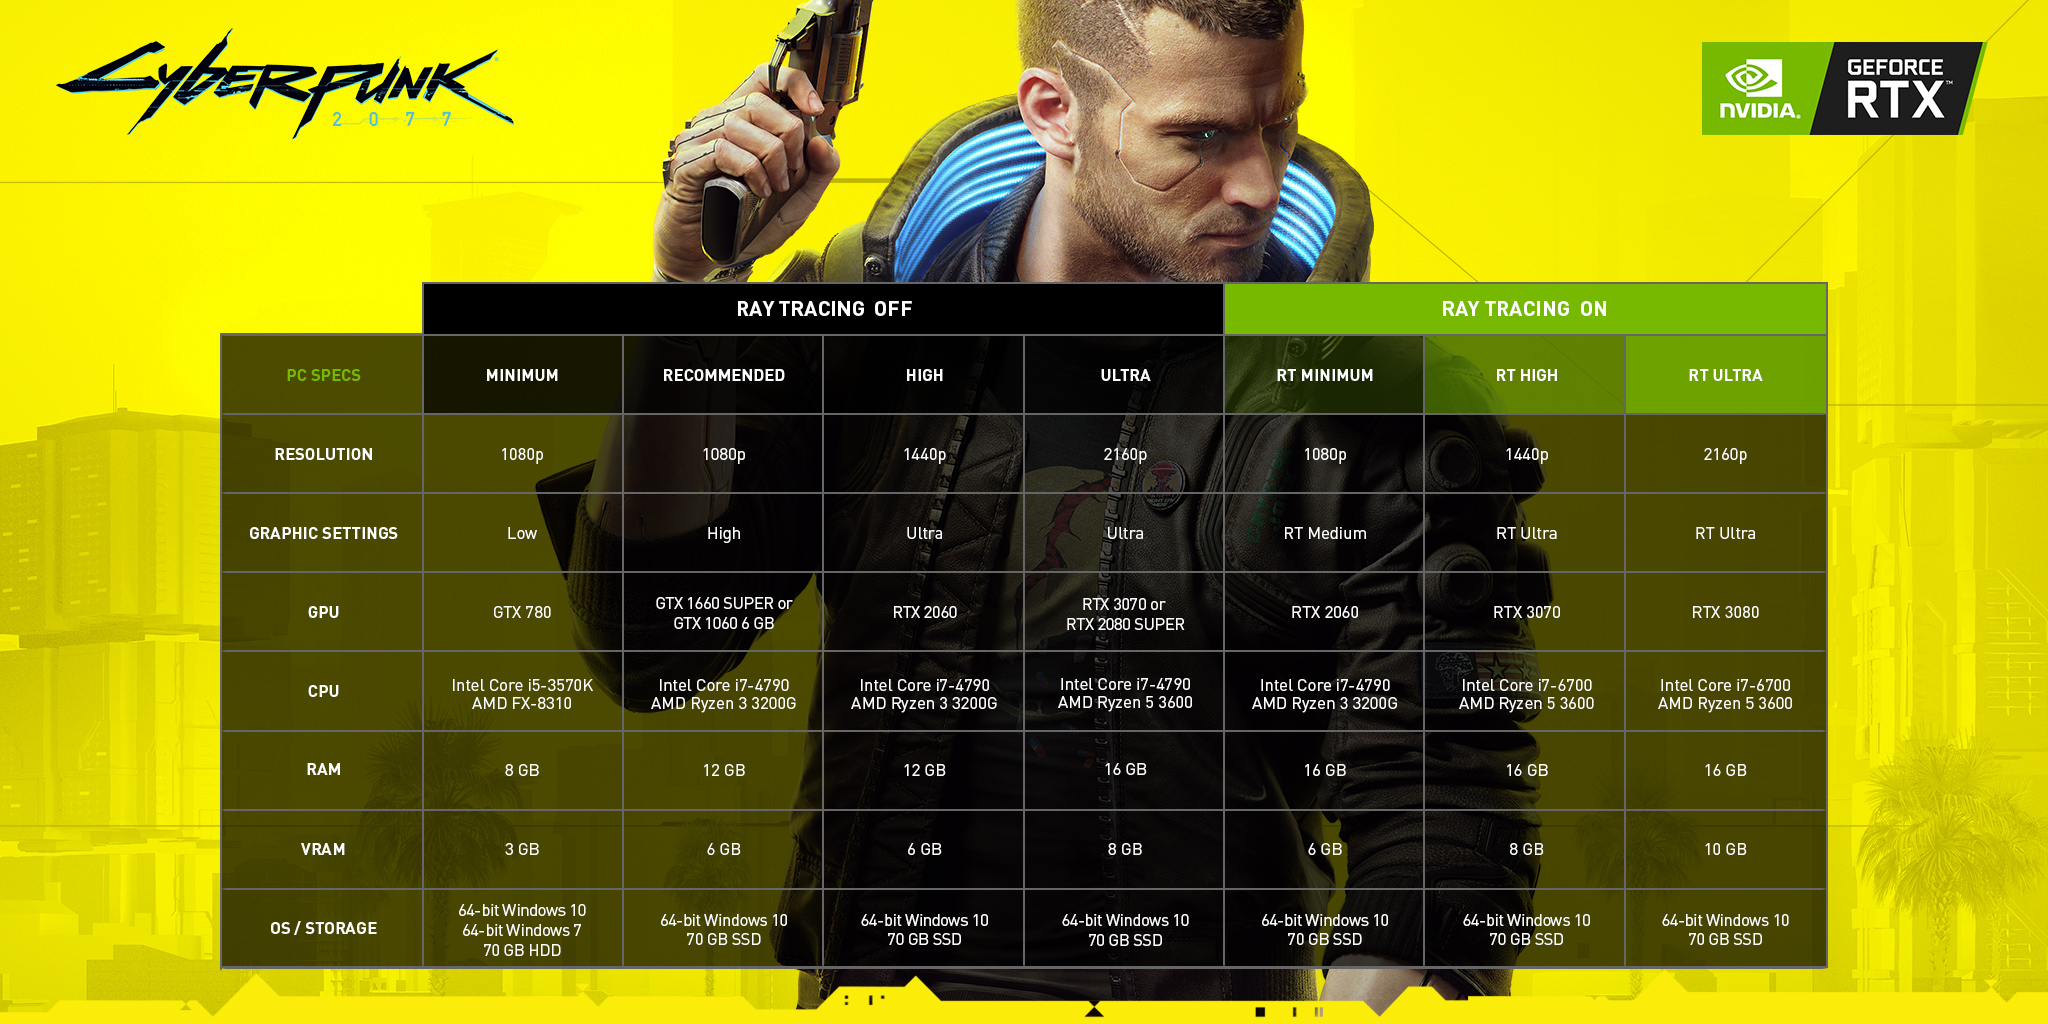
You’ll need at least a Core i7-6700 or Ryzen 5 1600 for the CPU, an Nvidia GTX 1060 or AMD RX 580 or Arc A380 for the GPU, and 12 GB of RAM to run Cyberpunk 2077.
The following settings impact the game’s performance on PC the most:
- Texture Quality
- Contact Shadows
- Cascade Shadow Range
- Cascade Shadow Resolution
- Level of Detail
- Crowd Density
- Ray Tracing
- Volumetric Fog Resolution
Say goodbye to the bug-infested version of Cyberpunk 2077 that we were given back in 2020. There have been several updates in hopes of fixing the game, but Update 2.0 was a significant one (more about it in Usama’s review of Cyberpunk 2077 Phantom Liberty). From improving performance to adding new mechanics, this has it has enough additions to redeem CDPR.
- Why Trust Us: Hammad Ijaz has spent 100+ hours on Cyberpunk, making him highly trustworthy!
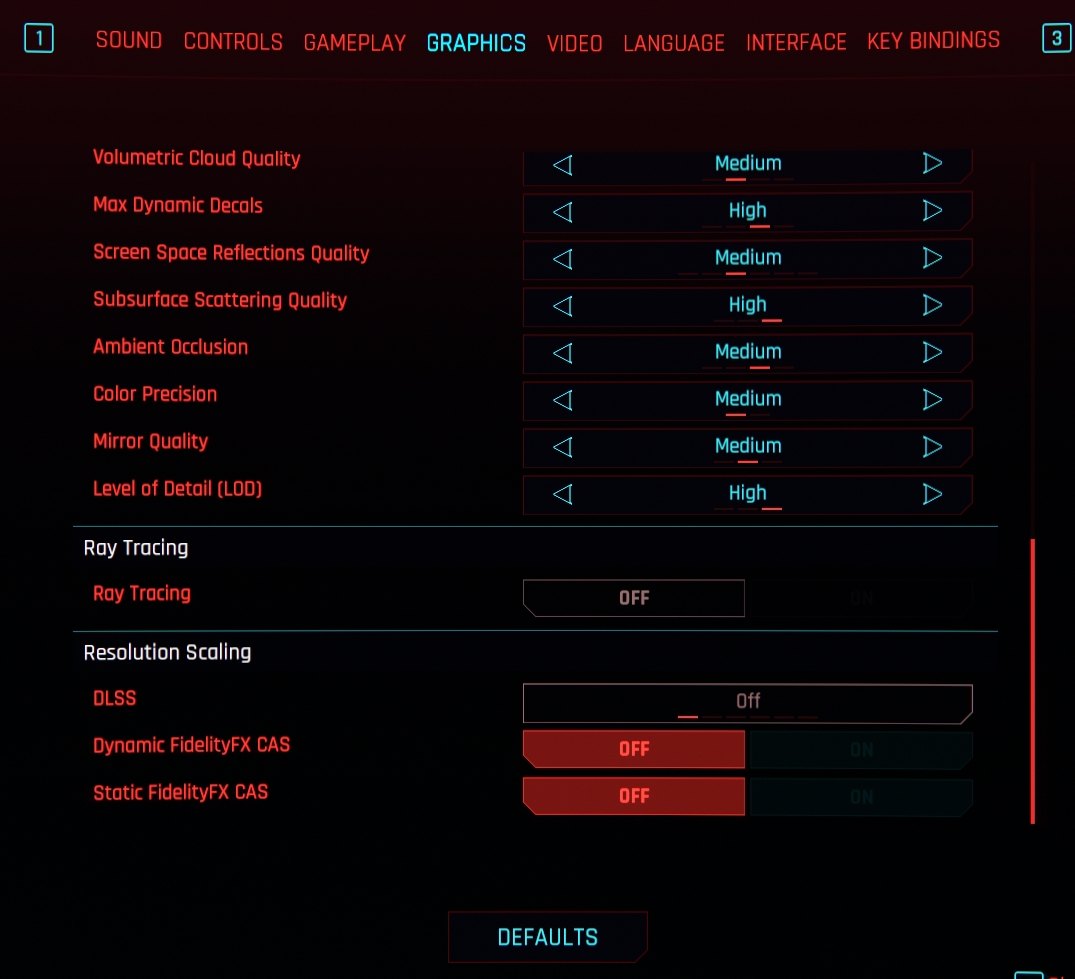
Cyberpunk 2077 Phantom Liberty Best Graphics Settings
| Quick Preset | Custom |
| Texture Quality | Medium |
| Field of View | 90 |
| Film Grain | Off |
| Chromatic Aberration and Lens Flare | Off |
| Depth of Field | Off |
| Motion Blur | Off |
| Contact Shadows | Off |
| Improved Facial Light Geometry | Enable |
| Anisotropy | 16x or 4x |
| Local Shadow Mesh Quality | High |
| Local Shadow Quality | High |
| Cascaded Shadows Range | Medium |
| Distant Shadows Resolution | High |
| Volumetric Fog Resolution | Low |
| Max Dynamic Decals | High |
| Screen Space Reflections Quality | Medium |
| Subsurface Scattering Quality | Medium |
| Ambient Occlusion | Medium |
| Color Precision | Medium |
| Volumetric Cloud Quality | Medium |
| Mirror Quality | High |
| Gamma Correction | 1.36 |
| Level of Detail (LOD) | High |
| Crowd Density | Low |
| VSync | Off |
| Slow HDD Mode | Off |
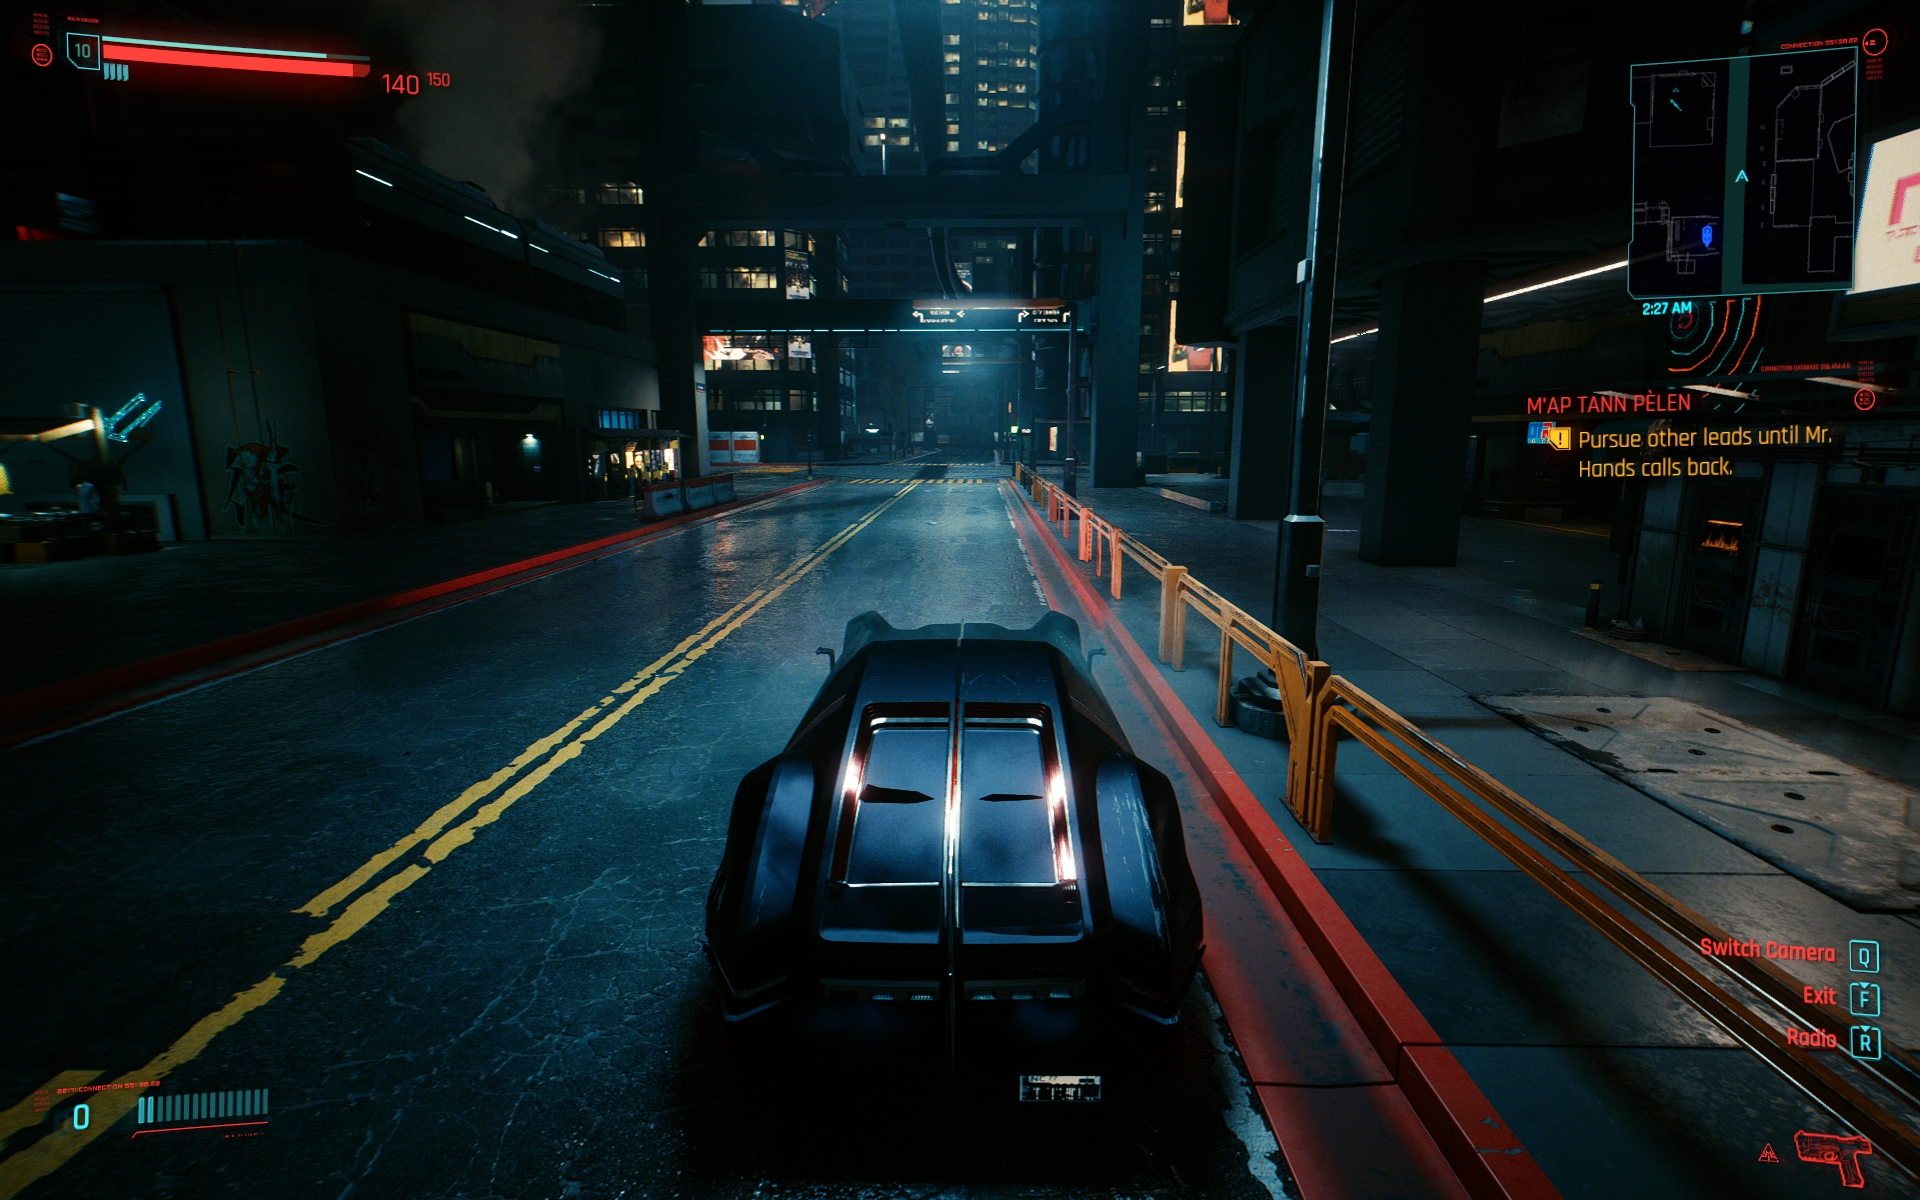
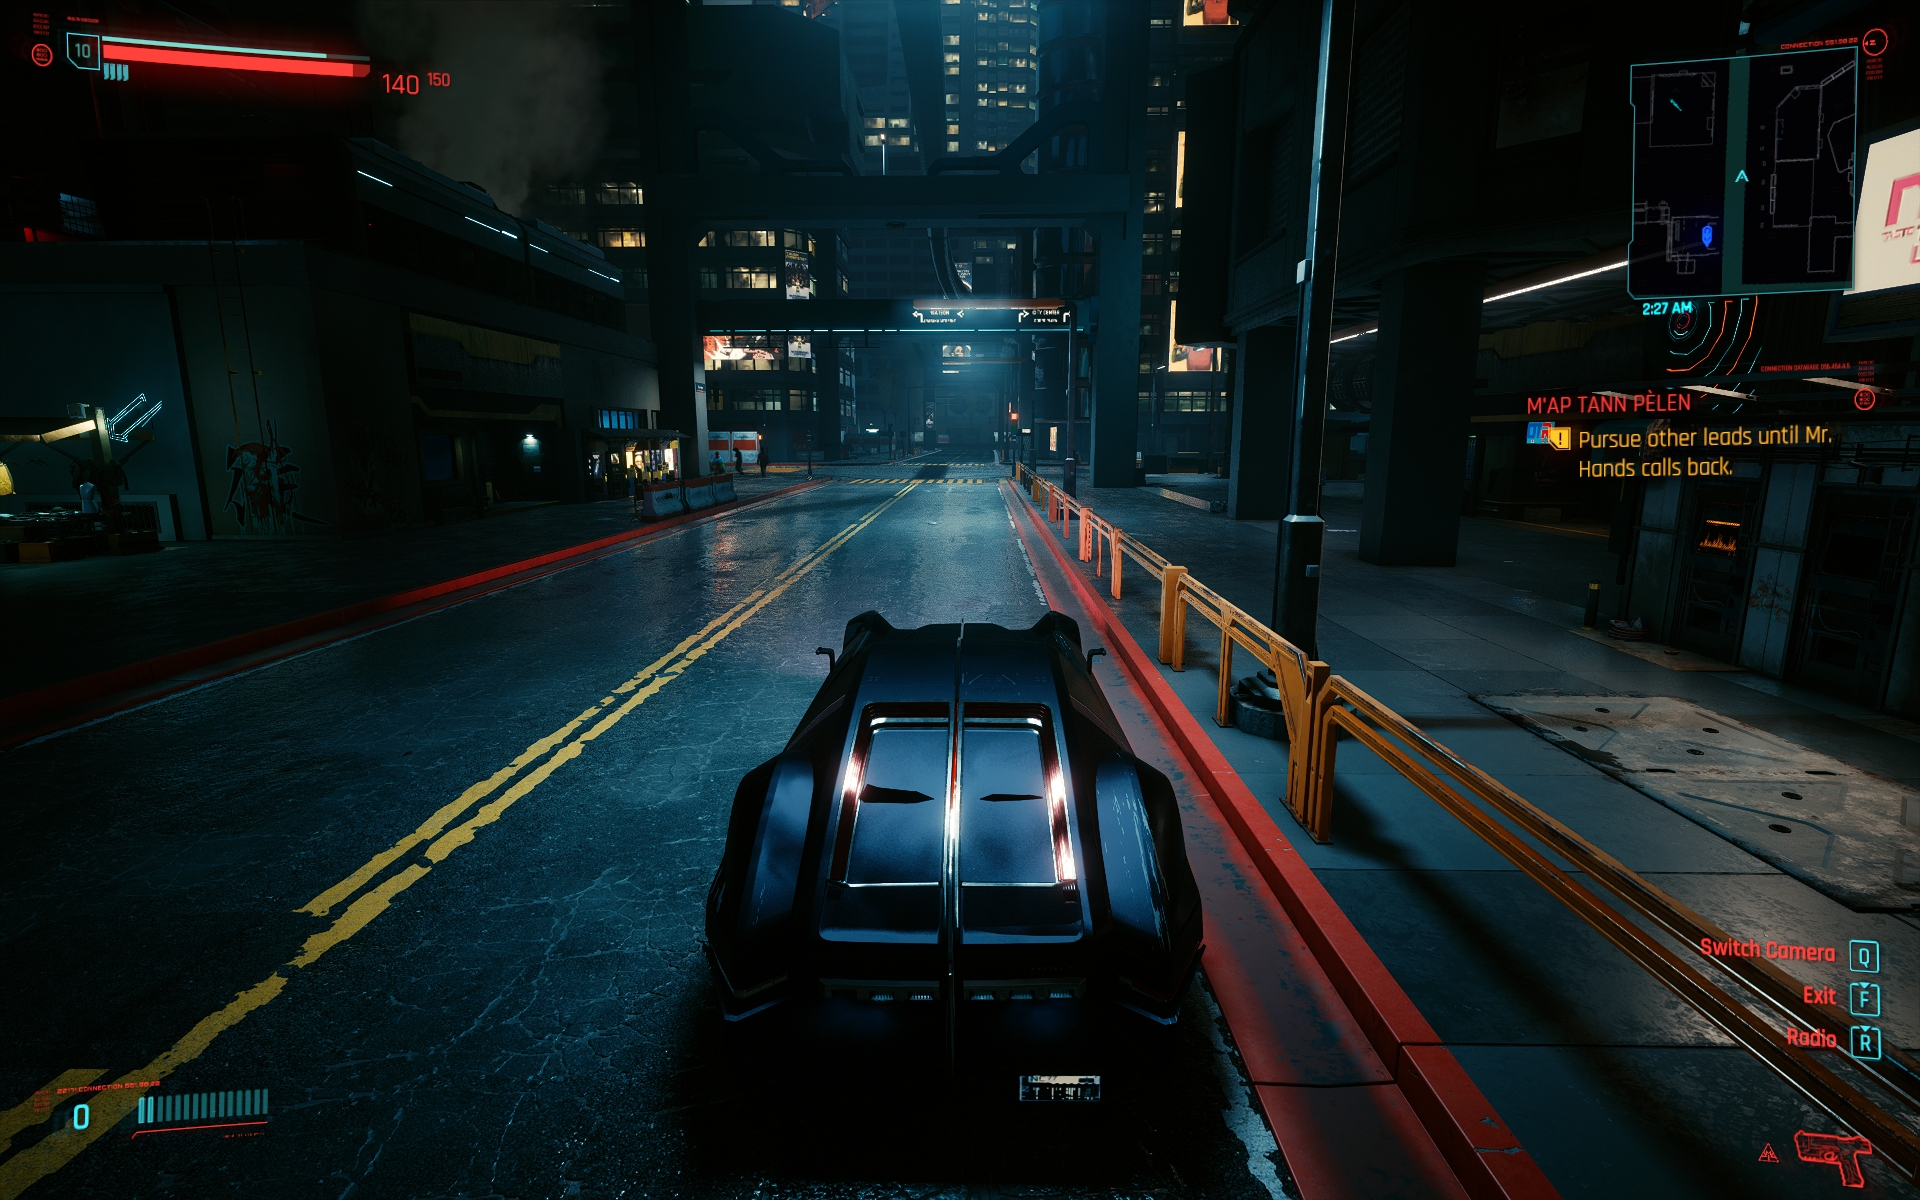
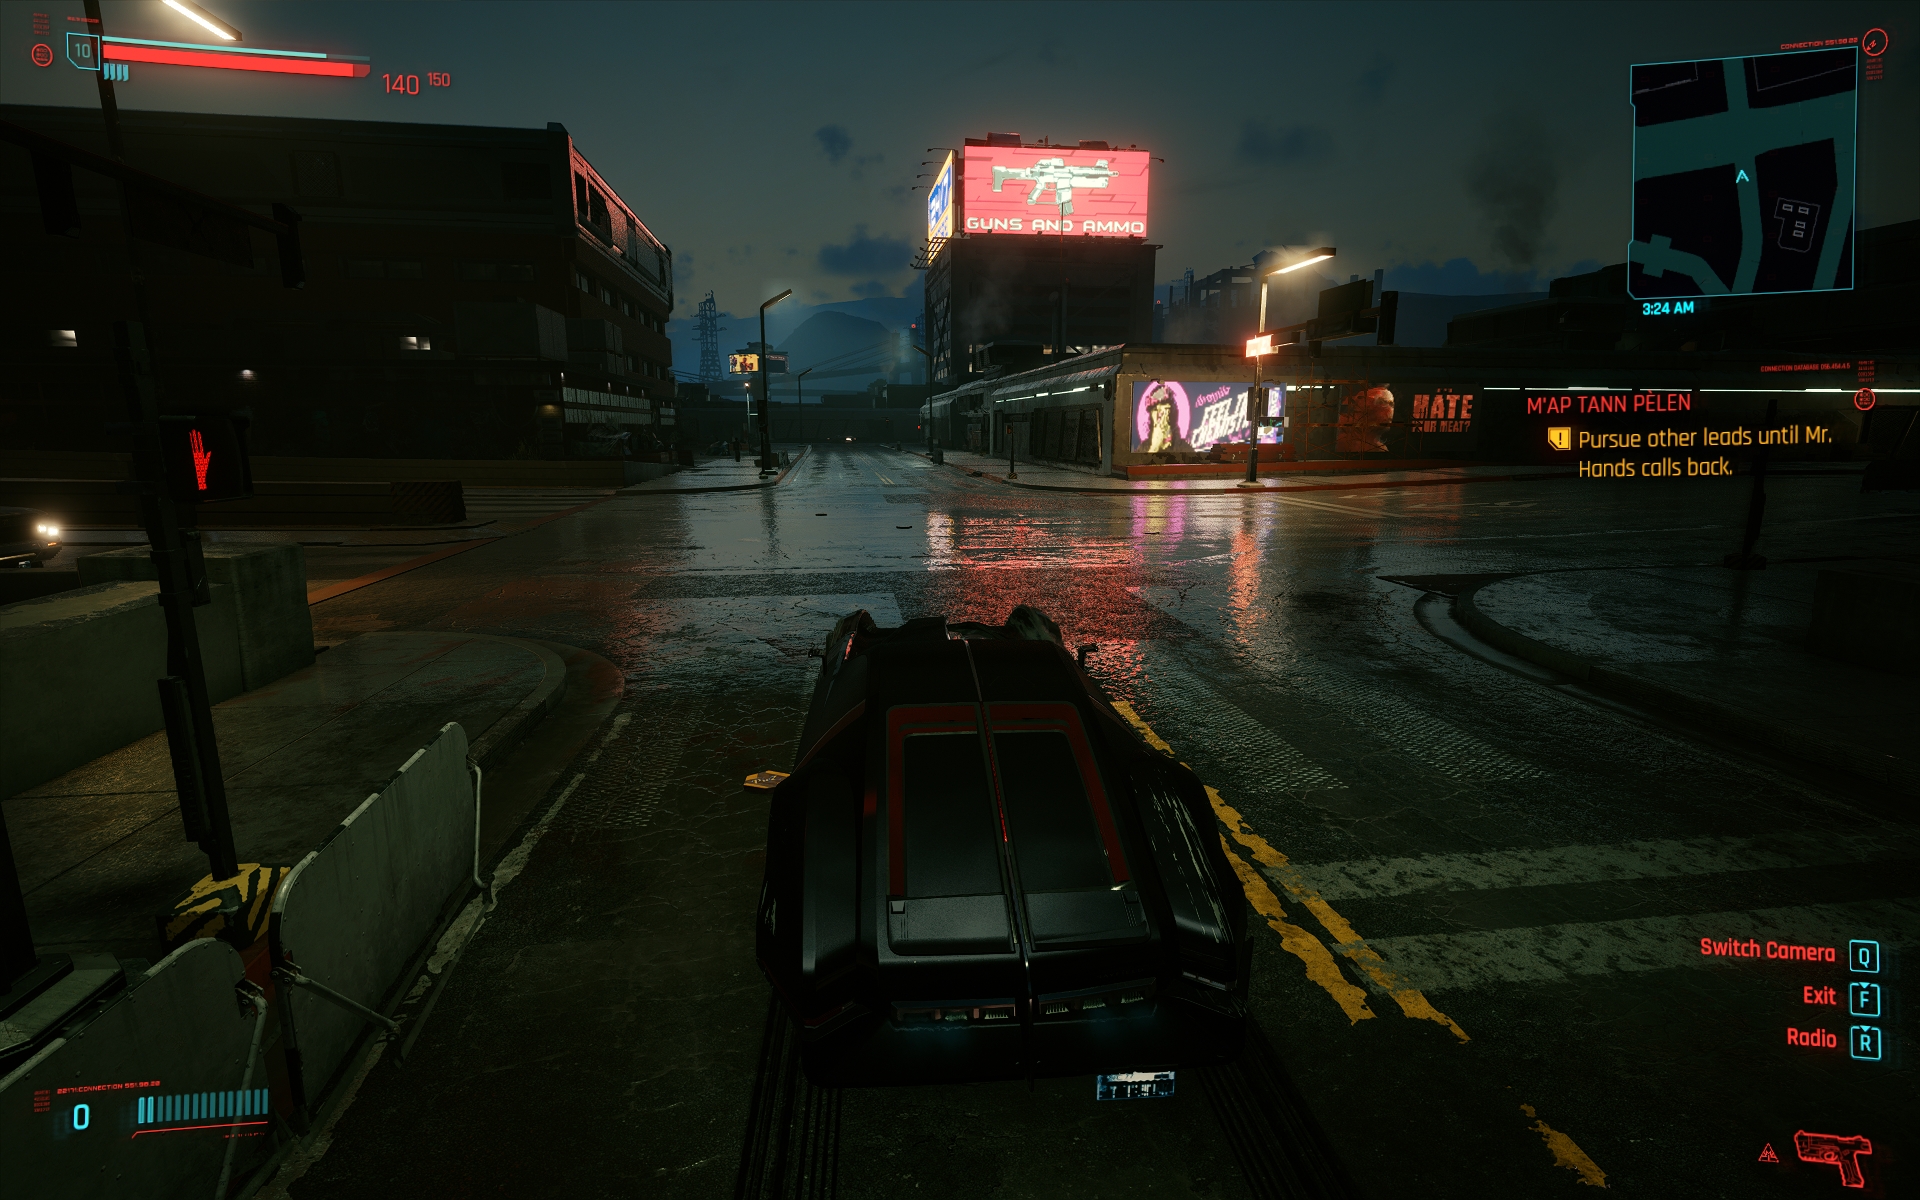
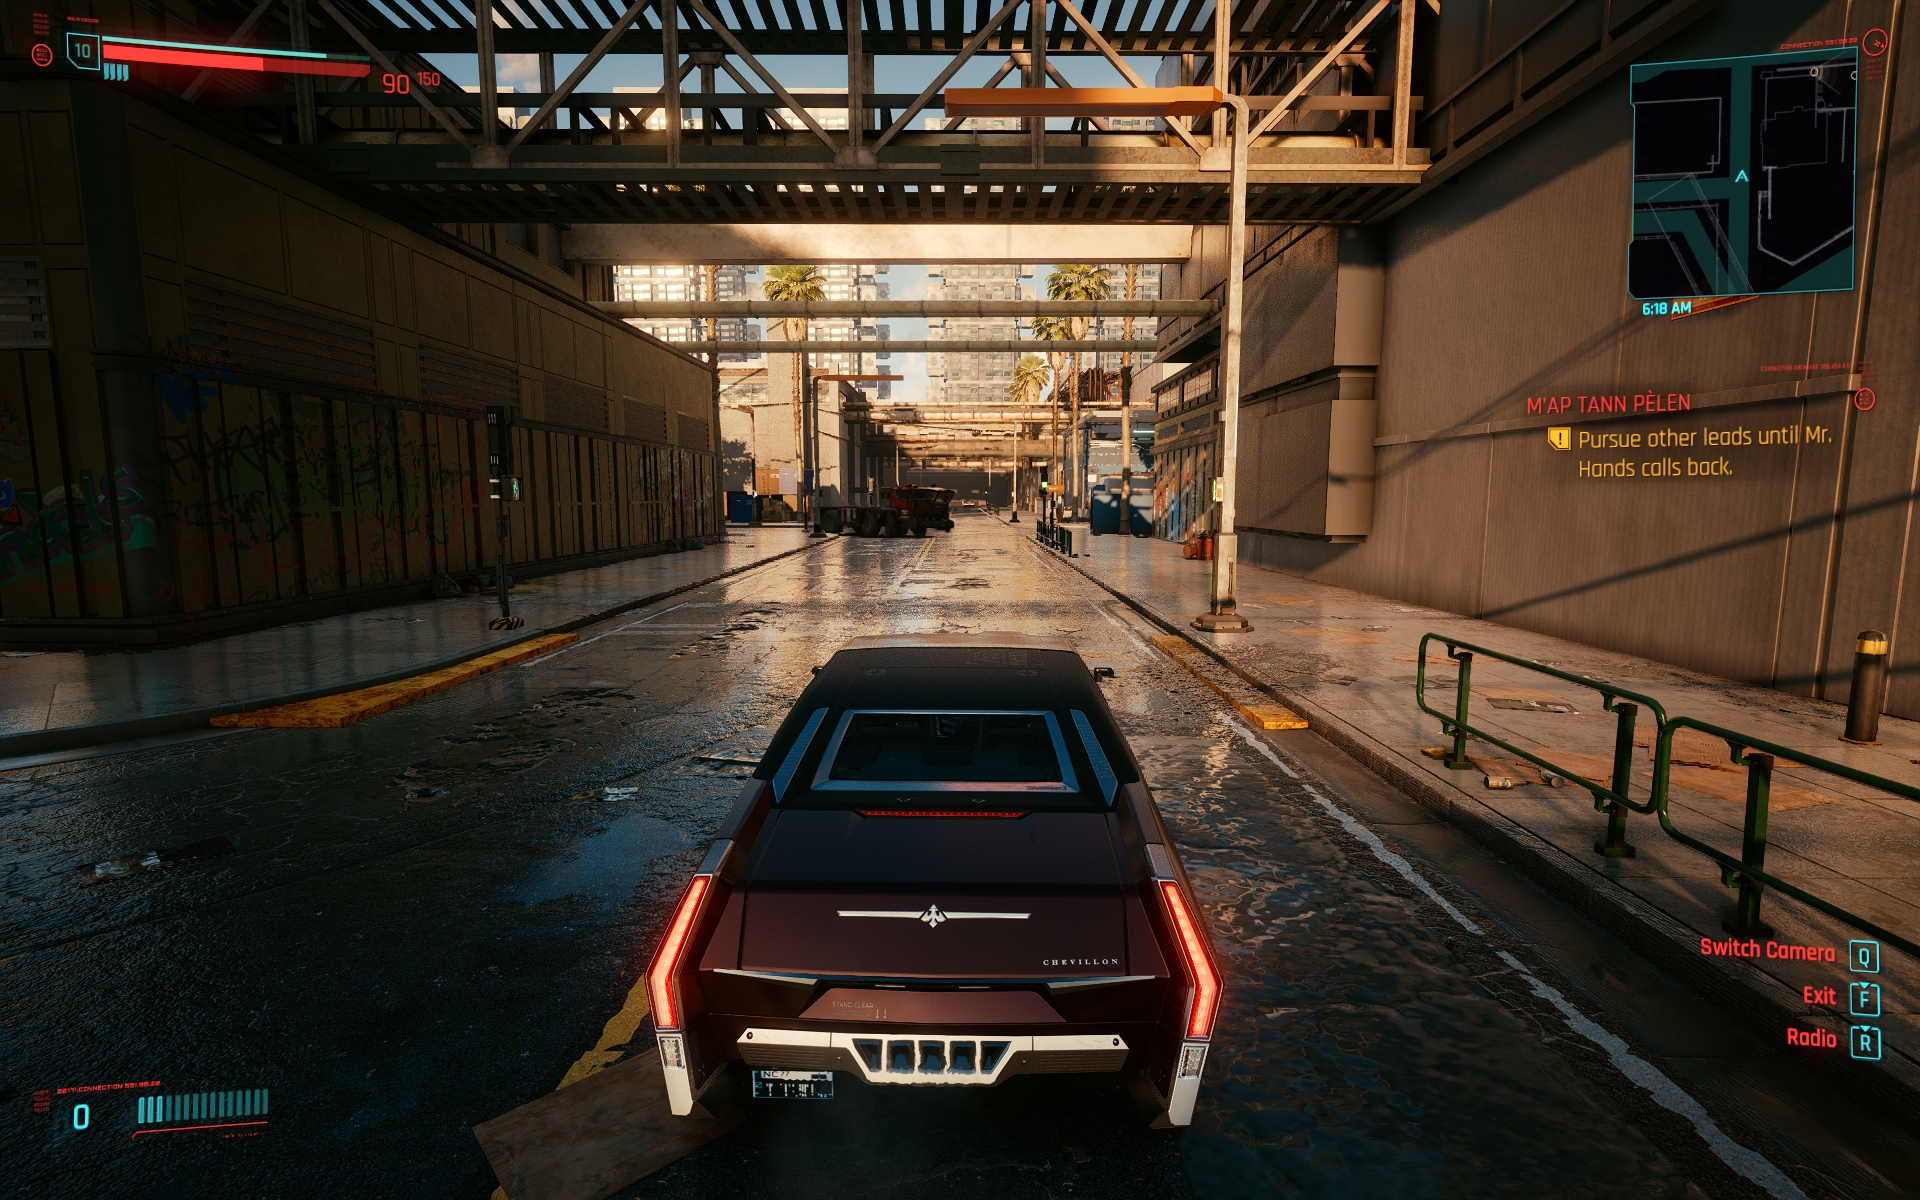
The Core Graphics of Cyberpunk 2077 isn’t that bad. The visuals are stunning, although Night City feels inconsistent in many scenarios. Its visuals are still worth appreciating. The problem with Cyberpunk 2077 Graphics is that they aren’t correctly set up.
I will be explaining the science behind each setting and note their impact on hardware; this will help you understand and calibrate where necessary.
Quick Preset – Custom
Setting Quick Preset to Custom will allow you to configure all the graphics settings to your choice.
Texture Quality – Medium
Note: Impacts both CPU and GPU.
High squeezes a lot of power while showing little to no improvements compared to medium; low genuinely made the game look bad. Medium is most suitable for both visual quality and performance. Also, remember that this option is only available in the Graphics Section while you are in the main menu settings.
Field of View – 90
Anything above 90 is kind of unnecessary for an open-world and shooter game. Moreover, there is a slight impact on performance because, with a higher field of view, you generally see more pixels at a time.
Film Grain – Off
Film Grain is an unnecessary feature that has nothing to do with actual gameplay. It only adds enhancement to cutscenes.
Chromatic Aberration and Lens flare-off
More features that add no substantial value to the gameplay but impact performance.
I checked the difference by enabling Film Grain, Chromatic Aberration, Depth of Field, and Lens Flare at high. In all cases, nothing changed; we only saw a minor improvement in the cinematic sector.
Depth of Field – Off
Depth of Field ensures that distant objects are blurred, which is silly if you think about it. Sure, the graphics look a bit better, but it’s not worth it and looks terrible.
Motion Blur – Off
There is no point in enabling Motion Blur inside a first-person shooter and open-world game. The surroundings are blurred, combat becomes difficult, and you will lose significant fps.
Contact Shadows – Off
Note: Contact Shadows Impact: GPU-related.
Although the game says, It is “responsible for enhanced shadow rendering and adding detail that is not available in normal settings.” This ultimately means self-shadowing for the characters. We at eXputer didn’t notice any difference in terms of graphics and frames. You can also enable it; the performance difference is nonexistent.
Improved Facial Light Geometry – Enable

Note: Improved Facial Light Geometry Impact: Both CPU and GPU.
Cyberpunk 2077 relies a lot on its story, and you are likely to encounter tons of people with numerous cut-scenes. Keeping this enabled will add further enhancement to facial animations. The impact on performance is zero to nothing.
Anisotropy – 16x or 4x
Anisotropic Filtering always makes a noticeable difference, while its performance impact on modern GPUs is negligible. If you have a low-end PC, you can also go with 4x; the difference isn’t that big.
Local Shadow Mesh Quality – High
Note: Optimum Impact on both CPU and GPU.
Keeping this high made a noticeable difference, while performance impact was nominal. Local Shadow Mesh Quality differentiates from the standard Local Shadow because it works around the cast of shadow mesh.
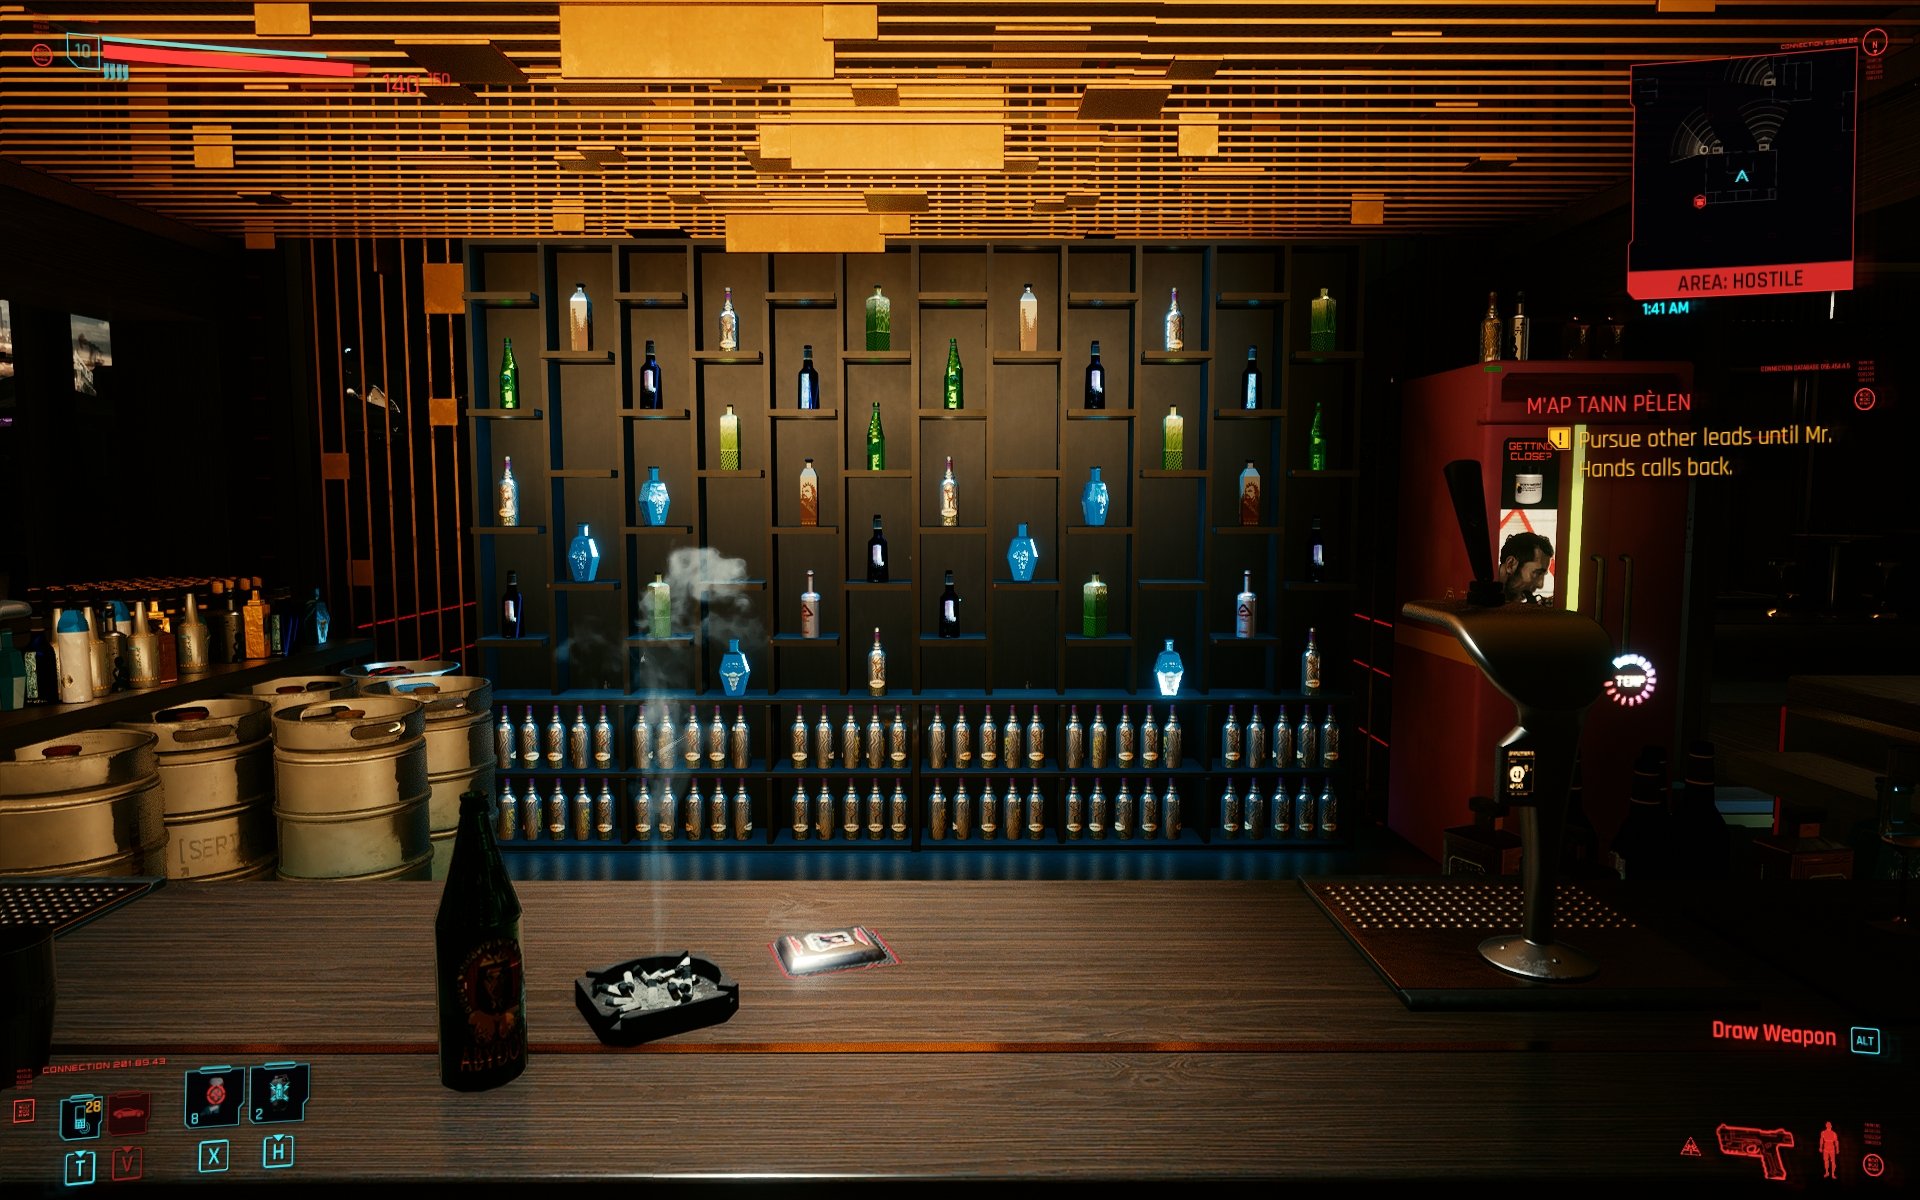
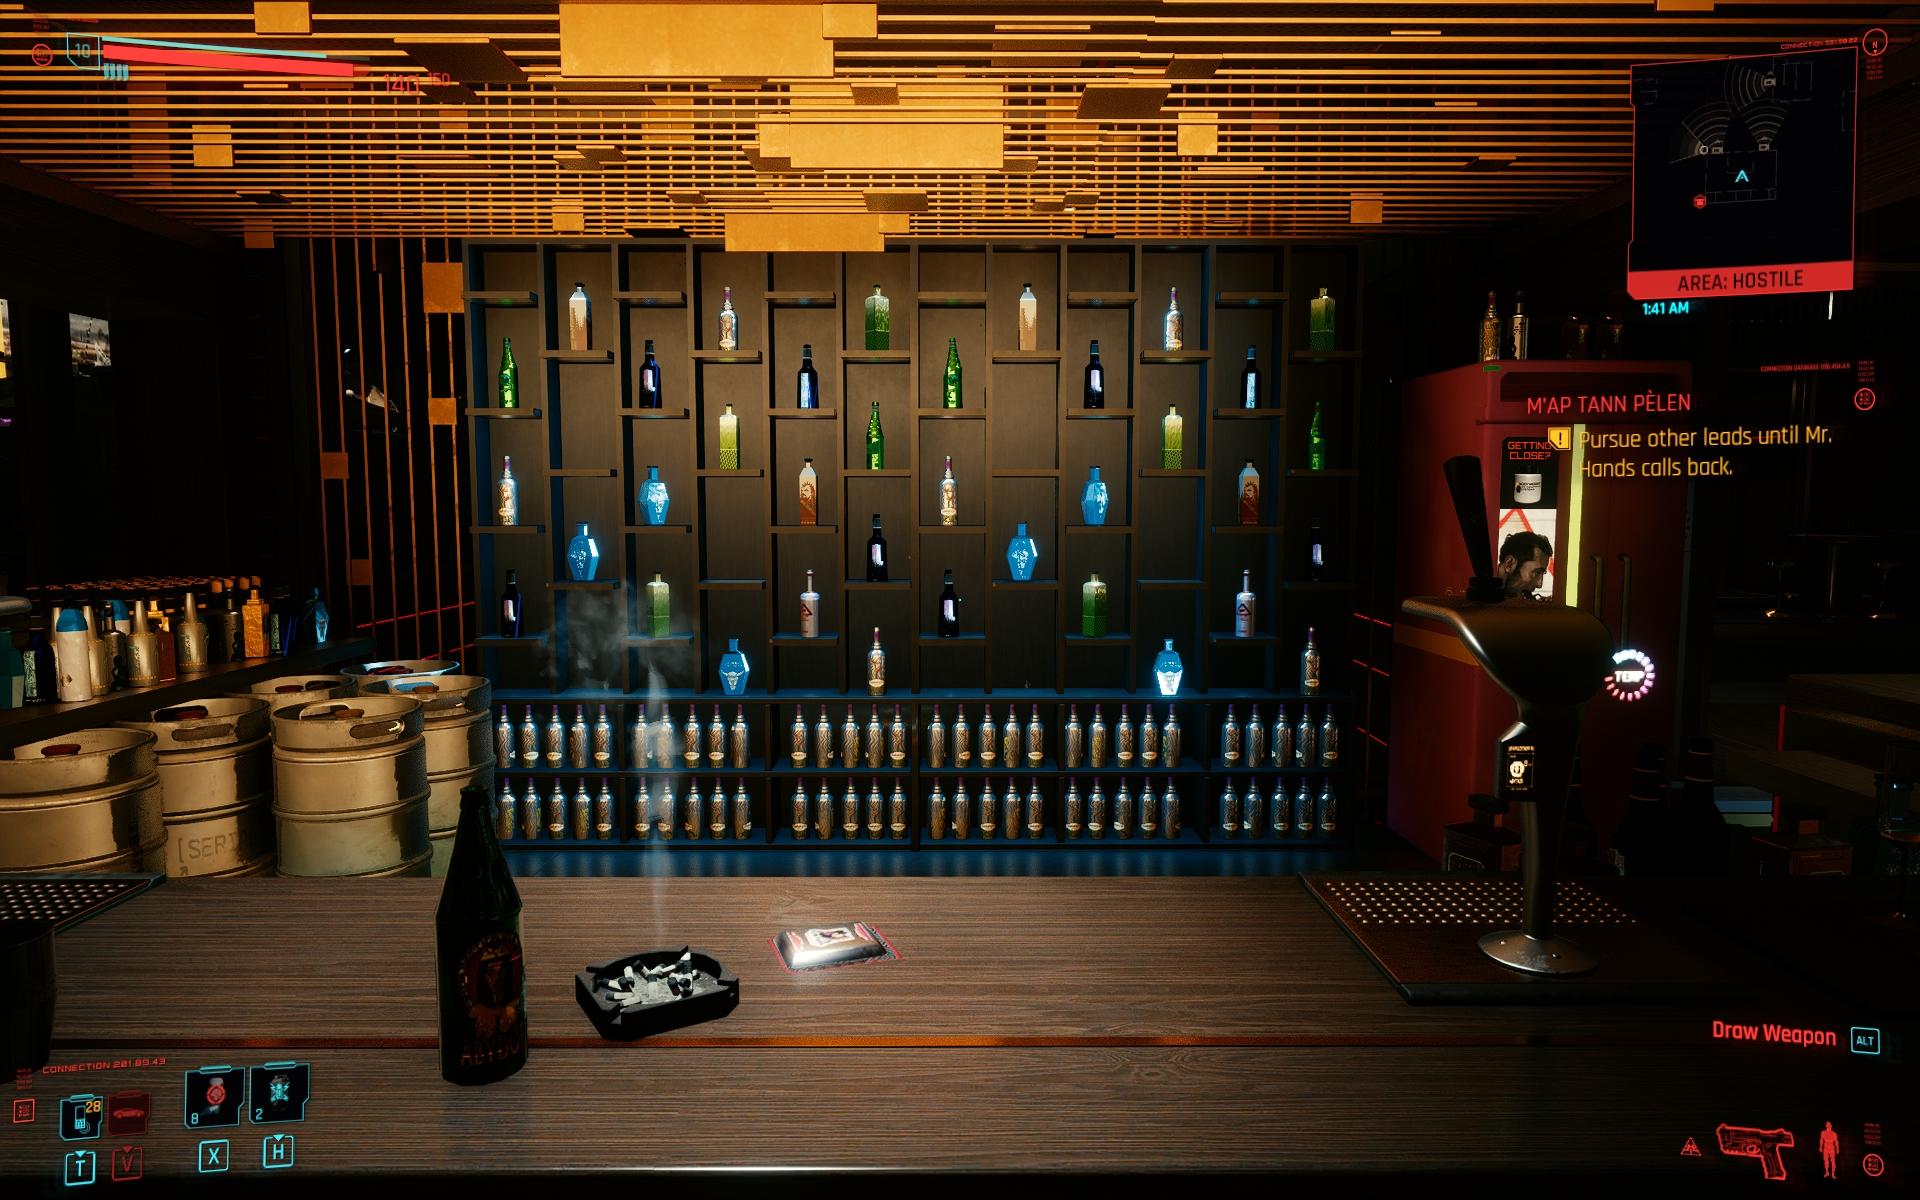
Local Shadow Quality – High
Note: High Impact on CPU.
When keeping this low, Nigh City always looks bright with Artificial light everywhere. Enabling Local Shadow Quality and then keeping it high brings a new level of realistic rays that make the visuals look stunning.
Cascaded Shadows Range – Medium
Note: Cascaded Shadow Range Impact: Highly CPU Intensive.
Although we are keeping other shadows high for better visuals, the cascaded Shadows Range will be limited to medium because it does not add a lot of value and only works in instances where the shadow is directly being glanced by the sun.
Distant Shadows Resolution – High
Suppose you keep Distant Shadows Resolution at Low, which is the only available option. In that case, the shadow quality will drop dramatically, and most of the time, you will notice highly sharp shadows. We recommend keeping it high for good-quality shadows that blend properly in Night City.
Volumetric Fog Resolution – Low
The Volumetric Fog Resolution’s job is to make the air particles in the surrounding atmosphere high quality. We tested this at various places, and there was no difference, while a 10% performance loss was noted.
Max Dynamic Decals – High
Doesn’t affect FPS much have given additional textures to vehicles and in-game objects
Screen Space Reflections Quality – Medium

Note: SSR Impact: Both CPU and GPU.
The best balance between all of the SSR settings is Medium. I noticed that on Ultra and Physcho, there was too much grain in the image quality, with extremely sharp pixels that gave us a headache.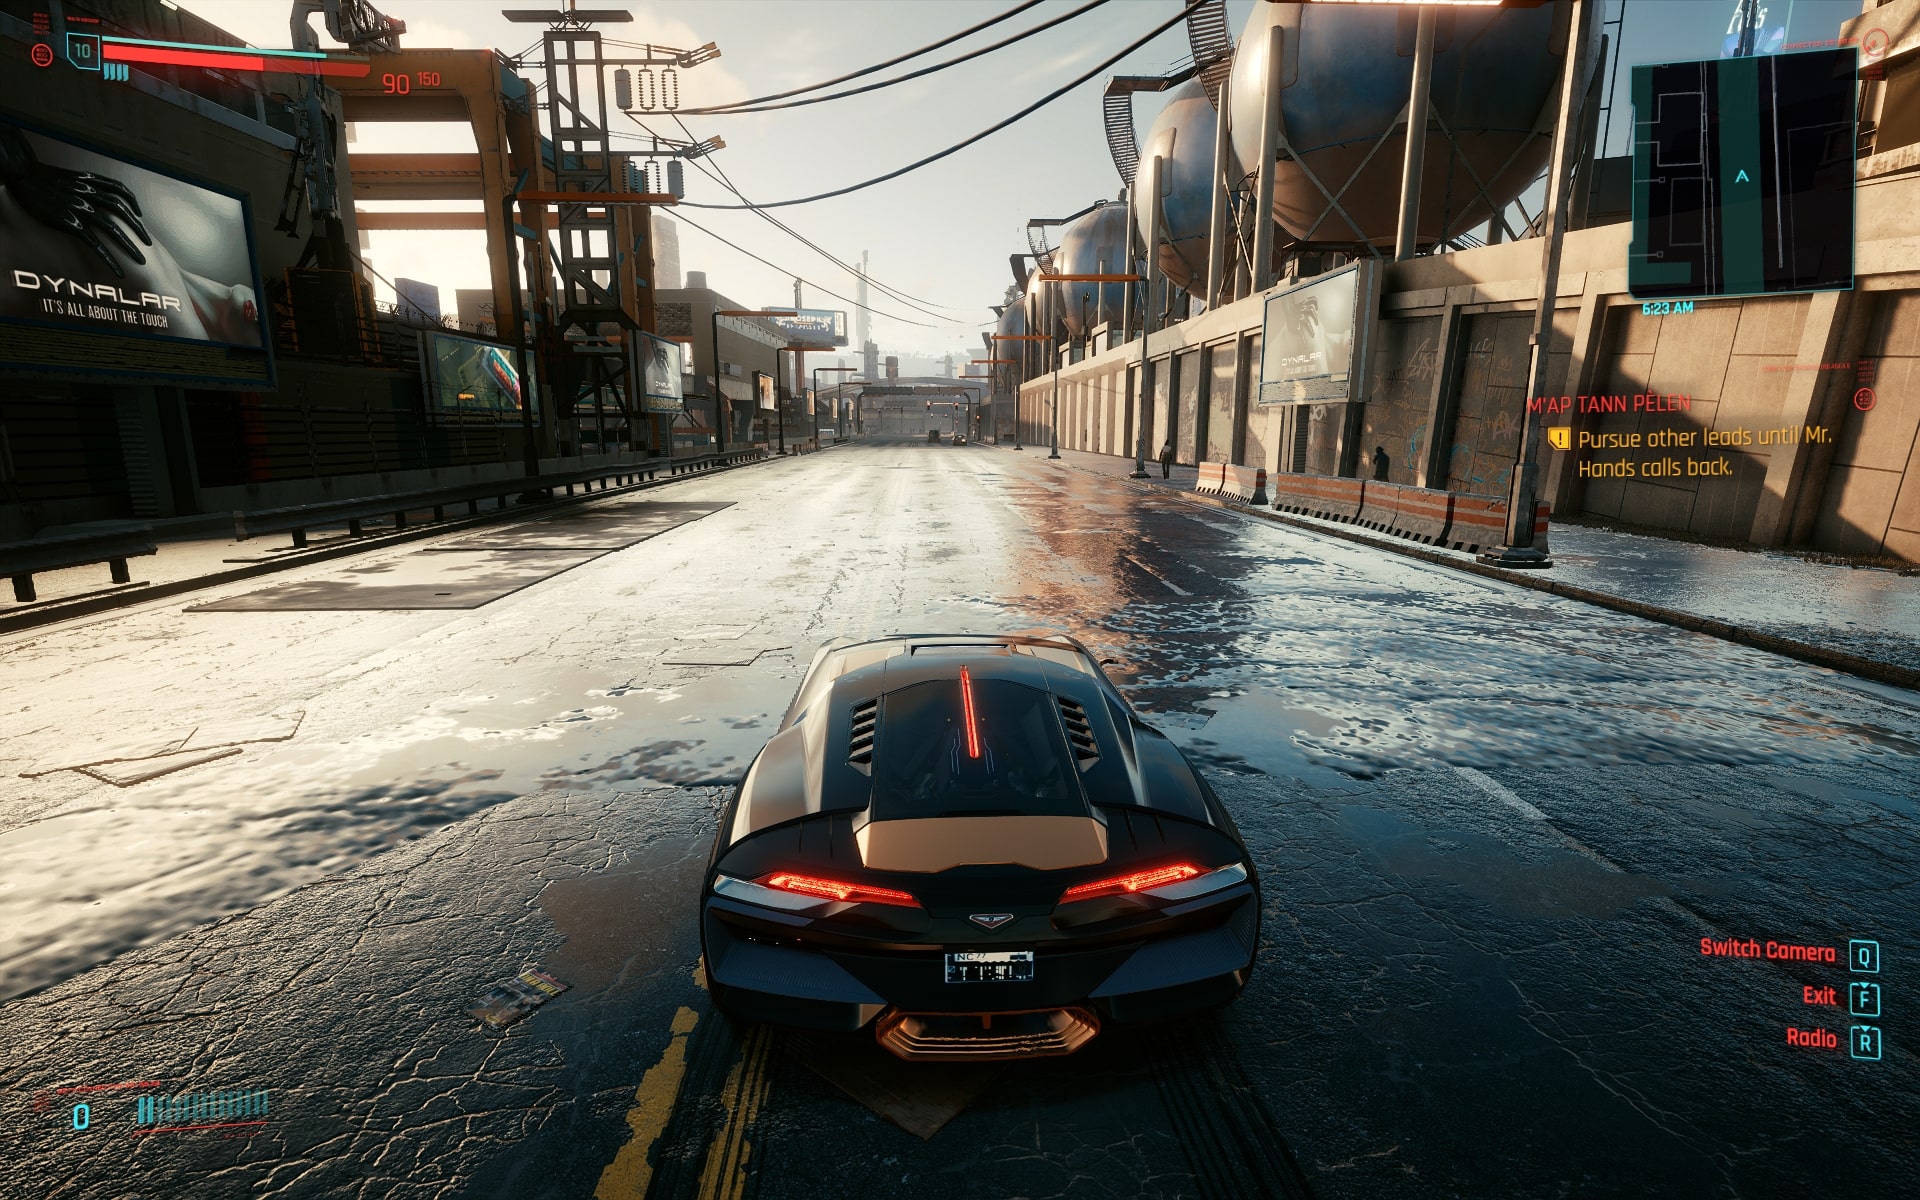
Subsurface Scattering Quality – Medium
There is no noticeable impact on performance and slight improvement across scenarios where light is reflected on NPC’s and player’s skin.
Ambient Occlusion – Medium
The Ambient Occlusion setting holds a lot of importance in Cyberpunk 2077 Graphics Settings. It adds lots of natural shadows, creates a more ambient environment, and works around the sampling. Likewise, its impact on performance is high.
On medium, it perfectly balanced graphics and performance. Switching it high cut down my average FPS by 15%.
Color Precisoin – Medium
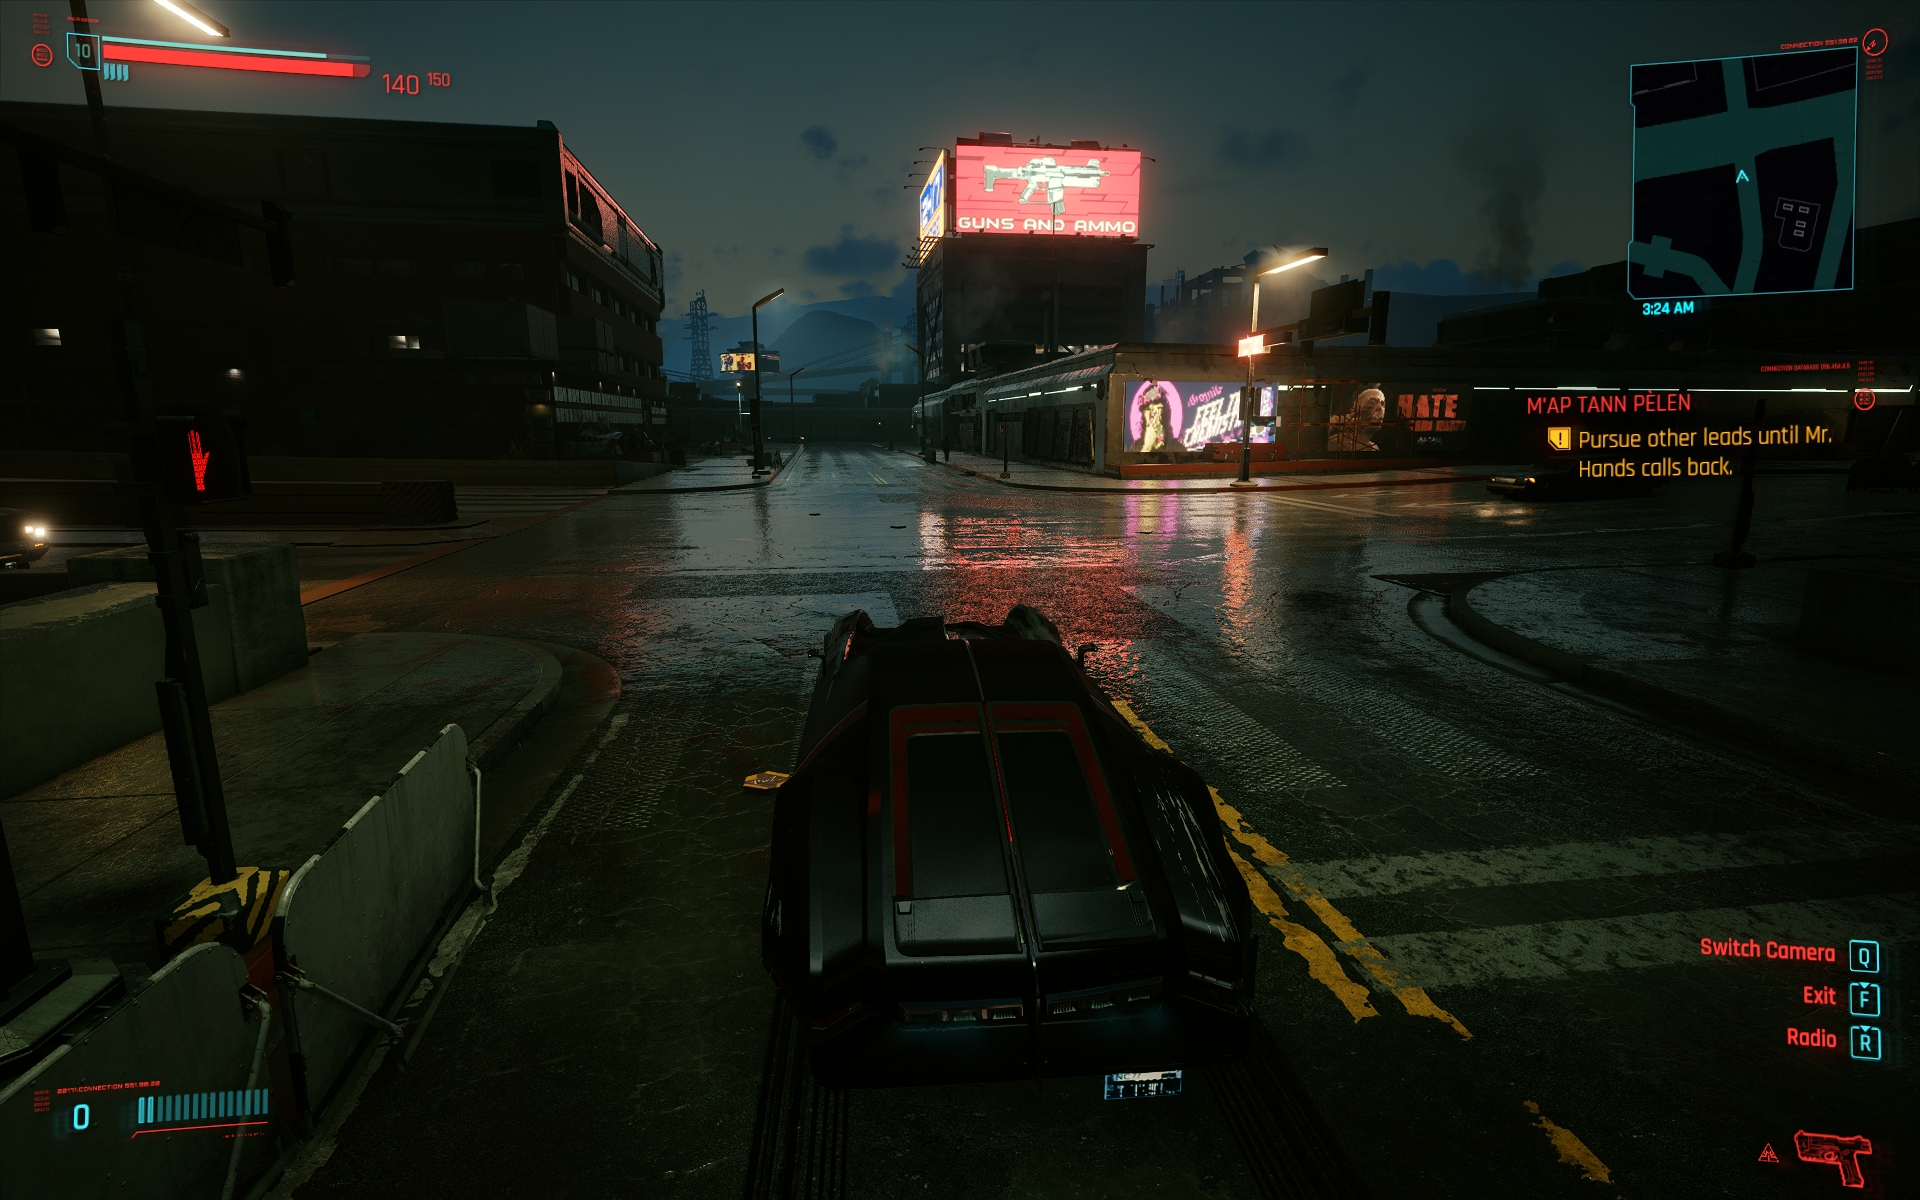
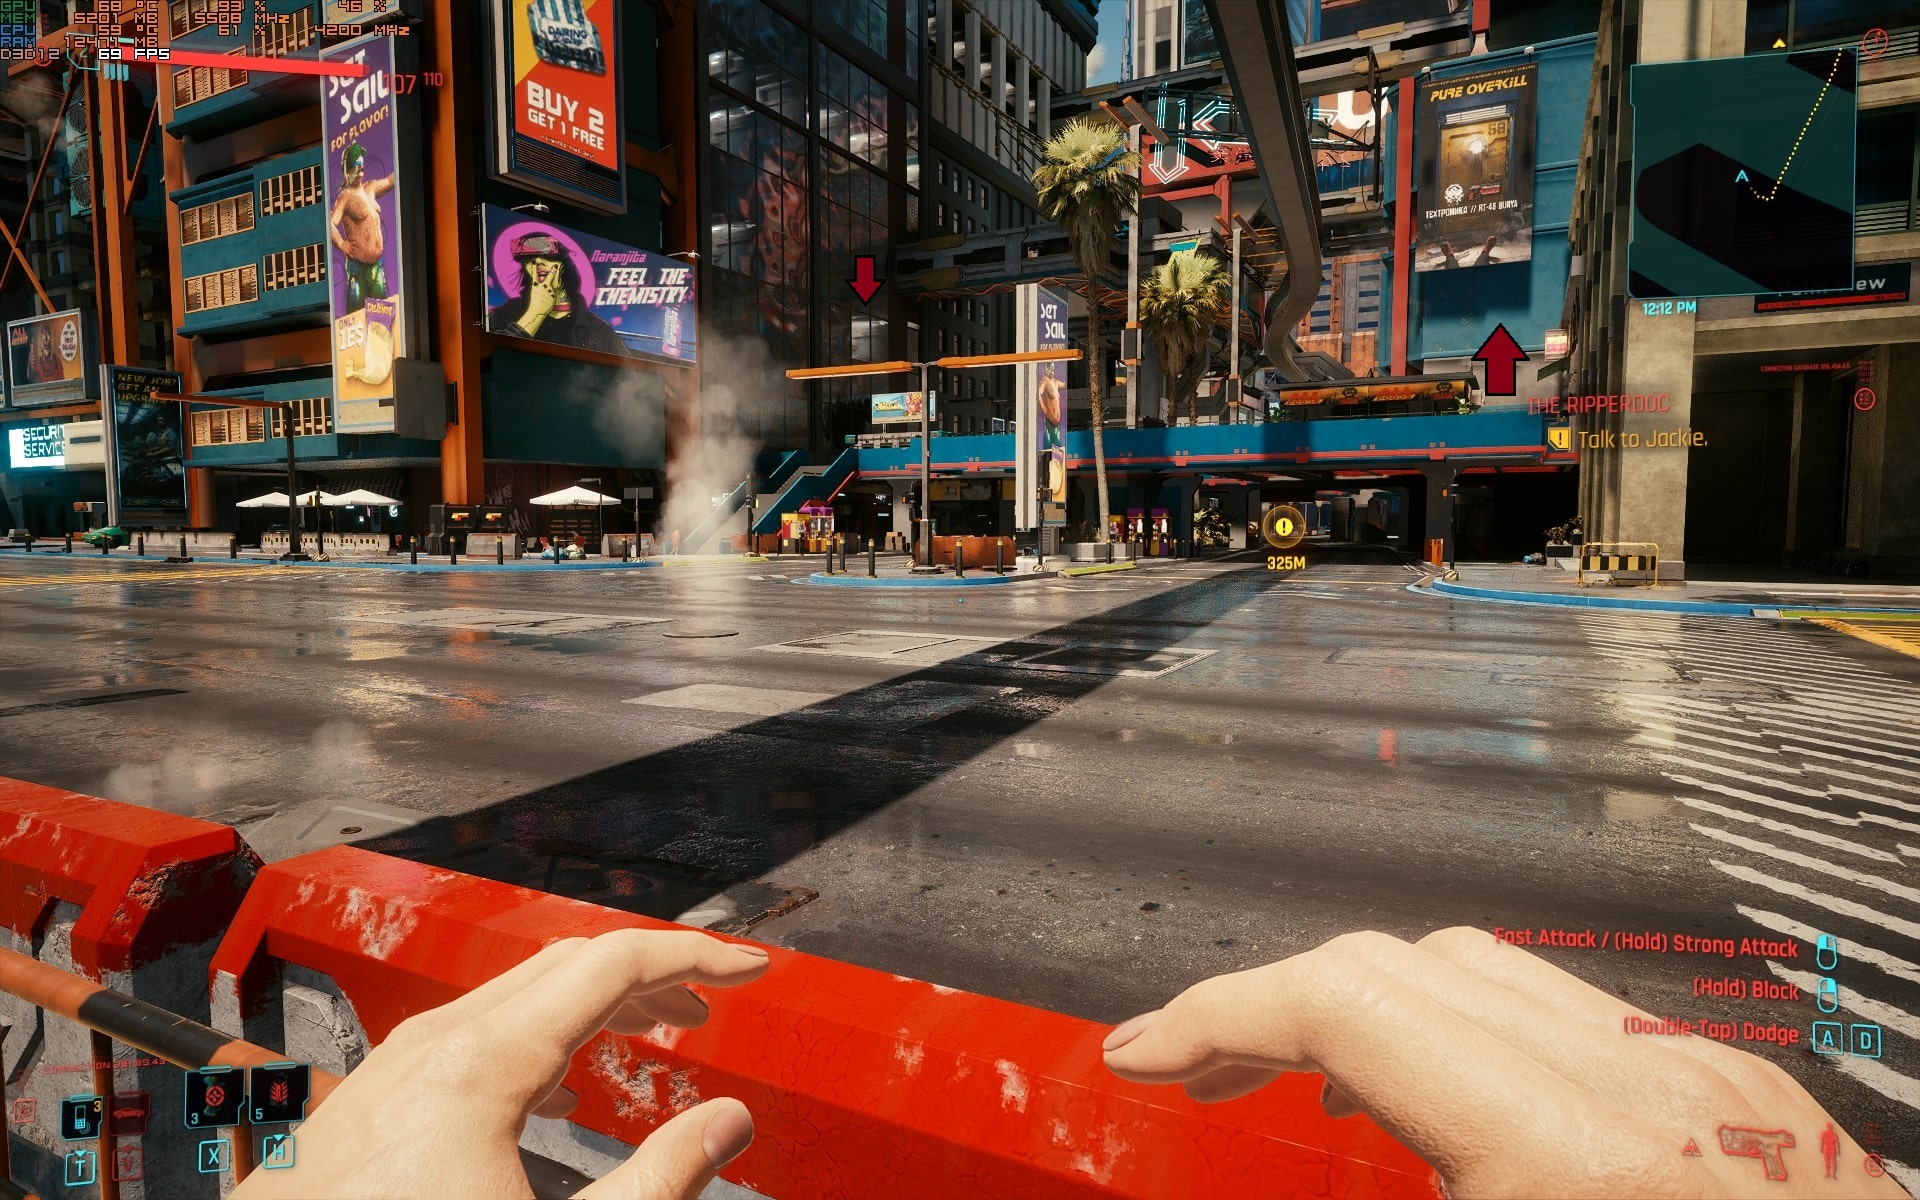
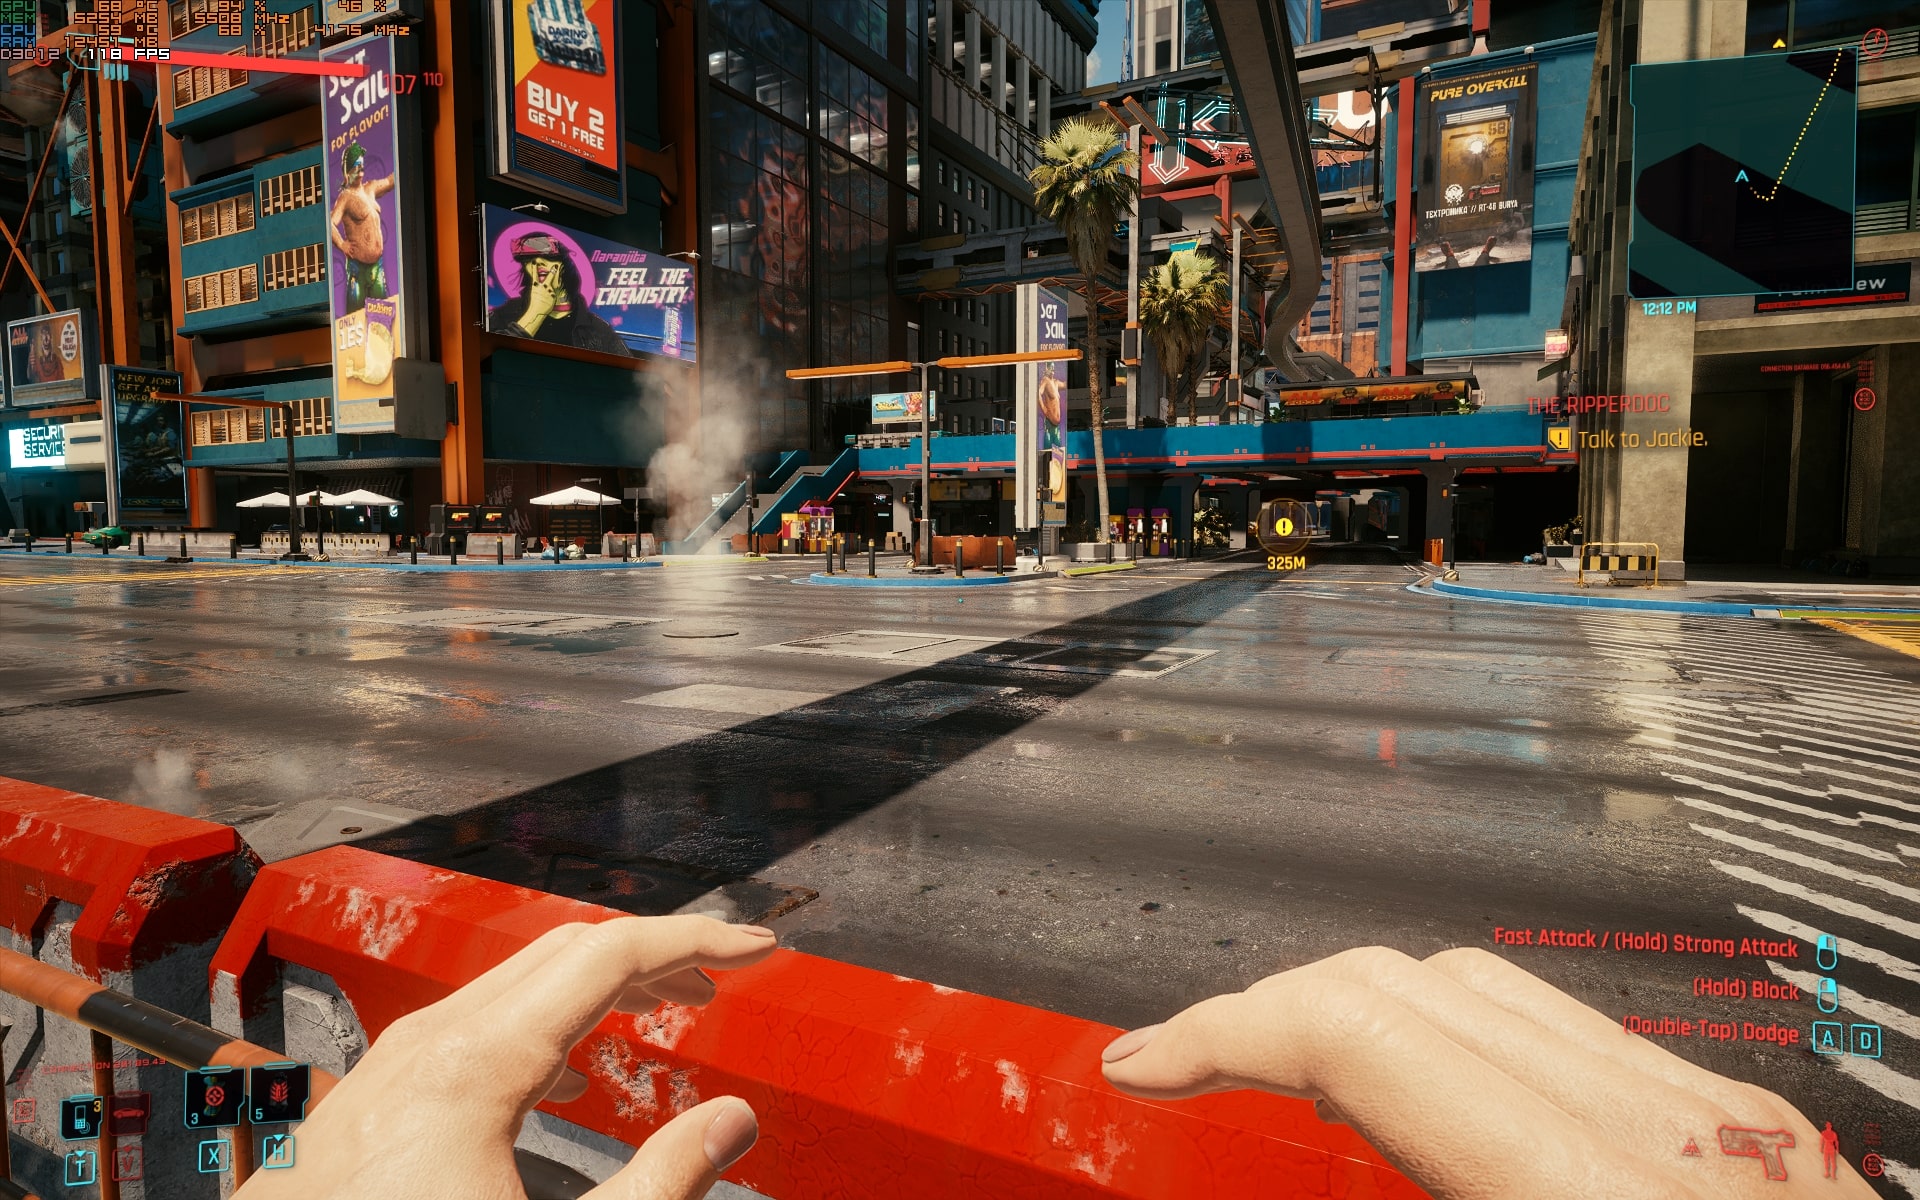
The overall difference in color collaboration and gradient is barely noticeable. In fact, It took us a decent amount of time to really spot the difference. The impact on performance was also slight, but what matters here is that there was no graphical difference. Look at these photos we captured in the most colorful environment.
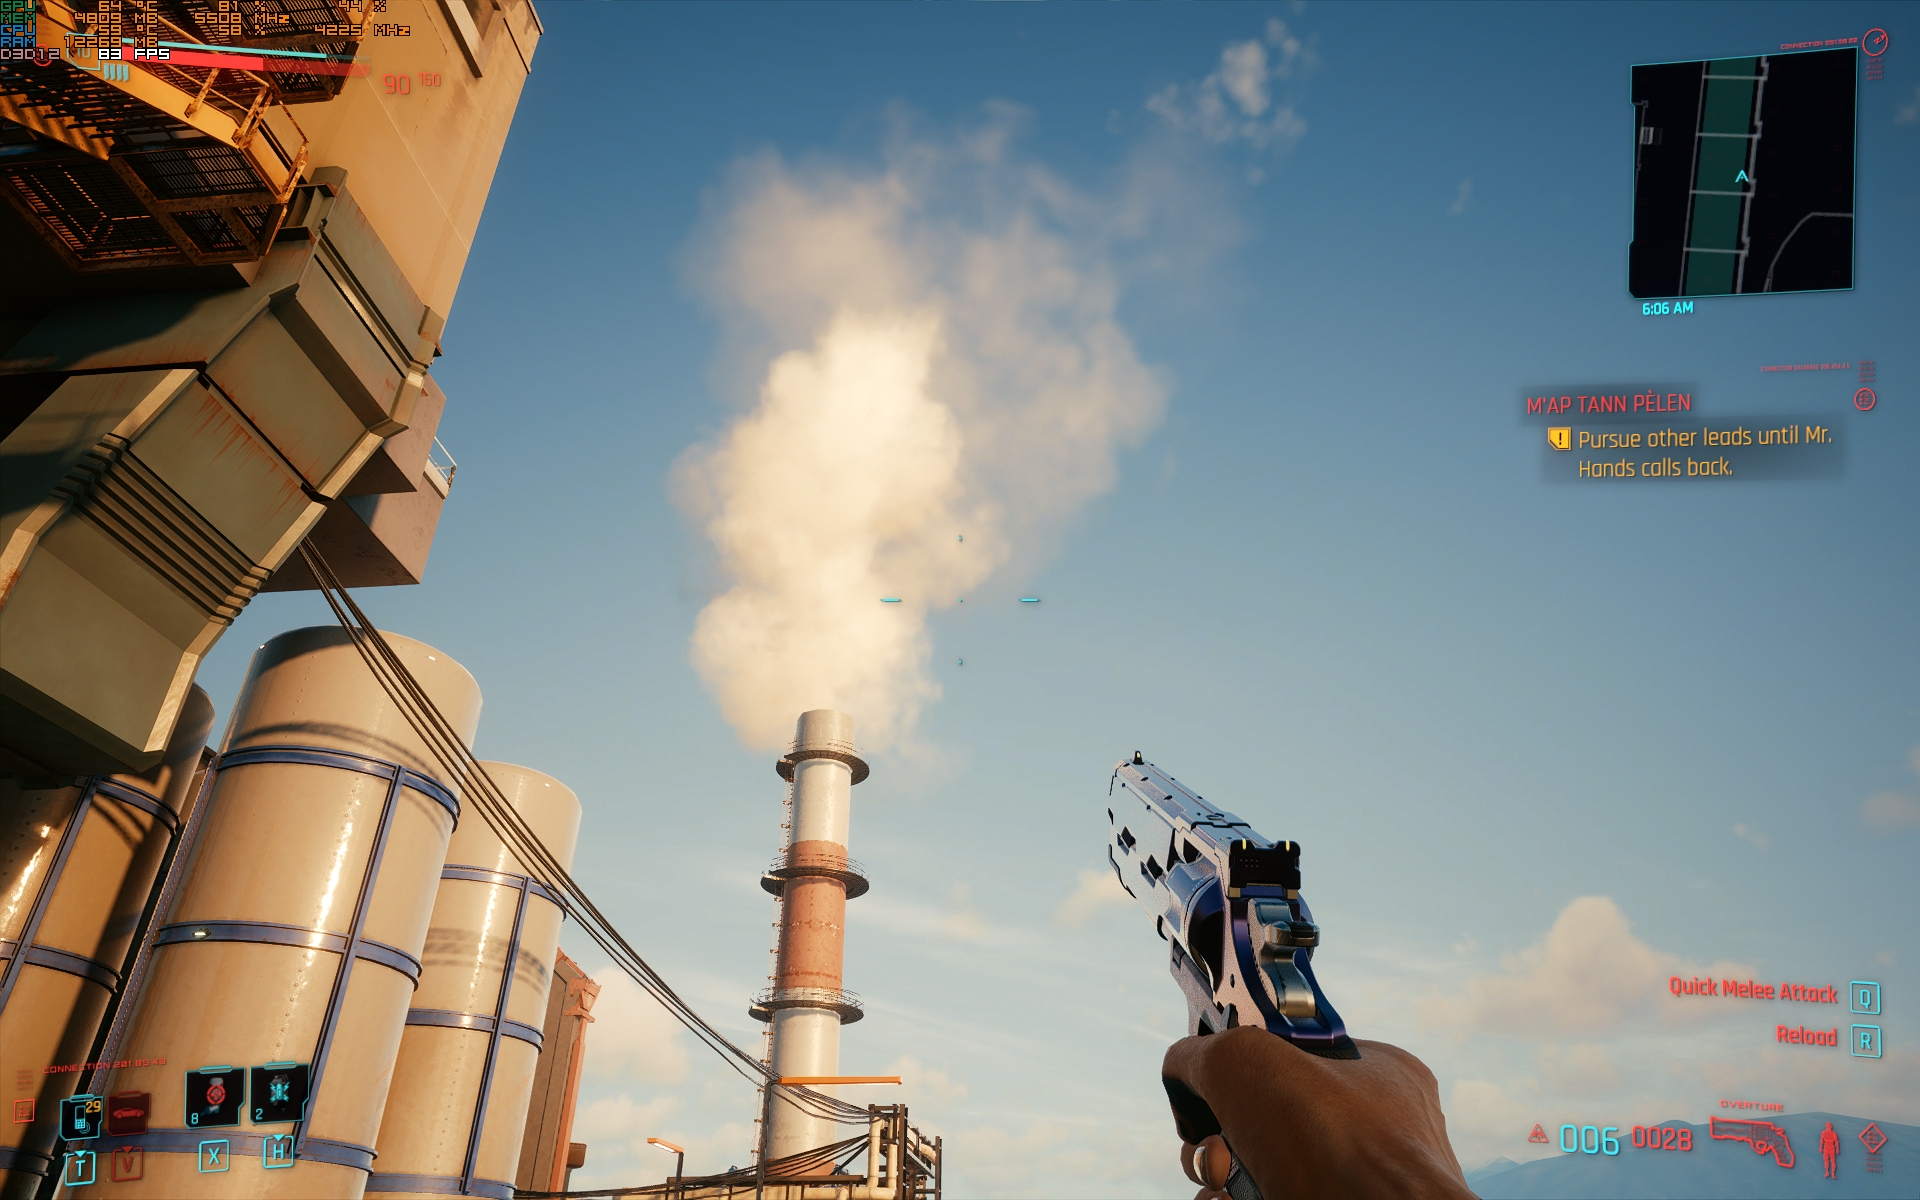
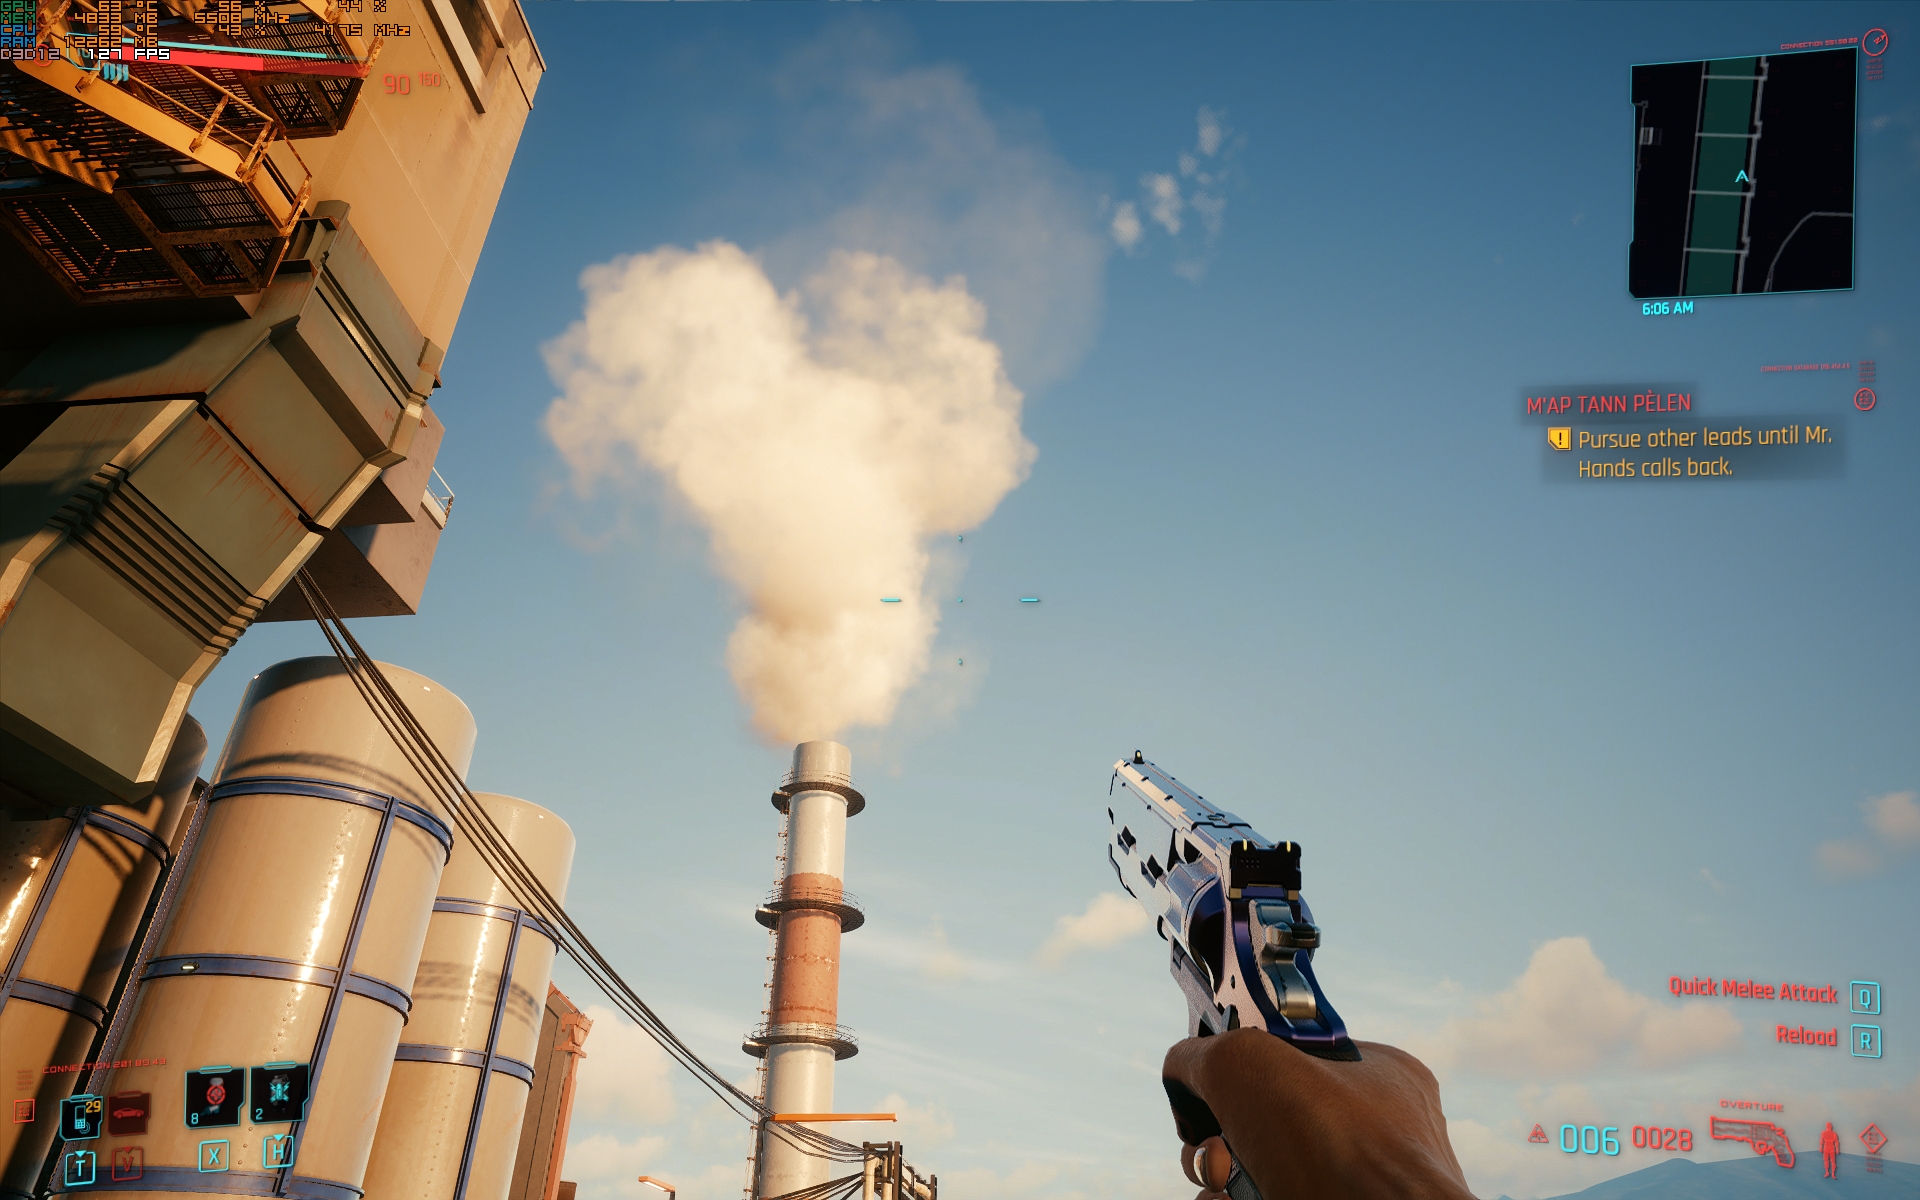
Volumetric Cloud Quality – Medium
Note: Impact on CPU while increased usage was also seen on the GPU.
Volumetric Cloud Quality in Cyberpunk 2077 only tweaks the actual clouds and nothing else. If you keep it low, no clouds will appear, while on Medium and Ultra, the same number of clouds arise, and there is little to no quality difference.
We tested the game on all three options and noted that performance was significantly lower in High while the clouds were precisely the same. Keep Volumetric Cloud Quality at medium for best visuals and performance.
Mirror Quality – High
Since Cyberpunk 2077 is a first-person game and features a ton of customizations like clothes. The only chance you are going to see yourself is through the mirror. Keeping Mirror Quality high won’t impact performance because it only works when looking at mirrors.
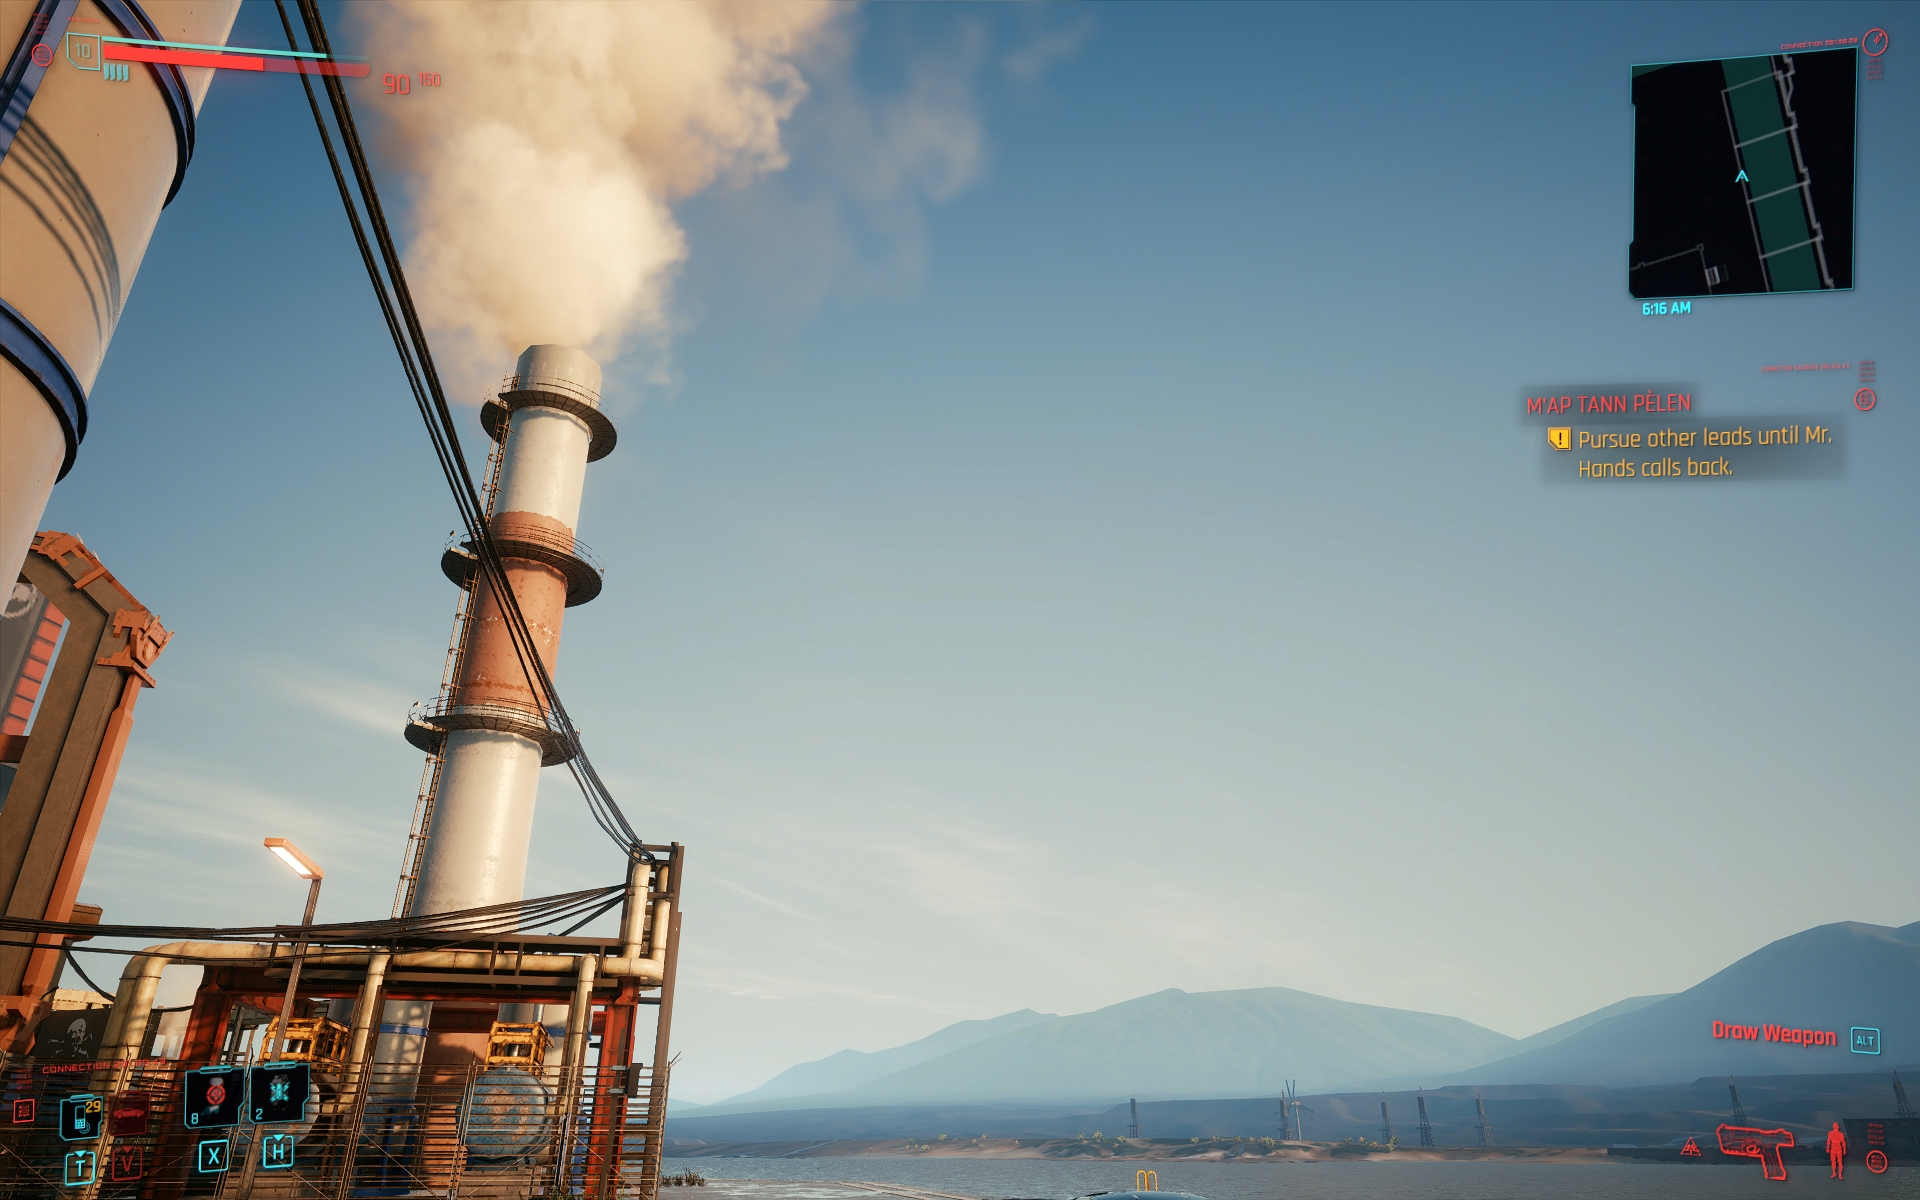
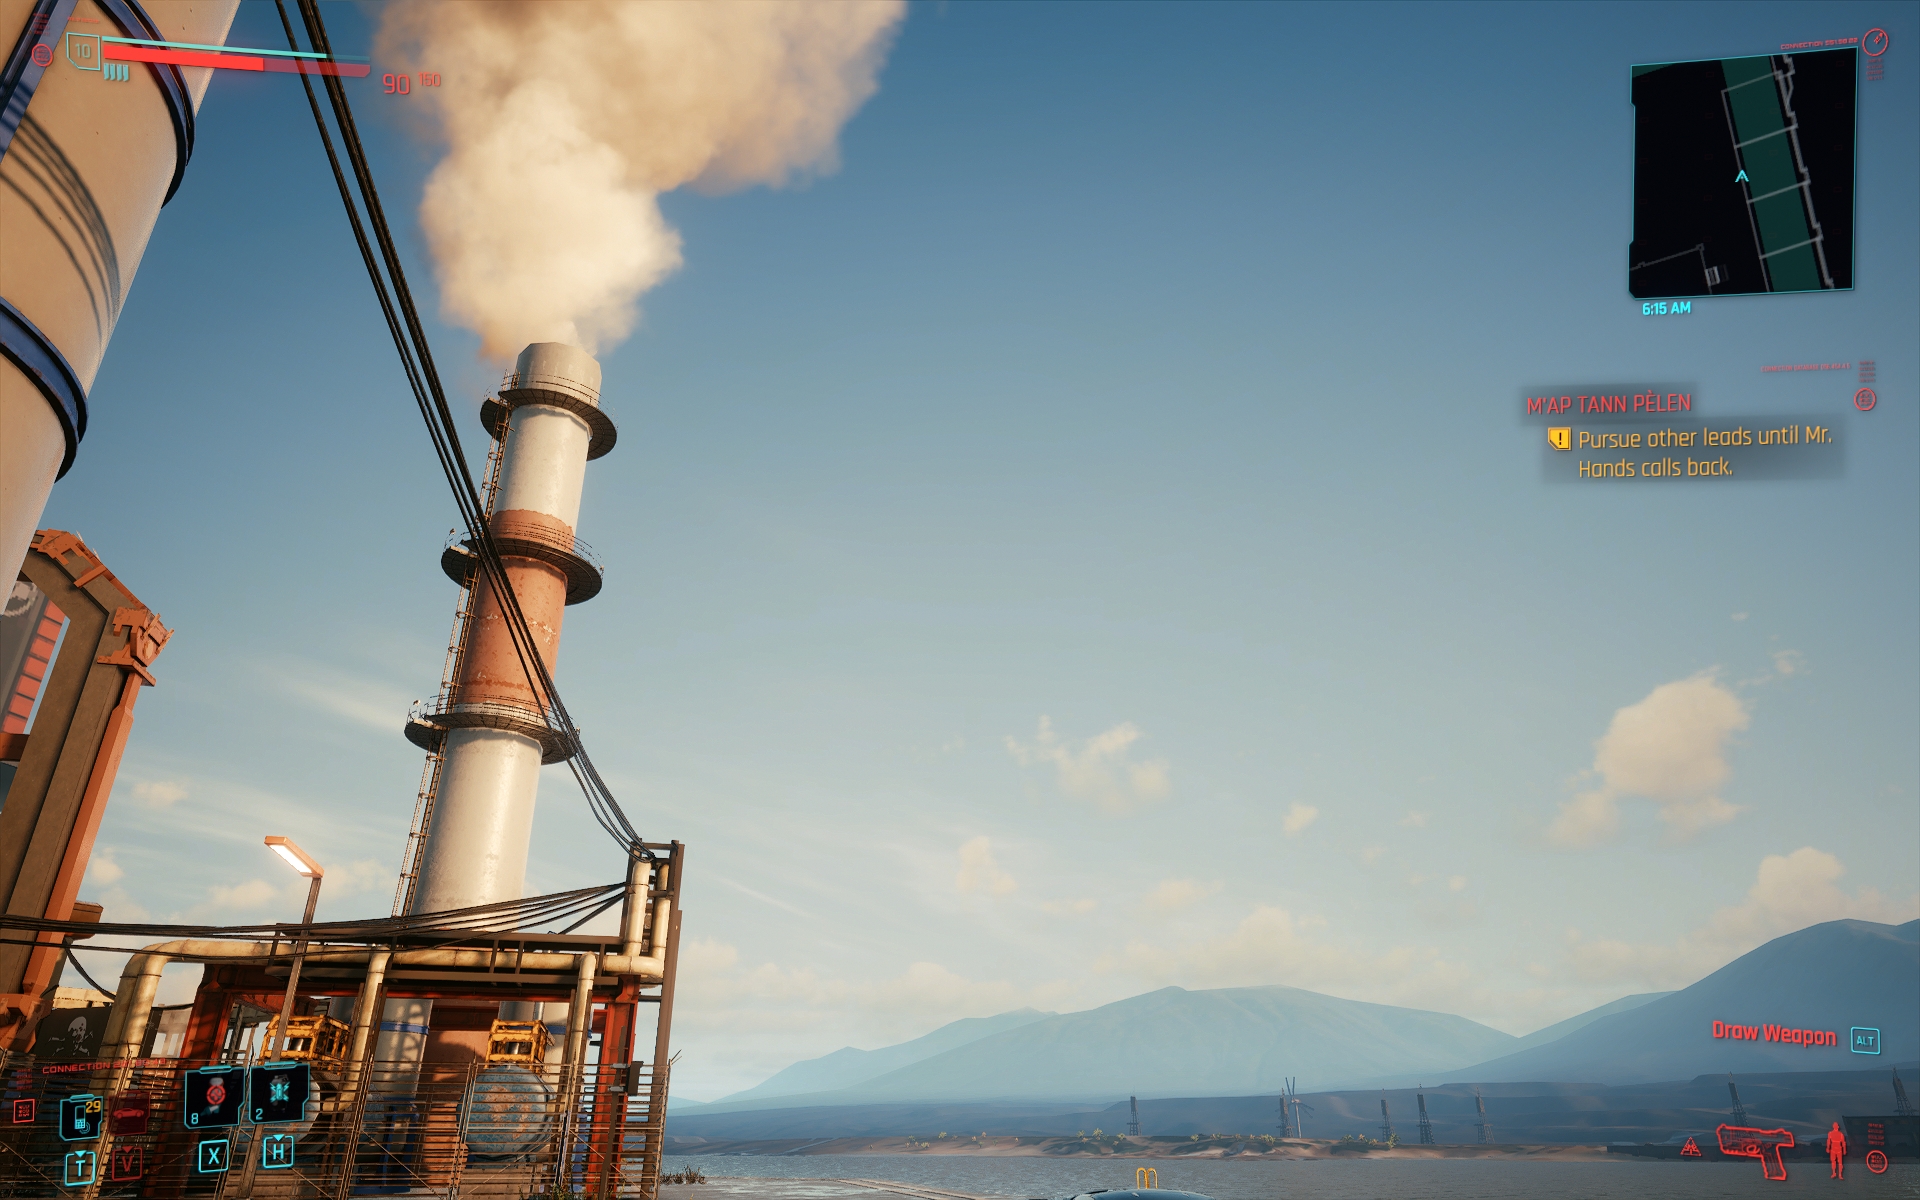
Gamma Correction – 1.36
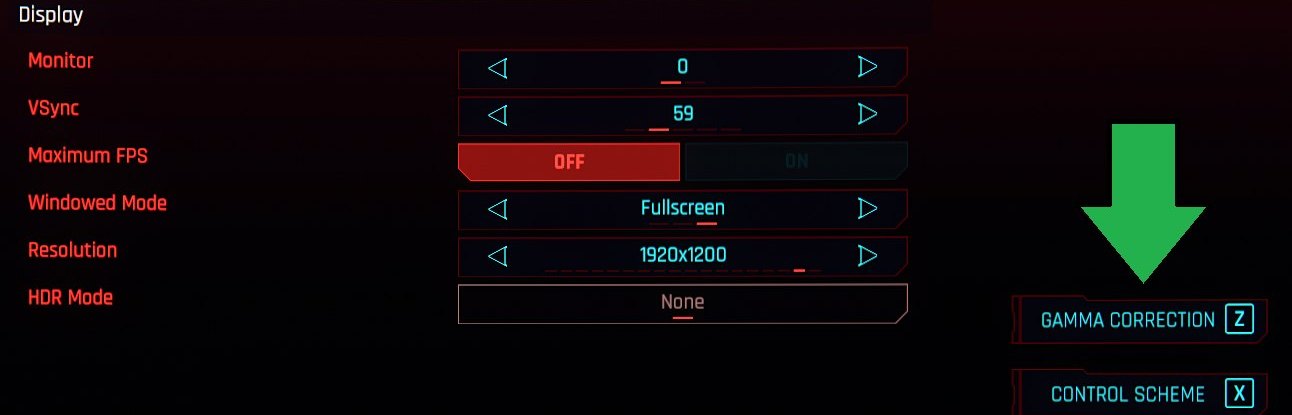
One of the core problems with Cyberpunk 2077 Graphics is extreme brightness. Night City looks completely washed out during the day, and at night it’s no good either. To fix this problem, in particular, we are first going to increase Gamma Correction to 1.36 and then further enhance it through Nvidia Ansel.
Level of Detail (LOD) – High
If you are playing the game on 1080p like me, the level of detail should be kept high. Our benchmarks here at eXputer proved that the performance loss was nominal while graphical improvement was incredible.
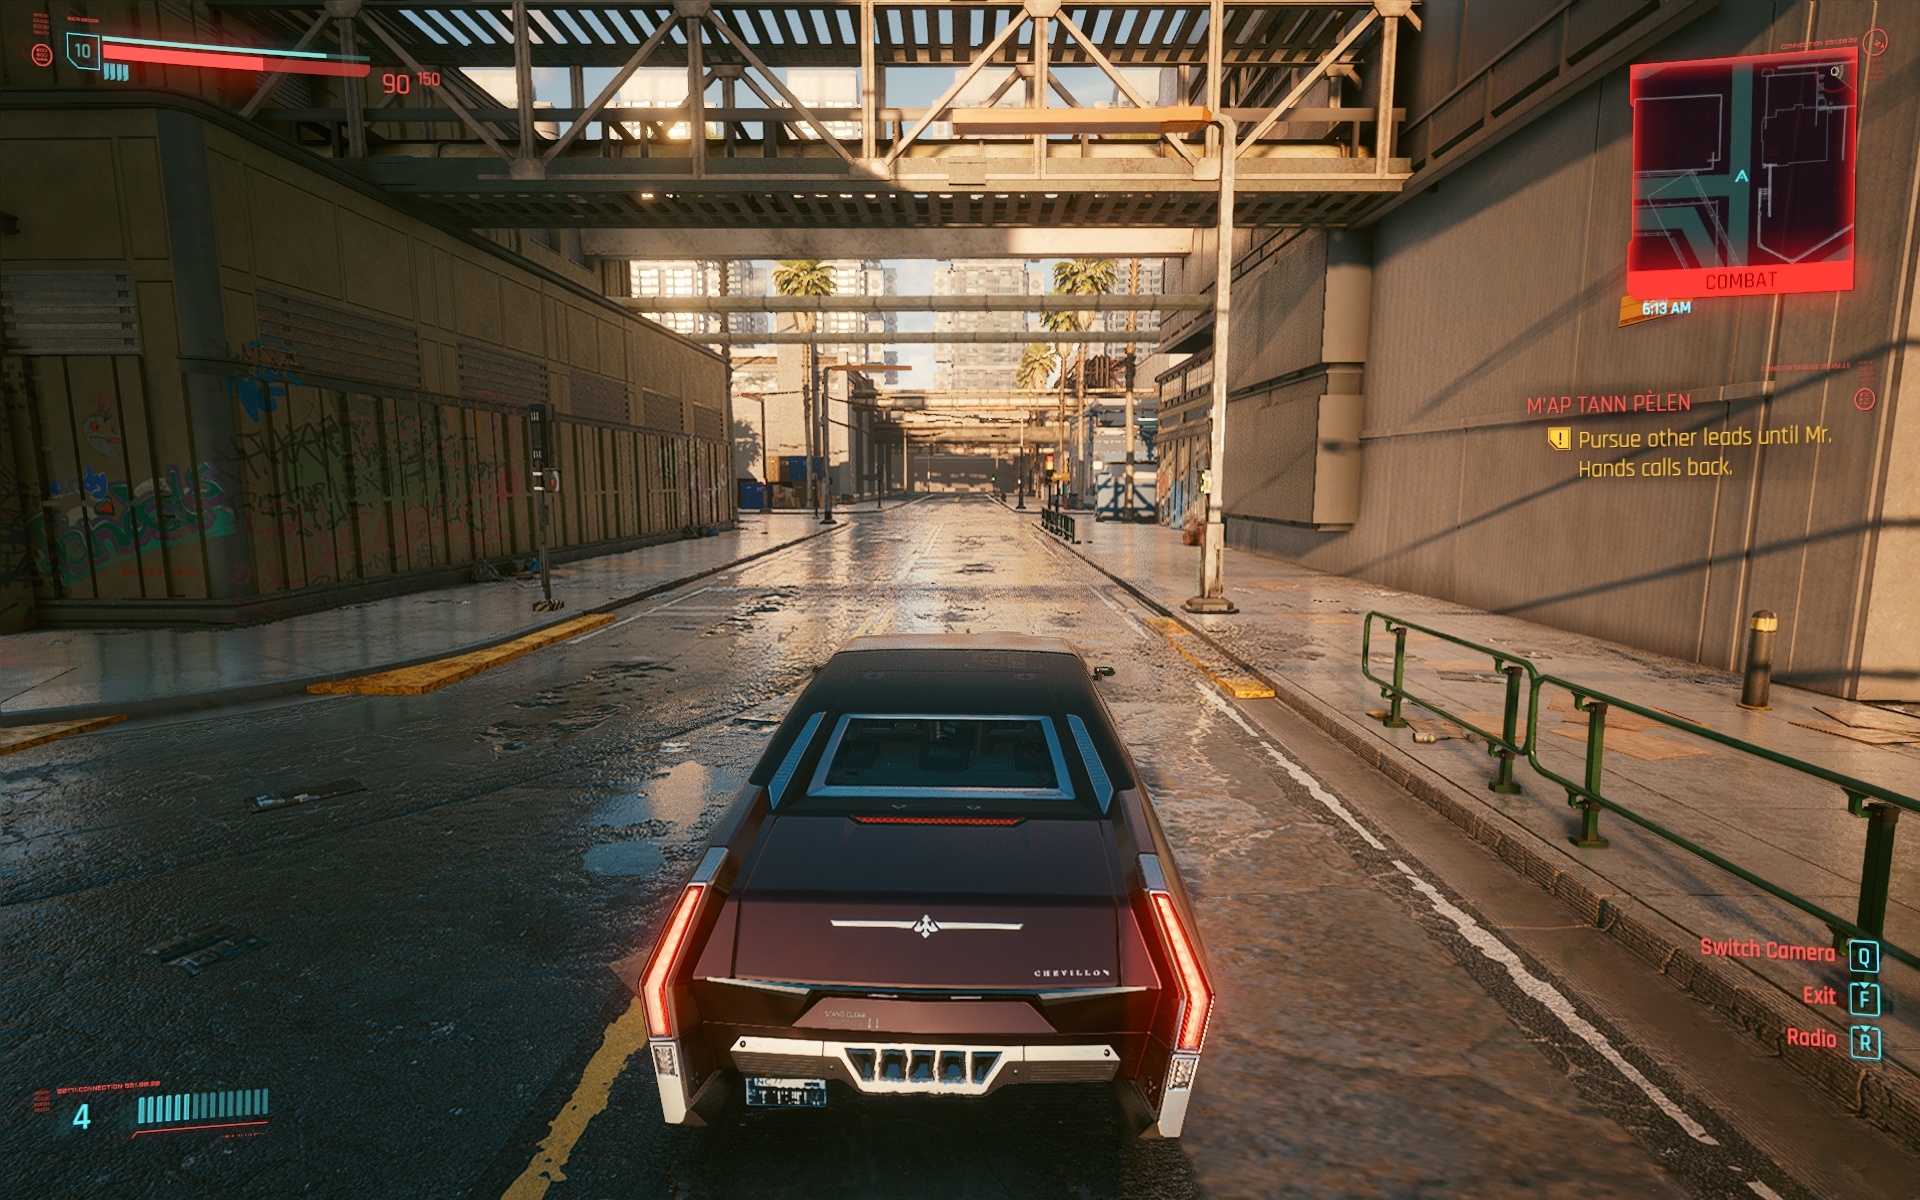
Crowd Density – Low
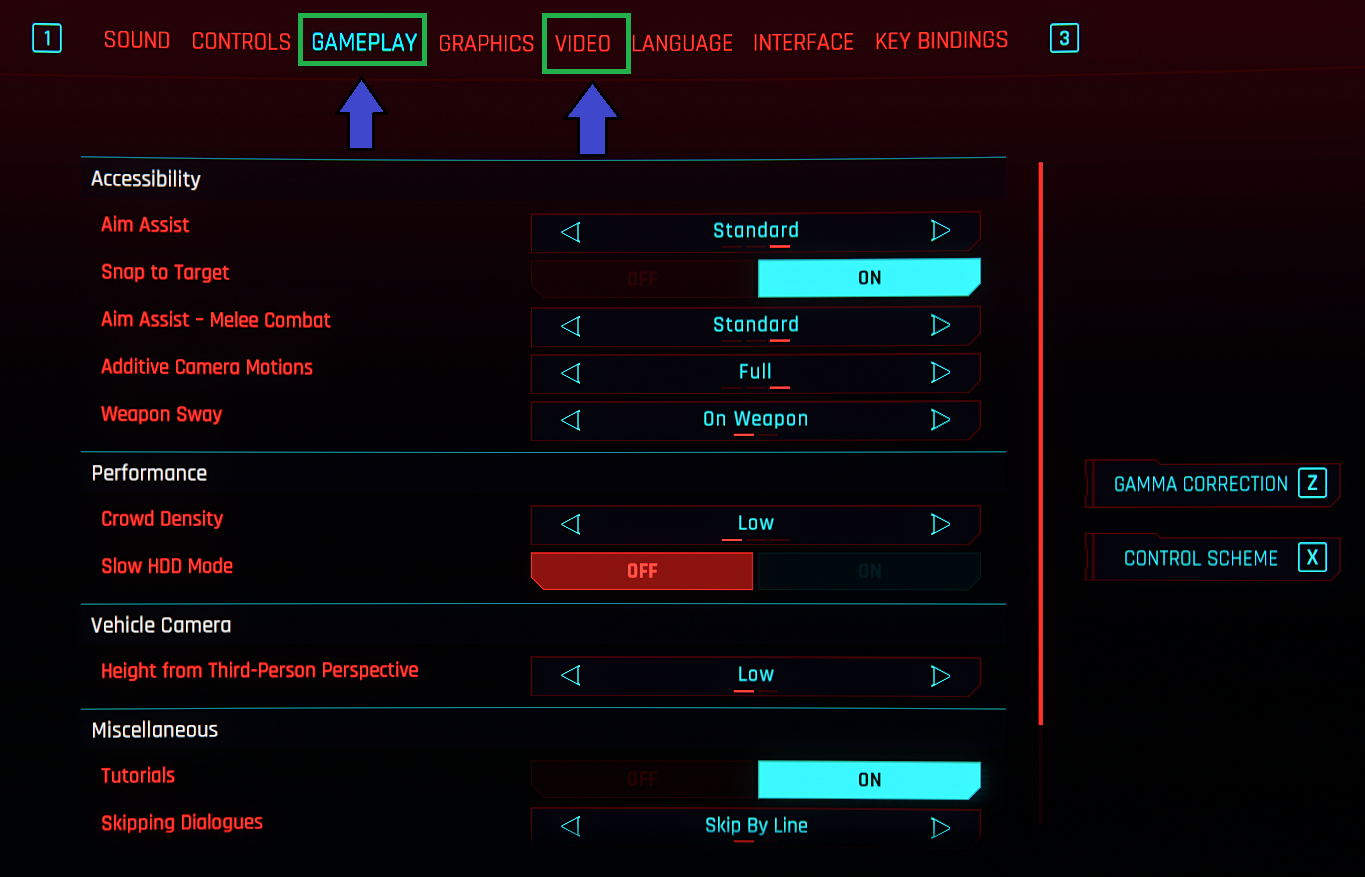
Note: Extreme Impact on CPU.
Now that you are done with the graphics section, hop over to the gameplay section on the left and lower the crowd density to low for two reasons.
Firstly, the impact on performance with more NPCs is high. You can expect at least a 40% performance loss, and that’s mainly because Night City becomes dense. Other than this, the NPCs in Cyberpunk 2077 are not meaningful. They speak irrelevant things and literally provide zero to no value in the game. It’s better to keep it low.
The other settings in the gameplay tab are personal preference. They don’t have any impact whatsoever on performance.
VSync: Off
There aren’t lots of video settings; just keep using the primary monitor, disable V-Sync if you are using a G-Sync/Freesync monitor, and go for full-screen mode with maxed-out resolution. HDR is bugged and not worth using right now. If you are on the console, there are plenty of guides to disable it.
Slow HDD Mode – Off
We analyzed Cyberpunk 2077’s performance on SSD, so this feature was unnecessary. Even If you have a slower Hard Drive, we don’t recommend enabling this because rendering, which is already a big issue in Cyberpunk 2077, becomes even worse.
Nvidia Optimization For Cyberpunk 2077
| Image Sharpening | 0.40 |
| Anisotropic Filtering | Application Controlled |
| Antialiasing Gamma correction | ON |
| Low Latency Mode | ON |
| Power Management Mode | Maximum Performance |
| Texture Filtering – Anisotropic Sample Optimization | OFF |
| Texture Filtering – Negative LOD Bias | Allow |
| Texture Filtering Quality | High Performance |
| Texture Filtering Trilinear Optimization | Enable |
| Threaded Optimization | Auto |
| Resolution | 1920 x 1200 (native) |
| Refresh rate | 60Hz (Highest) |
| Scaling Mode | Aspect Ratio |
Additional options are available if you are using an Nvidia Graphics Card for Cyberpunk 2077. Firstly, ensure you have adequately set up Ray Tracing and DLSS meta.
Once done, you can further improve performance with a few tweaks that we will do in the Nvidia Control Panel. This will provide additional improvement across the visual sector and help stabilize performance.
Nvidia Ansel Settings
In our benchmarks, we noticed that Cyberpunk 2077 Graphics were too blurred out, although we did apply some Sharpen in the Nvidia Control Panel. You can also further enhance it through the Nvidia Ansel.
Note that this section isn’t mandatory; we only recommend it to those who don’t feel like having the right colors and want better results.
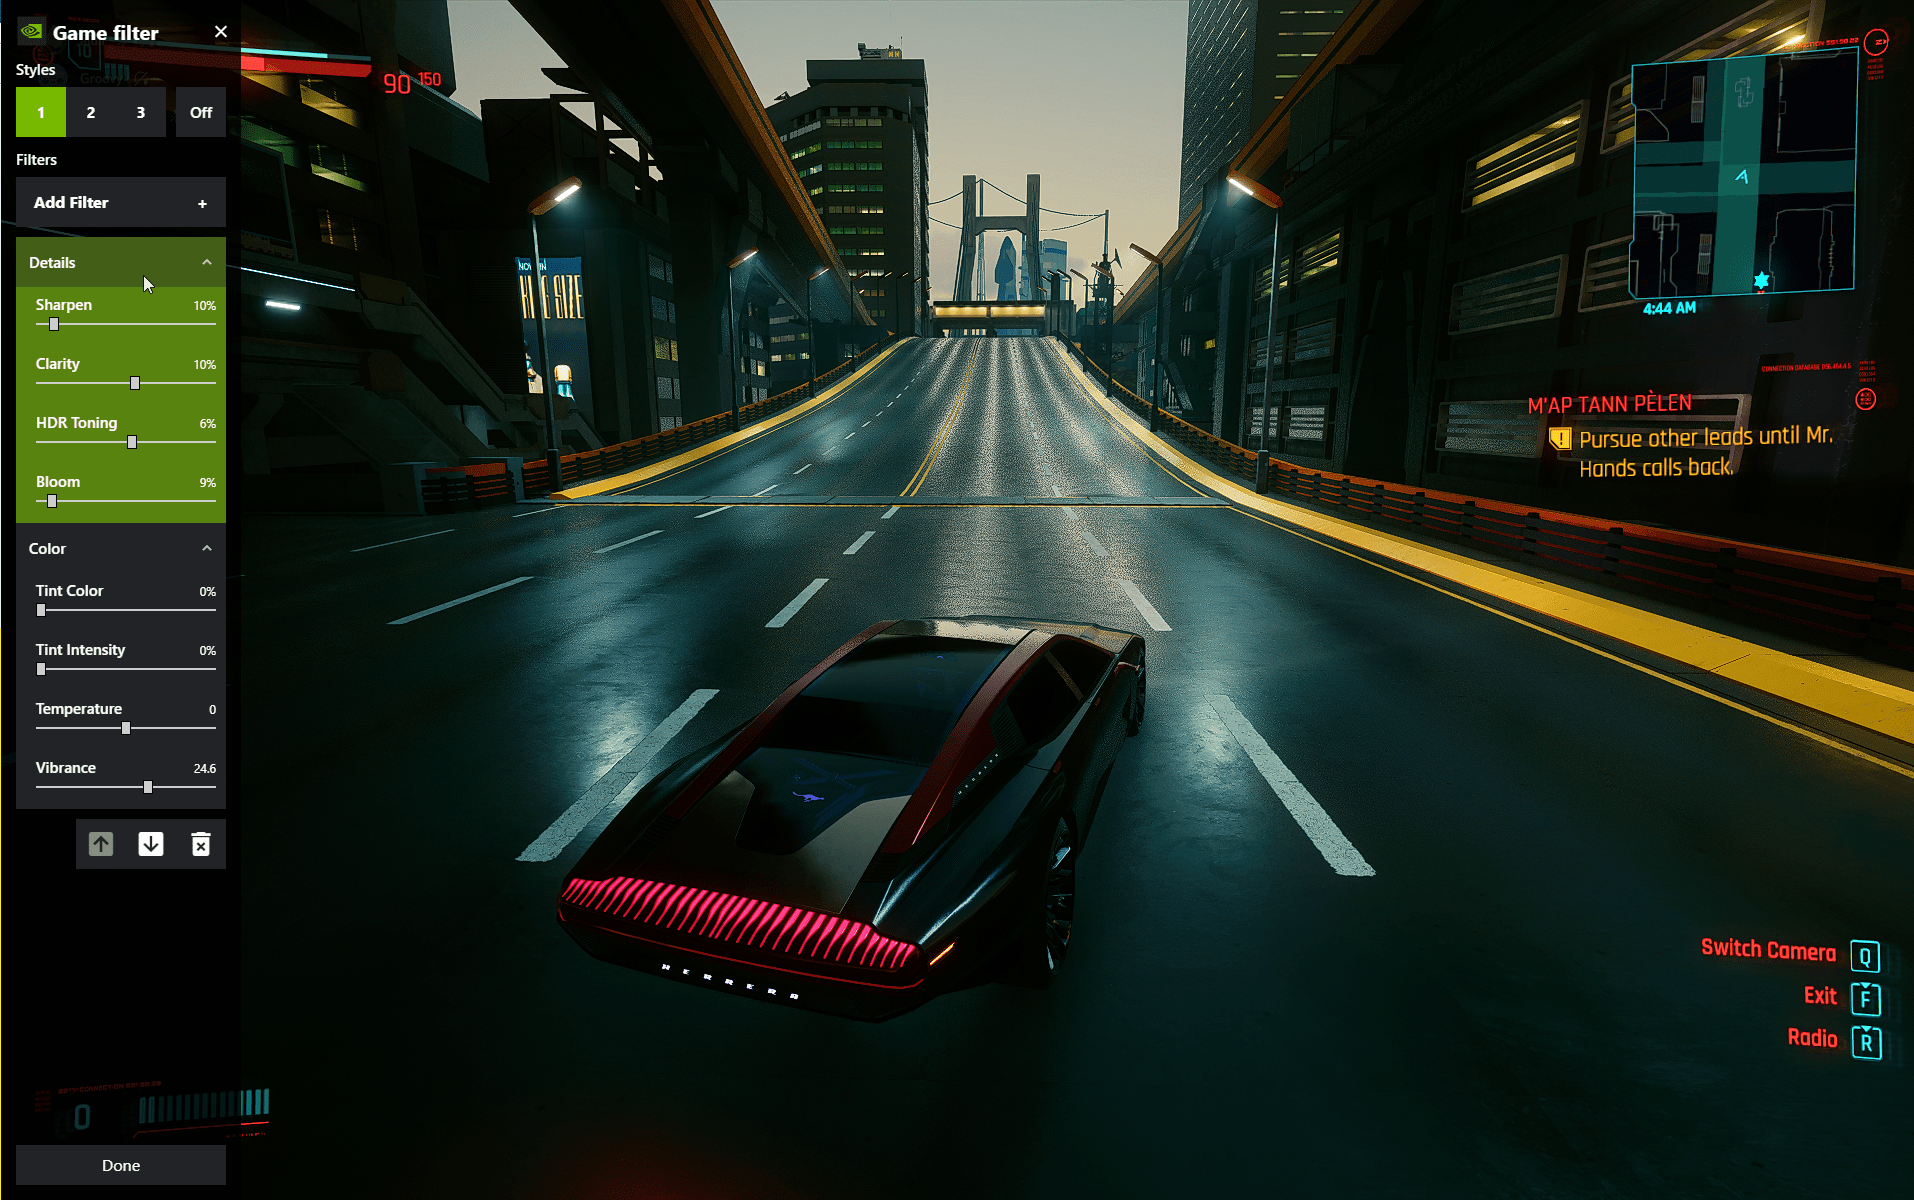
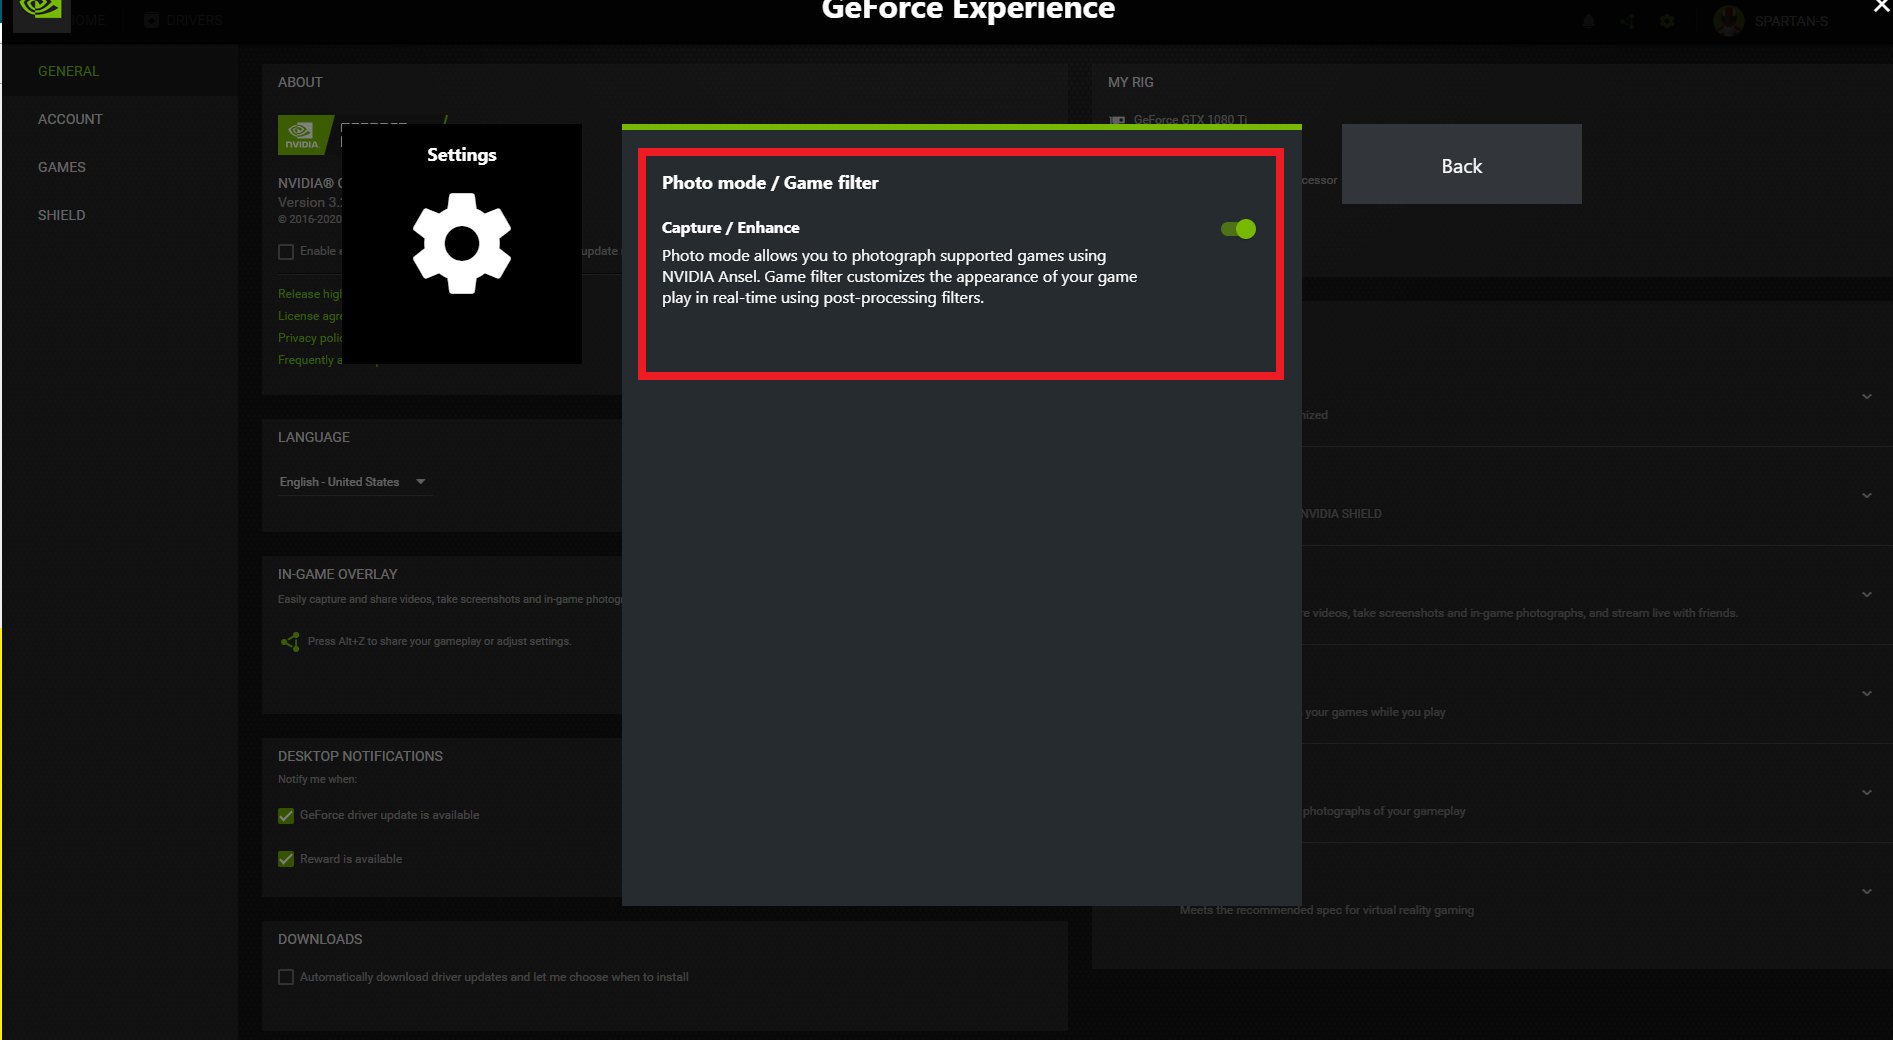
- Enable Nvidia Ansel inside GeForce Experience > Settings > Photo Mode Game filter.

Enable Game Filter. - Then Open Cyberpunk 2077 > Press ALT + Z to Open Nvidia Ansel and do the following.
Add Details
- Sharpen 10%.
- Clarity: 6%.
- HDR Toning: 0%.
- Bloom: 6%.
Add Color UPDATE
- Tint Color: 0%.
- Tint Intensity: 0%.
- Temperature: 0.
- Vibrance: 21.6.
These were all the Nvidia additional optimization settings that you can work on. If you have a G-Sync monitor, don’t forget to enable it from the control panel and Cyberpunk’s video graphics settings.
Cyberpunk 2077 Tweaks For AMD GPUs
If you are struggling to get decent FPS on an AMD Ryzen CPU while playing Cyberpunk 2077 2.0, there are a fair amount of chances; that Cyberpunk is not utilizing the logical cores of your CPU. This has been the case with many users, and it seems this is more of a glitch than a problem.
If you want to get at least 30% FPS Boost, we’ll have to configure the Cyberpunk.exe file through a hex editor. The steps are a bit long but completely worth it.
I’ll break down the entire procedure step by step; follow it below.
AMD Ryzen CPU Settings
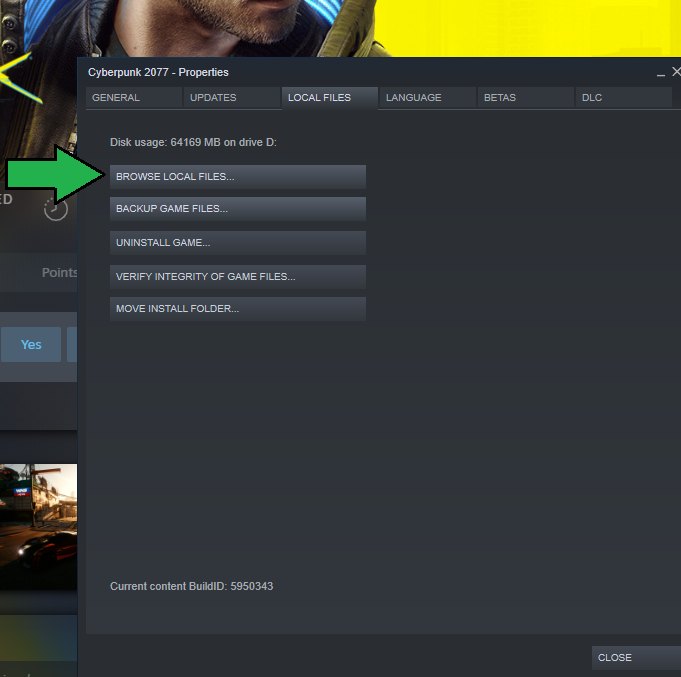
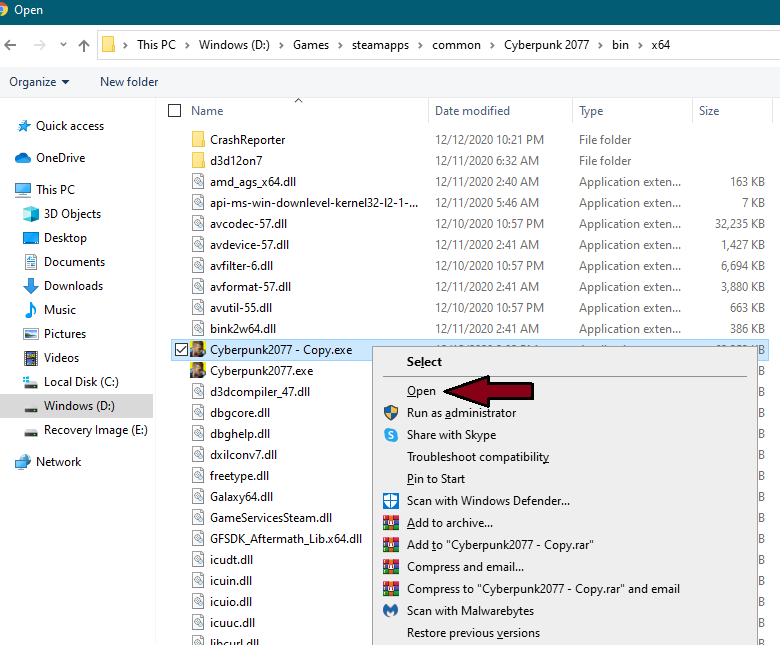
- Locate the Cyberpunk 2077 Folder by right-clicking the game > Properties > Local files > Browse Local Files.

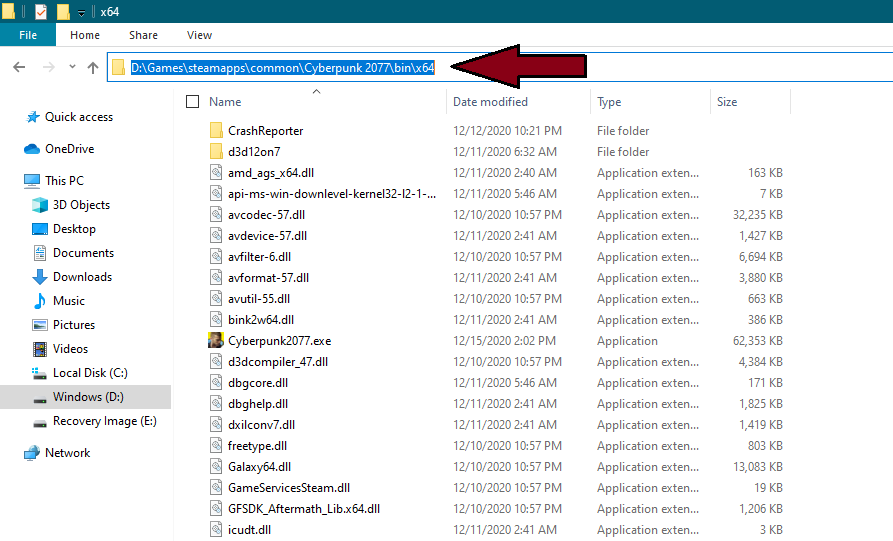
Finding Cyberpunk 2077 Directory. - Go To Bin > 64 > And Copy the Path by clicking on the top address bar > Ctrl + C.

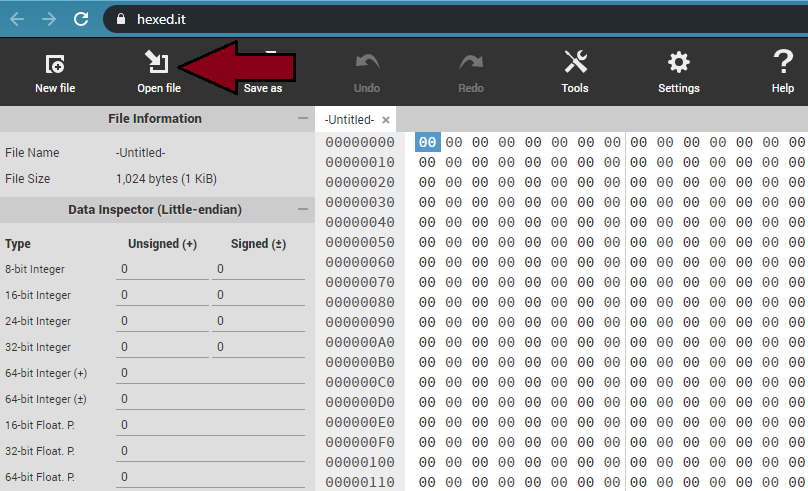
Copy the path. - Now go to hexed. And Click on Open File.

Edit the addresses. - Paste the directory we copied earlier and create a copy of Cyberpunk2077.exe; afterward, open it.

Save to the original file. - Once done, copy the code set from down below and paste it inside the “Search For” Bar, press enter.
-
75 30 33 C9 B8 01 00 00 00 0F A2 8B C8 C1 F9 08
- Replace the 75 by EB; the rest of the code is the same. Here is how it should look after you apply the change.
-
EB 30 33 C9 B8 01 00 00 00 0F A2 8B C8 C1 F9 08
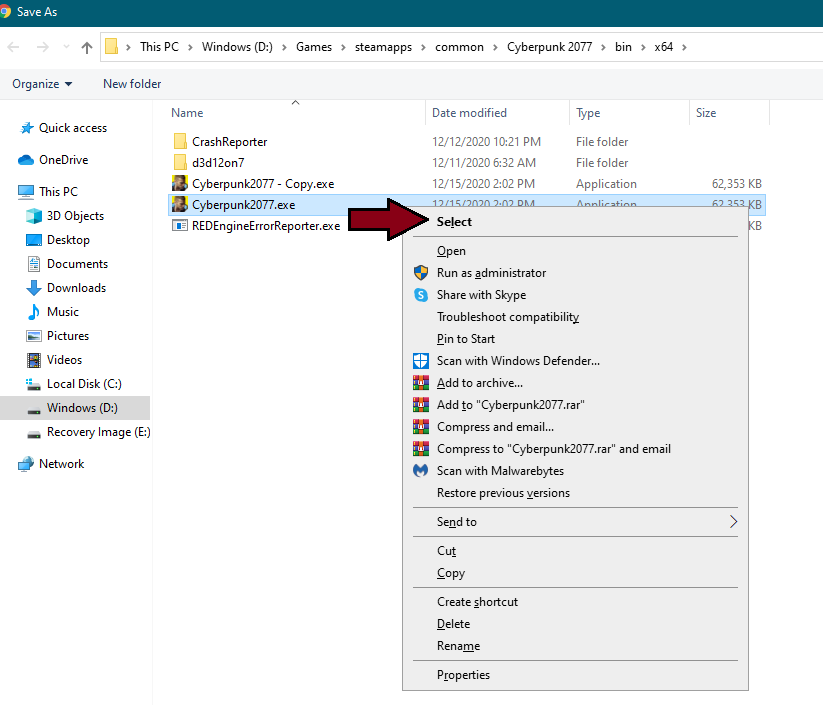
- Once you have changed the 75 to EB, Click on Save As, and this time replace the original, so we can override all changes.

Replace Original.
From now on, all the cores on Ryzen will work flawlessly while playing Cyberpunk 2077. Moreover, you can also expect at least a 30% Performance Improvement.
Enable Static FidelityFX Cas
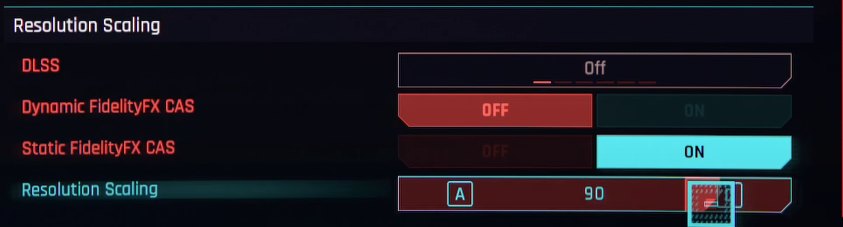
It’s highly recommended for AMD users that static FidelityFX Cas is enabled inside Cyberpunk 2077 Graphics Settings. This ensures further smoothening and resolution scaling, which is quite necessary because it is blurry in many situations.
Now, how do you go about enabling this? Static FidelityFX Cas is all about testing. I would recommend starting from 100% to 75% to see which you are getting the most frames and better image quality.
Note: Whatever percentage you apply, reduce it from native to get an idea. Don’t go too low; the image quality will be awful. Moreover, also avoid Dynamic FidelityFX CAS because it is broken right now.
Turn On The Image Sharpening
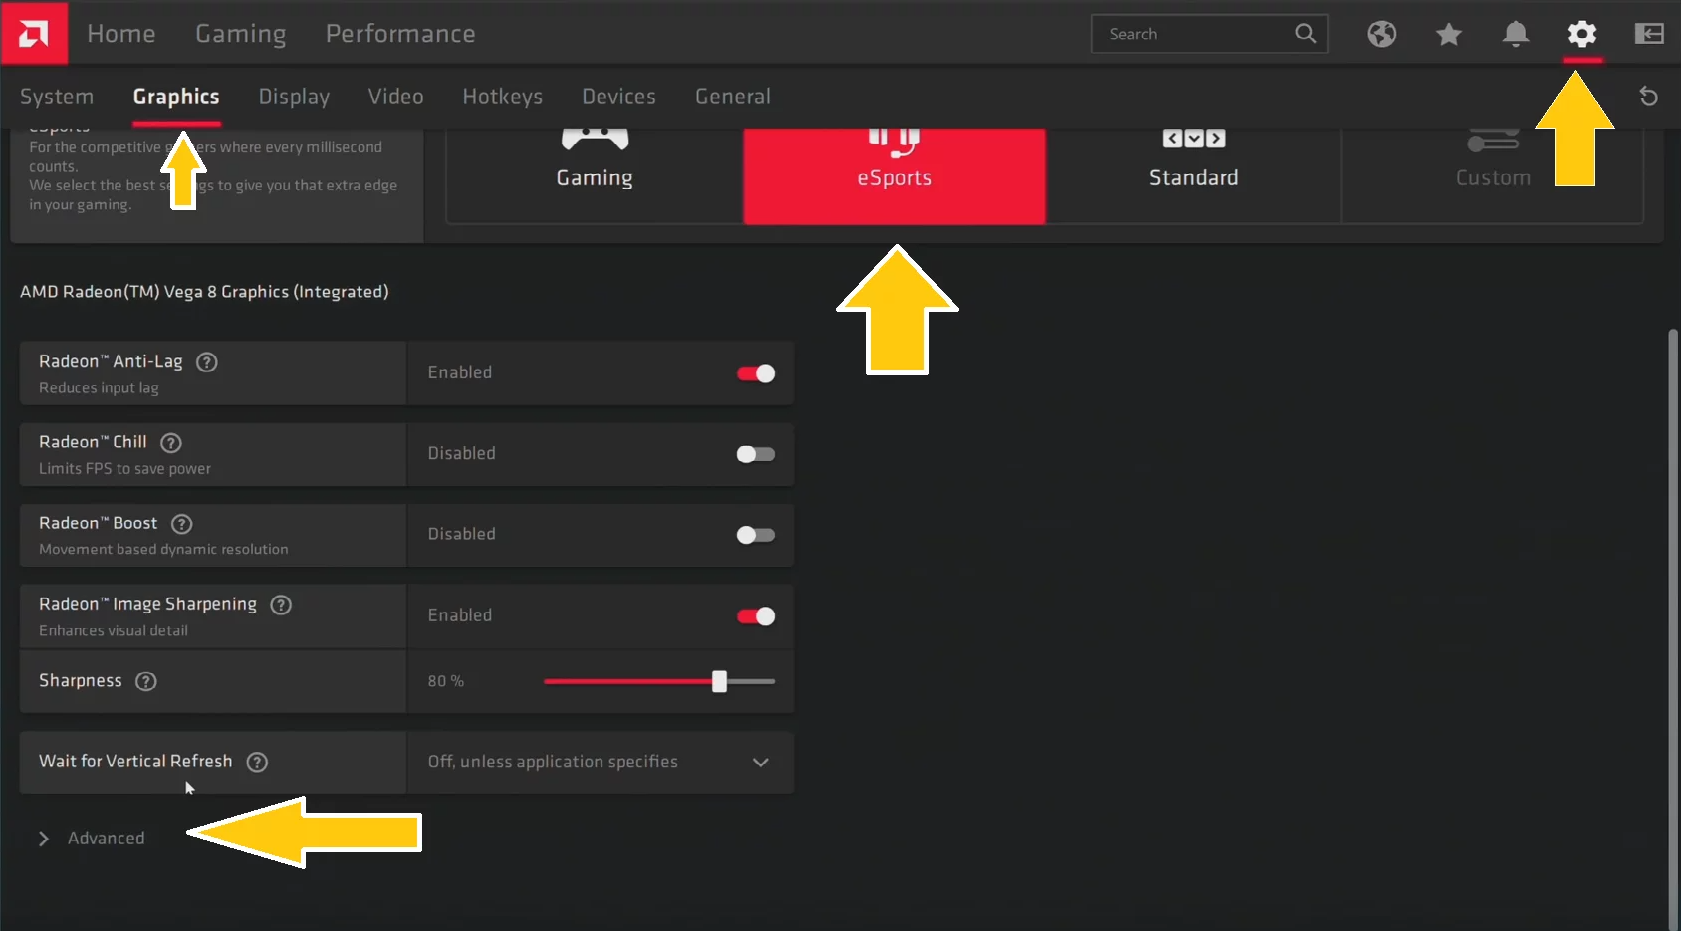
As I said previously, Cyberpunk 2077’s graphics are blurred out, and I suppose Static FidelityFX CAS isn’t working out for you. The alternate method is to enable image sharpening from the Radeon Control Panel and Set it to anything above 75%.
Allocating More RAM And Video Memory
Another problem with Cyberpunk 2077 is that it does not show you the amount of Memory and Graphics Cards being used. This results in the game not utilizing all the Memory and VRAM available; therefore, it crashes a lot, and frames are generally low.
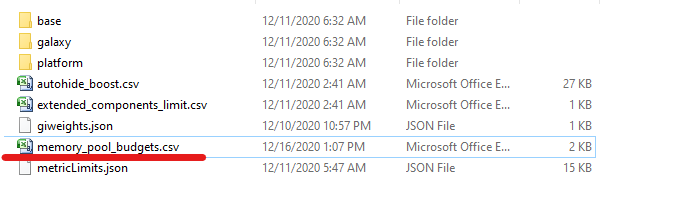
This can be easily fixed by editing the memory_pool_budgets file in the Cyberpunk folder and replacing the existing values with the newer ones. This will allow the game to utilize both RAM and video memory fully.
Here’s how to do it:
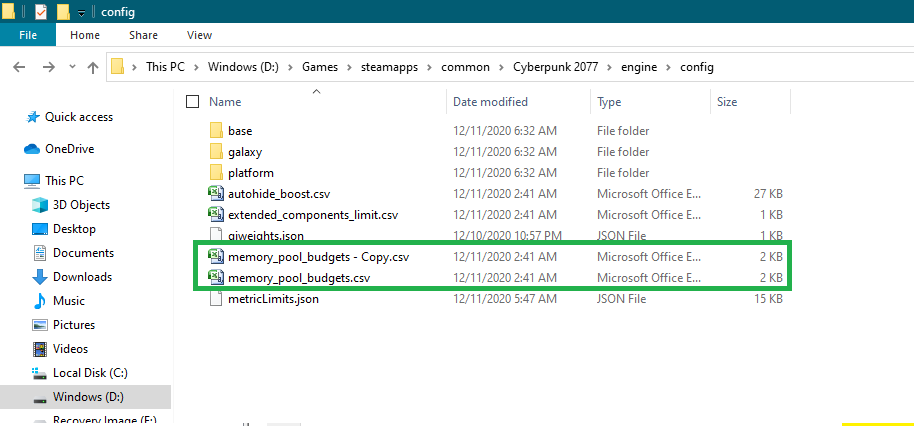
- Go to the D:\Games\steamapps\common\Cyberpunk 2077\engine\config (depending on wherever Cyberpunk 2077 is installed).
- Copy the memory_pool_budgets.csv file and save it as a backup elsewhere.

Create a copy. - Create a new copy and now edit it.
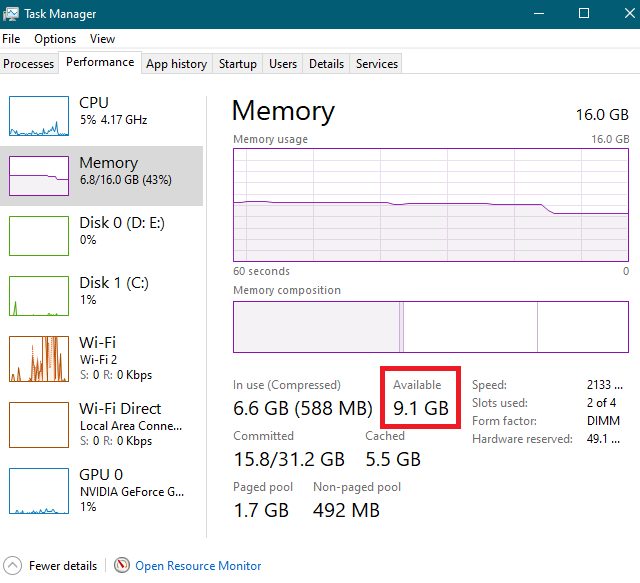
- Depending on how much memory you have available, after all, the necessary apps are open. Select 60% of its value. I’ve 16GB of total RAM, and checking it in Task Manager, there is 9.1 GB available, so I’ll allocate 8 GB For Cyberpunk.
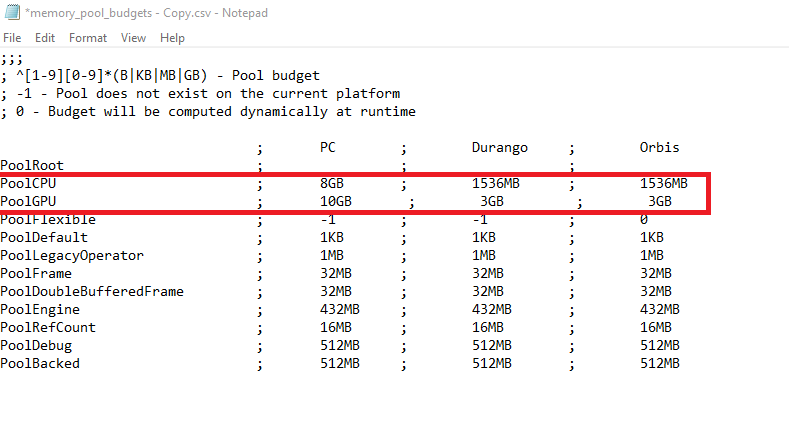
- Update 1: We retested this by changing the PoolCPU and PoolGPU to 0, which worked as a perfect alternate.

Check the available memory. - Next to PoolCPU, replace 1536MB, which translates to 1.53GB, and write 8GB. Do the same for PoolGPU by checking the GPU usage in Task Manager. There is always more than Ram available because, frequently, it’s not being utilized.

Rewrite these. - Once done, rename the copy file to memory_pool_budgets.csv

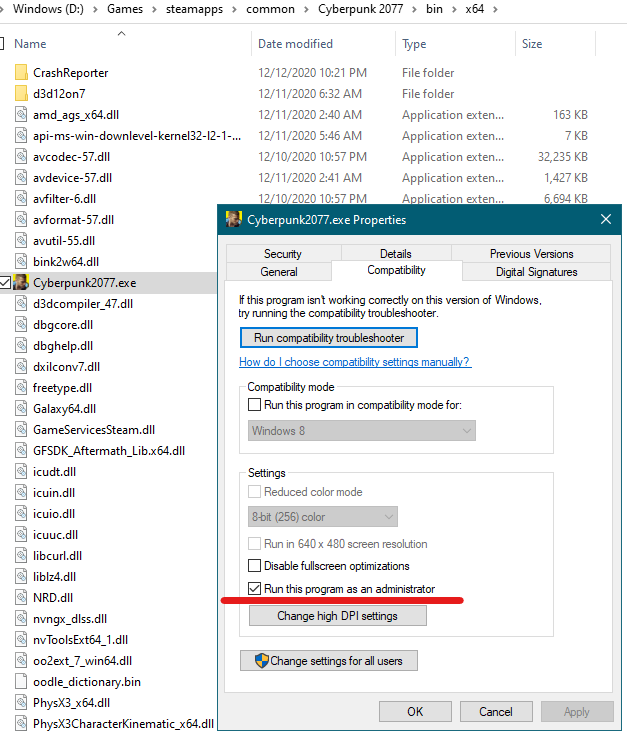
Rename the file now. - Afterward, right-click Cyberpunk2077.exe, which is located under Cyberpunk 2077 > bin > x64, and in the compatibility tab, checkmark “Run this program as an administrator.” Don’t forget to hit apply and ok.

Checkmark: Run this program as an administrator.
Windows 10 Optimizations For Cyberpunk 2077
All the above optimizations should dramatically increase your FPS in Cyberpunk 2077. Those were the core settings and the most important ones. However, If you are running Cyberpunk on a low-end PC with something below GTX 1060 and Ryzen 1700, these Windows 10 Optimizations will help you get an additional 15-20% FPS Boost.
The settings aren’t going to impact your Windows or anything; they will only speed it up and optimize it for gaming. The majority of settings we will optimize are strictly irrelevant and unnecessary so that you won’t be missing anything.
Enable Ultimate Performance
By default, Windows 10 runs at a very balanced power plan with several thresholds regarding power limit. You can change that to an Ultimate Performance Plan which ensures that 100% CPU is being utilized.
Here’s what to do:
- Open Command Prompt or Windows PowerShell With Administrator Privileges and paste the code given below.

Ultimate Performance Code. -
powercfg -duplicatescheme e9a42b02 -d5df -448d-aa00 -03f14749eb61
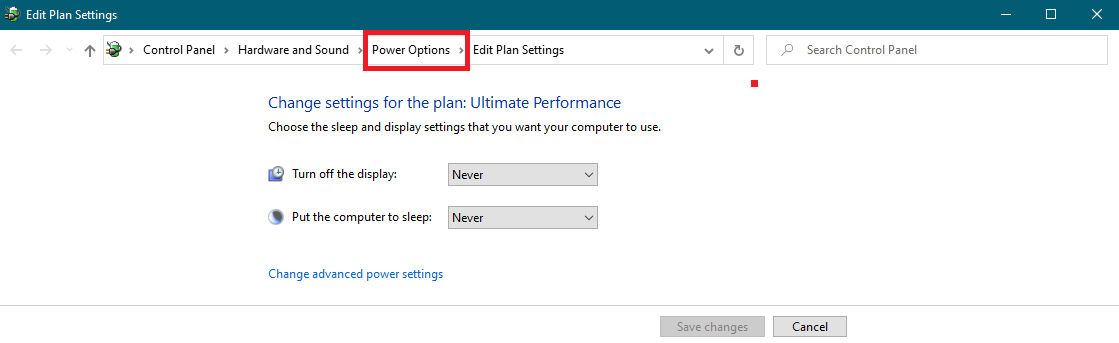
- Once done, you will be able to see the Ultimate Performance mentioned in the code. Afterward, go to Start> Edit Power Plan > Power Options.

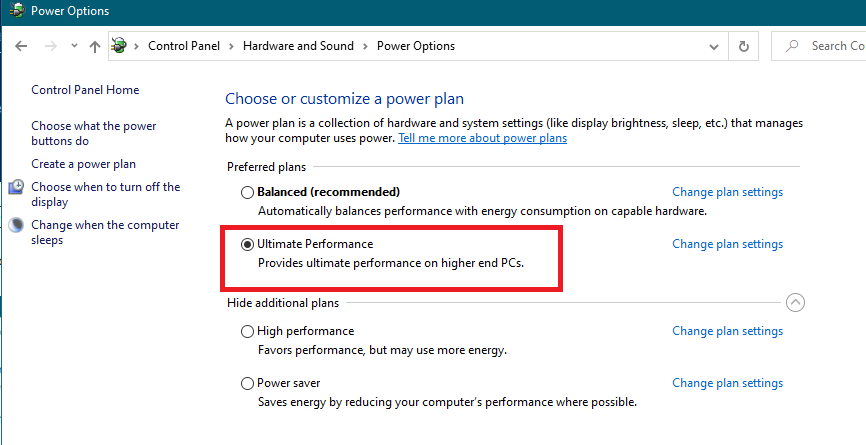
Power Options. - Then, checkmark Ultimate Performance, and you are done.

Checkmark Ultimate Performance.

Maximize GPU Usage On Cyberpunk 2077
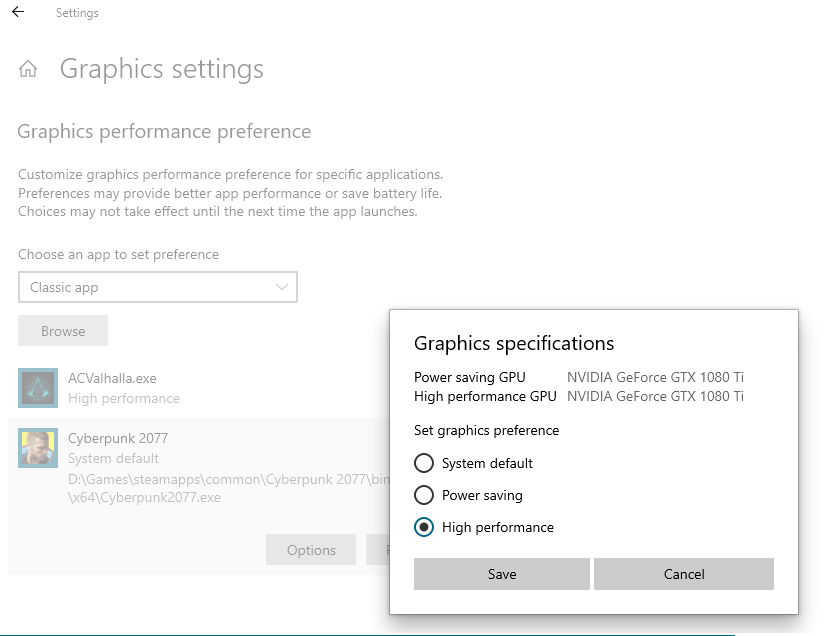
Similar to the Ultimate Performance, the Graphics Settings menu in Windows 10 will allow you to add a specific game and set its GPU Priority at High. This also results in an incredible FPS Boost and ensures that all Video Memory is available for the game to use.
- Under Start Type And Open Graphics Settings.
- Afterward, click Browse and add Cyberpunk2077.exe > then set its graphics preference to High.

Add Cyberpunk2077.exe. - Click on save once you are done.
Clear Temp Folder
Often, you uninstall or delete untrusty applications, thinking they are completely gone, which is not valid. Sometimes, the leftover virus-infected files are stored in the temp folder, which requires manual cleaning.
Here’s how to do this:
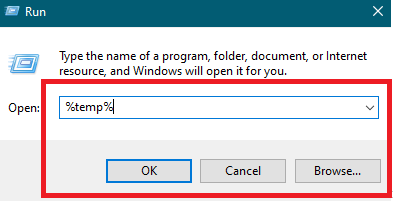
- Under Start > Type Run > write and enter %temp%.

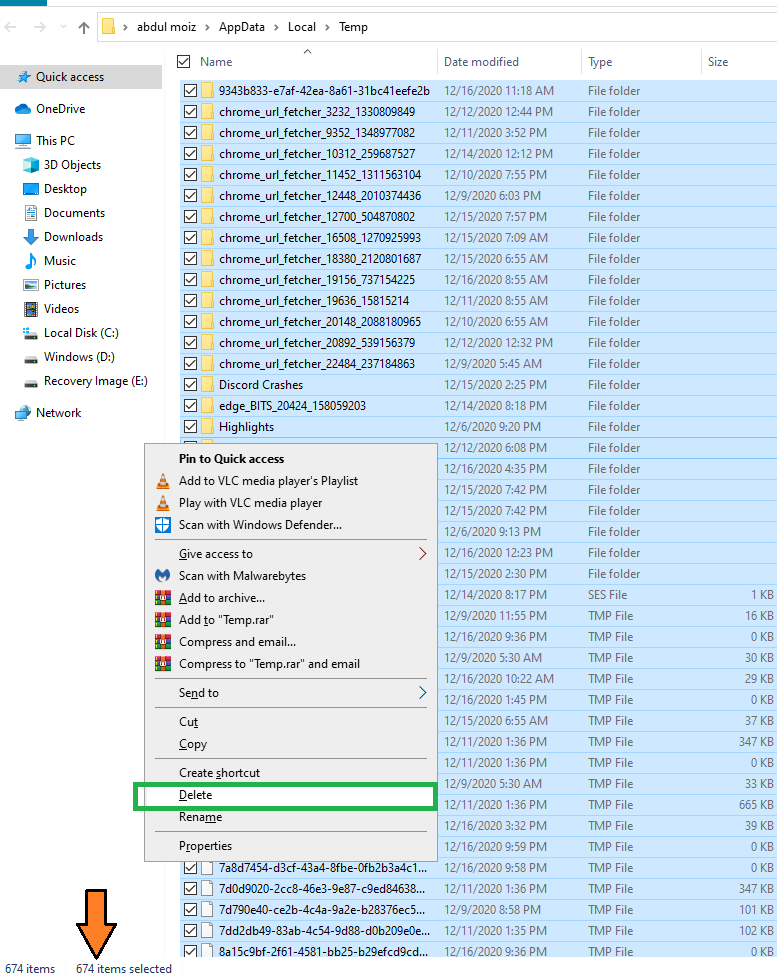
Run – Temp folder. - Press CTRL + A on the keyboard > right-click any file > delete. As you can see in my case, 600 leftover files might contain potential viruses.

Delete.
Disable Hardware Acceleration
Another Incredible method that will help you get a performance boost in Cyberpunk 2077 is disabling Hardware Acceleration. Although this does sound like a technical term, I can assure you it’s not.
Hardware Acceleration isn’t a Windows feature; it’s mostly within many common third-party applications. Besides, disabling this won’t change the applications’ core purpose and will only help you save resources.
Get Rid Of Unnecessary Background Applications and Services
Another common reason many people don’t get High FPS In Cyberpunk 2077 is that they always have applications like Chrome and Firefox running in the background, squeezing 40% of your entire memory. The rest is then adjusted by the game, but at the same time, the CPU is also being utilized in both places.
To get rid of these background applications and get high performance in Cyberpunk, firstly, make sure you are always closing unnecessary browsers and software. Besides, applications like CCleaner and Discord often start without permission and need to be manually disabled.
Disable The Xbox Game Bar
The last and most important Windows 10 optimization concerns Xbox Game Bar and other notifications that pile up in your background.
These notifications pile up in the task center resulting in reduced performance.
Don’t worry; here’s how to disable them and save performance for Cyberpunk 2077:
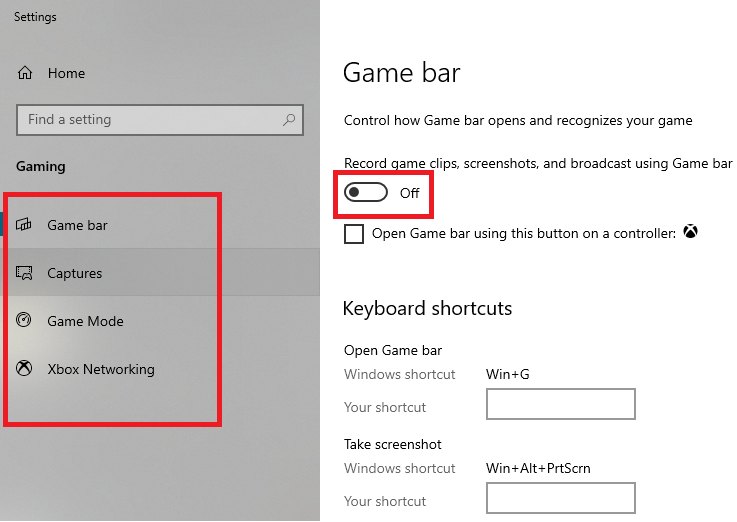
- Open Xbox Live Settings > Disable everything in the Game Bar Tab > Captures Tab > and Game Mode Section.

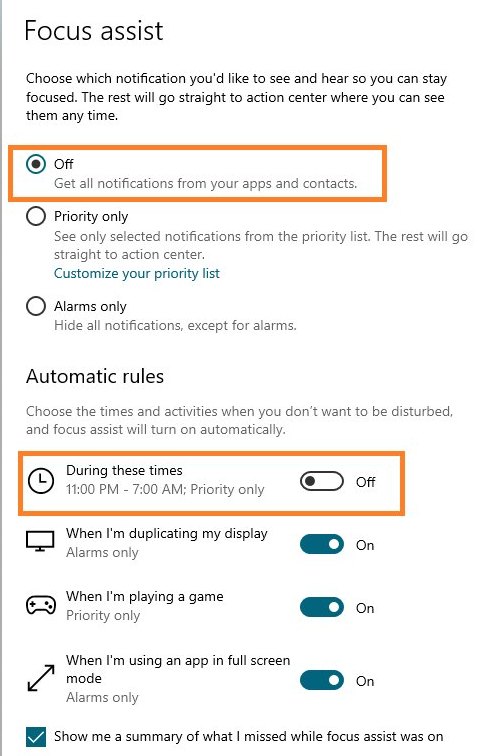
Disable everything in these three tabs. - Afterward, open Focus Assist Settings and Disable them accordingly.

Set them according to your preference.
Final Benchmarks On Optimized Settings
After applying all the optimized settings for Cyberpunk 2077 shown above. We ran a final test to see the visuals and check on the performance. The game was running super smooth, and we went with various options to push the limits.
These settings are undoubtedly giving the best visuals; that is to say, we tested this game for an entire week, and the results now are satisfactory. Suppose you have better hardware and can push the limits further. I’d recommend tuning these settings for further astounding fidelity.
- Screen Space Reflections Quality – Change it to High if the medium is too noisy.
- Cascaded Shadows Resolution – High
- Anisotropy – Although we recommend keeping it at 4x, you can also go with 16x for much better visuals.
- Texture Quality – Suppose you have a top-of-the-line RTX Card; change Texture Quality from Medium to High. This completely takes the graphics to the next level.
- Ray Tracing: Right now, Ray Tracing is a complete mess. However, If you have an RTX 3070 or 3080 with a decent CPU, I’d highly recommend giving DLSS and Ray Tracing a slight touch.
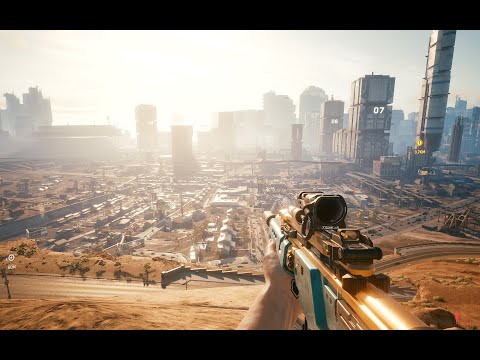
Here is a ten-minute compressed video gameplay on the optimized settings to show the difference between our Optimized and the Game’s Ultra Settings.
Update 1: The Hotfix 1.05 has now removed the memory_pool_budgets.csv file. CD Projekt said this was a leftover development file and had nothing to do with the game. This is strange since we have gotten lots of feedback that it resulted in a tremendous performance boost.
Other than the memory pool file, a few optimizations related to Ryzen Processors and Ray Tracing have also been made.
PATCH 2.0 Update Log
Cyberpunk 2077 Update 2.0 Official Patch Notes:
- Revised PC System Requirements:
- Cyberpunk 2077 PC system requirements have been recently updated. A Solid State Drive (SSD) is now essential to run the game smoothly.
- Enhanced NVIDIA DLSS Support:
- Cyberpunk 2077 now includes support for NVIDIA DLSS 3.5, which introduces a feature called DLSS Ray Reconstruction, enhancing the quality of the game’s Ray Traced effects.
- To utilize DLSS 3.5, you’ll need a GeForce RTX graphics card.
- You can find the option to enable it in the Settings menu under Graphics in the NVIDIA DLSS section.
- It’s worth noting that DLSS 3.5 is only accessible when Path Tracing is enabled.
- To ensure the proper functioning of DLSS Ray Reconstruction on your PC, make sure to update your NVIDIA Game Ready Driver to at least version 537.42.
- AMD SMT Option:
- A new AMD Simultaneous Multithreading (SMT) switch has been introduced in the game and you can locate it in the Settings menu under Gameplay → Performance.
- SMT switch allows you to choose between three settings: Off (utilizing only physical cores), On (utilizing all logical cores), or Auto (optimizing performance across various in-game situations).
- This change was implemented in collaboration with AMD and is based on comprehensive testing conducted by both parties.
- Crowd Density Adjustment:
- The Crowd Density setting has been relocated from the Gameplay tab to the Graphics tab in the game settings.
- Furthermore, Crowd Density now corresponds to Graphics Quick Presets, adjusting according to the selected preset. However, players still have the option to customize Crowd Density independently if necessary.
- Steam Deck Compatibility:
- With the recent changes to the PC requirements, it’s now essential to have an SSD when playing the game on Steam Deck.
- The graphic profile for Steam Deck has been revised to enhance frame rate stability.
Thanks! Do share your feedback with us. ⚡
How can we make this post better? Your help would be appreciated. ✍
Very informative and article kept being updated.
EXCELLENT ! :)
You\'re pretty good!
Well written and extremely well explained! Thanks so much
You guys are the best!
awesome thx
Homie took time to explain every settings, w guy bro fr no cap fr fr ong
RULES!
THANK YOU
Thx!
Great!
Great work. I am always confused when I have decent PC setup and still going lower and lower in game options because I can\'t reach acceptable for me experience from that game. With options from this guide I increased around 30-50 fps (even capped to 144hz). I can also promise to myself that I will have more patience with options testing in this kind games.
very nice article !
This is an excellent level of detail and much appreciated.
can\'t change texture quality. bad information.
 Fact Checked By Ayyoun Ali