I’ve played the game for nearly 3,000 hours, and I can assure you getting High FPS In PUBG is hard. The game still isn’t properly optimized yet, and the frames aren’t consistent even with good hardware. Now, if you are going through a similar position, don’t worry because you have to come to the right place. I’ve listed a set of best PUBG PC settings to help you get the best performance on your PC.
I’ve tested PUBG on the following PC specifications:
- CPU: Ryzen 3600x.
- GPU: MSI GTX 1080 Ti Gaming X.
- RAM: 16GB DDR4 Corsair RGB Pro.
- Storage: 2TB SSD.
- Operating System: Windows 10 Pro.
You’ll need at least an Intel i5-4430 or AMD FX-6300 CPU, Nvidia GTX 960 or AMD Radeon R7 370, and 8 GB of RAM to run PUBG on a PC.
The following settings are the most FPS hungry among the rest in PUBG:
- Antialiasing
- Post-Processing
- Shadows
- View Distance
I’ve been playing PUBG since the early access days and performance wasn’t its strong suit back then. However, over the years, the game has evolved and improved in several ways, performance being one of them. There are significantly less stuttering and FPS drops now. The overall performance of the game is also optimized (I’ve also talked about it in my review of PUBG), but there are occasional performance hitches that you need to keep an eye out for.
In this guide, we are going to make several changes in PUBG Settings, Graphics Card Settings, and Windows 10 itself. If you follow the guide properly, I can guarantee you won’t get any more stutters, crashes, Low Frames, and game freezes. Now, without wasting any more time, let’s jump into details.
Best PUBG Settings For High FPS
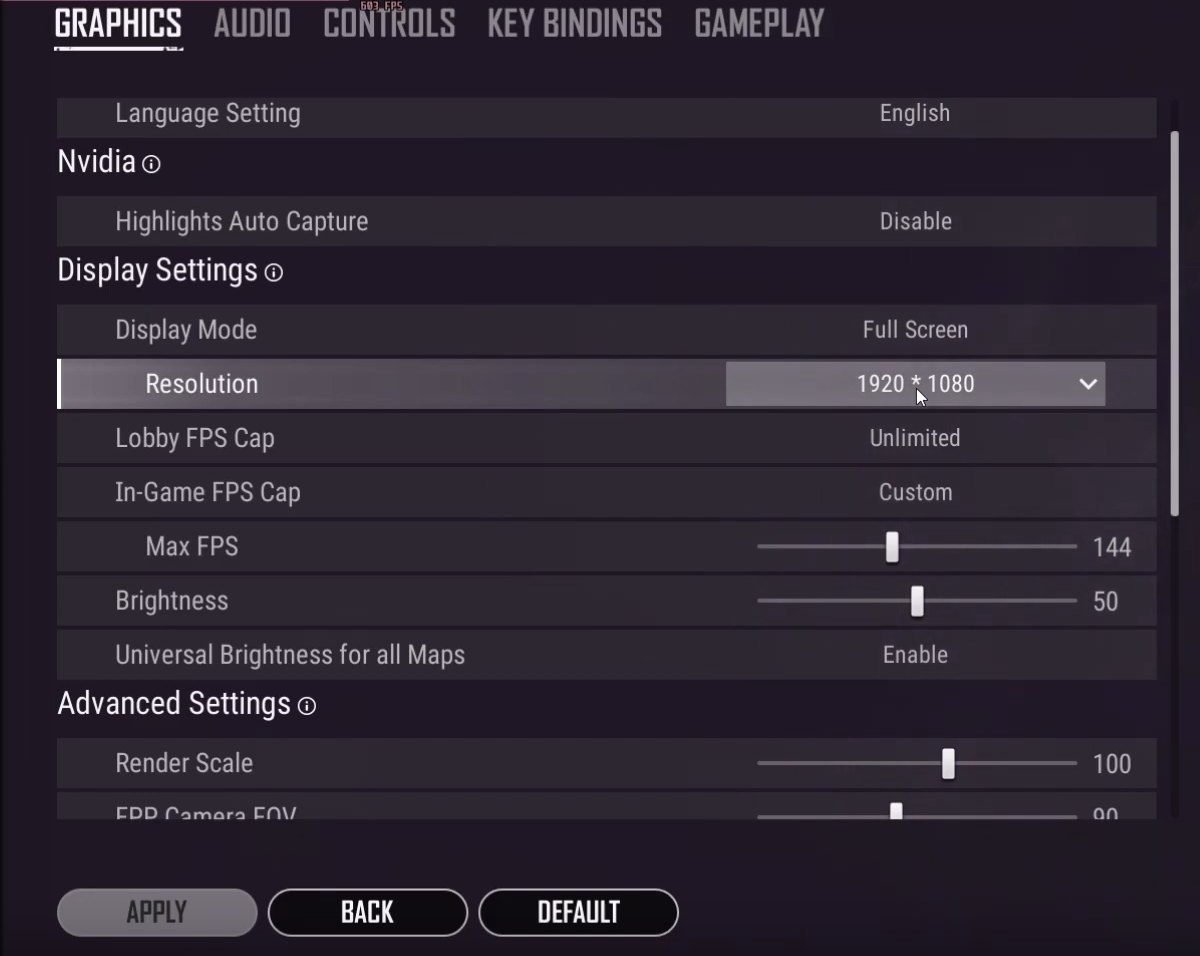
Let’s begin the guide by selecting the best PUBG settings for Max FPS and Performance.
PUBG Graphics Settings Summarized
| Resolution | Player’s Choice |
| Lobby FPS Cap | No Cap |
| In-Game FPS Cap | Custom – Max Refresh Rate Value |
| Brightness | Player’s Choice |
| Universal Brightness for all Maps | Enabled |
| Render Scale | 100 |
| FPP Camera FOV | 90 – 103 |
| Overall Graphics Quality | Custom |
| Anti-Aliasing | Very Low |
| Post-Processing | Very Low |
| Shadows | Very Low |
| Textures | Ultra |
| Effects | Very Low |
| Foliage | Very Low |
| View Distance | Medium |
| Sharpen | Disabled |
| V-Sync | Disabled |
| Motion Blur | Disabled |
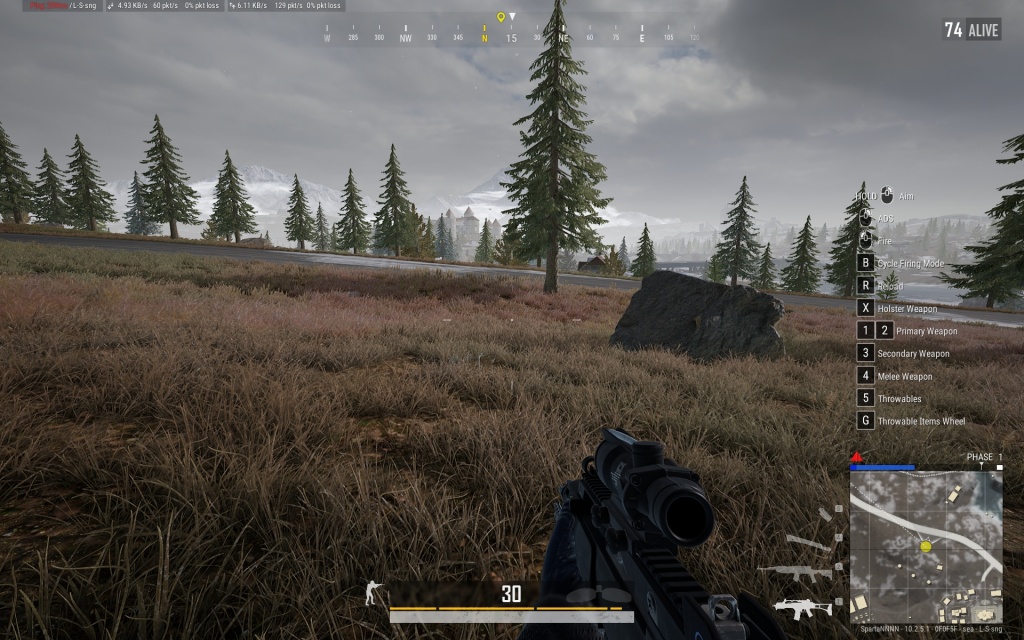
Here is a comparison between different graphical settings in PUBG:
 View Distance


Another Guide Like This: Best Valorant Settings For High FPS and Ultimate Performance.
Best Nvidia Graphics Settings for PUBG
After optimizing the in-game settings, it’s time to tweak the Nvidia Control Panel settings to get the most performance out of your GPU.
Nvidia Settings For PUBG Overview
| Image Sharpening | Disabled |
| Ambient Occlusion | Off |
| Anisotropic Filtering | Off |
| Antialiasing FXAA | Off |
| Antialiasing – Gamma Correction | On |
| Antialiasing – Mode | Off |
| Antialiasing – Settings | None |
| Antialiasing – Transparency | Off |
| CUDA – GPUs | All |
| DSR – Factors | Off |
| DSR – Smoothness | Off |
| Low Latency Mode | Off |
| Max Frame Rate | Off |
| Multi-Frame Sampled AA (MFAA) | Off |
| OpenGL Rendering GPU | Auto Select |
| Power Management Mode | Prefer Maximum Performance |
| Preferred Refresh Rate | Max / Application Controlled |
| Shader Cache | On |
| Texture Filtering – Anisotropic Sample Optimization | On |
| Texture Filtering – Negative LOD | Allow |
| Texture Filtering – Quality | High Performance |
| Texture Filtering – Trilinear Optimization | On |
| Threaded Optimization | On |
| Triple Buffering | Off |
| Vertical Sync | Off |
| Virtual Reality Pre-Rendered Frames | 1 |
Best AMD Settings for PUBG
For AMD Users, make sure that your drivers are updated to the latest Adrenaline version. Afterward, open the AMD Control Panel, select PUBG under Gaming and Graphics Profiles, and make the following changes.
Summary Table Of AMD Settings For PUBG
| Anti-Aliasing Mode | Use Application Settings |
| Anti-Aliasing Method | Adaptive Multisampling |
| Morphological Filtering | Off |
| Anisotropic Filtering Mode | Use Application Settings |
| Texture Filtering Quality | Performance |
| Surface Format Optimization | On |
| Wait For Vertical Refresh | Off |
| OpenGL Triple Buffering | Off |
| Shader Cache | On / AMD Optimized |
| Tessellation Mode | Override Application Settings |
| Maximum Teselation Level | Off |
| AMD FreeSync | On |
| Frame Rate Target Control | Disabled |
I’d recommend giving our full guide on AMD’s best settings a read for an in-depth look at individual options.
Windows Optimization Tips For PUBG
I’ll recommend following these Windows optimization tips and settings to improve your performance in PUBG; making your PC overall snappier:
- Disable Windows Fullscreen Optimisation: When full-screen optimization is disabled, you will also see massive responsiveness in minimizing PUBG and, in some cases, more Frames and Improved Performance. You’ll need to locate PUBG install Directory > Locate Main Executable File > Access Properties > Check Mark Disable Fullscreen Optimizations in Compatibility Tab.
- Enable Game Mode: Game Mode is a built-in Windows 10 feature that is designed to provide games with 100% processing power. Game Mode will automatically kill those applications and therefore ensure that your CPU/Memory is properly utilized. You can enable it in Settings > Gaming > Game Mode.
- Use Windows High-Performance Mode: Graphics Setting is strictly meant for optimizing the Graphic Card Usage. Simply go for High performance as it will make sure your GPU is running at 100%. You’ll find this option in Display Settings > Graphics > Locate PUBG Application > Set to High Performance.
Similar Guides: Rainbow Six Siege High FPS And Best Settings Guide
Bonus: PUBG Launch Options To Increase FPS
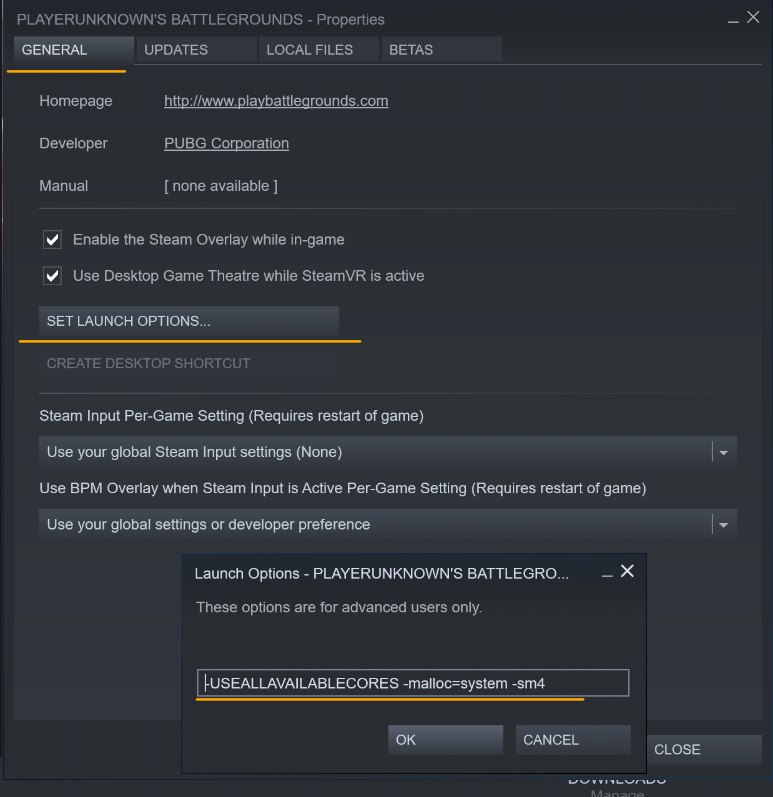
If you are unaware of launch options. Let me explain it in easy words. The Steam version of PUBG has launch options that Steam says are advanced settings. Well, there aren’t a lot of advanced gimmicks involved; all you have to do is just enter this set of code.
-USEALLAVAILABLECORES -malloc=system -sm4
- -USEALLAVAILABLECORES is going to unlock all your cores while playing PUBG. Therefore, you can expect more Frames than usual.
- -malloc=system also improves your performance by optimizing RAM usage.
- -sm4 forces DX10 graphics instead of DX11 or DX12. DX10 is much lighter than others but you’ll observe a hit in visual quality.
Here’s how to make use of these launch parameters:
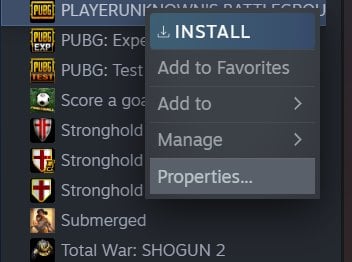
- Open Steam.
- Right-click on PUBG > Properties > General.

PUBG Launch Options - Now Under General Tab > Click on Set Launch Options and enter the code given below.
- -USEALLAVAILABLECORES -malloc=system -sm4.

Take a good look at spacing and make sure you are entering the exact same code. - Once done, simply exit and launch the game to see if you notice any changes.
Chicken Dinners Are Just Around The Corner
Running PUBG on my GTX 1080ti in 2024 might seem odd, but it’s more than enough to generate 100+ FPS since the game is much more optimized now. I did encounter occasional stutters but closing down Discord helped them a little (it may have to do with hardware acceleration which I recommend disabling).
Now where I was getting satisfactory performance with my setup, there were other players in the community who are getting low FPS in PUBG to this date. But the good thing is, I haven’t encountered much posts about PUBG performance issues which is a good sign.
Once you have applied all the changes suggested above. I can assure you that next time you are on your way to grab a chicken dinner. Your PUBG won’t lag, nor will it stutter or crash. ESports players use these settings and really the best ones in the game.
If you are still struggling to get chicken dinners, I highly recommend you to check our guide on “How To Become Absolute Pro At Any Competitive Game”.
Thanks! Do share your feedback with us. ⚡
How can we make this post better? Your help would be appreciated. ✍
it was great. Thank you !
good
nice job !
Extremely helpful article. I set these settings everytime that I re-install. Thank you!!
I play PUBG on a gtx 960. Performance has been below bar so this has helped me a lot.
Game runs really fluent now. Thanks
thank you :)
nice
Guide complet et simple d\'application
Tnx very much
Thank you
specific with the instructions perfectly understandable for everyone.
God job like it if you can provide advance sittings in the game also that would be great
thank <3
thanks
Dope easy tutorial
very helpfull for newbie as iam. please keep share info. semangat bray!
yes that was so good
Wow great job! I can see! Well... long rifle shots are now clear and crisp anyway.
very useful! Thanks!
Very useful, the author has extensive experience
good
Nice and helpful
Great!!!
GREAT
thanks
W guide
Great guide. Still worls!
got a massive fps boost thank you
thank you
Nvidia setting helped. Thanks alot
These settings really helped with my framerate. Thanks alot
thank you
My 10 year old Nvidia card is finally showing some good frames
thank god theres something for AMD cards as well