Players in Elden Ring are dealing with a bothersome “A Connection Error Occurred” prompt. It disrupts online play, whether joining others for co-op sessions or PvP. This issue appears when connecting for activities like helping in boss fights or engaging in PvP battles. It affects both inviting others and joining their sessions, pushing players to offline play. Reports suggest it’s a widespread problem among Elden Ring players.
Here is how to fix the Elden Ring Connection Error:
- Port Forwarding.
- Use Co-op Mod.
- Ensure Open NAT Type.
- Multiplayer Password.
- Change Character Build.
Forward the Relevant Ports for Better Connectivity
One of the first potential fixes that also seemed to be popular among other players for the “Connection error returning to your world” issue in Elden Ring revolves around forwarding some of your internet router’s ports.
The following steps are going to explain how to get this done exactly.
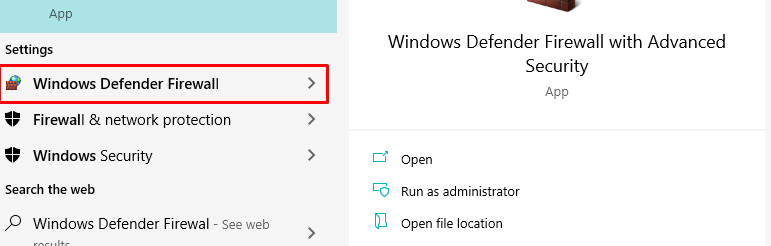
- Search for “Windows Defender Firewall” in the Windows Start menu > open the application.
2. Click “Advanced settings” in the sidebar.
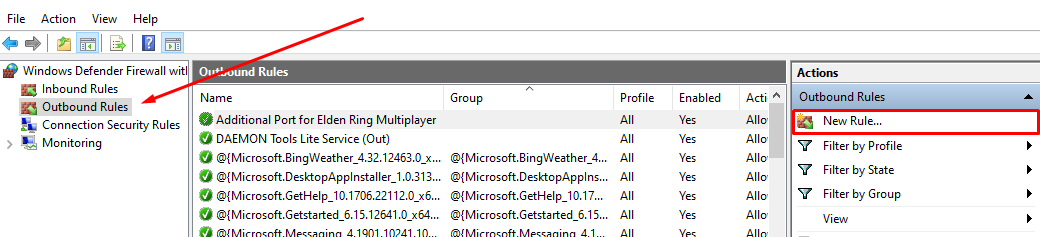
3. In the “Windows Defender Firewall with Advanced Security” window, choose “Outbound Rules” from the left sidebar and click “New Rule…” on the right.
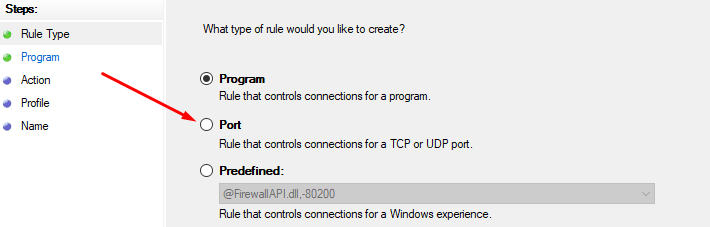
4. Start with “Port” > click “Next.”
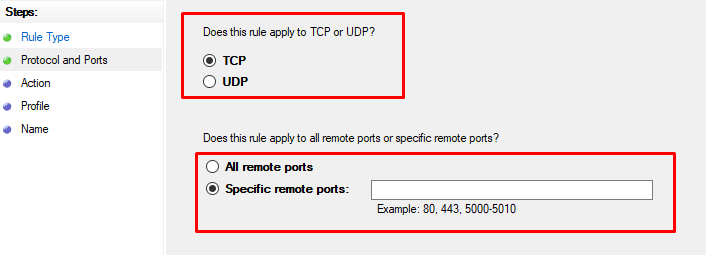
5. Select the specific port protocol for the outbound rule. Choose the ports you need to forward and specify them in this section on your Windows PC.
-
UDP: 27015, 27031, 27032, 27033, 27034, 27035, 27036.
-
TCP: 27015, 27036.
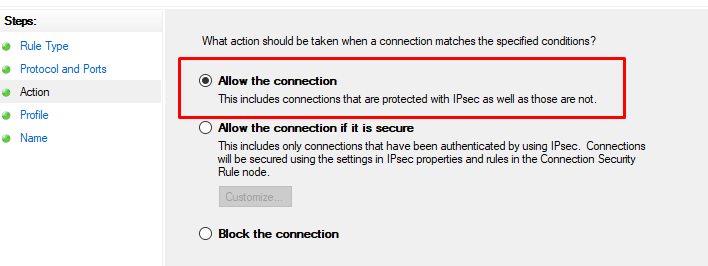
6. Simply click on the toggle beside “Allow the connection” and then select “Next” in this step to move forward.
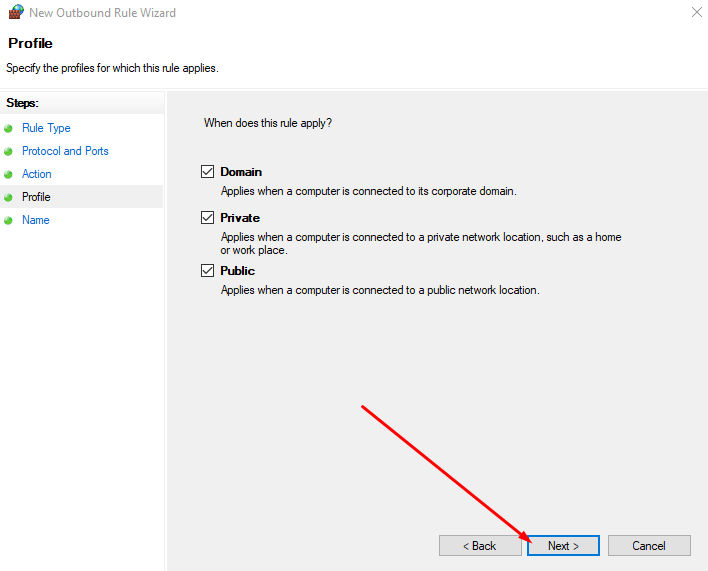
7. Apply the rule to all three profile types to complete the next step. Click on “Next” when you’ve checked all boxes.
8. In the final step, simply set a name for the outbound rule, add a description if you want, and finalize the whole measure by clicking “Finish.”
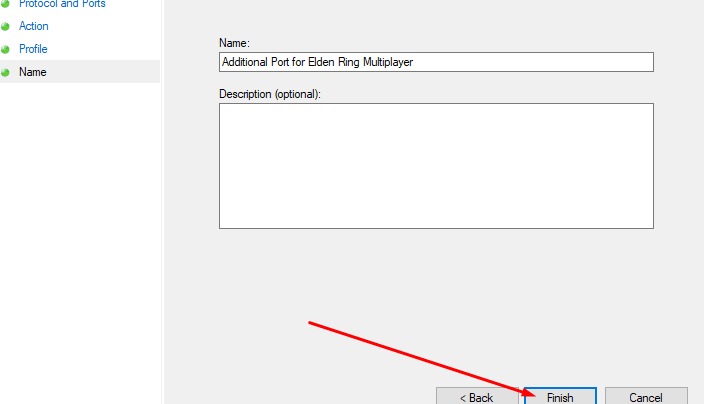
Specify outbound rules for Elden Ring’s multiplayer by repeating the process for both TCP and UDP ports. Remember to forward your ports initially for optimal results.
Try a Different Internet Connection
Despite people having a gigabit internet connection set up in their area of dwelling, it’s worth a shot to try an alternative internet connection to see if it would work. That’s because you never know what type of ports are currently blocked or prevented on your internet router.
The possibilities can span from many factors, so you’re better off confirming whether your specific internet router is causing the “A Connection Error Occurred,” or it is entirely something else. After going to said method, confirm if the problem has been resolved.
Using A Co-op Mod

In Elden Ring, the persistent “A Connection Error Occurred” problem primarily arises due to the interplay between EAC (Easy Anti-Cheat) and the networking code developed by FromSoftware.
This issue disrupts the game’s multiplayer functionalities, creating hurdles in connecting to matchmaking servers. However, a specific mod has surfaced as a remedy for me and many other players, effectively bypassing these connection errors and significantly enhancing the multiplayer experience by resolving communication issues with the game’s servers.
Make Sure Your NAT Type is Open
If you’re not on PC and are playing on any of the PlayStation or Xbox consoles then to optimize your Elden Ring multiplayer experience on consoles, prioritize adjusting your NAT-type settings. Access the “Network” settings on your console, verify an Open NAT type for smoother online gameplay, and mitigate issues associated with Moderate or Strict NAT types, which can cause multiplayer problems in Elden Ring.
Use a Multiplayer Password
If you aren’t doing this already, we highly recommend using a multiplayer password to alleviate the connection errors in the Elden Ring. This is one of the many ingrained game mechanics of Elden Ring that promotes cooperative play and allows you to easily find your friend(s) to connect with in the bustling world of the Lands Between.
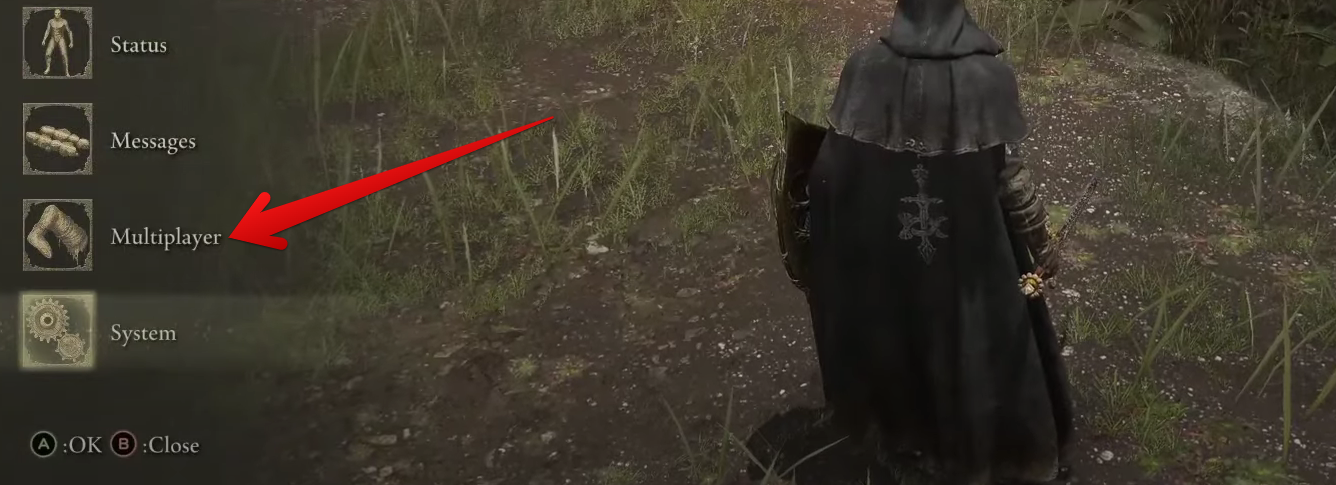
- To set a multiplayer password > access the in-game menu of the game > select the “Multiplayer” option. Doing that will get you to another menu.

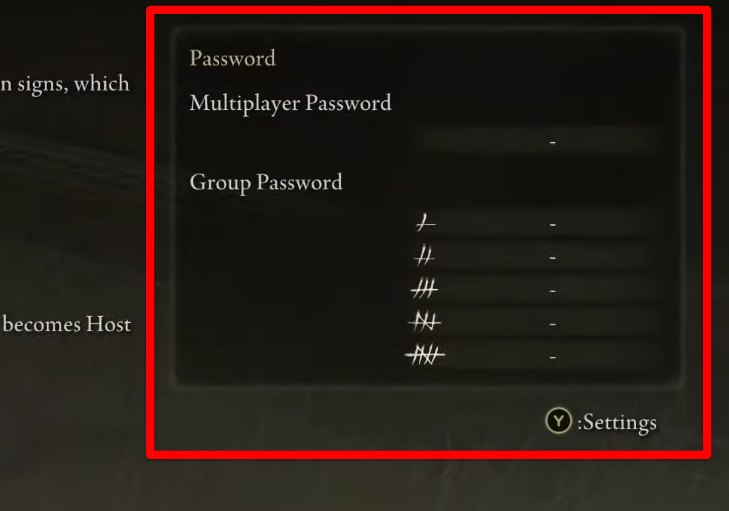
Selecting the “Multiplayer” Option (Image captured by eXputer) - Once done > you will be able to access the “Multiplayer Password” section by pressing either the “Y” or the “Triangle” button on your respective console.

Accessing the Multiplayer Password Area (Image captured by eXputer)
You can now set a multiplayer password for your session in Elden Ring. Choose something easy and simple so your friends can use it on their end painlessly.
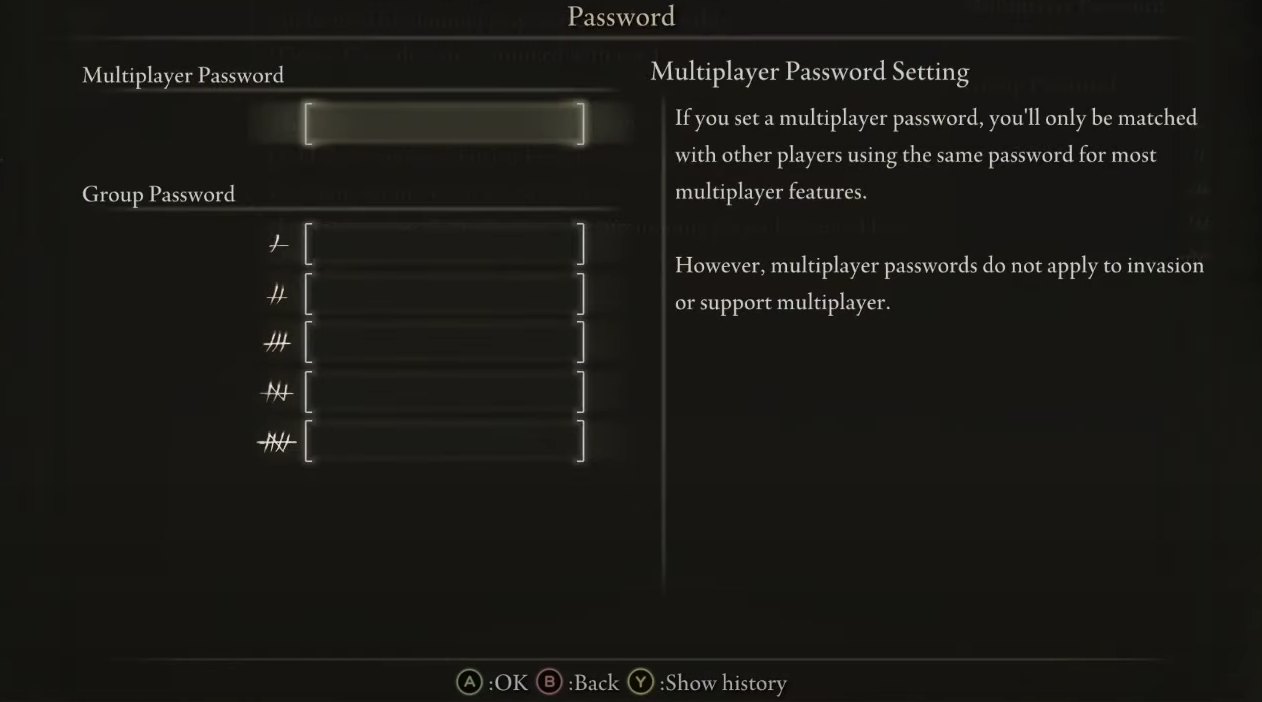
After setting the multiplayer password, send it to your friends so they can join you more effectively. Doing this will help you incline your multiplayer connection to select players.
Use a Different Character

Players facing online connection problems in Elden Ring might find relief by utilizing the game’s Respec feature. This function becomes available after defeating Rennala, Queen of the Full Moon, enabling a complete reset of character statistics. This workaround aims to address the connection error problems related to character builds in your friend’s world.
Ending Thoughts
The Elden Ring “A Connection Error Occurred” issue is widespread and hampers co-op and PvP gameplay. Fixing it isn’t straightforward and requires some decent technical skills. Discussions on Twitter and forums (Steam and Reddit) reveal player frustrations with connection errors and multiplayer issues.
I'm so tired of seeing "A connection error occurred. Returning to your world."
Is it worse in some areas than others? #EldenRing— Rita Wulff (@Varewulf) March 23, 2022
Trying various methods, like port forwarding and DNS modifications, yielded mixed results for me. Official acknowledgments in patch notes confirm they have fixed the issue however the issue is still persistent to this day. In summary, it’s a pervasive global problem needing a definitive resolution.

More Elden Ring Error Guides by eXputer:
Thanks! Do share your feedback with us. ⚡
How can we make this post better? Your help would be appreciated. ✍