Star Wars Jedi Survivor: All Bosses & How To Defeat Them
This Star Wars Jedi Survivor bosses guide lists the main story, optional & Legendary bosses with attack patterns & best strategies to defeat.

Players will encounter at least 18 Star Wars Jedi Survivor bosses ranging from the main story bosses that are not avoided, optional bosses & Legendary ones as well. These bosses range from bounty hunters, creatures, Jedi-turned-Imperial spies & much more. I have listed all the bosses you will encounter in Star Wars Jedi Survivor in this guide.
- There are 18 Star Wars Jedi Survivor bosses that include main, optional, and legendary bosses.
- Bosses like the Door Technician are not listed in the guide, as they’re pretty much normal enemy types labeled as a boss.
- Here is the complete list of all the bosses in Jedi Survivor:
- K-405.
- Ninth Sister.
- Zeik.
- Skriton.
- Spawn of Oggdo.
- Dagan Gera.
- Sutaban Alpha.
- Reprogrammed Magnaguard.
- The Mire Terror.
- Drya Thornne.
- Korej Lim.
- Rancor.
- AT-ST.
- Tague Louesh.
- Urgost, Fist of Rayvis.
- Rayvis.
- Darth Vader.
- Bode Akuna.
K-405

In Star Wars Jedi Survivor, K-405 is a formidable droid boss encountered early in the game. It serves as an introductory boss battle, teaching players about the game’s combat mechanics and various attack patterns. Bode Akuna, a helpful companion, aids you in this encounter and contributes significant damage to K-405.

| Attack Pattern Name | Description |
|---|---|
| Electric Baton Swings | K-405 performs three slow, easily dodged swings with its electric baton. |
| Unblockable Baton Swing | K-405 charges up for a powerful red-aura swing that cannot be blocked and must be evaded. |
| Vertical Baton Slam | Occasionally, K-405 slams its electric baton vertically, but the attack is slow and easy to anticipate. |
K-405 Boss Location
The boss fight against K-405 takes place on a lower platform, initiated when the droid pulls Cal out of a crevice and throws him there.
How To Defeat K-405

- Dodge and parry: Learn to dodge K-405’s slow electric baton swings and unblockable attacks. Familiarize yourself with the game’s dodging and parrying mechanics to outmaneuver the droid.
- Utilize standard lightsaber attacks: These attacks are effective against K-405. Engage the droid after it finishes its attack patterns to deal damage safely.
- Rely on Bode Akuna: If overwhelmed, maintain your distance and let Bode engage the droid. You can also command Bode to use his electric grenade, which stuns K-405, allowing you to land multiple hits.
- Watch for red attacks: Evade any red-glowing attack, as these cannot be blocked or parried. Stay alert and move quickly when K-405 initiates such an attack.
- Manage your health: Use stims wisely to heal during the battle and keep Cal’s maximum health, making sure to create distance between you and K-405 to avoid being interrupted while healing.
Ninth Sister

The Ninth Sister is a Dowutin Inquisitor with empathic Force abilities and returns as an adversary. Having lost her arm in a previous battle, she now wields a cybernetic right hand and is one of the early game toughest Star Wars Jedi Survivor bosses.

| Boss Attack Patterns | Descriptions |
|---|---|
| Basic Strike | Parry or dodge her basic attacks to weaken her stamina |
| Lightsaber Projectile | Parry or dodge the incoming lightsaber throws |
| Charged Moves | Use Pull Force or dodge to avoid her heavy attacks |
| Ground Smash | Double-jump to evade the shockwave from her ground pound |
| Combo Finishers | Dodge these attacks as they cannot be parried |
| Empathic Force | Cannot be countered; wait for it to wear off before attacking |
| Pull Force | Cannot be countered; maintain a safe distance |
Ninth Sister Boss Location
The boss fight with the Ninth Sister takes place in Senator Daho Jehan’s yacht after traversing the Coruscant Undercity.
How To Defeat Ninth Sister

- Choose the Single lightsaber stance: Out of all 5 stances in Star Wars Jedi Survivor, I will recommend you opt for the Single stance for its speed and quick counter-attack capabilities. The Double-Bladed stance is more suited for battles against multiple enemies.
- Focus on blocking and parrying: The Ninth Sister primarily uses long, slow, heavy combos. Hold L1/LB to block her attacks and wait for the combo to end before attempting to counter. Aim to parry by pressing L1/LB just before her attack connects, making her vulnerable for a counter-attack.
- Dodge unblockable attacks: When the Ninth Sister turns red, her attacks become unblockable. Tap Circle/B while pushing left or right on the left stick to dodge these attacks.
- Evade the ground pound shockwave: Later in the fight, the Ninth Sister will use a ground pound attack that sends out a shockwave. Jump over the shockwave to avoid damage.
- Patiently wait out her Force mind trick: During the fight, the Ninth Sister will use her empathic Force abilities to dodge and weave, making her untouchable. Stay back and wait for this effect to end before attacking.
- Utilize the Dual stance: When the Ninth Sister is down to about 25% health, you’ll acquire the Dual stance. This stance makes the fight easier, as she struggles to defend against it. Attack relentlessly and hold down Triangle/Y to automatically parry her attacks in this stance.
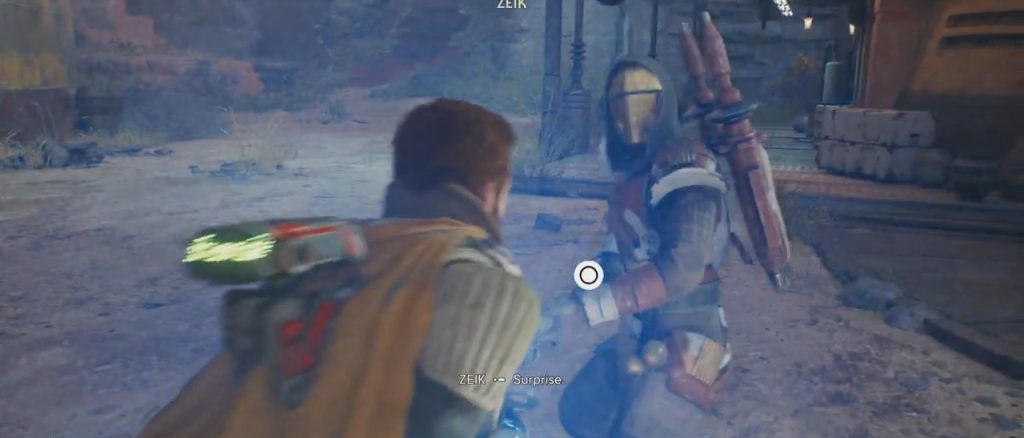
Zeik

Zeik, a formidable Bedlam Raider, is encountered during the Imperial Era on the dangerous planet of Koboh in Star Wars Jedi Survivor. Skilled in combat, this high-ranking raider proves to be a challenging adversary for inexperienced players.

| Boss Attack Patterns | Descriptions |
|---|---|
| Red Glowing Attacks | Unblockable, powerful attacks must be evaded. Sidestep or create distance to avoid damage. |
| Combo Chains | Zeik can chain multiple red attacks together, making it essential to stay alert and ready to dodge. |
| Pin Attack | Zeik may pin the player with his weapon, requiring rapid button presses to break free and avoid damage. |
| Parry Encounters | Zeik can parry the player’s attacks, leading to a brief cinematic sequence before resuming combat. |
| Normal Attacks | Zeik’s standard attacks can be blocked or parried, allowing for counterattacks when timed correctly. |
| Force Abilities | Utilize Cal’s Force powers to slow down Zeik, opening up opportunities for dealing substantial damage. |
Zeik Boss Location
Zeik, the imposing Bedlam Raider, is one of the Star Wars Jedi Survivor bosses, which can be found at Rambler’s Reach Outpost on the treacherous planet of Koboh. The showdown with this menacing boss takes place within the Cantina, where Cal discovers Turgle being threatened and steps in to defend him, initiating the battle against Zeik.
How To Defeat Zeik
- Maintain distance: Keep a safe distance from Zeik to avoid his powerful spear attacks and prepare to dodge or counterattack.
- Watch for red attacks: Zeik’s red glowing attacks are unblockable; make sure to sidestep or create distance to avoid taking damage.
- Master the parry: Parrying Zeik’s standard attacks can create opportunities for counterattacks, so practice timing your parries for maximum efficiency.
- Break combos: Zeik can chain multiple red attacks together; stay vigilant and ready to dodge these dangerous combinations.
- Use Force abilities strategically: Utilize Cal’s Force powers, such as slowing down Zeik, to create openings for dealing significant damage.
- Exploit openings after Zeik’s parry: When Zeik parries Cal’s attacks, a brief cinematic sequence follows, giving you the chance to plan your next move and resume combat with a counterattack.
- Stay aggressive but cautious: Maintain a balance between offense and defense, ensuring you deal damage to Zeik while avoiding his powerful attacks.
- Adapt your tactics: Be prepared to switch strategies and adapt to Zeik’s attack patterns, capitalizing on any opportunities to strike back.
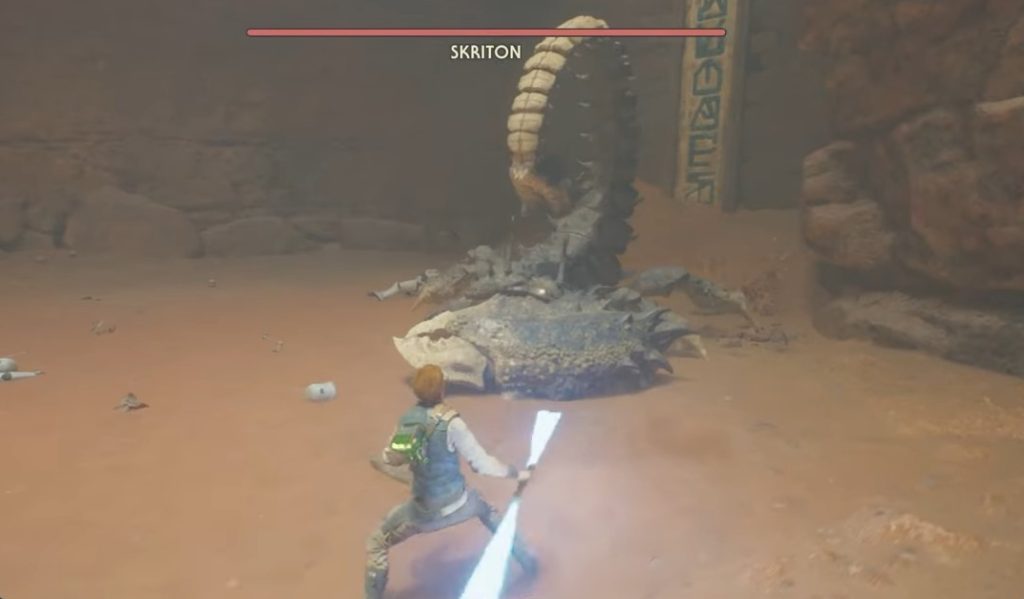
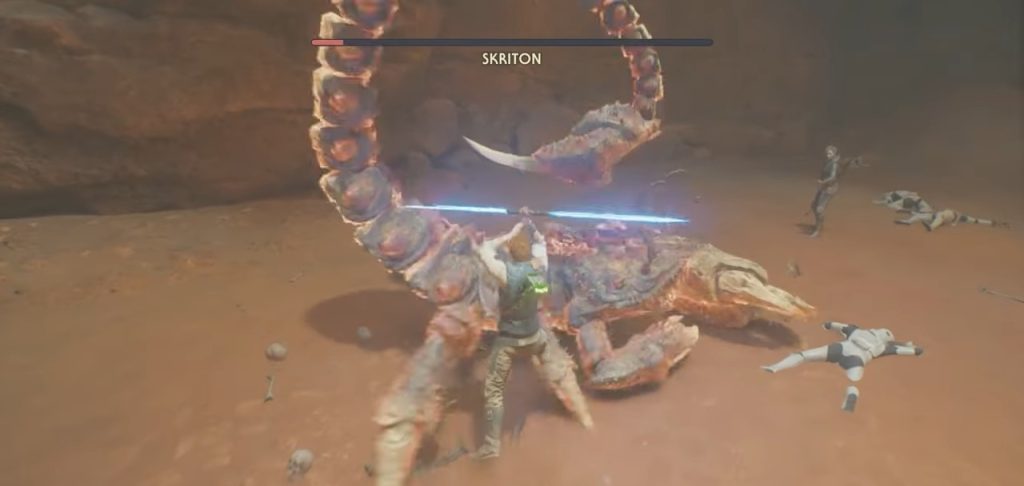
Skriton
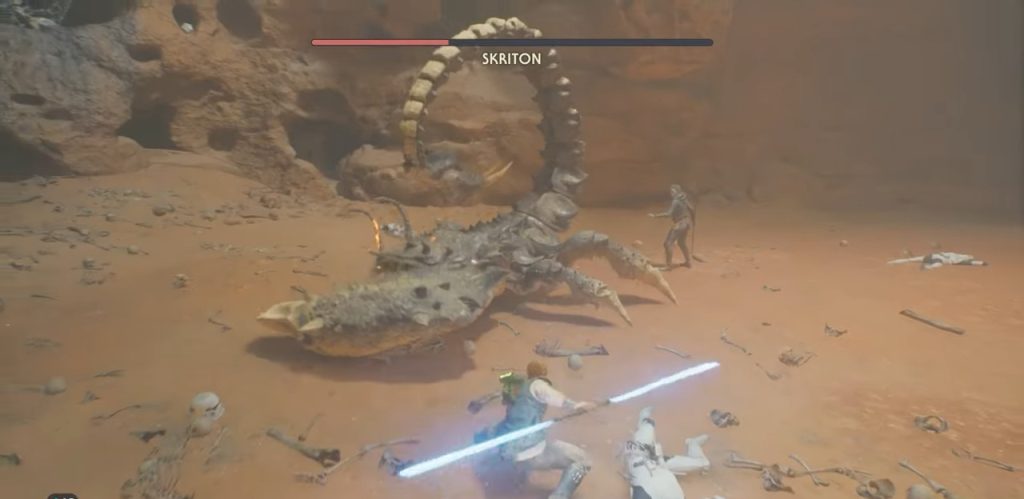
In Star Wars Jedi Survivor, Skriton is a formidable mini-boss that players will encounter on their first visit to Jedha. This colossal scorpion-like creature has a powerful claw and a sweeping stinger attack, making it crucial for players to stay agile and dodge its assaults throughout the battle.
| Attack Pattern | Description |
|---|---|
| Claw Block | Skriton uses its massive claw to block frontal attacks, so attack from the side instead. |
| Tail Sweep | Skriton performs a wide-reaching sweep with its tail, dealing significant damage. |
| Left Claw Hit | A short-range strike from Skriton’s left claw. |
| Unblockable Lunge | Skriton lunges forward with its claw, glowing red, and slams the ground, unable to be blocked. |
Skirton Boss Location
Skriton, a menacing scorpion-like mini-boss, can be found on the planet Jedha in Star Wars Jedi Survivor. Players will encounter Skriton as they progress through the game’s main storyline during their initial visit to the planet.
How To Defeat Skirton
- Stay Mobile: Keep moving and avoid staying in one spot for too long to prevent Skriton from grabbing you with its massive claw or striking with its tail.
- Attack from the Side: Skriton can block frontal attacks with its claw, so focus on attacking from the side, particularly by circling around its left.
- Dodge Tail Sweeps and Lunges: Be prepared to dodge Skriton’s sweeping tail attack and its unblockable lunge. Time your dodges carefully to evade these powerful moves.
- Use Merrin’s Tether Ability: Take advantage of Merrin’s tether ability to immobilize Skriton temporarily, providing you with a window of opportunity to deal substantial damage.
- Slow Skriton Down: Utilize Cal’s Slow ability to hinder Skriton’s movements, allowing you to move around and land attacks more effectively.
- Dual Blade Lightsaber Stance: Opt for the Dual Blade lightsaber stance due to its quicker attack speed, helping you to deal more damage during the fight.
- Share Aggro with Merrin: If Skriton becomes overwhelming, try to maintain a safe distance and let Merrin draw its attention. This strategy will give you a chance to recover and prepare for your next attack.
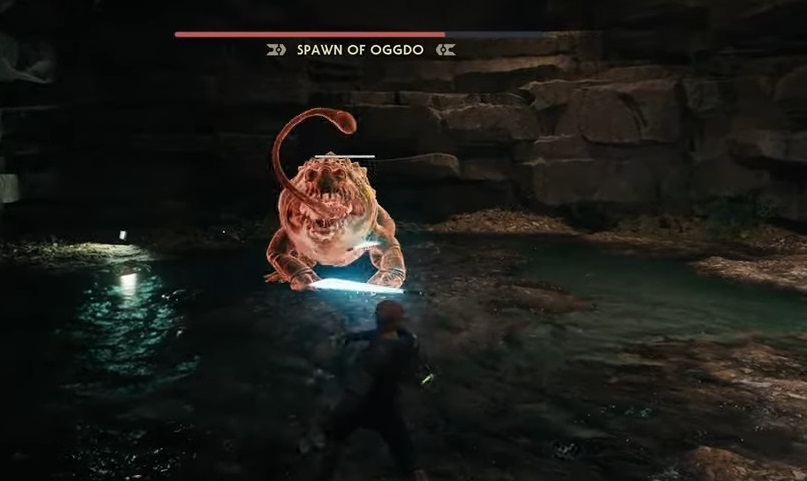
Spawn of Oggdo
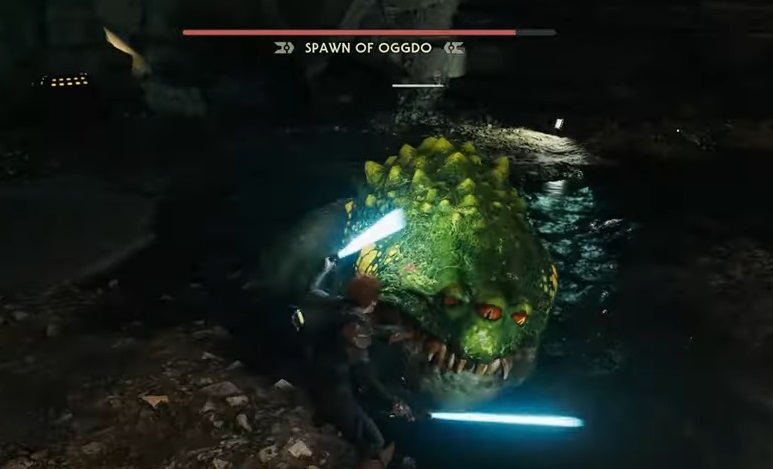
Spawn of Oggdo is one of the returning Star Wars Jedi Survivor bosses that players will encounter on the planet Koboh. This fearsome creature, the offspring of the infamous Oggdo Bogdo from Star Wars Jedi: Fallen Order, is a formidable opponent that will test Cal’s skills and abilities to their limits.
| Attack Pattern | Description |
|---|---|
| Bite Attack | The Spawn of Oggdo bites once or twice in quick succession. |
| Dash Attack | The creature reels back and then dashes towards Cal, requiring two dodges. |
| Tongue Grab | The Spawn of Oggdo uses its tongue to pull Cal into its jaws. |
| Unblockable Leap | As its health decreases, it starts to use unblockable leaping attacks. |
Spawn of Oggdo Boss Location
The Spawn of Oggdo boss fight takes place on the planet Koboh, inside the arena at Fort Kah’lin. Players will need to reach the Meditation Point at Fort Kah’lin, use the ascension cable, and defeat the Battle Droids they encounter along the way. Upon stepping on a suspicious platform in the center of the area, the platform opens, revealing the Spawn of Oggdo.
How To Defeat Spawn of Oggdo

- Clear the area: Before stepping on the platform, make sure to defeat all Battle Droids in the vicinity. Otherwise, they will drop into the arena and make the boss fight even more challenging.
- Pattern memorization: Pay close attention to the Spawn of Oggdo’s attack patterns, including its bite attack, dash attack, tongue grab, and unblockable leap. Memorize these patterns to dodge and counter them effectively.
- Dual Wield Saber Stance: Utilize the Dual Wield Saber Stance to maximize your damage output and agility during the fight.
- Dodge and counter: Focus on dodging the Spawn of Oggdo’s attacks and counterattacking when it’s safe. Be cautious not to attack after the first bite, as it may follow up with a second bite.
- Time your jumps: When the boss uses its tongue grab, time your jump late to avoid being pulled into its jaws.
- Manage unblockable leaps: As the Spawn of Oggdo’s health decreases, it will use unblockable leaps. Stay vigilant and dodge as often as possible.
- Don’t get overconfident: Maintain a steady and cautious approach, focusing on landing one or two hits at a time.
- Utilize lightsaber throws: If you need to maintain distance, use lightsaber throws to chip away at the boss’s health.
Dagan Gera

Dagan Gera is a formidable opponent in Star Wars Jedi: Survivor, encountered in a series of three progressively challenging boss fights. He is an aggressive and relentless foe, utilizing various powerful attack patterns and evolving his fighting style throughout the encounters.

| Attack Pattern | Description |
|---|---|
| Lunging Attack | Parryable, dashing lightsaber attack with a long-range, covering the entire arena |
| Uppercut Swing | Unblockable, vertical attack with less range; dodge to the side to avoid |
| Spinning Slash | Unblockable, horizontal spinning attack; dodge backward to evade |
| Thrusting Stab | Unblockable, slower stabbing attack; react quickly to dodge |
| Pouncing Attack | Unblockable, fast leaping attack; requires a roll to the side to avoid |
| Combo Attacks | A series of slashes and thrusts; focus on parrying and counterattacking when possible |
Dagan Gera Boss Fight Locations
Dagan Gera is one of the formidable Star Wars Jedi Survivor bosses, with players facing him in three separate battles, each more challenging than the last. The boss fights take place in the following locations:
- Forest Array
- Lucrehulk
- Koboh Observatory
How To Defeat Dagan Gera

To defeat Dagan Gera, players should employ the following strategies and tips:
- Forest Array Encounter:
- Maintain close proximity to maximize damage output
- Utilize the dual-bladed lightsaber stance for rapid damage
- Focus on breaking Dagan’s stance and exploiting attack windows
- Dodge wide-sweeping attacks and unblockable moves
- Lucrehulk Encounter:
- Watch for the orbiting blade attack and parry to deplete Dagan’s stun gauge
- Employ the Shatter Perk to fill Dagan’s stun gauge more quickly
- Anticipate alternating blockable and unblockable attacks
- Use the Crossguard Stance for high damage in short time periods
- Koboh Observatory Encounter:
- Avoid relying on Force abilities, as they have limited effectiveness
- Keep a close eye on Dagan’s unblockable attacks, as lighting may obscure visual cues
- Utilize Bode’s distractions to deal damage while Dagan’s attention is diverted
- In the final phase, eliminate Dagan’s projections quickly and dodge increased Force projectiles
- Carefully time dodges and maintain relentless attacks during open windows
By mastering these strategies and adapting to Dagan Gera’s evolving attack patterns, players will successfully overcome this challenging boss and progress further in Star Wars Jedi: Survivor.
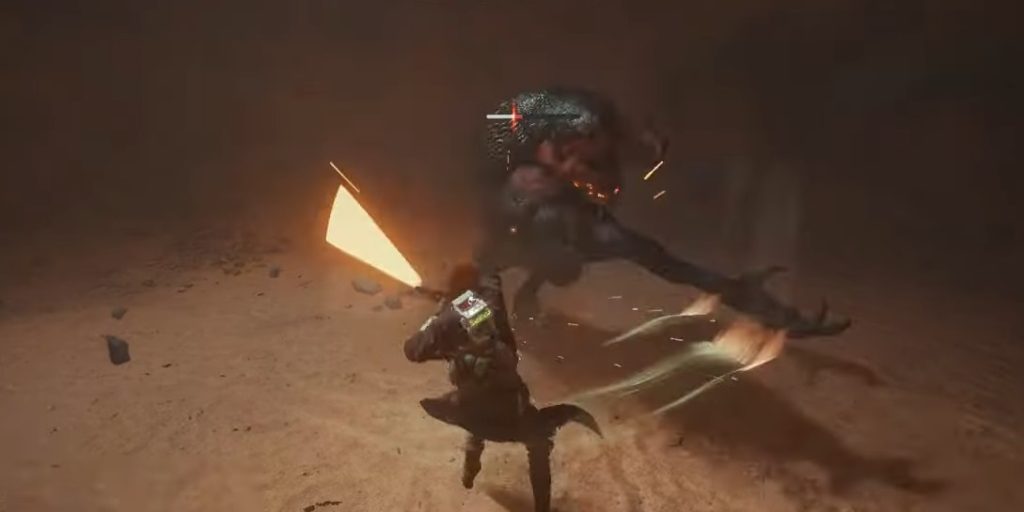
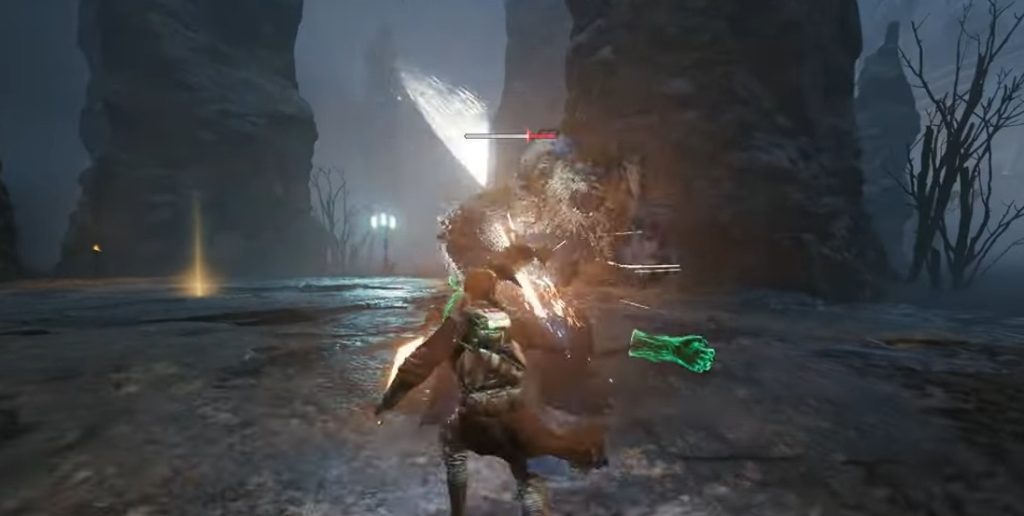
Sutaban Alpha
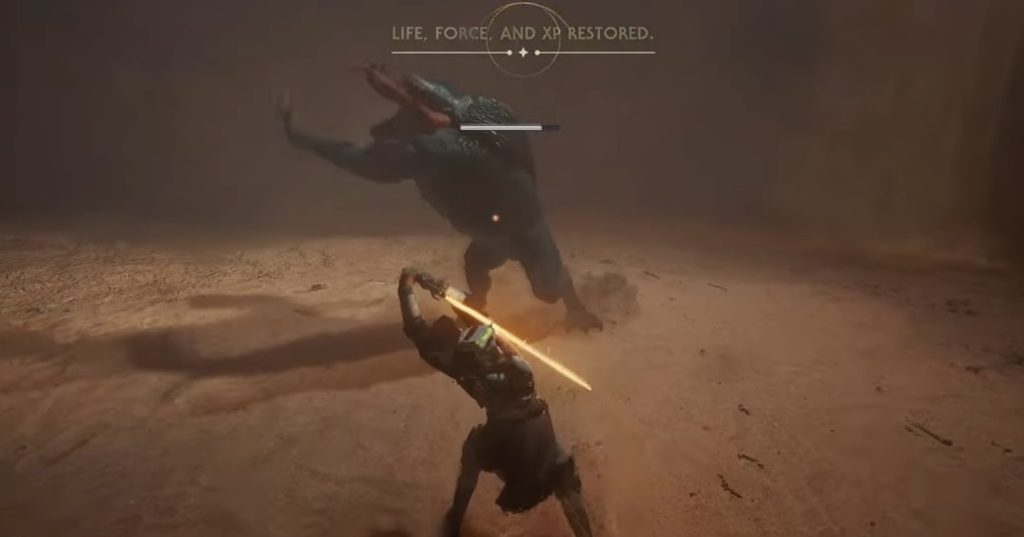
In Star Wars Jedi: Survivor, Sutaban Alpha is a formidable optional boss that awaits players in the Crypt of Uhrma on Pilgrim’s Path. This legendary creature is one of the deadliest predators on Jedha, challenging players with its immense agility and devastating attacks.
| Attack Pattern | Description |
|---|---|
| Ground Pound | A powerful area-of-effect attack; dodge to avoid damage. |
| Melee Strike Flurry | A series of rapid strikes; parry or block to counter. |
| Unblockable Lunge | A lunging attack that bypasses defenses; dodge to evade. |
Sutaban Alpha Boss Location
The Sutaban Alpha boss fight takes place within the Crypt of Uhrma, an ancient structure found along the Pilgrim’s Path on Jedha in Star Wars Jedi: Survivor. The crypt’s interior may feel slightly confined at first, but upon solving the puzzle within, the area opens up into a more spacious environment, setting the stage for the formidable battle against the legendary Sutaban Alpha.
How To Defeat Sutaban Alpha

- Prioritize evasion: Sutaban Alpha’s attacks are swift and powerful. Focus on dodging its attacks, especially the Unblockable Lunge, which can’t be blocked or parried.
- Learn attack patterns: Recognize the Ground Pound, Melee Strike Flurry, and Unblockable Lunge patterns, and adapt your strategy accordingly. Each attack has a unique timing and range, so understanding these patterns is crucial for survival.
- Counterattack during openings: Wait for the Sutaban Alpha to finish its attack animations before striking. Patience is essential, as this boss offers limited opportunities to deal damage safely.
- Parry with caution: If you’re confident in your parry timing, attempt to parry the Melee Strike Flurry to create additional opportunities for counterattacks. Be aware that mistiming a parry can leave you vulnerable to damage.
- Manage stamina: Keep an eye on your stamina bar, as excessive dodging, blocking, or attacking can deplete it quickly. Conserve stamina by avoiding unnecessary actions and taking advantage of the brief moments when the boss is stationary.
- Utilize Force powers: Use your Force powers strategically to create openings, control the battlefield, and deal additional damage to the Sutaban Alpha.
- Upgrade your gear: Before attempting the boss fight, ensure your lightsaber and other equipment are upgraded to provide maximum damage output and survivability.
- Stay at medium range: Maintain a moderate distance from the Sutaban Alpha, as getting too close or too far away can trigger its most devastating attacks.
Reprogrammed Magnaguard

Players will encounter the Reprogrammed Magnaguard, a formidable mini-boss in the long list of Star Wars Jedi Survivor bosses, located within the Automated Forge on the Shattered Moon. As a fast and aggressive opponent, the Reprogrammed Magnaguard will test players’ skills and strategies throughout the battle.

| Attack Pattern | Description |
|---|---|
| Unblockable Jump | The Magnaguard leaps towards the player with a powerful unblockable attack. Dodge to avoid taking damage. |
| Wide Weapon Swings | A series of unblockable, wide swings. Maintain a safe distance and wait for the attack to finish before engaging. |
| Stamina Depletion | Focus on depleting the Magnaguard’s stamina bar. Be prepared to parry or block repeatedly due to follow-up attacks. |
| Decapitation Response | If the Magnaguard is decapitated, it becomes more aggressive, launching a rapid chain of attacks. Dodge, block, or parry to counter. |
Reprogrammed Magnaguard Boss Location
The Reprogrammed Magnaguard boss fight takes place in the Automated Forge, located on the Shattered Moon. This encounter is part of the main storyline in Star Wars Jedi Survivor, and players must face this formidable droid to progress further in their quest.
How To Defeat Reprogrammed Magnaguard

- Dodge unblockable attacks: The Magnaguard frequently uses unblockable jump attacks and wide weapon swings. Stay alert and dodge these moves to avoid taking damage.
- Focus on depleting stamina: Aim to deplete the Magnaguard’s stamina bar through consistent parrying, blocking, and attacking. Keep in mind that it may counterattack even after a successful parry, so be prepared to parry or block again.
- Use distance to your advantage: When the Magnaguard initiates its wide weapon swings, maintain a safe distance and wait for the attack to finish before re-engaging.
- Adapt to increased aggression: If you decapitate the Magnaguard, it will become more aggressive and launch a rapid chain of attacks. Be ready to dodge, block, or parry these strikes.
- Prioritize parrying: Successfully parrying the Magnaguard’s swiping attacks can deal significant damage to its stun gauge. Aim to parry the entire sequence and follow up with a flurry of attacks when possible.
- Keep up the pressure: After the Magnaguard’s stun gauge recovers, it tends to fall back into its swiping attack sequence. Close the gap quickly and continue to apply pressure to stun it again and deal damage.
The Mire Terror
In Star Wars Jedi Survivor, the Mire Terror is a challenging encounter against two fearsome Mogu Trolls. As a legendary enemy, this boss fight takes place in the Viscid Bog area and requires players to have the Lift and Slam powers to access the battleground.
| Attack Pattern | Description |
|---|---|
| Aggressive Charge | Both Mogu Trolls charge at the player simultaneously. Most attacks can be blocked, except for grabs. |
| Grab Attack | Mogu Trolls will have a red highlight when attempting to grab the player. Avoid or counter these moves. |
| Parry-able Attacks | Mogu Trolls have slow and telegraphed attacks that can be parried to deal stamina damage. |
| Mind Control Response | When using Mind Control Jedi ability, the affected Mogu Troll will be attacked by its ally for a short duration. |
Mire Terror Boss Location
The Mire Terror boss fight takes place in the Viscid Bog area in Star Wars Jedi Survivor. To access this location, players must first complete Lucrehulk, acquire the Lift and Slam powers, and then head to the Gorge Crash Site. After opening a metal door and taking an elevator to the bottom, players will use their Lift power to raise stone pillars leading to another of these Star Wars Jedi Survivor bosses.
How To Defeat Mire Terror
- Block and dodge: The Mogu Trolls will aggressively charge at the player, but most of their attacks can be blocked. Focus on timing your blocks and dodges to avoid taking damage.
- Watch for grab attacks: The Mogu Trolls will have a red highlight when attempting a grab attack. Be prepared to evade these moves or use them against the enemy by successfully mashing a prompted button, which will cause the player to cut off the Troll’s arm and deal heavy damage.
- Parry their attacks: The Mogu Trolls have slow and well-telegraphed attacks that can be parried. Time your block with the Troll’s attack to deflect it and deal stamina damage.
- Use Mind Control Jedi ability: Utilize the Mind Control Jedi ability to buy yourself some time. Although it doesn’t last long, it will distract the Mogu Trolls long enough for you to reposition or heal. The other Troll will attack the mind-controlled one if they come in range.
- Focus on one Troll at a time: While it’s challenging to deal with both Trolls simultaneously, try to focus your damage on one of them to eliminate one threat sooner, making the fight more manageable.
- Keep a safe distance: Try to maintain a safe distance from both Trolls, and avoid getting cornered, as their combined attacks can quickly overwhelm you.
Drya Thornne

Drya Thornne is a formidable adversary in Star Wars Jedi Survivor, known for her speed and stealth capabilities. This boss fight is crucial for unlocking the Crossguard lightsaber stance and is both challenging and engaging for players.

| Attack Pattern | Description |
|---|---|
| Invisibility | Drya Thornne can turn invisible, making her harder to track. However, her form is still faintly visible, preventing surprise attacks. |
| Rapid Strikes | She executes a series of quick melee strikes that can overwhelm unprepared players. Keep your distance and dodge when needed. |
| Grenade Throw | Drya Thornne throws grenades at the player. Use your Force abilities to throw them back at her for extra damage. |
| Evasive Maneuvers | She moves rapidly around the battlefield, making it difficult to land hits. Anticipate her movements and strike when she is vulnerable. |
Drya Thornne Boss Location
The Drya Thornne boss fight takes place in the ancient ruins on the Shattered Moon, a location filled with mysterious artifacts and hidden chambers. As players navigate through the ruins, they’ll eventually stumble upon the chamber where Drya Thornne awaits, ready to test their skills and determination.
How To Defeat Drya Thornne

- Visibility: Although Drya Thornne can turn invisible, her form remains faintly visible. Keep an eye out for her shimmering silhouette to avoid being caught off guard by her attacks.
- Maintain distance: Drya Thornne’s rapid strikes can be overwhelming. Keep a safe distance from her and use ranged attacks or Force abilities to deal damage while avoiding her swift melee strikes.
- Counter grenades: When Drya Thornne throws grenades at you, use your Force abilities to throw them back at her. This not only avoids damage to you but also inflicts damage on her.
- Anticipate movements: As Drya Thornne moves rapidly around the battlefield, try to anticipate her movements to land hits when she’s vulnerable. Use Force Slow to gain an advantage in predicting her actions.
- Conserve stamina: Drya Thornne’s relentless attacks can quickly deplete your stamina. Manage your stamina wisely and disengage from combat temporarily to recover when necessary.
- Utilize the environment: Use the ancient ruins’ environment to your advantage by taking cover behind pillars or other structures to avoid her attacks and regain stamina.
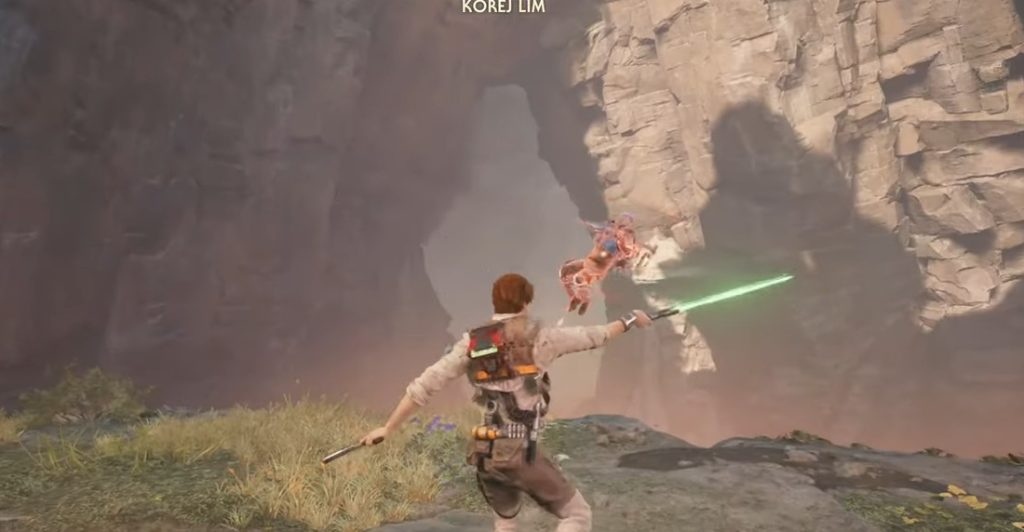
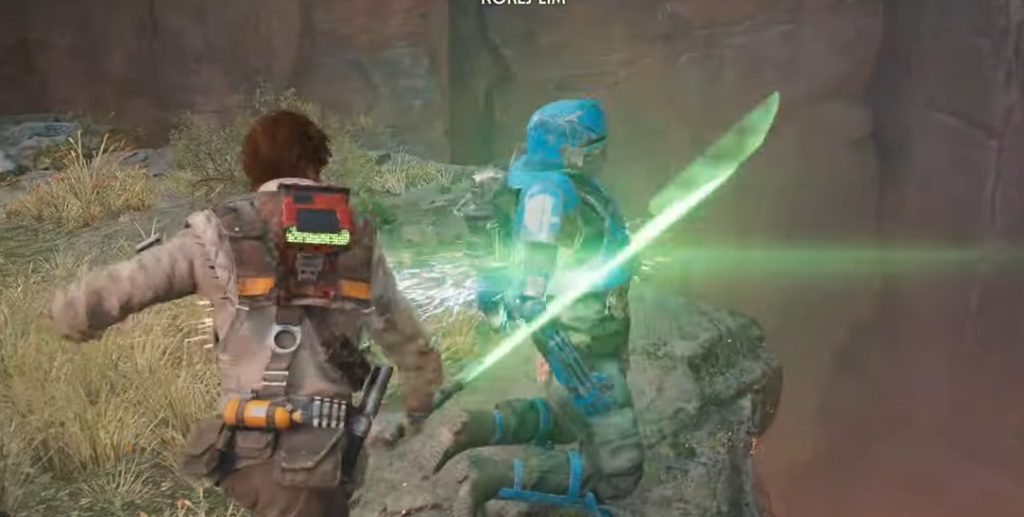
Korej Lim
Korej Lim, the notorious bounty hunter in Star Wars Jedi Survivor, relentlessly pursues the protagonist throughout the game. The inevitable confrontation occurs at the Destroyed Settlement on the planet Koboh. Armed with a jetpack, blaster, and an array of grenades, Korej Lim’s aerial prowess and firepower make him a formidable opponent.
| Attack Patterns | Descriptions |
|---|---|
| Blaster Barrage | Korej Lim fires multiple blaster bolts in quick succession; parrying the first bolt can deal damage and ground the boss. |
| Unblockable Blaster Shot | Occurs after a series of blaster bolts, Korej Lim shoots a powerful, unblockable bolt that knocks down the player. |
| Cluster Bomb Throw | Korej Lim tosses cluster bombs at the player; using Force Push to throw them back will damage and temporarily stun the boss. |
| Air Kick | An unblockable aerial kick attack that can catch the player off guard. |
| Grenade Scatter | When grounded, Korej Lim throws out grenades while taking off again; use Force Push to deflect them. |
Korej Lim Boss Location
Korej Lim, the relentless bounty hunter who also happens to be on the long list of A-lister Star Wars Jedi Survivor bosses. He is encountered at the Destroyed Settlement on the planet Koboh. This high-stakes battle takes place in a challenging environment, requiring players to be on their toes and prepared for an intense confrontation.
How To Defeat Korej Lim
- Ground the boss: Korej Lim’s aerial advantage makes him a challenging opponent. To level the playing field, force him to the ground by either parrying his blaster bolts or using Force Push to throw his cluster bombs back at him.
- Close-range combat: When Korej Lim is grounded, seize the opportunity to engage him in close combat. He lacks defenses against melee attacks, making it an ideal time to deal significant damage.
- Dodge unblockable attacks: Watch for Korej Lim’s unblockable blaster shots and air kicks. Be prepared to dodge these attacks, as they can quickly turn the tide of battle against you.
- Use the Blaster stance and lightsaber throws: When Korej Lim is airborne, utilize your Blaster stance and lightsaber throws to deal damage from a distance. Although the damage may be minimal, every hit counts in this intense battle.
- Beware of grenades: As Korej Lim takes off from the ground, he’ll throw grenades at you. Be ready to use Force Push to deflect them and avoid taking damage.
- Maintain situational awareness: Korej Lim is fast and agile, so always be aware of his position and potential attacks. Proper timing and quick reflexes are crucial to surviving this encounter.
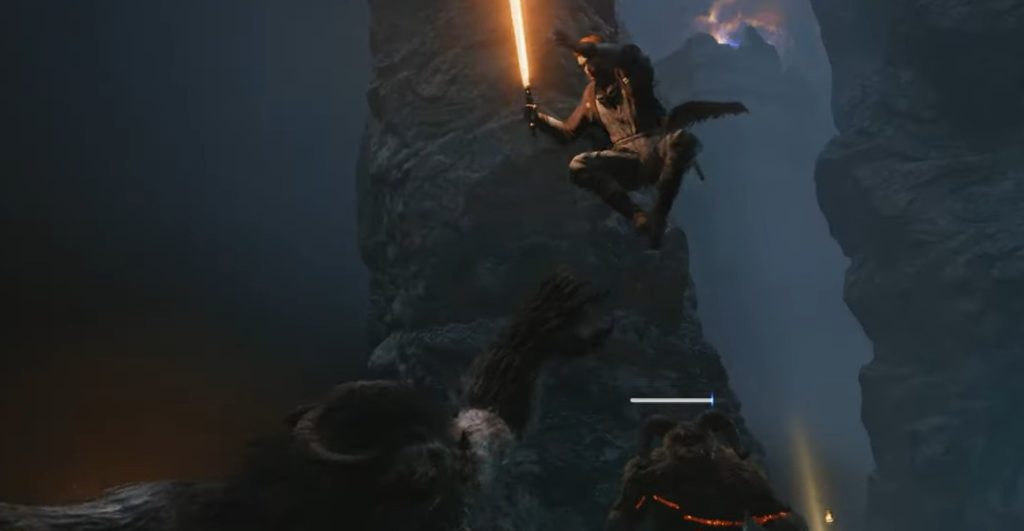
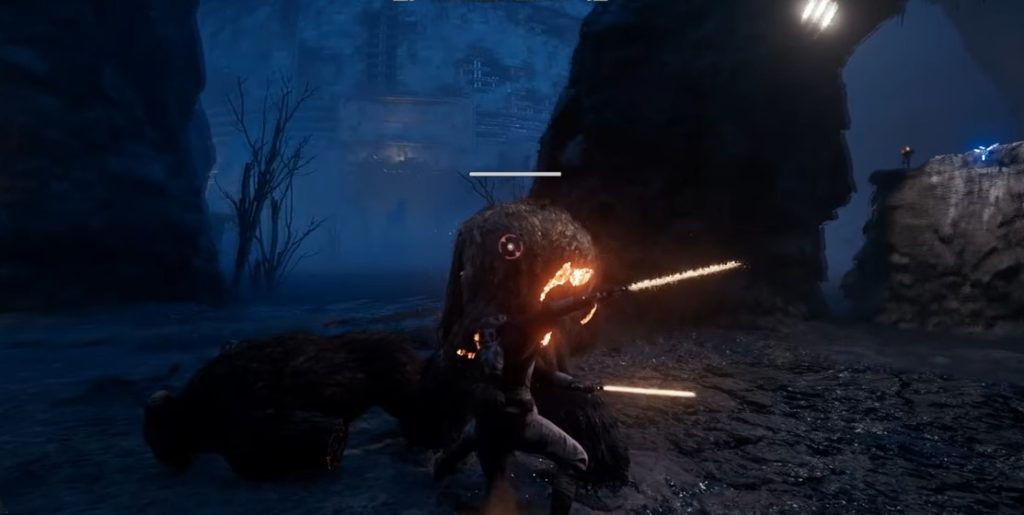
Rancor


Rancor, a fearsome Legendary Enemy, is encountered during the optional quest “Find The Missing Prospectors” in Star Wars Jedi Survivor. This colossal creature awaits players in a secluded cave on the planet Koboh and demands skill and strategy to defeat.

| Boss Attack Patterns | Descriptions |
|---|---|
| Ground Stomp | Rancor stomps the ground, creating a sonic radius around it; avoid by jumping or staying out of range. |
| Wide-Sweeping Attack | Rancor performs a wide-sweeping attack with its arms; dodge or jump to avoid being hit. |
| Unblockable Grab | Rancor lunges forward and attempts to grab and bite the player, dodging to avoid this deadly attack. |
| Ground Slam | An unblockable attack where Rancor slams the ground, sending a shockwave toward the player; jump to evade. |
Rancor Boss Location
The Rancor boss fight takes place in a hidden cave on the planet Koboh, encountered during the optional quest “Find The Missing Prospectors.” Players will need to navigate through tunnels and defeat minor enemies to reach this challenging battle.
How To Defeat Rancor

- Study its attack patterns: Pay close attention to Rancor’s ground stomp, wide-sweeping attack, unblockable grab, and ground slam. Familiarize yourself with the timing of these moves to dodge or evade effectively.
- Use the Double-Bladed Lightsaber Stance: This stance offers faster attacks and better chances to deal damage, especially when Rancor is recovering from an attack.
- Master the timing of blocks and parries: Parrying Rancor’s claw attacks can provide openings for counterattacks. Practice timing your blocks to parry these moves successfully.
- Target Rancor’s back and tail: Position yourself behind Rancor to minimize risk while attacking its vulnerable spots. Alternatively, if feeling confident, you can attack from the front, but be prepared for potential counterattacks.
- Jump to avoid ground-based attacks: Rancor’s ground stomp and ground slam can be evaded by jumping at the right moment. This will help you stay in the fight and avoid taking unnecessary damage.
AT-ST
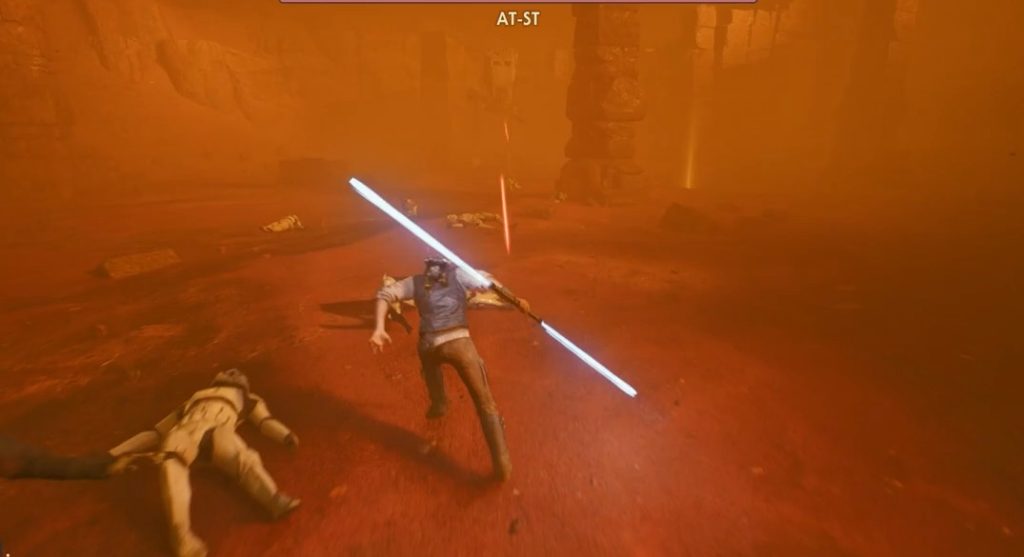
In Star Wars Jedi Survivor, players will encounter the AT-ST mini-boss during their journey on Jedha while meeting Cere’s contact. This bipedal walker is a formidable opponent equipped with powerful attacks that can deal significant damage if not handled carefully.

| Attack Pattern | Description |
|---|---|
| Electric Bombs | Launches a cluster of bombs that can stun and damage the player if not evaded. |
| Laser Bolts | Fires laser bolts that can be parried, dealing minimal damage if they hit. |
| Rocket Barrage | Shoots two quick-fire rockets that cause significant damage if not dodged or deflected using the Force Push ability. |
AT-ST Boss Location
The AT-ST boss fight takes place on the desert planet Jedha during the mission, where players are tasked with meeting Cere’s contact. This challenging mini-boss encounter will test your combat skills and strategic thinking.
How To Defeat AT-ST

- Maintain a safe distance: Keep yourself at a moderate distance from the AT-ST to avoid getting caught in its close-range electric bomb attacks.
- Parry laser bolts: When the AT-ST fires its laser bolts, time your parry correctly to deflect them back at the walker, dealing minor damage.
- Dodge or deflect rockets: When the AT-ST launches its rockets, either dodge them or use the Force Push ability to deflect them back, potentially causing significant damage to the walker.
- Target the legs: Focus your attacks on the AT-ST’s legs. Engaging in close-quarters combat may force the walker to use its electric bombs, which can be managed with careful dodging.
- Utilize Merrin’s assistance: Take advantage of Merrin’s presence during the fight. When your health is low, let her engage the AT-ST while you heal up.
- Use Slow ability: Employ Cal’s Slow ability to temporarily reduce the AT-ST’s movement speed, allowing you more opportunities to land hits on its legs.
- Be cautious of electric bombs: When the AT-ST drops electric bombs, dodge away from them to avoid taking damage and being stunned.
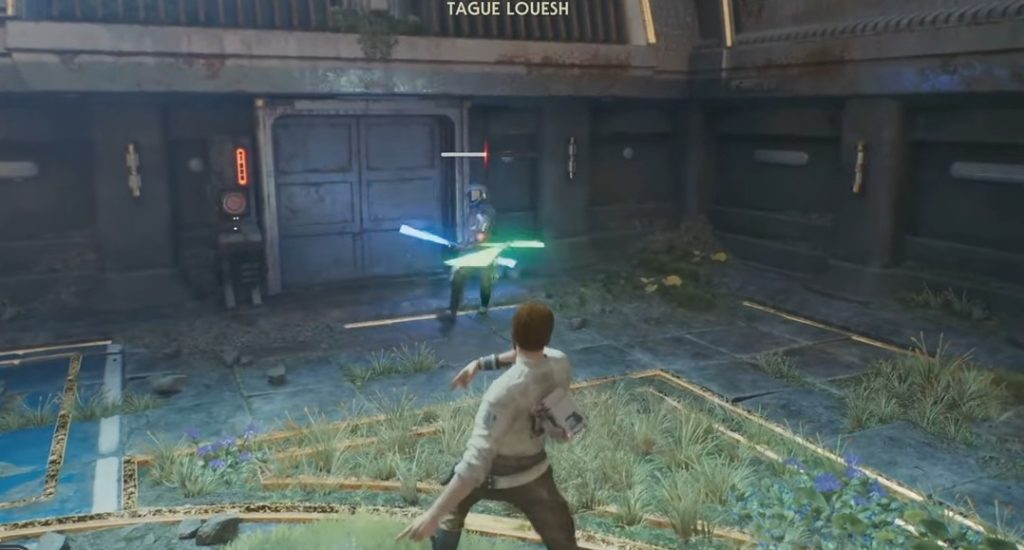
Tague Louesh
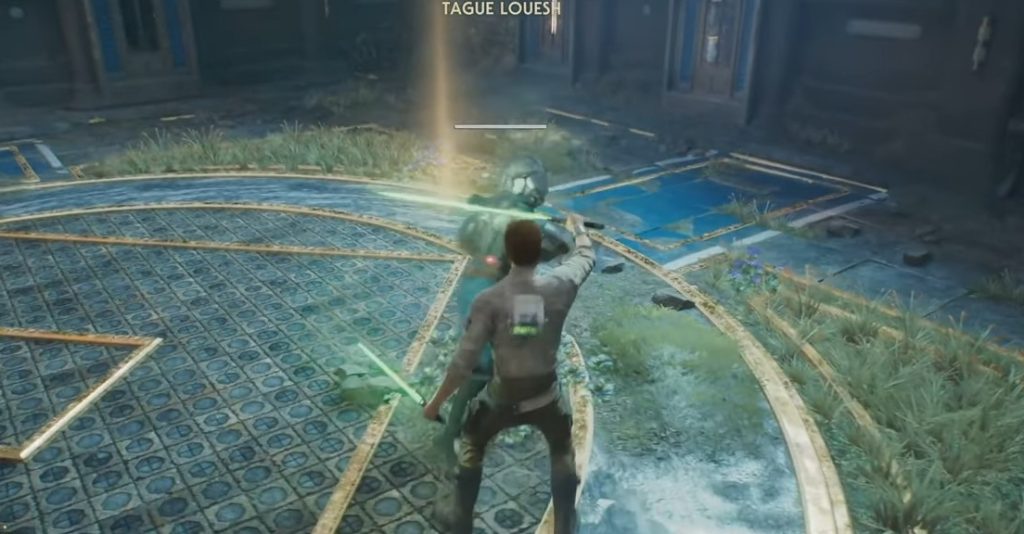
Tague Louesh is one of the most fierce Star Wars Jedi Survivor bosses that players encounter on the planet Koboh during their quest to research Tanalorr. This agile boss wields a double-bladed lightsaber and employs a variety of attack patterns to challenge players.

| Attack Patterns | Descriptions |
|---|---|
| Grapple-pull | Tague Louesh uses this move to interrupt Cal and pull him closer, setting up for additional attacks. |
| Double-bladed lightsaber swings | After the grapple pull, Tague Louesh follows up with several swings from his double-bladed lightsaber. |
| Unblockable stab | Tague Louesh performs an unblockable lightsaber stab, dealing significant damage. |
| Unblockable back-kick | When glowing red, Tague Louesh executes an unblockable back-kick, inflicting heavy damage on Cal. |
Tague Louesh Boss Location
Tague Louesh is a challenging boss encountered in Star Wars Jedi Survivor on the planet Koboh during the quest to research Tanalorr. Players will face Tague Louesh in the Grand Courtyard after reaching the meditation point and proceeding through the door.
How To Defeat Tague Louesh
- Learn his attack patterns: Familiarize yourself with Tague Louesh’s moves, including his grapple-pull, double-bladed lightsaber swings, unblockable stab, and unblockable back-kick.
- Evade and counter: Focus on dodging or blocking his attacks and launch devastating counterattacks when he finishes his moves. Employ the single-blade stance for quick strikes.
- Parry lightsaber attacks: Try to parry Tague Louesh’s lightsaber attacks to deal damage to his stun gauge. However, be prepared to parry multiple attacks in a sequence.
- Manage your distance: Keep a safe distance from Tague Louesh to avoid getting caught in his grapple-pull or unblockable attacks.
- Use Slow ability strategically: Save your Slow ability to deal direct damage or create an opportunity to heal with a Stim.
- Conserve Stims: As the boss has a large health pool, conserve Stims for when they are needed most.
- Beware of unblockable attacks: Pay close attention to Tague Louesh’s red glow, which indicates an unblockable attack. Dodge these attacks to minimize damage taken.
- Chip away at the stun gauge: Focus on breaking Tague Louesh’s stun gauge, as staggering the boss provides a brief window to deal significant damage.
- Avoid button mashing: Tague Louesh is skilled at evading combos, so avoid button mashing and be prepared for his counterattacks.
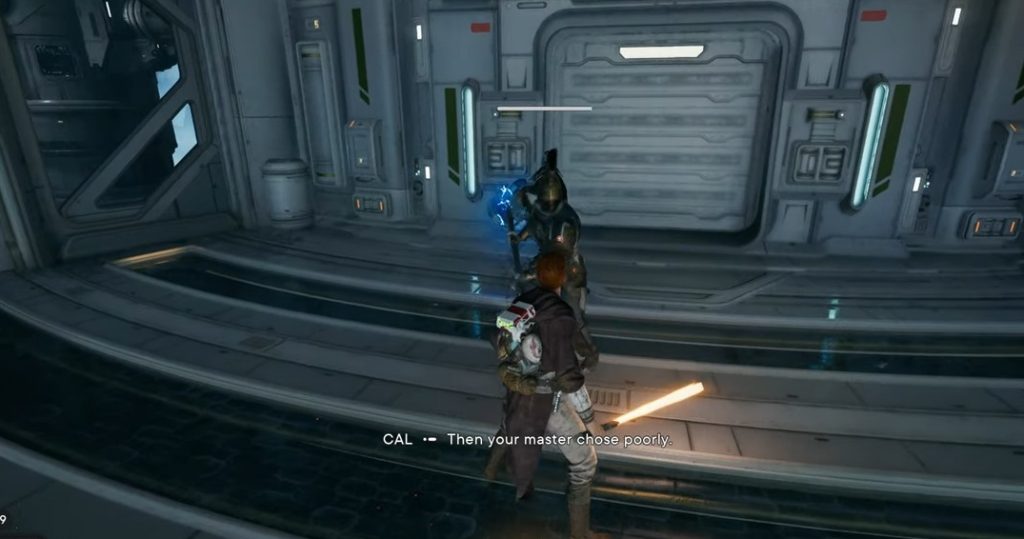
Urgost, Fist of Rayvis

In Star Wars Jedi Survivor, players will encounter Urgost, Fist of Rayvis, a formidable boss wielding a powerful hammer. Urgost is located on the Mountain Observatory within the Observatory Understructure, where players must face him as part of the main story quest.
| Attack Pattern | Description |
|---|---|
| Hammer Smash | Urgost slams his hammer down, dealing heavy damage to anyone caught in its radius. |
| Electrified Shockwave | Urgost charges his hammer and releases an electro-shockwave, causing area damage. |
| Hammer Swing Combo | A series of powerful hammer swings can deal significant damage if not avoided. |
| Unstoppable Charge | Urgost charges forward with his hammer, knocking down and damaging anyone in his path. |
Urgost, Fist of Rayvis Boss Location
Urgost, Fist of Rayvis is another of these challenging Star Wars Jedi Survivor bosses located on the Mountain Observatory within the Observatory Understructure. This formidable opponent wields a powerful hammer and is fought as part of the main story quest.
How To Defeat Urgost, Fist of Rayvis

- Observe attack patterns: Get familiar with Urgost’s hammer swings, electrified shockwaves, and charges. Recognizing these attacks will allow you to avoid or counter them effectively.
- Maintain distance: Stay at a safe distance from Urgost to avoid his powerful hammer strikes, which can deal substantial damage. When he initiates his electrified shockwave, make sure to keep enough space to avoid the area damage.
- Dodge and evade: Develop your dodging and evading skills to avoid Urgost’s hammer swing combos and unstoppable charges. Timing your dodges will be crucial to ensure you do not get caught in his attacks.
- Exploit vulnerabilities: Wait for Urgost to finish his attack combos, which will leave him briefly vulnerable. Use this window of opportunity to land powerful attacks and deal significant damage.
- Use ranged attacks: Utilize blaster shots or ranged Force abilities to chip away at Urgost’s health from a safe distance. This will help you maintain control of the fight while gradually weakening the boss.
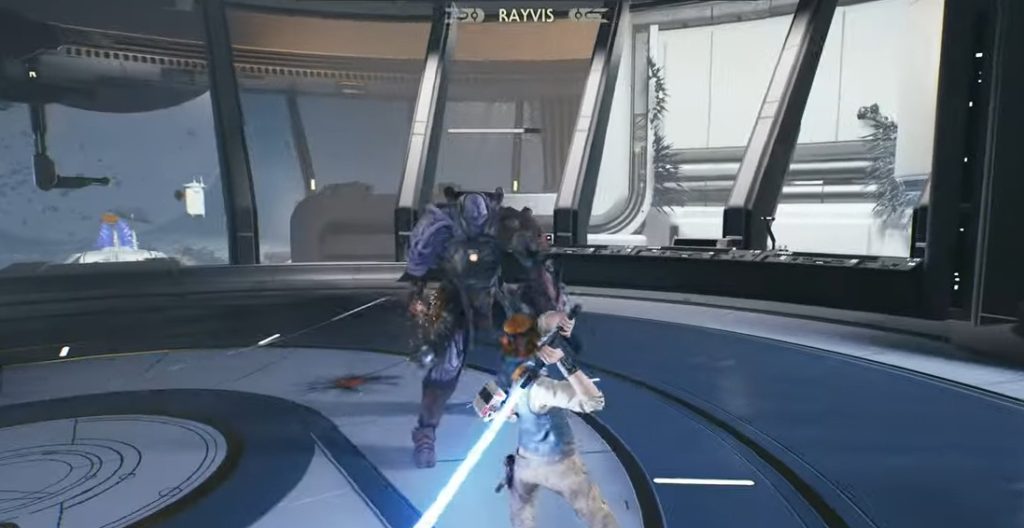
Rayvis

n Star Wars Jedi Survivor, Rayvis is the powerful leader of the Bedlam Raiders and a fearsome Gen’Dai who serves Dagan Gera. Players will encounter Rayvis during Chapter 5, where he presents a challenging boss fight with a range of deadly combos and abilities.

| Attack Pattern | Description |
|---|---|
| Flail Swing | A basic attack where Rayvis swings his flail; can be parried or dodged. |
| Projectiles | Rayvis fires projectiles at the player; dodge to avoid damage. |
| Blaster Shots | Rayvis shoots blaster bullets; parry to block them. |
| Grapple | Rayvis attempts to grab the player; dodge to avoid being caught. |
| Charged Flail Strike | An unblockable red-glowing attack with Rayvis’ flail; dodge to evade. |
| Kick | A powerful kick from Rayvis; can be parried or dodged. |
Rayvis Boss Location
In Star Wars Jedi Survivor, the boss fight against Rayvis takes place within a fortified stronghold on the remote planet of Velrakon. This location is part of the main storyline and becomes accessible to players as they progress through Chapter 5.
How To Defeat Rayvis
- Analyze his attack patterns: Pay close attention to Rayvis’ movements and attacks to anticipate and counter them effectively. Dodge or parry his flail swings and blaster shots, and always be prepared for his unblockable charged flail strike.
- Close-range combat in the initial phase: During the first phase of the battle, focus on staying close to Rayvis and parrying his strikes. Exploit the opportunities to counterattack when his stance breaks.
- Long-range combat in the second phase: As Rayvis becomes more aggressive and uses projectiles, maintain a safe distance and employ long-range moves, such as throwing your dual-wield lightsaber or firing your blaster.
- Stamina management: Keep an eye on Rayvis’ stamina bar (the white bar above his head). Drain it by parrying his attacks to make him vulnerable to your heavy attack combos or Slow Time ability.
- Utilize Slow Time ability: Use the Slow Time ability (activated by pressing both thumbsticks) strategically, either to heal or to deal significant damage when Rayvis is defenseless.
- Upgrade your skills: Invest in Focused Parry, Dancing Blades, Flying Lunge, and Point Blank skills. These will enhance your abilities and make it easier to defeat Rayvis.
- Choose the right stance: Switch between dual wield and blaster stances depending on Rayvis’ attack patterns and phase. Dual wield is effective for close-range combat, while the blaster stance is ideal for long-range engagements.
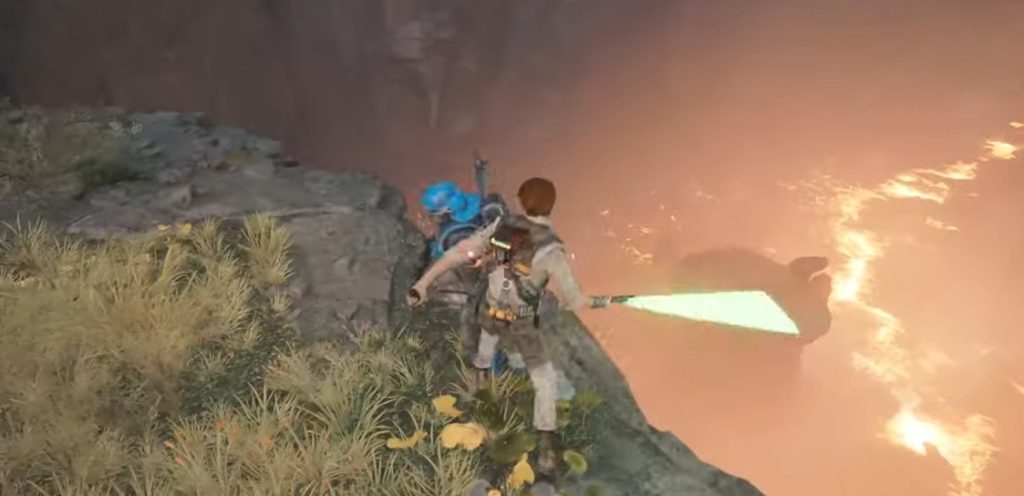
Darth Vader

Darth Vader, the feared Sith Lord, makes a formidable appearance in Star Wars Jedi Survivor. As Cere Junda, players must face this iconic villain in a challenging boss fight that relies on a classic lightsaber duel, testing their skills and mastery of the Force.

| Attack Pattern Name | Description |
|---|---|
| Dark Surge | Vader performs a quick dash toward the player, followed by a powerful lightsaber swing. |
| Force Choke | Vader uses the Force to choke and immobilize the player, leaving them open for follow-up attacks. |
| Saber Throw | Vader hurls his lightsaber at the player, dealing damage from a distance. |
| Force Push | Vader uses the Force to knock the player back, creating space and interrupting their attacks. |
| Fury Combo | Vader unleashes a rapid series of lightsaber strikes, increasing in speed and intensity. |
| Force Crush | Vader lifts and crushes objects in the environment, hurling them toward the player. |
Darth Vader Boss Location
Star Wars Jedi Survivor bosses like Darth Vader versus Cere Junda are not for the faint of heart. The boss fight against Darth Vader takes place in the heart of the Imperial Fortress, a menacing stronghold on the planet Mustafar. The atmosphere is charged with tension as the lava flows and dark energy engulfs the area, making it a fitting battleground for an epic showdown with the most feared Sith Lord in the galaxy.
How To Defeat Darth Vader

- Master the parry: Darth Vader’s lightsaber attacks can be relentless, so mastering the art of parrying is crucial. Time your parries correctly to create openings for counterattacks.
- Stay on the move: Keep your distance from Vader to avoid his Force Choke and Saber Throw abilities. Constant movement will make it more challenging for him to land these attacks.
- Dodge and counter: Vader’s powerful Force Push can knock you off your feet. Be ready to dodge and quickly counterattack when you see him preparing this move.
- Be patient: Vader’s Fury Combo is a series of rapid lightsaber strikes. Wait for the right moment to dodge or parry, and then capitalize on the brief window of vulnerability that follows.
- Use the environment: Keep an eye out for objects Vader may use with his Force Crush ability. Use your own Force powers to deflect these projectiles back at him, dealing damage and momentarily stunning him.
- Conserve your healing resources: Cere has limited healing during this fight, so use your healing items wisely. Focus on avoiding damage and only heal when absolutely necessary.
Bode Akuna

Bode Akuna, a cunning and skilled warrior, plays a pivotal role in Star Wars Jedi: Survivor. Initially, he accompanies Cal as a trusted ally throughout numerous missions, but eventually reveals himself to be a former Jedi turned Imperial spy. The ultimate betrayal leads to a climactic showdown between Cal and Bode as one of the game’s final boss battles.

| Attack Pattern | Description |
|---|---|
| Grenade Barrage | Bode throws multiple grenades at Cal, requiring evasive maneuvers to avoid damage. |
| Blaster Assault | Bode uses his blaster to fire a series of shots at Cal, which can be deflected using the Blaster stance. |
| Lightsaber Throw | Bode hurls his lightsaber towards Cal like a deadly boomerang, necessitating timely dodges. |
| Melee Strikes | Bode engages Cal in close-quarters combat with swift and powerful lightsaber attacks. |
| Jetpack Attack | Utilizing his jetpack, Bode takes to the sky to rain down fire from above or quickly close the gap for a melee strike. |
| Force Slash | Bode unleashes a devastating wave of Force energy that can be dodged by jumping in the opposite direction. |
| Dark Side-Infused Slow | Bode slows time with a Dark side-infused ability, allowing him to land a series of powerful strikes against Cal. Parrying is crucial during this phase. |
Bode Akuna Boss Location
In Star Wars Jedi: Survivor, the climactic boss battle against Bode Akuna takes place on the ancient and mysterious planet of Tanalorr. This location, steeped in both Jedi and Sith history, serves as the perfect backdrop for the ultimate showdown between Cal and his former ally.
How To Defeat Bode Akuna

- Maintain distance: Keep a safe distance from Bode when he is using his blaster or throwing grenades to avoid taking unnecessary damage. Use your Blaster stance to deflect his shots and counterattack.
- Parry and dodge: When Bode engages in close-quarters combat, be prepared to parry his lightsaber attacks and dodge his lightsaber throws. Timing is crucial to avoid getting hit.
- Exploit openings: After successfully parrying Bode’s attacks or dodging his lightsaber throws, seize the opportunity to strike back using your Double-bladed stance for fast, medium-damage attacks.
- Utilize Force powers: Use your Force abilities, such as Push and Pull, to create openings and disrupt Bode’s attack patterns. This will provide windows of opportunity to land some damaging blows.
- Manage your stims: Make sure to keep an eye on your health and use stims as needed to stay in the fight.
- Adapt to his aggression: As the battle progresses, Bode will become more aggressive, employing quicker and heavier lightsaber attacks and utilizing Force slashes. Be prepared to adjust your tactics accordingly, maintaining distance and dodging in the opposite direction of his swings.
- Interrupt with companion attacks: If Merrin is with you during the fight, make use of her companion attacks to interrupt Bode’s onslaught. Keep in mind, however, that this option is only available during select portions of the battle.
Final Remarks
With this, I conclude my guide about Star Wars Jedi Survivor bosses, where I have listed the main mission, optional & Legendary bosses. Before you move on to the next best thing, you must read Star Wars Jedi Survivor Holotactics, Cheats & Trainers, and Jedi Survivor best settings guides.
Next:
- Star Wars Jedi Survivor: All Lightsaber Colors
- Star Wars Jedi Survivor Outfits
- Star Wars Jedi Survivor: How Old Is Cal
- Star Wars Jedi Survivor: All Difficulty Settings
Thanks! Do share your feedback with us. ⚡
How can we make this post better? Your help would be appreciated. ✍