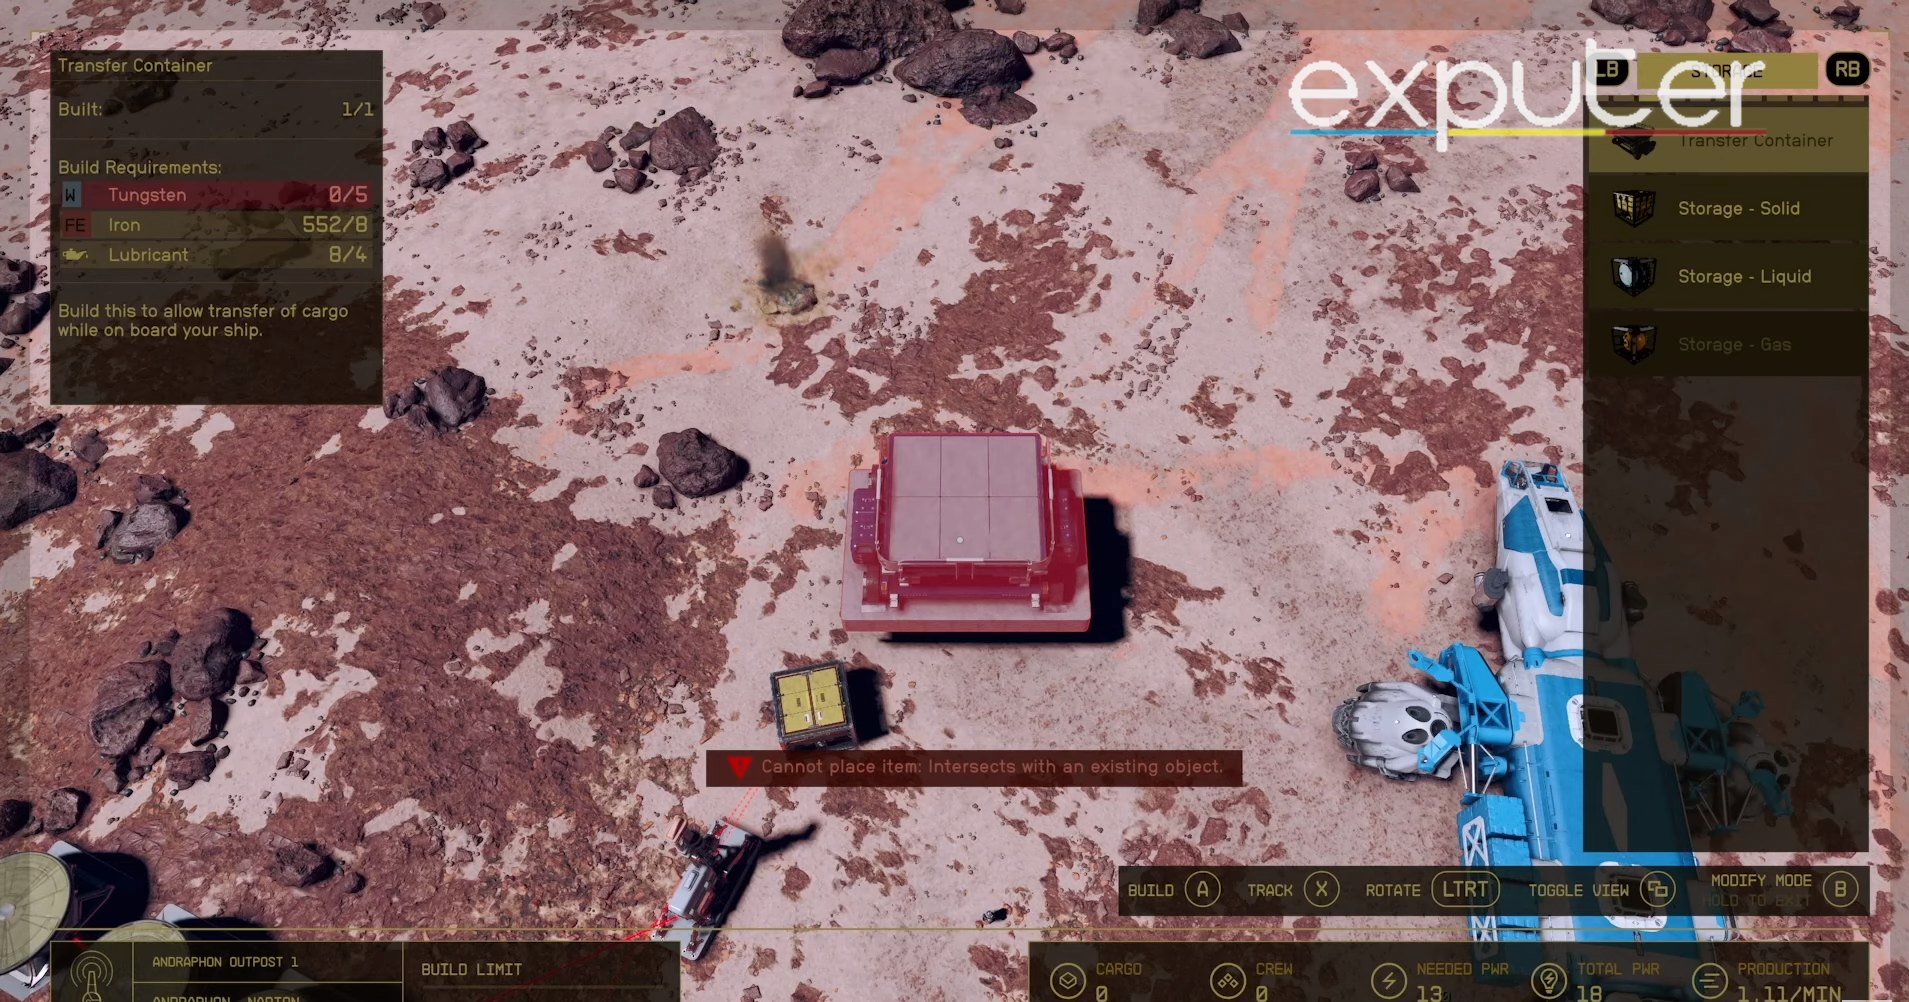
The Starfield Transfer Container is a temporary storage and transferring unit that you can place at the Outpost to manage your items and resources. Each Outpost can have one transport container that can act as a means to carry any necessary items. These units can prove useful in creating and managing new Outposts, so using the containers to your advantage is a huge plus.
- The Transfer Container is a storage structure in Starfield that collects the cargo from the Extractor and acts as a means of transportation.
- It acts as a temporary storage and transferring device in addition to the Ship Storage.
- Players can only build one Transfer Container on an Outpost and will need 8x Iron, 5x Tungsten, and 4x Lubricant.
- Once the container and the Extractor are linked, the resources will be automatically transported to the container, from where players can transfer them to your Ship using the Cargo Hold.
What Does Transfer Container Do In Starfield
Therefore, an easier way of transporting the equipment is with the help of this useful structure. The Transfer Container will carry the materials from your extractors and will move them to your desired destination.
Building A Transfer Container
- 8x Iron
- 5x Tungsten
- 4x Lubricant
- Once you’ve all the material, look for an optimal spot to place the Starfield Transfer Container.
- If the display of the container glows red, it means the spot is inappropriate, so make sure there’s enough space that the object is not colliding with any other structure.
- After placing the Transfer Container, you’ll need an Extractor and a power source to run it.
- You can set up the Extractor and Power source from the Build Mode menu.
- Make sure to set up the Extractor where it can extract plenty of resources.
- Once your Extractor starts working, create an Output link to connect your Extractor with the Transfer Container.
- As the link gets established, the resources from the Extractor will transfer directly to the container.
Transferring Resources To Your Ship
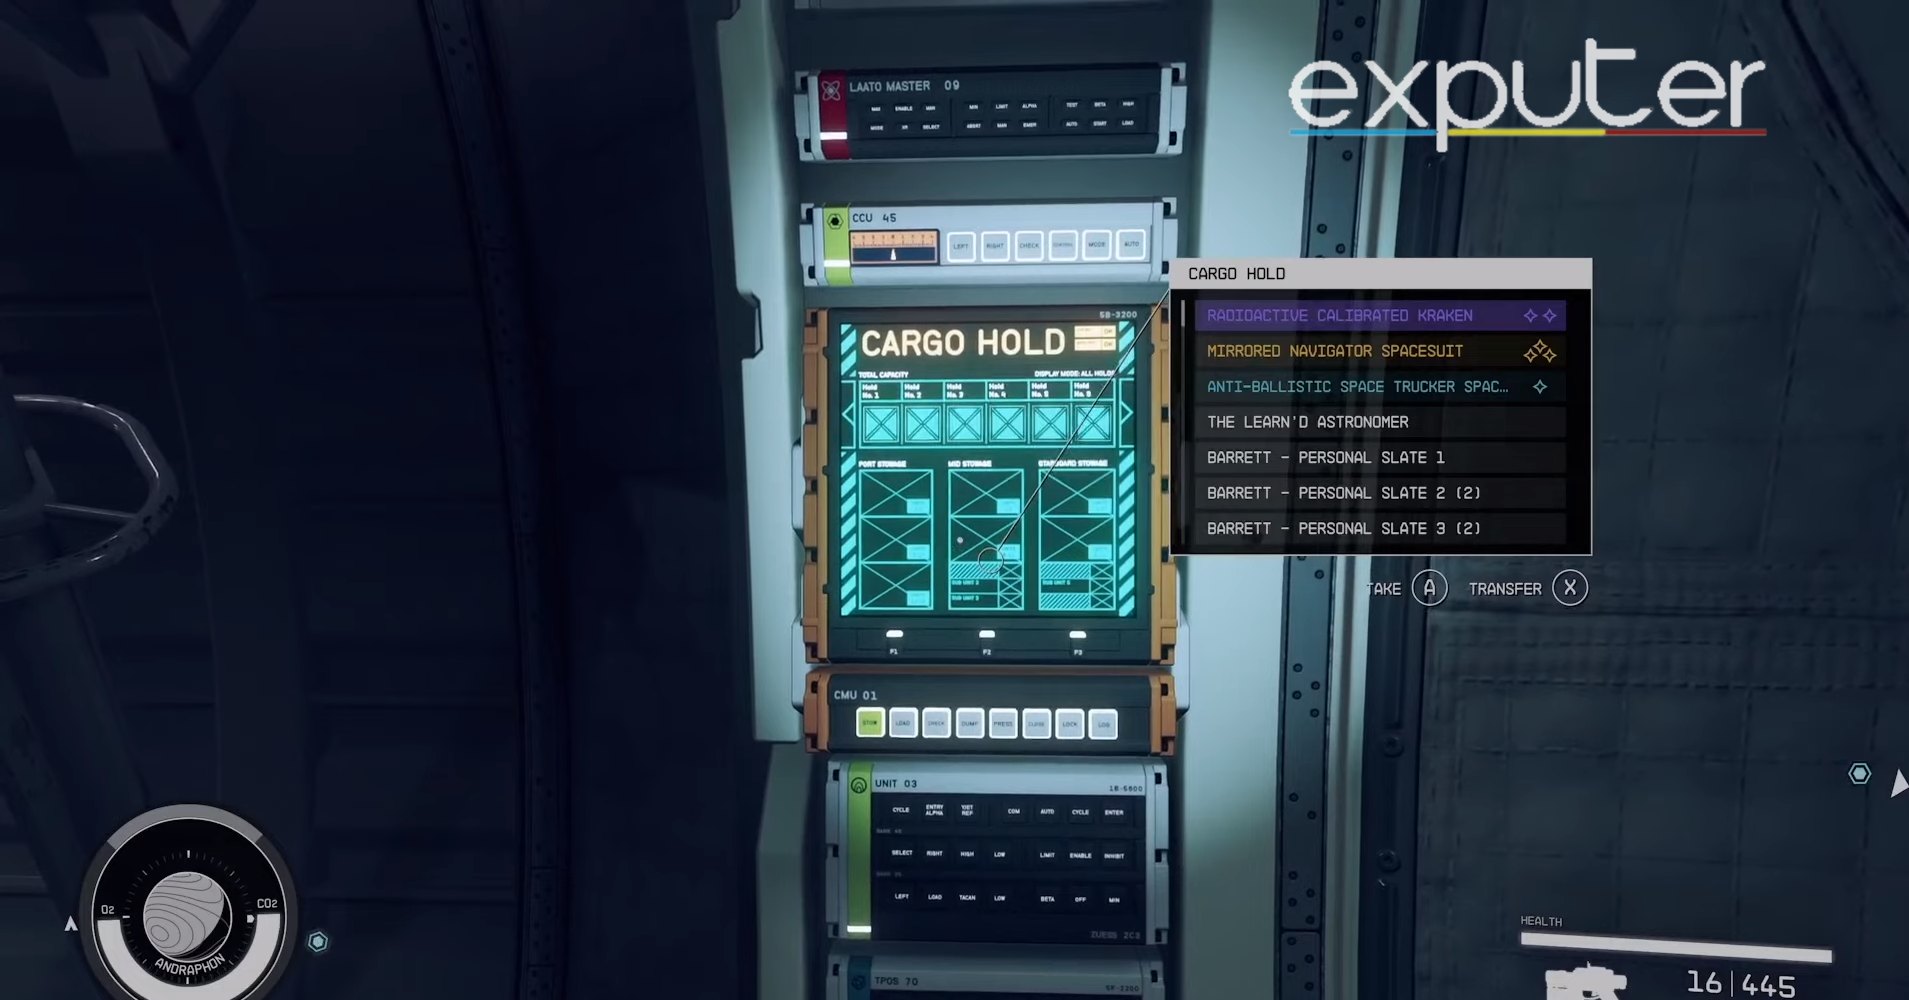
- For that, head inside the Ship and get access to the Cargo Hold.
- In the menu, select the desired resources you wish to transfer between the Ship’s inventory and Outpost’s inventory.
- Once you select the items you wish to transport, press the ‘E‘ key on your PC or ‘A‘ on your controller to start the transferring process.
- If your Cargo Hold doesn’t show the storage container, it means that the Ship is at quite a distance from the Outpost.
- For that purpose, you will need a Landing Pad, which requires 30x Iron, 2x Zero Wire, 18x Adaptive Frame, and 2x Beryllium.
- Once you have constructed the Landing Pad, you will be able to access the inventory of Outposts effectively, even when your Ship is afar.
With that, you must be clear about how the Starfield Transfer Container works and how you can use it to your advantage to manage your resources efficiently while setting up an Outpost. Now that you’ve sorted out the storage issue make sure to have a look at How To Lockpick and Starfield’s best backgrounds to have a better understanding of the game. You can also learn How To Use Boost Packs and jetpacks In Starfield to get fairly better at it.
Next:
Thanks! Do share your feedback with us. ⚡
How can we make this post better? Your help would be appreciated. ✍
![Star Field Best Reactor [Top 8]](https://exputer.com/wp-content/uploads/2023/09/Star-Field-Best-Reactor-Top-8-390x220.jpg)