V Rising is a vampire RPG video game. The game is full of various engaging activities to hook players to the game. However, the players prefer a smooth gameplay experience, making the game a hundred times better. The smooth gameplay experience comes from a V Rising dedicated server.
- For V Rising’s Server Hosting, you need to connect your game to a strong internet connection device. You can either be a local host or set up a dedicated server in V Rising.
- Local Server Hosting means that the player sets up the game from their computer and invites people to play using their file. It’s the best option for three to four people to play together.
- You can build your server setting by either renting it from Gportal, which will cost you money, or by setting up the server with SteamCMD.
- You can also follow the steps mentioned in the guide to set up the server settings on your PC or Secondary Computers.
How To Set Up Server In V Rising
To set up a V Rising server, you can either host locally or use a dedicated server, which can be rented from GPortal or other providers. Here’s what you need to know:
- Requirements:
- You’ll need a device with Windows 10, 5GB disk space, a Quad-core processor, and 16GB memory as specified by Stunlock Studios.
- Ensure you’re not hosting the server on the same machine you’re playing the game on; opt for a separate device with a strong internet connection.
- Familiarize yourself with your machine’s specifications and the server’s IP address before setting up.
Setting up a V Rising server requires meeting these requirements and choosing between local hosting or renting a dedicated server.
V Rising Local Server Hosting

Setting up a local server allows you to host the game from your computer, inviting friends to play using your file. Here’s how:
- Hosting:
- One person with a strong internet connection acts as the host.
- Access cave passages for faster travel using the V Rising Cave Passages guide.
- Configuring the Server:
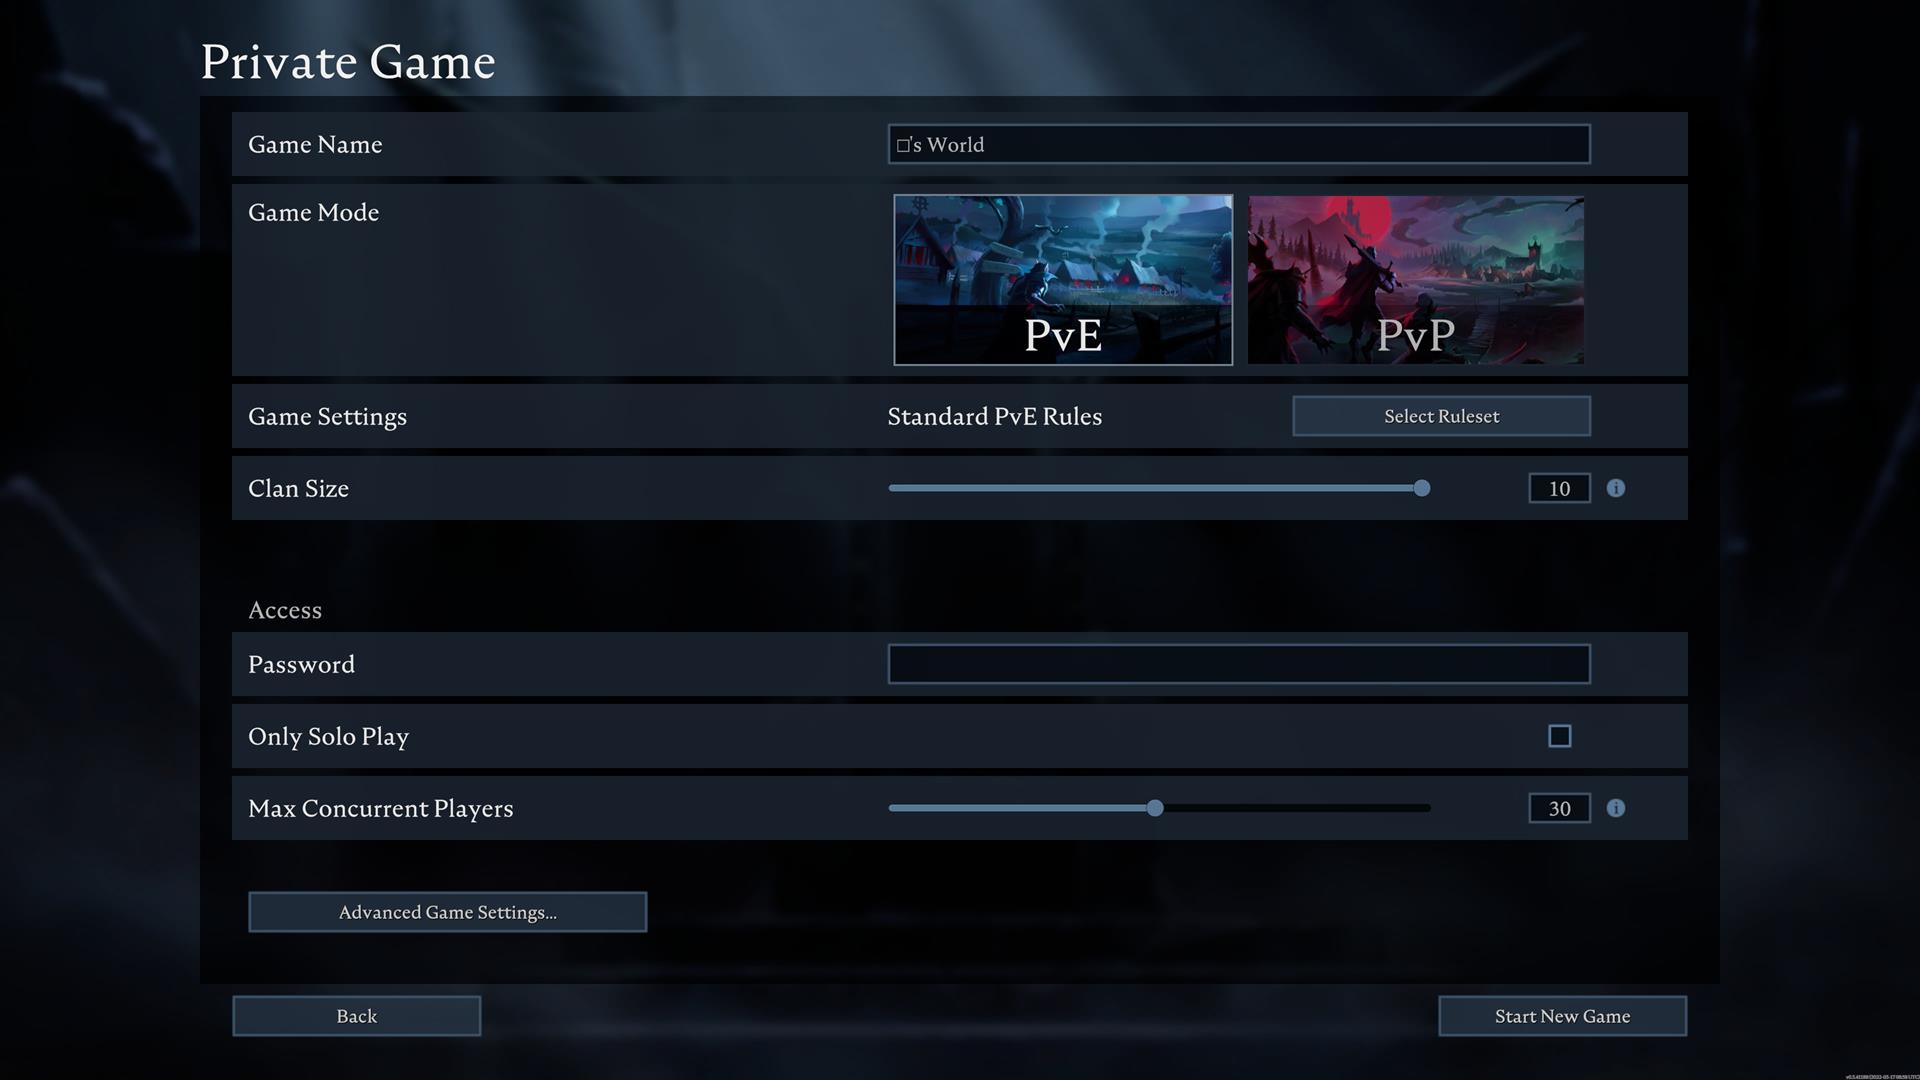
- Click “Play,” then select “Private Game.”
- Choose PvP or PvE ruleset, set clan and player caps, and adjust advanced server settings.
- Set a password for invited players.
- Click “Start,” create your character, and let it load.
- Joining the Server:
- To join a friend’s local server:
- Open “Play” and go to “Online Play.”
- Enter the server name in the “Find Server” field.
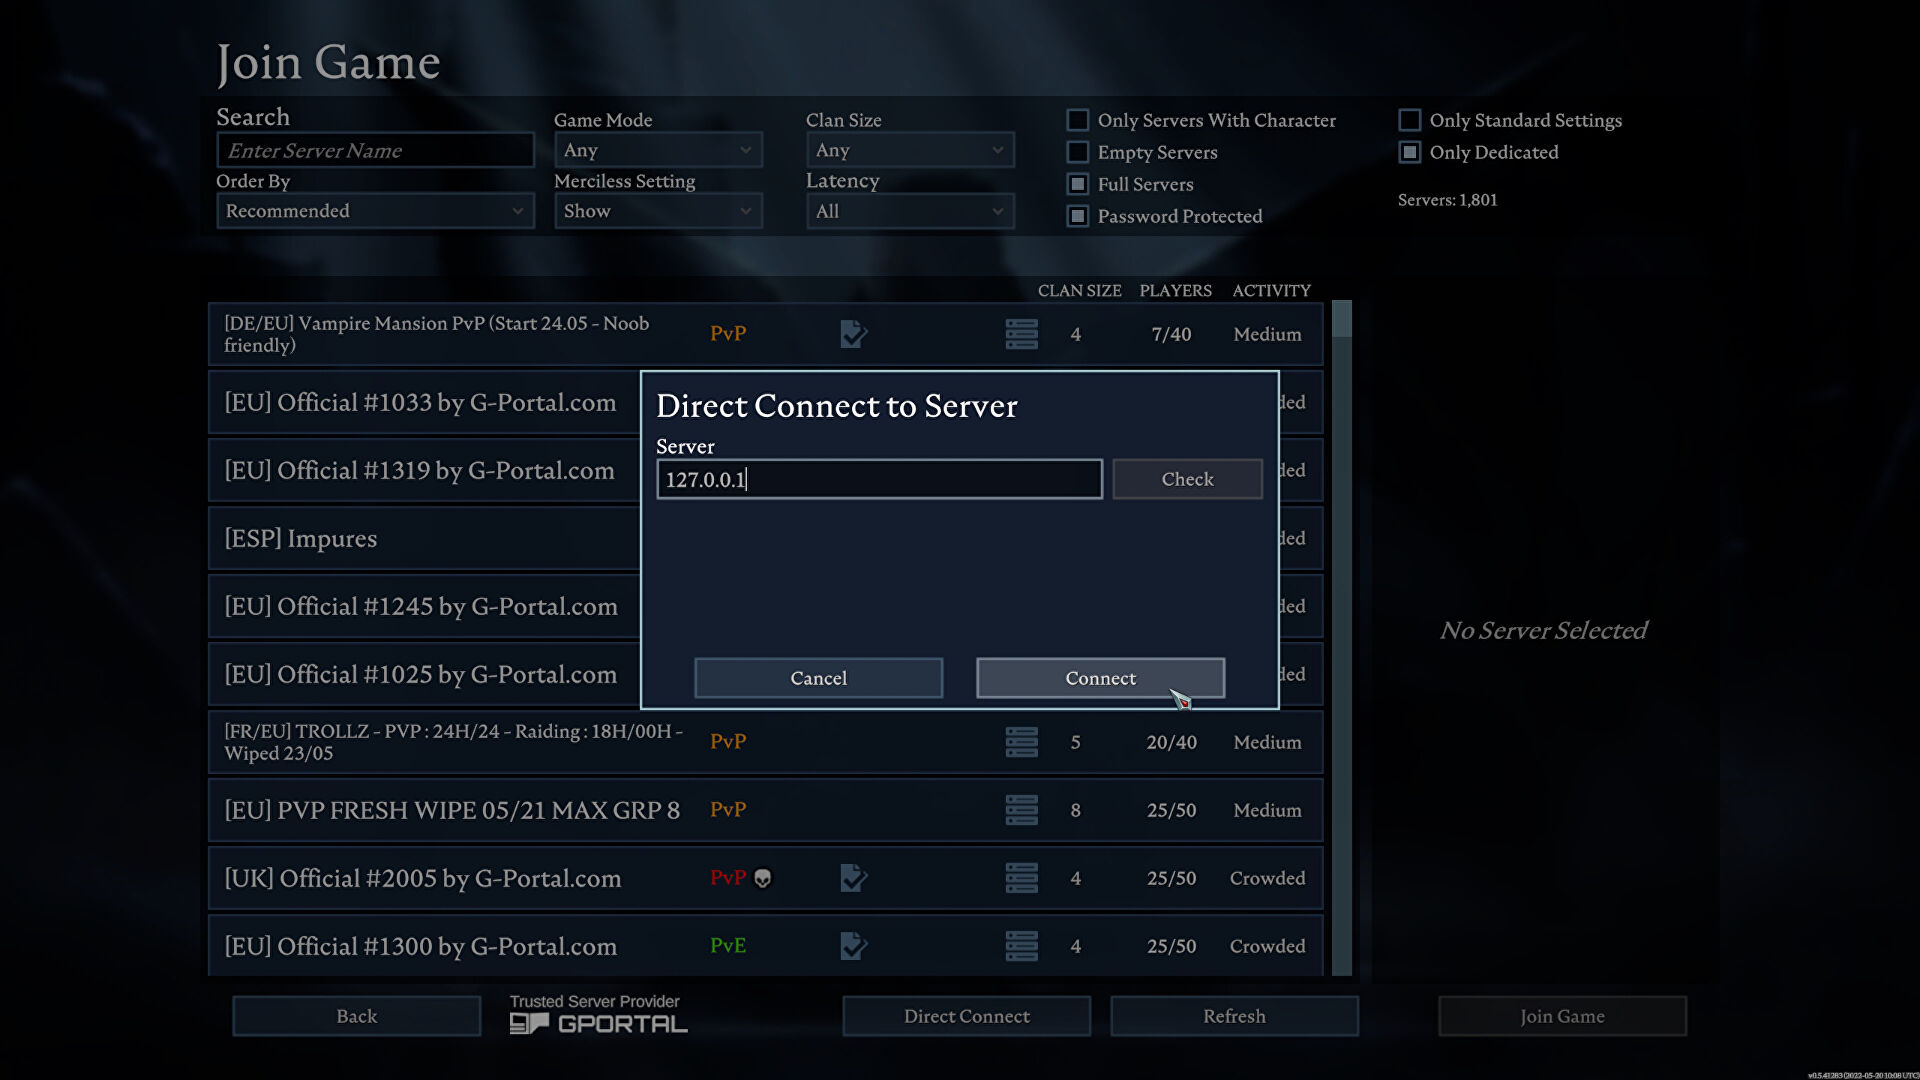
- Alternatively, use the “Direct Connect” button with the host’s IP information.
- To join a friend’s local server:
Note: Closing the local server ends the game; it doesn’t continue without the host. If the host leaves, all players get kicked.
V Rising Dedicated Server Hosting
You will get a variety of benefits by setting up your own server in V Rising. The process will be straightforward if you are familiar with setting up these dedicated servers for other games.
If you have not had the experience of doing so, we have covered all the steps in detail to make it easier for you. The guide below will cover setting up, launching, and joining your dedicated server.
How To Set Up
You can set up a V Rising dedicated server in three different ways.
- By renting it from GPortal. (will cost you money)
- By setting up the server with SteamCMD.
- The final one is by setting it up from Steam itself.
- Rent from GPortal:
- Visit GPortal’s Server Hosting page and choose your preferred service plan.
- Benefit: Ease of use and high performance.
- Downside: Cost involved.
- Set Up with SteamCMD:
- Download SteamCMD and extract it into a new folder.
- Run “steamcmd.exe” and log in anonymously.
- Type ‘App_Update 1829350’ and wait for the files to download.
- Navigate to “steamapps/common/VRisingDedicatedServer” to find your server files.
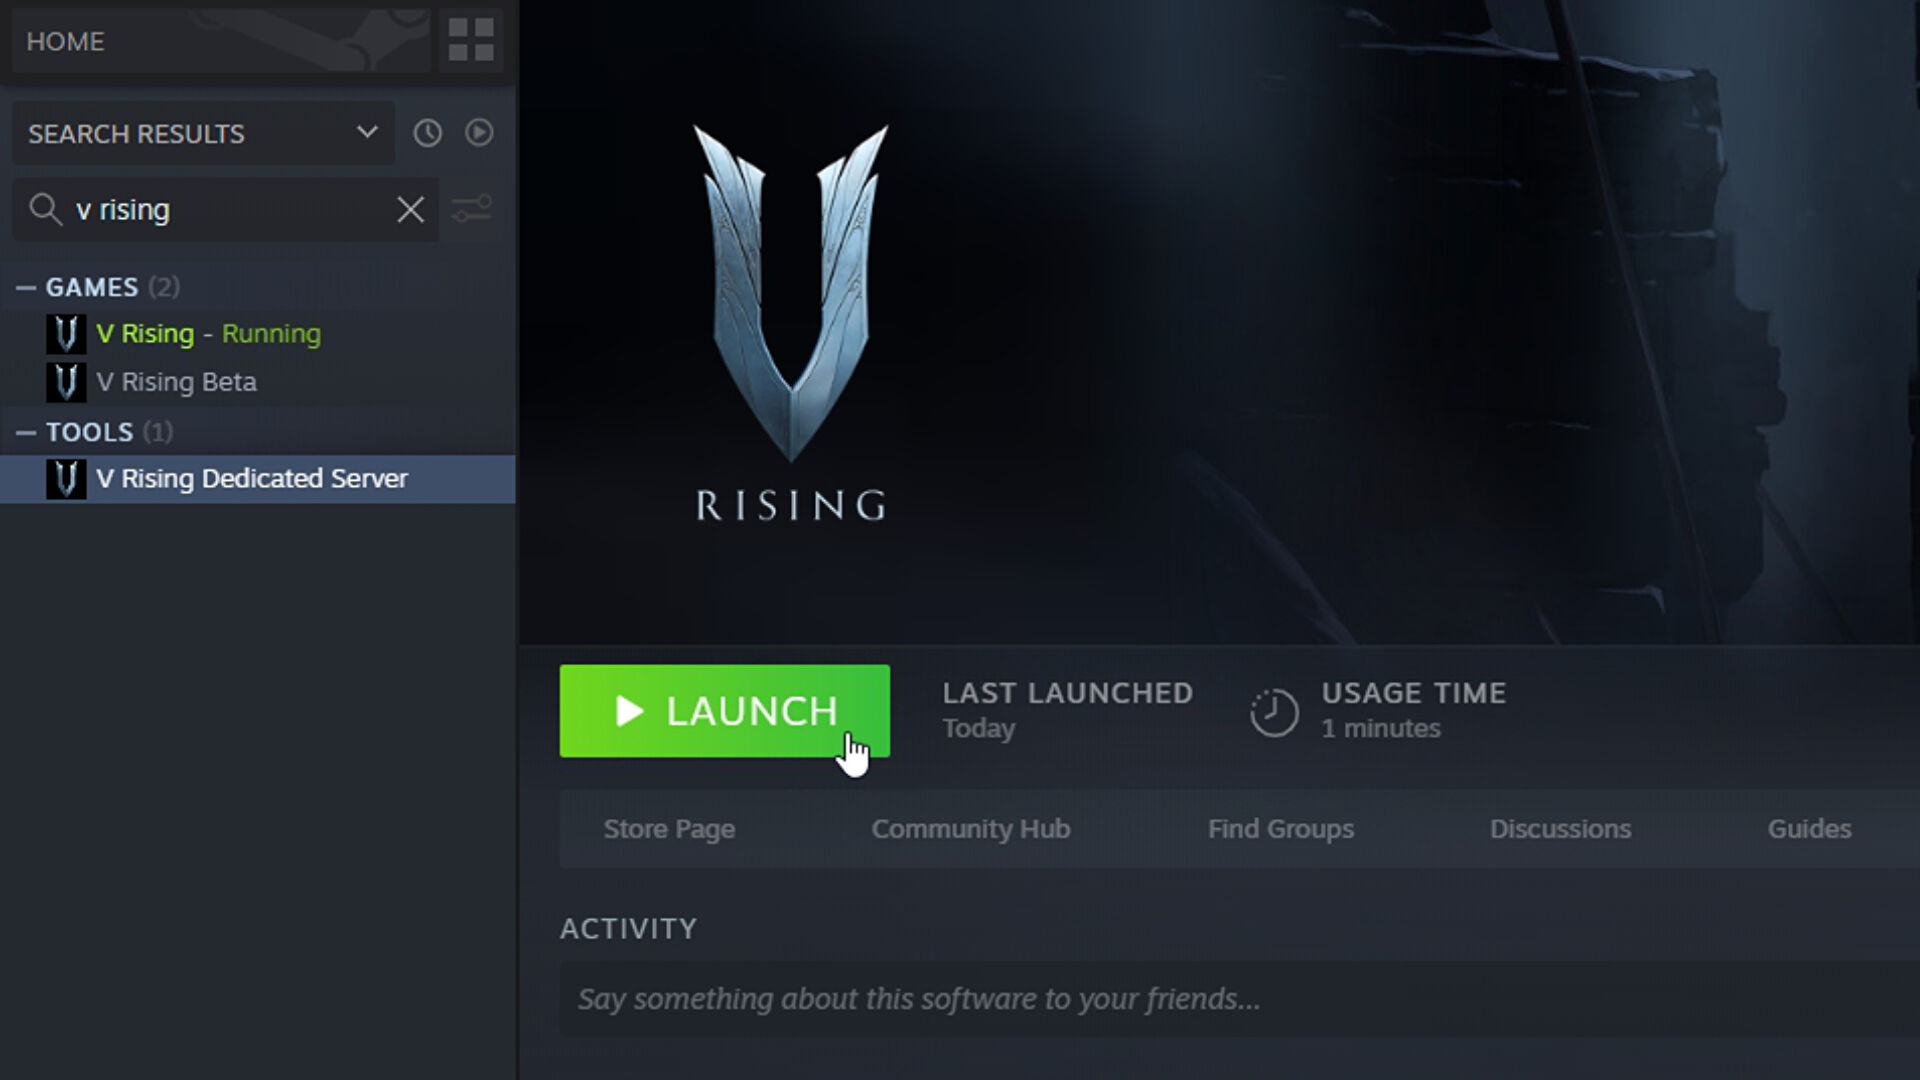
- Set Up from Steam:
- Search for “V Rising Dedicated Server” in your Steam library and install it.
- Right-click on the server tool, go to “Manage,” then “Browse Local Files.”
How To Join
Joining the V Rising server is easy if you follow the remaining steps correctly. Once the server is up and running, you can join it by following the steps given below.
- Click “Play” then “Online Play.”
- Choose “Find servers” and locate your server in the list.
- Click “Join Game” to enter.
- Alternatively, use the “Direct Connect” button with the server’s IP address if it’s not listed.
V Rising Server Settings
You can ignore most of the files you have downloaded for setting up the server, but a few important ones are listed below.
When setting up your V Rising server, focus on key files and configurations to customize your gaming experience:
- Adjusting Server Name and Save File:
- Edit the “start_server_example.bat” file:
- Modify the “-servername” quote to reflect your server’s name.
- Adjust the “-savename” quote for your saved game file.
- Edit the “start_server_example.bat” file:
- Admin and Ban Lists:
- Navigate to “VRisingServer_Data/Streaming Assets/Settings”:
- Add player names to “adminlist.txt” for server admin privileges.
- Populate “banlist.txt” with player names to enforce bans.
- Navigate to “VRisingServer_Data/Streaming Assets/Settings”:
- Game Settings Configuration:
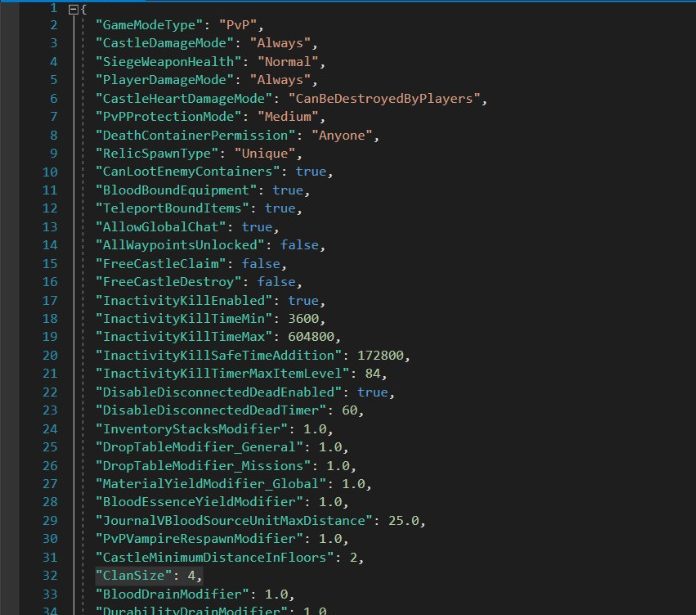
- Edit “ServerGameSettings.json” to customize gameplay:
- Set “GameModeType” to PvP or PvE.
- Enable “CanLootEnemyContainers” for looting enemy containers.
- Activate “BloodBoundEquipment” to retain tools and wearables after death.
- Adjust “ClanSize” to set maximum clan members.
- Edit “ServerGameSettings.json” to customize gameplay:
- Time and Environment Settings:
- Modify time-related settings:
- Define attack times with “VSPlayerWeekdayTime” and “VSPlayerWeekendTime.”
- Determine raid times with “VSCastleWeekdayTime” and “VSCastleWeekendTime.”
- Specify day/night cycle duration with “DayDurationInSeconds.”
- Modify time-related settings:
- Additional Configuration:
- Set “CastleLimit” for maximum Castle Hearts per player.
- Adjust “SunDamageModifier” to control sunlight damage.
- Custo
How To Start And Shut Down The Server
Now that the server is ready click on “start_server_example.bat” to launch the file. A black window will appear, which means that your server is running.
To shut down the server, click anywhere in the black server window. Hit “Ctrl+C,” and you will be prompted to terminate the batch job. Press Y and hit enter to shut down the whole server.
How To Turn Private Game Into A Dedicated Server
To convert your private game into a dedicated server, follow these steps:
- Join and Create Character:
- Join the server and create a new character.
- Exit the game and shut down the server.
- Delete Auto-Save Files:
- Navigate to “save-data/Saves/v1/[your server’s save name].”
- Delete all auto-save folders, leaving only the “SessionId.json” file.
- Access Local V Rising Saves:
- Enter “%Appdata%..\LocalLow\Stunlock Studios\VRising\Saves\v1” in Windows Explorer.
- Backup and Transfer Files:
- Locate the game folder you want to convert into a dedicated server.
- Back up the entire folder and copy the auto-save files.
- Paste the auto-save files into the location mentioned in Step 2.
- Configuration:
- Navigate to the location mentioned in Step 3.
- If no settings exist, create one.
- Paste the two JSON files you copied into this folder.
- Start Server:
- Once all steps are complete, start the server.
- Join the game from where you left off in your private world.
Why Set Up A Dedicated Server
Players opt for dedicated V Rising servers for two main reasons:
- Continuous Server Operation:
- In standard multiplayer games, the host must be actively playing for the server to run.
- With a dedicated server, other players can join and play even if the host is offline.
- This ensures uninterrupted gameplay and allows for a more flexible gaming experience.
- Separate Server and Gaming Machines:
- Running the server on one machine while playing the game on another offers several advantages.
- Improves user-friendliness and enhances gameplay experience.
- Distributes workload across multiple machines, resulting in smoother performance for both the game and server.
- Ensure the server is on the machine with a stronger internet connection for optimal performance.
Setting up a dedicated server in V Rising provides convenience, flexibility, and improved performance for all players involved.
How To Play V Rising Offline
On a final note, if you want to play V Rising offline with players in the same household as you, follow the steps below.
- Go into Steam, and in the top left corner, you will see the option “Go Offline.”
- Run V Rising
- Select “Play” and then “Private Game,” and then check the box next to “LAN Server.”
- Start the game in the offline LAN server to play V Rising offline.
Conclusion
A smooth in-game experience makes the game worth playing. Similarly, smooth gameplay is possible by Server Hosting. You can follow all the steps mentioned in the guide to set up the local or dedicated server for V Rising. It also has some additional server settings that make the game run smoothly. Just follow the methods and steps we have listed for you, and you will be good to set up a server.
Next: V Rising Dark Silver Weapons
Thanks! Do share your feedback with us. ⚡
How can we make this post better? Your help would be appreciated. ✍