This guide will discuss V Rising server settings and how to set up your custom server. If you have already tried setting up servers of games before, then the server settings won’t be a problem for you.
If, for some reason, you have any type of error with your server, then refer to the V Rising server errors solution error fix guide.
There are three server configurations available for V-Rising:
- G portal for a user-friendly experience with rental fees.
- Setting up a server through Steam itself for free.
- Using the free Steam CMD to establish a dedicated server.
Renting A Server Through G Portal (Paid)
Using G Portal to set up your server has its pros and cons. The pros are that it is the same thing that V Rising uses to run its official server. And that G Portal gives you a hassle-free, easy-to-use, and high-performing server experience.
But like all things, pros need to be balanced with cons. But in this case, there is only one con. That is, you have to pay to use G Portal to rent servers.
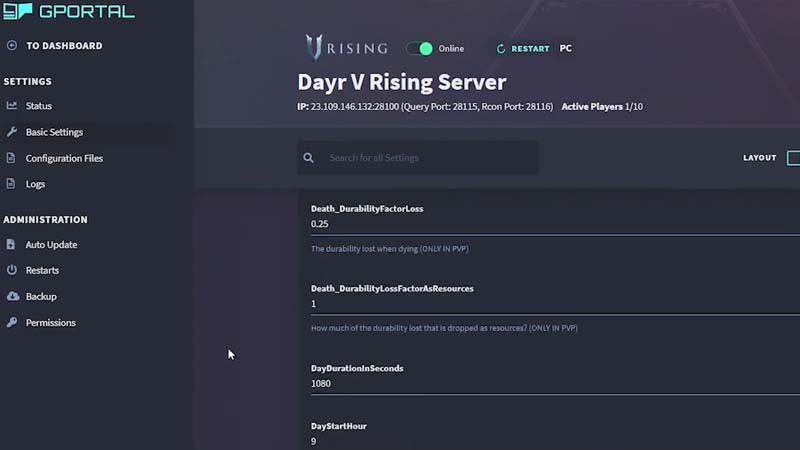
However, G Portal is very easy to use. All you have to do is visit the official website of G Portal and head to the V Rising server page. Next, select the server option that suits your needs. Also, you can configure your server through an option in G Portal.
Setting Up A Server Through Steam (Free)
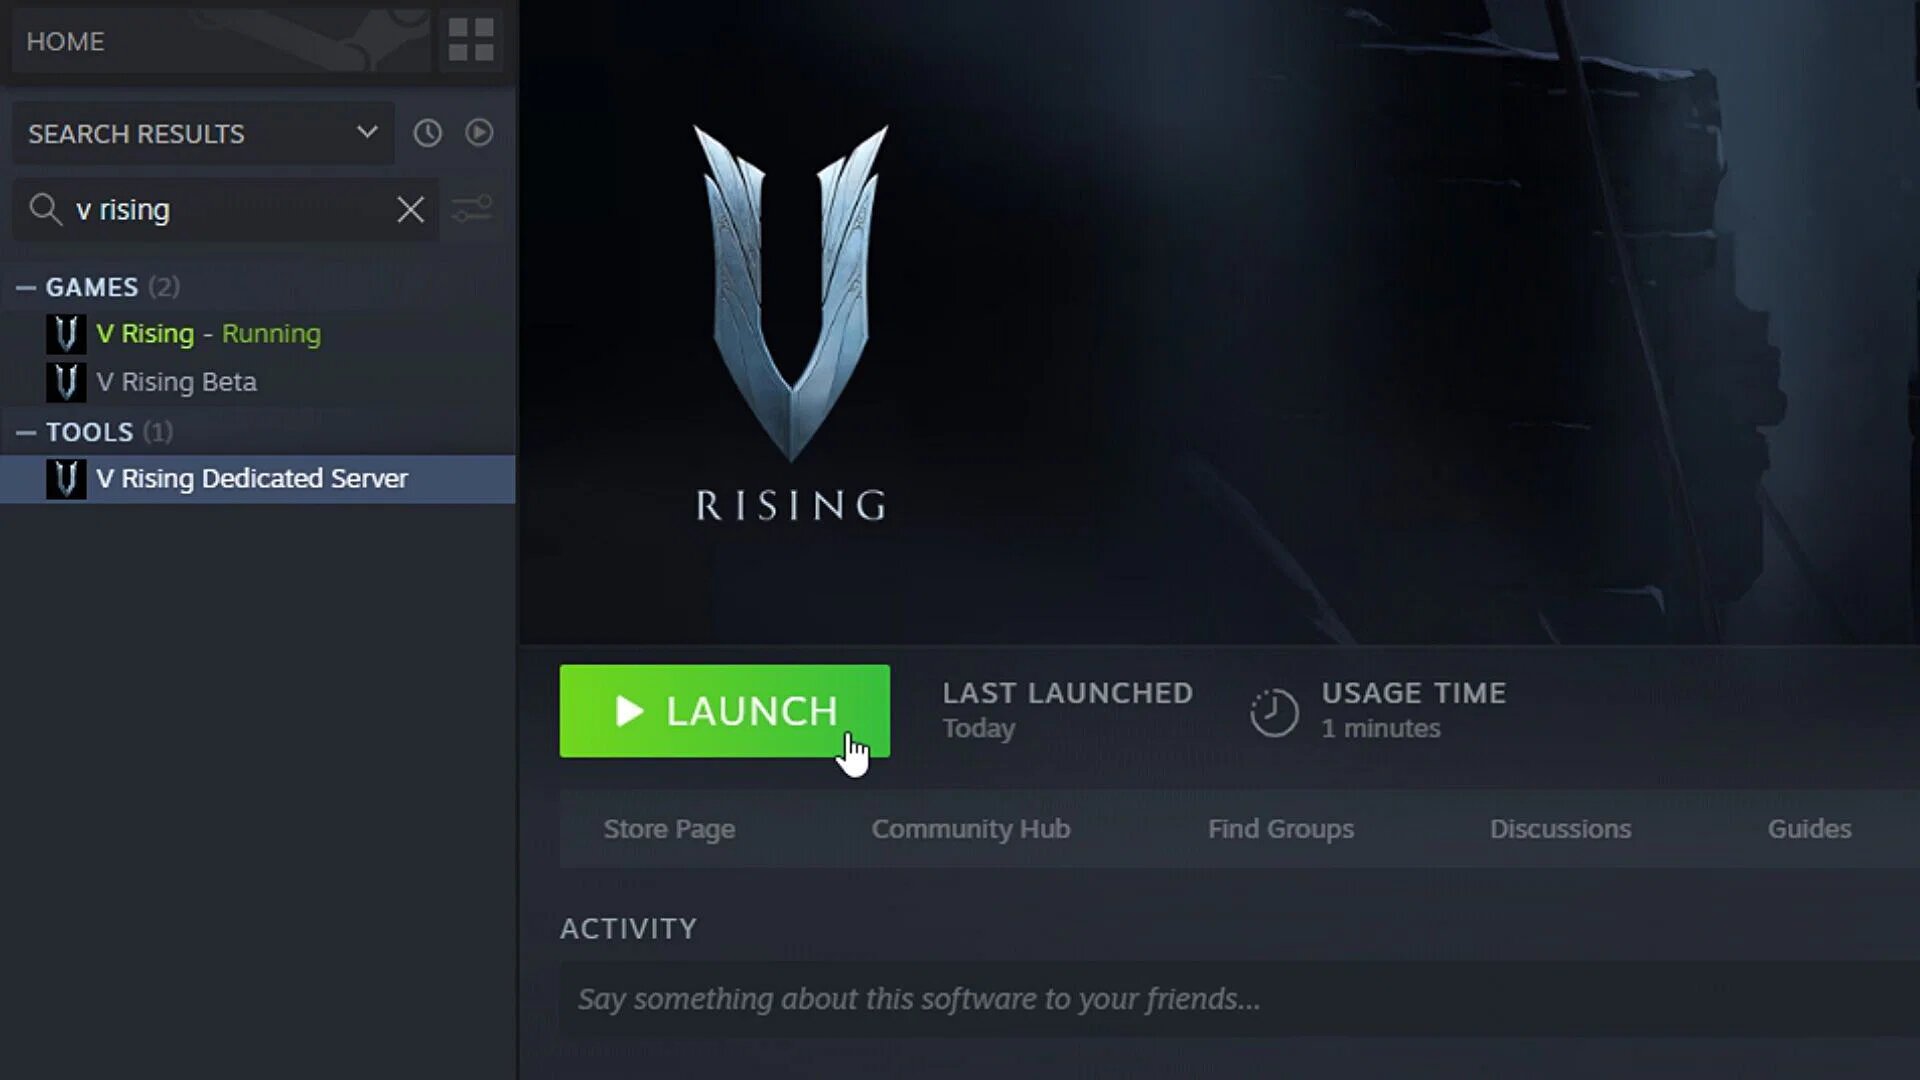
Here is another way to set up your dedicated V Rising Server, and this time it is through Steam itself. First, go open your Steam library and type “V Rising Dedicated Server.” Next, install it. Now right-click the app, select “manage,” and then “browse local files.”
This takes you to your server files. After that, you must follow the Server Settings, which we will discuss in detail later.
Setting Up A Server Through Steam CMD (Free)
Usually, steam players use Steam CMD to set up their dedicated servers in various games. The same strategy also works for dedicated servers.
If you wish to set up your dedicated server through Steam CMD, then follow our steps.
- First of all, you need to download Steam CMD.
- Then extract the zip file.
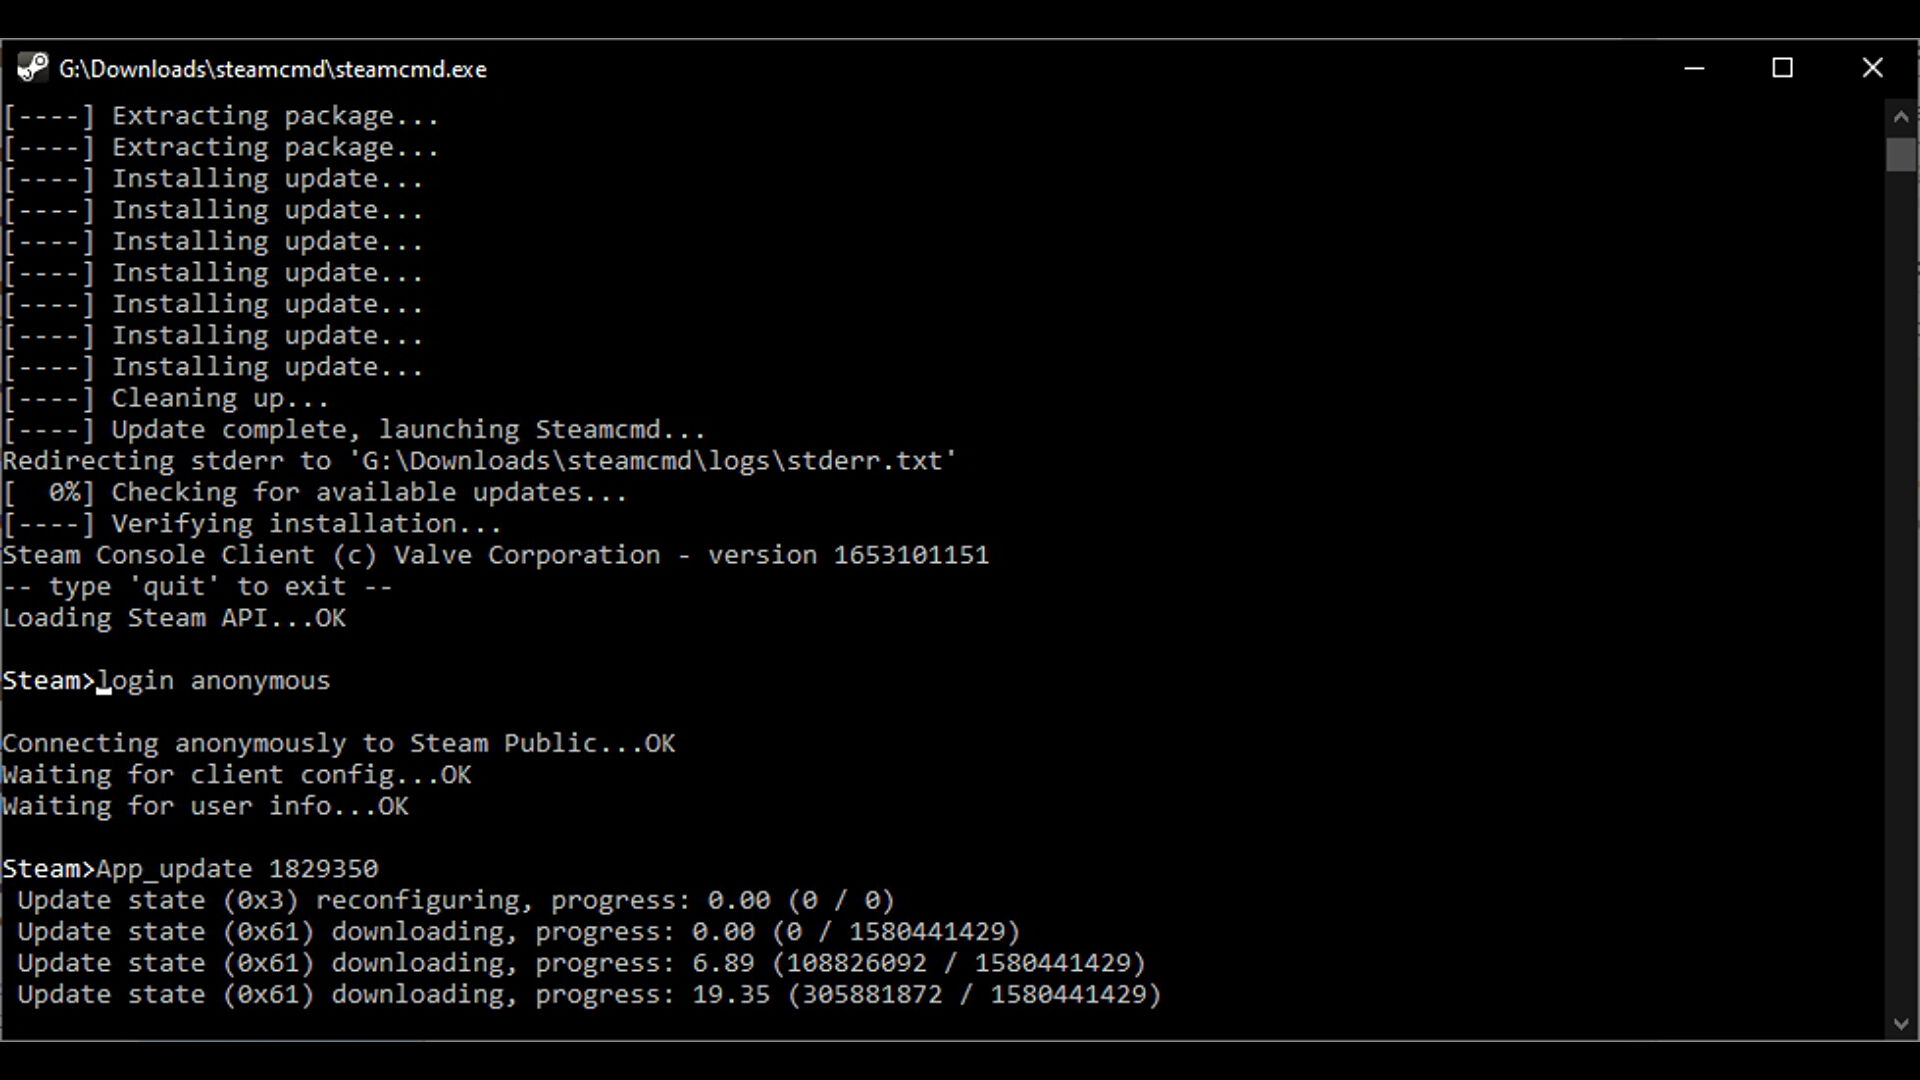
- Next, run “staemcmd.exe.”
- Now, type in “login anonymous” and proceed further to log into Steam CMD.
- Furthermore, type “App_update 1829350”. This will download all the server files.
- Now to exit the app, type “exit”.
- Now find your V Rising dedicated server files in your Steam CMD folder under steamapps/common.
V Rising Server Settings
Now that you have acquired the server files, you need to make a few changes to make it custom for yourself. First of all, you will need to add your server name.
Follow These Steps:
- Edit Server Name and Save Name:
- Right-click on “start_server_example.bat” and select “Edit.”
- Add your desired server name after “-serverName” and your save name after “-saveName.”
- Save the file and exit.
- Adjust Server and Game Settings:
- Navigate to “VRisingServer_Data/StreamingAssets/Settings.”
- Open “ServerHostSettings.json” to modify server settings like name, save name, password, and description. Ensure these match the names set in the batch file.
- Take note of the “Port” and “QueryPort” numbers for firewall access and port forwarding.
- Open “ServerGameSettings.json” to adjust game settings such as PVP or PVE.
- Manage Banlist and Adminlist:
- Edit “banlist.txt” to include the names of players you want to ban from the server.
- Edit “adminlist.txt” to include the names of players you want to make admins.
“ServerGameSettings.json” File Editing Option
Now, we will discuss some of the most important aspects of V Rising that you can change by editing the “ServerGameSettings.json” file. Here are some key options you can modify:
- ClanSize: Set the limit for the overall number of players in a clan.
- BloodBoundEquipment: If set to “true,” players can keep their inventory upon death.
- SunDamageModifier: Adjust the damage the sun inflicts on players. The default is 1.
- CastleLimit: Determine the number of castle hearts a player can have. The default is 2.
- CastleDecayRateModifier: Set the rate at which castle hearts decay.
- CanLootEnemyContainers: If set to “true,” players can loot other players’ containers.
- GameModeType: Choose between PVP or PVE game modes.
- DayDurationInSeconds: Set the duration of a full day-night cycle in seconds. The default is 1080.
- VSPlayerWeekdayTime and VSPlayerWeekendTime: Set times and days for players to attack each other (PVP servers only).
- VSCastleWeekdayTime and VSCastleWeekendTime: Set times when players can raid other players’ castles.
If you are playing on a PVP server, then you will require some of the best PVP weapons. So why not read the Best PVP Weapons and Best PVP Ultimate Abilities Guide?
Starting The Server
Now that you have completely set up your dedicated server, you will wonder how to start it.
- Open the “start_server_example.bat” file.
- A black window will open with text indicating that the server is starting. If these lines appear, your server has started successfully.
Closing Down TheServer
Now if for some reason you have to close your server down:
- Click on the black server window.
- Press “Ctrl+C”.
- A prompt will appear asking, “Terminate batch job (Y/N)?” Type “y” to close the server.
Bonus: Using Port Forwarding
Port Forwarding and Firewall are very important if you run into any type of joining error or any type of server issue. These two things must be done correctly so people can easily join your V Rising Server.
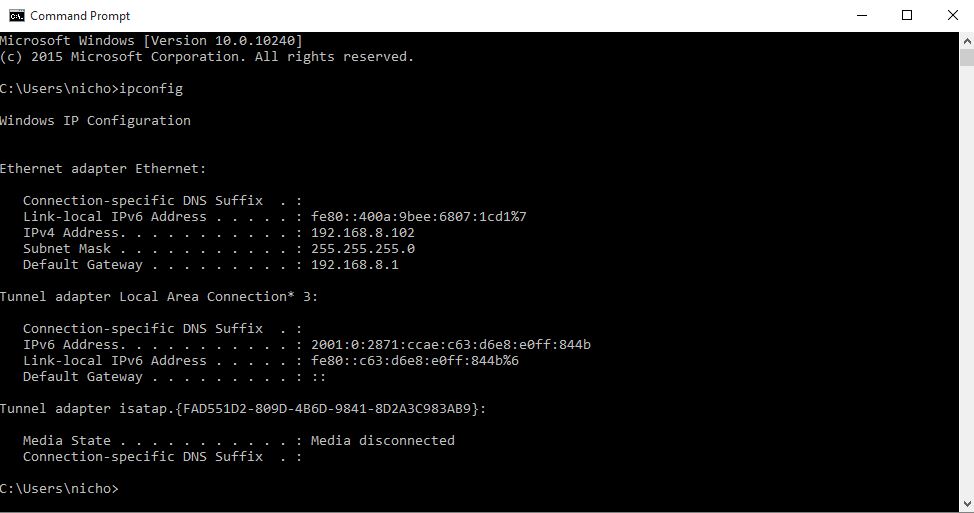
- Find your router’s IP address by pressing “Windows Start Button+R,” and then typing “cmd” in the Run tab. In the command prompt, type “ipconfig” and note the number next to “Default Gateway.”
- Enter this number into your internet browser to access your router’s settings.
- Follow your router’s instructions for port forwarding. This process varies for each router.
- Use the “Port” and “QueryPort” numbers from the “ServerHostSettings.json” file and your IPV4 address for port forwarding.
- Once port forwarding is set up, ensure the ports are allowed through your firewall. Press “Windows Start Button+R,” type “wf.msc” in the Run tab, and create new inbound rules for TCP and UDP using the same port numbers.
Allowing Server Port Through Firewall
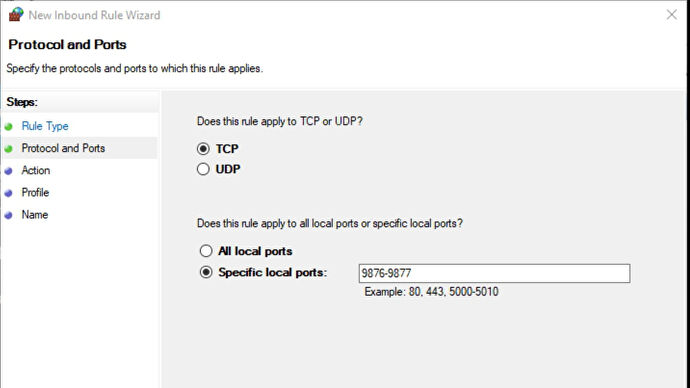
To allow the port through the firewall on Windows, follow these steps:
- Press “Start+R” to open the Run tab, then type “wf.msc” and hit Enter.
- Select “Inbound Rules” and click “New Rule.”
- Choose “Port” and select “TCP.” Enter the ports from port forwarding, separated by commas.
- Click “Allow the Connection,” then check all boxes on the next screen. Name the new rule and click “Finish.”
- Repeat the process for the same ports, but choose “UDP” instead of “TCP” this time.
How To Join A Dedicated Server In V-Rising
Now, Joining a dedicated server is a straightforward process. All you have to do is start the game and then find Display all Servers & Settings under Find Servers which is further under Online Play.
Now make sure that you have selected the right filter options. Next, type your server’s name and just hit “Join”.
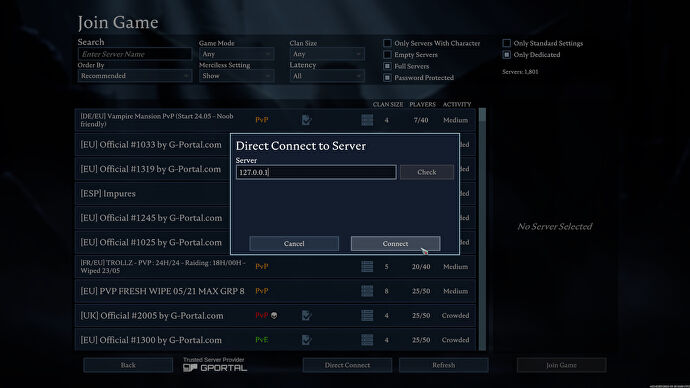
Alternative Method To Join A Server
For those unable to join the server using the first method, an alternative approach is available:
- Select the “Direct Connect” option in the Join server section of V Rising.
- Depending on your situation:
- If joining from the PC where the server is running, use “127.0.0.1” to connect directly.
- If not on the same network as the server machine, input the server machine’s external IP Address.
- If joining from a PC on the same network as the server machine, use the server’s IPV4 address.
Bonus: Turn Your Private Game Into A Dedicated Server
Yes, turning your private V Rising game into a Dedicated server is possible. However, to do that, you will have to follow the following steps:
- Create a new server with a new save file name and start it.
- Join the server and create a new character.
- Navigate to “save-data/Saves/v1/[your server’s save name]” and delete all files except “SessionId.json”.
- Find your saves by typing “%Appdata%..\LocalLow\Stunlock Studios\VRising\Saves\v1” in Windows search. Open each folder’s “ServerHostSettings.json” file to identify the required one.
- Back up the required files and paste them into “save-data/Saves/v1/[your server’s save name]” to replace deleted files.
- Copy “ServerGameSettings.json” and “ServerHostSettings.json” from “%Appdata%..\LocalLow\Stunlock Studios\VRising\Saves\v1”.
- Navigate to “%Appdata%..\LocalLow\Stunlock Studios\VRisingServer” and create a settings folder if not present. Paste the copied .json files here.
Now, if you have followed the above steps correctly, you should be able to join the server. And you get to keep all your progress from the private world.
We hope you found the guide very detailed and informative, as we tried our best to cover everything required to set up your dedicated server and how to tweak its settings.
Thanks! Do share your feedback with us. ⚡
How can we make this post better? Your help would be appreciated. ✍