God Of War Ragnarok has a plethora of valuable resources and materials that you will need to hunt down, one of which includes the Crackle of Bilskirnir, a unique crafting component. It is used to craft one of the Best Relics in the game, known as the Hilt of Ridill. You must learn how to get the Crackle of Bilskirnir in God Of War Ragnarok, as it is one of several relics you will need in order to obtain the Collector Trophy for the game.
- The Crackle Of Bilskirnir is used to forge the Hilt of Ridill Relic at Brok and Sindri’s in God of War Ragnarok.
- To obtain the Crackle of Bilskirnir, complete the Animal Instincts favor.
- Trigger the favor by heading to a cave near Tyr’s Temple in the Lake of Nine, located in Midgard.
- In the cave, face a Kol Raider encampment. Kill all enemies to prompt Atreus to mention other encampments.
- All remaining encampments will now be marked on your Lake of Nine map.
- Defeat all Kol Raiders to face Olaf Nautson. Utilize parrying against his slow attacks and watch for unblockable moves.
- After defeating Olaf Nautson, complete the Animal Instincts favor to obtain the Crackle of Bilskirnir
The crafting component is found by defeating a boss during one of the late-game ‘favors’, which is the game’s term for side quests. First things first, we will discuss a short overview of the quest called Animal Instincts, as it is mostly self-explanatory on its objectives and navigation, along with the boss fight at the end.
[Note: Some parts may have spoilers in them. Read at your own discretion]
How To Start The Animal Instincts Favor
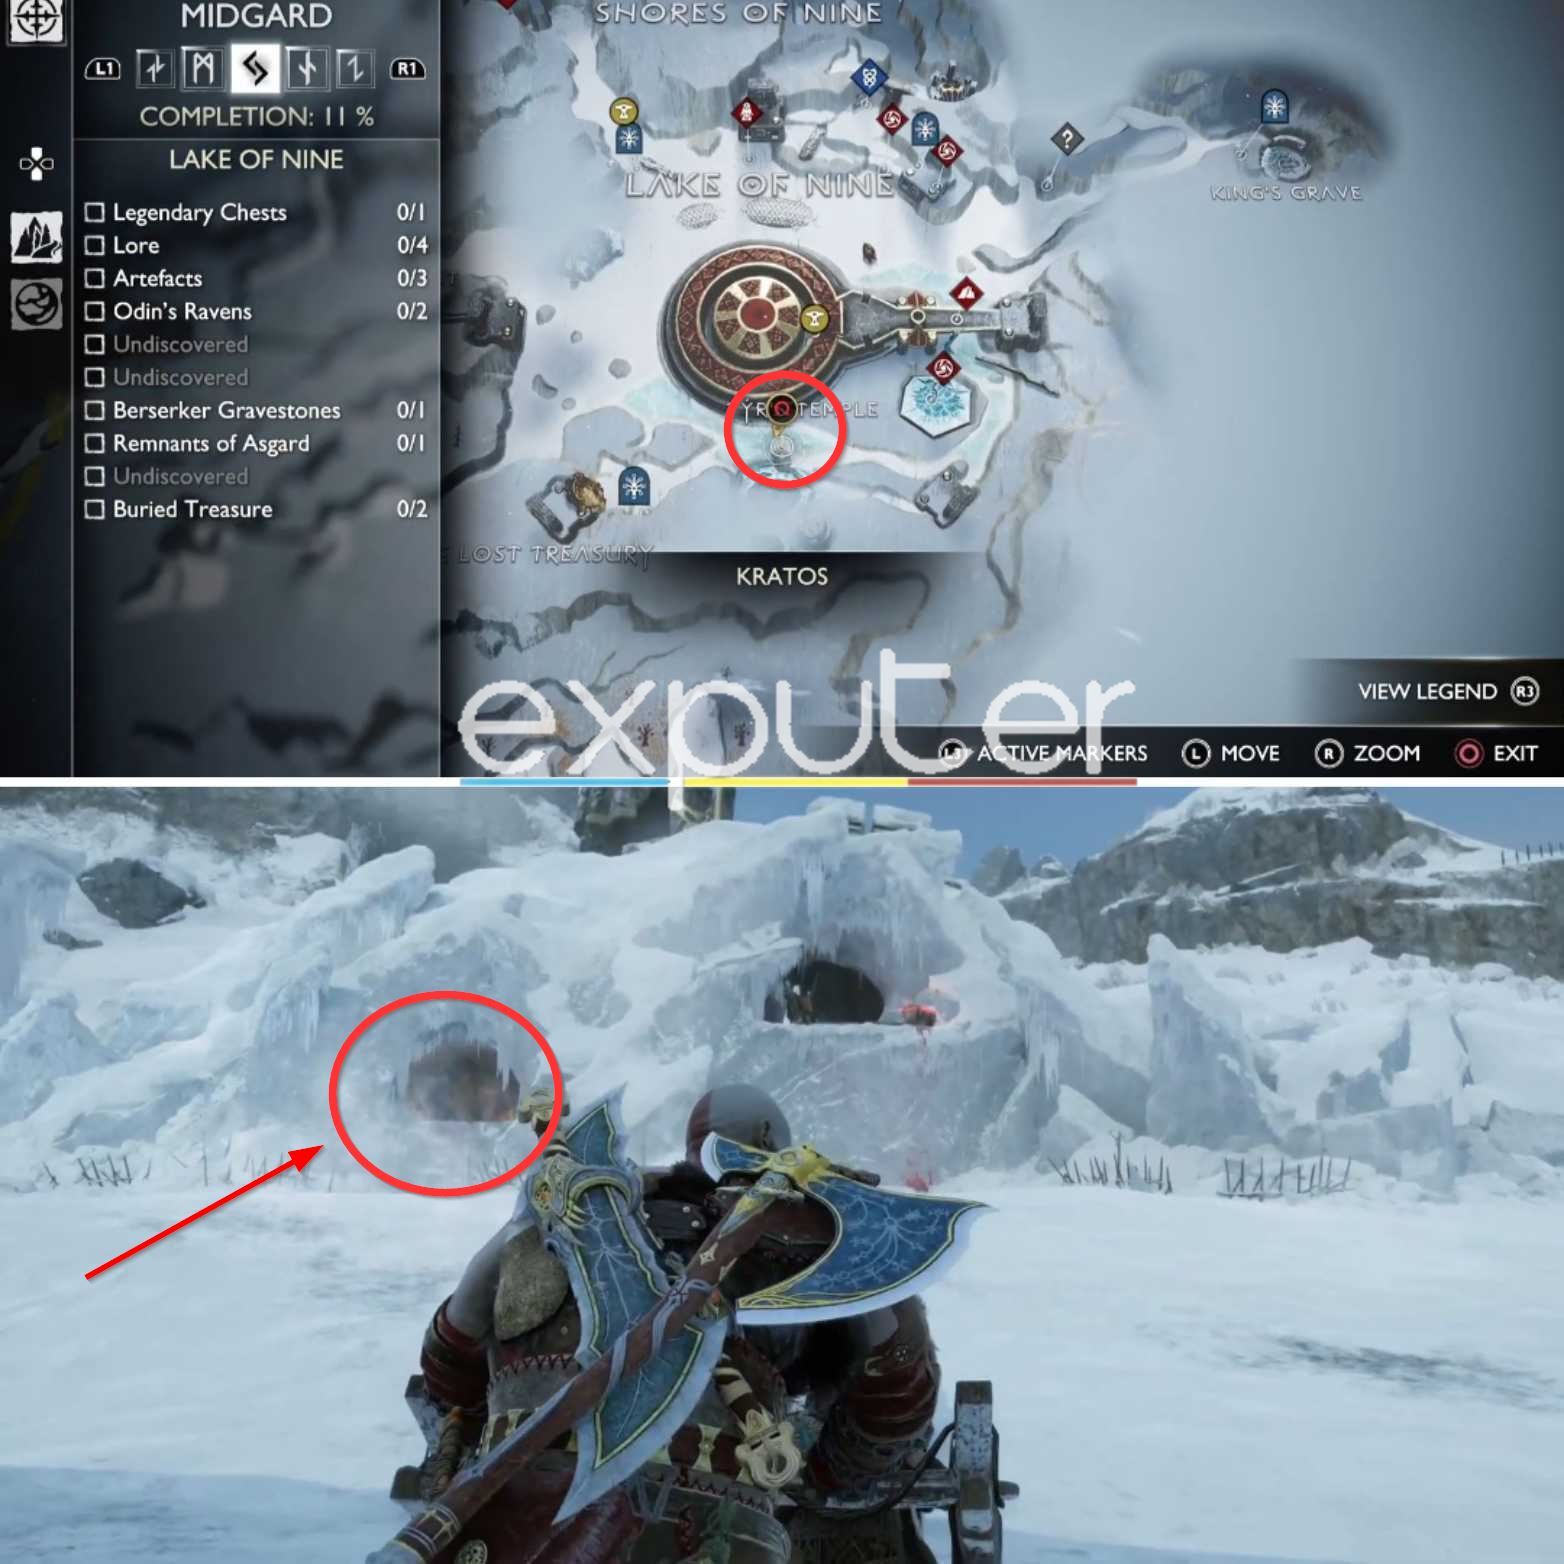
In order to trigger the side quest itself, you will need to head to the realm of Midgard, which is accessible during the mid to late-game sections of GOW Ragnarok. Travel to the section of the map shown in the image above, which is the lower section of the Lake Of Nine. Here, you will come across a large hideout with a red loot chest to the right side of the main entrance; ignore that for now.
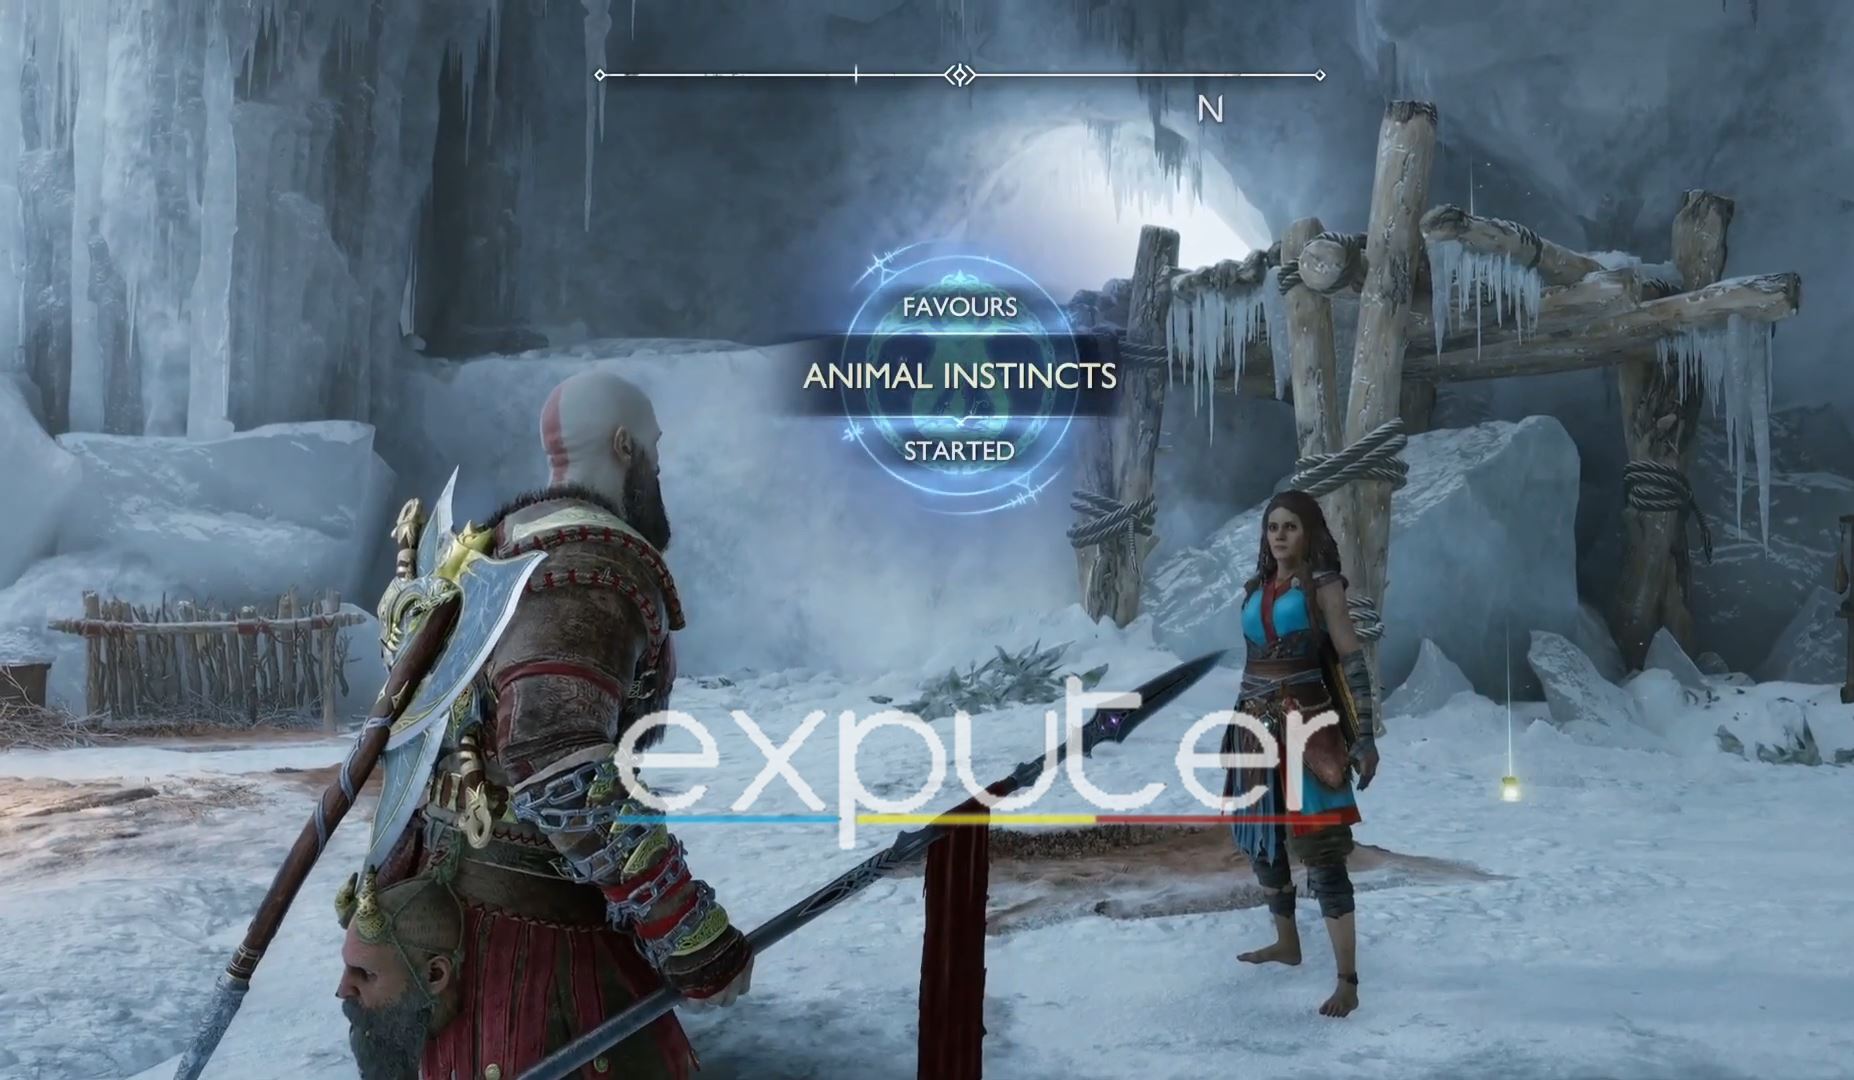
Head into the structure, and you will be faced with Kol Raiders, whom, at this point in the game, you will already have encountered numerous times and defeated. Clear all of the enemies out, using any of the environmental artillery at your disposal to deal large chunks of damage. Once you clear all of them out, feel free to grab the chest here we mentioned previously.
Whichever companion between Freya or Atreus you have alongside you at this point will remark how there are more Kol Raider encampments needed to be taken down around the area. After which, you will now be tasked with the favor and with the objective of clearing each of the camps and the stronghold marked on your map.
Kol Raider Encampment Locations
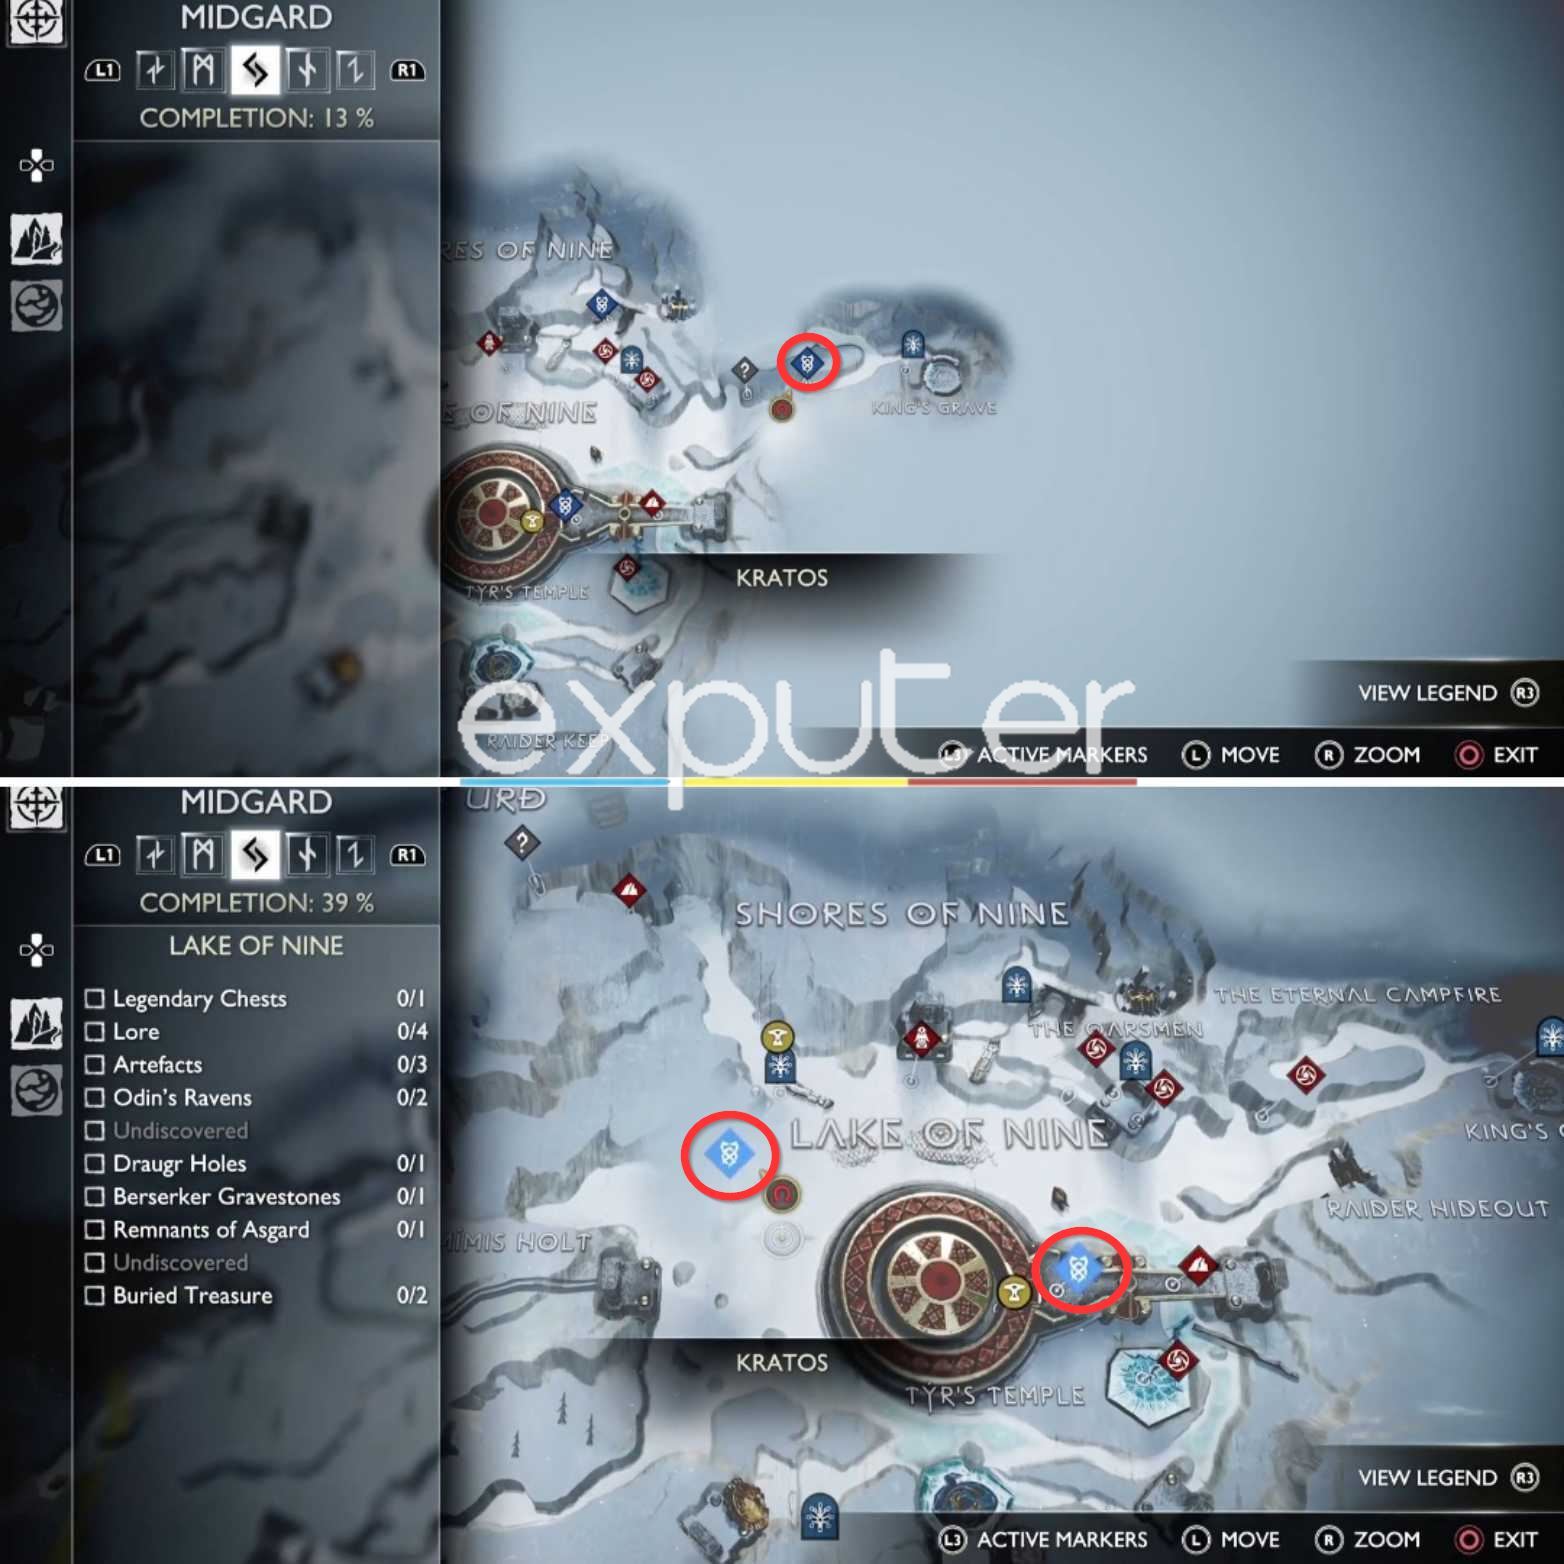
We have marked all three of the locations where you must seek out and defeat the Kol Raiders, which include a hideout to the right of the area, a Fort to the left side, and finally, in the center, you can find the stronghold. Each of the enemies here shouldn’t pose too much of a threat considering where you’re at in terms of progression by the time you reach the quest itself.
We strongly advise maintaining proper distancing and not letting the enemies overpower or crowd around you, which will more than likely prove to be your main downfall. You have complete freedom of whichever location you want to tackle first, regardless of which, at the end of clearing the last one, you will face off against the boss fight, Oluf Nautson, the Chieftain of the Kol Raiders, be prepared as we discuss a basic strategy against him.
Oluf Nautson Boss Fight Guide
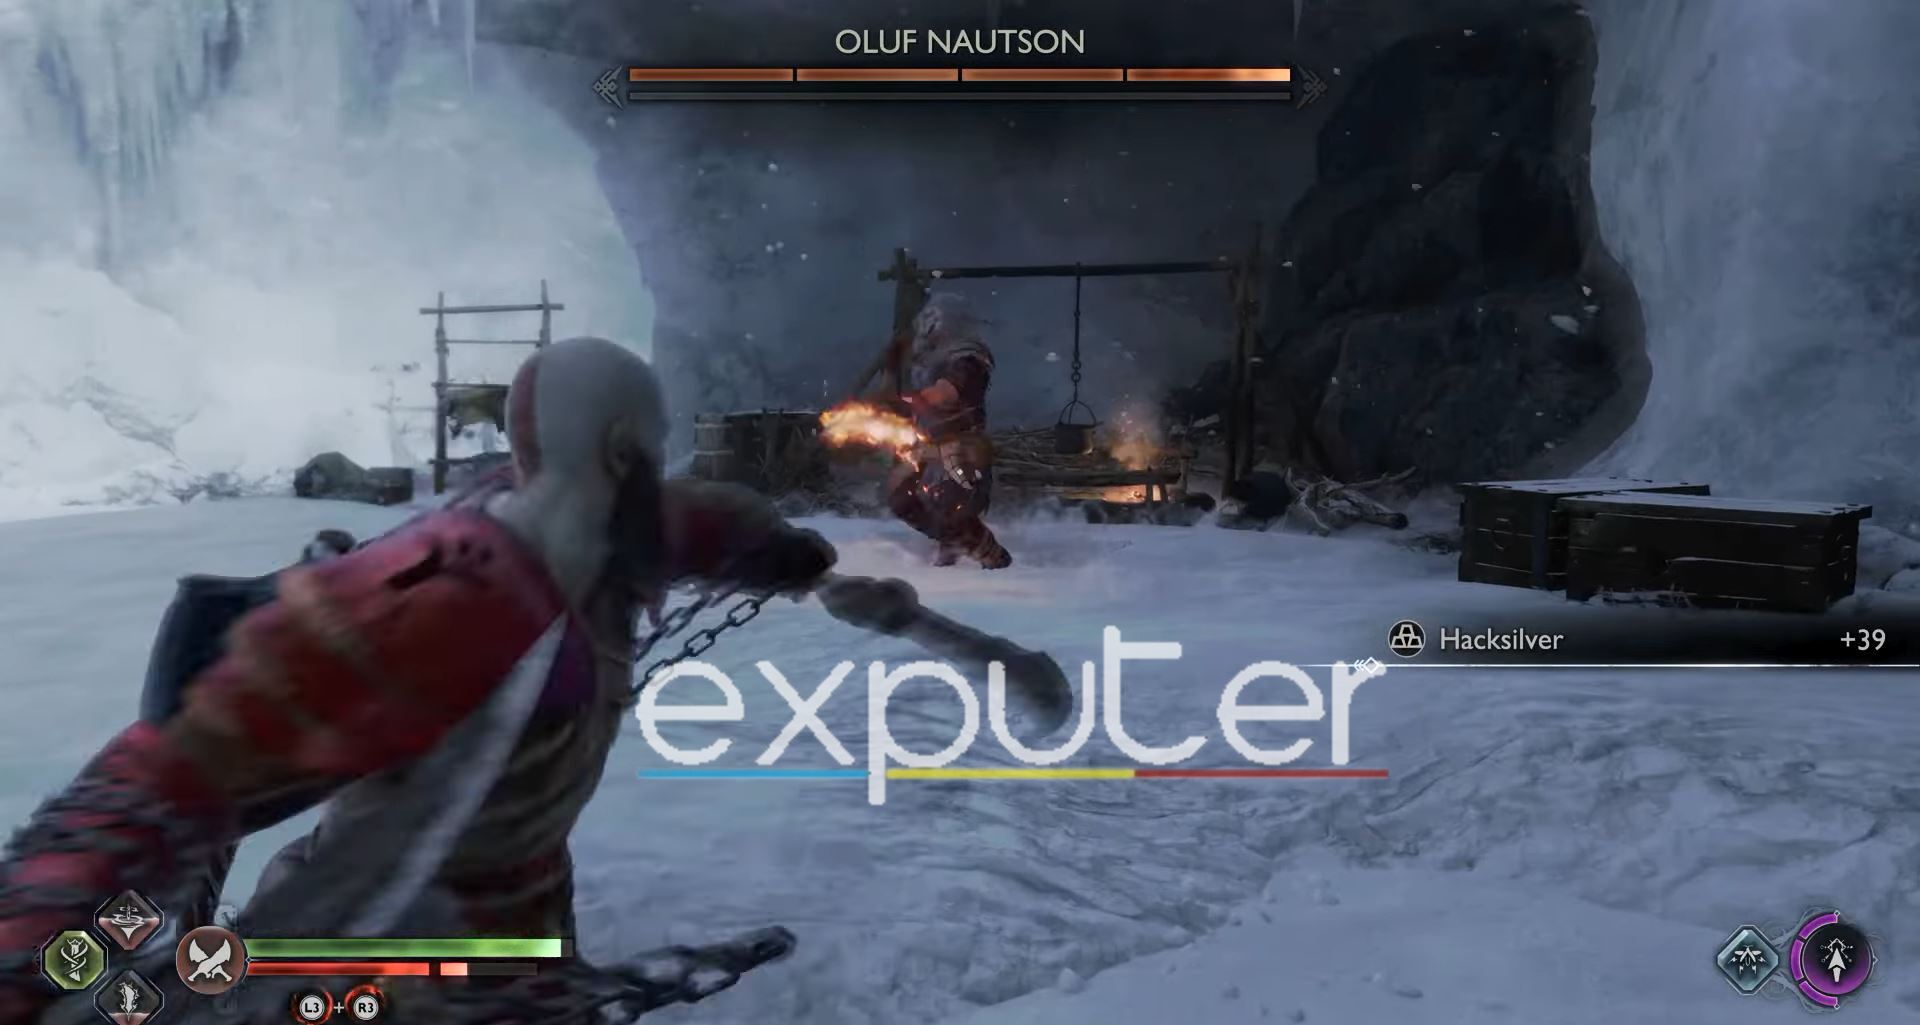
As stated previously, the boss will spawn as soon as you clear all 4 encampments in total; there is no specific order to follow, and each location for the fight to take place can be different depending on which camps you take down first and vice versa.
Oluf Nautson is a large Kol Raider Chieftain, and while his size may be intimidating, there is no need to worry too much as he can be defeated with ease as long as you follow our tips for him down below:
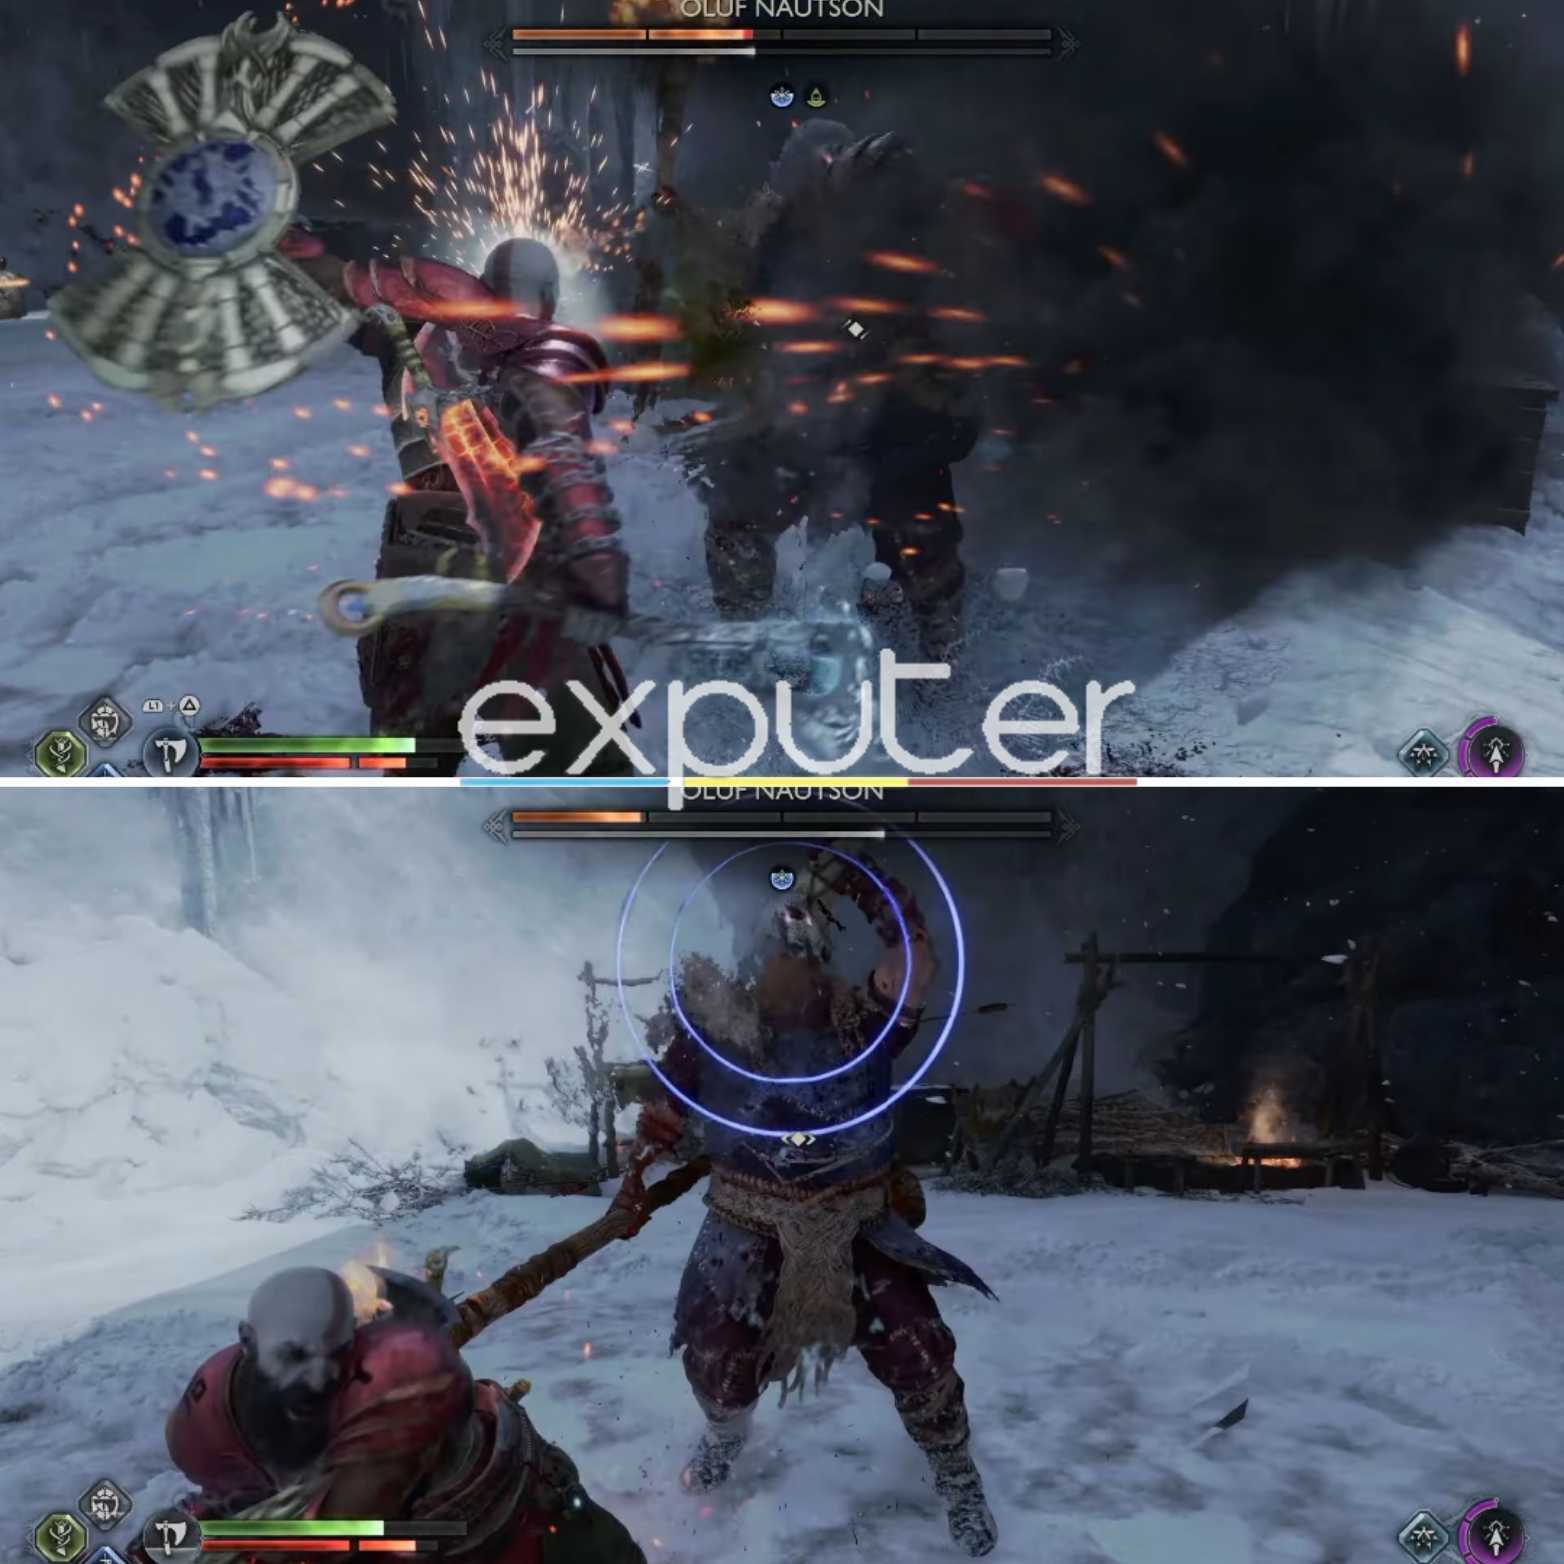
- He mostly has slow wind-up attacks, which can all be easily readable and dodged at the right time.
- It is worth mentioning that all of his attacks can be parried with relative ease using the Dauntless Shield.
- Keep an eye out when he does a drinking animation, as it will have a blue ring for a couple of seconds, indicating that you can counter-attack him with your shield by double-tapping L1 and interrupting his action.
- The Best Skills For Kratos, such as the Glacial Rake from the Axe, can help you deal Frost status on him with ease, making DPS a lot more powerful once you switch to the Blades of Chaos and use Vaporize Frost.
Rewards
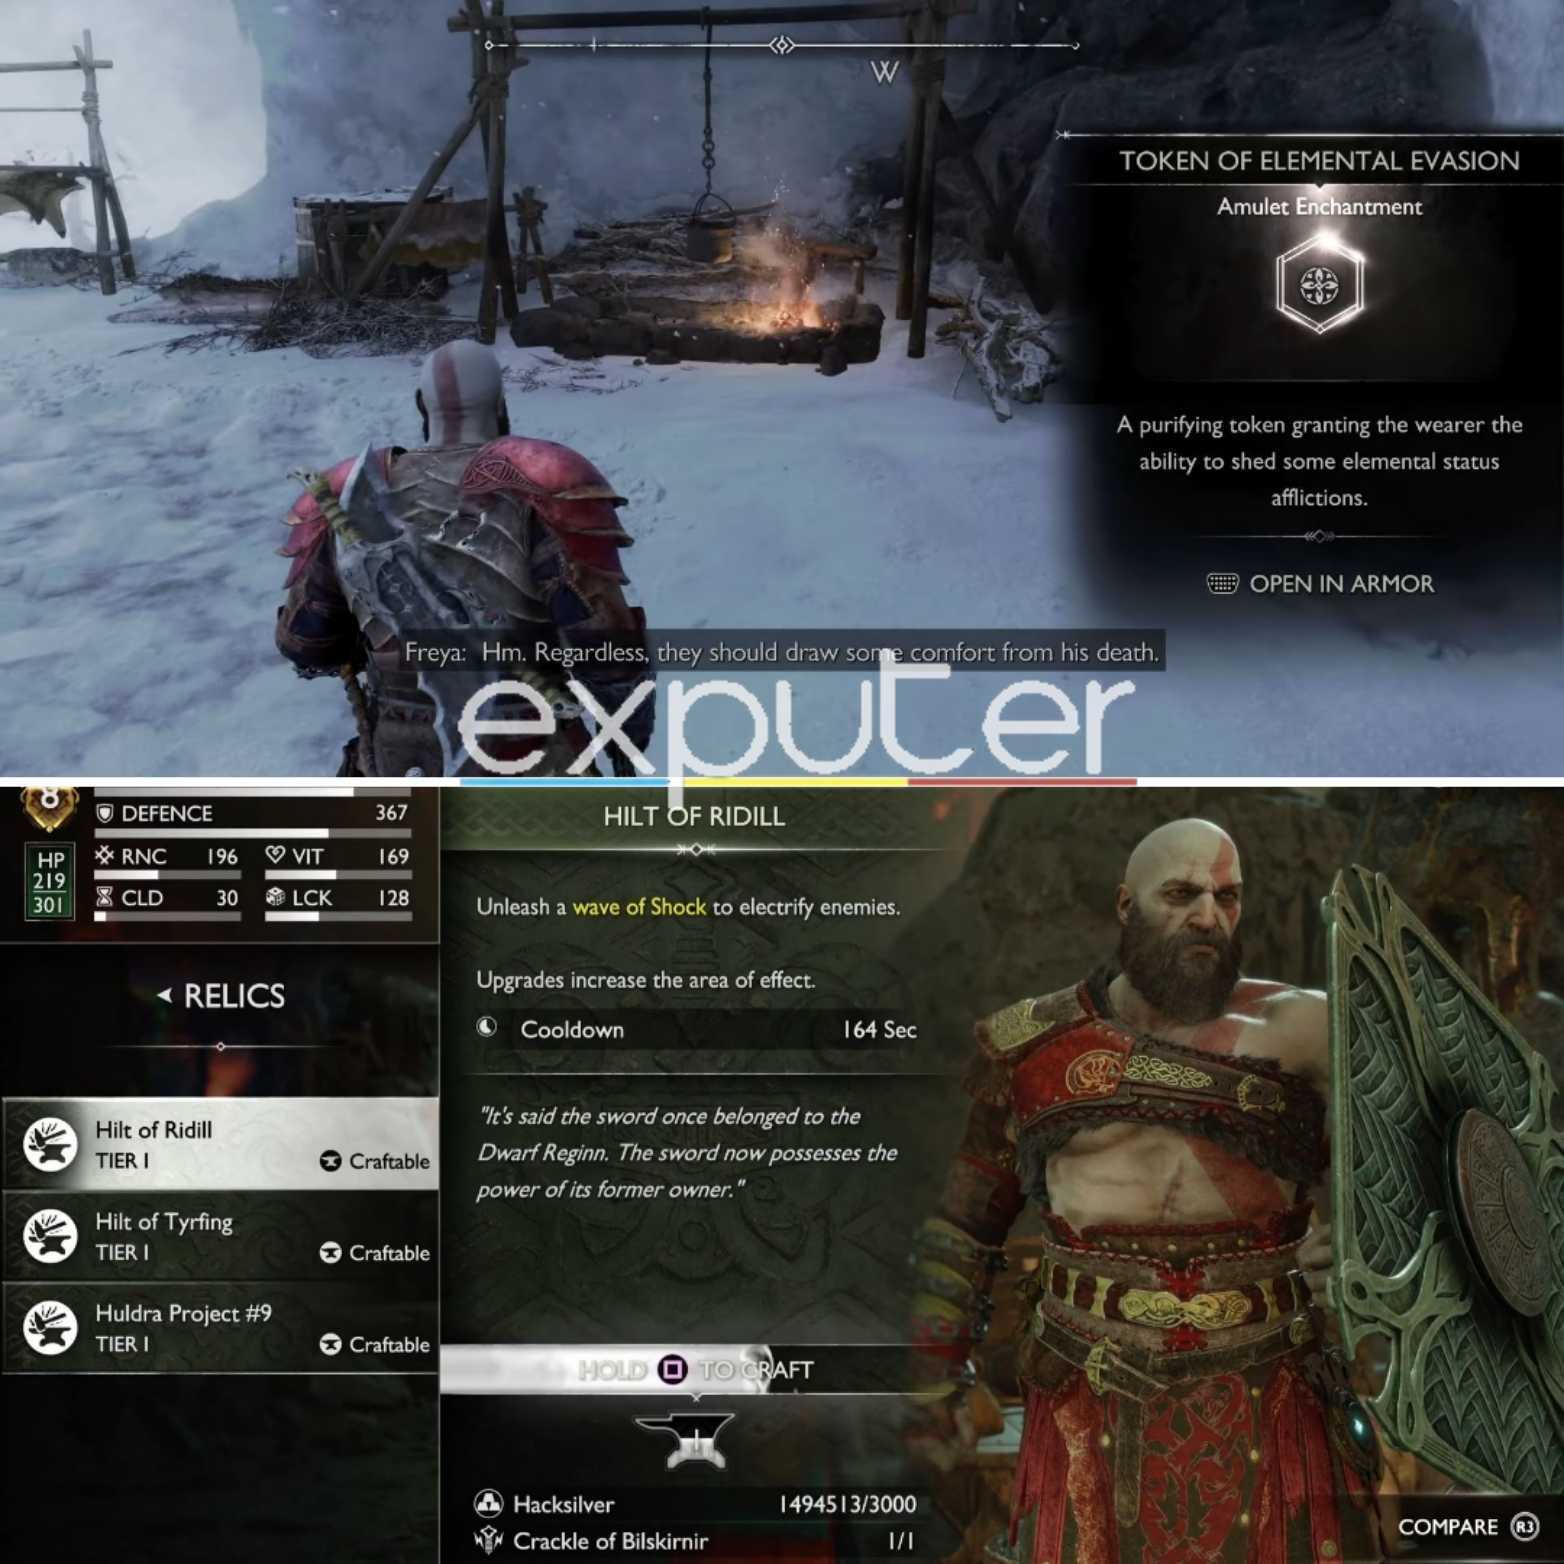
Of course, the reward for defeating him will be the Crackle Of Bilskirnir, whose in-game item description states that it is an “Object imbued with dormant of thunder and lightning and guarded jealously by Kol Raiders of Midgard. ”
Furthermore, you will also receive an enchantment called the Token of Elemental Evasion, which will increase Kratos’ fortification against oncoming status ailments from enemies. Once you have completed the side quest, you can head back to either Brok or Sindri’s workshop in order to craft the Hilt of Ridill relic.
The Wrap-Up
Just like with the previous game, you can also witness GOW Ragnarok’s Secret Ending, which is worth seeing in case you miss it by any chance. In addition to crafting these relics, you can also hunt down all of the Chaos Flame and Frozen Flames for Kratos’ main weapons. If you want to stay optimal in damage capabilities and overall stats, then equipping the Best Armor Sets in the game is vital for any player of the game.
For now, this concludes our guide on how you can get the Crackle of Bilskirnir in GOW Ragnarok. If you have any questions related to the guide or want to share your experience with the game with us, then be sure to let us know all about it in the comments section below!
Up Next:
- The Best Settings in God Of War Ragnarok
- How To Get Raven Tears Armor
- How To Unlock Draupnir Spear
- GOW Ragnarok Mission List
Thanks! Do share your feedback with us. ⚡
How can we make this post better? Your help would be appreciated. ✍