RE4 Remake has a few weapon attachments mounted on the best weapons to help them serve another purpose. The Resident Evil 4 Remake Thermal Scope is one of them, which can be mounted on a few weapons, and players might need assistance figuring out how to get it!
- The Resident Evil 4 thermal scope, also known as the Biosensor Scope, is used to zoom in on distant targets and thermally image them.
- It’s particularly useful for targeting enemies infected with the virus or Plagas parasite.
- Compatible weapons include SR M1903, LE5, CQBR AR, and Stingray.
- To obtain the Biosensor Scope, follow these steps:
- Divert power to the Dissection Room, calibrate the puzzle, acquire the level 1 keycard
- Divert power to the Freezer and solve another calibration puzzle.
- Head to the Incubation Lab to find the Biosensor Scope near the 2002 Case File.
- To use the Thermal Scope, select it from your inventory and mount it on a compatible weapon.
Our video breaks down how to get thermal scope & we believe it’d be easy for you to learn step-by-step method of how to get the Biosensor scope in RE4 Remake from it.
Basic Info
Players will want the Biosensor scope mainly to gain thermal imaging of the area or the Regenerator creatures. It is described to be a scope that can be used with any weapon or gun that can use it.
How To Get The Thermal Scope
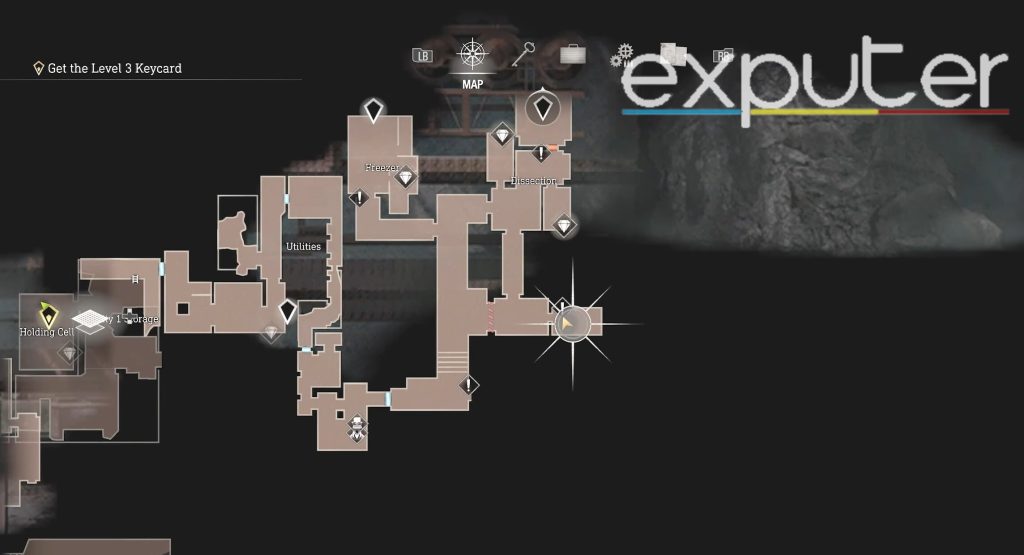
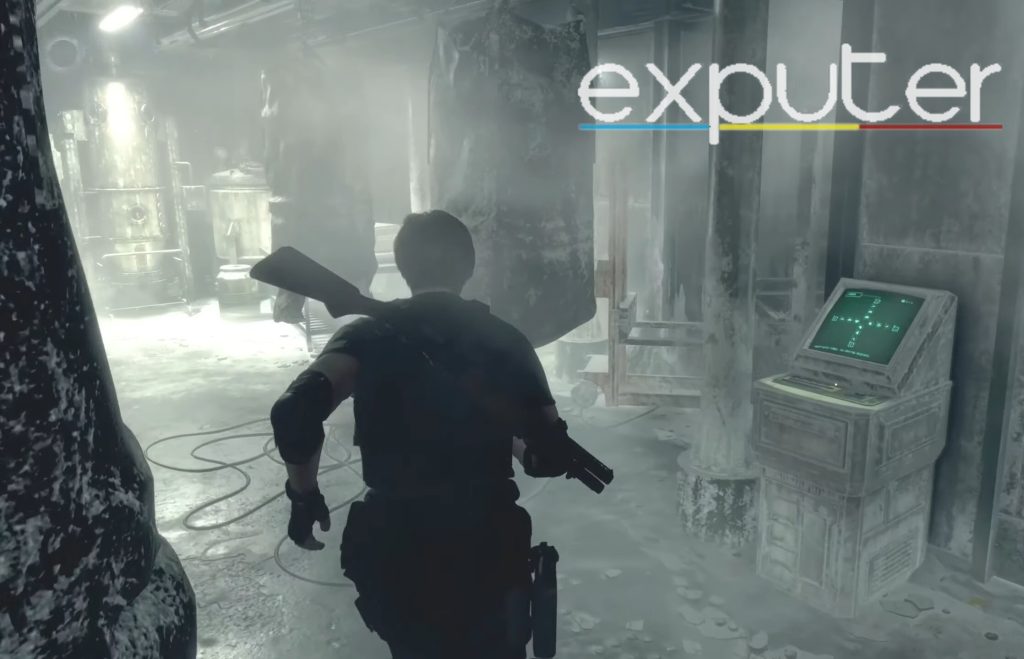
First, if players want to get their hands on the Resident Evil 4 Remake Thermal Scope, they need to make a detour and go through the Incubation Lab, where they require a Level 2 Keycard to grant access to it inside. Let’s go into complete detail about how players can locate it.
Dissection Room Power Diversion
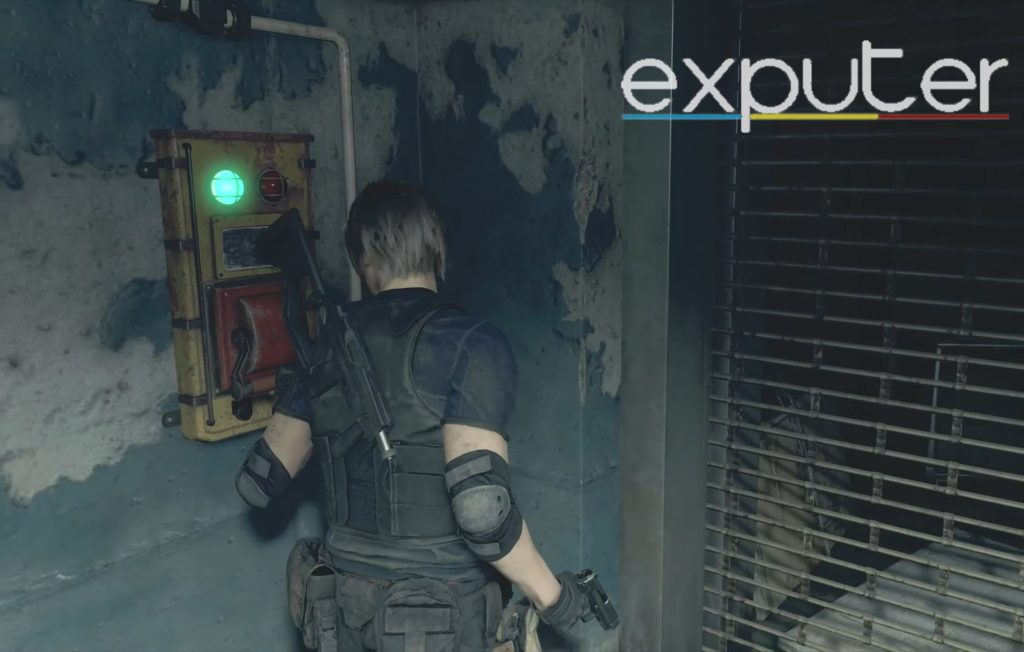
One of the main things players will need to do is dissect power to the Dissection room, where players need to head into but can’t without the diversion of power.
- On the map, it can be seen that players need to first head toward the far bottom right, where a power control lever is located.
- Head towards the red level with the yellow handle, and players can easily interact with it, and with that, they can bring it down.
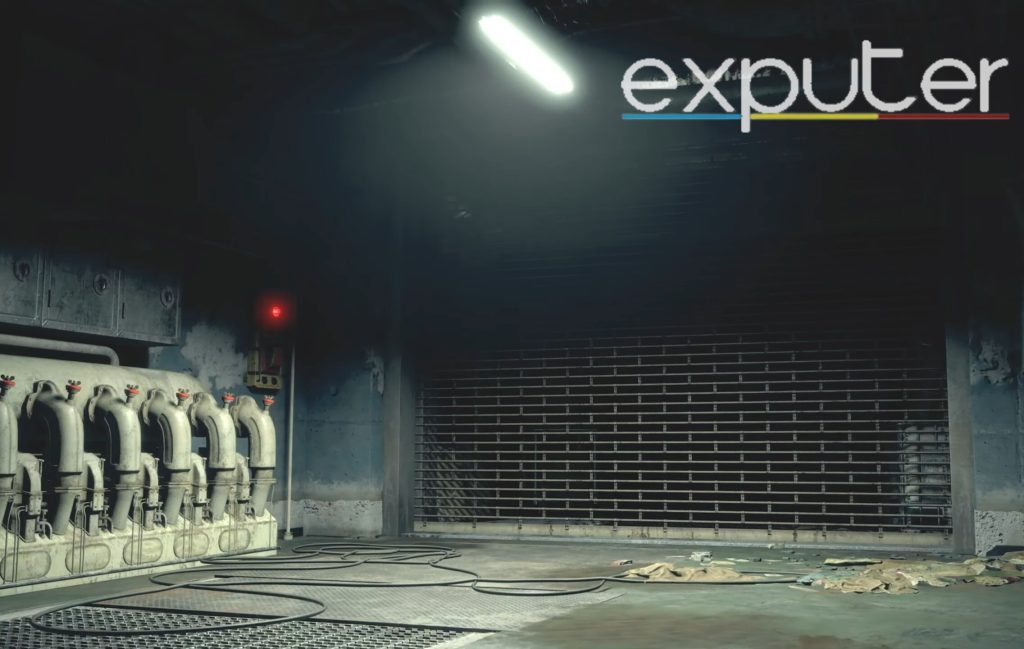
- This triggers a cutscene showcasing power being diverted to another part of the room.
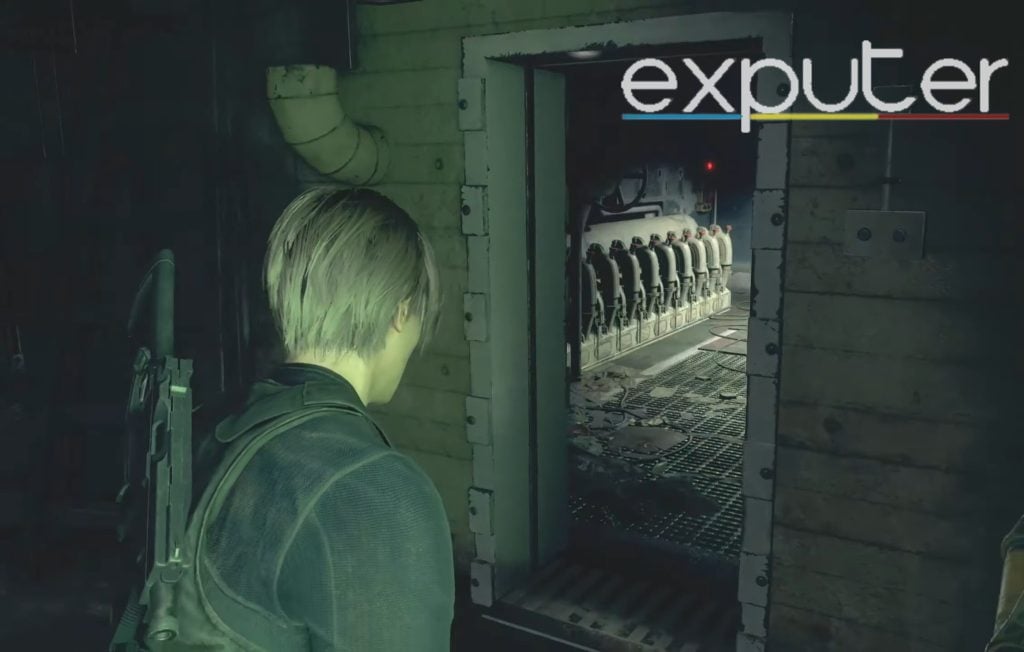
- From here, turn around, face the door towards your left, and head right through it.
- As you do so, you enter another room where the power was diverted, and there is another power control lever beside the grated bars towards the far left of the room.
- Approach the lever and interact with it to bring it down, and the red light turns green.
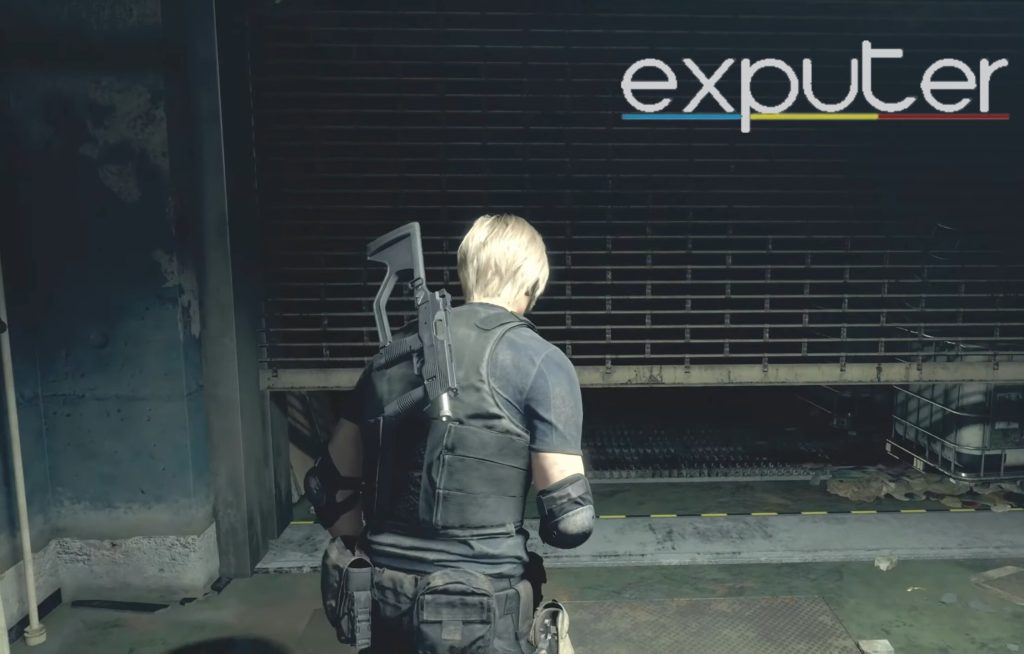
- Diverting the power here unlocks the grated doors.
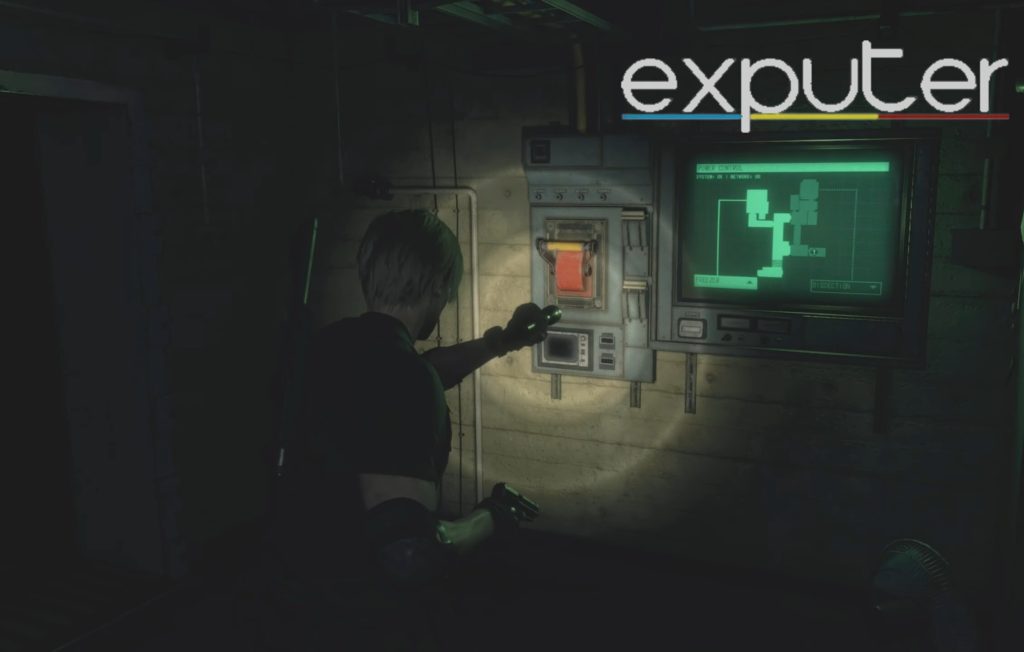
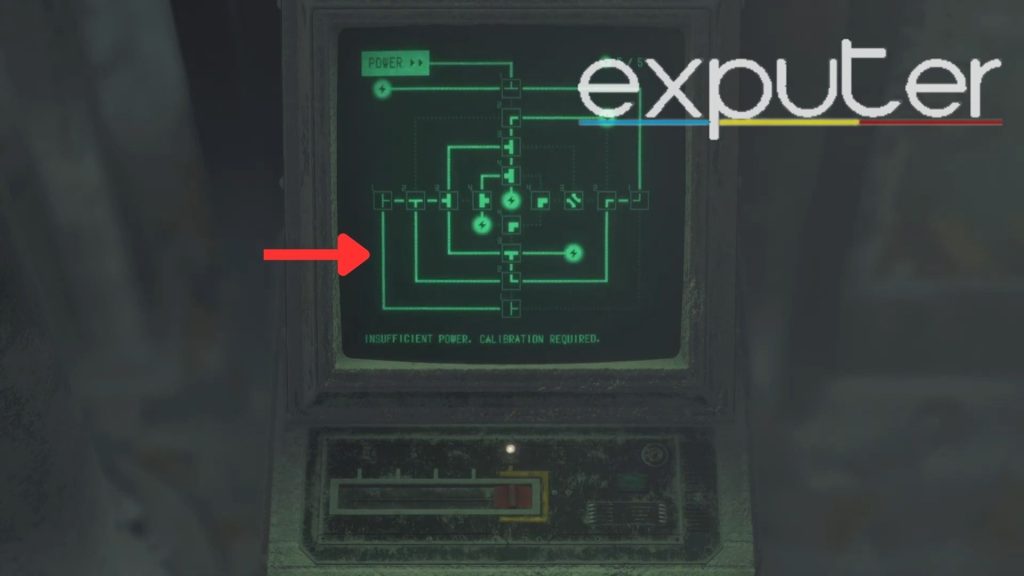
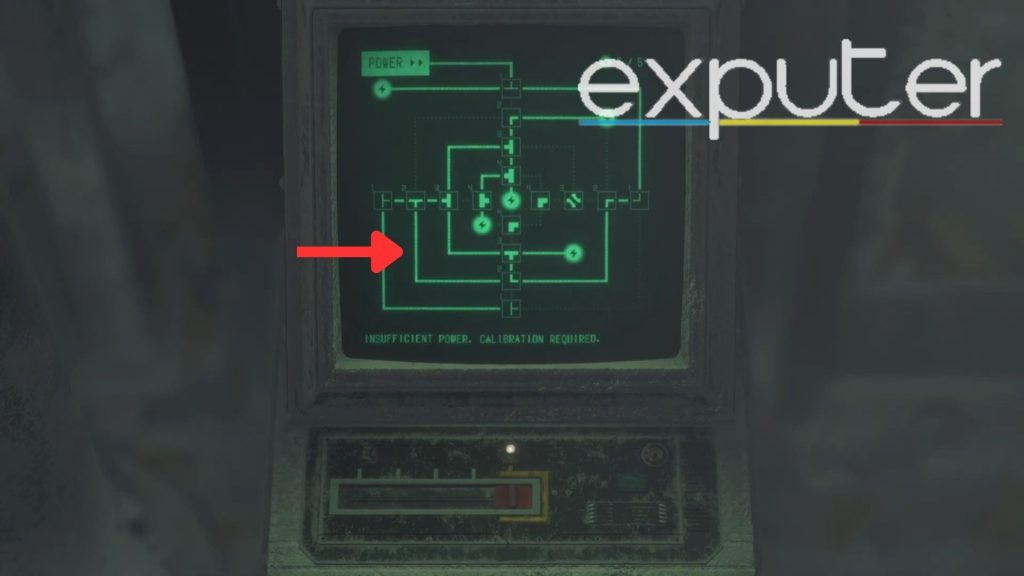
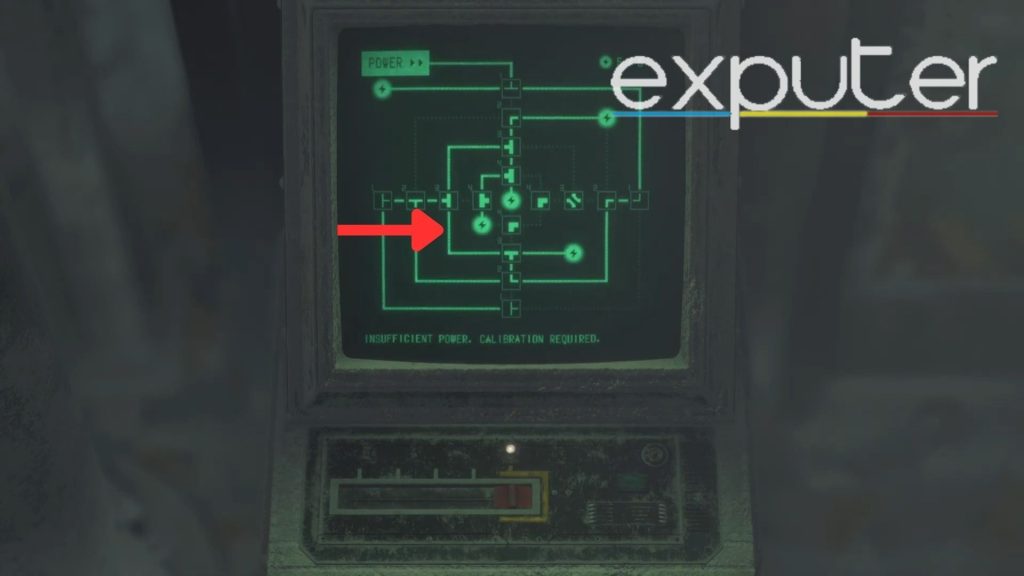
Puzzle In Dissection
From here, players will be able to locate a puzzle that they need to solve. Once you enter the Dissection room, there is a puzzle machine towards the far end beside a set of blue separators.
- Get closer to it, and you should be able to interact with it easily.
- The puzzle can get quite confusing if you don’t already know the ins and outs of it. Therefore, below is a simple explanation of how these puzzles work so players can figure them out beforehand.
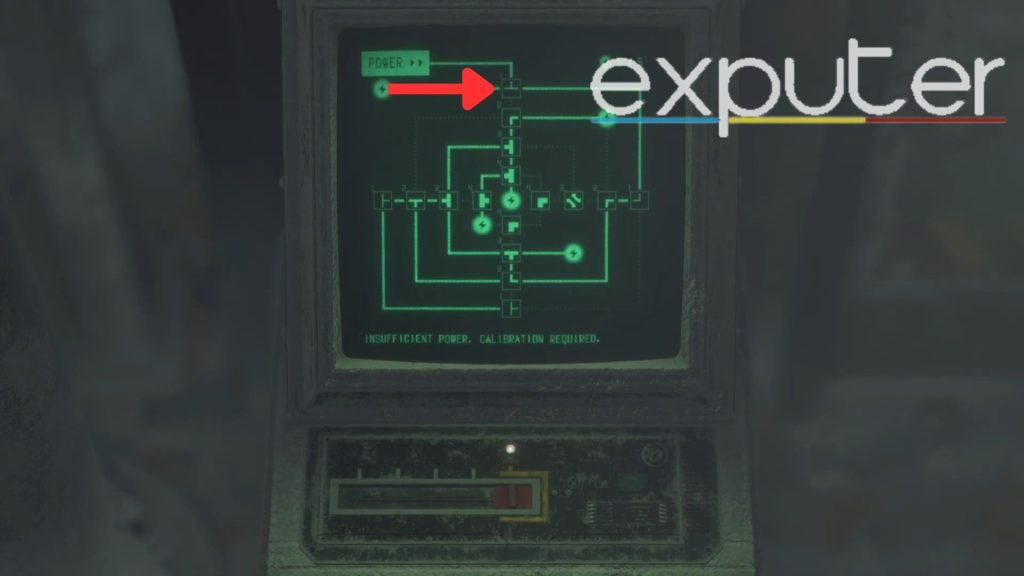
The nodes throughout the puzzle are essentially how players can let power divert through the lines.
- Players must divert the power from the main source, present at the top, from where it starts to flow and travels through the green lines.
- Alongside the green lines, there are also dotted and stable green lines, the dotted ones showcasing no power diversion occurring, while the stable green lines show the power flowing through that particular line.
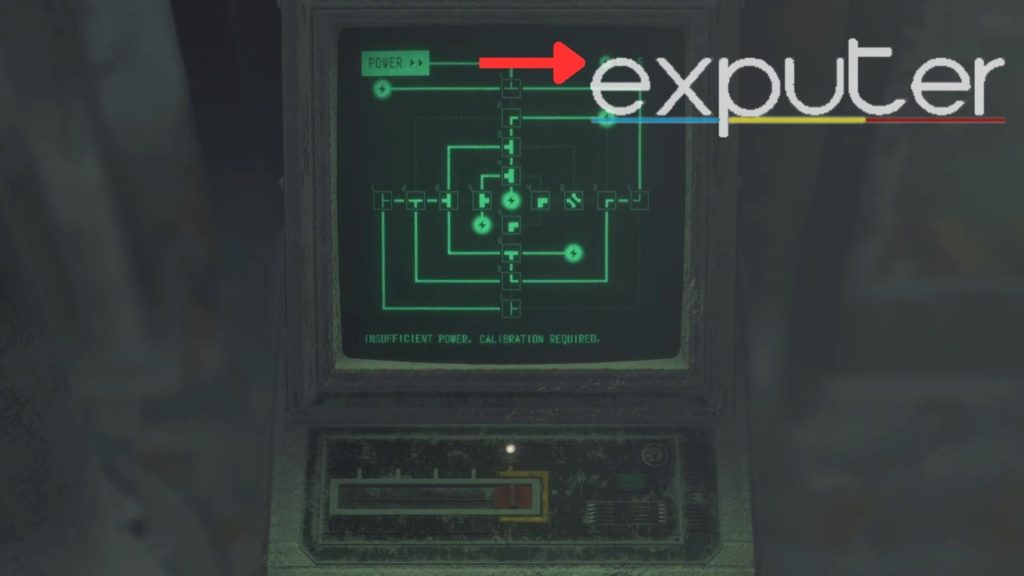
- On the top right, a node counter conveniently calculates the total nodes players need to activate and have activated.
- The main goal of these puzzles is to provide enough power, and when it’s done, the calibration can occur.
Now, for the Dissection puzzle, there are a total of 3 lines that are present on the puzzle that need the power to diverge.
Here’s how players should solve it:
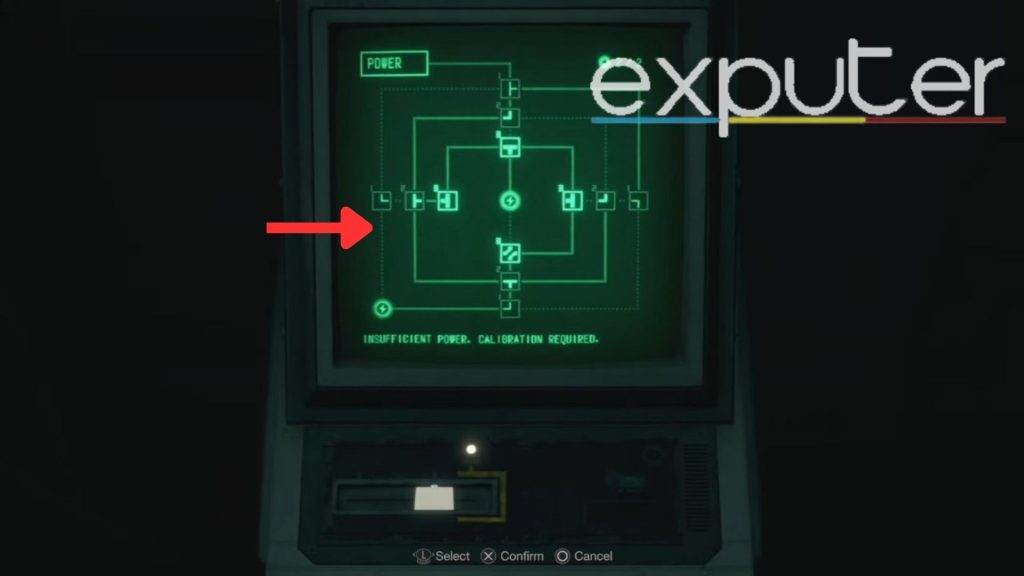
- For the first line, players need to switch the top T node towards the right side, while the symbol present towards the right must be facing down. With that, the symbol on the bottom must face the left, and the symbol on the left must face the right.
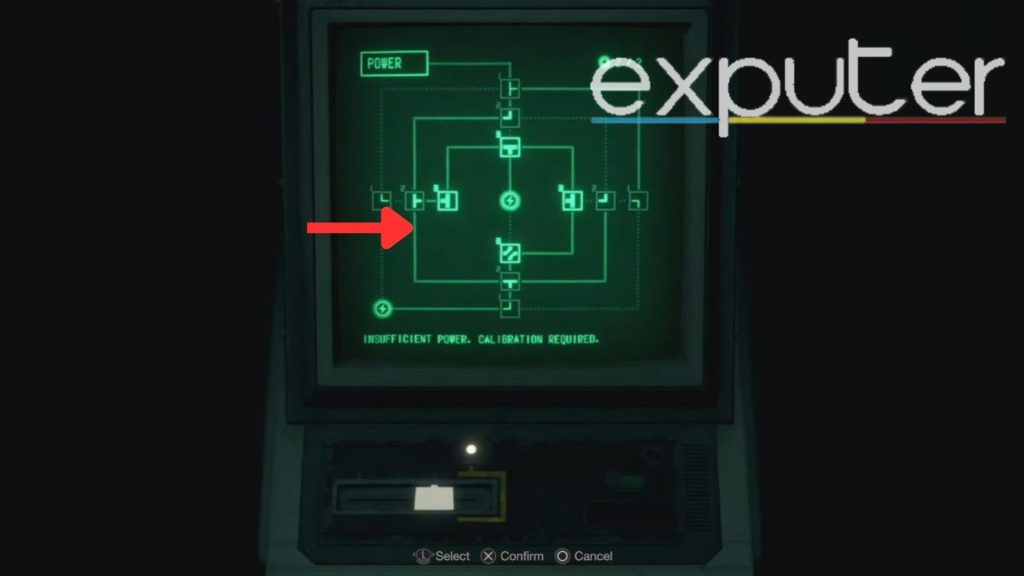
- For the second line, the T node on the bottom must face down, while the one on the left must face the right. Alongside that, the symbol on top should be facing left, and the symbol on the right should also be facing left.
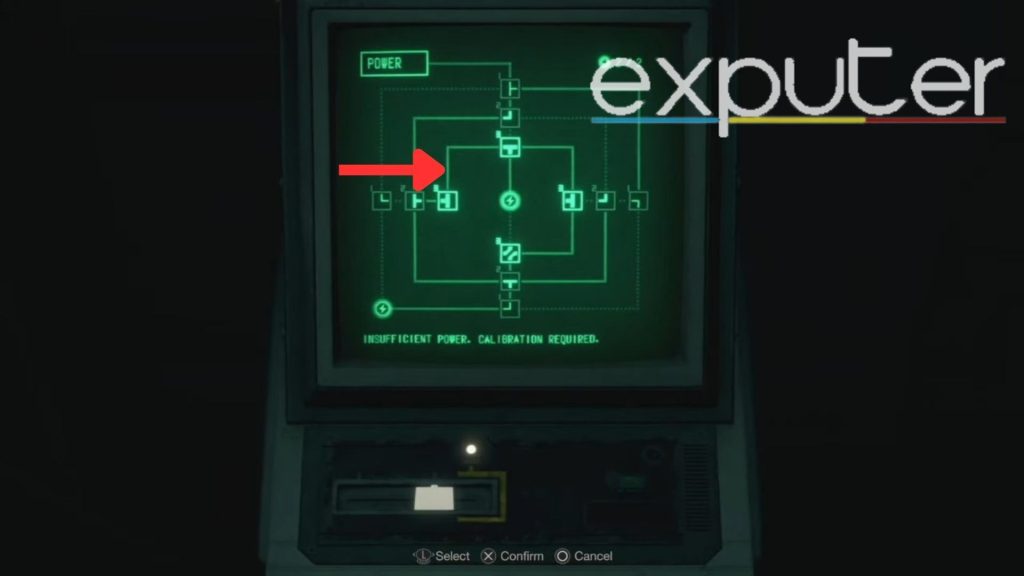
- The third line features a different symbol on the bottom that doesn’t need to be interacted with. The T node on the left should face up, while the T node on the top should face the left. With that, the T node on the right should also face up.
Level 1 Keycard
With that puzzle out of the way, players will be able to get their hands on the first keycard and, alongside that, also get a little closer to getting the Resident Evil 4 Remake Biosensor Scope.
- After the puzzle has been solved, the door next to it opens and the heads inside.
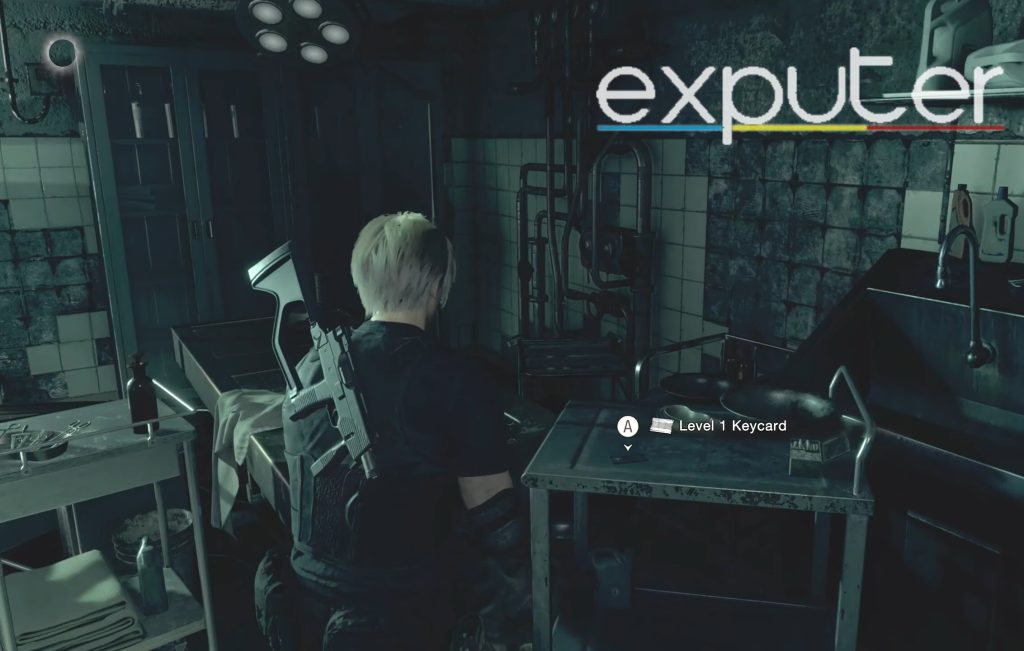
- Run to the back of the room, where a small cart is present, and the level one card is on top of it and can be collected.
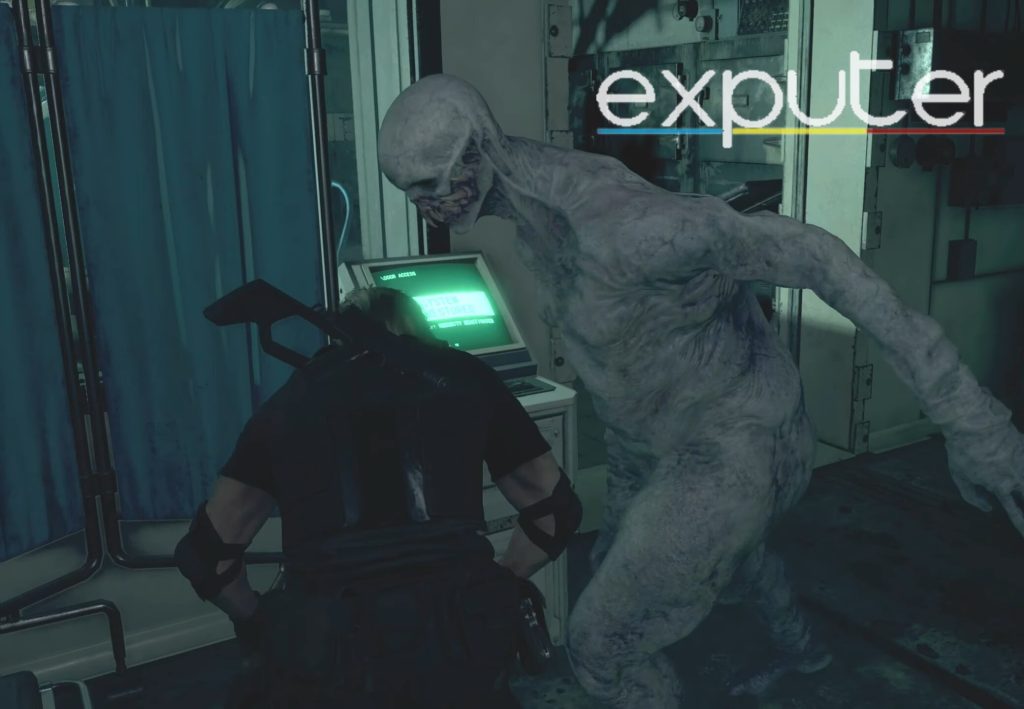
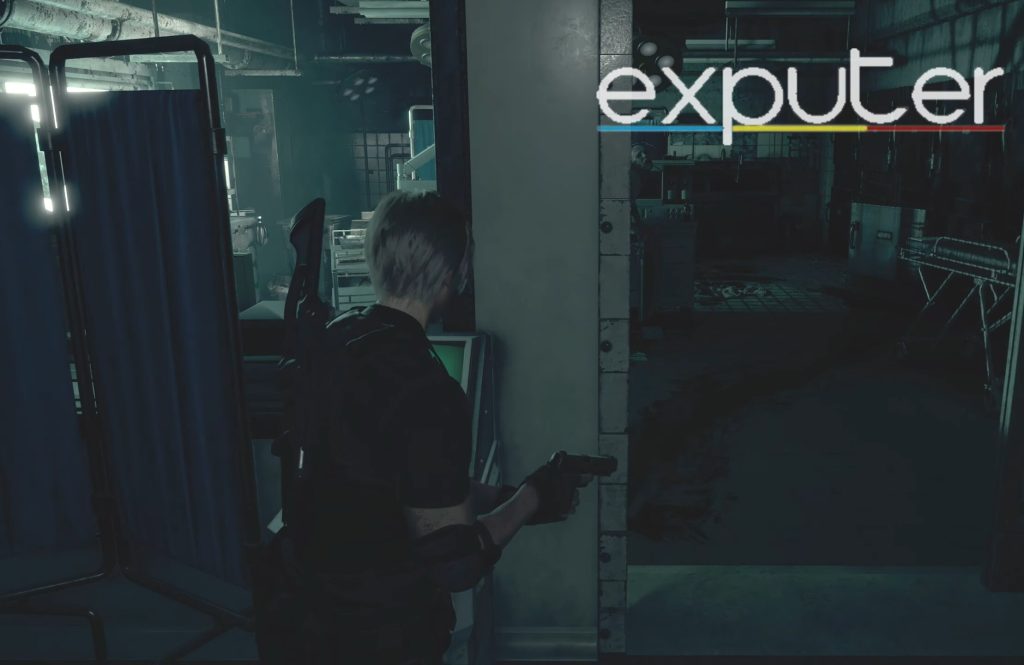
- From here, turn back around and head outside the door, where a Regenerator awaits you, and you need to dodge it.
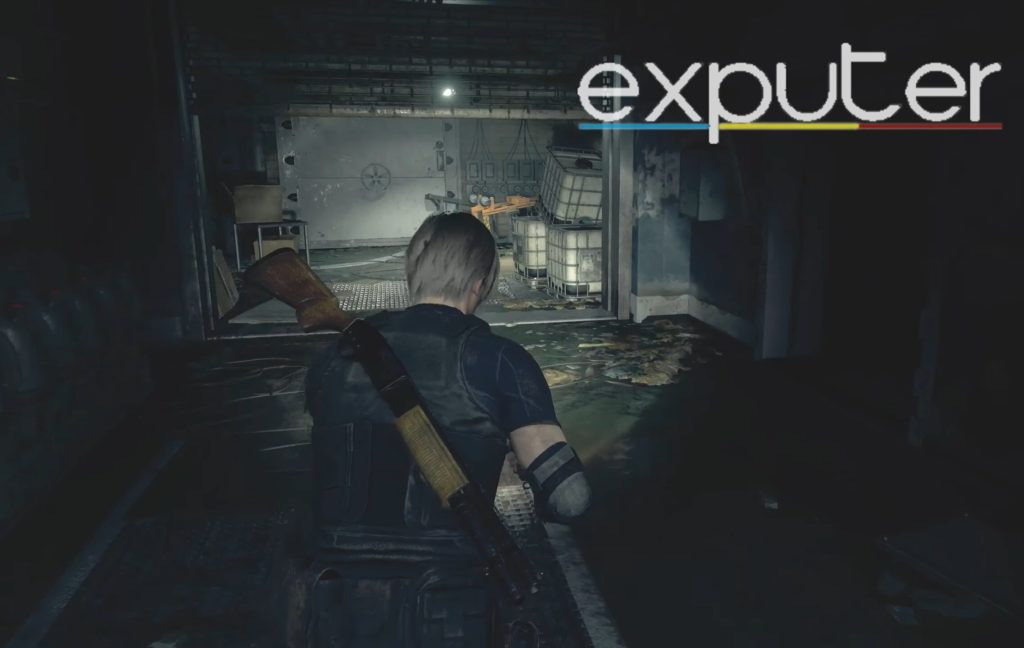
Freezer Room Power Diversion And Puzzle
After this, players need to head over to the freezer room, but the place also needs to get power first, so follow these quick steps to get it going:
- Turn up the first lever that you see.
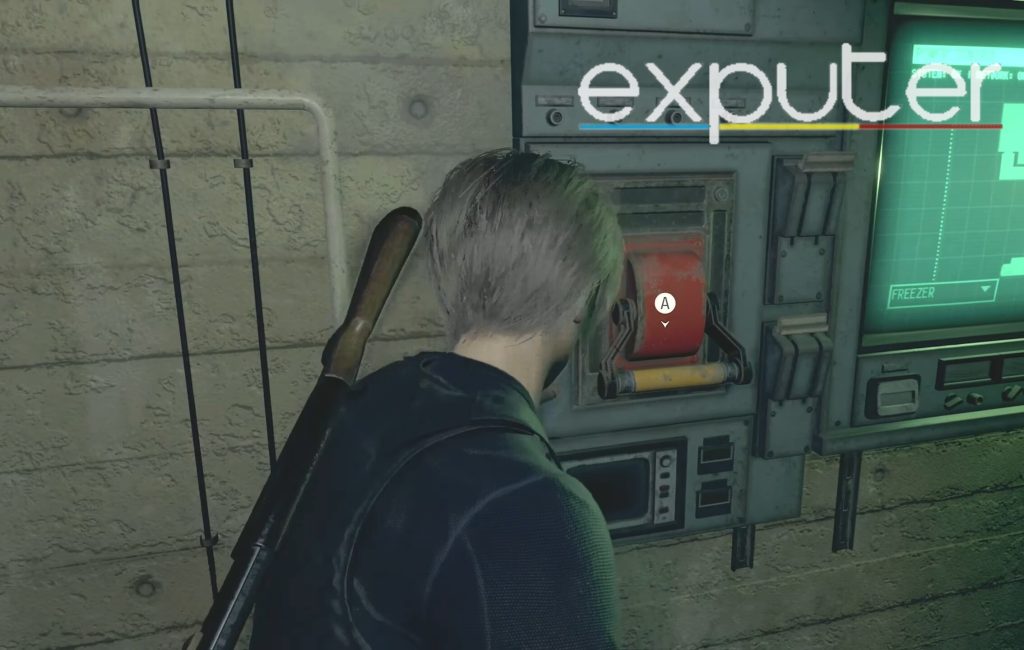
- Head back through the metal doors and then through the corridor, and there should be a machine on which you can swipe your keycard.
- Interact with the machine, through which you can select your level 1 keycard. Swipe it, and it should open the door to the freezer room.
Moving on, the next thing players will want to solve to get the Resident Evil 4 Remake Thermal Scope is the puzzle inside the freezer room once you make your way there.
- Heading inside the room, the puzzle should be located right as you enter the room and pan your camera to the right. The puzzle will be pressed against a wall, waiting to be calibrated.
- As you head closer to the puzzle, you can interact with it, which activates it.
- This time, the puzzle has 4 lines that players need to divert the power towards, and as usual, the power diversion starts from the top. There are also 5 nodes where the power needs to be supplied, which can be counted from the node counter at the top right.
- Regarding the first line, the top T-node must be facing down. With that, the symbol on the right must be facing up, the T node at the bottom should be facing right, and the T node on the left should be facing right, too.
- As you approach the second line, the symbol on the top must face right, as does the symbol on the right. The symbol on the bottom must face up, and the T node on the left should face down.
- For the third power line, the T node on the top should face left, the symbol on the right can’t be interacted with, the T node on the bottom should face down, and the one on the left should face left, too.
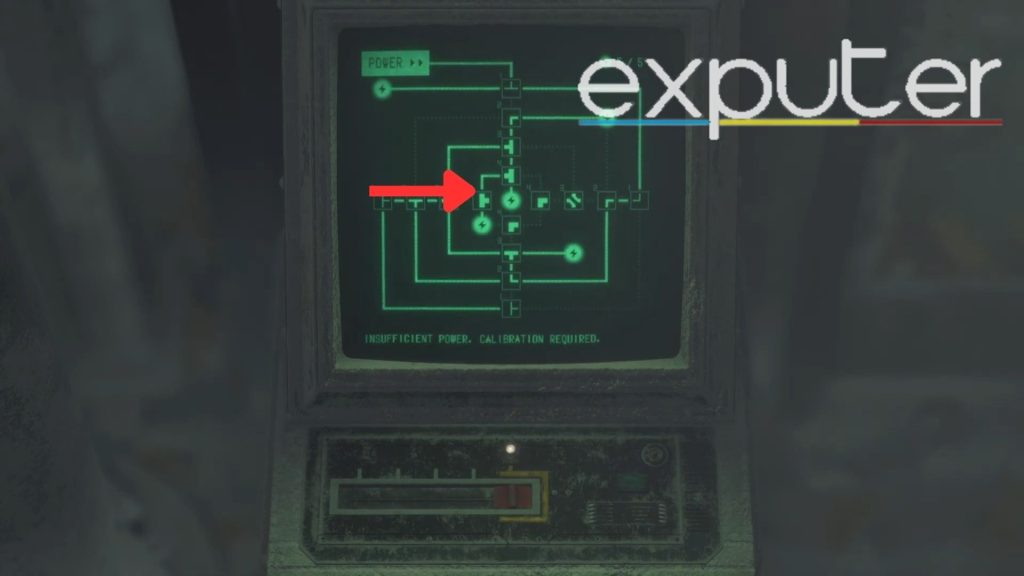
- For the final power line, players must have the top T node face left, both symbols on the right and bottom face right, and the T node on the left should face right.
- When the puzzle is solved, players should be able to also get their hands on the LE5 weapon, which is pretty solid.
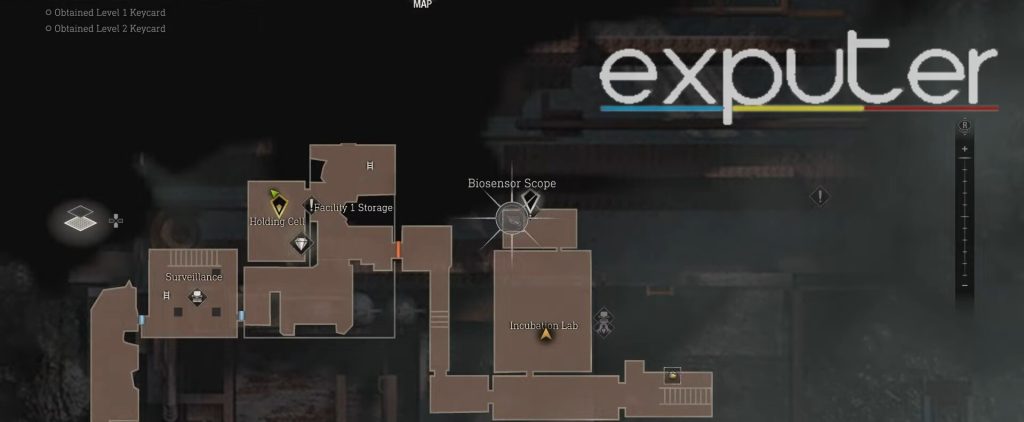
Heading To Incubation Lab
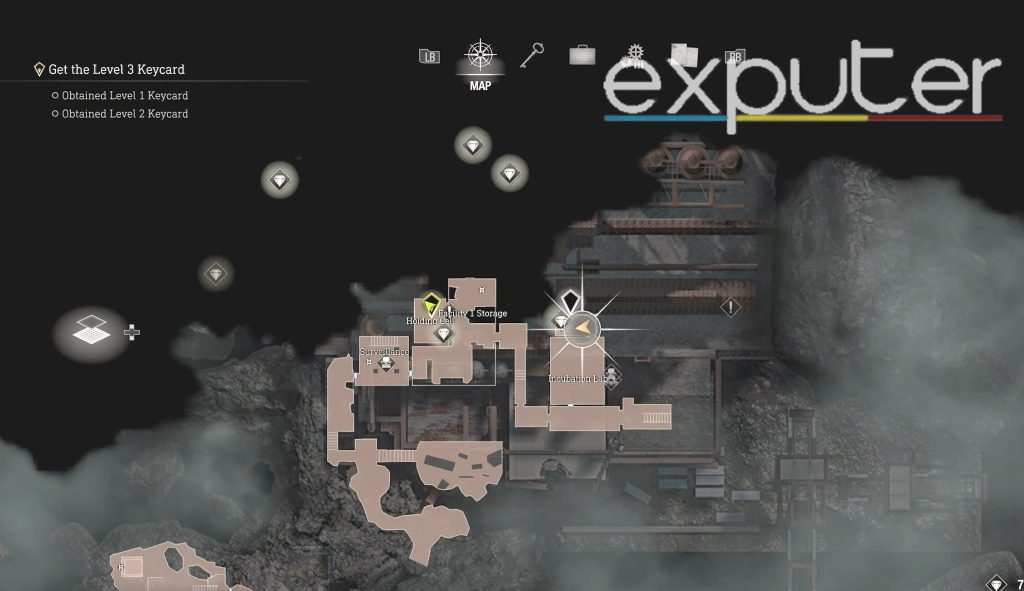
With that, the final thing players must do to obtain the Resident Evil 4 Remake Thermal Scope is to make their way over to the Incubation Lab.

- The incubation lab is towards the far-right room on the map, located towards the right of Facility 1 storage on the map as well.
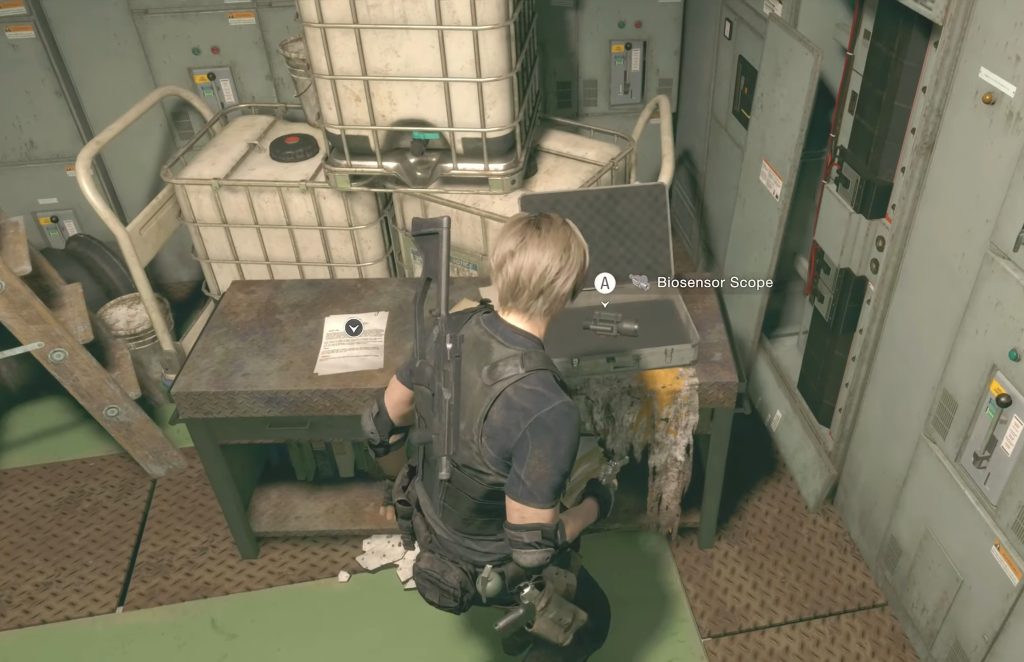
- As players head inside the incubator lab, they should be able to see two giant tubes with creatures placed.

- From there, players need to head toward the very back of the lab, where there is a broken window that players can go towards.
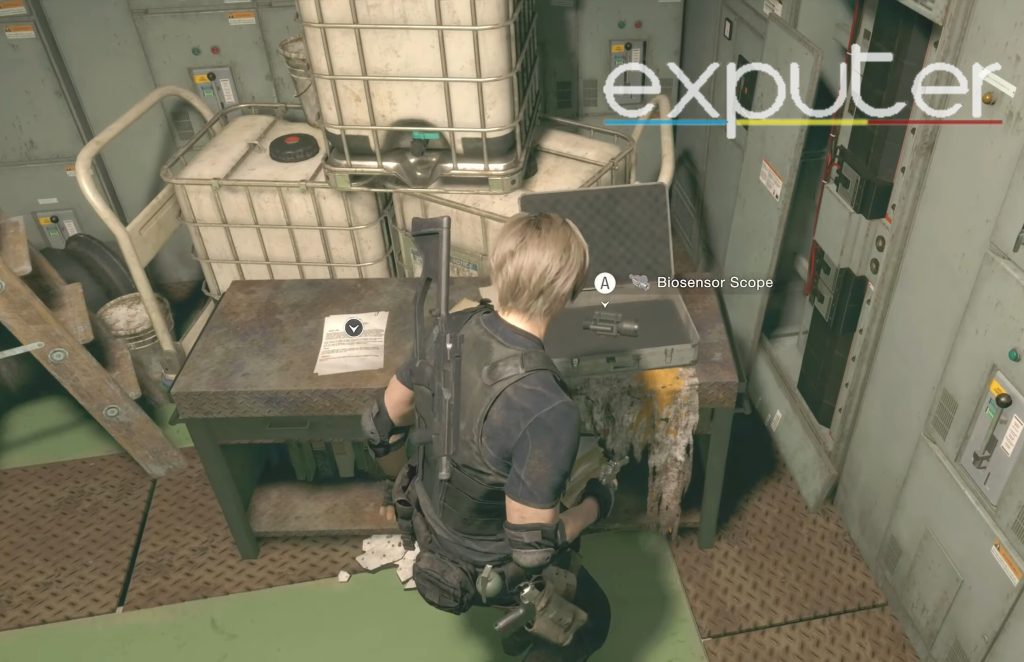
- Interact with the space there, allowing you to enter the room, and a table is at the back.
- The Biosensor scope is present beside a 2002 case file and can be interacted with, and once you do so, you can pick it up and add it to your inventory.
How To Use Biosensor Scope
Knowing the method is not all that difficult when using the Biosensor Scope.
- Once you get the Scope in Resident Evil 4 Remake, open your inventory and pick it out from there.
- Open the Biosensor scope option from your inventory, and you should be able to attach it to a weapon of your choice.
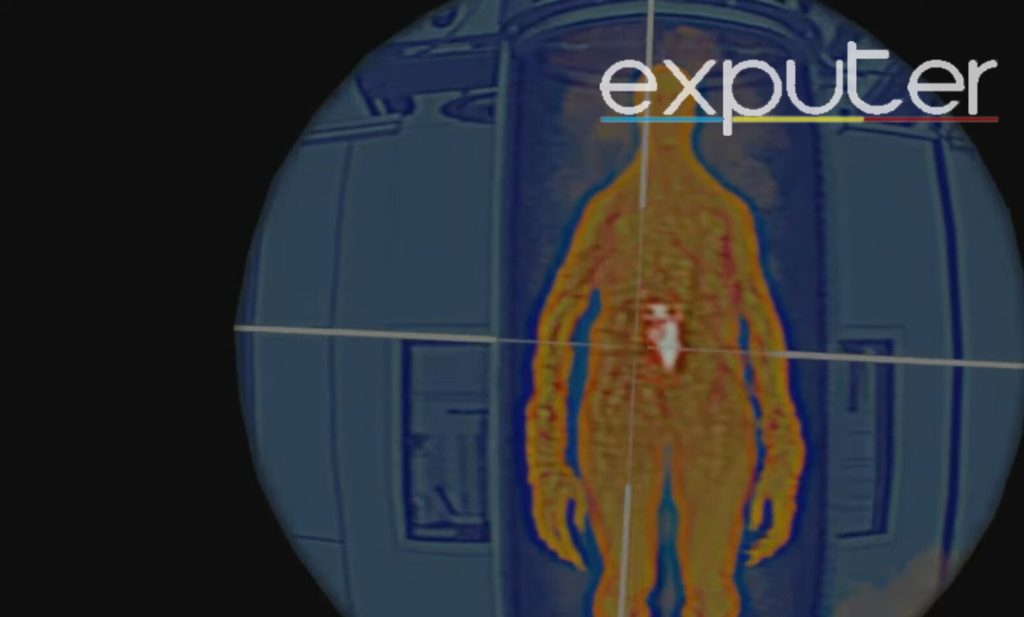
- Once you do so, the next time that you use the weapon, it will display anything that is present infront of you as a thermal image instead of the typical image.

- It also zooms into anything that is in front of you, and you can zoom into items a bit more too.
Which Weapons Is The Scope Compatible With?
Last but not least, there are a total of 4 weapons with which the Scope is compatible, and it doesn’t work with any other weapons in-game.
- One of the first weapons is the SR M1903, essentially a sniper rifle; players can buy it from the merchant by spending 12000 Pesetas.
- The CQBR AR also is compatible with the Scope, and players can get the weapon from a lockbox when they head into Chapter 10.

- The Scope also works pretty well with the LE5, which already has the mentioned location.
- Lastly, the Stingray can be obtained from the merchant for a total of 30,000 Pesetas and works with the Resident Evil 4 Remake Biosensor Scope.
My Tips On The Thermal Scope
Towards the late-game phase of Resident Evil 4 Remake, the Thermal Scope tends to be the most important attachment in your inventory. Without it, my initial 15-hour experience would’ve been dragged out for much longer since the scope is a necessity for tackling Regenerators.
While most players try to use the Thermal Scope on the TMP, LE5, or CQBR, I recommend using it on slower and heavier rifles like the Stingray. That way, you can kill the Regenerators with 1 or 2 well-aimed shots instead of wasting your bullets. If you feel like you’re running out of inventory, I would also suggest you drop the scope at the start of Chapter 16.
And there we have it! All that players need to know about the Resident Evil 4 Remake Thermal Scope, and with that, we will wrap up our guide! If you’ve wanted to catch the Lunker Bass, then you might want to read up on our Resident Evil 4 Remake Get Lunker Bass guide! Alongside that, you might also like our Resident Evil 4 Remake Striker Shotgun guide since it covers the location and how to get it!
With that, you can also check out our Resident Evil 4 Remake Best Charms guide so that you can know which ones to invest in! Lastly, our Resident Evil 4 Remake Mendez False Eye guide covers the entire boss fight with Mendez and getting the False Eye!
Up Next:
- Resident Evil 4 Remake How To Get Blackmail
- Resident Evil 4 Remake W 870 Shotgun
- Resident Evil 4 Remake Church Dial Puzzle
- Resident Evil 4 Remake How To Parry
Thanks! Do share your feedback with us. ⚡
How can we make this post better? Your help would be appreciated. ✍