We’ll focus on an in-depth analysis of how to increase FPS In Rust, what are the Best Rust Settings, and how to get the most out of your System. The methods shared in this performance guide are perfectly safe and guaranteed to show results.
I’ve benchmarked Rust on a PC with the following specs:
- OS: Windows 11 Pro 23H2
- System: Lenovo Legion 7i Laptop
- CPU: Intel i7-11800H
- GPU: NVIDIA RTX 3070 8GB
- RAM: 32GB DDR4
- Storage: Samsung 1TB SSD Gen 4
You’ll at least require an Intel i7-3770 or AMD FX-9590 for a CPU, Nvidia GTX 670 or AMD R9 280 for a GPU, and 10GB of RAM to run Rust on a PC.
You’ll find the following settings impacting your in-game FPS the most:
- Anti-Aliasing
- High-Quality Bloom
- Graphics Quality
- Large Scale Occlusion
- Grass Displacement
- Shadow Cascades
- Water Quality & Reflections
- Max Shadow Lights
- Anisotropic Filtering
- Parallax Mapping
- Grass Quality
- Object Quality
- Particle Quality
Rust is a very old game at this point which has been optimized with countless patches up until now. However, one of the main problems players had with the game was improper CPU utilization and high disk usage. The CPU utilization became better with updates and the latest CPUs. The disk usage problems were resolved with high-performance SSDs. However, you may encounter random FPS drops in some crowded areas.
Best Rust Settings
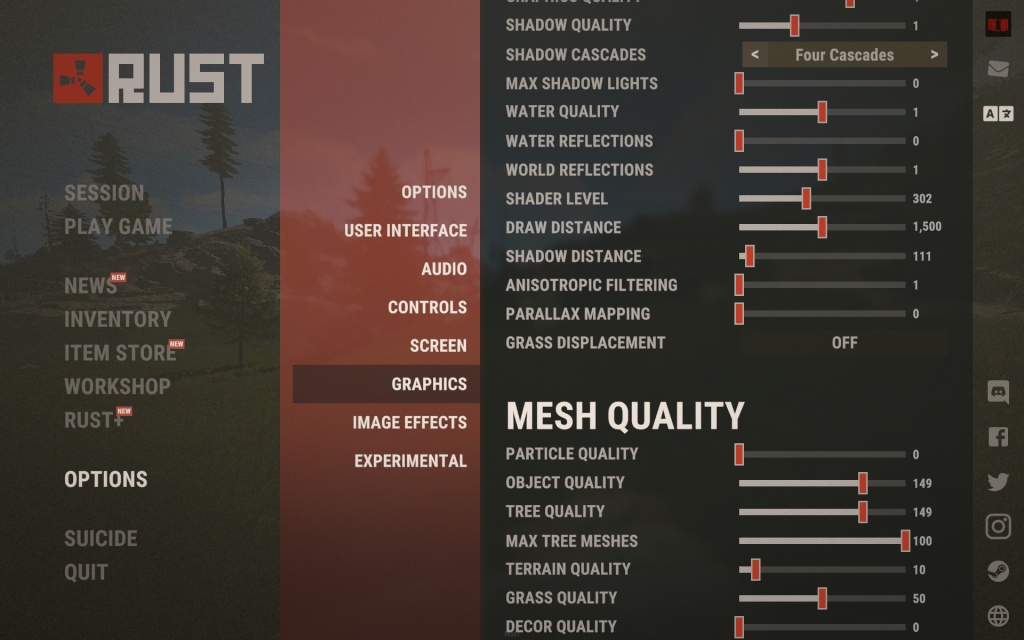
My settings, as always, are focused on High FPS and Sharp Visuals, so the goal is to find the right balance. In addition, we benchmarked the game several times and avoided focusing on settings that had a huge performance impact while showing little to no improvement in the Graphical Sector.
Summary Of Rust’s Best In-Game Settings
| Setting | What to Set it to |
|---|---|
| Screen Resolution | Native |
| Mode | Exclusive (Fullscreen) |
| VSync | Off |
| Graphical Quality | 4 |
| Shadow Quality | 1 |
| Shadow Cascades | Four Cascades |
| Max Shadow Lights | 0 |
| Water Quality | 1 |
| Water Reflections | 0 |
| World Reflections | 1 |
| Anisotropic Filtering | 1 |
| Parallax Mapping | 0 |
| Grass Displacement | Off |
| Particle Quality | 0 |
| Object Quality | 150 |
| Tree Quality | 145 |
| Max Tree Meshes | 100 |
| Terrain Quality | 10 |
| Grass Quality | 50 |
| Decor Quality | 0 |
| Anti-Aliasing | TSSAA (or SMAA) |
| Depth of Field | Off |
| Ambient Occlusion | Off |
| High-Quality Bloom | Off |
| Lens Dirt | Enable (Subjective) |
| Motion Blur | Off |
| Sun Shafts | Off |
| Sharpen | Off |
| Vignetting | Off |
| Occlusion Culling | Enabled |
| Field of View (FOV) | 90 (Subjective) |
| Compass Visibility | On |
| Streamer Mode | Off |
| Nudity | Uncensored |
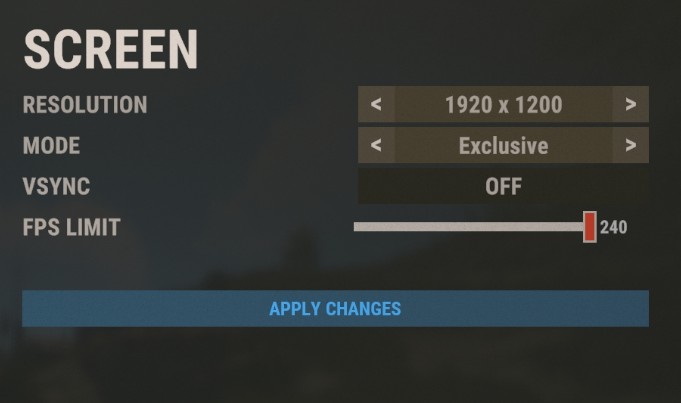
Screen Resolution: Select Native
Selecting your display’s native resolution will result in the best visual clarity.
Mode: Exclusive
This is another word used for full-screen, which is necessary for maximum refresh rate and high performance. Some people also prefer Borderless due to the quick Alt Tabbing. However, we noticed several crashes with that.
VSync: Off
Enabling Vsync would introduce input lag in your game as well as cap your framerates. You best leave it disabled.
Graphical Quality: 4
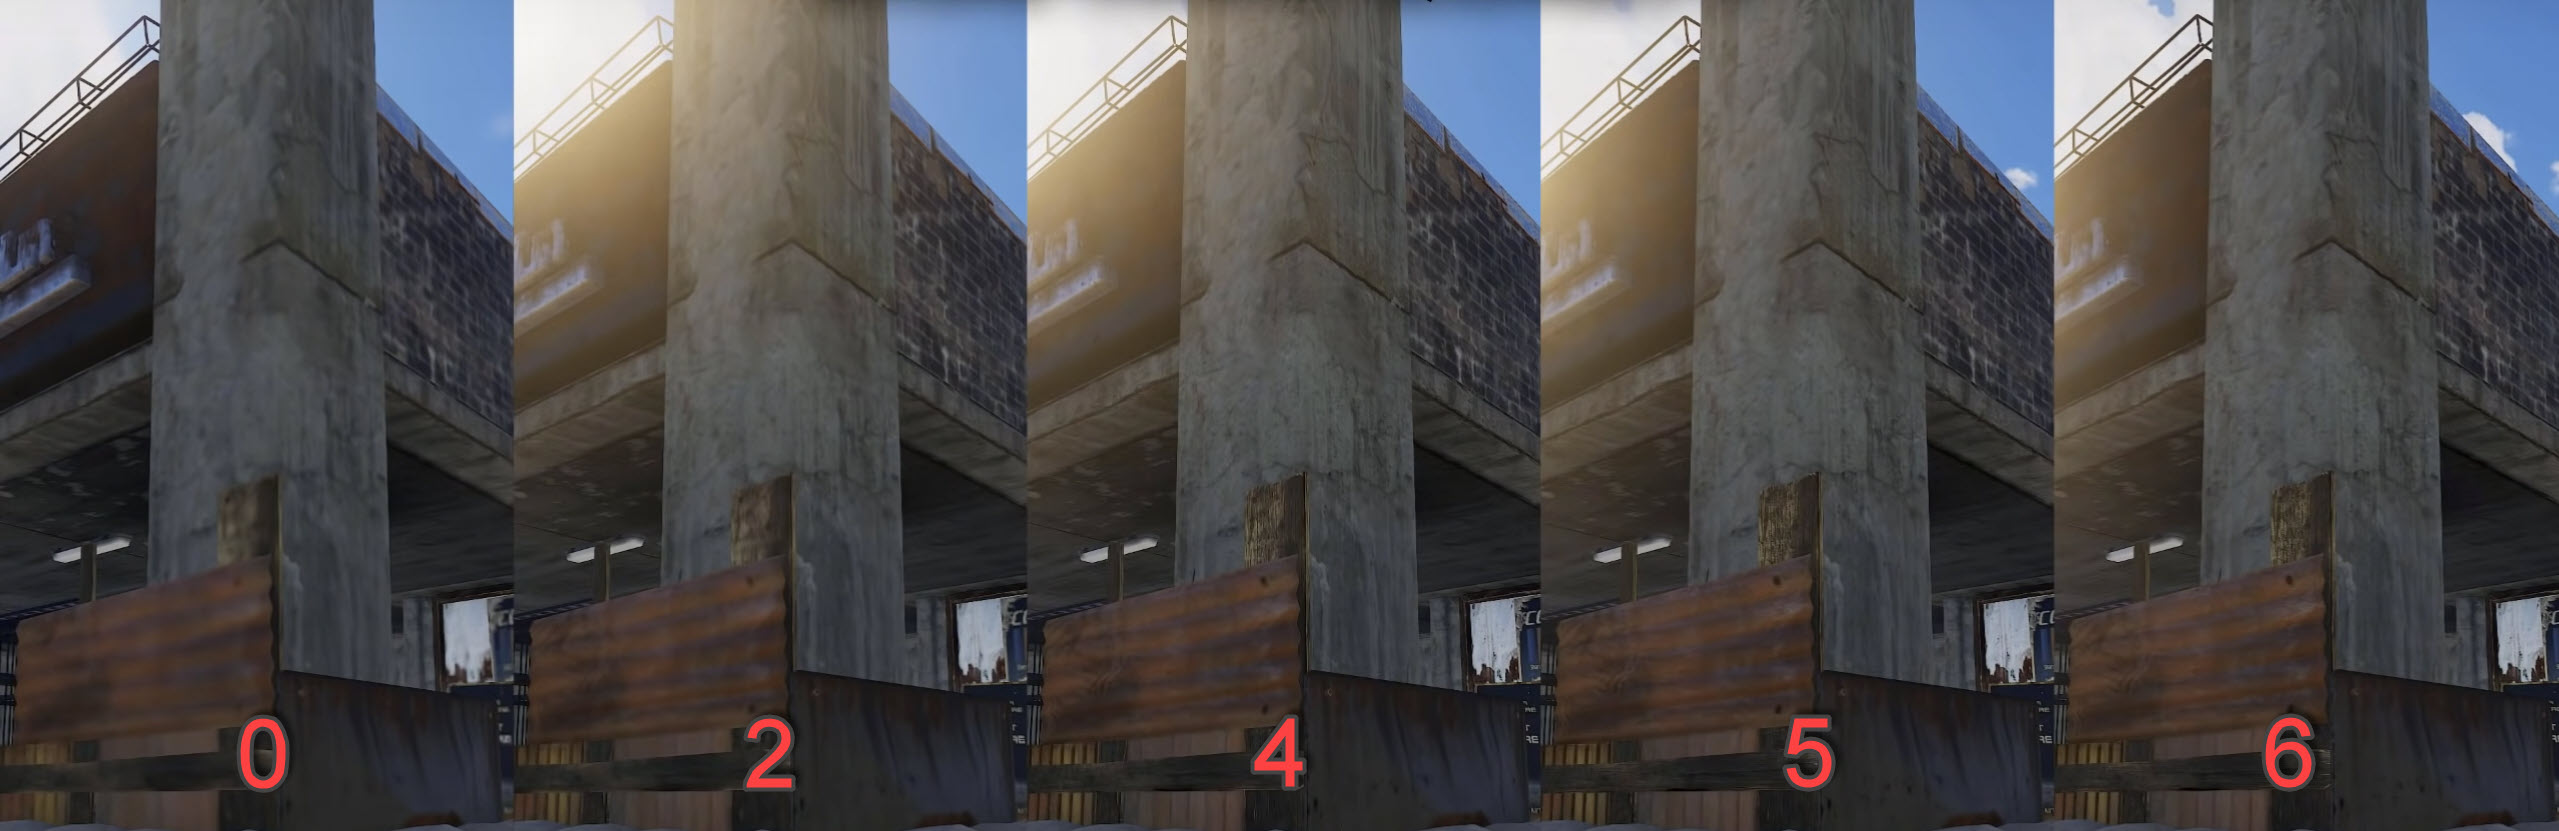
I’ve noticed heavy lag on anything above 4 during benchmarks while testing it on 1,2 and 3. Hence, 4 seems to be the best preset for it.
Shadow Quality: 1
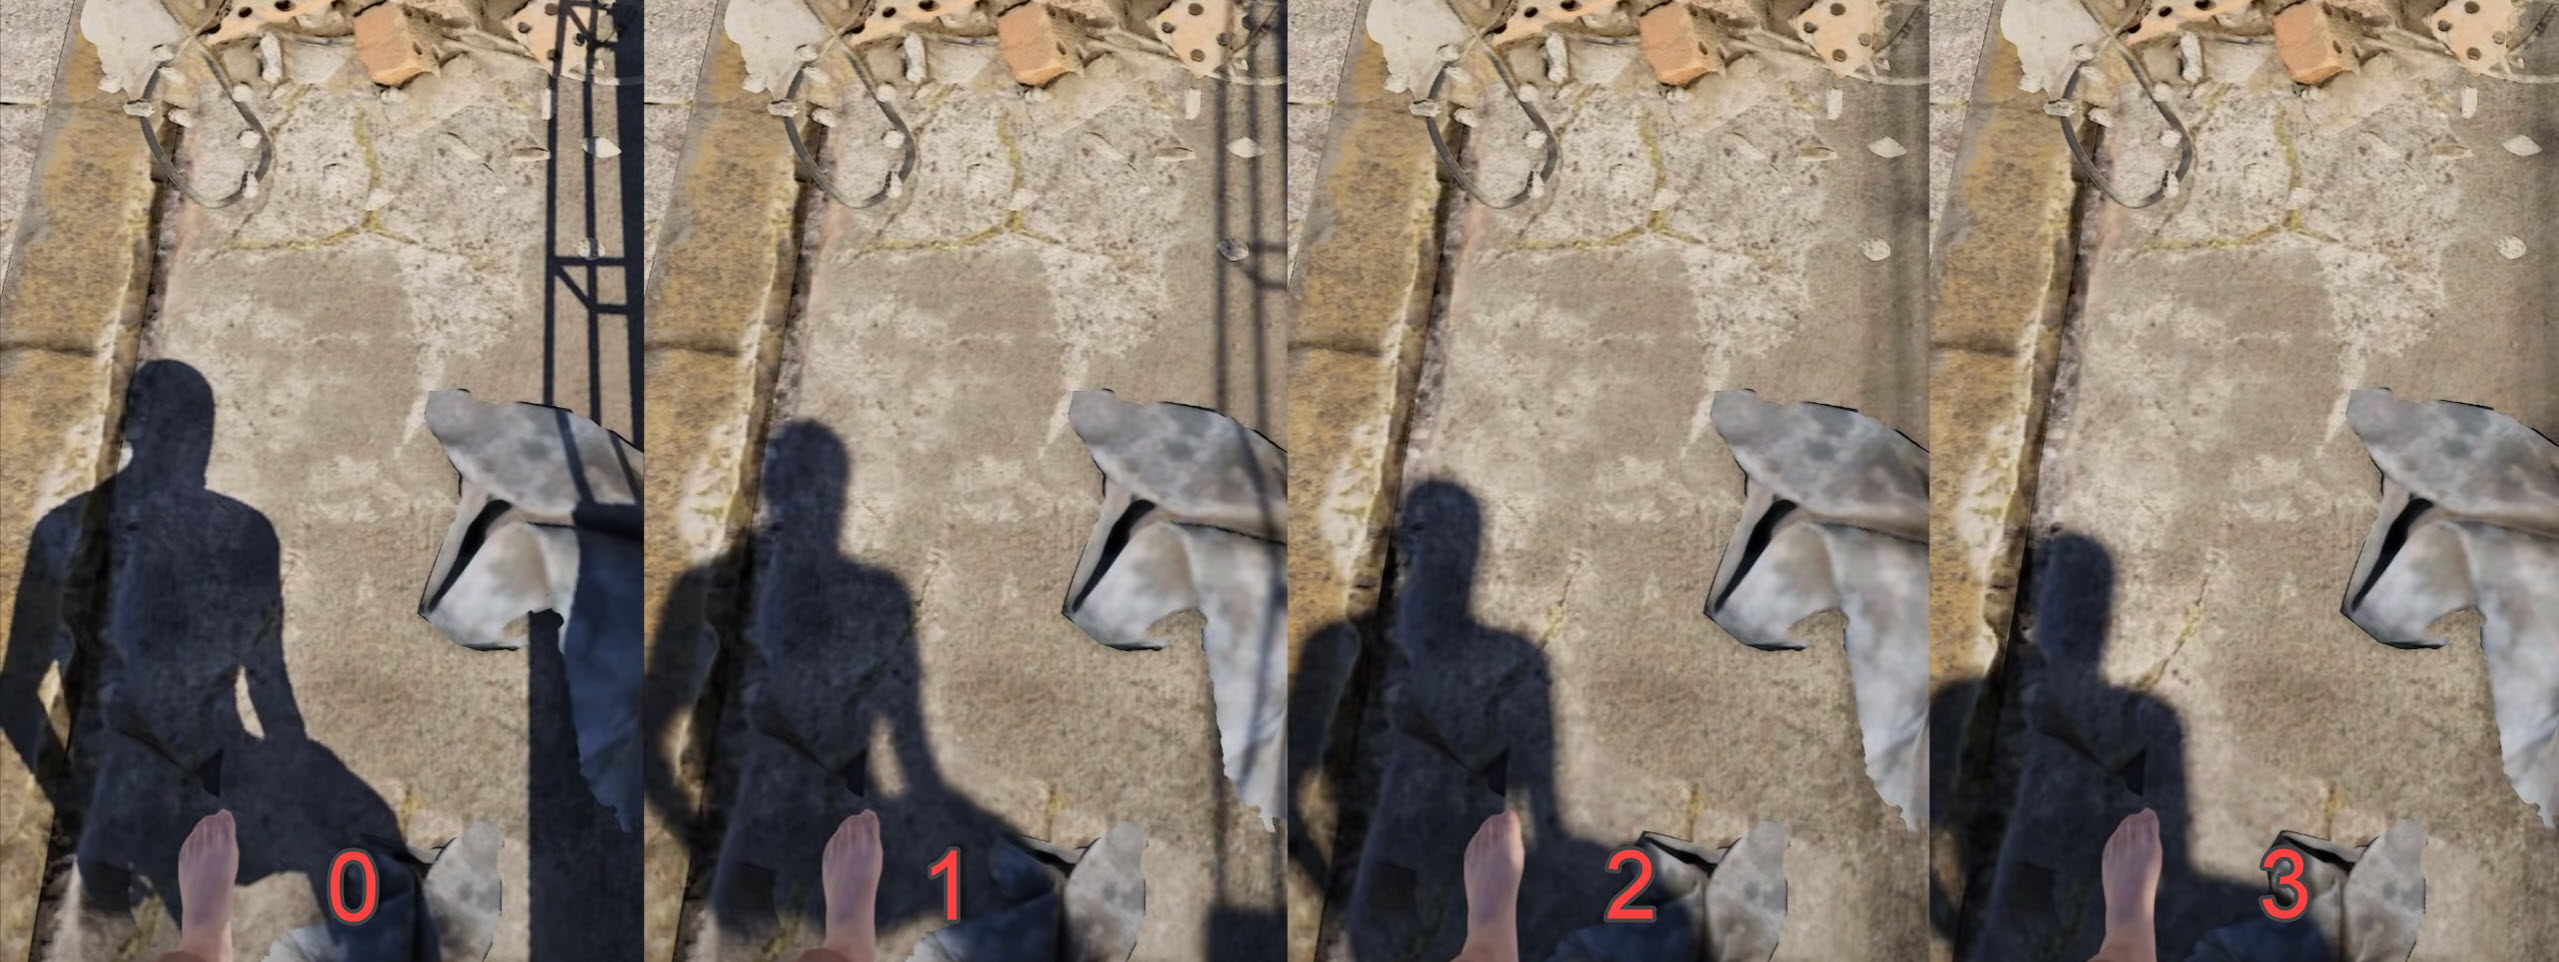
No Major difference in all other presets. One seems to be the most optimized setting.
Shadow Cascades: Four Cascades
There is a slight change in the dimensions of the shadow, which does signify the overall quality. If you go with lower Shadow Cascades quality, make note that the Shadow Distance quality will also be limited.
Max Shadow Lights: 0
The Max Shadow Lights only seem to have a purpose when there is a reflection from objects. Subsequently, If you look at the performance, this setting does seem to be a problem to sum it up. It is not worth it.
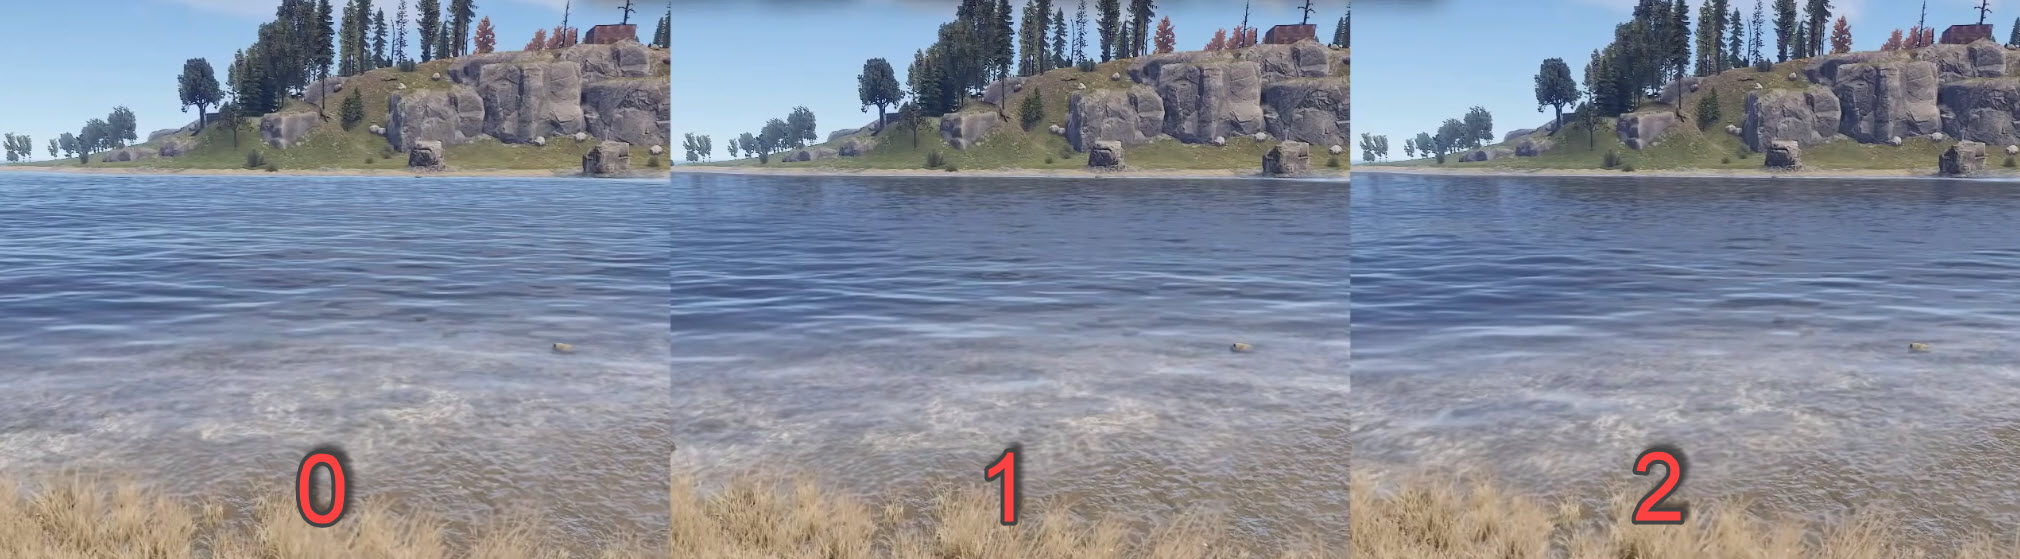
Water Quality: 1
The essential difference between Water Quality 1-3 boils down to the texture, blurriness, and reflections. It isn’t noticeable across all places and therefore, we must keep it at one.
Water Reflections: 0
It is imperative to keep water reflections at 0 due to two reasons. The first is that we have already kept Water Quality at one, which will play a significant role in setting the overall meta. And the second is due to a performance problem, which is huge in water reflections.
World Reflections: 1
The Water Reflection setting maintains an astounding clarity and adds exceptional fidelity to the overall world of rust. Likewise, it also has its drawbacks, but luckily, at one, we were only able to find a roughly 2% performance loss, which isn’t a big deal, considering the massive improvements.
Anisotropic Filtering: 1

After finishing our test bench, we were heavily bugged with Anisotropic Filtering because it provided very grainy graphics.
If you still feel like the textures aren’t sharp enough. We still don’t recommend tuning up Anisotropic Filtering, and instead take the benefit of Nvidia Ansel and AMD’s FreeStyle, which is explained in the last section of this guide.
Parallax Mapping: 0
Keeping Parallax Mapping at Zero is the best thing you can do in Rust. That is to say, the impact on performance was roughly 30%, and on the dark side, it has zero to no benefits except showing slight illusions that are merely rare, depending on the weather.
Grass Displacement: Off
The Grass Displacement feature seems to be another unnecessary setting that impacts performance with no meaningful purpose.
Particle Quality: 0
While showing little to no improvement across the Graphical Sector. It’s reasonable to presume that Particle Quality Should be kept at 0.
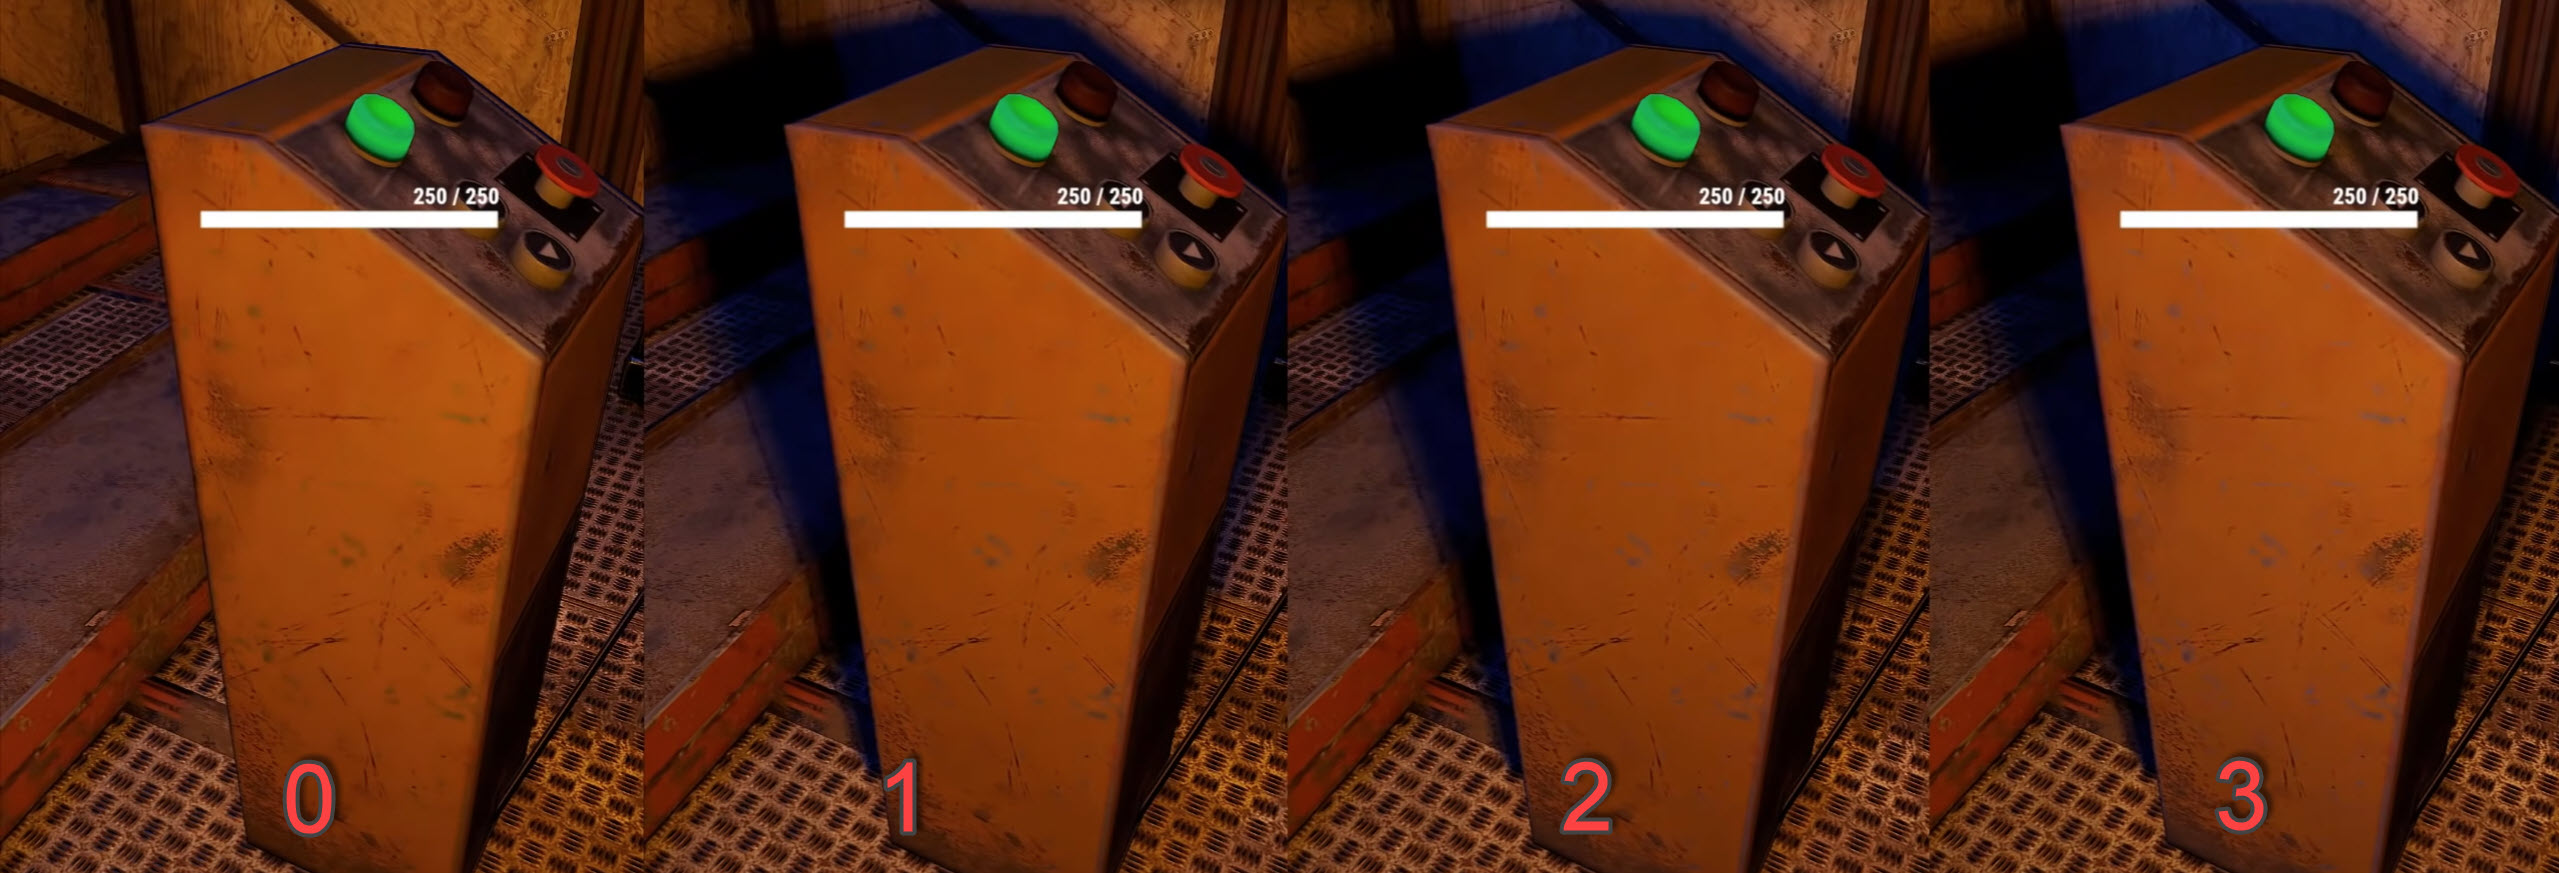
Object Quality: 150
Have you ever encountered numerous objects that aren’t rendered, and you can see through walls? Well, that is definitely due to Object Quality, which pre-renders all graphical elements to an extent depending on the quality. I recommend keeping it at 150 for the best FPS and realistic fidelity.
More From Settings Guide: Black Ops Cold War PC Settings
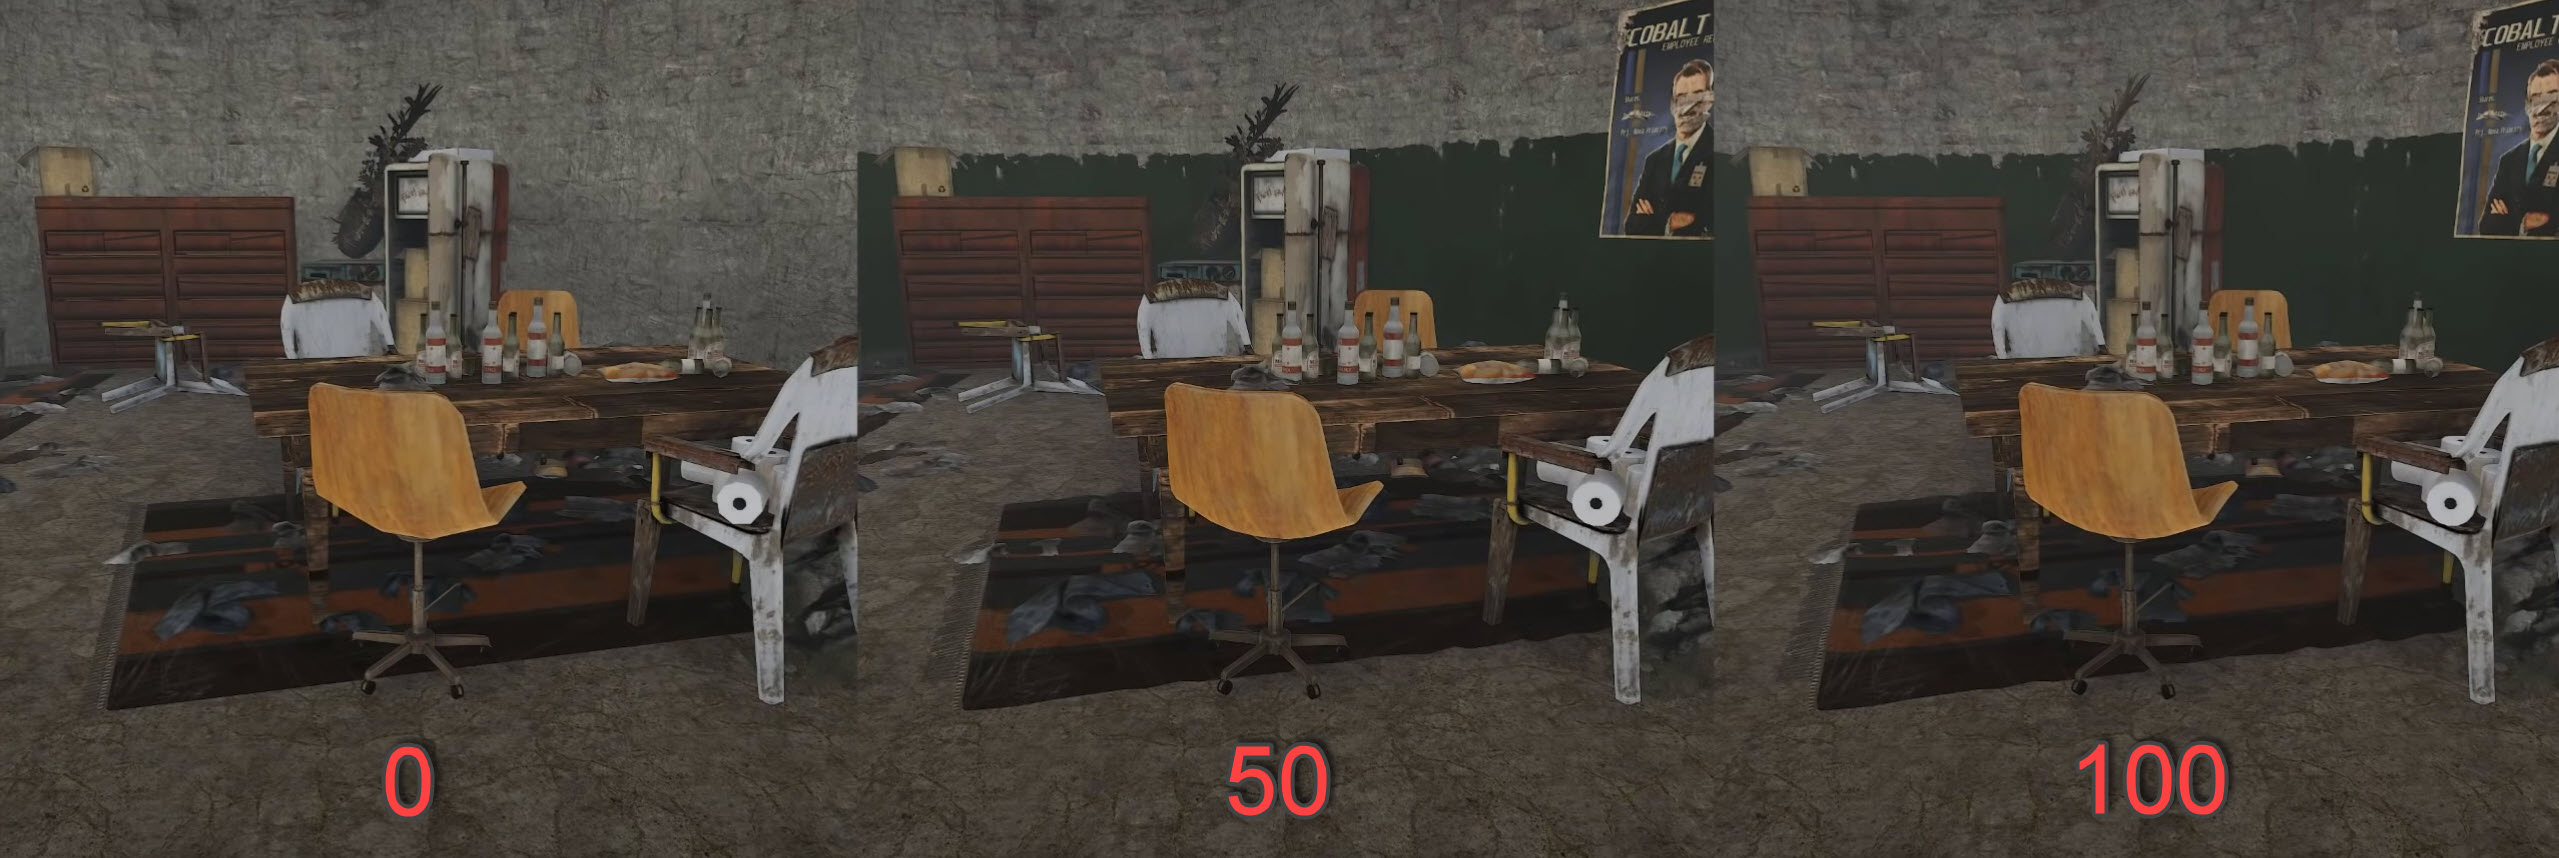
Tree Quality: 145
Like Object Quality, the Tree Quality preset also focuses on rendering the bushes, trees, and more. This gets further expanded through the Tree Quality and enhancing the overall object. If you keep it at 50-100, the Trees Look something out of a 2D Game, and performance isn’t very noticeable. The best results come in at 150 with accurate greenery elements and detailed graphics.
Max Tree Meshes: 100
Trees are a vital part of survival in Rust, and you’ll want to view as many and as detailed trees as possible.
Terrain Quality: 10
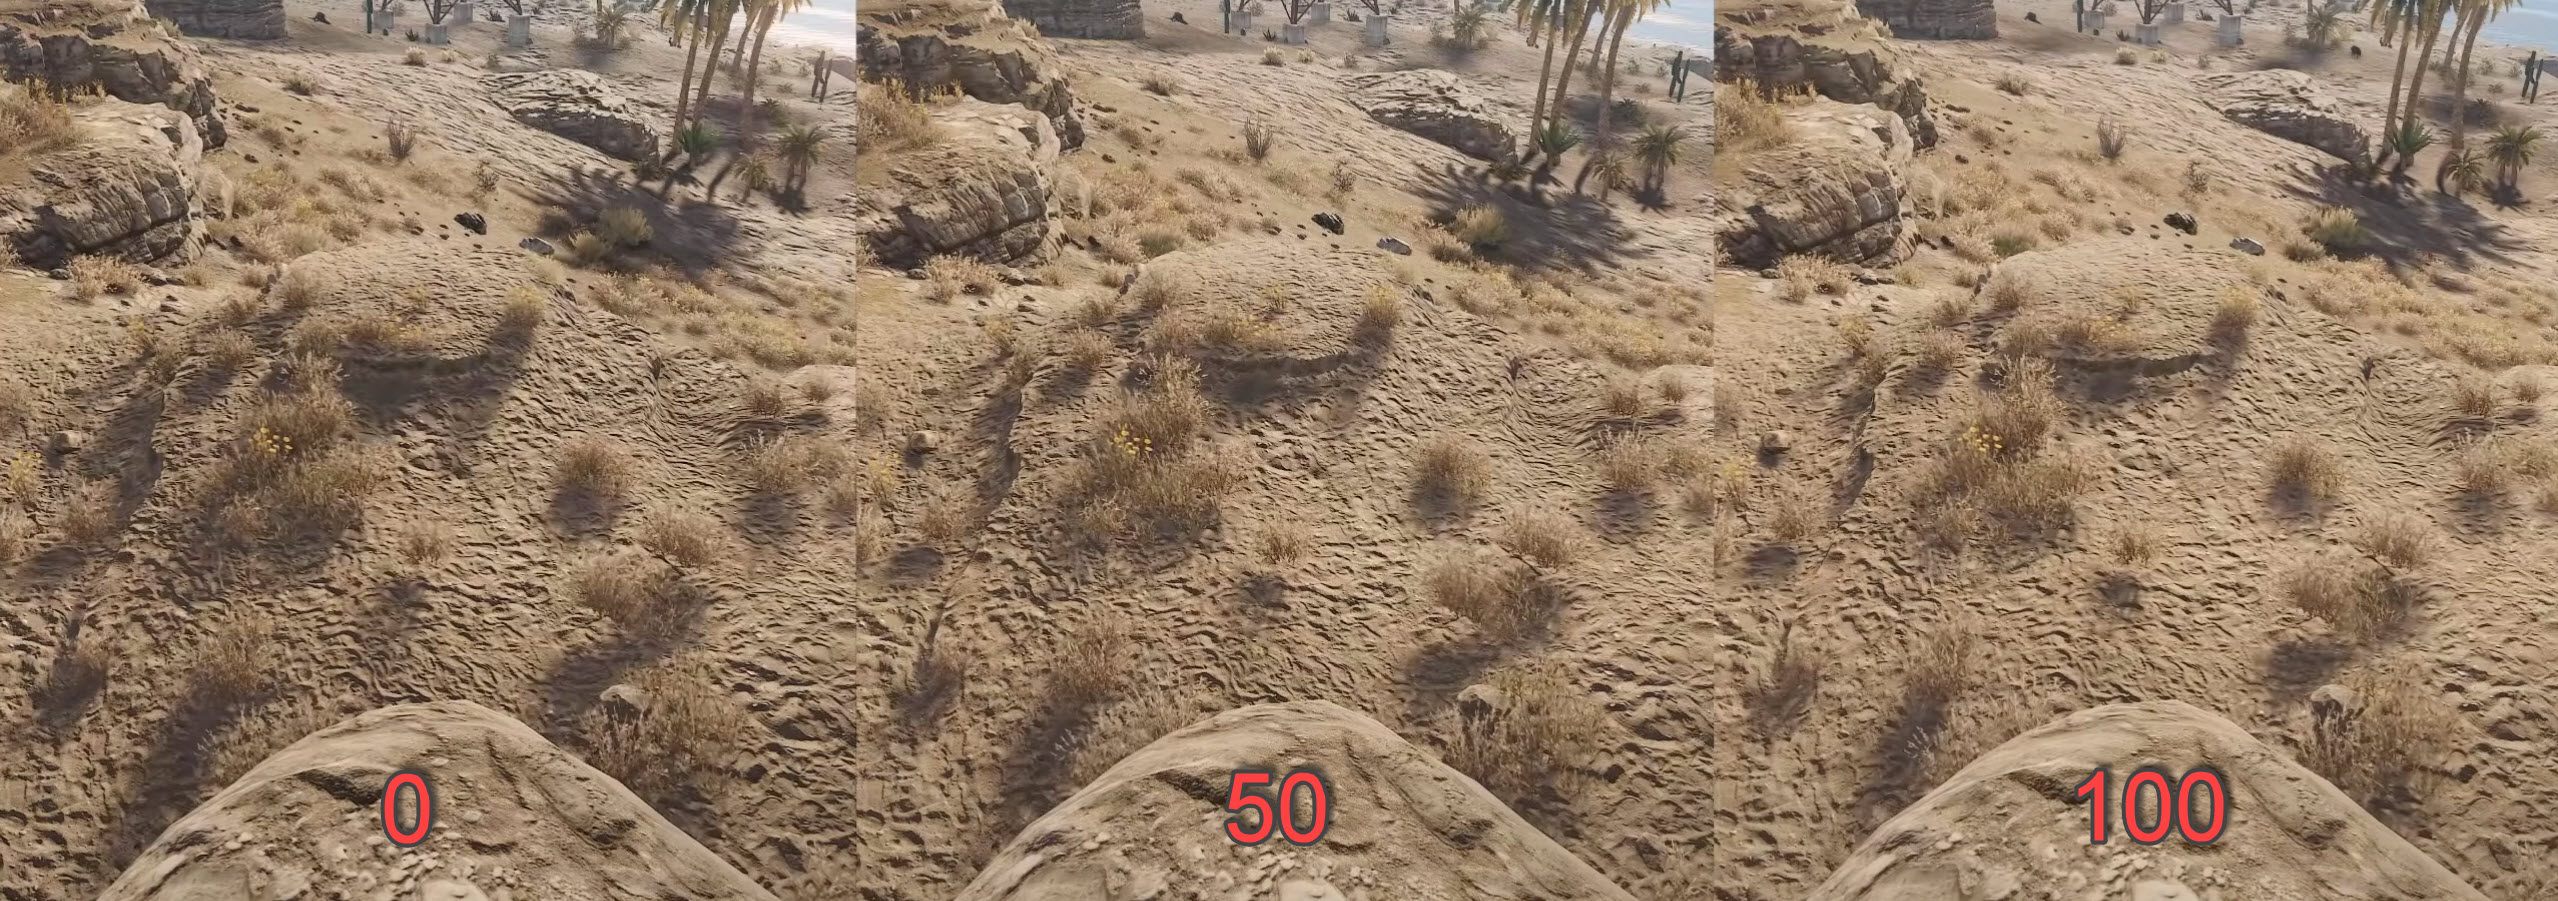
Although many Rust Players Across Steam, YouTube, and Forums conclude that apart from the quality itself, the Terrain Quality feature also improves the rendering distance, which isn’t actually true.
The most optimized and best setting seems to be at 10, which gets further compensated by Anti-Aliasing.
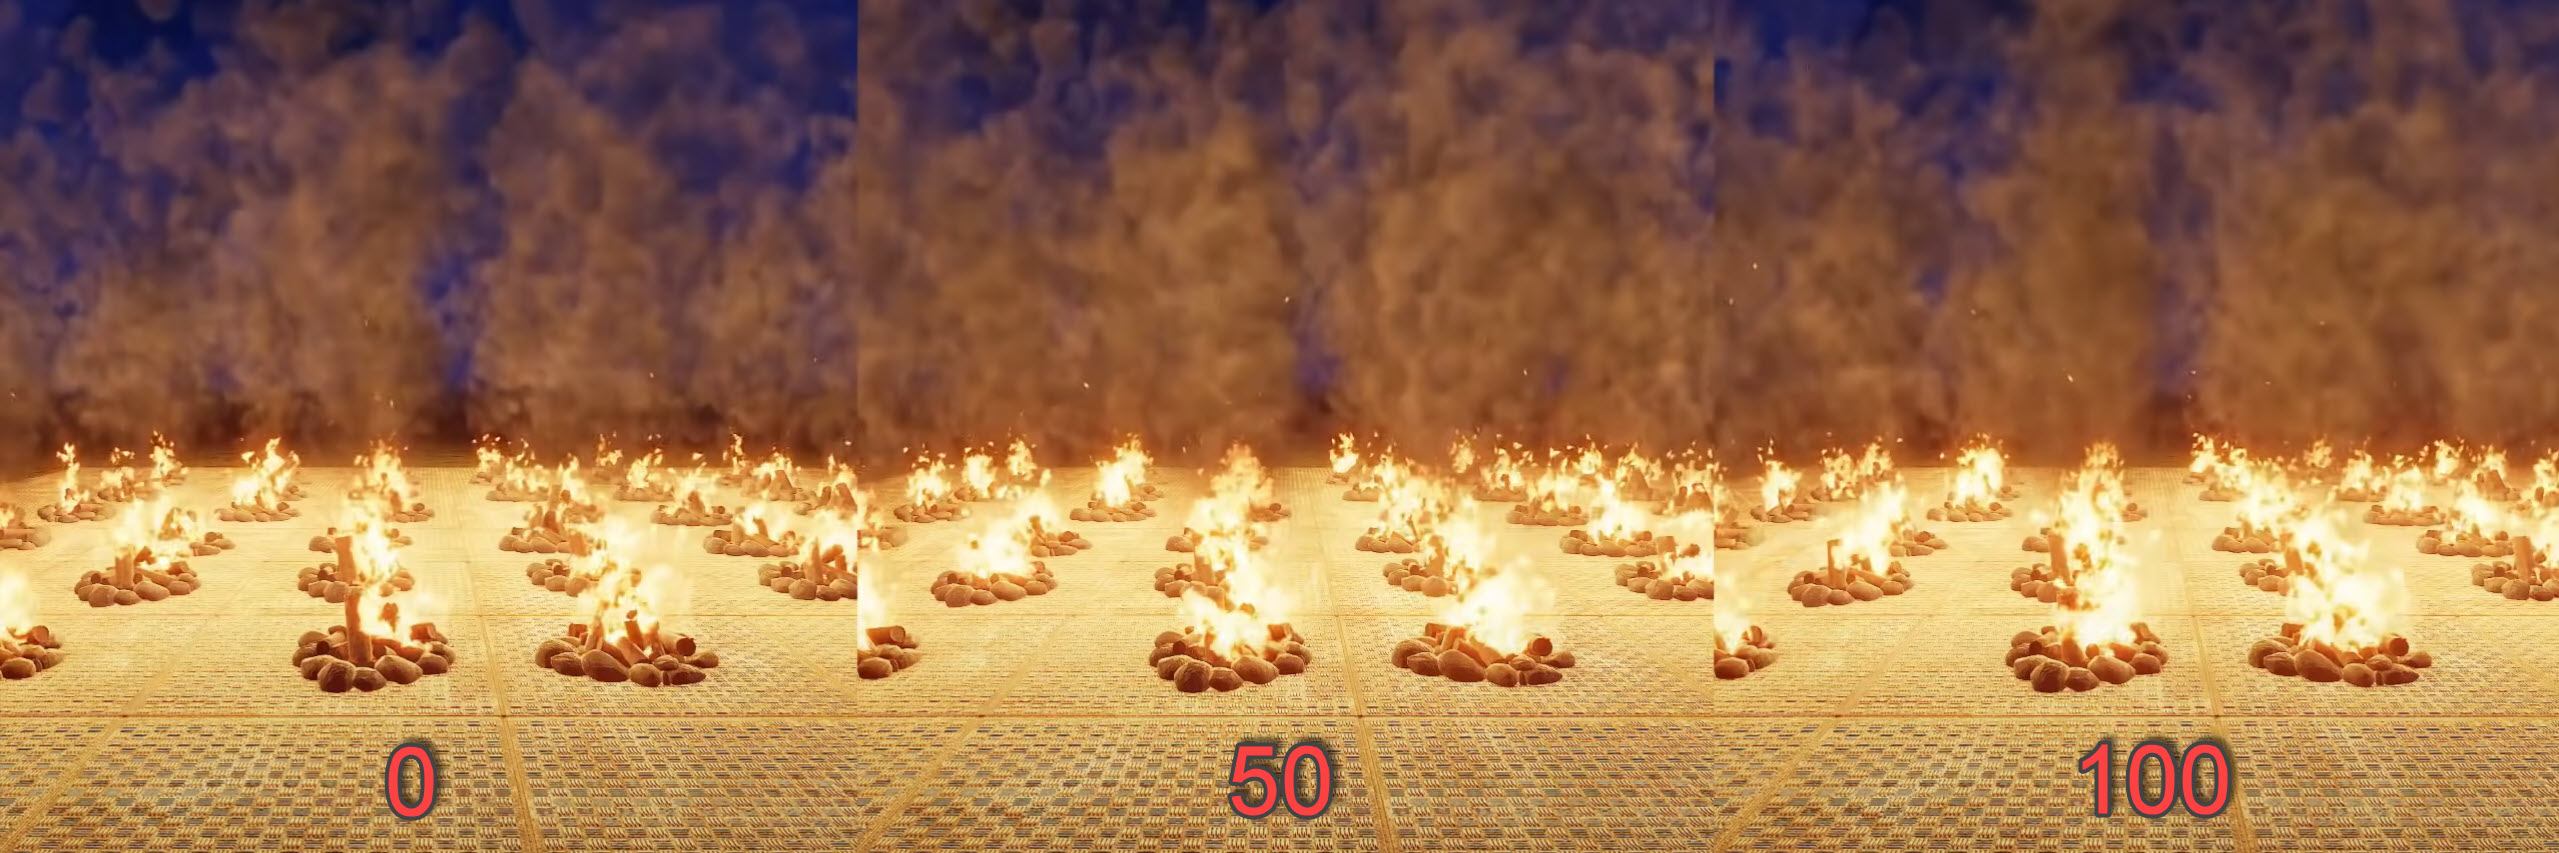
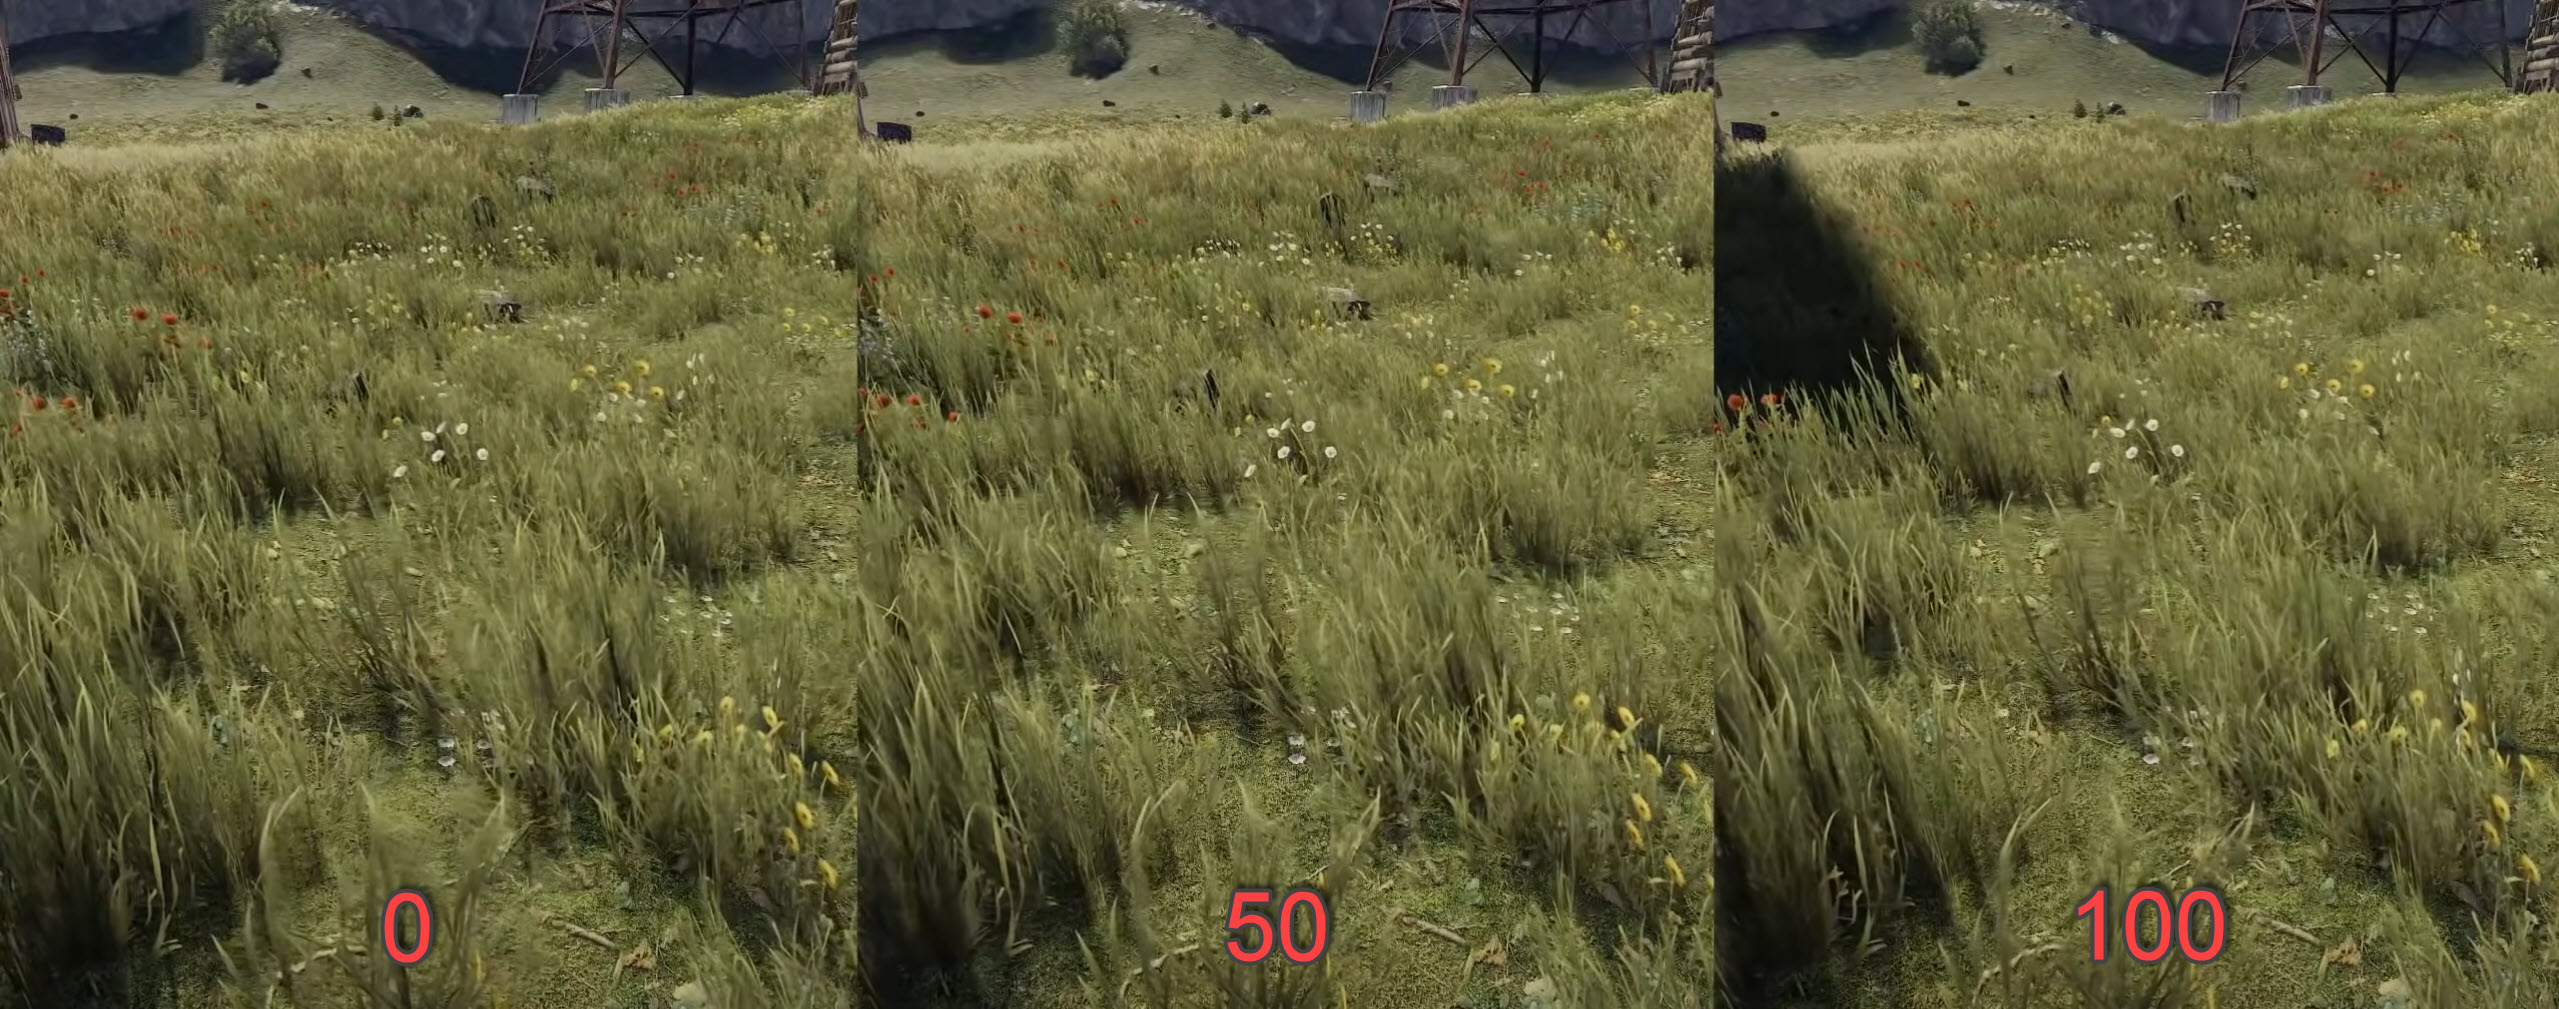
Grass Quality: 50
The Grass Quality setting doesn’t really require an explanation. All it does is change the textures and quantity of all grass across Rust. I found 50 to be optimized, resulting in a 4% FPS Drop, which is perfectly fine.
Decor Quality: 0
Experienced Rust players would know that Decor Quality needs to be turned off because once enabled, the Grass Density increases significantly, making it harder to find items. I tested Decor Quality across numerous green belts and couldn’t find any performance differences.
Anti-Aliasing: TSSAA
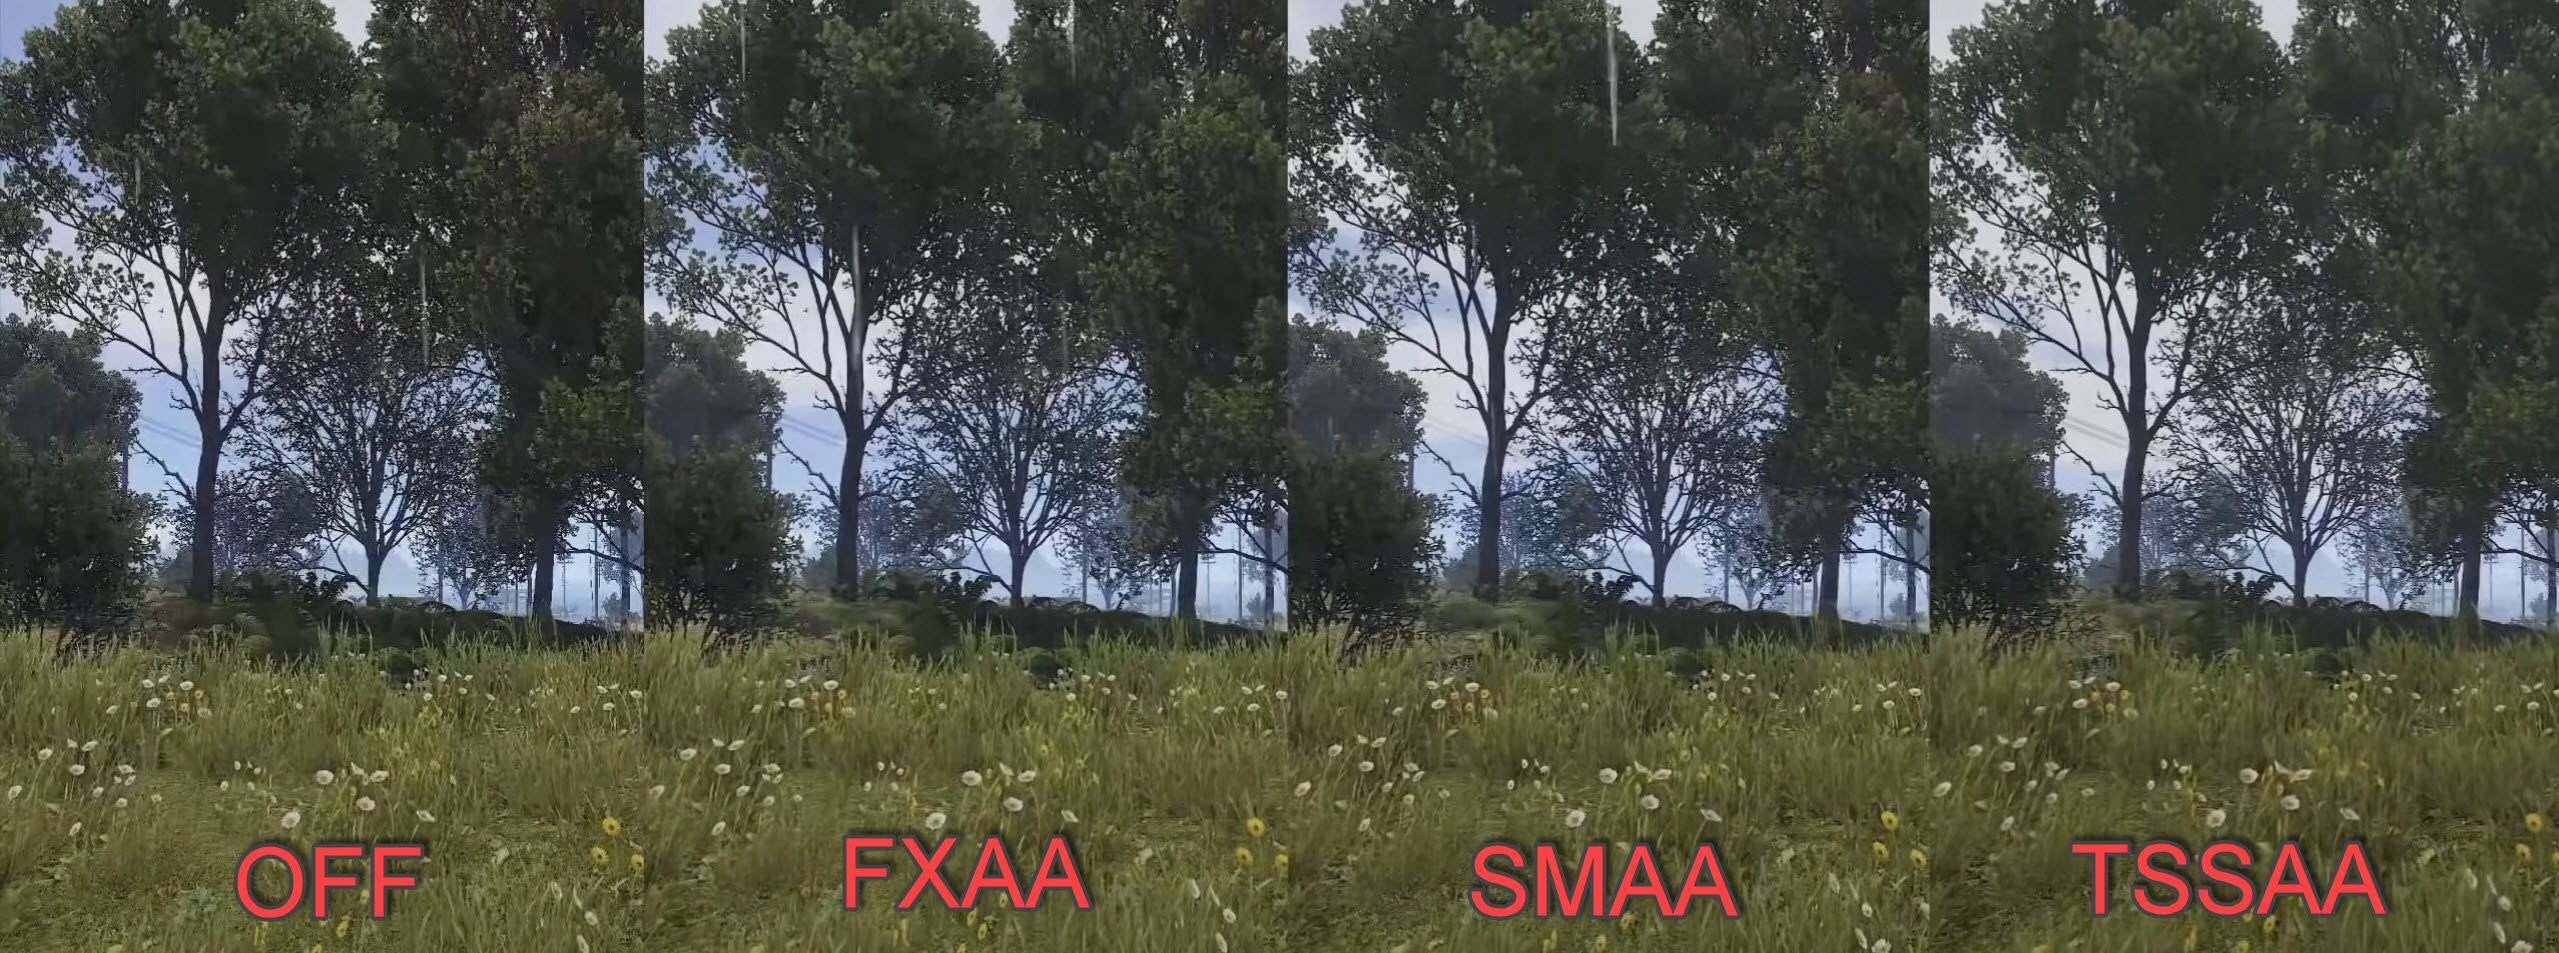
Under the Forest Portion of the Image Effects Settings Tab, you will find numerous entries, including the Anti-Aliasing, which is considered the core feature of all graphics.
You can certainly go with SMAA, which is also a decent choice, but remember that sharpness can also be figured through Nvidia Ansel, which doesn’t come with the consequence of performance.
Depth of Field: Off
Keep Depth of Field disabled because it has added layers that increase the blurriness in long-distance objects. The game does look fabulous, but it’s more of a cinematic feature and not good for gameplay.
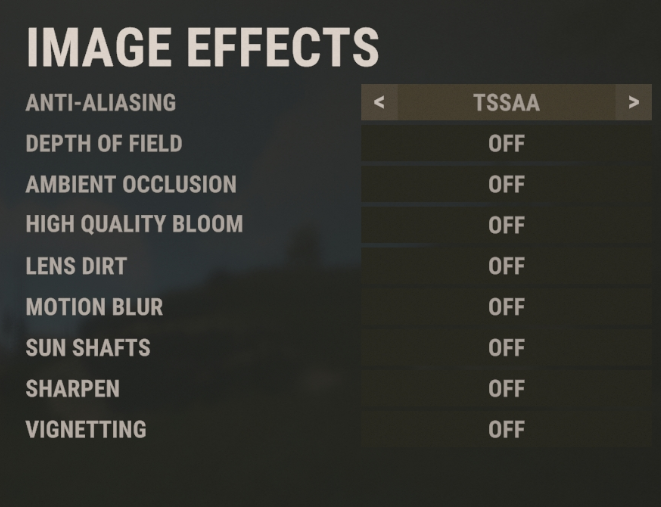
Ambient Occlusion: Off
Many Rust players complain about the graphics being too washed out. The Ambient Occlusion feature could be a decent fix because not only does it provide added shadows, but it also improves their depth. The setting is handy in situations like these, but since we have already enabled Four Cascaded Shadows, you can turn it off to save performance.
High-Quality Bloom: Off
Enabling this would improve the brightness and lighting across rare places, and apart from that, this setting doesn’t seem to have lots of value. We recommend keeping it disabled, and you will find more about this in the Nvidia Ansel section.
Lens Dirt: Enable
The Lens Dirt feature is subjective and can be both enabled or disabled, depending on the performance. We couldn’t find a noticeable difference in performance, and that goes the same for fidelity. According to Rust, this adds dirt effect in extremely bright places, which ultimately means a new layer that is similar to a glass pane.
Motion Blur: Off
We have always recommended turning off Motion Blur because it’s an unnecessary feature that has a huge impact on performance.
Sun Shafts: Off
We tested Sun Shafts for a few hours and weren’t able to find any noticeable difference. The only place where we found any noticeable difference was also in bright sunlight, and rays seemed to have an extra layer of features. Moreover, the impact on performance is also barely noticeable.
Sharpen: Off
Initially, we enabled Sharpen for better texture quality. However, in the later phases of our tests, it was disabled due to two reasons. If Anti-Aliasing is disabled, there is no point in adding an extra depth of sharpness. Secondly, Sharpen seemed to have a notable impact on performance, and we achieved the exact same results with Nvidia Ansel without compromising on performance.
Vignetting: Off
No noticeable difference in fidelity and performance
Occlusion Culling: Enabled
Under the Experimental Settings, Only Enable Occlusion Culling and disable the rest.
Field of View: 90
The Field of View usually accounts for 30% of performance in numerous games. However, that was not the case in Rust. With a roughly 8% FPS Loss on Max FOV, the difference in gameplay was very meaningful. Other than this, FOV also depends on your monitor size and your distance to the desk, so I’d say this setting is subjective.
Compass Visibility: On
It’s literally impossible to play Rust without Compass Visibility.
Streamer Mode: Off
Are you a streamer? If so, Enable this in Rust. Likewise, keep it disabled if you aren’t.
Nudity: Uncensored
With Censored, there is roughly a 4% reduction in performance. Therefore, see If you would like to trade that for the change.
Performance Tips And Tricks For Rust
It is important to have some of the best rest settings so that you can perform well in combat and the PvP mode. Here are some tips and tricks that will help you get the maximum FPS for Rust.
- First, make sure to update your drivers as well as Windows.
- Furthermore, your GPU in usage must be your dedicated GPU. Many players make the mistake of using an integrated GPU for rust, which makes their FPS performance quite low.
- Before playing Rust or any other game, always check your temperature. Thermal throttling may occur if a high temperature is kept for a long time.
- Use the best settings in your Nvidia Control Panel or your AMD Radeon Center.
- Make sure that the background apps that you are not using are always closed.
- The window power settings should always be set to high performance, even if you’re using a desktop.
- Instead of the dropdown menu, change your graphics settings in the game. Doing so will give you many more options, and this is the best way to get Max FPS settings in Rust.
- In case you are stuck or the items on your character are glitched out, ask an admin or your friend to kill your sleeper to fix the problem.
- For a network lag issue. Always check that you are not populating any server list in the background.
Check out our Windows Optimization guide for more tips on increasing performance for Rust.
Best Launch Options For Rust
Launch Options play a vital role in improving our Best Rust Settings. Usually, lots of players debate over the use of launch options in Rust, as most suggest they do not work anymore, and compatibility is a serious problem. We acknowledged this but still went above and beyond to test the game.
As per our benchmarks, only some launch options worked, and these are listed below.
- -window-mode exclusive – Rust has serious full-screen problems that are further expanded by the weird hybrid mode in which the game mostly runs in borderless mode. This can be fixed through two options: the first is -window-mode exclusive, which will guarantee the full-screen option, and the second is -high, which runs the application on priority.
- -high – This expands on window mode exclusive and also provides an additional benefit by running Rust in high priority mode. This ultimately results in more FPS, as the PC focuses on deriving all resources for the game.
- -forcee-feature-level-11-0 – Many argue this isn’t needed as, by default, the Force feature level works fine. Nonetheless, it’s better than anything, and insurance is always worth it.
- -malloc=system – The malloc system command line varies and would not benefit in all cases. In case you don’t know about this class code, it simply enhances or configures what memory allocator is being used by the game.
- -maxMem=14000 – The MaxMem command has proven to be the most beneficial of all. We noticed that Rust wasn’t utilizing all the RAM available. Therefore, Assets wouldn’t load faster, and there were terrible frame drops. This was later fixed through the maxMem command that utilizes a certain value associated. You can check your Memory through the Task Manager and utilize 20% for Windows while the remaining for the game. In this picture, 14000 refers to 14 GB.
- -cpuCount=6 – Similar to maxMem, you can also change the cpuCount for the game. Once again, this can be checked through the Task Manager. In my case, I’m using the Ryzen 3600x, so the core count would be 6.
- -exThreads=12 – The last enhancement would be through the exThreads amount. You can make sure that Rust is utilizing all the cores through this command line. We have 12 threads in our Ryzen 3600x, so the value would be 12.
All in all, these command lines sum up to this. You can enter them in the Steam Launch Options.
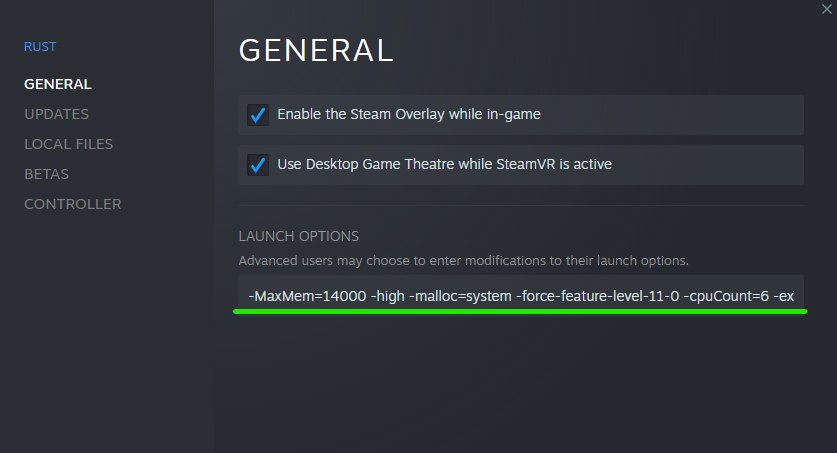
-MaxMem=14000 -high -malloc=system -force-feature-level-11-0 -cpuCount=6 -exThreads=12 -window-mode exclusive
Rust Optimization Takeaways
Rust graphics sliders are one of the most confusing UI that I’ve come across. Measuring performance across different incremental presets was a nightmare. The worst thing that plagued my testing was the need to restart the game sometimes after changing one graphics setting. If I didn’t do it, the setting didn’t apply.
I wasn’t really impressed with the performance of Rust on my PC either. The average FPS hung around 70 to 80 FPS mark at 1600p resolution. I did encounter random FPS drops in more wooded areas and near water bodies. Thermals is where the game really tested my system as my CPU was getting quite hot at 96 C.
Besides my experience with the game, there have been several reports of performance issues within the game on forums. Almost all the reports indicate random FPS drops which is a major issue considering a small lapse in combat can result in you losing your supplies and gear. Hopefully, these settings will be useful to you.
Let us know in the comments below If you have any suggestions or complaints.
More Best Settings Guide: Best Cyberpunk 2077 PC Settings
Thanks! Do share your feedback with us. ⚡
How can we make this post better? Your help would be appreciated. ✍
worked great
thanks
Very detailed
Finally i can play high graphic min 50fps love u
Awesome sauce
must save this site
+rep
Ty man
great work!
heaps of stuff on my pc needed changing to optimise rust. thanks for the easy walkthrough
<3
good job burhh
Perfect!
most comprehensive rust settings guide I have EVER read, and I\'ve been playing Rust for a very long time.