Tears of the Kingdom has 15 towers that can be located and activated, most of which are tough to find. Therefore, players might need assistance figuring out where all the Tears of the Kingdom Tower Locations are, as it can require some time to get through!
- There are a total of 15 Skyview Towers that are located all over the map in Tears of the Kingdom that can be unlocked and activated.
Tears of the Kingdom Towers
| Skyview Towers | Coordinates |
| Lookout Landing | -0298, 0142, 0025 |
| Hyrule Field | -0761, -1019, 0064 |
| Sahasra Slope | 1342, -1177, 0166 |
| Thyphlo Ruins | 0343, 3141, 0180 |
| Eldin Canyon | 1641, 1190, 0225 |
| Upland Zorana | 2866, 0581, 0379 |
| Ulri Mountain | 3498, 2025, 0188 |
| Mount Lanayru | 3847, -1314, 0539 |
| Popla Foothills | 0604, -2127, 0098 |
| Rabella Wetlands | 2420, -2754, 0222 |
| Gerudo Canyon | -2438, -2182, 0307 |
| Gerudo Highlands | -3961, -1305, 0422 |
| Rospro Pass | -3679, 2346, 0233 |
| Lindor’s Brow | -1909, 1245, 0297 |
| Pikida Stonegrove | -2311, 3062, 0443 |
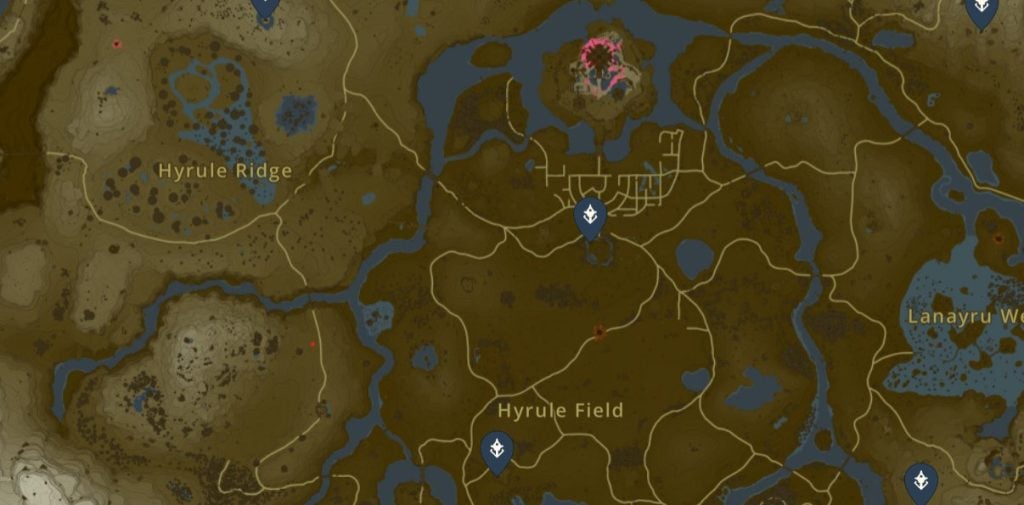
1. Hyrule Field
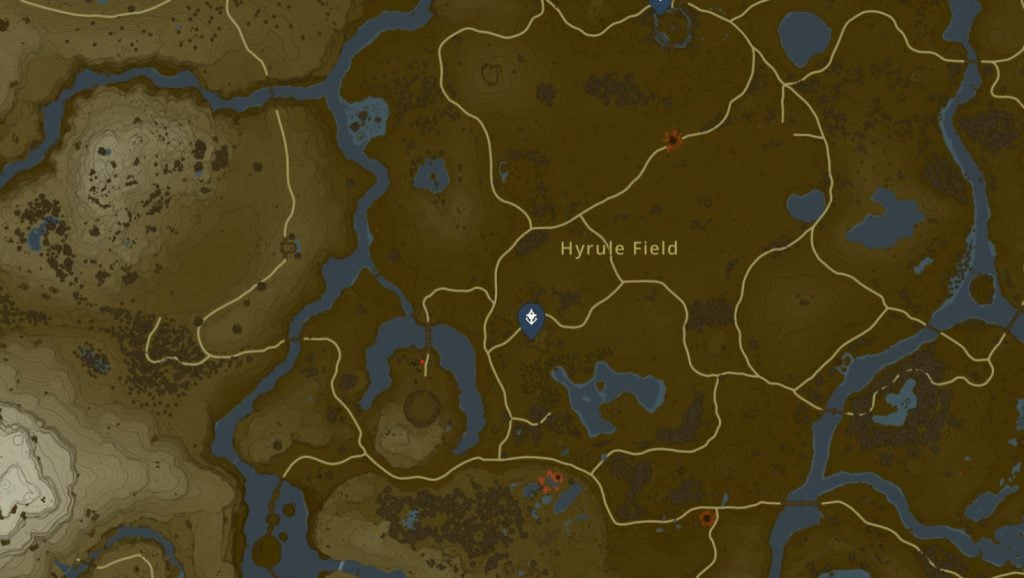
Now, one of the first towers you can find the Tears of the Kingdom Tower Locations of is the Hyrule Field Skyview Tower.
- The tower location itself is towards the southern end of the Hyrule Field.

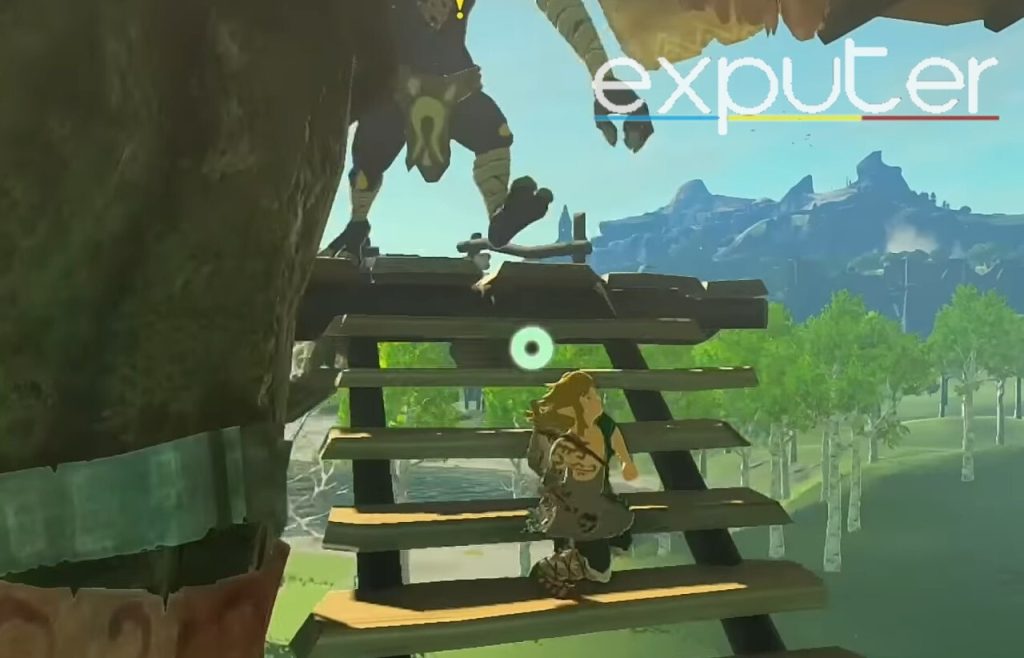
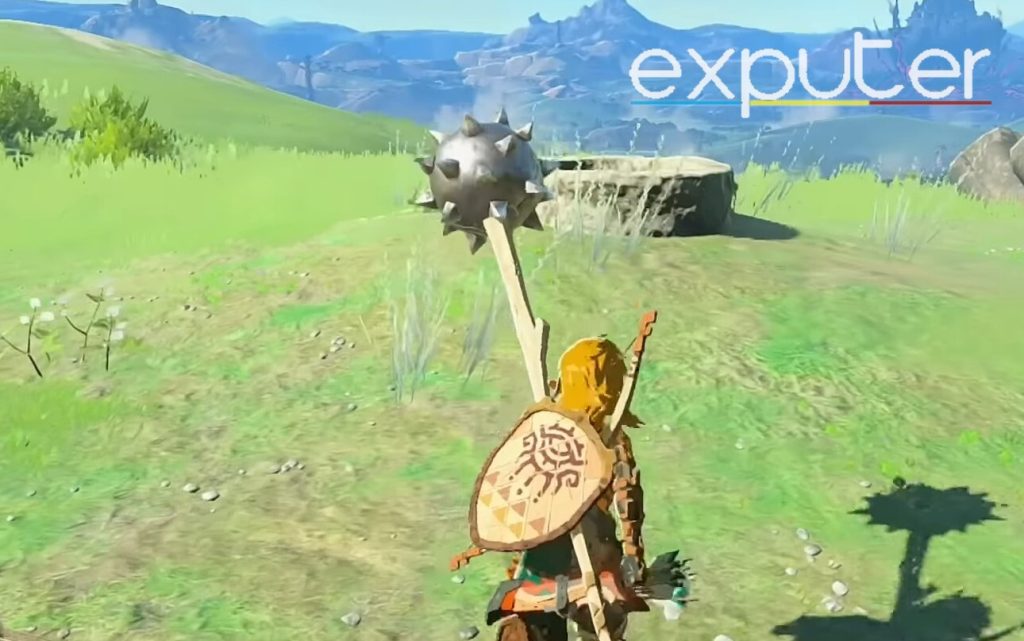
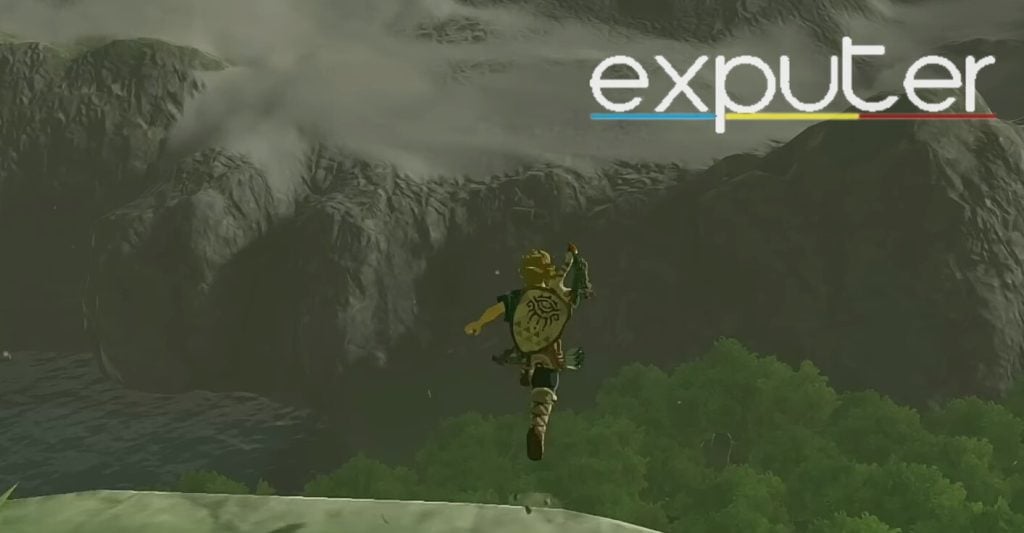
Enemy Encampment (Image Credits Exputer) - There will be an enemy encampment located nearby, and instead of running up the towers, the best thing to do here is to simply ascend, through which you can skip and ascend towards the tower.

Tower Reached (Image Credits Exputer) - As you go up, a giant ball will be thrown toward you, which can be thrown toward the enemies or simply avoided, and then the tower can be located with ease.

2. Sahasra Slope
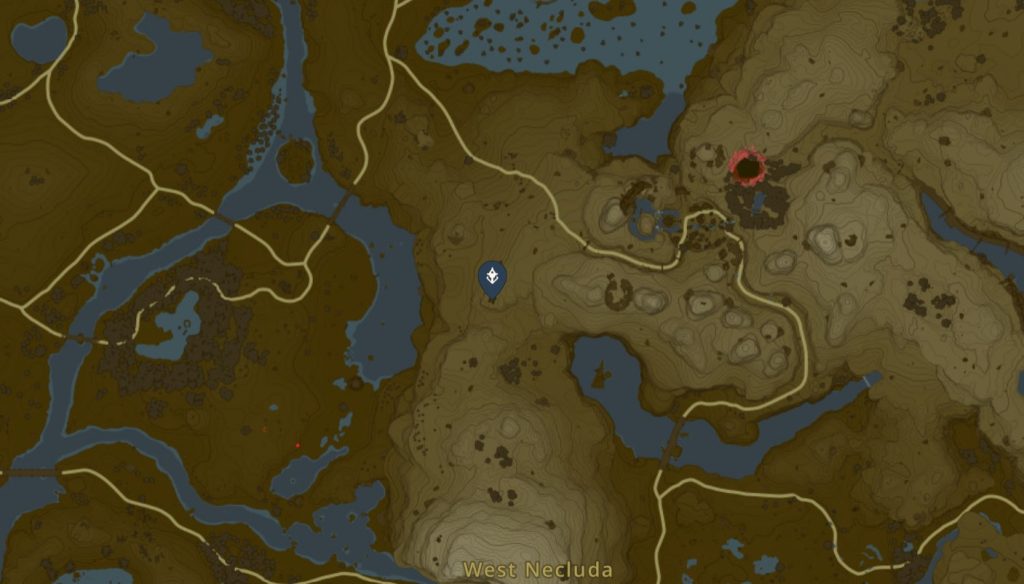
The next tower we will look at is the Sahasra Slope, located close to the Kakariko Village area.
- You should be able to take a route from the Hyrule Field area.

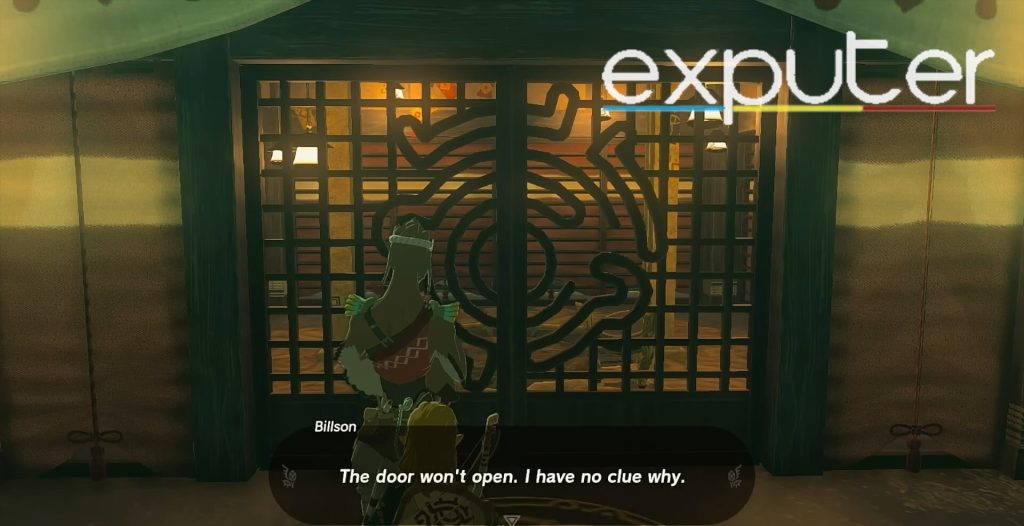
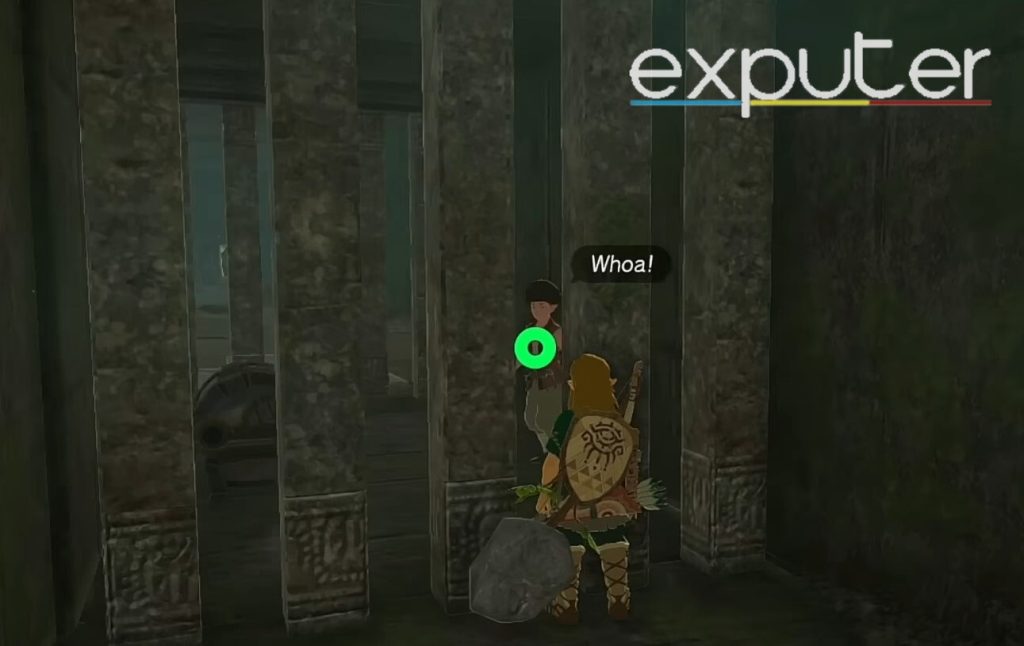
NPC (Image Credits Exputer) - After crossing the bridge and making your way to the tower, you can interact with an NPC named Billson, and the NPC will ask whether you’ve come to see the tower.
- The NPC tells you that the door to the tower won’t open and needs repairs, and there should be a Blupee that you can follow that leads you toward a cave entrance.
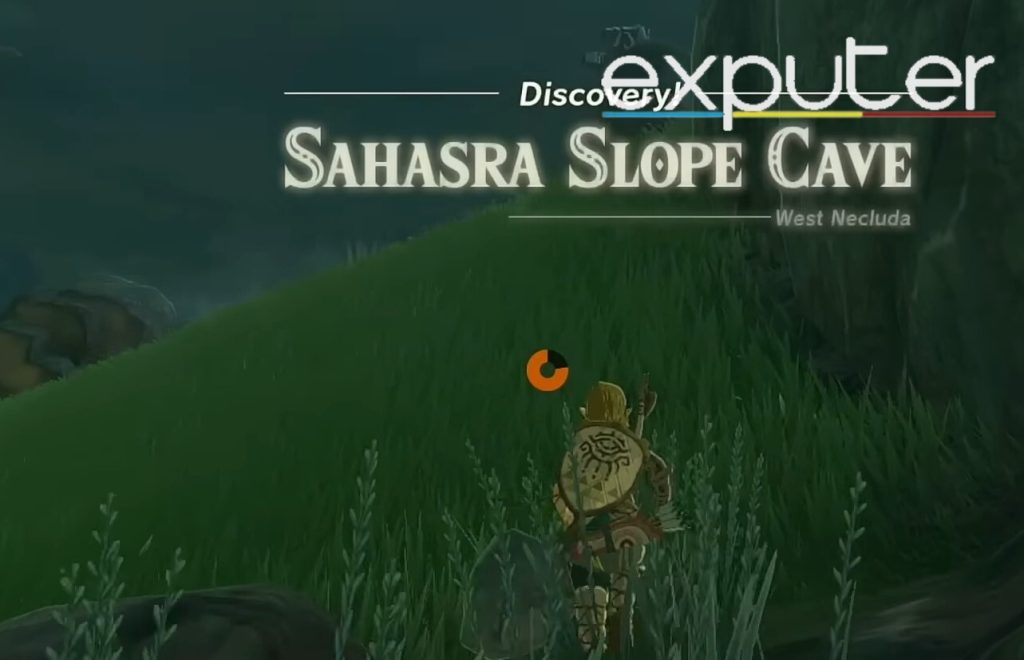
- After going inside the Sahasra Slope Cave, the entrance is completely blocked by a few rock walls that you need to break through.

Slope Cave (Image Credits Exputer) - As you do so, you can head deeper inside, and there are monsters; murder them, and then head into a room with a boulder with two smaller stones next to it.

Ascend (Image Credits Exputer) - Look up and ascend from the room with the boulder, which will instantly lead you to the tower, and you will spawn inside it.
- The NPC seems surprised to see the door open from the inside and will leave with a goodbye.

Tower Reached (Image Credits Exputer)


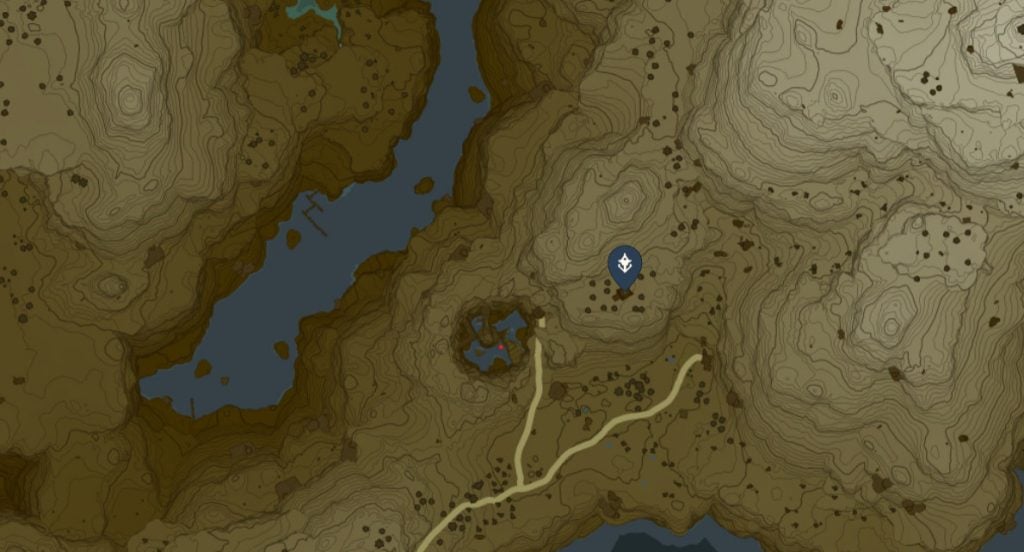
3. Popla Foothills

Moving on, another tower you might need to learn, Tears of the Kingdom How To Unlock Towers, is located in the Popla Foothills area.
- The tower is right beside the Dueling Peaks, specifically towards the right side of the peaks.
Dueling Peaks (Image Credits Exputer) - The tower won’t be activated until you complete a related quest.
- Pretty close to the tower, there should be a well that can be accessed, and the well will be located a few feet away from the stairs that lead up towards the entrance of the tower, and after you get close to it, you should be able to jump down.

Well (Image Credits Exputer) - Therefore, head towards the well, get on top of the edge of the well, and then conveniently jump down, which lands you in a pool of water; therefore, you don’t hurt yourself; instead, you start swimming.
- From here, break the rock wall, and head deeper inside, after which you should be able to locate a man who seems trapped and needs help getting out.

Trapped Man (Image Credits Exputer) - The trapped man tells you a cave entrance is nearby, and you should be able to find the switch there.
- Therefore, ascend from where you are standing and head towards the southern end of the tower, and you should be able to find a creature you can follow that leads you toward the cave entrance.
- Inside the excavation site, you should be able to open the trapdoor and ket out the trapped guy, and also find a chest on which you can use your Ultrahand ability to put it onto a switch that can open the door.

Excavation Site (Image Credits Exputer) - After saving the man, return to the tower, which can be easily activated now.

4. Eldin Canyon
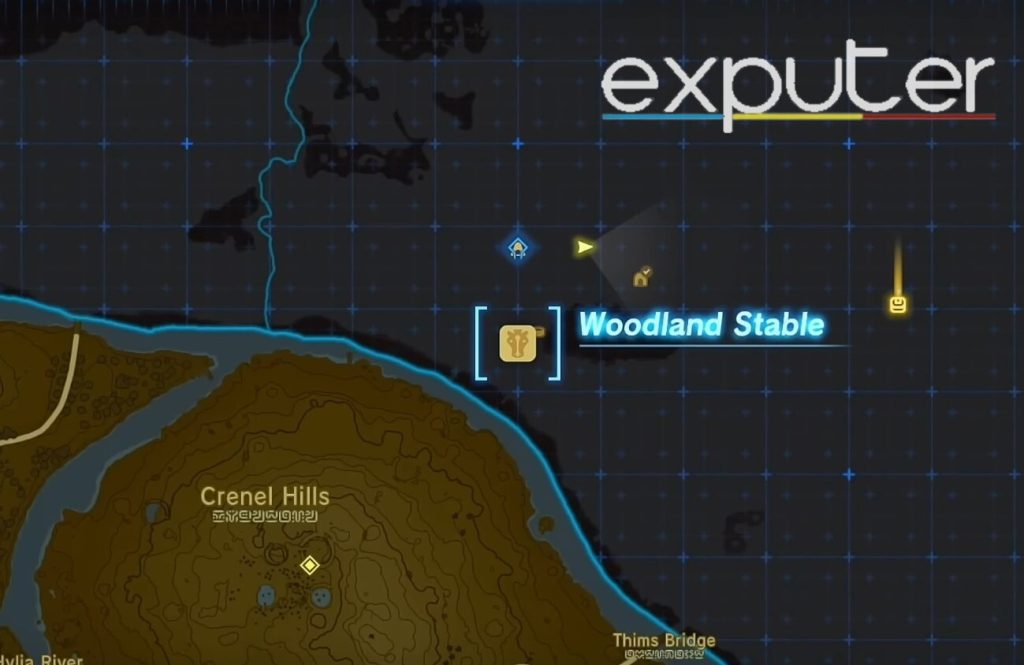
Next up, the next Tears of the Kingdom Tower Locations will be for the Eldin Canyon, which is located towards the eastern side of the Woodland Stables area, which is also present towards the North-Eastern side of the Crenel Hills as can be seen on the map.
- Take the route towards the outside of the Woodland Stables and head towards the northern side; the travel time to the tower will be fast.

Woodland Stable (Image Credits Exputer) - Keep heading forth until you can see the Death Mountain sign, and you want to move towards the right side of the sign.

Death Mountain Area (Image Credits Exputer) - Start climbing up the hill, and you should be able to see the tower in the near distance.
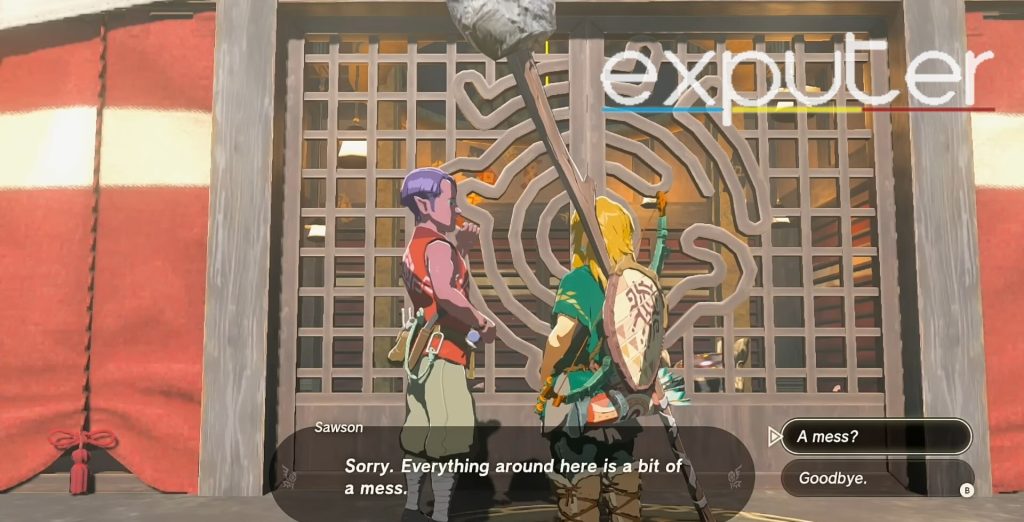
- As you reach there, there will be an NPC by the name of Sawson, and he tells you that there is a problem and that the tower roof has fallen, and you can rewind after you find its pieces close by and can enter through the roof.

NPC (Image Credits Exputer)
5. Upland Zorana

Now, the route to the Upland Zora skyview tower can be pretty daunting if you don’t want to do all the climbing and quest that is related to it, and an easier way is listed below.
- The coordinates of the tower are 2866, 0581, and 1222, and it is present in the eastern area of Hyrule.
6. Rabella Wetlands
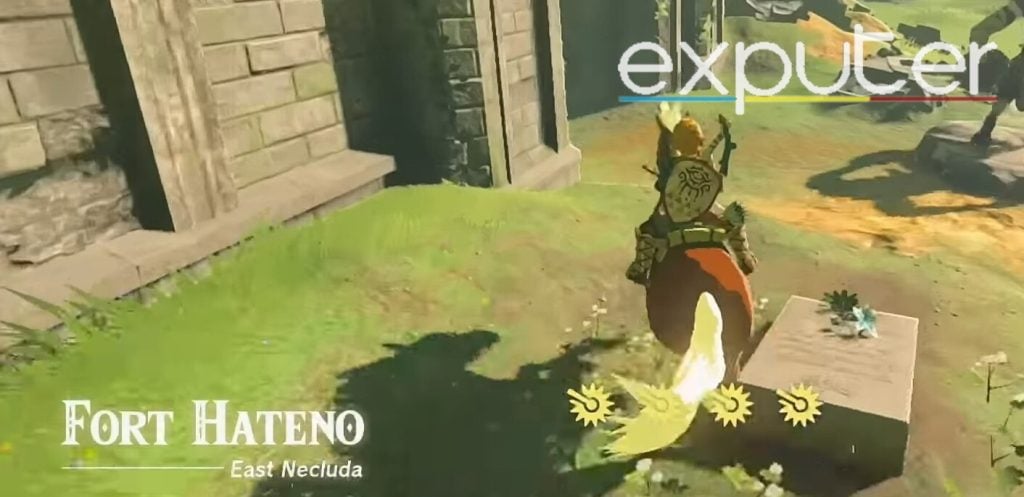
The next tower you can look at and aim to head towards is the Rabella Wetlands Skyview Tower, conveniently located towards the southern end of the East Necluda area and the Lurelin Village area.
- You want to head towards the Fort Hateno area first and go past the area you encounter.
- After that, keep heading south, and you want to go around and take a longer pathway until you reach the tower.

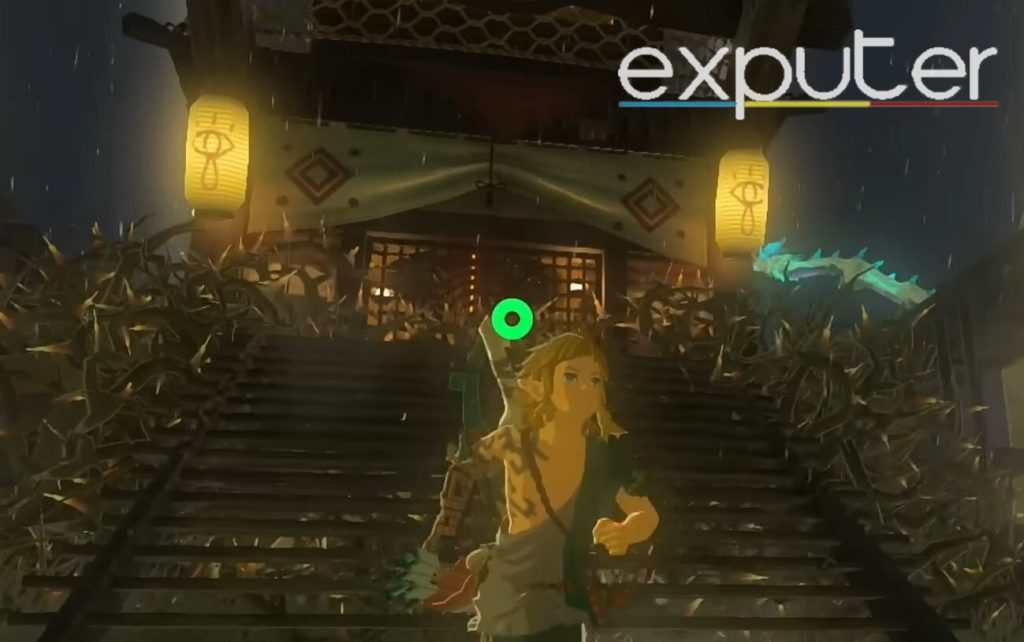
Fort Hateno Area (Image Credits Exputer) - As you do so, you will find that the entrance to the tower has been completely covered by spikes and vines that won’t let you through, no matter how hard you try.
- Therefore, to combat that, you should be able to find some square wooden blocks on the ground that you can use your Ultrahand ability to pick up, and then you can make an open-sided box from it.

Tower Found (Image Credits Exputer) - Start heading up the tower’s stairs, and you should stand right in front of the entrance to the skyview tower.
- From here, angle the box so it has an upper layer, then place it upside down on the spikes/vines in front of the tower.

Box Over Vines (Image Credits Exputer) - After that, go to your inventory and find a Fire Fruit, which will come in handy to throw at the vines, and the main reason that they were covered was to protect them from the rain and so that they could stay lit up.
- After the vines have burned away, you can enter and activate the tower.

7. Ulri Mountain

As far as the Ulri Mountain Skyview Tower is concerned, it is located towards the Akkala Highlands area, and for this, you want to take the path that goes through Terry Town.
- As you reach the tower, the NPC present there is named Sawson, and he tells you that a flying creature nearby has stolen its terminal.
- Shoot at the flying creature, bring it down, take it back to the tower, and slot it back into place.
- Talk to the NPC, and the NPC will ask you to install it, and the tower can be activated after that.
8. Lindor’s Brow
Lindor’s Brow is present towards the Hyrule Bridge area, specifically the northeastern end and towards the northern side of the Lookout Landing.
- Because the tower is located conveniently on a boulder in the middle of a lake, there isn’t a way to use your stamina here since swimming and climbing both can consume quite a bit of stamina.

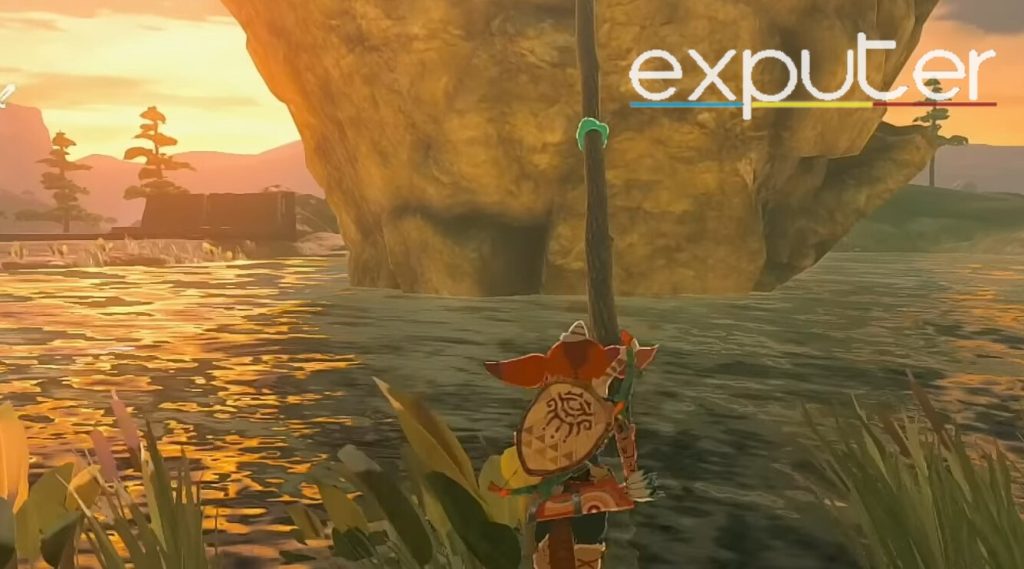
Boulder In Lake (Image Credits Exputer) - Therefore, to get on top of the boulder and access the tower, the best strategy is to make stairs or combine wooden sticks to make a makeshift bridge and then go up from there and activate the bridge.
9. Pikida Stonegrove
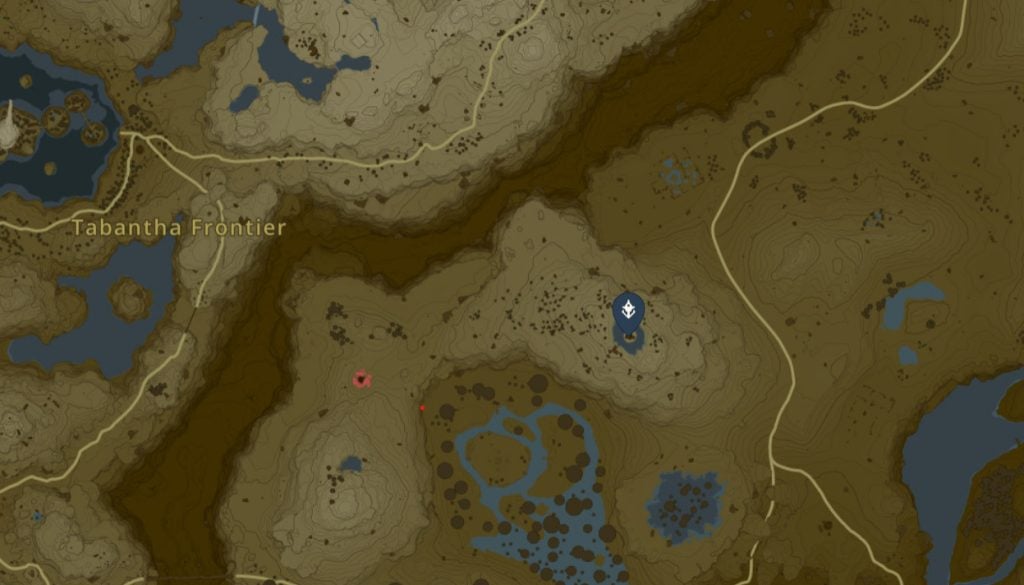
Next up, the Pikida Stonegrove tower is on the northeastern side of the Rito Village and is located very blatantly between the Tabantha Tundra and the Hebra Mountains.
- When you arrive at the bridge, if you cannot fly up, all you need to do here is use your Ultrahand ability to link the wooden planks, make the bridge, and climb up to the tower.
10. Mount Lanayru
Moving onto the next Tears of the Kingdom Tower Location, this tower is called the Mount Lanayru Skyview Tower, which is located towards a bit of a southern part of Mount Lanayru. As you can see on the map, it should also be towards the northern end of the Hateno Village area.
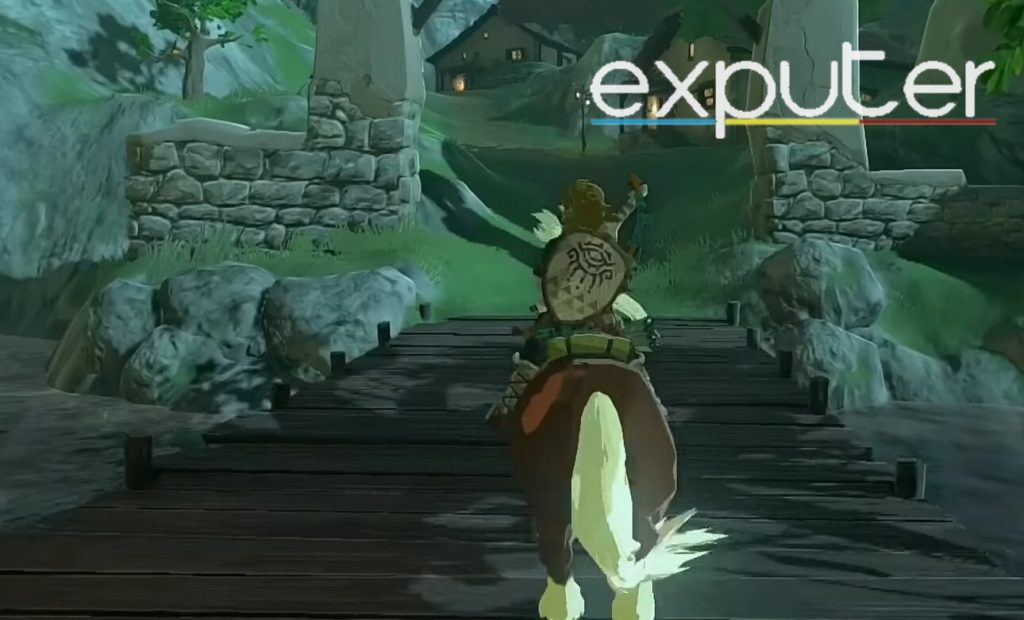
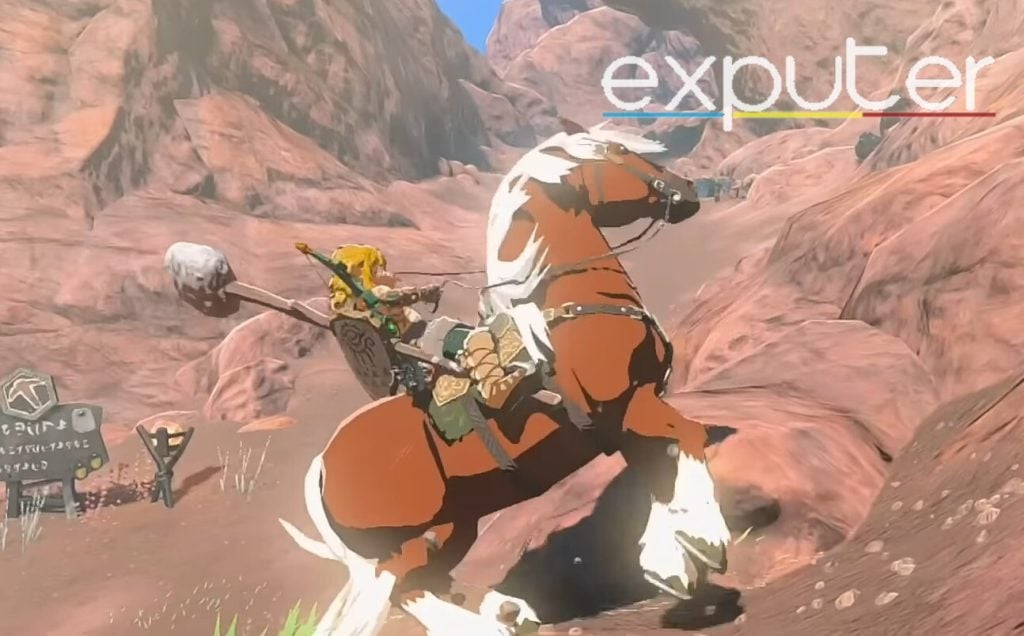
- Start making your way over to the Hateno Village; the best way to traverse there is to simply take a horse since it makes travel much easier than traveling by foot and is much faster.

Cold Resistance (Image Credits Exputer) - After that, if you haven’t; already, you can grab the shrine at the Hateno Village while you’re at it and then make your way over to Mount Lanayru, where there is quite a bit of climbing that you will need to do if you are to make your way to the top and go to the tower.
One thing that will be essential here is to have some cold resistance food on your hand so that you can survive in the harsh conditions of the mountain dn make your way to the tower without dying.
11. Rospro Pass
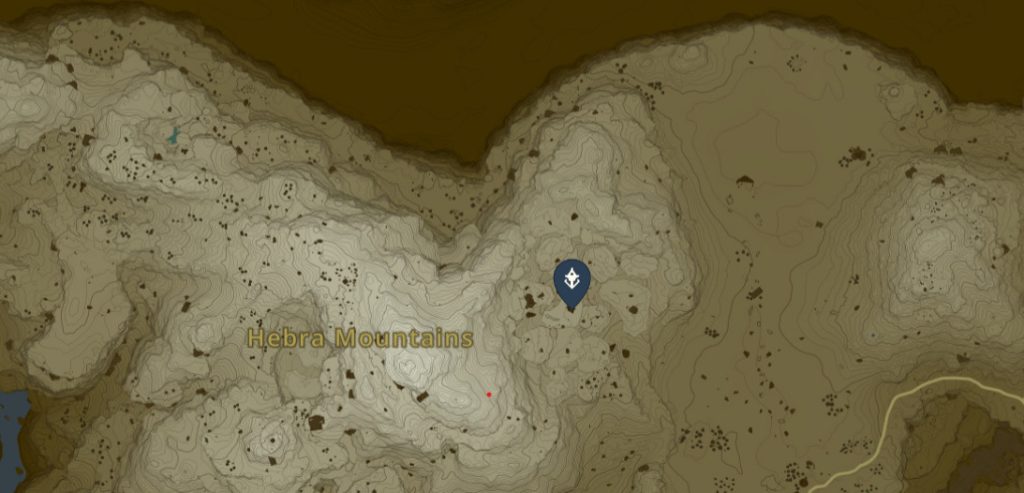
The Rospro Pass Skyview Tower is located towards the northern side of the Rito Village and a bit towards the Southern-western end of the Hebra Mountains area.
- If you’re heading there from the Snowfield Stable area, you should be able to head through the snowy region with the help of your ride.
- Head past the area of the Lucky Clover Gazette in the Tabantha Frontier when you encounter it, and keep heading forth.
- As you reach the tower, you can light the vines that surround the tower on fire and head on inside.
12. Lookout Landing
As far as the Lookout Landing tower is concerned, all that players need to do is go through the questline called The Crisis At Hyrule Castle, and you can activate it during it.
13. Gerudo Canyon
This tower is located towards the northeastern side of the Gerudo Desert and presents a bit towards the northern and western end of Faron Grasslands.
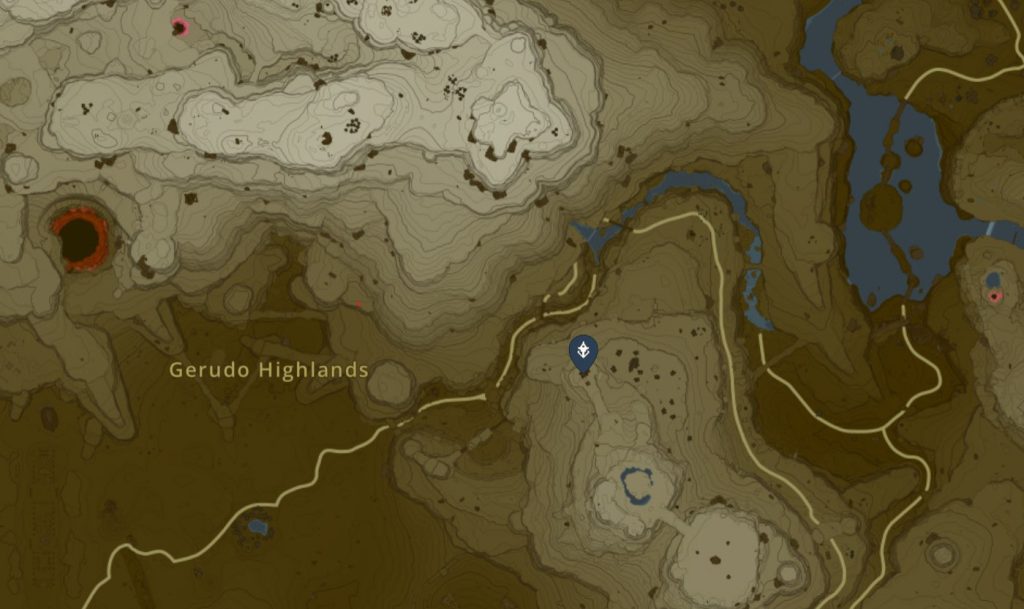
14. Gerudo Highlands
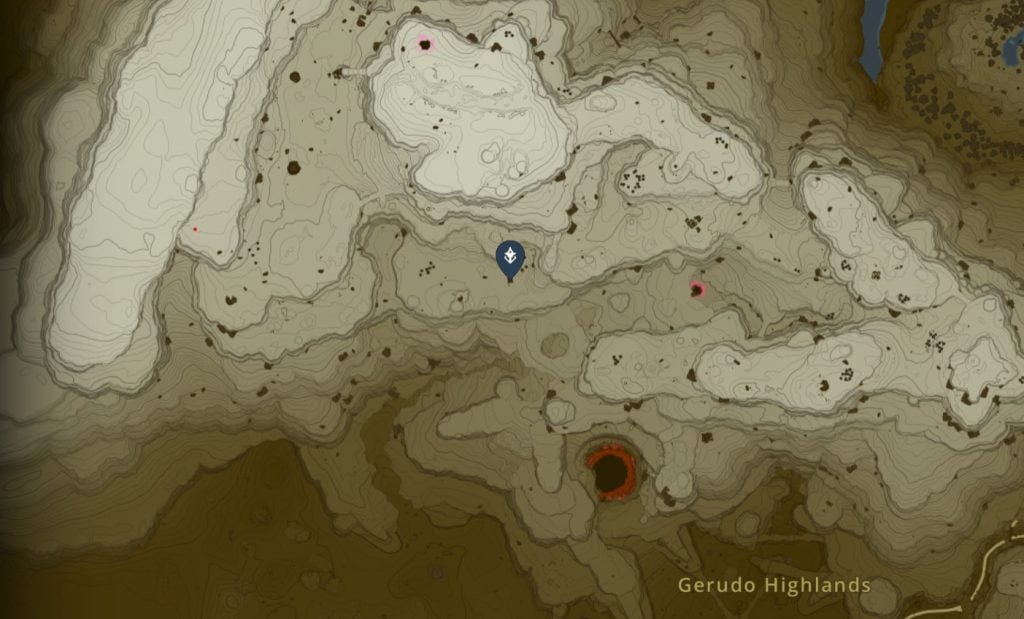
To get to the Gerudo Highlands Skyview Tower, you want to start going to the western side of the Hyrule Field.
Make sure to take some cold-resistance food to combat the cold.
15. Thyphlo Ruins
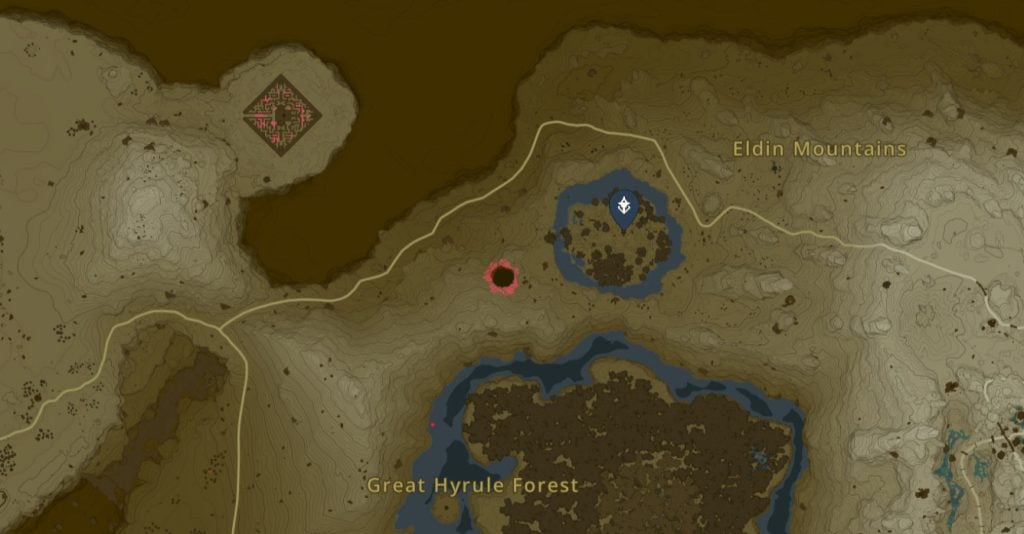
Last but not least, the Thyphlo Ruins tower will be located towards the northern end of the Great Hyrule Forest.
And that’s just about it! All that players need to know about the Tears of the Kingdom Tower Locations, and with that, let’s wrap up this guide! While you’re here, why not check out the Tears of the Kingdom Great Sky Island Shrines guide too? Besides that, the Tears of the Kingdom Best Items guide is also a must-read! With that, the Zelda Tears of the Kingdom Cooking guide is a guide you must also skim through!
Up Next:
- Tears of the Kingdom Best Recipes
- Tears of the Kingdom Outfit
- Tears of the Kingdom Best Bow
- How to get Rupees Tears of the Kingdom
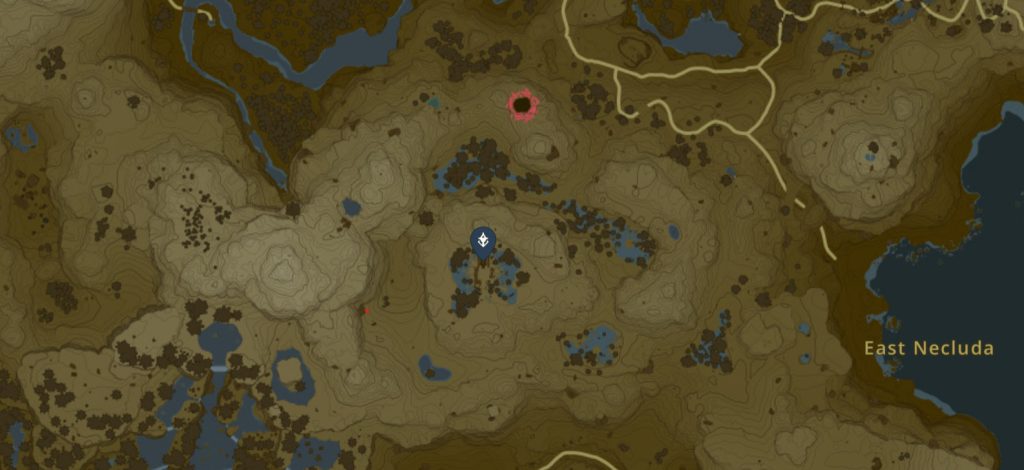
Map Photo Credits: MapGenie
Thanks! Do share your feedback with us. ⚡
How can we make this post better? Your help would be appreciated. ✍