Destiny 2 being stuck on initializing is a fairly common issue many players encounter while trying to launch the game. There can be a number of issues that can cause Destiny 2 to be stuck on initializing in the launcher, ranging from corrupted files to bad network connection or even faulty cache files interfering with the connection of the game.
You can easily fix Destiny 2 PC Stuck on Initializing by simply following the methods listed in this guide further down below.
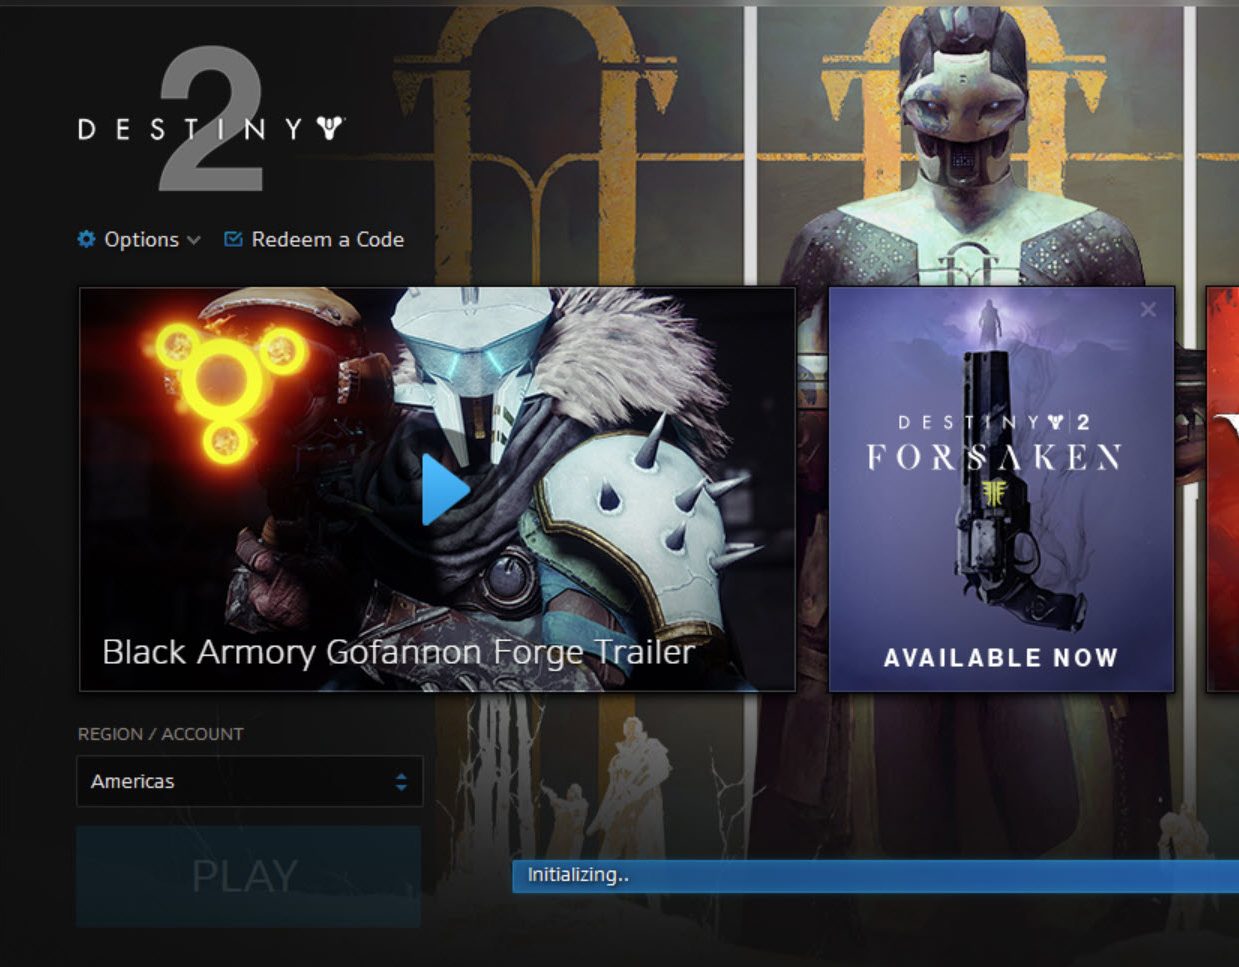
Here are all the methods through which you can fix the Destiny 2 PC Stuck on Initializing error:
- Fix Corrupted Game Files.
- Launch as an Administrator.
- Disable antivirus.
- Delete the Blizzard.net cache.
- Close any Battle.net background process.
- Reinstall the Destiny 2.
Close Any Battle.Net Background Processes
Another effective method to fix the issue is to relaunch the battle.net launcher completely, but there may be battle.net processes running in the background even after closing the launcher.
So, in order to ensure a complete reset of the battle.net launcher, you have to close any blizzard-related programs that may be running in the background. You can visit our guide to How To Terminate Unnecessary Programs if you need help in this regard.
Disable Antivirus
Your Windows Defender and virus protection software may be interfering with the battle.net launcher and making it unable to access files on the system properly. So, you must temporarily disable the virus and threat protection to see if it fixes the issues. However, make sure to turn it back ON.
If the antivirus turns out to be the problem, you can whitelist the game, as it is much easier than turning it off every time.
Fix Corrupted Game Files
Corrupted game files are always responsible for various issues that may hamper the game in many different ways, like crashing and freezing. In this particular scenario, Battle.net is stuck on a loop, unable to find the necessary files to continue with the download. Therefore, due to missing/corrupted files, your game is stuck on initializing.
There are a few methods to fix this issue, but the most effective one is temporarily removing the game from the directory.
Here is how you can easily remove the game from the directly without redownloading:
- Start the update of Destiny 2, and after 5 to 10 minutes, pause the update.
- Now, find the Destiny 2 game directory.
- Rename the Destiny 2 folder to any alternative name.
- Now, Click on the install button on the battle.net launcher when you open the launcher again.
- Before the launcher starts installing the game, go back to the directory folder and change the Destiny 2 folder to its original name.
- Lastly, simply relaunch battle.net and click on the install button to see if battle.net will detect any missing or corrupted game files.
The majority of players were having problems in the game due to corrupted files, and they were able to solve the issue through this method.
Launch As An Administrator
Destiny 2 being stuck on initialization might occur due to the launcher’s inability to find the appropriate files needed to continue the game’s initialization process.
So, it’s necessary to ensure that the Battle.net launcher has permission to read and write any files necessary for the initializing process. You can do this by running the launcher as an administrator.
Delete The Blizzard.Net Cache
The blizzard.net launcher stores temporary files on the computer so that the launcher can effectively launch the game with the proper settings.
These files may have been piling up for a long time and then gotten corrupted at some point. This may be the reason why you’re facing the initialization error for Destiny 2.
The best course of action is to simply delete the blizzard.net cache folder to reset the cache files of the blizzard.net launcher. This fix has helped other users in the Bungie forum successfully launch their game as well.
Reinstall the Game
If none of the methods listed above are working towards fixing the issue, then your final course of action is to reinstall the game from scratch completely.
Completely reinstalling games has been shown to fix issues like these that won’t be fixed by attempting various known solutions like those listed above. Here is how you can easily uninstall the game from the battle.net launcher.
- Launch battle.net and open the Destiny 2 section.
- Now, press the options button and select the uninstall option to uninstall the game successfully.
- You can reinstall the game to see if the issue is fixed.
Final Words
Applying all the different methods listed above will surely be able to fix your battle.net launcher because these are the most used methods that will get your Destiny 2 out of the initializing loop.
According to my experience in writing troubleshooting guides, in most scenarios, this kind of error originates on the server end. When the server isn’t responding properly to your Blizzard game launcher, it gets stuck while initializing files download. You can always check the Destiny 2 server status page to see if the issue is server-side or not. Simply wait for the issue to fix itself.
However, if the game’s working well for other players and it’s your launcher that’s presenting such an issue, then the above methods are a guaranteed fix.
FAQs
Yes, the server downtime can also cause the Destiny 2 PC Stuck on Initializing error.
You can fix Destiny 2 PC Stuck on Initializing by deleting the battle.net cache folder.
Here are some other Destiny 2 error guides at eXputer:
- Destiny 2 Error Code Chicken
- Destiny 2 Error Code Cat
- How To Fix Vex Input Error In Destiny 2
- Destiny 2 Error Code Weasel
- Bungie Error Code Bee In Destiny 2
- Destiny 2 Crashing On PC
Thanks! Do share your feedback with us. ⚡
How can we make this post better? Your help would be appreciated. ✍