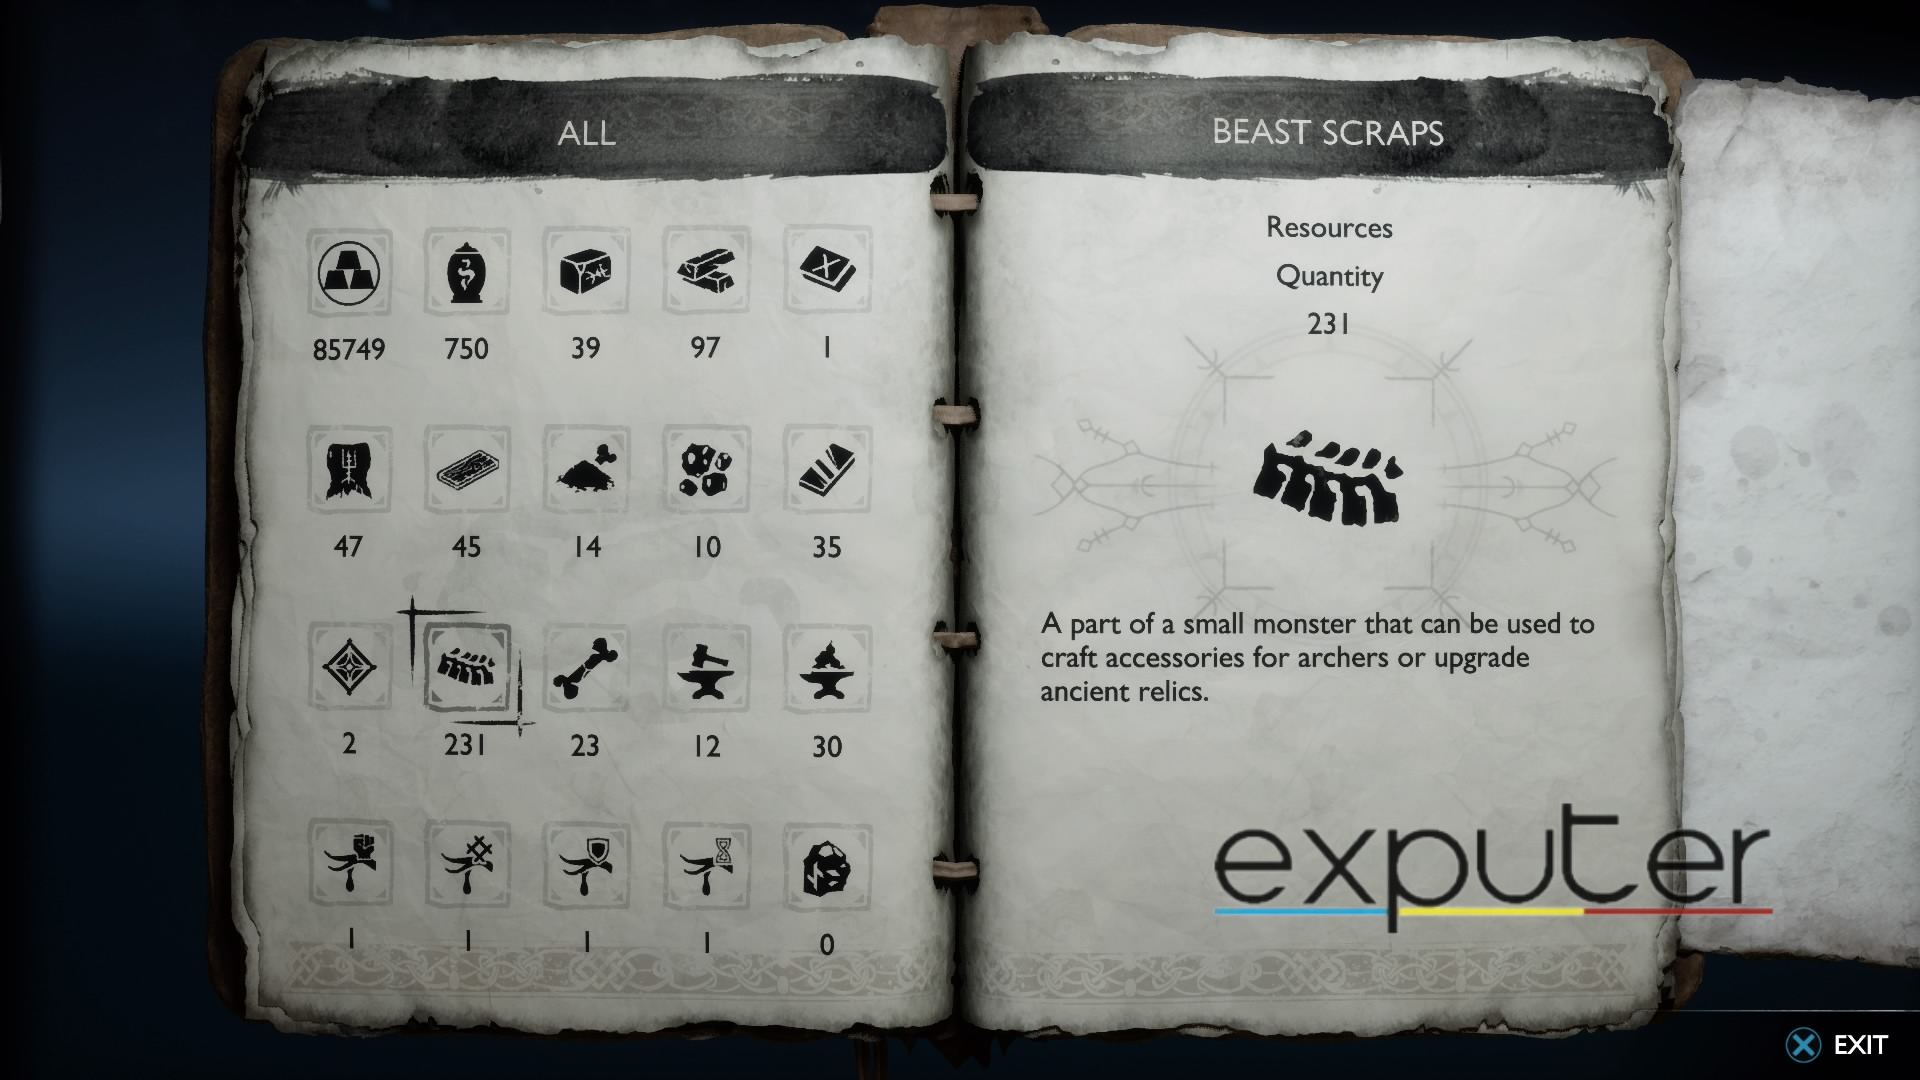
Beast Scraps can often be collected from beasts, as the item description of these scraps says, “A part of a smaller monster that can be used to craft accessories for archers or upgrade ancient relics.”
In God of War, beasts can be classified as almost any animal-like creature. This means that most enemies you fight will likely drop beast scraps since they are common enemies. Most of the early-game enemies you fight in the game are human-like enemies such as raiders and Hel raiders. Therefore, they won’t drop any Beast scraps. Once you get into Svartalfheim, you’ll start to collect them off of enemies and chests.
Beast Scraps are valuable upgrade materials in God of War Ragnarok. Here’s how to obtain them:
- Defeating Monster Enemies: Beast Scraps can be obtained by defeating certain monster enemies in the game. These enemies include Wretches, Grims, Nightmares, Gulons, Wyverns, Tatzelwurms, and Gradungrs. These foes can be found in various locations throughout the game, with many of them being in Svartálheim.
- Chests: Beast Scraps can also be found in Red and Legendary Chests scattered across the game world. Keep an eye out for these special chests during your exploration.
- Main Story Progression: You’ll naturally accumulate Beast Scraps as you progress through the main story. Completing quests and defeating enemies during the main storyline will provide you with an adequate amount of this material.
Wretches
Svartalfheim is the first major area in God of War Ragnarok, where you’ll find tons of beast enemies. A few common enemies you’ll find are Wretches in multiple arenas in this realm that you can easily take down and loot to get Beast scraps.
Despite their small size, they can often be an annoying bunch that attacks in groups and jumps across to give you a surprise attack. Therefore, you’ll need to deal with each one quickly before they start to outnumber you massively.
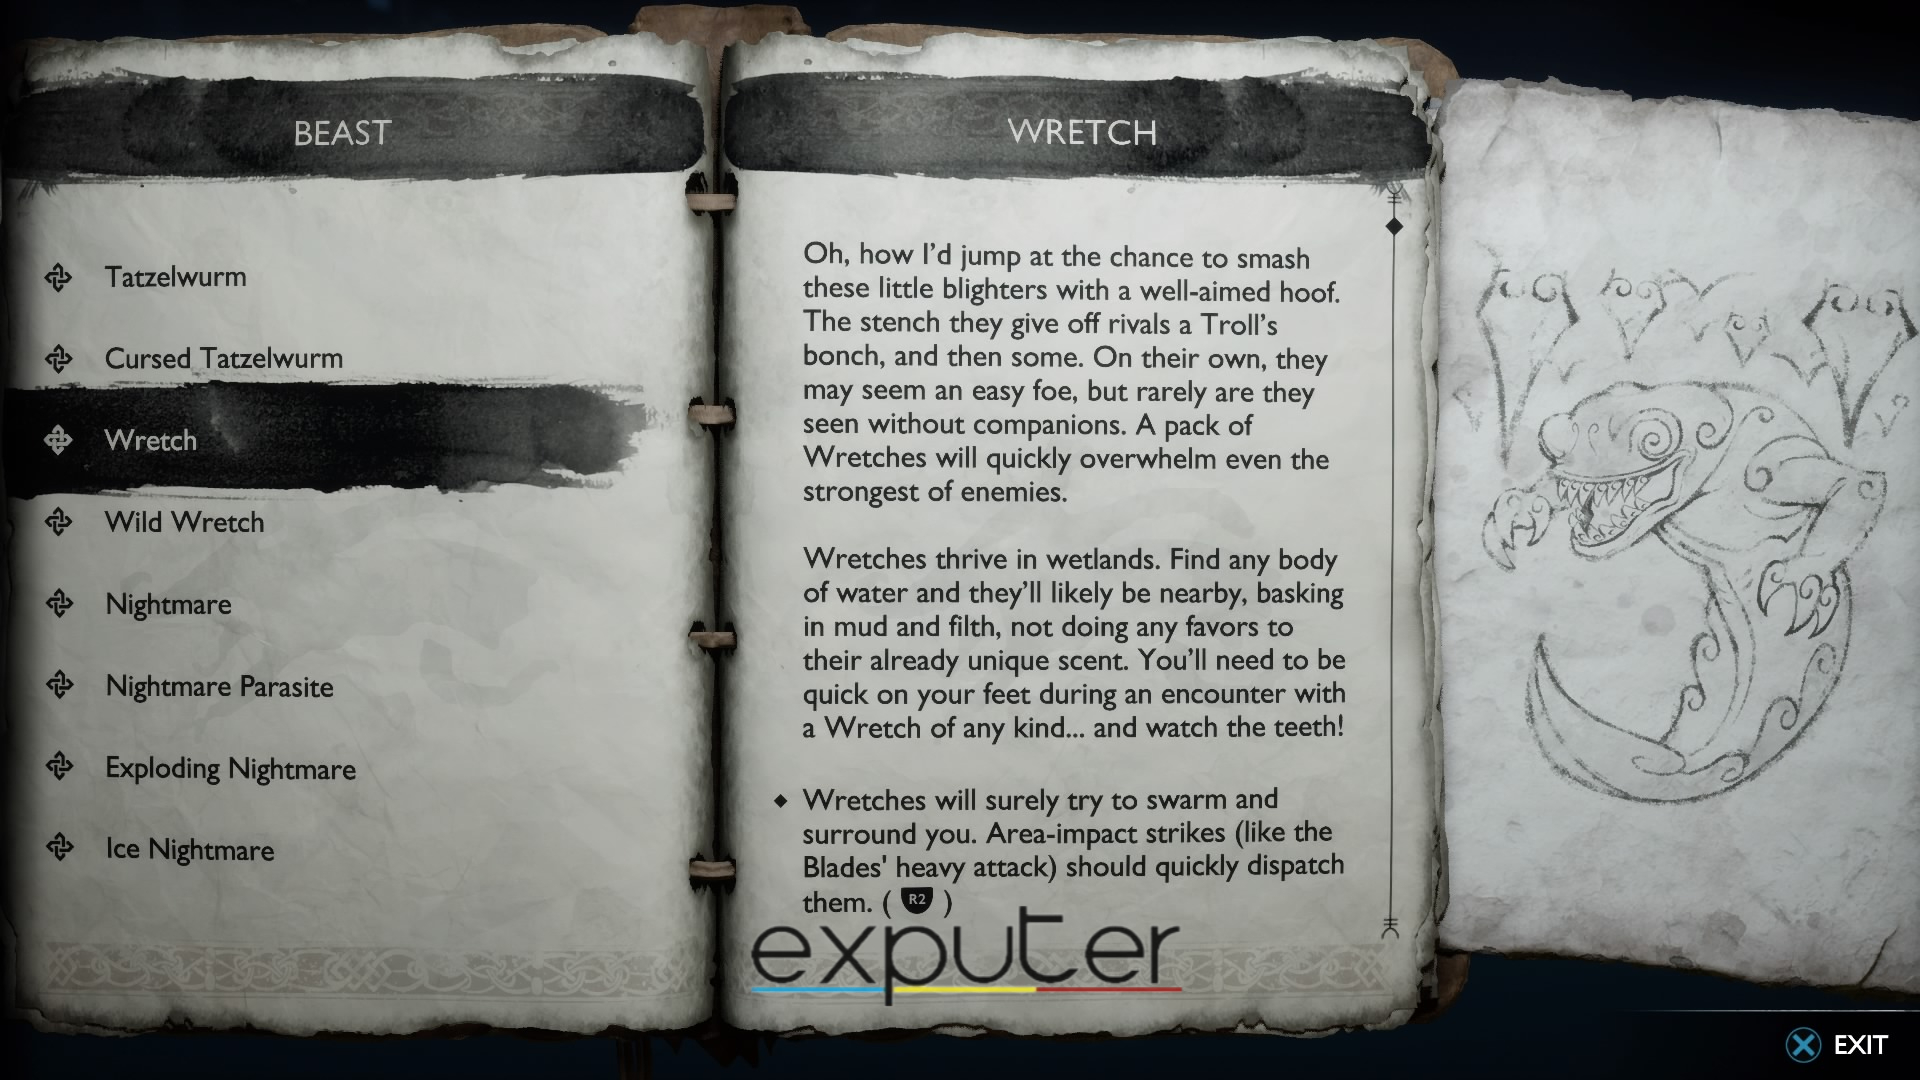
You’ll find 2 other types of Wretches in God of War Ragnarok. The first type is Wild Wretches, which are stronger Wretches that are more hostile and deal damage.
The second type is Exploding Wretches that explode once you kill them, so be careful around them since their blast might catch you off-guard. It’s also important to remember that most Wretches will have Wretch Nests nearby that spawn them without end, so take them out as quickly as you can!
Grims
Grims are the second beast-type enemy you’ll come across in Svartalfheim. They slither around you to create confusion and do a spinning attack once they get too close. However, their low health doesn’t make them too formidable. Just keep your eye on them, and they’ll be easy to take out.
Nightmares
Nightmares make a return in God of War Ragnarok. These small floating creatures also classify as beasts, and their weak health bar means you can take them out with 1 or 2 swings for easy Beast scraps. It’s best to use Atreus, or your projectile throws against them since Nightmares are using outside your reach.
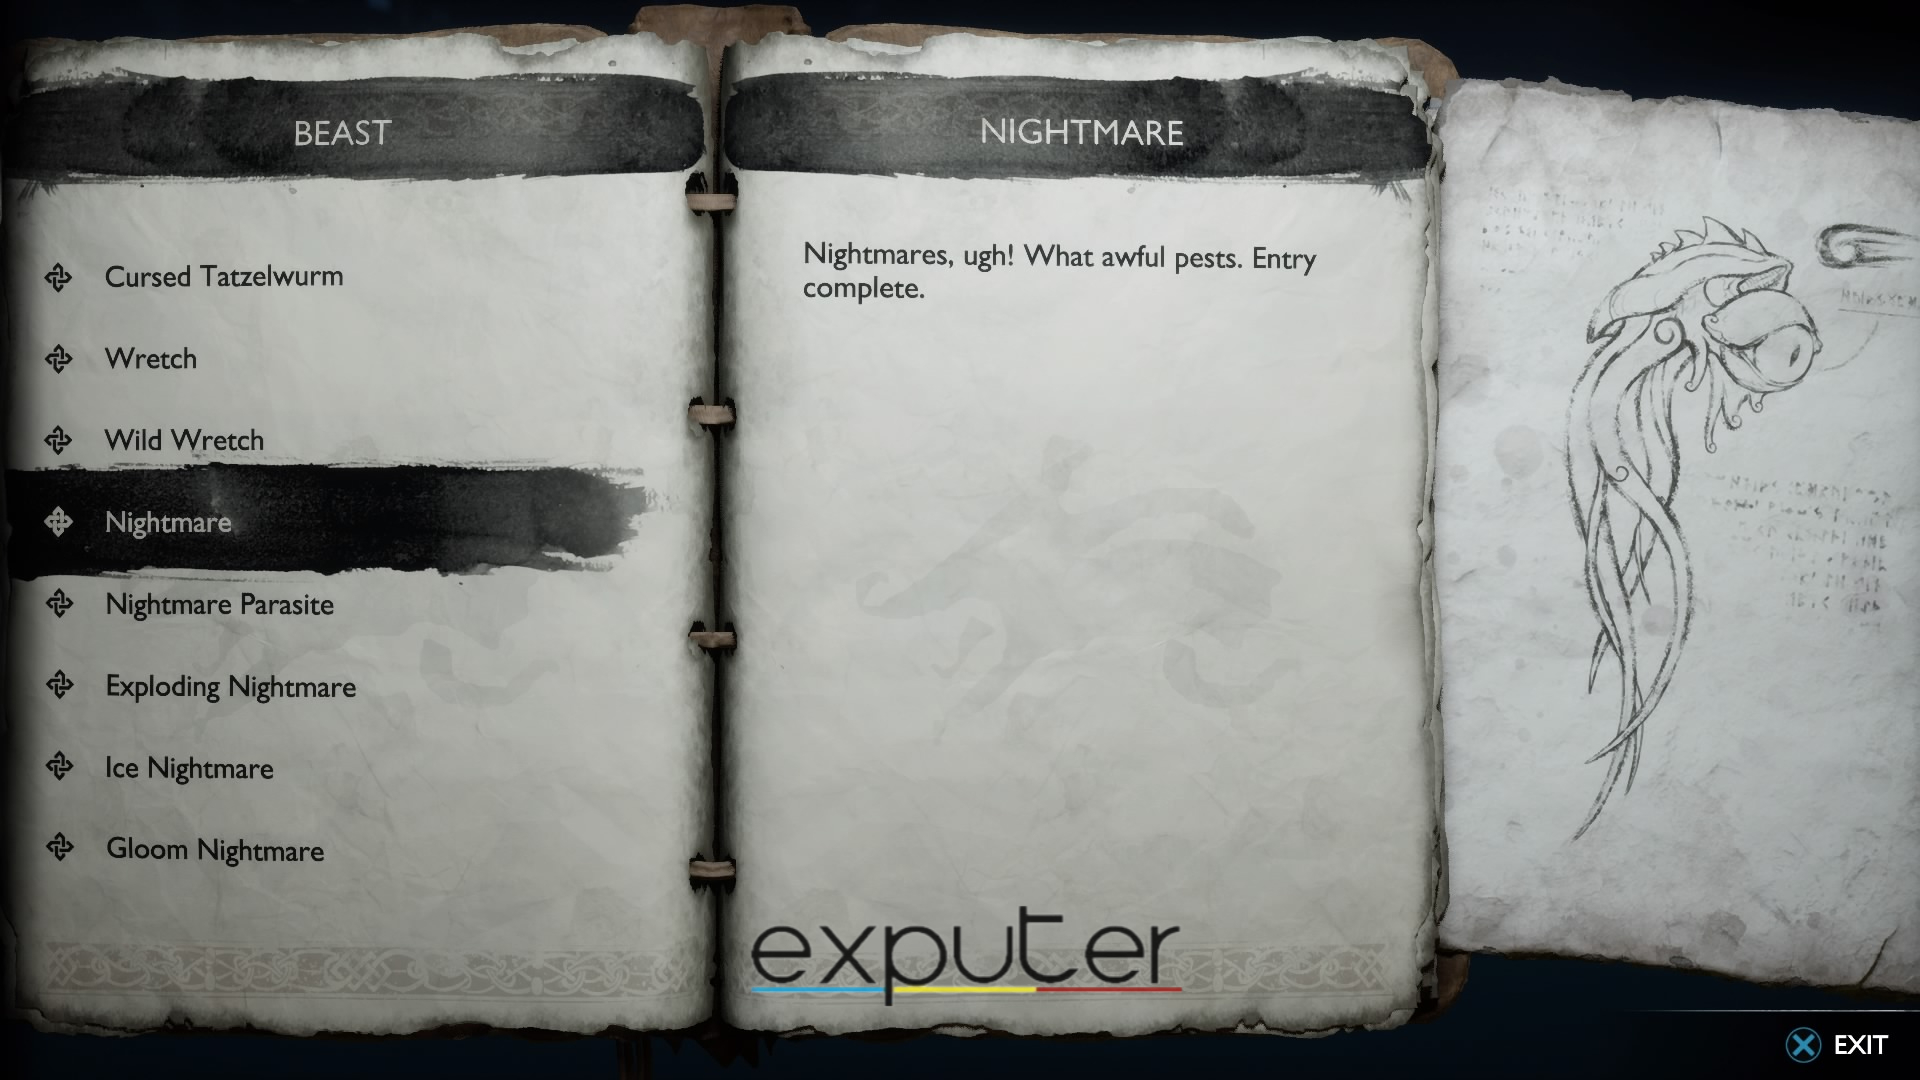
There are 4 variants of Nightmares in God of War Ragnarok – Ice, Gloom, Exploding, and Parasites. The worst thing about them is that they become more troublesome the longer they live. Therefore, you should always tackle them first since they’re initially an easy target. You can usually find Nightmares throughout the Nine Realms, and they’re a constant and healthy source of Beast scraps.
Gulons
Gulons are dog-like beasts that hunt in packs and have annoying mobility. According to their description, they move in a zigzag pattern and come in for a bite. They also have a Sonic Shield that is only vulnerable to Sonic Arrows to the face.

Cursed Gulons are the only variant of Gulons whose poisonous attacks fill up the arena and become a nuisance. As their description suggests, their poisonous acid blocks off most places of the arena, limiting your movement. Their lunging attack is especially deadly since it staggers and ultimately makes you vulnerable to other enemies attacking you.
Wyverns
Wyverns are another source of Beast Scraps. These flying dragon-like creatures are mainly found in Vanaheim, and their quick movement and high damage output mean that they’re going to cause trouble in a fight. It’s better to use your Leviathan Axe against them to pack a mean punch and kill them as quickly as you can.
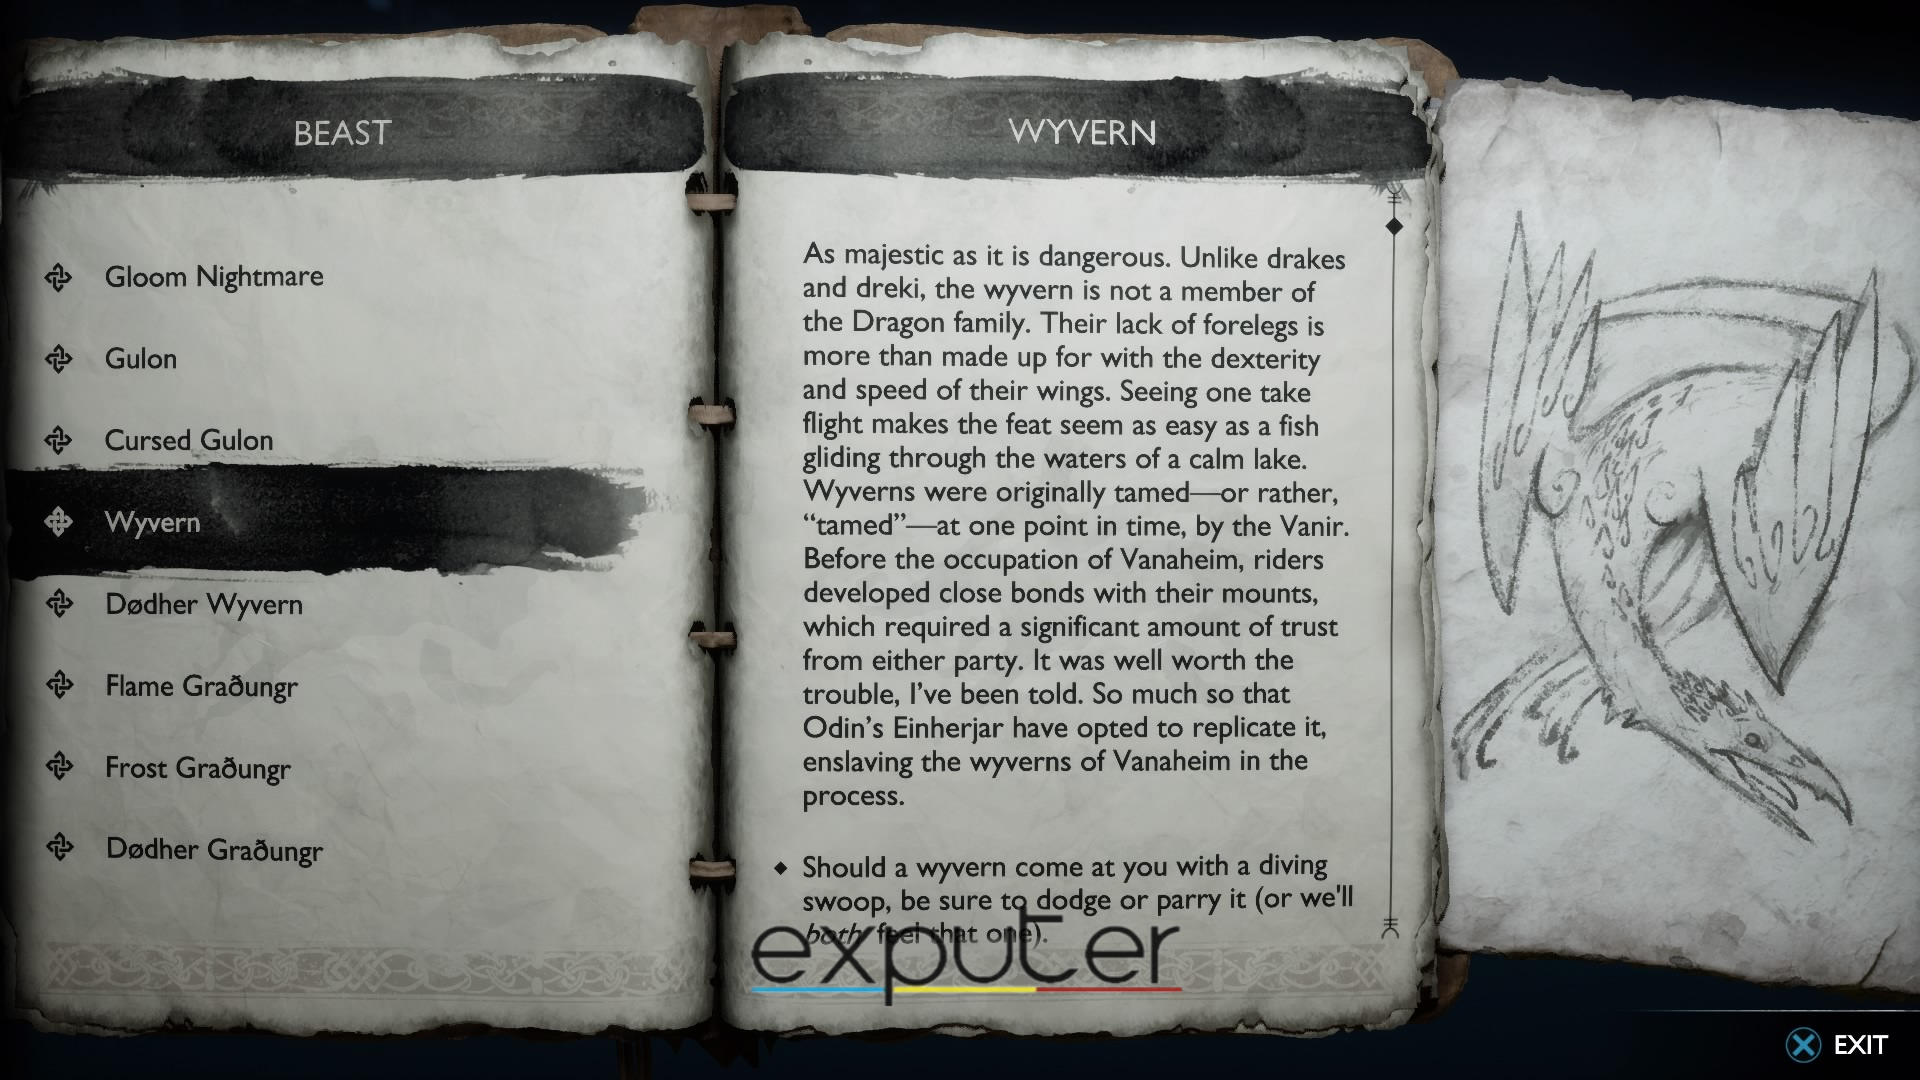
Dodher Wyverns are the only other type of Wyverns in the game that are usually found in Asgard. These creatures carry the Bifrost ability, meaning follow-up attacks will detonate on Kratos and cause massive damage.
Tatzelwurms
Tatzelwurms are a hybrid between dogs and fish that sink underground and suddenly jump out and attack. Despite their sneaky movement, they have low health and can easily be taken care of. They have an underground trail that shows where they are. When that trail is close to you, that means they’re ready to attack. Once they jump out, quickly block their attack with your shield and start pummeling them with your axe.
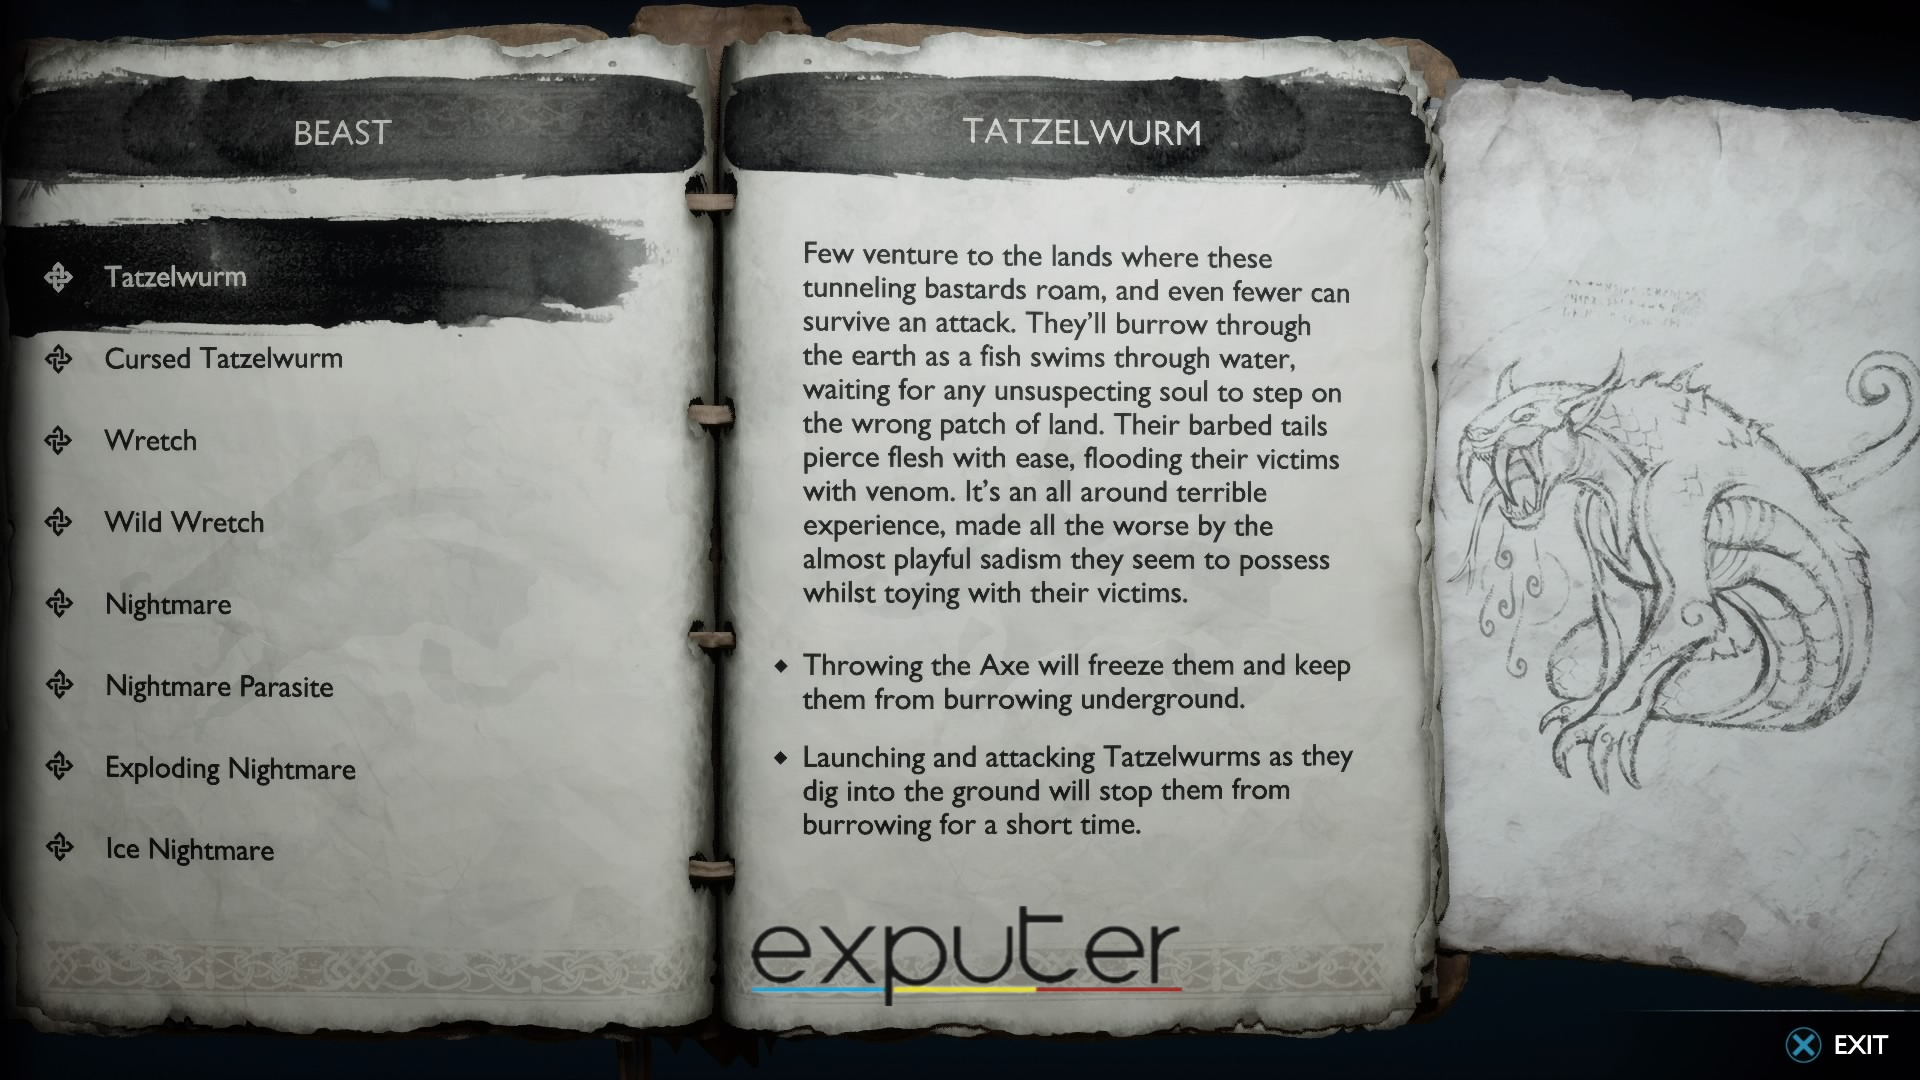
Tatzelwurms, along with their poisonous twins, the Cursed Tatzelwurms, are a good source for Beast scraps in God of War Ragnarok. You can find them in multiple realms like Vanaheim as well as Niflheim if you’re playing as Atreus.
Gradungrs
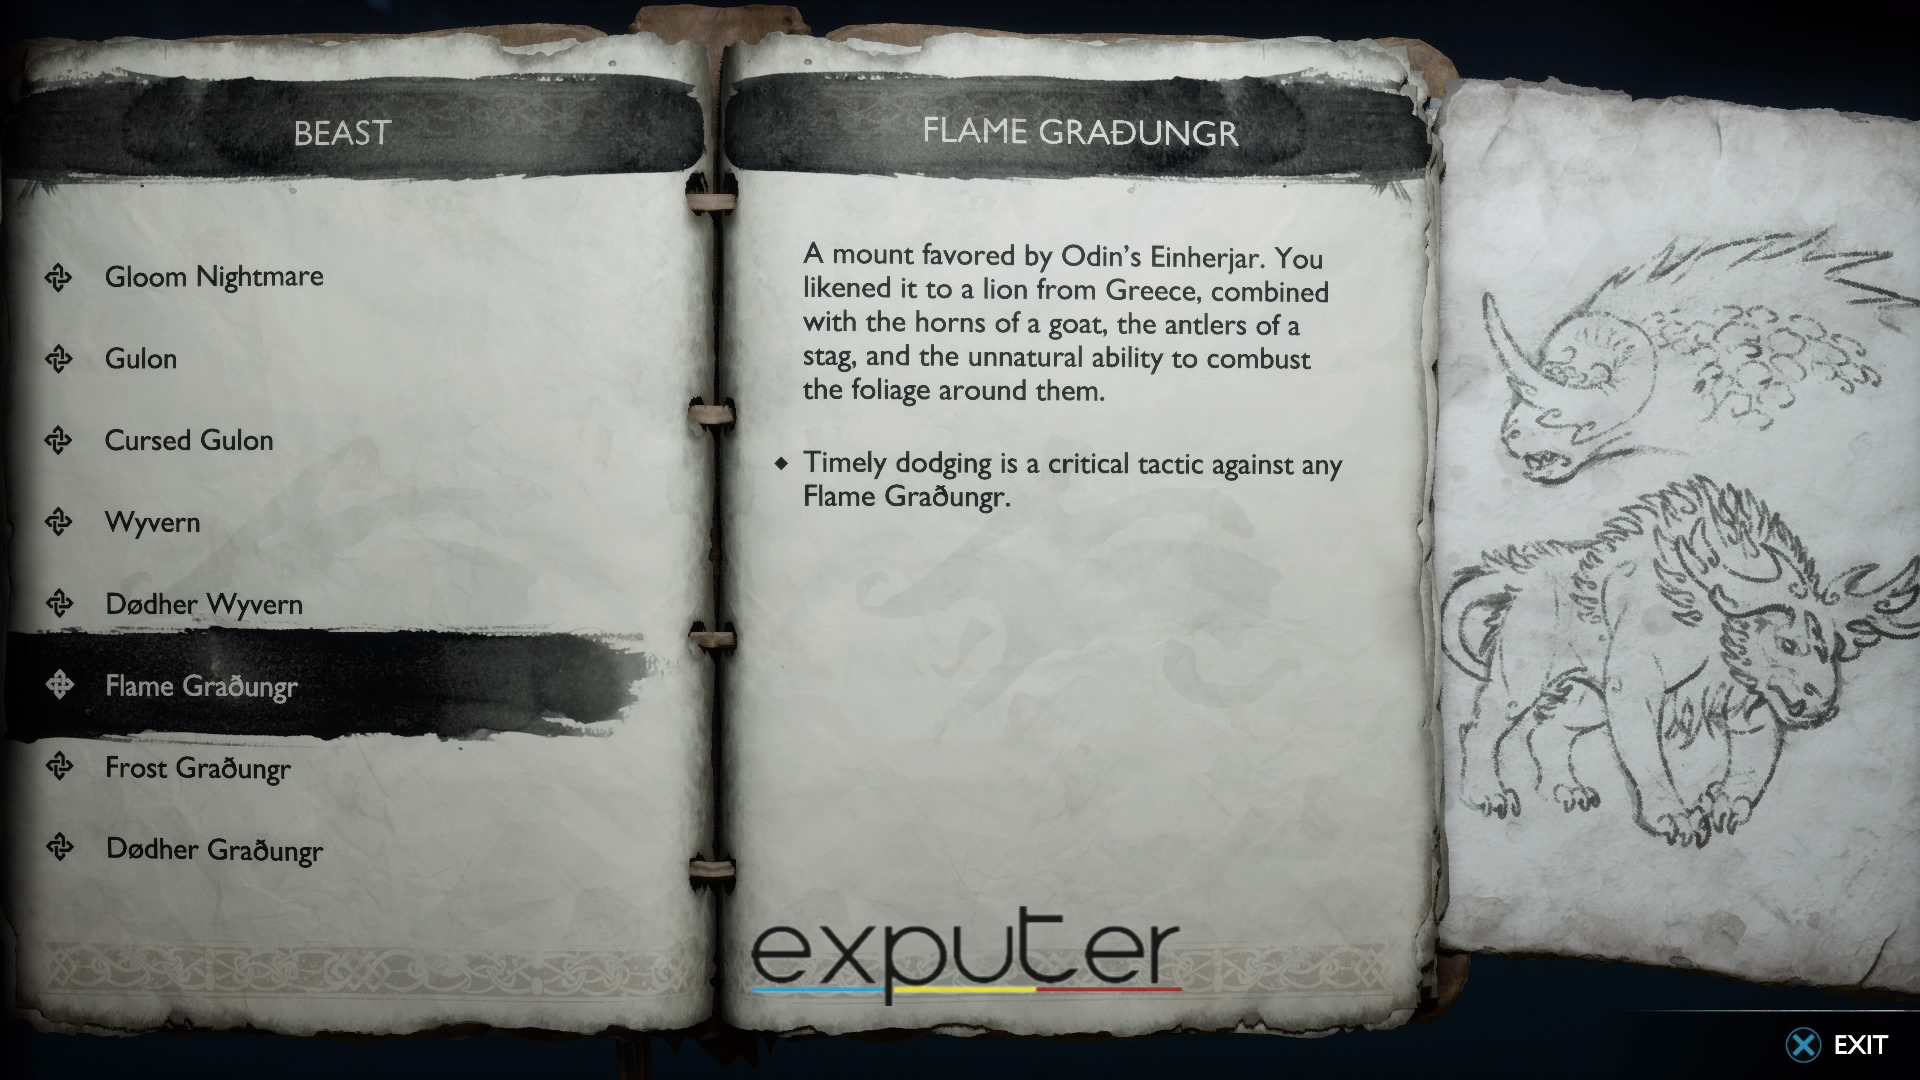
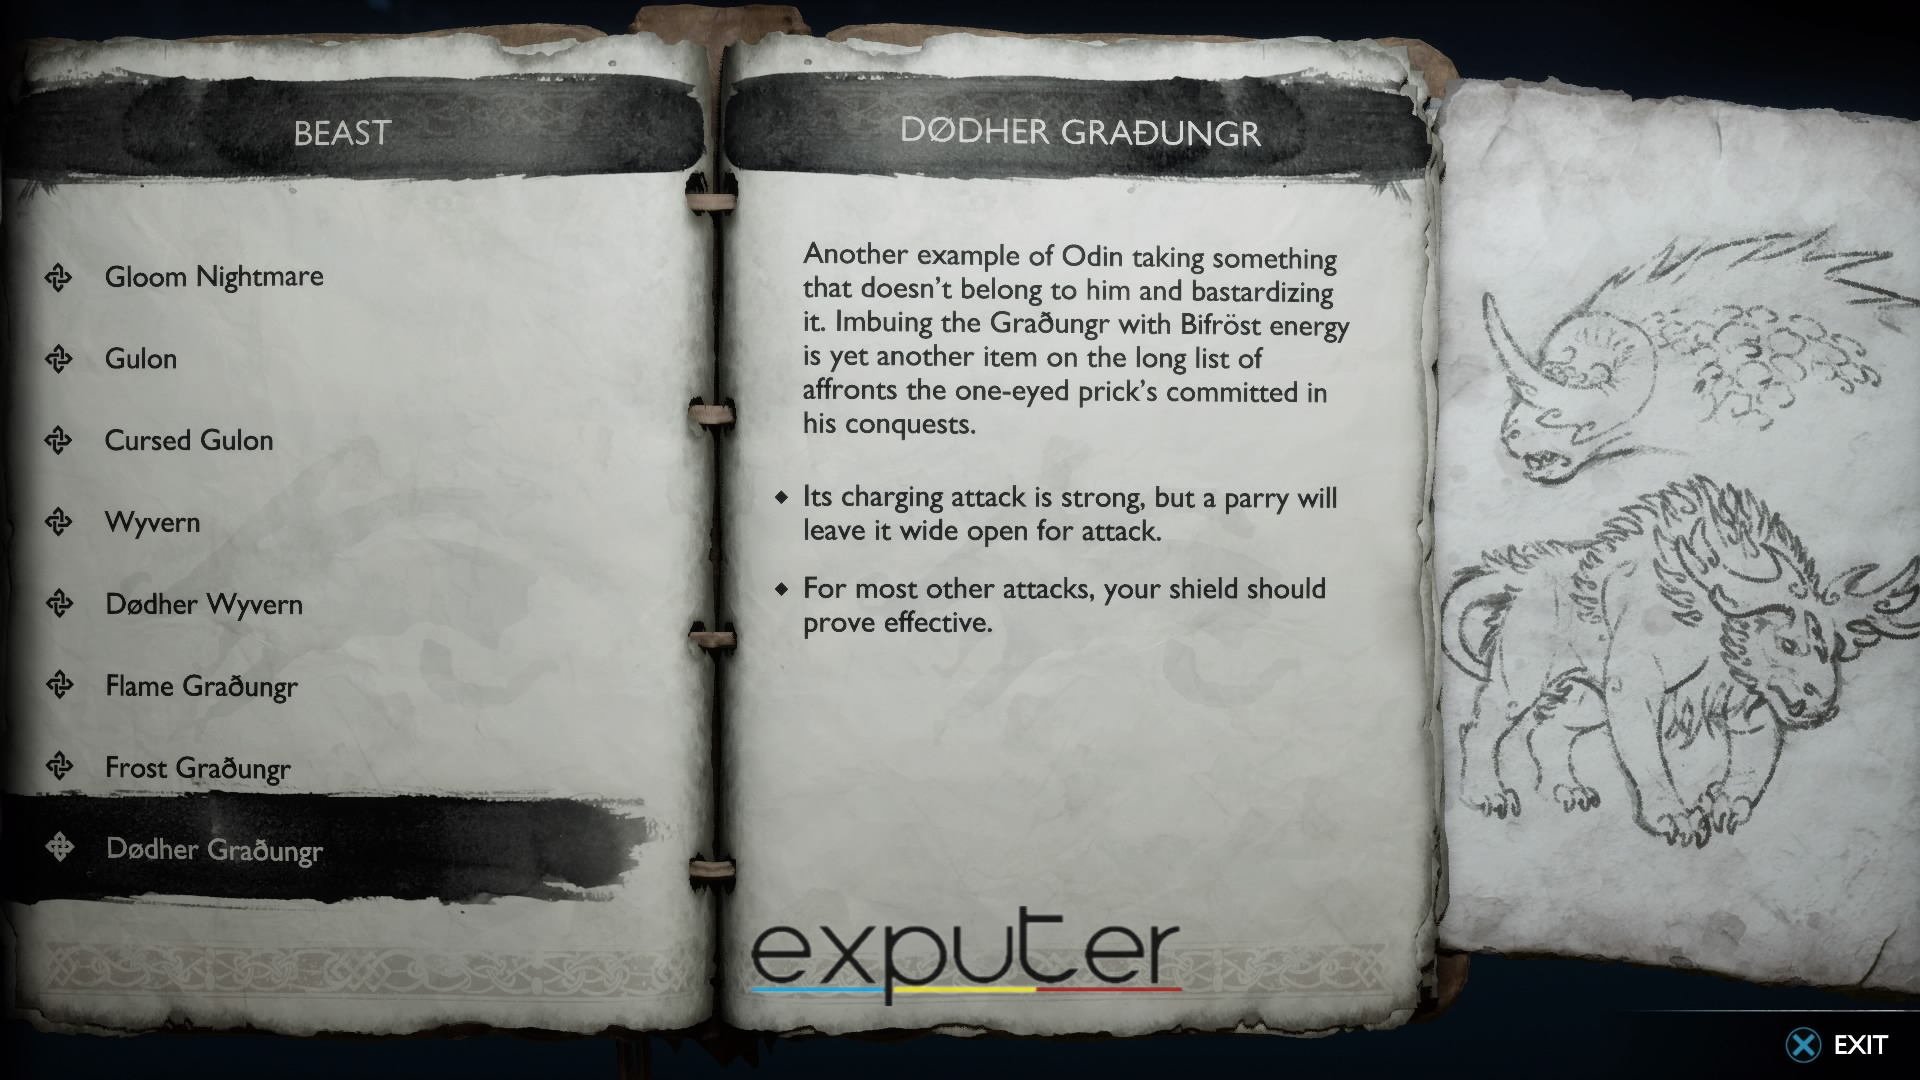
Finally, I move on to the tanky Gradungrs. These menacing bull-like creatures charge at you with full force, dealing a decent chunk of damage to you. They’re usually the main enemy type for any wave, and they give the highest number of beast scraps in God of War Ragnarok.
Gradungrs have a variety of types. At first, I have Flame Gradungrs that are resistant to fire and have an unblockable attack where they shoot flames through the ground toward you. Their resistance to fire means you’ll have to stick to your Leviathan Axe for them.
Secondly, I have Dodher Gradungr that are similar to Flame Gradungrs but instead shoot Bifrost and ice. They also have a Bifrost shield, which needs to be broken first to deal damage to them.
Finally, I have Ice Gradungrs, which, as their name suggests, are resistant to ice. Therefore, you should use the Blades of Chaos against them.
Legendary And Red Chests
Apart from slaying enemies, another way to get beast scraps in God of War Ragnarok is by exploring the world and opening the various chests across the map. Red chests are more common than legendary chests and have a larger chance of having beast scraps. You can find most of these while doing side quests and Favours. If you’re lucky, you might also find a few in Nornir Chests that are scattered throughout the realms.

Another important chest type to regularly check for beast scraps are the ones next to Brok and Sindri. Once you reach the two blacksmith dwarves, these chests will store the items and resources that you missed on your path. Sometimes, you might leave a few beast scraps lying around your trail, so these trusty chests will keep them instead for you to loot later.
What Can You Upgrade With Beast Scraps
Now that I’ve discussed where and how you can get beast scraps in God of War Ragnarok, it’s time to move on to its uses. These scraps are often used to upgrade accessories of Atreus or Freya to Tier 1 and Tier 2. You can later upgrade those skills to Tier 3 via Beast Bones, another important resource common among beasts. It’s important to remember that you can equip up to 3 accessories at a time, so choose your trio wisely according to your preferred playstyle.
Sonic Aftershock And Sonic Attunement
- Sonic Aftershock increases stun after using melee on Sonic-inflicted enemies.
- Sonic Attunement enhances Sonic Arrow status effects.
- Upgrade Sonic Aftershock to Tier 2 for 60 Beast Scraps.
- Upgrade Sonic Attunement to Tier 2 with 60 Beast Scraps.

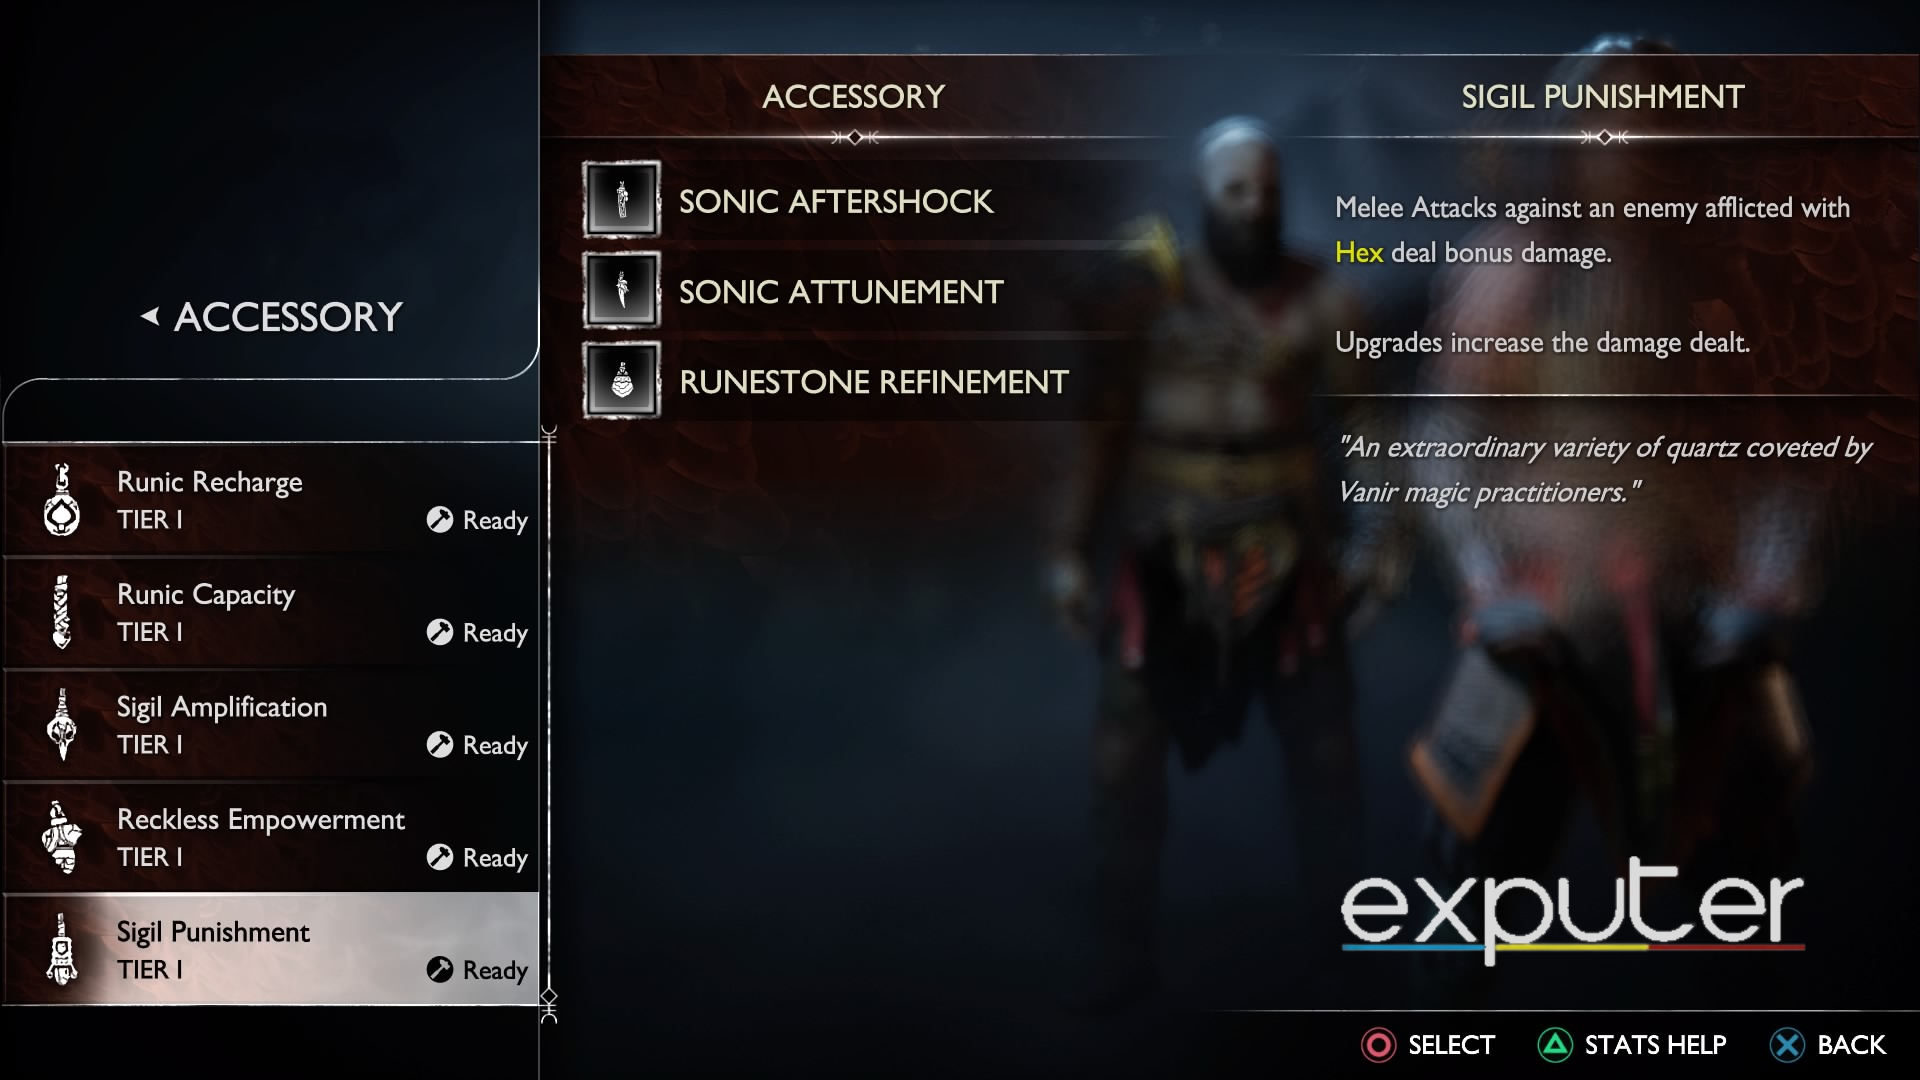
Sigil Punishment And Sigil Amplification
- Sigil Punishment boosts stun from melee attacks on hex-inflicted enemies.
- Sigil Amplification strengthens Sigil arrow effects.
- Upgrade Sigil Punishment to Tier 2 for 60 Beast Scraps.
- Upgrade Sigil Amplification to Tier 3 using Beast Scraps.
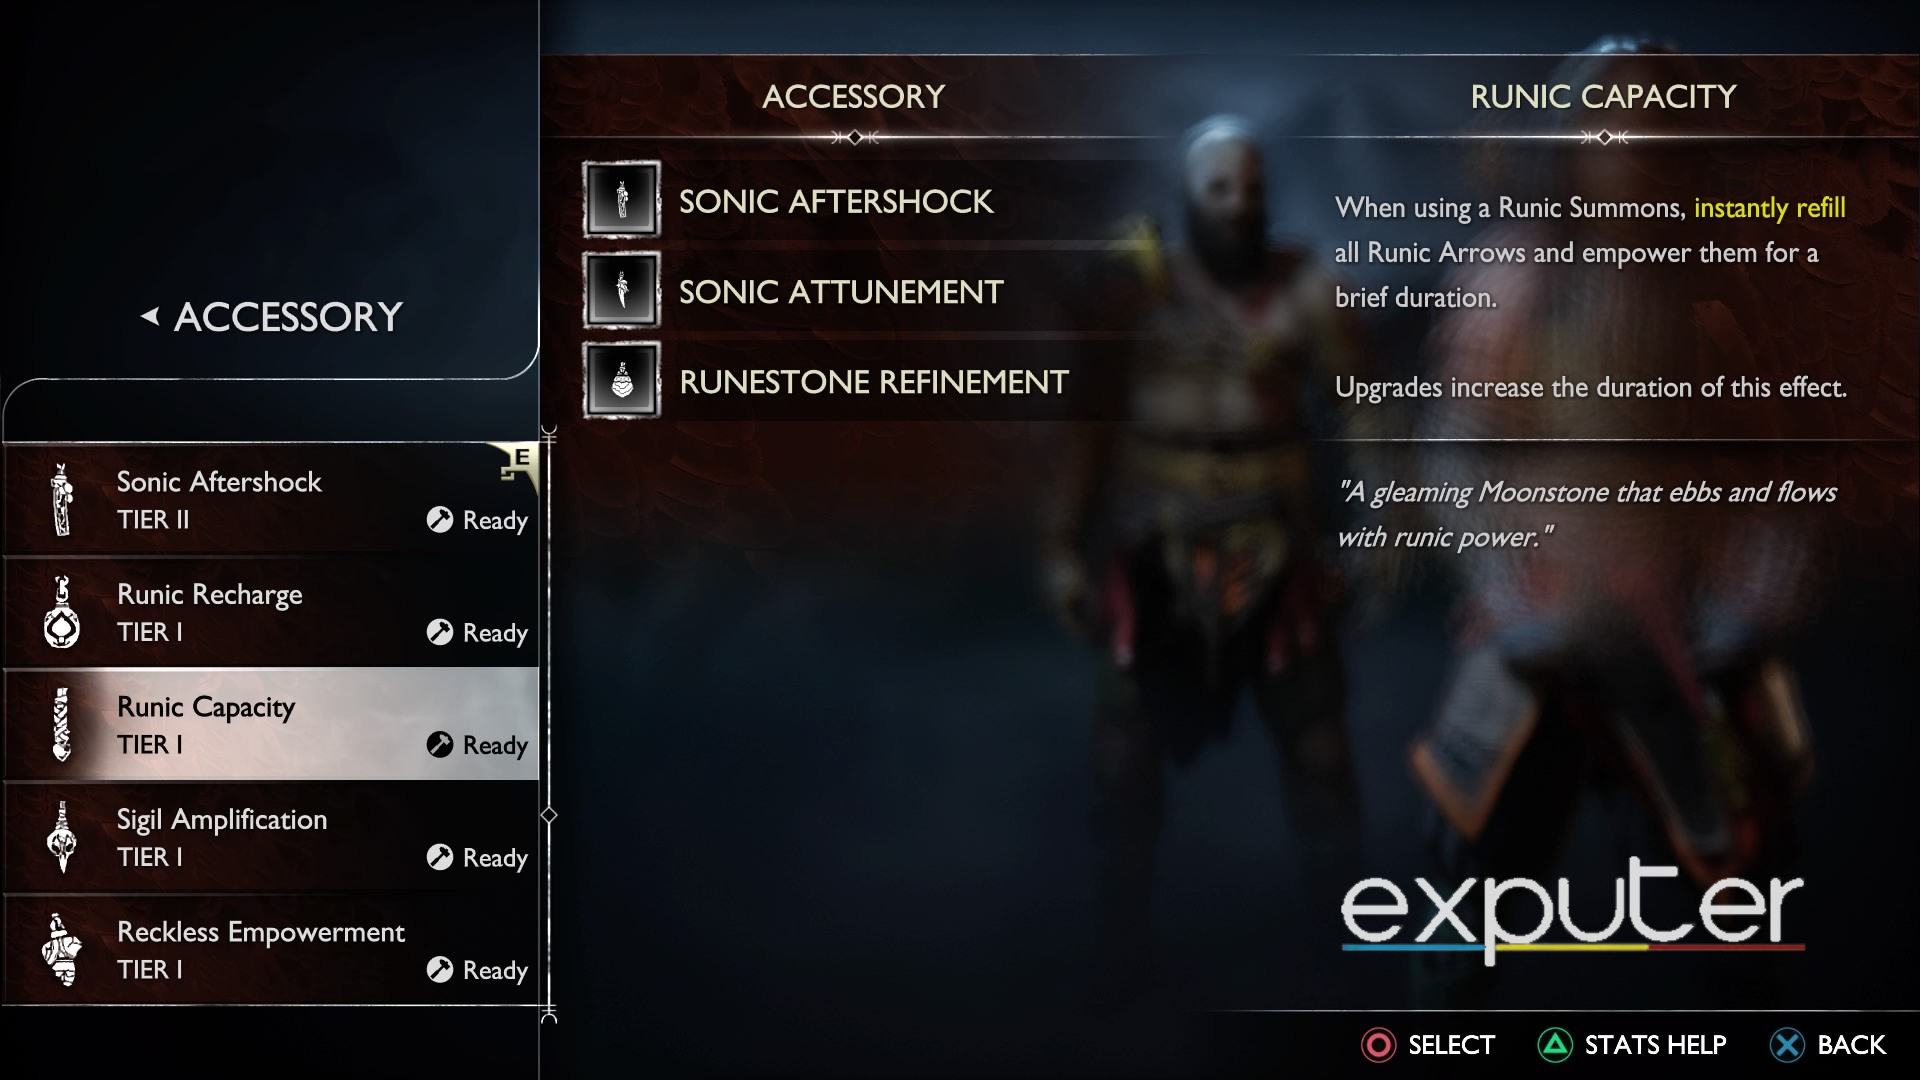
Runic Capacity, Runic Potency, And Runic Recharge
- Runic Capacity recharges all arrows and empowers them during Runic summons.
- Runic Potency enhances the effects of your arrows.
- Runic Recharge refills runic arrows after killing an enemy with runic arrows.
- Upgrade all three to Tier 2 with 60 Beast Scraps each.
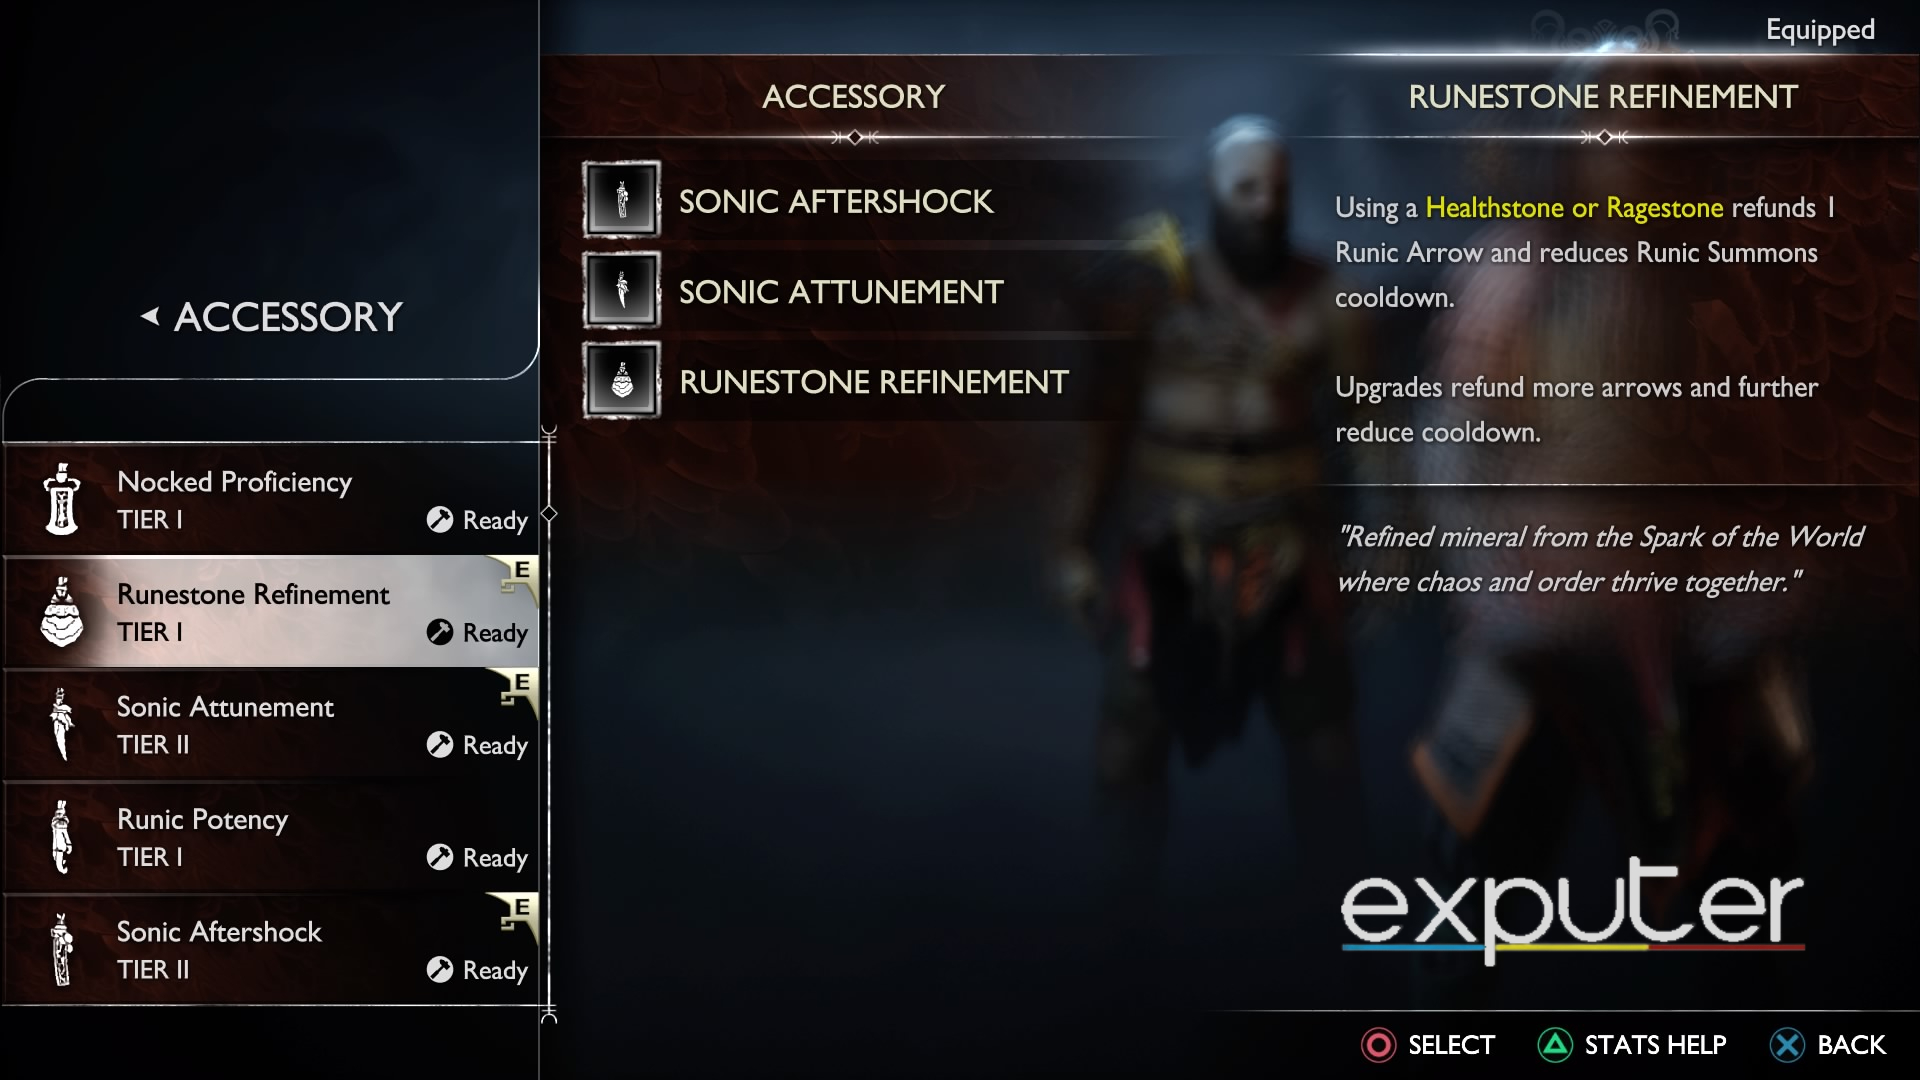
Runestone Refinement And Lethal Detonation
- Runestone Refinement reduces runic summon cooldown and grants a runic arrow when using Healthstone or Ragestone.
- Lethal Detonation causes enemies killed by runic arrows to explode, dealing area damage.
- Upgrade Runestone Refinement to Tier 2 for 60 Beast Scraps.
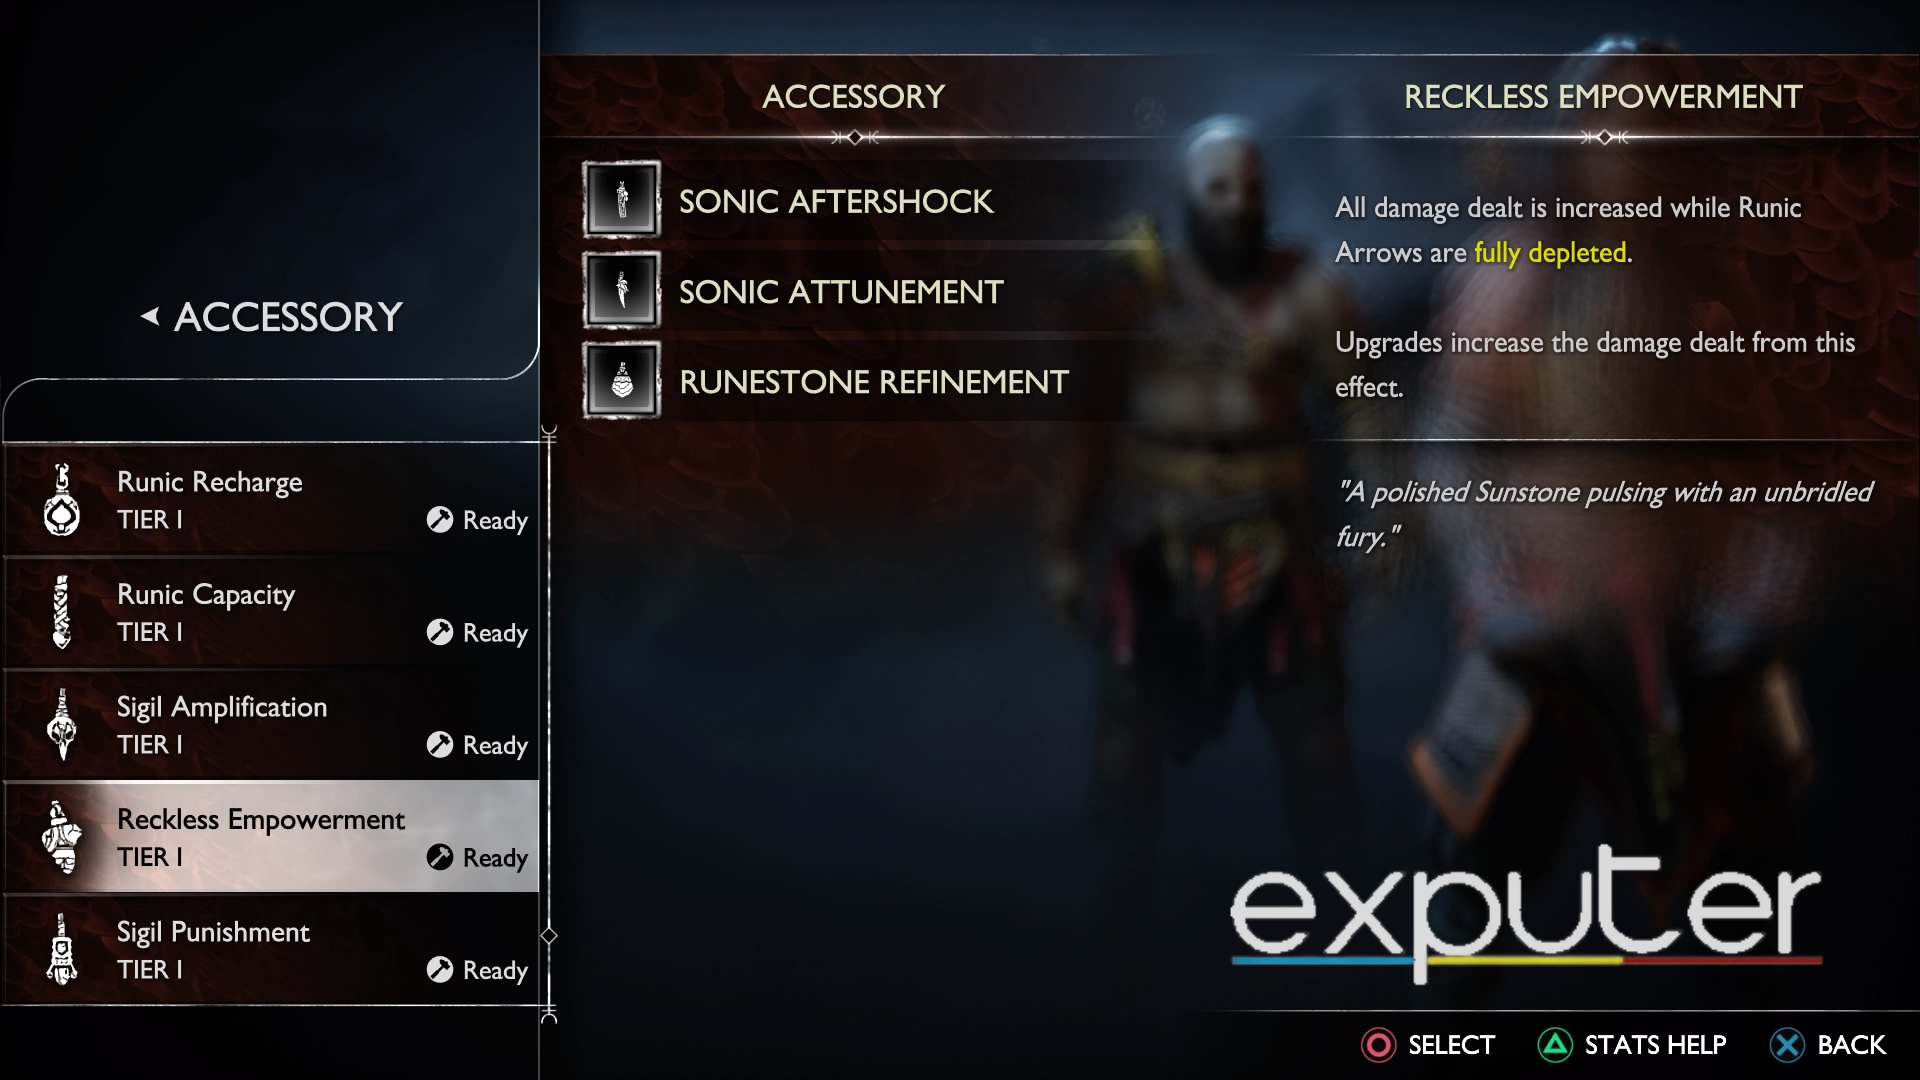
Reckless Empowerment And Rune-Engraved Release
- Reckless Empowerment increases damage when you have no arrows.
- Rune-Engraved Release boosts the damage of the first runic arrow from a full quiver.
- Upgrade both to Tier 2 with 60 Beast Scraps each.
Wrap Up
That wraps up my guide on Beast scraps and how to find them in GOW Ragnarok. If you regularly use arrows, then beast scraps are essential for your journey. They’re easy to get and can craft some insanely good accessories for you to use. Additionally, you could also use them for Kratos’ relics, which can further enhance your combat skills.
If you want to learn more about relics, here’s a guide on the best relics in God of War Ragnarok. You may also consider reading this guide on the best Atreus skills in case you want to improve Atreus’ combat expertise further. If you instead want to focus on both Kratos and Atreus, you can check out our guide on the best armor sets and how to get them so that you can enhance your physical attributes as well.
Thanks! Do share your feedback with us. ⚡
How can we make this post better? Your help would be appreciated. ✍