God of War Ragnarok has a staggering 30+ armor sets [including all characters] to choose from, which are all accessed through completing main story quests, favors, or side quests that are not available to players from the get-go.
To obtain the Giptumadr’s Armor in God of War Ragnarok, follow these steps:
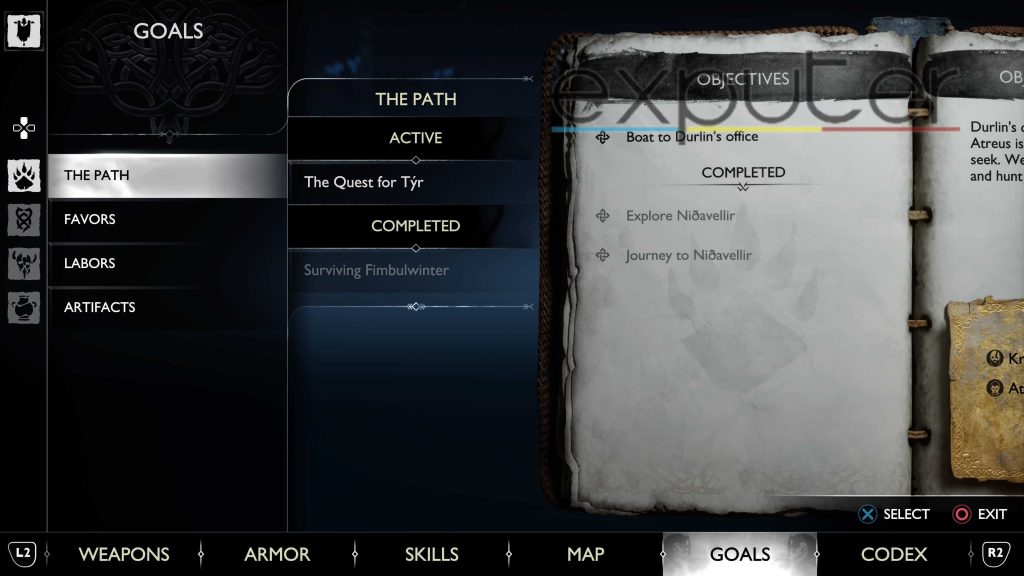
- Complete the Ninth Main Mission: You can acquire the Giptumadr’s Armor after completing the ninth main mission in the game called “World of Fate.”
- Visit Brok and Sindri: Once you’ve finished the “World of Fate” mission, head to Brok and Sindri, the game’s blacksmiths, to have them craft the armor for you.
- Crafting Costs: Crafting all three pieces of the Giptumadr’s Armor (Breastplate, Waistguard, and Gauntlets) will require a total of 20,500 Hacksilver.
Here are the unique abilities and attributes of each piece of the Giptumadr’s Armor:
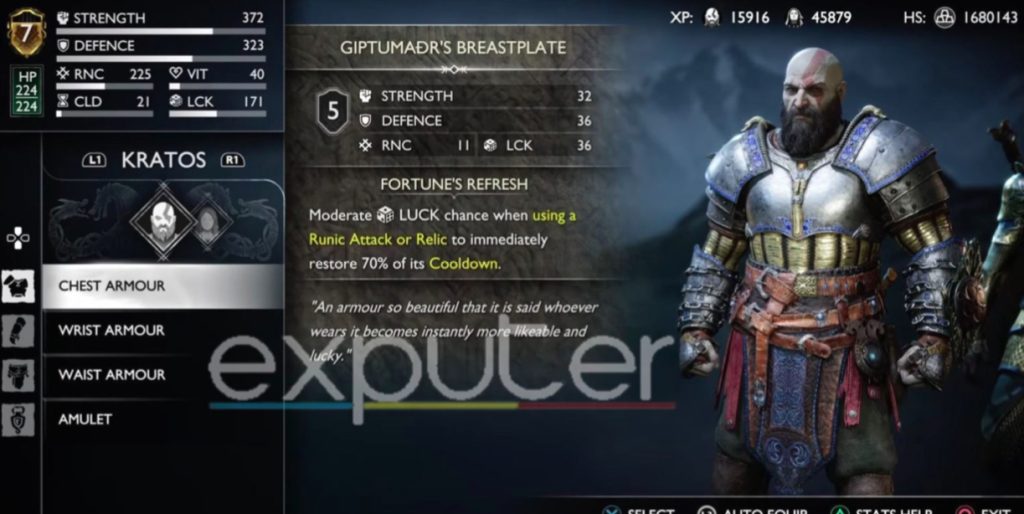
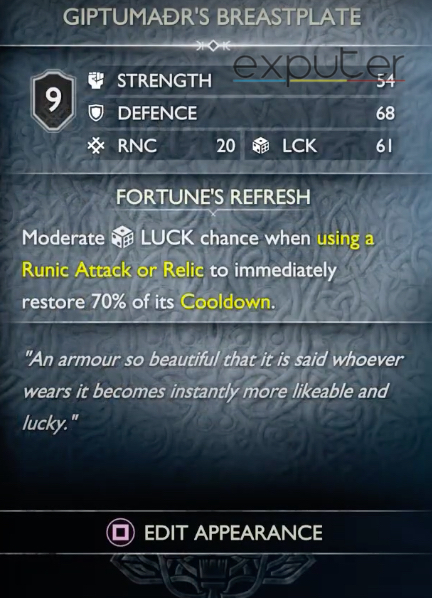
- Breastplate: This piece has a special ability that grants a chance to restore your Runic attack’s cooldown by 70 percent. The effectiveness of this ability depends on your Luck stat.
- Waistguard and Gauntlets: Both the Waistguard and Gauntlets have the potential to drop health stones or rage stones, depending on your Luck stat.
Note: Expect Spoilers Ahead if you haven’t progressed through the game.
How To Get Giptumadr’s Armor Set Pieces

In order to know how to get God of War Ragnarök Giptumadr’s Armor set, players will be able to get it once they are pretty familiar with the entire storyline. Because GOWR has 10+ main story missions, players will need to complete the ninth main mission.
After they’ve done the quest, you will be able to able to head over to Sindri and Brok’s workshop, from where you will be able to interact with them, and they will be able to help further you craft the armor set using hack silver. If you want a more detailed walkthrough on how to get it, you can refer to the below.
Giptumadr’s Armor
| Armor Piece Name | Strength | Defense | Runic | Luck | Perks / Buffs |
|---|---|---|---|---|---|
| Giptumadr's Breastplate | 32.0 | 36.0 | 11.0 | 36.0 | Fortune's Refresh |
| Giptumadr's Gauntlets | 43.0 | 0.0 | 7.0 | 23.0 | Fortune's Bounty I |
| Giptumadr's Waist Guard | 0.0 | 43.0 | 7.0 | 23.0 | Fortune's Bounty I |
With each complete armor set having 3 pieces, with the chest armor, wrist as well as waist armor, the Giptumadr’s Set is not unique to it. The set itself offers players a solid amount of strength, as well as luck distribution.
As its description tells the player, “an armor so beautiful that whoever wears it becomes instantly more likable and lucky”, is true, considering the way that it allows players to gain extra luck.
Giptumadr’s Breastplate
| Levels | Stats | Crafted / Upgraded / Purchased |
| Level 5 |
|
Crafted: Need 8,500 hacksilver |
| Level 6 |
|
Upgraded: Need 15,000 hacksilver and 2 Asgardian ingot |
| Level 7 |
|
Upgraded: Need 20,000 hacksilver and 4 Asgardian Ingot. |
| Level 8 |
|
Upgraded: Need 25,000 hacksilver, 5 Asgardian ingots, and 20 bonded leather |
| Level 9 |
|
Upgraded: Need 35,000 hacksilver, 40 bonded leather, and 2 Smouldering Embers. |
With the Giptumadr’s Breastplate in hand, players will be able to adorn it on their chest and protect themselves from any kinds of incoming attacks that are aimed at the chest.
The piece itself offers something known as Fortune’s Refresh to players, which essentially grants players the ability an increased luck chance whenever they are using a runic attack or relic, which will allow them to regain 70% of their cooldown, making it all the easier to take out enemies.
Giptumadr’s Gauntlets
| Levels | Stats | Crafted / Upgraded / Purchased |
| Level 5 |
|
Crafted: Need 6,000 hacksilver |
| Level 6 |
|
Upgraded: Need 10,000 hacksilver and 1 Asgardian Ingot |
| Level 7 |
|
Upgraded: Need 13,500 hacksilver and 2 Asgardian Ingot |
| Level 8 |
|
Upgraded: Need 16,500 hacksilver, 3 Asgardian ingot, and 10 bonded leather. |
| Level 9 |
|
Upgraded: Need 25,000 hacksilver, 20 Bonded Leather, and 5 Tempered Remnants. |
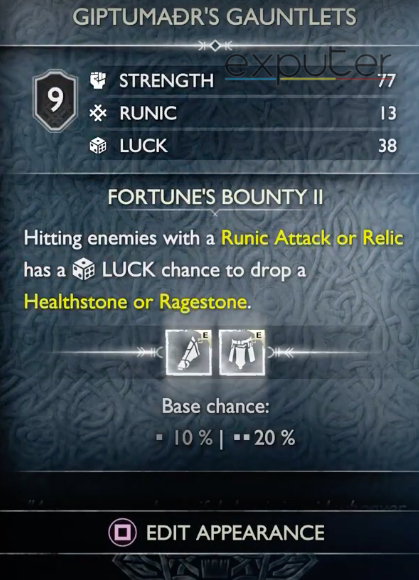
Next up, I have Giptumadr’s Gauntlets, which provide the player with even more strength, with it being 77, as well as a total of 13 runic, which is on the lower end, as well as a total luck of 38.
The gauntlets offer a Fortune’s Bounty II, which essentially allows players to launch an attack against enemies by using their runic attacks or their relics, and it will give them a luck chance whereby it might drop a healthstone or a ragestone.
Waist Guard
| Levels | Stats | Crafted / Upgraded / Purchased |
| Level 5 |
|
Crafted: Need 6,000 hacksilver |
| Level 6 |
|
Upgraded: Need 10,000 hacksilver and 1 Asgardian Ingot |
| Level 7 |
|
Upgraded: Need 13,500 hacksilver and 2 Asgardian Ingot |
| Level 8 |
|
Upgraded: Need 16,500 hacksilver, 3 Asgardian ingot, and 10 bonded leather. |
| Level 9 |
|
Upgraded: Need 25,000 hacksilver, 20 Bonded Leather, and 10 sparkling crystal.. |
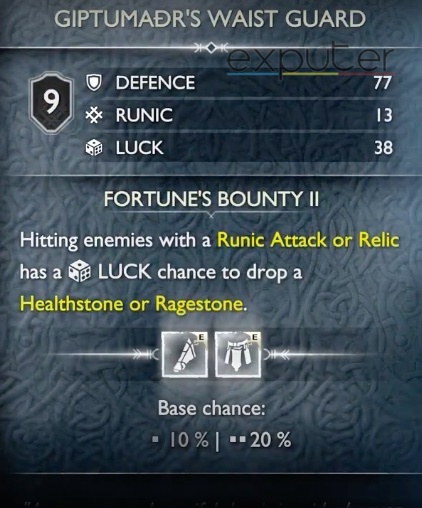
For the last piece, I have the Giptumadr’s Waist Guard, which, as the name suggests, will protect the players’ waist from all kinds of incoming attacks. The waist guard will provide players with a defense of 77, a runic of 13, as well as luck of 38.
The waist guard will also have the same Fortune’s Bounty II perk.
Giptumadr’s Armor Walkthrough In GOW Ragnarok
Major warning: considering the armor is acquired in the ninth main story mission, players will need to play through the first 9 chapters.
For the 9th quest, players will need to make their way over to Midgard, from where they will need to find the wolves at the kennel, open the gate, and then follow the wolves to Norns and track them.
Find the norns at the Well of Urd and then get rid of the Frost Phantom, and then leave the norns.
Up Next:
- God of War Ragnarok Lunda’s Armor
- God of War Ragnarok Best Relics
- God of War Ragnarok How To Heal
- God Of War Ragnarok Best Shields
Thanks! Do share your feedback with us. ⚡
How can we make this post better? Your help would be appreciated. ✍