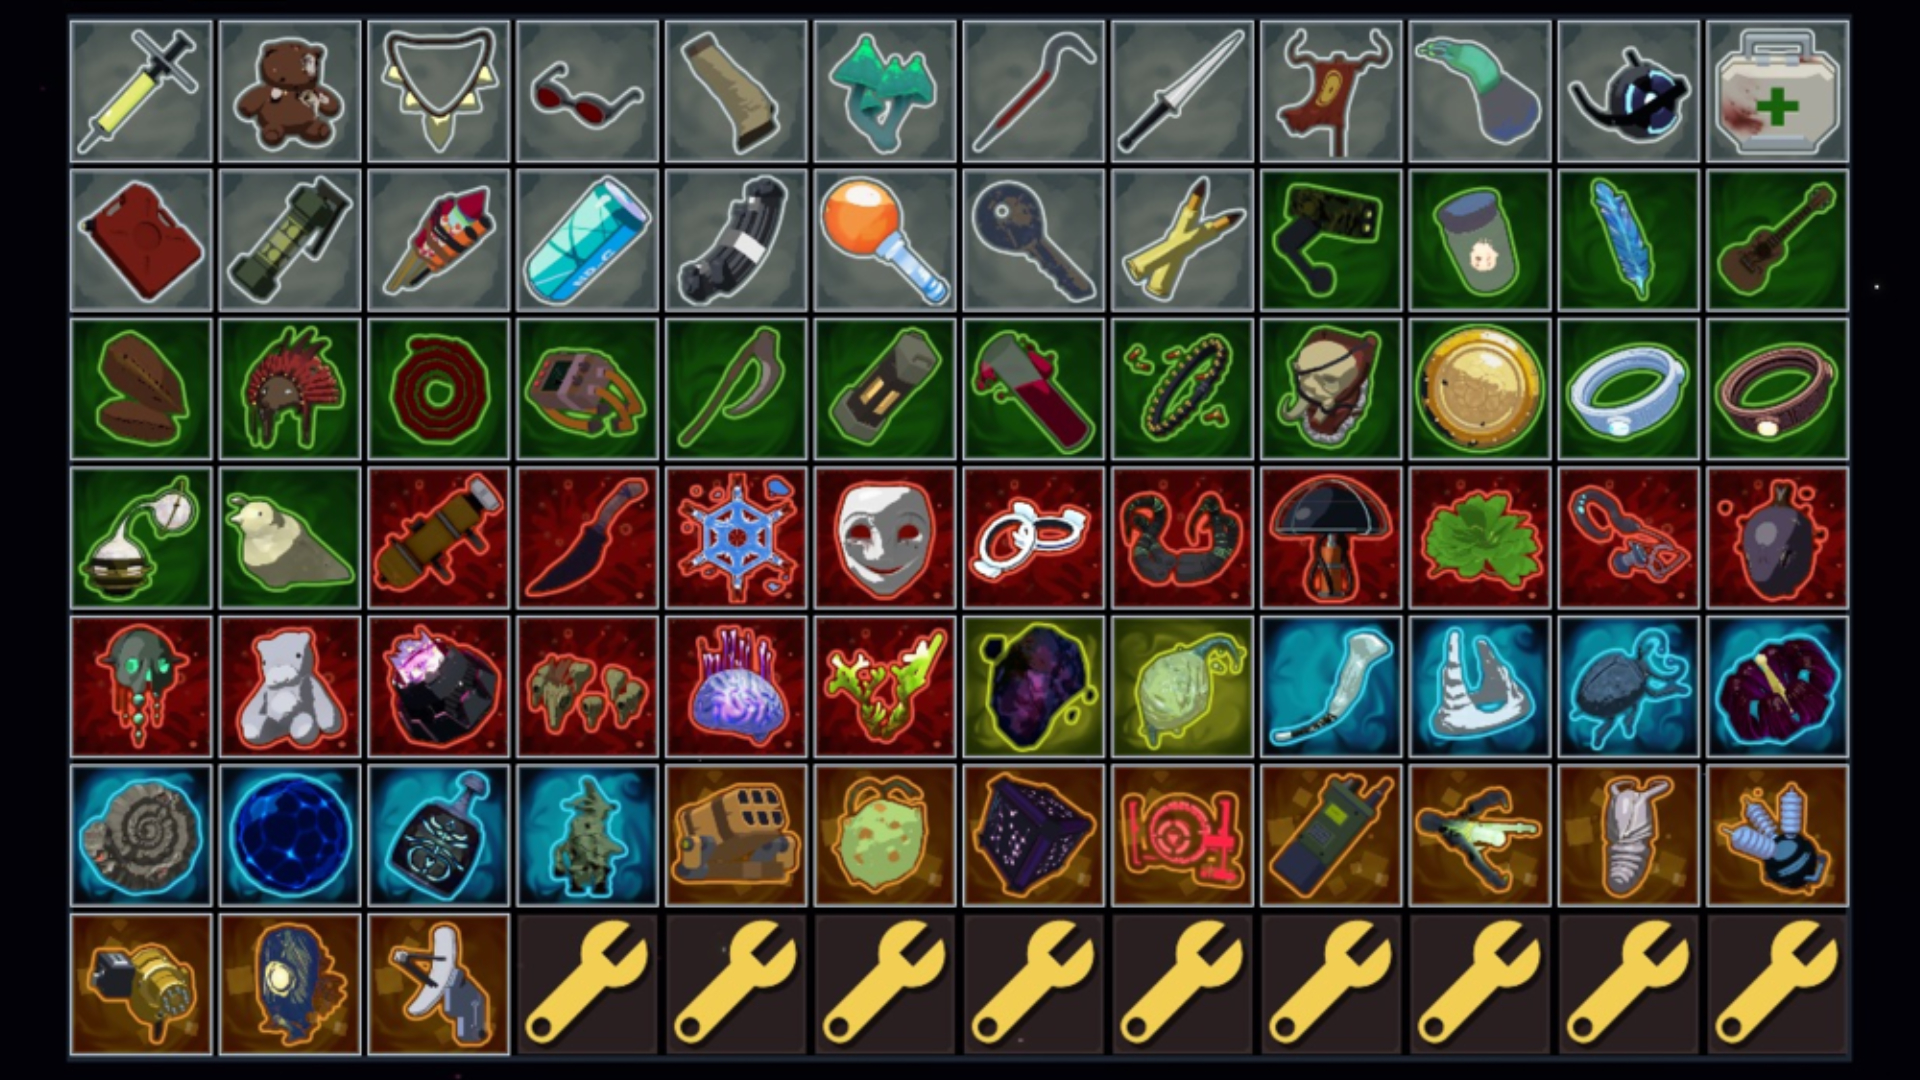
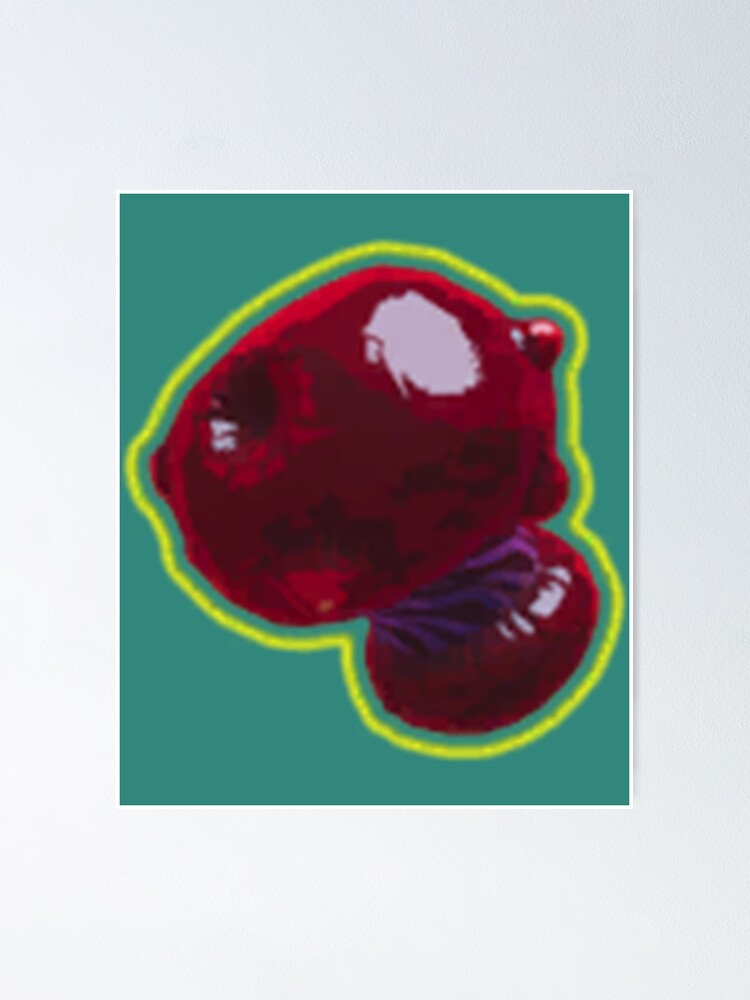
Items in Risk of Rain 2 are special collectibles that players can spawn while playing the game. Moreover, all the items have special features; players choose items according to their needs. Also, every item has a border color that represents them. In this guide, we will discuss the Risk of Rain 2 Yellow Items in detail with some useful tips.
- Yellow items can be acquired by beating the teleporter bosses. These items provide different buffs in the game. There are numerous yellow items in Risk of Rain 2.
Risk of Rain 2 Yellow Items:
- Halcyon Seed: Conquer Aurelionite at Gilded Coast to gain it. It assists in battling stronger foes.
- Irradiant Pearl: Obtain from a Cleansing pool by trading Lunar items, granting a 10% stat boost.
- Item Scrap, Yellow: Acquire from a Scrapper to use with an Overgrown 3D printer.
- Little Disciple: Dropped by Grovetender, it enables bonus attacks while sprinting and using skills.
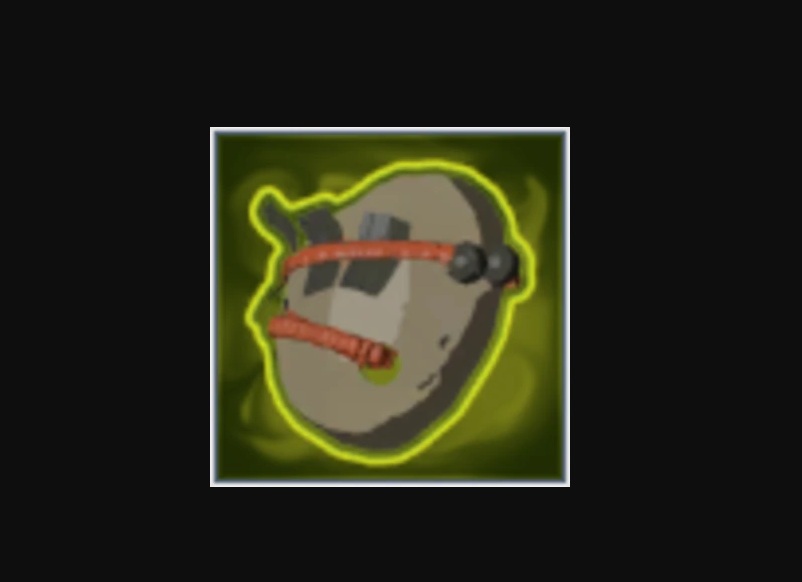
- Mired Urn: Collect from Clay Dunestrider to damage and slow enemies with a tar debuff.
- Artifact Key: Dropped in Bulwark’s Ambry during an Artifact Trial, useful for damage and interacting with Artifact Reliquary.
- Charged Perforator: Obtain from Overloading Worm for a 500% damage boost against flying monsters.
- Defense Nucleus: Vanquish Xi Construct Boss to get Alpha Construct, aiding progression.
- Empathy Cores: Defeat the Solus Control Unit to summon two Solus Probes every 30 seconds, dealing 100% extra damage.
- Genesis Loop: Conquer Wandering Vagrant to get health buffs and deal 6000% extra damage.
- Molten Perforator: Dropped by Boss Magma Worm, it spawns Magna balls, dealing 300% damage.
- Pearl: Exchange Lunar items at a cleansing pool to increase health by 10%.
- Planula: Obtain from Grandparent; it boosts health regeneration by 15HP per stack.
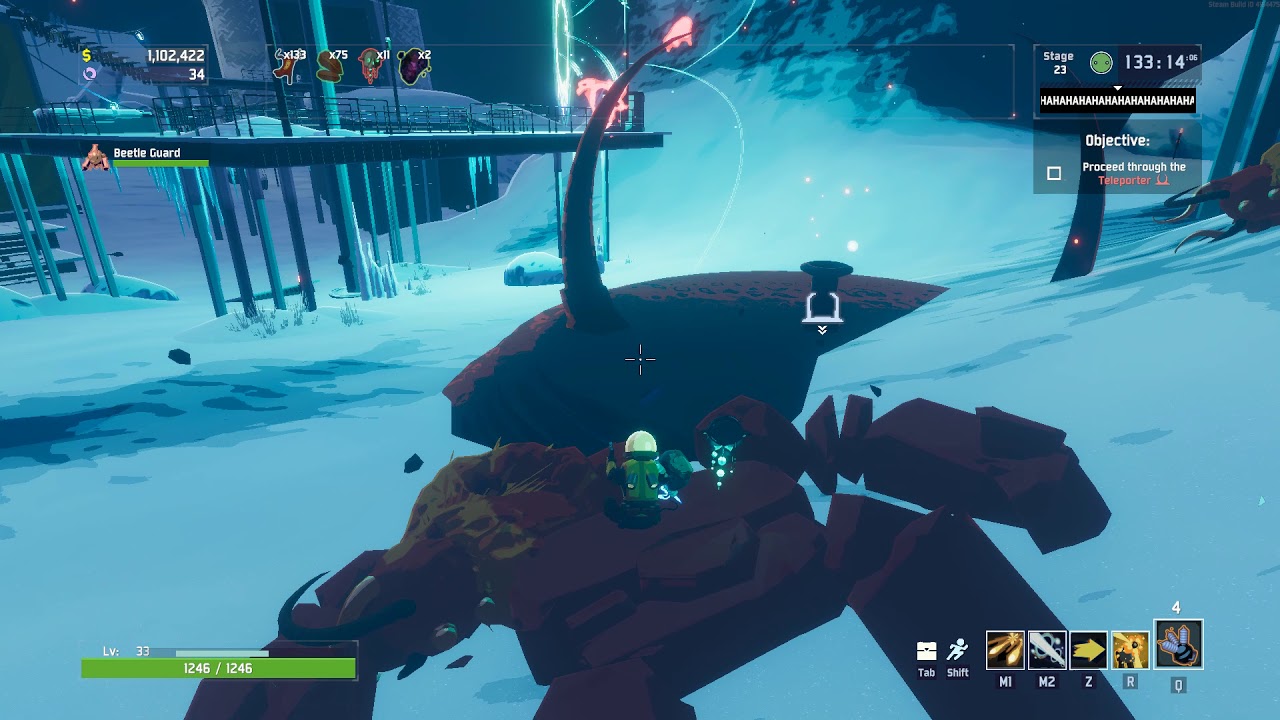
- Queen’s Gland: Acquire from the Beetle Queen, granting Beetle Guards for boss battles.
- Shatterspleen: Dropped by Imp Overlord, it provides a 5% critical chance strike.
- Titanic Knurl: Obtain from the Stone Titan, granting +40 HP and increased normal health regeneration by +1.6 HP.
What Are Yellow Items?
| Item | Dropped By {Bosses) | Effect |
|---|---|---|
| Halcyon Seed | Aurelionite | Temporarily allies with Aurelionite |
| Irradiant Pearl | Cleansing Pool (Lunar items exchange) | Increases all stats by 10% |
| Item Scrap, Yellow | Dropped by enemies, obtained from Scrapper | Used for crafting |
| Little Disciple | Grovetender | Shoots homing wisps when sprinting |
| Mired Urn | Clay Dunestrider | Drains health from nearby enemies, heals holder |
| Artifact Key | Bulwark's Ambry Artifact Trial enemies | Used to damage Artifact Reliquary |
| Charged Perforator | Overloading Worm | 10% chance to summon lightning on enemies |
| Defense Nucleus | Xi Construct | Creates Alpha Constructs upon killing elites |
| Empathy Cores | Solus Control Unit | Summons Solus Probes to attack enemies |
| Genesis Loop | Wandering Vagrant | Causes an explosion at low health |
| Molten Perforator | Magma Worm | 10% chance to spawn magma balls on hit |
| Pearl | Cleansing Pool (Lunar items exchange) | Increases maximum health by 10% |
| Planula | Grandparent | Heals 15 HP on taking damage |
| Queen's Gland | Beetle Queen | Summons Beetle Guard allies |
| Shatterspleen | Imp Overlord | Adds critical strike explosion on bleed deaths |
| Titanic Knurl | Stone Titan | Increases HP and health regeneration |
Yellow items are also known as Boss or Planet items in RoR2. These are rare items and can only be achieved after defeating Teleporter Bosses. Each will represent a particular signature or some characteristics of the related boss.
1. Halcyon Seed
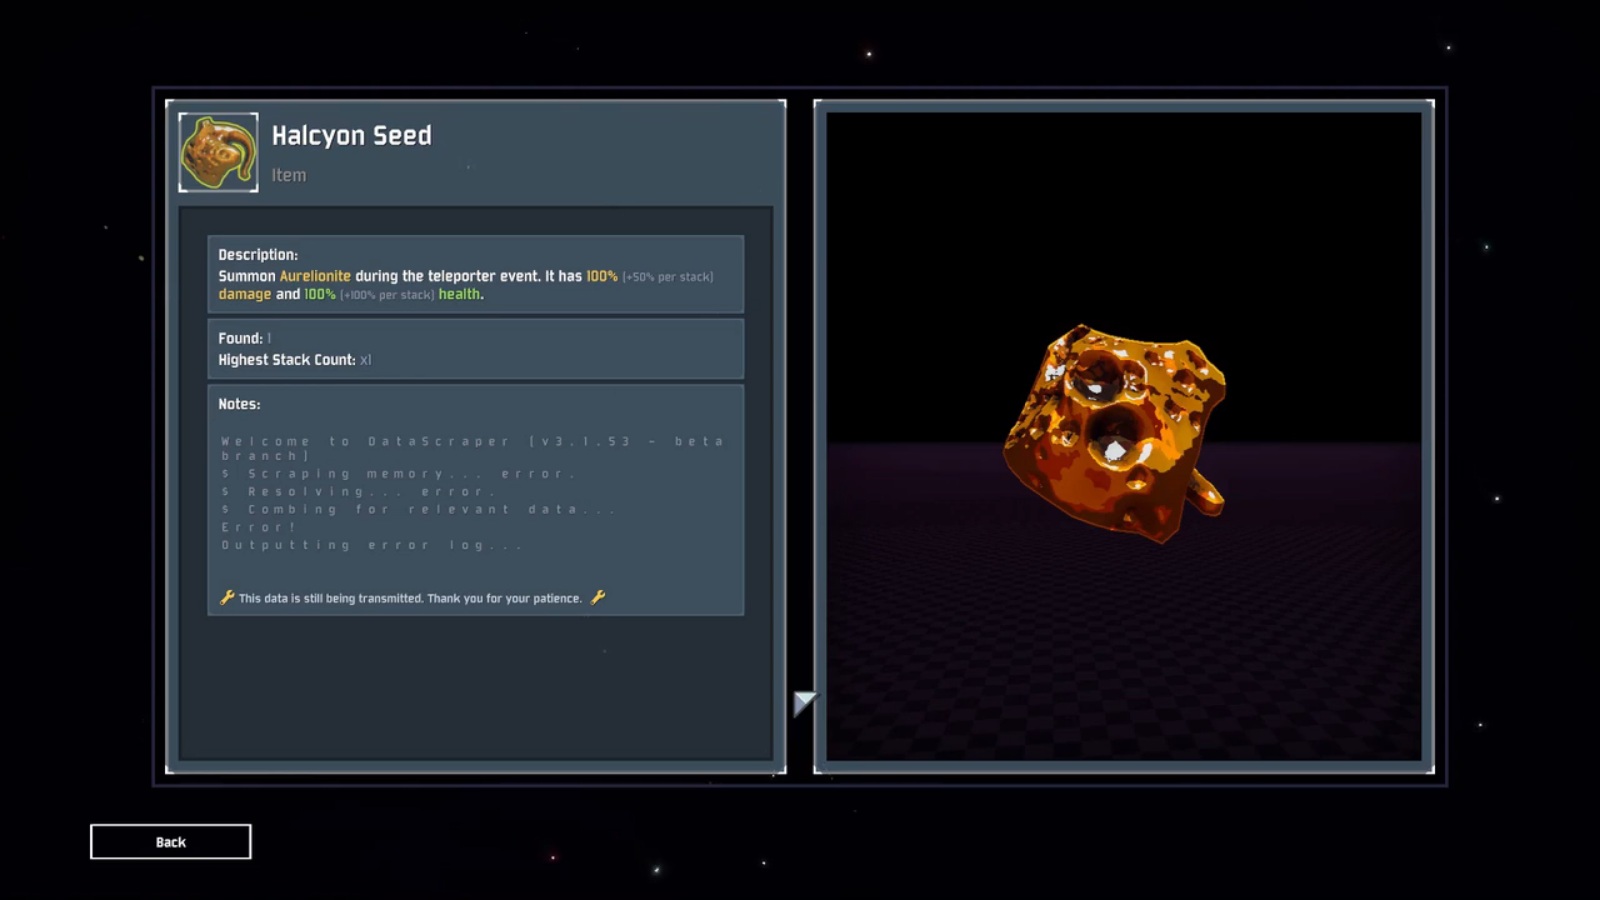
| Dropped by (Bosses) | Aurelionite |
| Effects | Temporarily becomes allies with Aurelionite |
To get Halcyon Seed, you have to defeat Aurelionite at Glided Coast. If you start a Teleporter Event, you will lose Halcyon seed, and later, Aurelionite will spawn as your ally. Until the Teleporter is charged, the boss will continue to fight for the player. Afterward player gets their Halcyon seed back when the Aurelionite is dead.
Stacks of the item are based on the total amount players have combined, which is similar to Lepton Daisy. After the first Halcyon Seed, the Boss gets an additional 50% damage and 100% health. Moreover, if you are fighting the final boss in phase 4, Aurelionite will be there to help you.
2. Irradiant Pearl

| Dropped by (Bosses) | Cleansing Pool (Lunar items exchange) |
| Effects | Enhance every stats by 10% |
The yellow item Irradiant Pearl was introduced in the Hidden Realms update. Players can acquire this item from a Cleansing pool but have to exchange the Lunar items. The perk of having the Irradiant Pearl item is that the holder’s stats are increased by 10%.
Due to the rarity of Lunar items and the scarcity of Cleansing pools, Irradiant Pearl is a rare find. It can’t be obtained via the Recycler with boss items, nor when the Artifact of Command is active. Irradiant Pearl boosts base armor, providing 2 armor to survivors like Loader, but those without base armor won’t benefit from it.
3. Item Scrap, Yellow
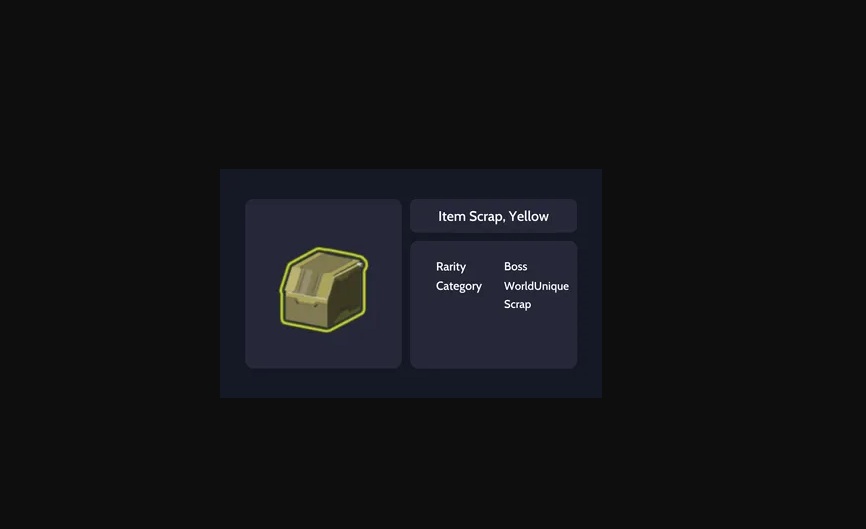
| Dropped by (Bosses) | Dropped by opponents, gain from Scrapper |
| Effects | Used for crafting |
This item doesn’t have much use, but while using an Overgrown 3D printer, the scrap will be prioritized and also consumed. Also, Item Scrap, Yellow can be acquired from a scrapper.
4. Little Disciple
| Dropped by (Bosses) | Grovetender |
| Effects | When sprinting, it shoots homing wisps |
Little Disciple is a yellow item added in Scorched Acres Update; Grovetender drops it. If the holder of this item is sprinting, they will shoot homing wisps at enemies, causing 300% damage. At a proc coefficient of 1.0, these wisps have a range of 40m.
The item is handy for survivors with Agile Keywords on their skills, like Huntress. This allows them to sprint quickly while using skills and achieve bonus attacks from the Little Disciple. However, Engineer’s Turrets don’t have an advantage with the item, as they don’t sprint.
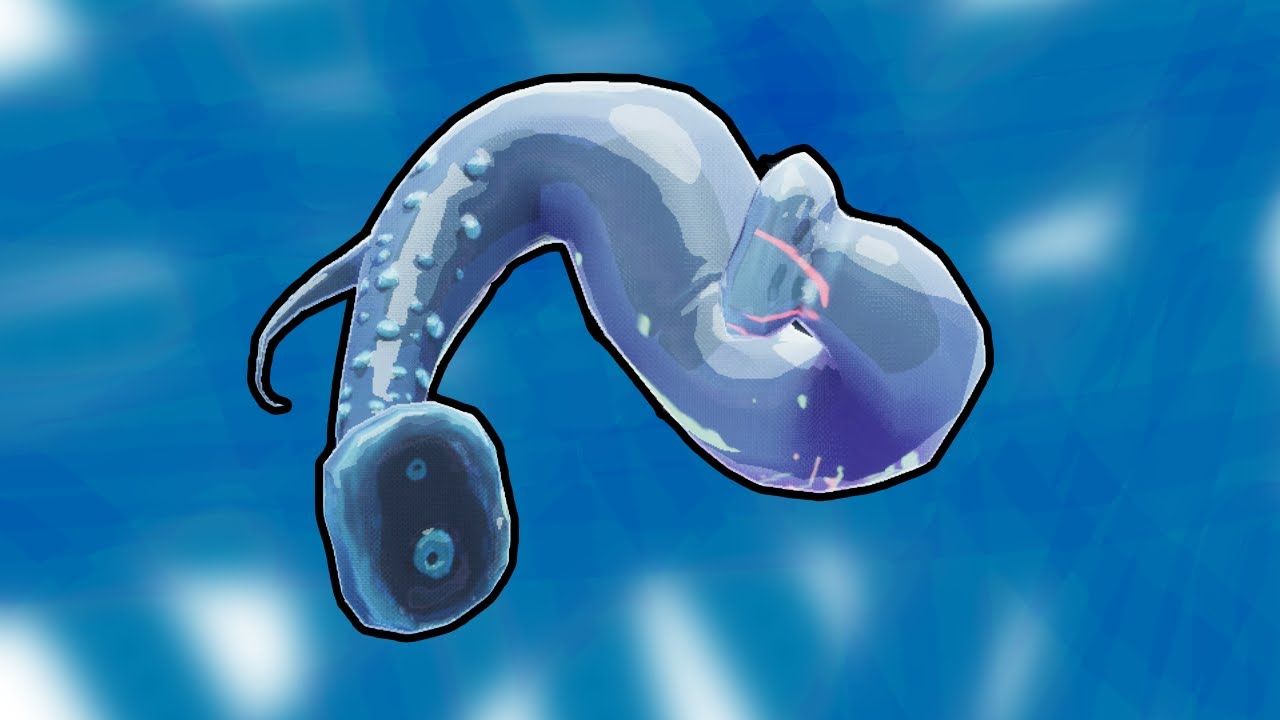
5. Mired Urn
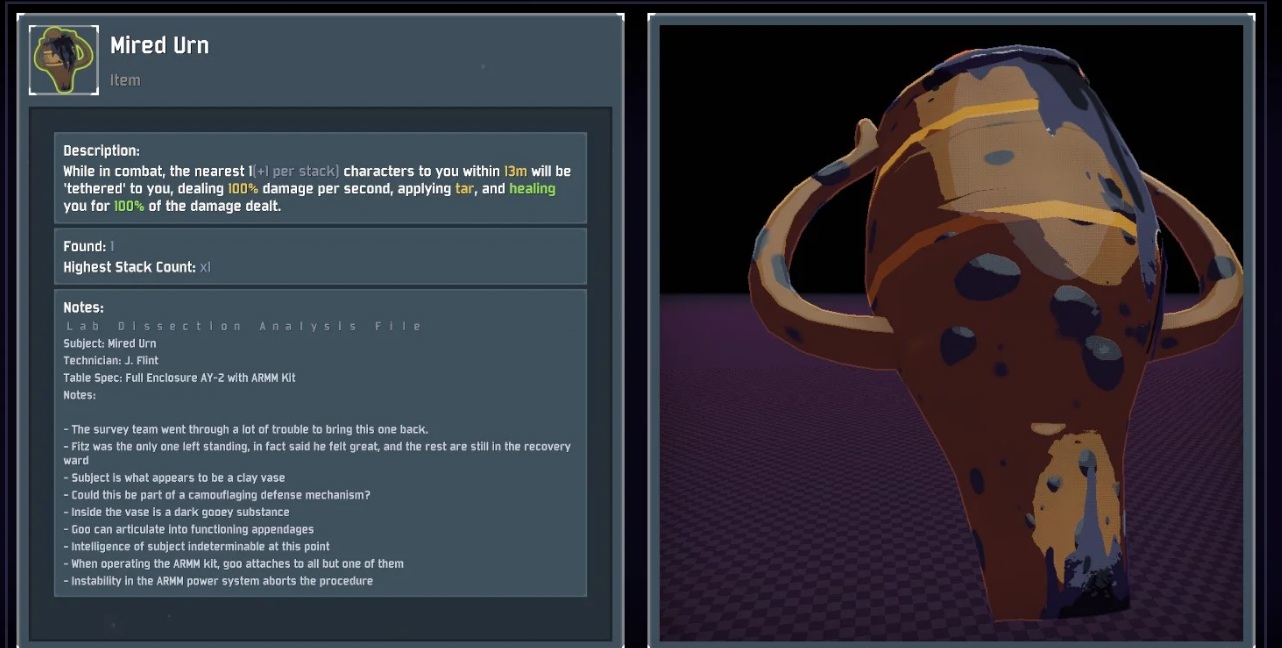
| Dropped by (Bosses) | Clay Dunestrider |
| Effects | Completely drain the health of any nearby enemies |
Clay Dunestrider drops the Mired Urn in Risk of Rain 2. If the enemies are near to the player holding this item, a tendril of tar will come from them to the enemy. The Tendril causes Tar debuff, which reduces the speed of movement of an enemy.
Moreover, it continuously damages them 100% per second and heals the holder. The number of Tendrils that can be activated depends upon the number of Mired Urns the player has.
Survivors that are close to enemies can use the item effectively, survivors such as Mercenary, Acrid, and Loader. Moreover, Engineers can allow their turrets to drain the health of enemies. Players can also combine Mired Urn with Focus Crystal to increase the damage and health restoration.
6. Artifact Key
| Dropped by (Bosses) | Bulwark’s Ambry Artifact Trial enemies |
| Effects | Cause major damage to Artifact Reliquary |
This Boss item gets dropped by foes in Bulwark’s Ambry, while an Artifact Trial. Moreover, these Artifact Key item is used to damage and interact with the Artifact Reliquary. All the other ways of damaging will not work on Artifact Reliquary.
When we use it, the player’s inventory containing all Artifact Keys gets consumed, and it stops them from stockpiling them. You can collect the item after defeating Bullwark Ambry’s boss and has 101 ID.
The chances of dropping Artifact Key aren’t affected by the Purity or 57 Leaf Clover. Moreover, the item will drop even when the Artifact of Sacrifice is disabled. Artifact of Command has no effect on this item. You cannot convert the item into anything other than Artifact Key.
7. Charged Perforator
| Dropped by (Bosses) | Overloading Worm |
| Effects | The chance of Summon lightning on opponents enhance by 10% |
The Overloading Worm drops this Yellow item. Holder of Charged Perforator item, while fighting enemy, has a 10 percent chance that lightning will strike opponents and damage 500% more than total damage. Moreover, the lighting strike is very similar to the Royal Capacitor, unfortunately, the enemy can avoid the damage if they are quick.
While fighting with a flying monster, the Charged Perforator is very useful; the lightning strike will immediately kill them. Sometimes, it is hard to inflict damage upon airborne monsters, and therefore, this item comes in handy. The item also gets corrupted by Newly Hatched Zoea.
8. Defense Nucleus

| Dropped by (Bosses) | Xi Construct |
| Effects | Upon killing the elites, it creates Alpha Constructs |
To acquire this yellow item, you must defeat Xi Construct Boss. If you have a Defense Nucleus item and you kill an elite monster, you will receive Alpha Construct that will help you progress in-game. However, it is limited to only +4 per stack and gets altered by Newly Hatched Zoea.
Remember that Alpha Constructs created by the yellow item can become Void Infester and will not help survivors anymore. However, since they are allied with Alpha Constructs, they are extremely strong. If the item is given to the Engineer’s turrets, then every turret can spawn up to 4 extra Alpha constructs per every Defense Nucleus.
9. Empathy Cores
| Dropped by (Bosses) | Solus Control Unit |
| Effects | To attack the enemies, it summons Solus Probes |
You get Empathy Cores by Killing the Solus Control Unit. With the help of this item, you can summon two Solus Probes every 30 seconds, one with a green color and the other with a red color. They will attack enemies with a laser beam, causing 100% extra damage.
Queen’s Gland can spawn allies such as Drones, turrets, other players, and minions. If you activate the Artifact of Swarms, instead of two, you can spawn 4 probes. Unfortunately, this yellow item cannot be inherited by Engineer’s turrets.
10. Genesis Loop
| Dropped by (Bosses) | Wandering Vagrant |
| Effects | When at weak health, it’ll cause massive explosion |
To get the Genesis Loop yellow item, you must defeat Wandering Vagrant. It helps when your health is 25% of the max health; this item will cause a 100m explosion that will damage up to 6000%. It will kill all the nearby enemies, similar to Vagrants’ signature attacks.
While the explosion is charging, it would be best for the player to go to the player where they can damage most enemies. Fortunately, Old Warn Stealthkit helps you in this regard; it offers you extra speed. Moreover, engineers can have a great advantage using the item; their turrets can expand to trigger the explosion, keeping the safety Engineer.
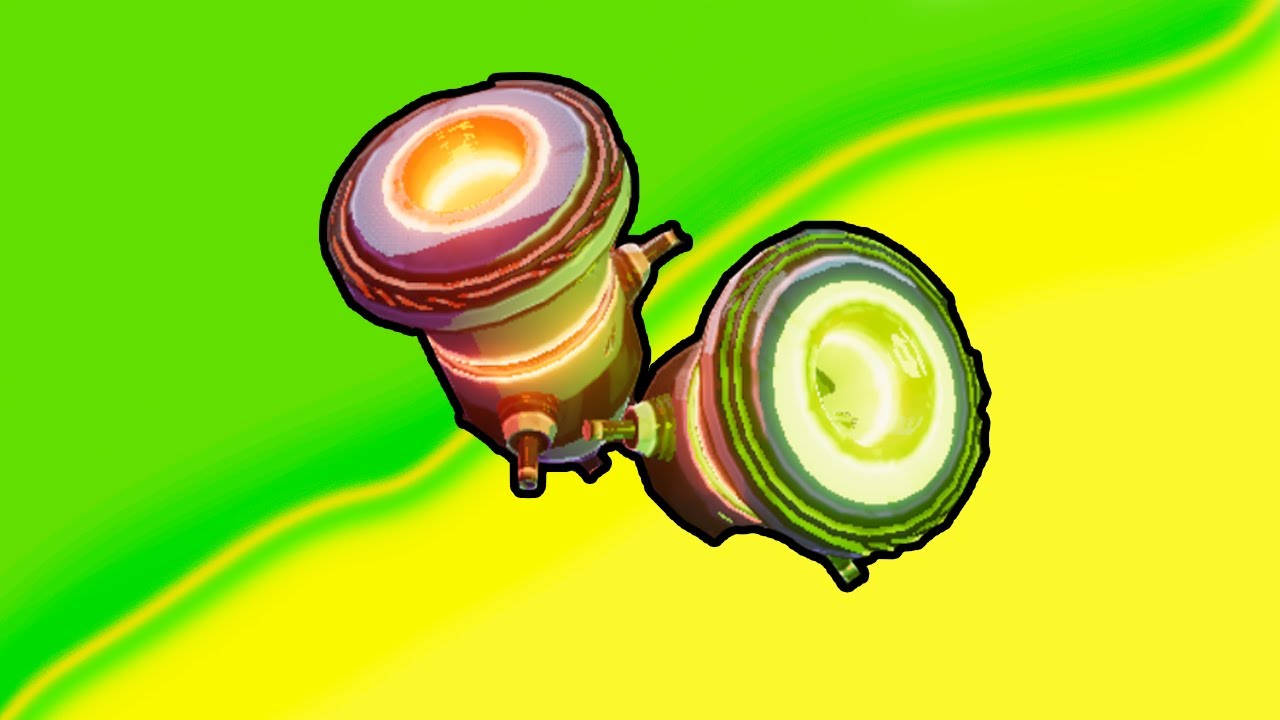
11. Molten Perforator
| Dropped by (Bosses) | Magma Worm |
| Effects | Spawn magma balls hit chances increase to 10% |
The Yellow item Molten Perforator is dropped by the Boss Magma Worm in RoR2. The holder of the Molten Perforator has a 10 percent chance that they can spawn 3 Magna balls. Each Magna ball can explode with a radius of 7m, doing 300% damage and firing up enemies. The Proc Coefficient of each magma ball is 0.7.
Remember that the total damage of the item is 300%, and it’s not base damage. Moreover, these balls might miss small enemies such as Alloy Vultures but are great against Bosses and Elder Lemurians. If you want to make it more powerful, have an ignition Tank, and you will get huge damage.
12. Pearl

| Dropped by (Bosses) | Cleansing Pool (Lunar items exchange) |
| Effects | Enhance max health by 10% |
In the Hidden Reals, the Update Pearl item was introduced, and it can be obtained from the cleansing pool in exchange for Lunar items. If it has this item, its maximum health increases by 10%. The counterpart of Pearl is Irradiant Pearl, which increases all other stats.
Players cannot use Recycler to turn other boss items into pearls. Note that you must keep Artifact of Command inactive if you want to achieve the Pearl yellow item. Moreover, Overgrown 3D also doesn’t offer Pearl items.
13. Planula

| Dropped by (Bosses) | Grandparent |
| Effects | While taking damage, it heals 15 HP |
The Planula is found by defeating Grandparent, and it is a Yellow item. The player who holds the Panula Boss item, after taking damage, will heal 15 HP immediately per stack. That makes it incredibly powerful against monsters that attack low-damage hits.
14. Queen’s Gland
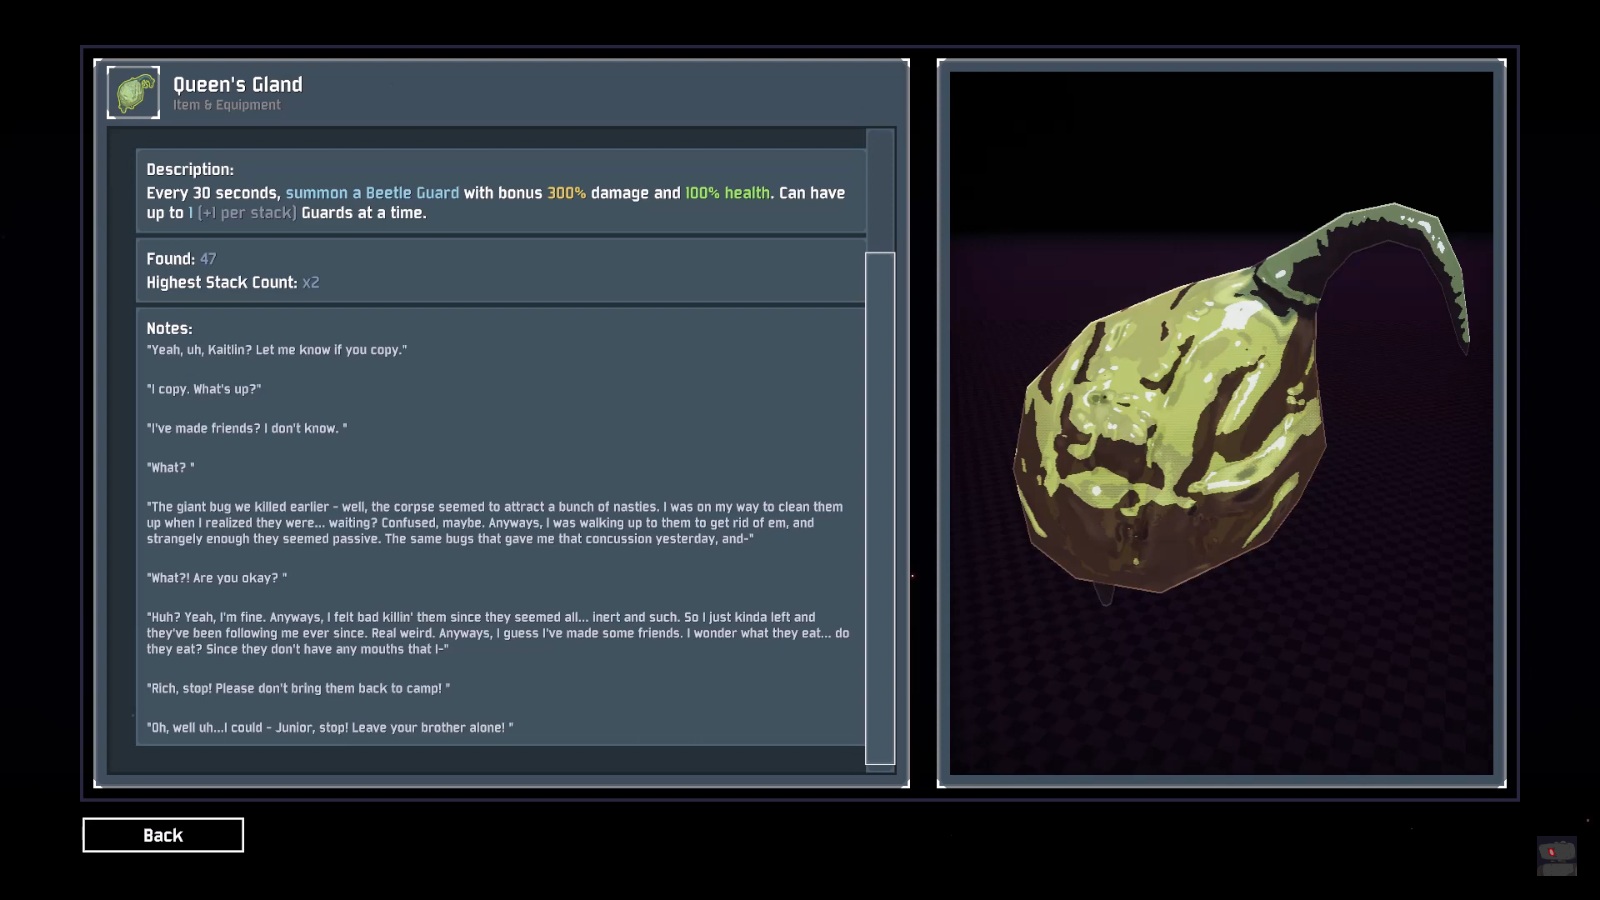
| Dropped by (Bosses) | Beetle Queen |
| Effects | Summons Beetle Guard allies |
The Queen’s Gland is dropped by the Beetle Queen. The player gets a Beetle Guard that protects and fights on their side. Beetle Guard is more powerful than ordinary guard; it does 4 times more damage and twice health.
In any case, players inflict some damage on Beetle guards with items like Hellfire Tincture; it will chase them, but it won’t be able to do any damage. This will help you get two Beetle guards with half health, but it will only take one Queen’s Gland. Engineer’s Turrets cannot inherit Queen’s Gland as it is in blacklisted items.
15. Shatterspleen
| Dropped by (Bosses) | Imp Overlord |
| Effects | Include critical strike explosion on bleed deaths |
Imp Overlord drops this, and the holder gets a 5% critical chance strike. Moreover, if any enemies die by bleeding from a critical strike, it will explode and cause 400% damage within 16m.
Tri-Tip Dagger does the bleed damage as Shatterspleen, so if you have both items, only one bleed damage will be inflicted. Players can also pair it with Ocular HUD’s effect, and all damage done will stack for a particular duration. Remember that if the target dies immediately by critical strike, it will not explode.
16. Titanic Knurl
| Dropped by (Bosses) | Stone Titan |
| Effects | Enhance your Health and HP regeneration |
The Titanic Knurl is a yellow item; the Stone Titan drops that. The player that holds the item gets flat +40 HP, and the natural health regeneration is increased to +1.6 HP. Moreover, it also increases by 20% per level(Regeneration bonus).
Titanic Knurl’s regeneration also benefits from Rejuvenation Rack. Like the other healing items, which only increase base health generation, these don’t complete the Naturopath Challenge.
This is the end of our guide about Yellow Items in Risk of Rain 2. All items in the game have special features and abilities that are useful in playing games and progressing.
Next up, read our Risk of Rain 2 Armor guide. Also, check out our Risk of Rain 2 Character Tier list, best builds, and how to unlock characters guides. If you want, you can also get familiar with the Risk of Rain 2 Achievements in our guide.
Thanks! Do share your feedback with us. ⚡
How can we make this post better? Your help would be appreciated. ✍